How To Measure Yardage And Stop Playing Yarn Chicken

How to Measure Yardage and Stop Playing Yarn Chicken | withwool.com

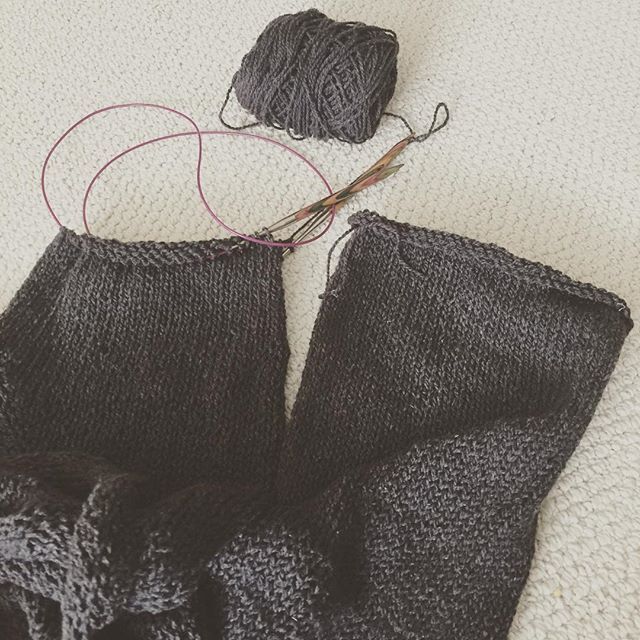
The urge to finish all the things bit me hard in August. I’ve finished a sweater and a cabled scarf, and have moved on to the Norma Blanket that I cast on in 2012. Part of the reason Norma still isn’t finished is because I’m knitting the expanded version. The other reason is that I wanted to use every yard of nature’s brown Fisherman’s Wool I had in my stash. That’s a grand total of 1,860 yards and the expanded version calls for only 1,500 yards. 

Well, I finished the extended charts and still had a skein leftover which meant I had to chart the extra rows. But how many? To answer that question, I’ve been tracking my yardage. I use this trick a lot to figure out both how big I can knit something before binding off and when I need to stop to knit edging. It’s also pretty handy when you’re working on a pattern with growing repeats. Shawls, blankets, socks, sweaters, hats, and anything you can knit or crochet are all fair game.

How to Measure Yardage and Stop Playing Yarn Chicken | withwool.com

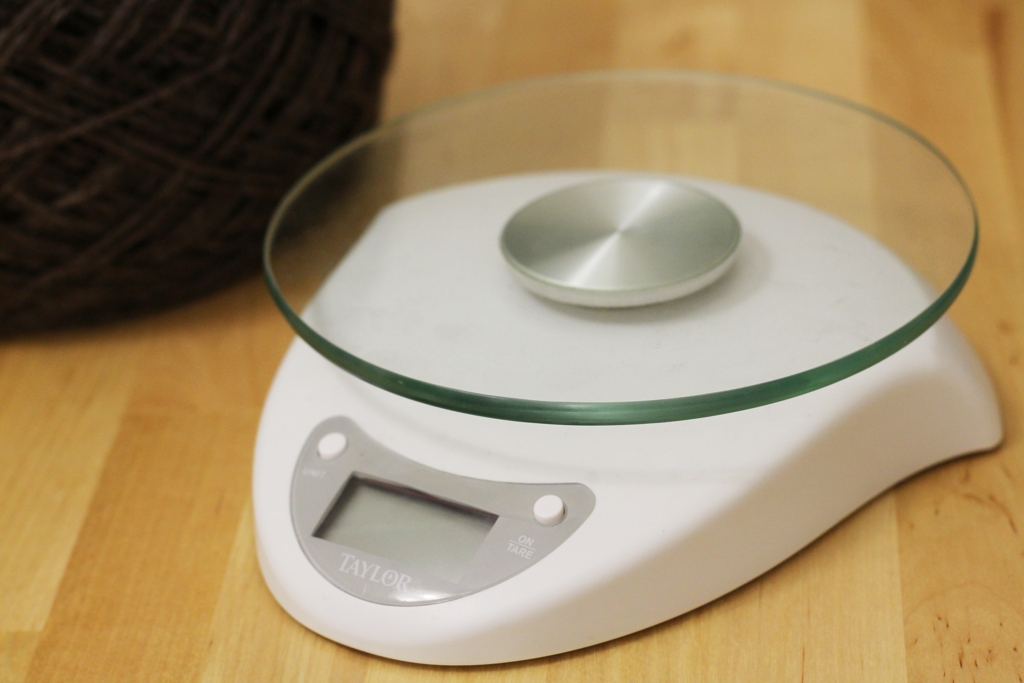
To track your yardage, you’re going to need a scale that can measure in grams. I use a basic digital kitchen scale.

How often you weigh your yarn depends on what you’re making:

  • If you’re making something where the stitch count stays the same, like a scarf, you only have to measure once. After you’ve cast on and worked a few rows, weigh the yarn ball, and knit a few more rows. 

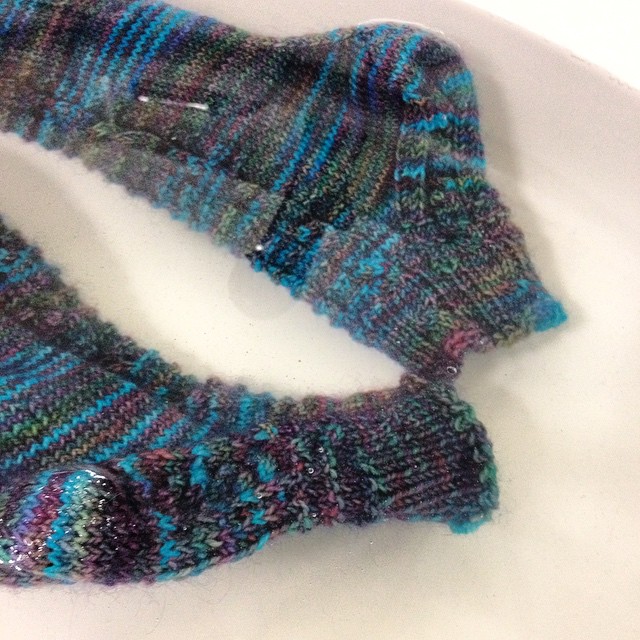
  • If you’re making something small, - say a pair of stockinette socks or a hat - weigh, work at least 4 rows, and weigh the yarn again. The numbers will be more accurate over a larger number of rows than just one.

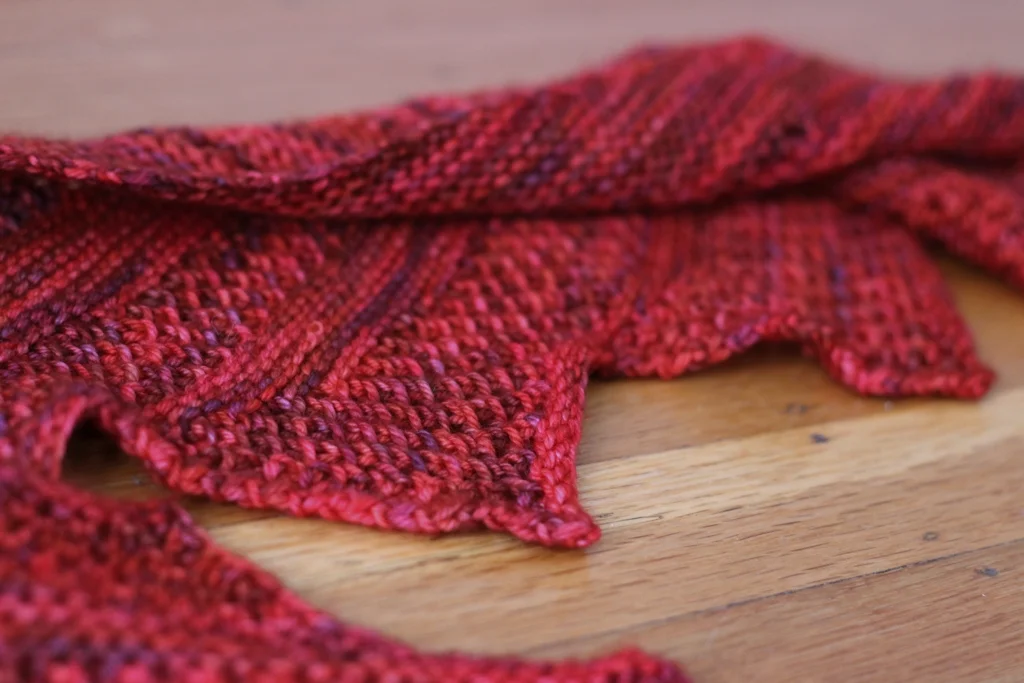
  • If you’re making something with a larger stitch count, like a shawl, you can knit a single row or pair of rows between weigh-ins. 

  • If making something with repeats, measure the yarn before and after working one repeat. Even if the repeats get larger as you go, you’ll have a better idea of the amount of yarn required. 

  • Weigh the yarn when the stitch pattern changes. A section of straight stockinette isn’t going to need the same about of yarn as a section of elongated stitches, cables, or slipped stitches.

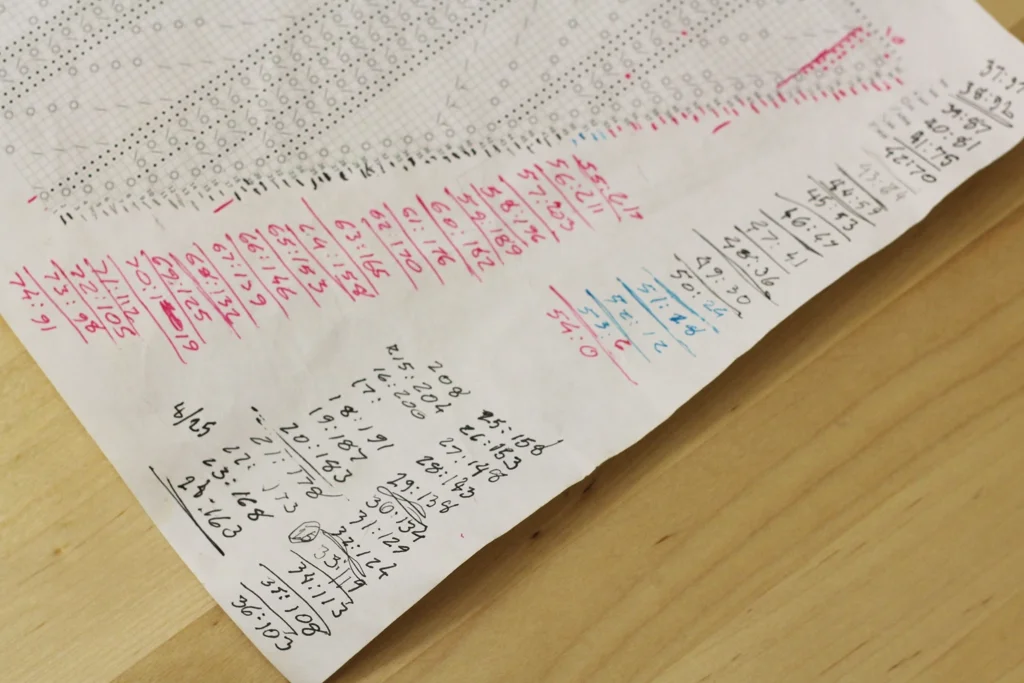
  • Tracking yardage for projects where the stitch counts increase or decrease is a little more complicated. The good news is that, in most cases, the amount of yarn it takes to knit a row isn’t going to change that quickly. You don’t have to measure after every single row like I did for 100 or so rows of the Norma blanket. Maybe you measure yardage every 5, 10, or 15 rows. Just check regularly and keep your notes handy.

How to Measure Yardage and Stop Playing Yarn Chicken | withwool.com

Once you have the numbers, it’s time to do the math. There are two options. The first is a little easier and gives an estimate. The second is more precise but requires more math.

Option 1: Divide the grams of remaining yarn by grams per row. The answer is the max number of knit-able rows, including the bind off. Next subtract the bind off and number of edge rows, if any, from the max row number. That answer is how many rows to work before starting an edging or binding off. If you’re working a repeat, divide the number of workable rows by the number of repeat rows. 

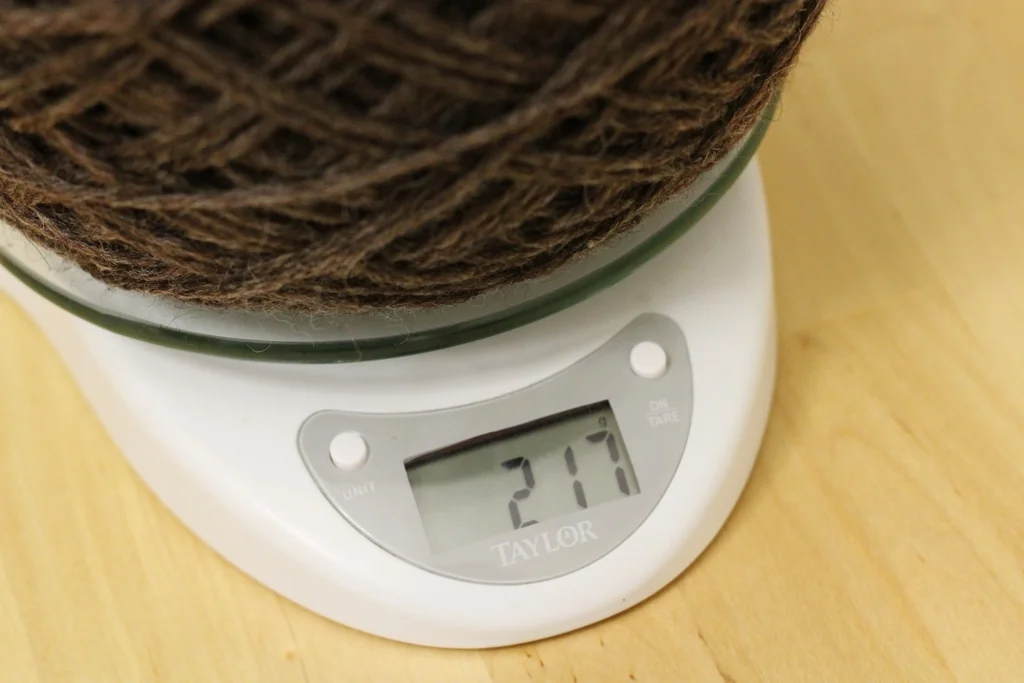
As an example, here’s the math I did to find out how many more rows I needed to chart out for Norma. At the end of the chart I had 268 grams of yarn and was using 7-8 grams per row. Thanks to my meticulous measuring, I knew it would take a lot more stitches to need 9 or more grams per row.

268 grams / 7grams per row = 38.2 rows

268 grams / 8 grams per row = 33.5 rows

Since I’m going to be using more and more yarn with every row, I went with the 8 gram result which means 33 rows in the maximum I have yarn for. 

33 rows - 7 edge rows - 1 bind off row = 25 rows

25 rows / 8 rows per repeat = 3.1 repeats. 

So, I can knit 3 full repeats before starting the edging. Plus, I have a little wiggle room with the yardage, and hopefully not have to play yarn chicken during the bind off. 

How to Measure Yardage and Stop Playing Yarn Chicken | withwool.com

Option 2: Instead of working with row counts, this option focuses on finding stitches per gram. 

Why worry with the number stitches per gram of yarn? It’s great for estimating the yarn required for patterns where the stitch count changes from row to row. If you’re designing a pattern, you can use stitches per gram of a swatch to estimate how much yarn the pattern will need before you cast on. The only downside is that you need to have a fairly accurate stitch count. In the example below, stitch count could refer to the number of stitches per row, per repeat, or the number of stitches worked between weigh-ins. 

Stitch Count / Grams Worked= Stitches Per Gram

732 stitches / 7 grams = 104.5 stitches per gram

Armed with the number of stitches you can knit per gram and a spreadsheet of stitch counts, you can figure out exactly how much yarn a row, repeat, or bind off with need. Take the numbers with a grain of salt though because gauge changes and yarn isn’t always evenly spun. You can also follow the steps in the first method with stitches per gram as well. 

I-Cord Necklace How To

Learn how to make an i-cord necklace that’s a quick gift for you or a friend. | withwool.com

While I was shopping for beads for an upcoming project, I found a cute turtle pendant that ended up in my digital cart. It was still cute once I had it in hand, but I didn’t have a way to wear it. I knew if I put it away in drawer that I’d forget about it so it stayed on the table. My kitchen table, AKA my desk, is a jumble of books, yarn, knitting needles, spinning fiber, and tech. It wasn’t long before the pendant and the right yarn ended up next to each other. It be much easier to make a necklace for the pendant instead of forgetting to ever buy one. 

Learn how to make an i-cord necklace that’s a quick gift for you or a friend. | withwool.com

Materials

2-3 yds Sport Weight Yarn

2 2.75 mm double pointed needles OR a short circular needle

A pendant, charm, or bead

Tapestry needle

Knitting The Cord

Learn how to make an i-cord necklace that’s a quick gift for you or a friend. | withwool.com

 Cast on 3 stitches and slide them to the right tip of the needle. 

Learn how to make an i-cord necklace that’s a quick gift for you or a friend. | withwool.com

Pull the working end of the yarn behind the stitches from left to right. Knit the 3 stitches and slide them back to the right hand tip of the needle. This method allows you to work flat but still get a closed, round cord when you’re done. 

Repeat until the i-cord is 19” long or the length you want plus 2” to tie the knots. I decided how long to make my i-cord by comparing it the length of one of my favorite necklaces. 

Learn how to make an i-cord necklace that’s a quick gift for you or a friend. | withwool.com

Bind off the 3 stitches and cut the working yarn. Weave in the ends by pushing the needle and thread through the center of the cord for an inch before pushing the needle out and cutting the thread. If your pendant has a small bail or opening, wait to weave in one of the ends. 

Learn how to make an i-cord necklace that’s a quick gift for you or a friend. | withwool.com

While not strictly necessary, blocking the i-cord will help even out the stitches and create a nicer looking necklace. To block, soak the i-cord in cool water for 15 minutes. Wrap it in a towel and squeeze out the excess water without wringing. Lay it flat to dry. 

Tying the Stopper Knot

It might take a few attempts to get the knots in the right spot or looking just so. Keep the tapestry needle ready because it’s a big help unpicking the knots. I re-tied each several times to get the right tension and placement.

Learn how to make an i-cord necklace that’s a quick gift for you or a friend. | withwool.com

Make a loop with one end of the cord. 

Learn how to make an i-cord necklace that’s a quick gift for you or a friend. | withwool.com

Bring the end of the cord behind both strands of the loop…

Learn how to make an i-cord necklace that’s a quick gift for you or a friend. | withwool.com

then pull it around the first loop and into the space between the loop and the wrapping end of the cord.

Learn how to make an i-cord necklace that’s a quick gift for you or a friend. | withwool.com

Pull the end through the first loop from behind and tighten the knot. 

If the photos aren’t helping, check out this animation of how to tie the Stopper Knot

Learn how to make an i-cord necklace that’s a quick gift for you or a friend. | withwool.com

Before tying the next knot, string the pendant. If the bail is small, pull the unwoven end through the bail first and use it to pull the cord through. Weave in the end. 

Tying the Slip Knot

Learn how to make an i-cord necklace that’s a quick gift for you or a friend. | withwool.com

Make a loop with the opposite end of the cord.

Learn how to make an i-cord necklace that’s a quick gift for you or a friend. | withwool.com

Bring the end over the legs of the first loop and make a second loop. 

Learn how to make an i-cord necklace that’s a quick gift for you or a friend. | withwool.com

Wrap the end around the first loop’s two legs twice and bring the end out through the second loop. Tighten the knot leaving the first loop open at the end. Done correctly, you’ll be able to shrink or grow the loop as needed. I like the pull the slip knot tight after pulling the stopper knot through to keep the necklace in place.  

If the photos aren’t helping, check out this animation of how to tie the Slip Knot

Learn how to make an i-cord necklace that’s a quick gift for you or a friend. | withwool.com

Done! Enjoy your new necklace!

Learn how to make an i-cord necklace that’s a quick gift for you or a friend. | withwool.com

Exploring the Balclutha

Long weekends are the perfect time to go exploring so  The Bearded One and I took the opportunity to explore more of San Francisco. This time we ended up wandering around the San Francisco Maritime National Historical Park. Meandering through a collection of old, restored ships is a pretty good way to spend the afternoon. The Balclutha, built in 1886, was particularly interesting because of its age and beautiful details. The spinner in me kept noticing all the really cool knots and rope work. 

The chart house is happy to see you.

The Eureka ferry boat is a little confused. 

This handle was in the galley of the steam tug Hercules. 

Lessons from 31 Days of #DrawingAugust

#AugustDrawing-Lessons.jpg

There’s been plenty of knitting going around here. I finished a sweater, put a few feet on a scarf, and worked on a few designs. While it feels great to have made progress and crossed a few things off my knitting list, August’s main project was #DrawingAugust. #DrawingAugust is pretty simple - draw every day and show your work. Thanks to the previous habit-building 212 days of #yearofmaking, drawing everyday was pretty easy. When I missed a day, I caught up on the next day which means I have 31 drawings tucked away in my sketch book. 

The hard part of this challenge wasn’t the drawing. It was showing my work. There were a few sketches that I was really proud of, and I couldn’t wait to post them to Instagram. But there were also a few that I would have rather hidden away. I’m a firm believer that once something goes online, it’s always online. The possibility that someone’s first impression of my work might not be the “perfect” one I want is rattling. Even though I’ve posted the less than perfect sketches this month, it didn’t get any easier. Here’s the thing though: I’d didn’t start #DrawingAugust with the intention of creating perfection. There’s no way I could have finished 31 sketches or even started the first if I had. #DrawingAugust was about the process, about learning, and about doing the work. I wasn’t chasing perfection; I was just trying to get better at drawing. 

31 days later I’m happy to say that my drawing skills did improve. I’m certainly more confident with a pen. I’ve also gotten past the idea that all of my sketches had to 100% accurate. That rule had been floating around in my head for years, and it wasn’t until I let it go that I realized how much it held me back. I knew I couldn’t accurately reproduce an object so there was no reason to try. Beginner or not, the idea that you have to chase perfection and achieve it every day can be the biggest stumbling block. You have to give yourself permission to fail so that you can keep trying day after day. 

Also, 20 - 30 minutes every day adds up. The bulk of my sketches took about 20 minutes from start to finish. Some might have only taken 5 and some might have take 45, but 20 minutes was the norm. 20 minutes a day might not seem like much, but that’s over 10 hours of work spread across the month. It’s time well spent.  

Now that it’s September, I’m moving on to a different daily project, but I’m not packing away the sketchbook. I was getting bored doing straight line drawing so I’m going to experiment and try different techniques and styles. Maybe I’ll have a full sketchbook by the end of the year.

In Defense of the Cosy and a Free Pattern

A few months ago I decided that I had to knit a cosy for my water bottle. I was tired condensation soaking the side of my pants as a I walked and wiping up water rings whenever I picked it up. A knit cosy seemed like the perfect solution. Stay with me here. I know the first thing people thing of when they hear “cosy” are creepy toilet paper covers. I know I do. 

Cozies can be functional though. I like cup cozies since anything that lets me drink hot beverages without burning my hands is a winner. Phone cozies are pretty helpful too since they protect screens from scratches. Hot water bottle cozies keep hot water hot longer. I’ve never made a tea cosy but I’ve got a small glass pot that could probably use a little insulation between pours.

So, I measured my water bottle and started knitting it a cosy in hopes that the thing would stop sweating all over me. My first thought was to use cotton because it makes absorbent kitchen towels, but I went with wool instead. Wool has more stretch than cotton which has helped keep the cosy on the bottle. Plus, wool is a much better insulator. It’ll definitely keep you warm, but it’ll also keep cold things cold. I fill up the cozied water bottle with ice and cold water. Even after sitting in 80º room for 70 minutes, there’s still ice floating around hours later. Cozies win!

If I’ve convinced you to cosy up your water bottle, here are a few tips and a recipe.

Measure first. It’s tempting to eye ball and guess how many stitches to cast on, but water bottles are larger around than you’d think. Mine holds 33oz/1000 ml and is 11” in circumference.

Negative ease will keep the cosy in place. The knitting is going to stretch during use and, if it stretches too much, the cosy will just fall off. By making the cosy slightly smaller than the water bottle, the cosy will stretch to fit but not get too big. A negative ease of 10% worked well for me. 

For example: My water bottle is 11” around and my gauge was 6 stitches to the inch which would give me 66 stitches before negative ease. Including 10% ease means I’d need 10% fewer stitches which brings the cast on number to 60. 

Put some ribbing on it. Whether you’re adding lace or sticking with stockinette, a few inches of 2x2 ribbing at the top will make the cosy easy to get on and off.  

Use wool. It’s got great stretch which will keep the cosy on your bottle. It’ll keep cold water cold and hot water hot. Plus, it’ll be a little easier on your hands when you knit.

Waffle Rib Water Bottle Cosy Recipe

Cast on a multiple of 4 stitches. For my 11” circumference bottle, that was 60 stitches at gauge of 6 stitches/inch.

Join to work in the round. Work 2x2 rib for 1.5”

Repeat the waffle rib pattern until the cosy is as tall as your water bottle. 

    Rows 1-2: knit

    Rows 3-4: knit 2, purl 2

Decreases work just like a hat. Repeat 1 decrease row and 1 knit row. Here’s what it looks like over 60 sts (there were 6 set of decreases that happened over 10 sts):

    Row 1: *knit 8 sts, k2tog* repeat between * *

    Row 2: knit all 

    Row 3: *knit 7 sts, k2tog*

    Row 4: knit all

    Row 5: *knit 6 sts, k2tog*

    Row 6: knit all 

    Row 7: *knit 5 sts, k2tog*

    Row 8: knit all

Once I’d decreased half the stitches, I started decreasing every row to keep bottom from bunching.

Cut the yarn and pull through the stitches when there’s 10 or less on the needles.

Weave in the ends and the cosy is good to go. 

Rainbow Waffle Socks

My sock drawer might be close to overflowing, but it’s been awhile since I’ve knit myself a pair of cushy socks to wear to bed. At night, my toes can get painfully cold and thick worsted-weight socks are the only answer. My favorite pair of bed socks - they’re also the first pair of toe up socks I ever made way back in 2007 - finally saw enough wear to develop a few well placed holes. I have every intention of darning them. Eventually. In the mean time, I need another pair of socks in the rotation. So, hello rainbow waffle socks. 

Once there were enough stitches on the needles I went with one of my favorite stitch patterns, the waffle rib, because it’s stretchy, fun to knit, and good looking. It added just enough texture to keep the knitting from getting boring, especially during the larger color blocks. Since there was only 244 yards and I wanted a longer cuff, the afterthought heel was the way to go. I followed the steps in this tutorial to open up and knit the heel.

The one thing I did differently on this pair was changing up the order of ssk’s and k2tog’s on the heel decreases. Even though it definitely looks different, the fit is exactly the same. 

I’m glad I didn’t try to match up the stripes because the 2 balls weren’t even close to the same. Both were the same dye lot, and I had no idea they were so different from just looking at the balls. Somehow the heels matched up with no help from me. I like wearing mismatched socks though so this pair makes me extra happy. What more could a knitter ask for?

The Details: 

Yarn: 2 balls Classic Elite Yarns Liberty Wool - 7838

Needles: 2.75 mm circs

Date: June 18 - Aug 4, 2015

Full notes on the Ravelry page

223 Days of #YearOfMaking

Read more: Lessons from 50 Days of #YearOfMaking

Way back on January 1st when I started #yearofmaking, my goals were simple. I wanted to make something every day, learn new things, and improve my skills. To keep myself accountable, I’d post a photo of the day’s work to Instagram. Day 223 looks a lot different than Day 1. 

Over the past 7+ months, I’ve spun yarn, knit a lot, cooked many dinners, taken photos, written thousands of words, made videos, baked cakes, and doodled. I have photos and logs tracking everything I’ve made. Seeing those chains grow has helped me keep going. Sure, there are days that I didn’t make anything, but those days are rare. 

Making something every day is now a habit and I get a little fidgety if I haven’t done something by the end of the day. That’s not to say that I’m finishing something everyday. There’s no way I could keep up the pace if a project had to be complete by the time I went to bed. If I only knit 2 rows on sock, it counts. Building the habit of making is what was important. 

I’ve gotten a lot of good from #yearofmaking but it was starting to feeling like I was just going through the motions in June and July. Then Tour de Fleece happened. To get ready I set goals and picked a skill to focus on. After 3 dedicated weeks of spinning, my forward draft and handspun were much improved. I was even able to check “make sock yarn” off my spinning bucket list! Seeing that improvement put the excitement back into daily making. 

When Tour de Fleece ended, I went looking for something else to focus on. When I read about #DrawingAugust I knew I’d found my next goal. I’m now drawing every day and keeping the sketches simple so I can finish them in 15 - 30 minutes. Some drawings I’m really proud of and others I’m embarrassed to show, but they all go up. It’ll be nice to see how I’ve improved at the end of the month. Plus, this project has also been a good kick in the butt to finally watch all those online classes I’ve bought and never gotten around to watching. 

Instead of being separate projects, Tour de Fleece and #DrawingAugust brought intention back to #yearofmaking for me. At first, just making something every day was enough because I was building the habit. Once that intention was “complete”, I was still making things but I wasn’t learning or improving my skills. I needed a new intention to keep going or I was going to find reasons about why playing video games was a perfect use of all my free time. This month, improving my drawing is my motivation. These smaller goals are what’s going to keep me making to the end of the year.  

How To Measure Wraps Per Inch

Got a fresh skein of handspun yarn off the bobbins or spindle? Heres a different way to measure wraps per inch. | withwool.com

The usual method for measuring a yarn’s wraps per inch, commonly abbreviated as WPI, is taking the yarn and wrapping it around a WPI gauge or a ruler. Count the number of times the yarn wraps around the gauge and that’s the WPI, which is used to determine a yarn thickness*. The problem with wrapping yarn around a gauge is that it’s easy to stretch the yarn and get a skewed number. Jillian Moreno recommends rolling and moving the gauge instead of wrapping the finished yarn. I like to do something different.

Got a fresh skein of handspun yarn off the bobbins or spindle? Heres a different way to measure wraps per inch. | withwool.com

My handspun isn’t always as consistent as I would like it to be. So, instead of measuring a short 6-12” segment of yarn which might be wildly different from another 6-12”, I measure WPI after the yarn is in a skein. I pull away a few strands from the rest and fit them into the gap on my gauge. If there’s space, I add a few more. If it’s crowded, I take a few out. The yarn isn’t stretched at all. Plus, the WPI is a more accurate average of the entire skein, and it’s a lot to harder to fudge the numbers. 

I got my gauge from Girl on the Rocks a few years ago and it’s been a great tool. 

One more thing. There’s not a lot of agreement on a standard WPI for yarn weights, much less an industry standard. Some sources match up and some don’t. This post from Ask The Bellwether offers a good explanation of the situation and includes tips for matching handspun to commercial yarn. Even though there's no agreed upon standard, I like measuring the WPI of my yarn since it makes it easier for me recreate or match a yarn later. 

3 Weeks of Tour de Fleece and 3-Ply Sock Yarn

Check out Tour de Fleece Week 1 and Week 2.

Tour de Fleece is a most excellent challenge. One year I might set out to spin enough yarn for a sweater, but I’m pretty happy using the time to learn about spinning. I planned to work through Drafting Worsted to Woolen but never got past the short forward draft. No complaints because I want to spin smoother, more consistent yarn which is hard to do with long-draw. Besides from the bump of orange merino I started with, I didn’t set aside any fiber beforehand. I dug through my stash and grabbed what caught my eye. Not the most efficient way to rock Tour de Fleece but it worked for me. In three weeks, I spun a worsted-weight 3-ply, a thick and thin single, and a 3-ply sock yarn.  

The first 2 yards were great but the sock yarn was this year’s challenge. I’ve been wanted to spin sock yarn for years and who knows how long I would have put it off if not for the Tour. Unlike my usual modus operandi, I didn’t go a lot of research before hand. I’ve been working towards spinning finer and finer yarn for the past few months and decided to just do it. I looked up sock yarn constructions in The Spinner’s Book of Yarn Designs and went for an opposing 3-ply construction because I’d never spun that style of yarn before. 

The other yarns spun up quickly and I suppose this one did too. Each of the 3 singles took about 3 days to draft. I reminded myself every time I sat down at my wheel that the third single had to go in the opposite direction so I wouldn’t forget.

Plying happened over during the last two days of the Tour. Sunday was pretty much a marathon plying session filled with lots of tv and I got finished yarn at the end of the day. It’s actually sock weight too! Putting it together was interesting because the yarn looked like one single wasn’t evenly tensioned with the other two. My guess is that putting more twist into the opposing ply of the opposing ply sock yarn is the reason. We’ll see how it relaxes after I give it a soak to set the twist.

At the end of the tour I’d spun 10 ounces of fiber which turned into 7 plies, 4 skeins of yarn (plus leftovers), and 875 yards. Not bad for three weeks of spinning. My short forward draw is much improved, and I’ve got the confidence to spin more sock yarn. Learning and improving my craft  are the reasons that I look forward to spinning during Tour de Fleece every year. The yarn doesn’t hurt either.

Still Rocking Tour de Fleece

I feel like I spun so much during the first 9 days of Tour de Fleece and so little last week. I took a break on the first rest day and then another the next day but I’ve been spinning (and binge watching Gilmore Girls) every day since. My only project has been the sock yarn I started on the 9th day. As fine as the singles are, I’ve been making good time and finishing one every 3 days. I started the third yesterday which means I should have just enough time to finish it, and ply them all together by the end of Tour on Sunday. Fingers crossed. Or not, it’s hard to draft that way. 

I didn’t spin a sample since I only had 4 ounces and decided to make sock yarn on a lark. So, it might be a little too thick to count as fingering weight. That’s fine by me though since I like heavier fingering weight yarns for knitting socks. Especially when I’ve promised said sock yarn to size 14 feet.

My thick-and-thin Columbia/Firestar single couldn’t take up space on my last bobbin any more so I skeined it up. I just couldn’t get the idea of keeping it as a single and striping it with another single. Maybe it’ll be a hat or maybe a shawl, but it’s going to turn into stripes. Before that I have to set twist and I hope it’ll plump up into more than the sport weight it averages now.

Happy spinning during the final days of Tour de Fleece 2015!

Rocking the First Week of Tour de Fleece

The first week of Tour de Fleece is over and Monday was the first rest day. Instead of spinning anyway, I took the opportunity to empty my bobbins, inspect my new handspun, and prep for the next week of making all the yarn.

The first yarns off the bobbins were these two skeins of Ashland Bay Merino in Apricot. I’ve had the image in my head of a smooth, lustrous 3-ply since I bought the fiber several months ago and am so happy that I was able to pull it off. Thanks to watching Drafting From Worsted to Woolen I was able to consistently use a short-forward draft without getting lazy and switching over to long-draw. Slow as it was, the short forward draw allowed me to spin finer singles which means this is my first 3-ply worsted weight yarn.  My other attempts have all ended up bulky. I even got some decent yardage, 192 yds, which is more than enough for a slouchy hat. 

The mini skein, another 40 yards, is a leftover single plied with itself. It’s 2 plies turned into a mostly sport weight yarn. 

Columbia-Firestar-Single.jpg

I dipped into some of my stash acquisitions from Stitches West. This uneven single started as two ounces of Columbia wool and Firestar pencil roving from Carolina Homespun. When I started spinning, I was sure I wanted it to be a fat single. Unfortunately, only the last half of the single is anything close to what I was going for. Can’t decide if I should leave it as it is or ply it for a more even yarn.

Here’s my current yarn-in-progress and it’s also my biggest challenge this year. Since I’ve gotten more comfortable with the short forward draw over the past weeks (and liking the resulting handspun), I’m attempting to spin my first skein of sock yarn. Why wait for the challenge day to do something difficult?

This yarn will also be a 3-ply but I’m trying out an opposing ply construction, two of the singles are spun in one direction with the third spun in the direction of the plying twist, that I found in The Spinner’s Book of Yarn Designs by Sarah Anderson on page 129. The extra twist that goes into the opposing single during plying is thought to add durability and elasticity to the finished yarn. The fiber I’m using is 100% Cheviot wool, which my reference say is fairly durable, but I’m hoping this construction will compensate for the lack of nylon. I wouldn’t be surprised if I spent the rest of the Tour spinning this one skein of sock yarn, but I’m going have fun doing it. 

What are you spinning for Tour de Fleece? 

Handspun Flight of Fancy

So much of my handspun starts simply with the urge to spin and these skeins were no exception. I had no end project in mind and went digging through my fiber for the first thing that caught my eye.. The winner was 4 oz of Falkland top from Cosy Makes. She no longer dyes and this bump was one of the last she sold to clear out her stock. It was also the last bit of her lovely work in my stash so I wanted it to be more than mindless spinning.

I had a few unwatched Craftsy classes on spinning (still do) and picked Jacey Boggs’ Drafting From Worsted to Woolen. What better way to keep my mind on the fiber than to learn how to spin better. Those 23+ minutes I watched about worsted spinning were golden. My singles were smoother and more consistent. Plus, they were finer than I usually spin which is something I’ve been working towards for a few months but haven’t quite figured out yet.

The singles sat until I decided it was time to empty the bobbins for Tour de Fleece. Plying was easy, and the first single only broke once. Once it came off the bobbin though it looked like I hadn’t put enough twist, despite frequently checking that the twist was equal. Thankfully, the fiber relaxed a lot after a long soak and let the twist do it’s thing. The finished yarn is plump and soft with plenty of twist. It’s not as shiny as the singles, but that’s probably because it’s Falkland, and the fact that I gave it a few good thwacks across the shower wall. 

The grand yardage total came to 514 yards between the main skein and the plied leftovers, but that was before setting the twist. After last week’s experiment remeasuring the yardage of finished yarn, I’m sure that I have far less than that to work with. I’ll figure out the exact number when the yarn tells me it’s time to knit it up. 

The Specs:

Fiber: 4 oz Cosy Makes Falkland - Flights of Fancy 

Drafting Method: Short-forward draw

Construction: 2-ply fractal

Weight: Sport - Worsted

How Setting The Twist Can Change The Yardage of Handspun Yarn

Every yard of handspun yarn is a wonderful thing, but you might not have as much as you think. Finishing and setting the twist of handspun can drastically reduce your yardage. How Setting The Twist Can Change The Yardage of Handspun Yarn | withwool.…

I’ve been trying to knit more with my handspun as skeins move from being a finished project in their own right to knit-able yarn. The length of time for this transformation varies. For the skein that became Dotted Rays that was about a year and a half.  Recently plied and freshly skeined, I had about 512 yards to work with. That’s about 200 less than the 700 required for a small Dotted Rays Shawl. I plowed on anyway with the thought that I could bind off at any time; the pattern is fairly forgiving that way. After blocking, the shawl was absolutely beautiful but it seemed small. Did the skein really measure 512 yards? 

Had I stretched the yarn when I was winding it?

Did the yarn plump in the bath when I set the twist, gaining in diameter but losing length?

Did plying twist affect the yarn differently after I set the twist in a bath?

Had I just miscounted the wraps?

There’s no way to know for sure now, but I have other skeins to put to the test. The guinea skeins you see before you were spun during Spinzilla 2014 which makes them perfect candidates. Since the challenge of Spinzilla is to spin as much yarn as possible in a week, I was meticulous in measuring the yardage of these 4 skeins. The kicker, the yardage was measured before I set the twist in a cool water bath and snapped between my hands. The plied skeins also got a few good thwacks on the shower wall.  None of the skeins were felted or weighted during washing or drying.  

Here are the steps I followed to remeasure their yardage:

  1. Check to see if the skeins still fit around the swift. 3 of the 4 skeins were wound to have a circumference of 72”. The fourth, the hot pink single, was wound to a 60” circumference. I used the same windmill-style swift that they were all wound on to remeasure. 
  2. If a skein did’t fit over the swift, I loosely rewound it to its original circumference. If I stretched the yarn, I wouldn’t be able to get an accurate number.
  3. Count the number of wraps and do the math to get the new yardage. 

Fiber: Mountain Colors Targhee - Gold Rush

Initial Yardage: 286 yds

Drafting Method: long-draw

Construction: 2-ply

Did it fit on the swift? Nope.

Yardage After Setting The Twist: 238 yds

Yardage Difference: 48 yds or 16.8%

Notes: This skein wasn’t even close to fitting on the swift at 72”. Of the 4 skeins I measured, this one had the most drastic and unexpected before and after. 

Fiber: Mixed Blue Faced Leicester

Initial Yardage: 184

Drafting Method: long-draw

Construction: 2-ply

Did it fit on the swift? Nope

Yardage After Setting The Twist: 168yds

Yardage Difference: 16 yds or 8.9%


Notes: Rewinding this skein was a trying process because I had to spend an hour untangling it. While sorting the strands, I thought it might not have fit because I didn’t put it on the swift correctly. After measuring and finding a 16 yd difference I know it wouldn’t have mattered how I put in on the swift.

Fiber: Abstract Fiber Targhee - Laurelhurst

Initial Yardage: 330

Drafting Method: long-draw

Construction: 2-ply

Did it fit on the swift? Nope

Yardage After Setting The Twist: 316 yds

Yardage Difference: 14 yds or 4.24%

Notes: I can’t really pinpoint the exact reason this skein of Targhee didn’t lose the same amount of yardage as the first skein. It could be how the fiber was prepped and dyed, the length of my long-draw, or plying twist. 

Fiber: Spun Right Round Polworth - Color Bot

Initial Yardage: 133 yds

Drafting Method: short forward draw 

Construction: Single

Did it still fit on the swift? Almost.

Yardage After Setting The Twist: 128 yds

Yardage Difference: 5 yds or 3.6%

Notes: Compared to the plied skeins, the single lost very little yardage which I’m chalking up to how it was drafted and the fact that is was’t plied. The single was spun with a short forward draw from combed top which resulted in a smooth and dense worsted style yarn. Had the single been spun long-draw, my guess is that the lighter and airier yarn would have more potential to lose yardage while setting the twist.

The lack of plying twist is probably the main reason the single only lost 5 yds. Plying compresses the singles as it wraps them together because now they’re positioned at an angle instead of a straight line.  


The numbers of my test are all over the place with one skein losing just 3.6% of its yardage and another losing 16.8%. What’s the same across the board though is that all 4 of the skeins “shrunk”. The skeins that lost the most yardage were plied which points to plying twist as the main force behind the change. Another possibility is that I simply wound the skeins too tightly around the swift and they relaxed to a much smaller circumference. There’s no way my yardage counts would have been correct if that’s the case. 

Realistically, it’s probably a bit of both. I haven’t done the best job of always loosely winding my skeins. Some I couldn’t put them back on the swift if I tried. I’m not saying this to discount how setting the twist changes the plying. Finishing a yarn affects its surface, diameter, final twist, workability, and, yes, even yardage.

I wish I could just give you a formula to estimate how much a skein will “shrink” after setting the twist. That’s just not possible. I spun all 4 of those skeins in a week, 3 with similar methods, and none of them lost a consistent amount compared to another. Calculating how yardage changes after setting the twist is something that has to be done on a skein by skein basis. But is it worth doing every time? Probably not. 

So, what’s a spinner to do? 

Wind skeins loosely. Plied yarns with high twist are going to be stretchier than skeins with less twist. You’ll get a better estimate of yardage this way.

Don’t take the measured yardage before setting the twist as a definite number. It’s a high estimate. 

Spin a sample. I’ll admit that I don’t do this but I’m usually not spinning for than 4 oz at a time or for a particular project. Sampling before before spinning a large quantity or because you want to make a specific kind of yarn lets you test your methods and figure out how much you need to spin. 

Spin more than you think you need. You might need those extra yards. 

When you’ve finally work with that one precious skein of handspun, pick a pattern that calls for less yardage than you have. This is assuming that you haven’t measured the yardage after setting the twist. Plus, there’s less chance you’ll run out of yarn 6” before binding off the last stitch. 

If you’re working with a lot of yardage, it might be worth using a McMorran Balance or a scale instead of counting wraps. Either device would let you calculate yardage by weight instead of relying solely on wraps and skein circumference. 

Say Hello To Señor Squid

Señor Squid was hanging out on the ocean floor and he was feeling kind of bored. 

Swimming through the inky depths wasn’t much fun and he wanted to see the sun.

He said good bye to his tentacled friends and quickly began to ascend. 

He waved hello to sea snails and avoided passing whales. 

Being eaten for dinner wasn’t part of the plan.

He swam and swam until he found a patch of clams.

They pointed him to a seaweed grove hidden in an underwater cove. 

He kept swimming after a nap even though he didn’t have a map.

He passed sharks, submarines, and fish as it was starting to look like he’d get his wish.

The water was brighter now and he was far from where he began. 

He’d reached the surface and was only just a little bit nervous.

With one eye above the waves he decided to keep being brave 

because the beach was within his reach.

Soon he touched the sand and gave the land another scan.

There was an octopus with an umbrella and he looked like an interesting fella. 

They said hello and got to know each other in the sun’s glow.

At this time, I walked by solo and they asked for a photo.

After the shot, Señor Squid let me in on his plan. 

I was only too glad to show him around as I picked him up from the ground. 

Between seeing the sights and the city lights, 

Señor Squid became a good friend and I’ll be sorry to see him descend.

When I cast on for Señor Squid, I’d just finished another project and was in the mood to make something fun and frivolous. The yarn had been wound and waiting for months along with the pattern, Inkling the Squid by Cate Carter-Evans. Then, once I started I just couldn’t stop. From the tip of the mantle to the last tentacle tip, I knit and assembled the whole thing in 8 days.

Knitting the squid was definitely fun, but also really finicky once I got to the tentacles. There were 2 strands of yarn at all times, an ever increasing number of almost-tentacles, and DPN’s sticking out all angles. Would I knit it again, knowing what I do now? Of course. The challenge of corralling DPN’s, seaming things just so, and learning basic intarsia was part of the fun. 

Oh all the things I’ve made during #yearofmaking, I’m most proud of Señor Squid. Knitting him required me to take my knitting skills and knowledge to another level of patience and detail. Looking forward to taking that step again with Horatio the Nautilus and Opus the Octopus

The Pattern: Inkling the Squid by Cate Carter-Evans

Yarn: Done Roving Yarns Frolicking Feet - Chartreuse (Body) and Knitted Wit Gumballs Fingering - Carbon (Underbelly and Tentacles)

Needles: 2.5 mm 

Dates: April 25 - May 3, 2015

@Ravelry

Let’s Get Ready For Tour de Fleece 2015

Tour de Fleece, the grand summer spin-along to the Tour de France, is coming up on July 4th. I am so excited to spin more yarn for my fourth Tour! Part of the why I look forward to it every year is that I add lots of new handspun to my stash. I haven’t knit it all up yet but that’s okay. The reason I’m most excited for Tour de Fleece though is that I use it as a time to learn new techniques, try different fibers, and level up my skills.

Before the 2014 Tour I wrote a post with 5 training tips for Tour de Fleece. This year I’m taking my own training advice which means the first thing to do is empty all my bobbins. I only have 3 bobbins that I can use on my Sidekick and one of them is a Jumbo for plying. My current project, 4 oz of hand dyed falkland,  has been on the wheel for far too long and I finally finished spinning the second single last Monday. Tuesday, I started plying. I’m still plying today, but I’m always happy to see how much faster the bobbin fills up. One more skein before Tour de Fleece! Well, at least one more.

I’ve also set my goals for 3 weeks of dedicated spinning. The first and most important one, don’t hurt myself. My shoulder wasn’t pleased after I spent so much time drafting long-draw last year. I had no choice but to take a spinning break. My second goal involves this yarn I’m spinning right now. Before I started drafting I watched the second segment of Jacey Boggs’ Craftsy class, Drafting From Worsted to Woolen. The difference in my worsted spun yarn before and after watching the 23 minutes of this segment is incredible. My singles are smoother, more consistent, and much finer. So, for Tour de Fleece I’m going to spin and ply my way through the rest of Drafting From Worsted to Woolen. This is going to be fun. 

Happy spinning and training for Tour de Fleece!

Knitting Fail

I had to count on my fingers to figure this out, but I have been knitting for about 10 years. Over those 10 years I have learned a lot about the art of knitting and worked with a lot of yarn. I’ve knit small things, big things, geeky things, comfy things, and completely frivolous things. I’ve also knit things that I am incredibly proud of. Even with all that experience under my belt I still make silly mistakes. Example A, these socks.

They look the same, right? The stripes match, except for the heels. They’re the same length from cast on to bind off. But they’re different.

The first sock I knit on a 2.5 mm needle. I knit the second sock on a 2.25 mm needle, thinking that it was the 2.5 mm needle. I didn’t realize the difference until after the bind off when I had to cajole it on to my foot. The first sock is a half inch larger and much more cooperative. 

This week’s knitting public service announcement: If you ever have to snag your sock needles for another project between the first and second sock, do yourself a favor. Use your trusty needle gauge to make sure you’re using the same size needle for both socks.

After leaving the pair to its own devices for a night, I came up with two options for how to fix it. Option 1, unpick the bind off and rip right back to the toe. Nope. Option 2, wash the socks and stretch the second sock into shape over a sock blocker. That’ll happen as soon as I get my hands on my blockers, but it’s not as necessary as I’d first thought. In the few minutes I wore the socks to photograph them, the tighter sock (on the left) relaxed enough to be comfy. Snug, but comfy. All those stitches were not in vain and I still get a pair of socks!

So this knitting fail wasn’t a complete lose. Plus, I’ll get the added bonus of seeing how long each sock holds up. Will the looser knit but better fitting sock outlast the stretched sock with the tighter gauge? Only time and steps will tell. 

Pattern: Full pattern notes on the Ravelry page.

Yarn: 2 balls Patons Kroy Stripes - Spring Leaf Colors

Needles: 2.5 and 2.25 mm circulars

Date: January 29 - May 27, 2015

Spinning Yarn With Sweaty Hands

There’s no way to say this without relying on a host of cliches, so I’m just going to come out and say it. My hands sweat. Sometimes a lot which makes it hard to do things without messing them up. Half the time I’m writing with a napkin under my hand to keep my notebook from turning into a soggy mess. Damp hands make knitting almost impossible without a fan. Spinning yarn, especially drafting singles, isn’t much easier, but I have stumbled upon a helpful trick to keep the working end of roving/top from turning into a mangled clump. 

Instead of holding the roving in my hand, I drape it across my fingers and palm. The tail of the roving is held between the bottom edge of my hand and my thigh. Since the bottom of my fiber supply hand is securing the fiber, those fingers don’t have to do anything. When I do have to use my thumb, it is inches away from the tip. Only the hand I’m using to draft touches the working end of the roving which keeps the fibers aligned in one direction. Holding the fiber this way still gives me plenty of to work with and keeps me from unconsciously putting a death grip on my roving.

Since the fiber supply hand doesn’t move at all, this tip won’t help if drafting backwards or long-draw. So, stick with drafting styles that favor the forward hand. Also don’t forget the fan and a cold drink. 

The Second Frisson Shawl

I don’t often knit patterns more than once, but Frisson has made it on to that short list. The first one I knit was a gift, but the second was all for me. I would even have used the exact same yarn if I could have gotten my hands on a skein. Instead, I lucked across a skein of Cephalopod Yarn’s Traveler during my first and only visit to the now closed yarn shop. 

The months I’d waited to cast on for the second shawl made sure that pattern was familiar but not boring. No second sock shawl syndrome here. Starting out at the tiniest point and seeing it grow all over again was still really fun. My only annoyance was that I didn’t buy 2 skeins. I was only able to get 10 points so the shawl is more of a shawlette. That said, I can still wrap myself up in it just fine, but I’ll pick something bigger for the windy days.  

As small of this shawl is, it’s been with me for a lot of big, awesome things. I started knitting it on a trip visiting family across the country. Blocking and pinning it out was the first thing I did for #yearofmaking. I wore it to Stitches West this year when I met Stephen West. In the future, my Frisson is small enough to fit into my bag and bring along on adventures. Can’t wait. 

The Pattern: Frisson by Brittany Wilson

Yarn: Cephalopod Yarns Traveler - Red Palace

Needles: US 6 (4 mm) circulars

Dates: December 13 - 26, 2014

@Ravelry

Review: Knit Picks Hawthorne

The Yarn: Hawthorne Fingering Multi 

Company: Knit Picks

Price: $10.99 US


TL;DR: One pair of washed socks later, I’m impressed and will definitely buy Hawthorne again. 

Yarn Weight: Fingering

Knitting Gauge: 7 - 8 sts = 1" on #1 - 3 needles (2.25mm-3.25mm)

Crochet Gauge: 21 – 32 sc = 4'' on B - E hooks (2.25mm-3.5mm)

Yardage/Weight: 357 yds/ 100 g

Suggested Care: Machine Wash Gentle/Tumble Dry Low

A good friend of mine has knit me several comfy pairs of socks and I wanted to knit a pair for her. Even if they have small feet, sock knitters appreciate all the work that goes into a good pair of hand knit socks. I didn’t have anything in my stash that I thought she’d love so I went shopping for a nice skein of sock yarn. I was looking for yarns for other projects on the Knit Picks site and decided look over their sock yarn. One Hawthorne’s colorways, Vancouver, seemed like the perfect choice and, after checking how it knit up on Ravelry, it went in the cart. 

My first impression after carefully cutting open the box was good. The colors were as saturated and true as they appeared on my screen. As for the yarn, it was soft but still seemed strong enough to be made into a pair of socks. The good impression continued when I wound the hank into a ball/cake. I didn’t have to untangle any of the strands and didn’t find any knots or weak spots. The only thing left to do was knit. I cast on for a modified version of the Smokestack socks which you can check out here.

At 357 yards per hank the yardage is on the low side when compared to other put-ups; however, the 2-ply yarn is on the thicker side of fingering weight which is a major bonus for me. Hawthorne is spun to high twist suitable for a sock yarn and held up well to repeated ripping. I couldn’t see or feel any difference between the yarn that I worked with several times and the yarn I’d only knit once. The other bonus of the twist was that it created strong stitch definition. Cables popped and garter ridges stood out. Even with this twist, the yarn isn’t wiry and it didn’t hurt my hands while I was knitting it.

Hawthorne is hand painted and the Vancouver colorway is a combination dark earth tones - green, purple, brown, burgundy - and a bright sky blue. Looking at it directly, the majority of the colors are muted but saturate the yarn. There are no white spots nor muddying between colors. The full color repeat is several feet long while the length of individual colors varies. Thanks to the blended nylon and the smooth tight twist, Hawthorne has a slight luster which really shows up on camera.

Knit Pick’s care instructions say that the yarn can be machine washed on gentle and tumbled dried low. I didn’t machine wash the pair since I didn’t need to do laundry and wanted to save my $3.25 in quarters for another day. The socks got a 30 minute soak in cool water with a bit of unscented Eucalan. I dried them by squishing them, rolling them up in a towel, and stomping on them to get out the last of the excess water. Then I hung them up to dry.  The socks stayed the same size and the colors didn’t bleed at all. 

Since my friend has small feet, I had ~150 yards leftover. I loved working with this yarn so much that I’m going to pair it with a skein of the kettle dyed Hawthorne to make socks for me. The Broken Seed Socks seem like the right pattern. 

Smokestack Socks

I’m pretty sure that hidden away in all the math that is knitting there’s a simple equation which reads: give hand knit socks = get hand knit socks. I’ve gotten a few pairs of comfy, well-fitting socks as gifts from one particular knitting friend, and it was past time I equalized the equation. 

Step 1: Buy sock yarn in her favorite colors. I took a chance on Knit Picks Hawthorne and picked up a skein of the Fingering Multi in the Vancouver colorway.

Step 2: Snoop through her Ravelry queue to find out what she likes in a sock. Cables popped up quite a bit which lead me to pick the Smokestack Socks by Tanis Lavallee. The pattern has been in my queue to knit for myself for awhile but I also picked it because of the cables and how easy it looked to modify the stitch count. Just as important was how the pattern looked with variegated yarn which, thanks to Ravelry, was quick to see.

Step 3: Wind the yarn.

Step 4: Actually knit the socks. This is easier written than it was done because of how many times I ripped out. Not the patterns fault at all; it was all me. The Smokestack Socks are written to be knit from the cuff down, but I worked them toe-up as I knit all of my socks. The first ripping came when I found out how small knitting friend’s feet are. The rest of the sock was smooth sailing asides from the moments I tinked back to add the purl ridges or cross a missed cable. 

The second sock was not as forgiving. I cast on, knit the toe, worked the foot, increased for the gusset, turned the heel, and was working the heel flap when I noticed that it was too long. By almost an inch and there’s no fudging that. I measured and my gauge had increased by 1 row/inch; nothing else changed except the speed I was knitting. That’s what I get for rushing. At least I had the company and sympathy of a few knitting buddies when I ripped all the way back to the toe. Thankfully, my gauge cooperated for the second attempt. 

Step 5: Wash the socks. No problems here.

Step 6: Mail the socks. The package arrived over the weekend and I got a photo of the socks on her feet. Social media is pretty awesome like that. All the ripping and re-knitting was worth it because they’re a perfect fit. #knittingwin The equation is equal, and now I get to knit a pair for myself in green. 

The Specs

Pattern: Smokestack Socks by Tanis Lavallee

Yarn: 204 yds Knit Picks Hawthrone - Vancouver (204 yds)

Needles: 2.25 mm circulars

Dates: April 3 - 21, 2015

Full modificaitons listed @Ravelry