How to Skein Handspun Yarn with a Swift

Skeining-Yarn-On-An-Umbrella-Swift.jpg
SkeiningYarnHowTo.jpg

Ah, the niddy-noddy. Why does such as simple tool have such a strange name? In all the research I did before taking the plunge and finally learning to spin, I never found the origin of its name. Only that I needed one to make skeins. A niddy-noddy is basically a bar with an offset handle at each end. So, I bought one before I started spinning to pad out a yarn order. I did finally use my niddy-noddy and it was fine for small skeins; however, as I started producing more yardage, using the noddy became cumbersome and took a good chunk of time. Time I would rather have spent spinning.

I also had a swift but never thought to use it to skein handspun because all I saw people using were niddy-noddys. You want to know what makes an umbrella swift perfect for skeining yarn? A loop of string and a clothespin. That’s it. With a swift you can make large skeins and small skeins, know the exact yardage, and spend less time doing it. Using a swift instead of niddy-noddy is also easier on your arms and shoulders too.

CordMaterials.jpg

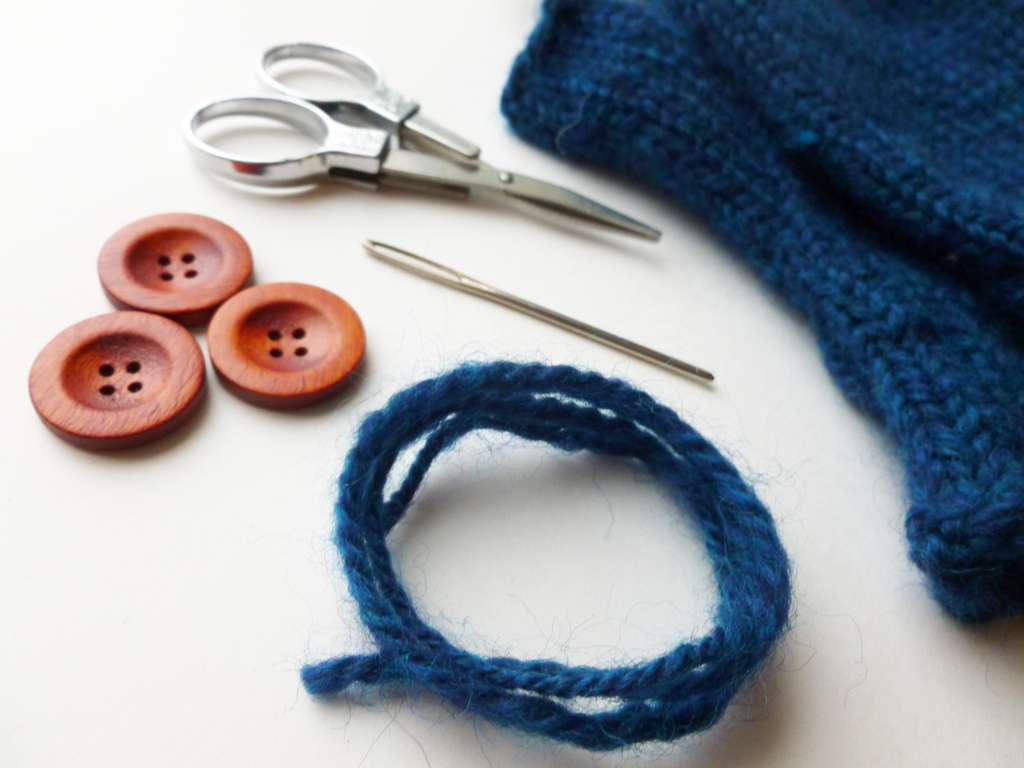
To make the loop, you’ll need:

  • a button
  • string that won’t stretch (I used baker’s twine)
  • scissors
  • marker
  • tape measure
  • tapestry needle

SkeiningYarn1.jpg
SkeiningYarn2.jpg

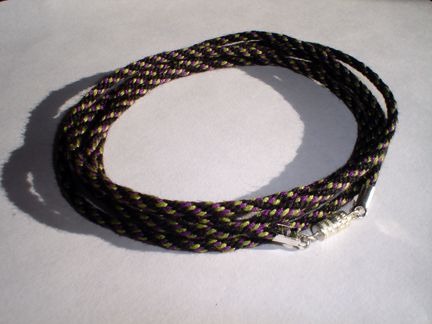
You can make any size loop you want as long as it will fit on your swift. I made mine really long so I could double and triple it for smaller skeins without having to make another loop. 

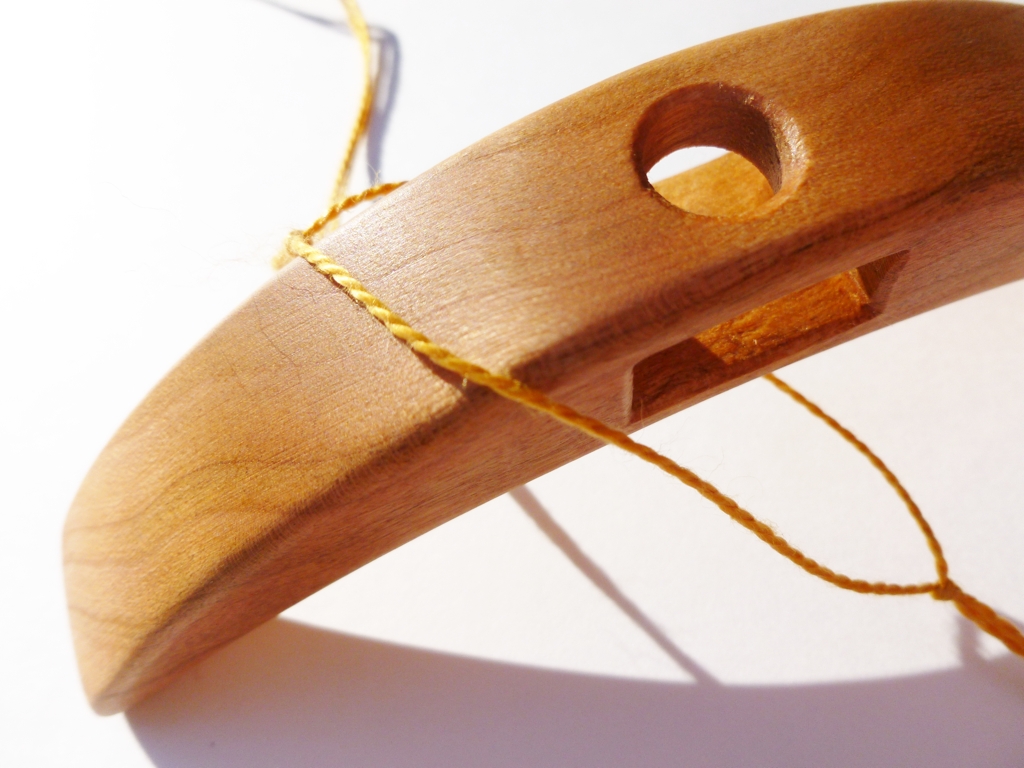
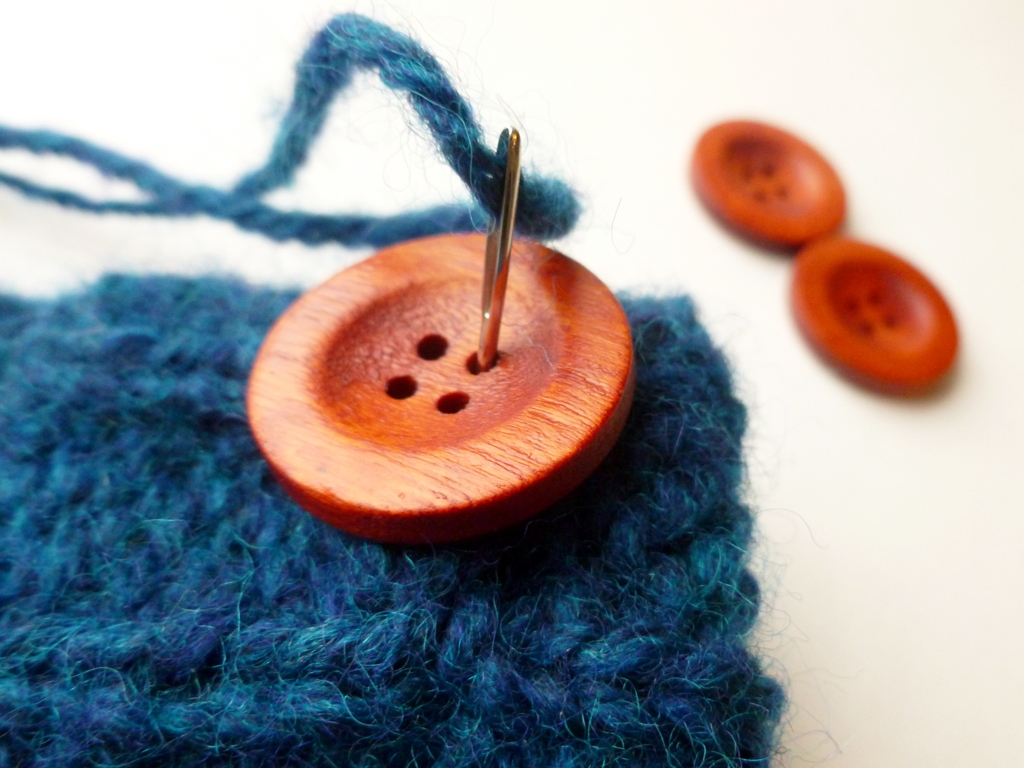
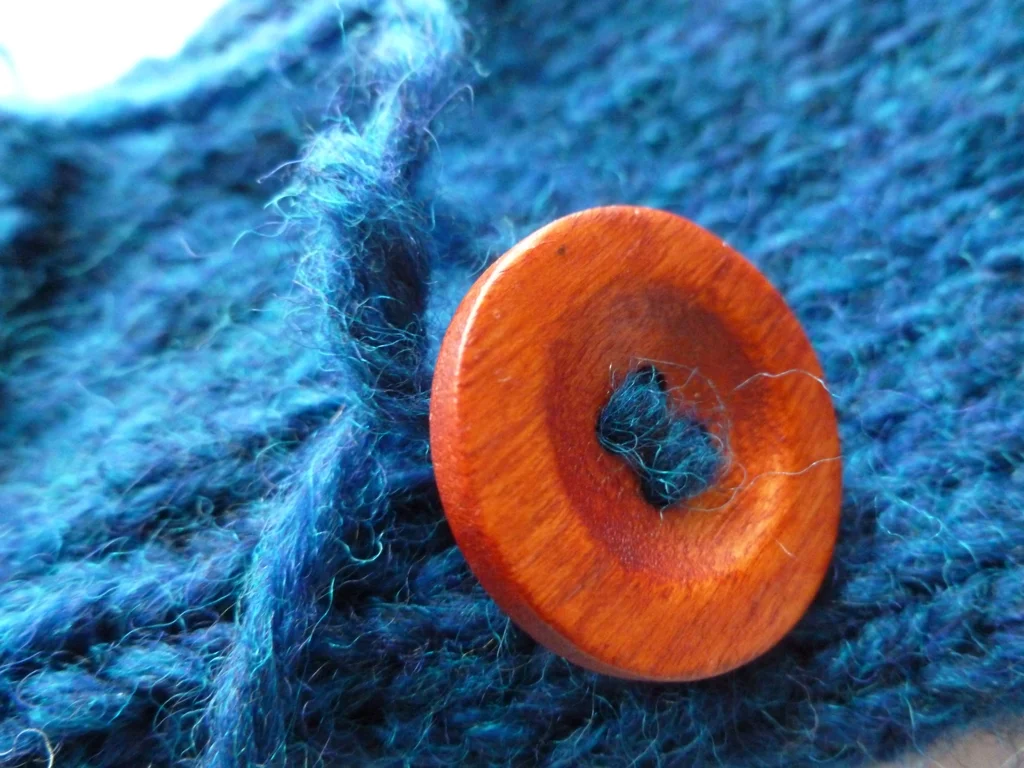
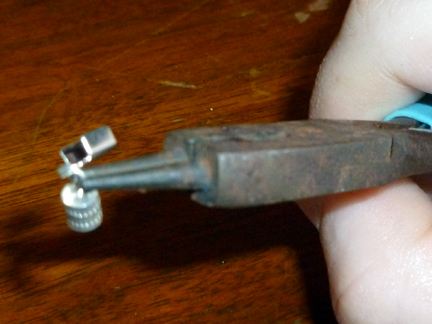
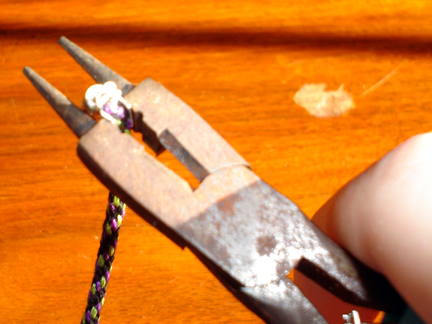
Tie a loop large enough to fit around the button at one end of the string. From the end of the loop, measure the string to the length you want and mark that spot. I wanted a cord 72” long so I measured to 36” twice. Cut the string plus a few extra inches. Thread the string through the button holes till the mark is between them and tie a double knot. A button with a shank works well too. Optionally, you can dap some glue on the knot to help keep it together. All that’s left is to write the length of the loop on the button.

SkeiningYarn4.jpg

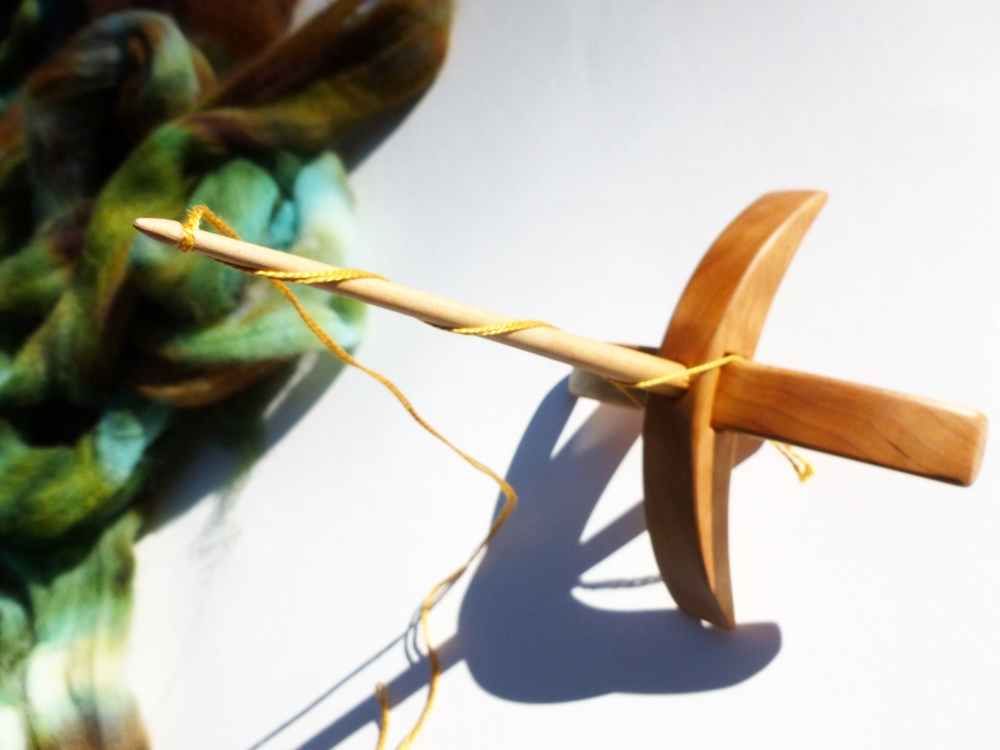
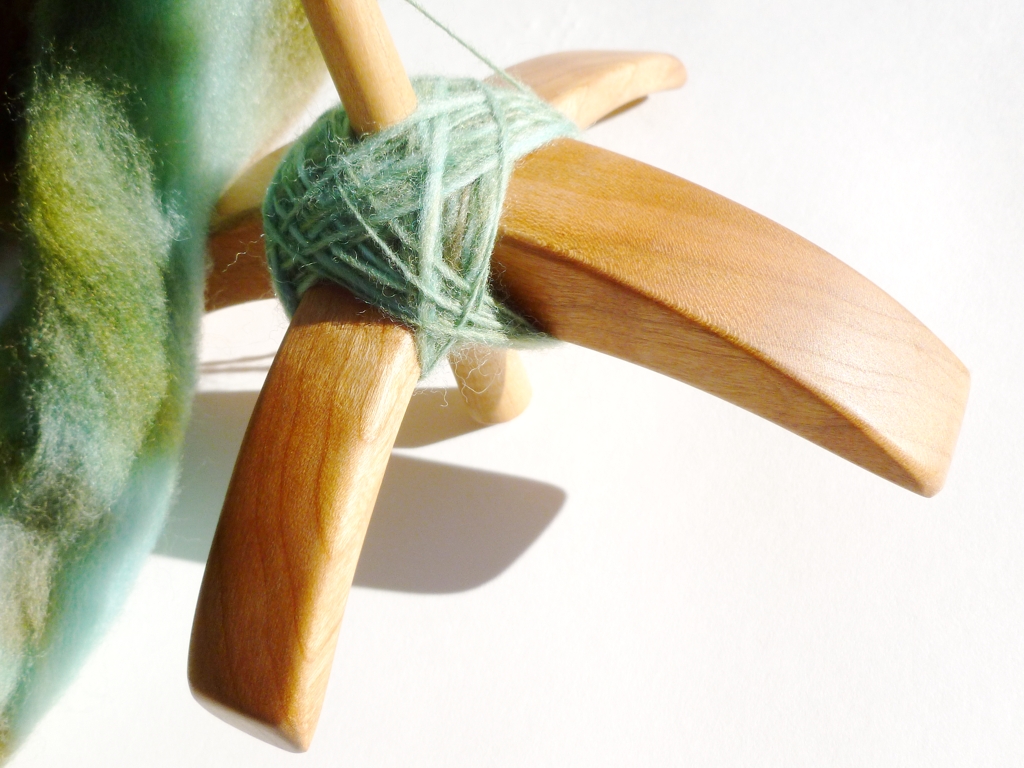
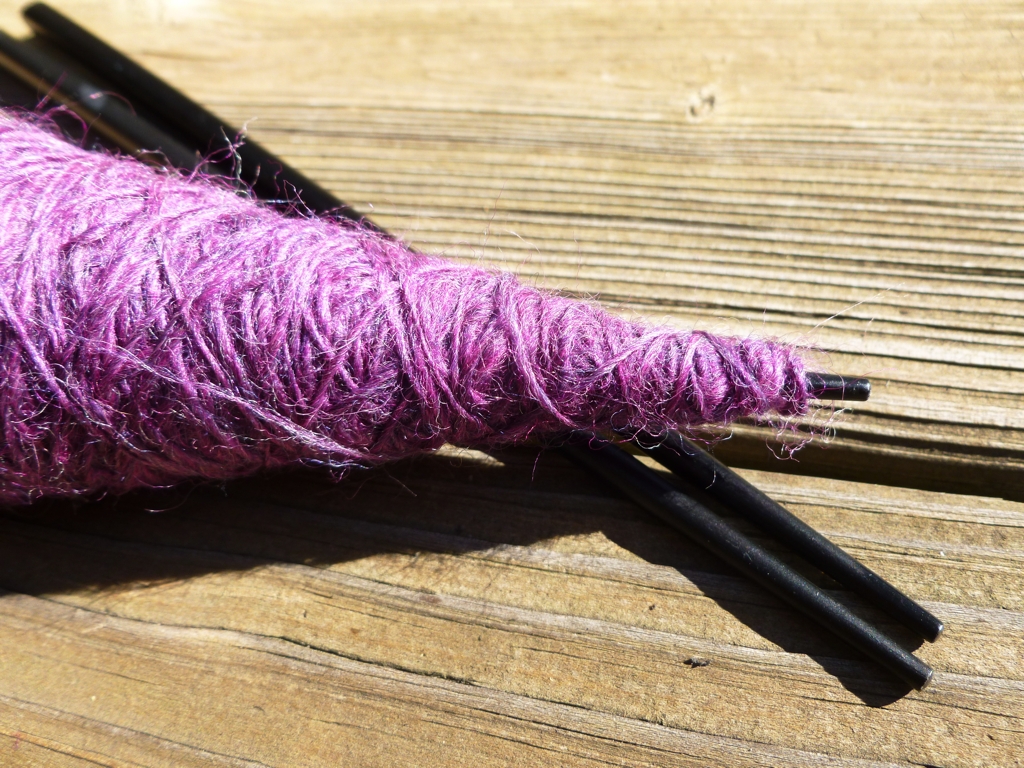
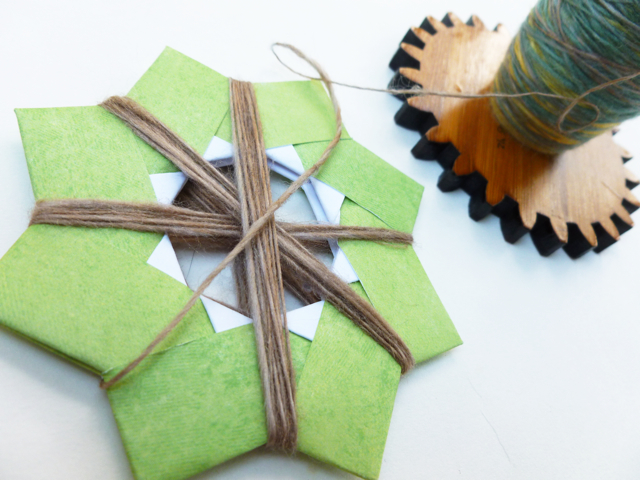
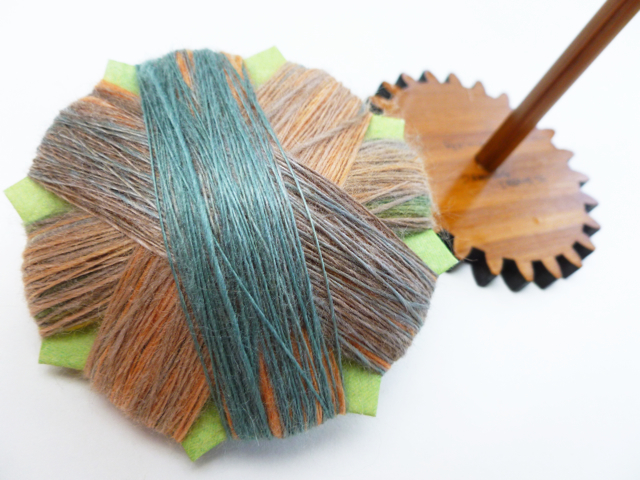
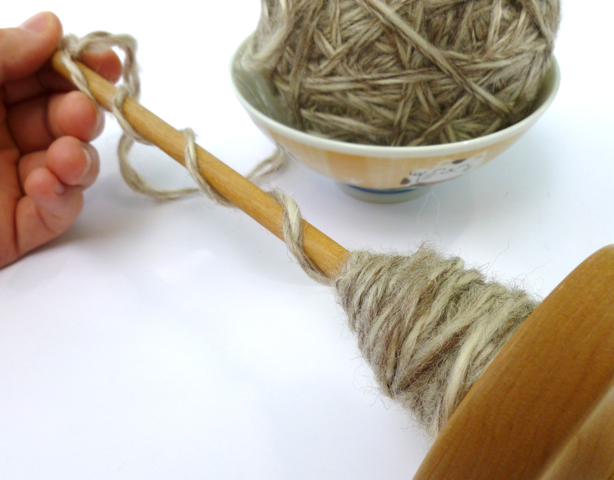
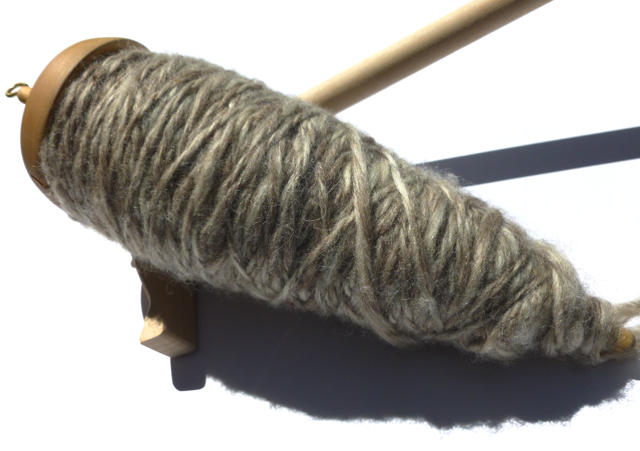
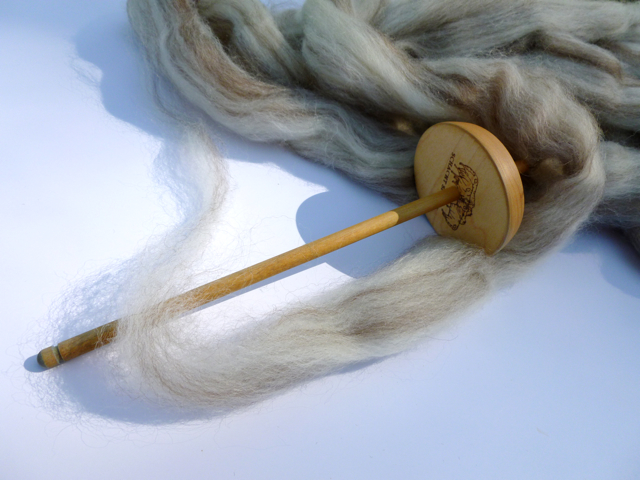
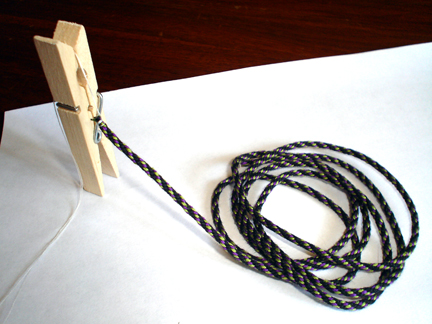
Now you’re almost ready to skein your handspun! Set up your swift and slip the buttoned loop around the arms just like a skein of yarn. Here’s where the clothespin comes in. Use the clothespin to clip one end of the yarn to an arm. The pin will hold the end in place and make it easy to find when it’s time to tie up the yarn. Now, just spin the swift and get all that wonderful handspun off the spindle or the bobbin. You don’t need to put tension on the yarn just don’t give it any slack. When you’re finished, tie up the skein at the ends. If you tie up the loop with the skein like I do half the time, just unbutton the loop and pull it out

SkeiningYarn6.jpg

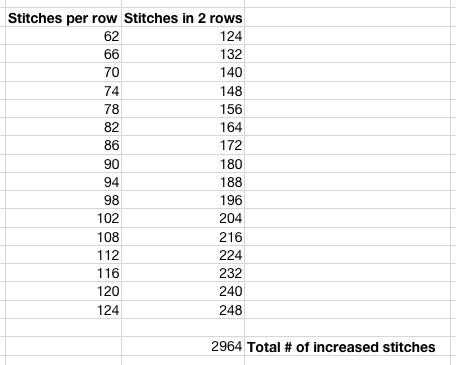
Knowing the size of the finished skein makes it easy to determine how many yards you’ve spun. Just count how many times the yarn went around the swift and multiply by the length of your loop. You’ll also need to divide by 36” if your measurement is in inches so you’ll get the total in yards.

For example, my loop is 72” (2 yards) long and the handspun went around the swift 59 times.

(72” x 59)/36” = 118 yards

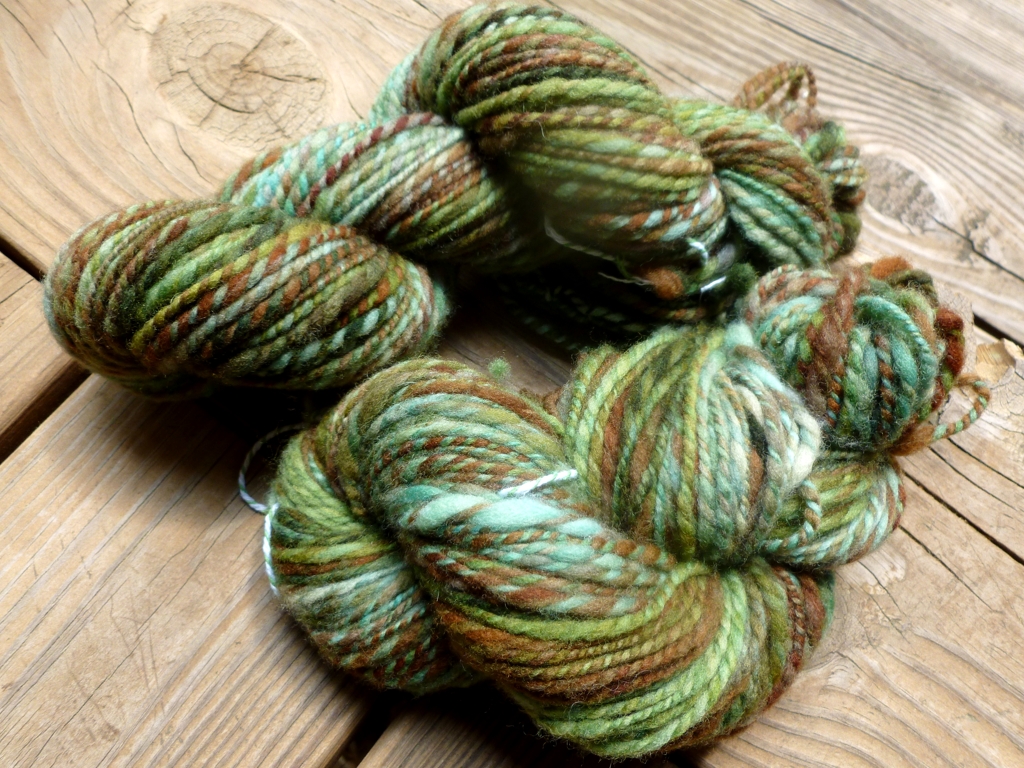
Now that I know that skein has 118 yards, it’ll be much easier to find just the pattern to show it off.

SpinningTarghee10.jpg

Simple DIY Wrist Distaff

WristDistaff1.jpg

It was Saturday and I was following my usual springtime routine of staying inside to avoid as much foul pollen as possible while also enjoying the internet. My routine may be simple but it works for me. During one of the many internet enjoyment portions of the day, I was catching up on Twitter when someone linked to a blog post about basic spinning vocabulary from Clean Cup, Move Down. Reading through the post, which is solid and worth reading if you’re new to spinning or need a refresher, inspired me to pull out a neglected spinning project

I had no problem with the single, the spindle, or the wool except that I put them away and promptly forgot about them. The spinning was wonderful and kept me inside and away from the pollen which is always a bonus. Also, I like to pace while I’m spinning and the roving was still long enough that I had to be careful not to step on it. I know I could torn off a chunk but I don’t want to join any more than I have too. It was at this point that I remembered such a thing called a distaff exists and I went back to the internet to figure out how to make one work for me. Distaffs, at least in relation to spinning, are cleft staffs which hold large quantities of wool or flax ready for spinning with a spindle. Not quite what I needed. Turns out that what I was looking for was a variation, called the wrist distaff, which is worn on the arm opposite the drafting hand. Most wrist distaffs hold just a few grams of fiber though and I wanted to have room for much more. The solution was simple.

WristDistaff2.jpg

All you need for a simple wrist distaff is a drawstring bag with ties long enough to fit around your arm. The bag should be large enough to hold a few ounces of fiber and the spindle. I’m using a Pretty Cheep project bag but any drawstring bag will work. Just put the roving or top into the bag so that it can easily feed out a little at a time. When it’s time to spin, take the fiber and spindle out of the bag, hang said bag from your arm, and get spinning.

Now you can pace to your heart’s content or go spinning in public. Plus, when you’re finished spinning, just put the spindle in the bag are you’re good to go. 

WristDistaff3.jpg

How To Tie A Turkish Spindle Leader

MooseMoss.jpg

In the last installment of my spinning misadventures, I was trying to decide what to spin from a lovely bump of Targhee wool. Since this is my first time working with Targhee, I decided to keep things simple and go with a solid 2-ply yarn. The fiber gets to lead the rest of the way and do its wooly thing. The spindle of choice - a 33g Jenkins Swan which I haven’t used anywhere near enough. Time to fix that.

Turkish spindles can be tricky to start without a hook to help the process and leaders knotted to the spindle can be finicky when there’s a few yards of new handspun wrapped around your hand. I came across a solution quite by accident after I had the used the same leader, a piece of yarn or thread that helps add twist to fiber at the very beginning of spinning, to start several different singles. 

TurkishLeader2.jpg

Tying the leader is simple. I used craft thread because I had it at hand but you can use yarn, twine, or any string in your junk drawer. Take a piece of string at least 18” long - length can vary based on the size of your spindle - and put the ends together. Tie an overhand knot near the end and a second knot about 2” from the first. That‘s it.

TurkishLeader3.jpg

When you’re ready to start spinning, slip the larger spindle arm through the space between the knots. Insert the smaller spindle arm through the notch and the open loop at the same time. 

TurkishLeader4.jpg

Once the shaft is in place, the loop will be secure around the arms of the spindle. Wrap the leader around the shaft and tie a slip knot at the top. To add fiber, draft out a few inches from your top or roving  and put it through the loop hanging off the spindle. Fold the roving back on itself and start spinning. It’s the same process as starting without a leader when the spindle has a hook which you can check out in this tutorial.

TurkishLeader5.jpg

When it’s time to wind the single on to the arms, just wrap 2 over, 1 under as usual. No special treatment required. Nothing special to do when taking the single off the arms either. Just slide everything apart since the single isn’t tied, just wrapped, around spindle. 

TurkishLeader6.jpg

The Targhee and I are getting along well so far. I’m still learning a lot from spinning it though and looking forward to the rest of the process. Hey, I alway look forward to new yarn.  

Afterthought Heel Tips & Tricks

Tips & Tricks to take the guesswork out of knitting afterthought heels. | withwool.com 

What happens when I get bored knitting a pair of socks? I start another pair. If the next pair just so happens to be self-striping and knit with heavier yarn, said pair is even more entertaining. I just couldn’t resist. The last in-progress pair or, more specifically, the 3x2 ribbing on the last pair, became mind-numbing. Not even knitting along to the cheesiest and most hilarious of horror movies made the socks any more appealing. Nor did waiting in slow moving lines. Thankfully, stash yarn came to the rescue.

Tips & Tricks to take the guesswork out of knitting afterthought heels. | withwool.com

Yarn: Knit Picks Felici Sport Self Striping - Kingpin

Needles: 2.5 mm

Date: January 7 - 29, 2013

@Ravelry

Self-striping sock yarn was a lot more fun to work than just plain 3x2 ribbing. No, the irony of a plain vanilla sock being more interesting than ribbing is not lost on me. Uninterrupted striping yarn really is that good. Just knit, adding in a few increases/decreases as needed, and the yarn does most of the work.

Tips & Tricks to take the guesswork out of knitting afterthought heels. | withwool.com

There were a few “Why didn’t I think of this during the last pair of afterthought socks,” moments that I’m sharing to save you the trouble.

1. When figuring out where to open the heel, measure the length of the toe. If you’re working toe-up measure the toe once it reaches the final stitch count. If you’re working cuff down, measure from where you started decreasing. Toe length and heel length will usually be the same unless you make the toe very pointed. Subtract the toe length from the total foot length measurement for where to place the heel. 

For these socks, the toe length was 1.75”  

10.25” - 1.75”= 8.5”  

From the tip of the toe, I measured 8.5” and marked the rounds with thread to follow Cat Bordhi’s afterthought method. The finished sock came out just the right length and fits wonderfully. 

2. Weigh the finished toe to know how much yarn to put aside for the heel. This trick requires a scale but removes all the guess work. When knitting toe-up, measure the weight of the ball before and after you finish the toe. The difference, multiplied by 2, is how much yarn is needed for the heels. 

If you’re working from the cuff, this trick isn’t as helpful since knitting the toe is one of the last steps. Instead, you could pause to knit the heel, measuring the difference in weight, and leave that much yarn to work the toe.   

If you’re using self-striping yarn and want the colors to match, like I did with this pair, wait to cut the yarn until you know which color the heel falls on. This is easier to do with toe-up socks than cuff down unless you’re knitting the cuff to a certain length. Either way, keep an eye on the stripes and finish before you knit up all of that color.

How to Sew on a Button with Handspun Yarn

How to Sew on a Button with Handspun Yarn | withwool.com

The snow made me do it. Seriously, the only reason I finally sewed the buttons on my latest pair of mitts was because it was cold and snowing. Being able to take photos of said mitts in the snow might also have had something to do with it.  Part of the reason for the wait was that I could never find thread to match the handspun. The thread was too blue, too purple, not blue enough, or not even close. The yarn itself was made of so many different shades of blues and purple that I couldn’t find a good match. Thankfully, I still had a few useable scraps of leftover yarn. Then it was a just problem of attaching the buttons in a way that looked finished instead of just tied on. Solved.

How to Sew on a Button with Handspun Yarn | withwool.com

1. Gather your supplies: buttons, yarn, scissors, your almost finished object, and a tapestry needle to fit through the button holes.

How to Sew on a Button with Handspun Yarn | withwool.com

2.  Decide where the button will go and push the threaded needle through the button and fabric.

3. Sew through all the buttons holes, into the fabric, and finish with both yarn ends on the wrong side of the piece.

How to Sew on a Button with Handspun Yarn | withwool.com

4. Pull both ends through the fabric underneath the button but do not go through the button holes again.

How to Sew on a Button with Handspun Yarn | withwool.com

5. With the ends, tie a double knot and trim off the extra yarn. 

6. Repeat as necessary.

How to Sew on a Button with Handspun Yarn | withwool.com

If you’re having trouble threading the yarn through the tapestry needle, fold the yarn in half to form a loop. Tightly hold the top of the loop and push it through the eye of the needle. 

How to Sew on a Button with Handspun Yarn | withwool.com

Origami Stars

OrigamiOrnaments1.jpg

Now that my Christmas cards are in the mail and winging their ways across the States, it’s time to show off the goodness inside: origami ornaments. I like to make ornaments every year for the tree and add them as special touches with friends’ gifts. This year, I’m taking a break from knitted leaves, birds, stockings, mittens, and pom-poms for origami. There’s no lack of holiday knitting around here and origami is a nice change. The ornaments are much faster to fold than to knit, easy to make, and just the right size to mail to friends across the country.

OrigamiOrnaments3.jpg

There are tons of instructions for origami stars across the internet and I fell for the Robin Star by Maria Sinayskaya. This video helped clear up some of the more complicated parts of the folding and assembly. I used 3” foil origami paper and the completed stars came out 4” across. The only thing I changed was to tuck the “triangle”, that is normally folded behind all layers, under the last layer to hide the paper’s wrong side.  Once all the stars were folded, a hole punch (an awl would work too) and some craft thread quickly turned the bunch into ornaments. 

After folding 20 of these stars I have a few tips :

  1. Don’t wait to the last minute. The stars are quick to make but won’t just appear in your hands. I made mine over the course of a week. 
  2. Assembly line the process. Once I’d picked the paper for a particular star, I worked the same fold on all the pieces before moving to the next step. Seemed to make the whole process go a lot faster.
  3. Practice first. Before I started using the small, foil squares, I practiced making the stars from larger paper. I was able to memorize the steps and make sure the process wasn’t too finicky before making the real thing.
OrigamiOrnaments2.jpg

Store Singles on Chopsticks

I love chopsticks. Have for years and I’ve got quite the collection now. I have chopsticks made of wood, plastic, metal, and ceramic. I have lacquered chopsticks, orange chopsticks, and red chopsticks. The collection has chopsticks that say Happy Birthday, that are inlayed with Mother of Pearl, and others that are decorated with ukiyo-e samurai. I took a selection of these off to college with me. Based on the look on my roommate’s face, you’d think eating fruit cups with chopsticks was weird or something. Also part of the collection are several sets of plain, black chopsticks. They sat in the silverware drawer for years and I always picked more decorative pairs instead. Well, I found a much better use for those plain jane chopsticks: storing singles.

Chopsticks1.jpg

A chopstick and the shaft of a spindle aren’t that different. The two share similar and compatible lengths and diameters. Both have been sanded, perhaps finished with paint or stain, and are smooth to the touch. A finished cop - the mass of single wrapped around the shaft - slides easily without snags or tangles along both. A chopstick is more durable than a straw and can even be used as part of an improvised lazy kate. As a bonus, chopsticks are fairly cheap and come in a range of styles so you can afford to pair up all your spindles with a few sets.

Chopsticks3.jpg

To transfer, all you have to do is slide the cop off the spindle and on to the chopstick. If the spindle has a tapered shaft, slide the cop onto a straw first and then the chopstick so that the diameters match. With the chopstick full of proto-yarn, the spindle is free and clear for more spinning.

Afterthought Heels the Cat Bordhi Way

After making several pairs of socks with afterthought heels, Cat Bordhi’s method is my absolute favorite for adding afterthought heels. Works really well for afterthought Cuffs too. Afterthought Heels The Cat Bordhi Way | withwool.com

It’s only been a month and a half since I cast on for these socks in Atlanta and the pair is almost finished. The first sock, in all its toe-up, self-striping, 3x1 rib glory, is bound off. The second sock is not. The first sock has a heel. The second sock does not but soon will thanks to an awesome technique called the Afterthought Heel.

When it comes to socks, I’m usually a big fan of the gusset and heel flap since the combo fits my feet really well; however, the socks I’ve made from Cat Bordhi’s Personal Footprints for Insouciant Sock Knitters have shown me that I don’t need a gusset to have a well fitting sock. So, when I started the socks and wanted even stripes all the way up, I decided to try an afterthought heel with 3x1 ribbing on the instep to help the fit. The rows would stay the same width, and I wouldn’t have to worry about where to start the gusset increases or measure the sock every 5 minutes while stuck in Atlanta traffic. I could just knit and put my mind on other things. 

Most afterthought heels call for knitting in a half row of waste yarn where the heel should go which leaves a gap in each of the corners. In Personal Footprints, Bordhi has a great alternative that prevent gaps and is very easy to knit from. You just can’t be afraid to cut your knitting. Honestly, it’s not as scary as it sounds.

After making several pairs of socks with afterthought heels, Cat Bordhi’s method is my absolute favorite for adding afterthought heels. Works really well for afterthought Cuffs too. Afterthought Heels The Cat Bordhi Way | withwool.com

When you reach the spot for the heel (Most patterns mark this as 2” or 2.5” less than the total length but I only needed an 1.5”. My sock came out .5” short but still fits well so the measurements are forgiving.) or come back to it after a few more inches of knitting, thread a lifeline through through the sole stitches on one row of the sock and the sole stitches two rows up.

After making several pairs of socks with afterthought heels, Cat Bordhi’s method is my absolute favorite for adding afterthought heels. Works really well for afterthought Cuffs too. Afterthought Heels The Cat Bordhi Way | withwool.com

Come back and slip your needles back into stitches on the lifeline. Pull out the lifeline.

After making several pairs of socks with afterthought heels, Cat Bordhi’s method is my absolute favorite for adding afterthought heels. Works really well for afterthought Cuffs too. Afterthought Heels The Cat Bordhi Way | withwool.com

Pick a stitch in the middle of the middle row and snip.

After making several pairs of socks with afterthought heels, Cat Bordhi’s method is my absolute favorite for adding afterthought heels. Works really well for afterthought Cuffs too. Afterthought Heels The Cat Bordhi Way | withwool.com

Unravel the remaining middle stitches but leave the last 2 at each corner. They prevent those annoying gaps. You’ll knit the corner stitches just like normal stitches.

After making several pairs of socks with afterthought heels, Cat Bordhi’s method is my absolute favorite for adding afterthought heels. Works really well for afterthought Cuffs too. Afterthought Heels The Cat Bordhi Way | withwool.com

With new yarn, start knitting a toe. I went for a standard wedge toe and to help the “toe” fit better I decreased on the last 2 rows to round out the shape. Then, I grafted the remaining stitches. Feel free to drop in any toe you like. 

Cat Bordhi has a great video demonstrating this technique on a pair of Houdini Socks (Afterthought Legs!) that I highly recommend.

After making several pairs of socks with afterthought heels, Cat Bordhi’s method is my absolute favorite for adding afterthought heels. Works really well for afterthought Cuffs too. Afterthought Heels The Cat Bordhi Way | withwool.com

Sock one is all finished and I am in love. The stripes are even, the heel looks great, and the fit is wonderful. Now I just need to finish up sock number two before the weather turns much colder.

Origami for Plying

Since I started seriously learning to spin, I have been monogamous spinner. Just one bump of fiber on the spindles at a time, thank you. I don’t want to confuse my hands with wildly different fibers and jump between lace and worsted weight all in the same day. So when I pick some fiber to spin, I see it through to the end and don’t start something new until the yarn is drying on the rack. For the past few weeks my default spinning project has been a lovely bunch of lace weight singles which are be chain plied for some self-striping goodness. The time had finally come to ply the first singles a few days ago but I only had one plying ball and two singles. I didn’t want to wrap both singles around the same ball since I wouldn’t know where one ended and another began. One single went on the ball and I wrapped the second around a box of sewing pins. That box kept the singles orderly but it wasn’t quiet about it. “Oh, you need more singles? I shall play you the song of my people.”

Until I get around to knitting up a few more plying balls, origami to rescue. I love making modular origami where a bunch of simple folded pieces combine to create something wonderful and complex. Stars are a particular favorite. In the rare moments of silent plying, I remembered the Gudrun Star over on GoOrigami.com. I’ve made them before and they seemed perfect for holding bits of handspun. The stars are simple to make, easy to memorize, and don't take up much space. I made these units listening to podcasts and watching movies.

I know I could have just cut out a few squares of card board instead of folding stars but there is a method to my madness. The extra points make it easier to wrap and secure the yarn. Plus, I’m going to be using these stars a lot and I’d rather look at them than a drab piece of cardboard or an advertisement on the back of a cereal box.

To make your own stars, you’ll need the Gudrun Star diagram from GoOrigami.com and a sheet of scrapbook paper cut into 2 x 3” rectangles. Scrapbook paper is thicker than origami paper but still easy to fold and makes a sturdy star too. One sheet is enough to make 3 stars 3.25” across. FYI, the diagram is in German but the illustrations are clear without the words. Don’t forget that Google Translate is your friend if you need it. 

Once you’ve made your stars, they’re ready for yarn. Hold the end in a valley and wrap the yarn around the opposite side of the star 3 or 4 times. Rotate and repeat. When you can’t see the points anymore, you can wrap the yarn just like on any other ball.

Wrapped and ready to go! Time for some plying that won’t outdo the television speakers. 

Spinning Batts

Once I pulled this batt out of the envelope and decided it was good, my second thought was that it was larger than my head. Then, how am I supposed to make this into yarn? For all I knew it might as well have been a monster waiting for my to let down my guard so it could eat me. 

Since Tour de Fleece waits for no spinner, I went looking for tutorials on spinning from batts and the internet came to my rescue. 

How to Spin from Batts by Vampy

The post lists five different ways to prep batts for spinning with clear photos and written instructions.

How to Spin a Batt from the Knit Girllls

This video covers four ways to spin from a batt. The yarn is being made on a spinning wheel but the prep still applies for a spindle. 

A Batt? What’s that? by St Seraphina Knits

Another informative video but this covers how to open the packaged batt and focuses on tearing the batt into strips for easy spinning.

Eventually, I decided to tear the batt into strips and pre-drafted the fibers down to a manageable size. After all the uncertainty, this seemed like cheating since the prep work was so easy and nothing to fear. Now I want to get more batts and experiment with different prep methods. 

Now that the monster had been tamed, it was time to spin and it was no harder than working from roving. If only the single didn’t look like upchucked bodily fluids.  Any suggestions for what to do with 3.5 oz of fiber that you don’t want to spin anymore?

How To Ply Yarn

...or Process Part 5 of Spinning Yarn on a Spindle. Part 1. Part 2. Part 3. Part 4.

| - | - | - | - |

After how much time it took my hands to learn how to draft fiber and flick a spindle, plying yarn seemed like such a simple thing. Put two or more singles together (or one single that’s been doubled or tripled) and spin them together counter-clockwise to make one intertwined strand. That’s it. The only thing I had to think about was how much twist to add. It seemed so much simpler than spinning up the singles but I knew there was more to it. At the same, I wasn’t worried about the details because I knew I’d figure them out eventually.

So, if you’re worried about ruining your singles, just jump in and go for it. As long as you ply opposite the singles and add enough twist, you’re golden.  

A spindle, 2-ply plying ball, and a bowl for wrangling.

Tie the singles together in a knot. If you’re using a top whorl spindle, slip the hook between the plies. For a bottom whorl, tie the singles around the shaft.

Flick the spindle counter-clockwise to add twist since singles are typically spun clockwise.

Once there’s at least an arm’s length of yarn and you’re happy with the amount of twist, wrap the yarn around the shaft. Bring the yarn back around to the hook or tie a slip knot and leave just yarn enough free to get the spindle going again. 

Repeat until you have one very full spindle and all the singles are plied. Woot!

To get your new yarn off the spindle and into a skein, you can wrap the yarn around your arm from palm to wrist or use a niddy noddy. Add a few ties around the skein to keep it from tangling.

Wash the skein to set the twist (I like Eucalan for this part) and hang it up to dry after a few good thwacks.  In this case, a thwack is pulling at both ends of the skein to make the fibers bloom and even out the twist. You don’t have to be about it gentle either. 

Ready to knit.

Now that I’ve gotten a little more practice under my belt, I’m beginning to see more of the nuances of plying. I’m refining my technique and experimenting with different methods (chain plying, anyone?). I’m making yarn that I love and can’t wait to knit with once I find that perfect pattern. This never would have happened I hadn’t thrown caution to the wind, and just tried in the first place. The first skein isn’t perfect but it’s still yarn and a first step.

How to Wind a Plying Ball

Plying Ball.jpeg

...or Process Part 4 of Spinning Yarn on a Spindle. Part 1. Part 2. Part 3.

| - | - | - | - |

I have finally finished plying all three singles for my little experiment making a 3-ply yarn. The first single flew off my spindle. The second single ate all my mojo. The third single brought back my mojo with some to spare. I used a smaller spindle that weighs just over an ounce and is just the right size to slide the cop - the mass of single or plied yarn wrapped around the shaft - off to a straw.

It’s really funny how quickly a new tool can change a process. My first favorite spindle weighs 2.2 oz and has a shaft too large to slide a straw over. Every time I finished a single, I’d let it rest overnight and then wind the single onto a small dowel (a ball would work too). It’s more time consuming but worth the effort to get an empty spindle.

Trying to ply three separate singles from three separate straws is just a recipe for disaster but all three plies on a single ball is much more manageable. This method also works well with two singles but I’d hesitate to wrap more than four since it would be harder to keep all the strands evenly tensioned. Also, just wrapping a single around a ball would be a nice way to store it for later since the ball is an easy and tangle free way to start wrapping. 

I’m using a styrofoam ball since I have them on hand but tennis balls and felted beads work too.

Gather up all your ends and start wrapping. A pail or box will keep the singles from running off to the four corners of the world. 

Keep wrapping until you come to the end of a single and cut the rest to match. If you have extra like I do, you can wind them onto another ball to make a cute little mini skein. 

Next up, plying!

Fixing Breaks and Making Joins

...or Process Part 3 of Spinning Yarn on a Spindle. Part 1. Part 2

There are days when spinning comes easy. I can pick up the spindle and find my rhythm immediately. Yarn just seems to spring from my fingers and all I have to do is wind it on the spindle before things touch the ground. The only time I have to make a join is when I need more fiber. I’m in the zone. 

Then are days where the spindle drops every 30 seconds and I’ve got a pile of loose, under spun fiber that couldn’t hold a paperclip off the ground. Bah. Once I get so frustrated that I want to jumble up everything into a giant felted ball, I put the spindle down and walk away. Better to calmly fix something the next day than rip it to shreds in frustration. Thankfully, fixing breaks isn’t a difficult, drawn out process.

| - | - | - | - |

When it’s time for more fiber, fan out the end of the fiber coming off the spindle and the end of the new fiber.

Overlap the two ends by about 3” and start drafting and adding twist. If you just add twist without drafting the join will be lumpy and bulkier than the surrounding single.

Keep spinning and keep joining and, soon enough, you’ll have a full spindle. 

| - | - | - | - |

Joining new fiber and fixing a broken single on a spindle are, essentially, the same process. Usually, a single breaks because there isn’t enough twist to hold it together. The ends won’t immediately untwist and become a frazzled mess but they won’t always salvageable. Sometimes, you just have to pull out the weak parts and get back to business. When joining two ends of single back together, just overlap the ends by about 6 to 12” and add more twist. Wind the join onto the spindle and keep going. That’s all there is to it.

If you have a broken single and need to join it a bit of un-spun fiber, draft out the fiber and overlap the two pieces by 12”. Wind yarn off the spindle to work with if need be. “Park and Draft” is your best friend here since it lets you slowly add twist and test the join to see if it holds. Plus, it might be more difficult to draft if the single was tightly spun. 

Good luck and don’t be afraid of a little practice.

Make A Bow

Despite what all those posts about spinning might have told you, I do still knit. Some of is secret, some of it for commission, and some of it I just haven’t gotten around to photographing yet. These two little Saplings fall into the commission pile. Now that they’re finished and delivered I can show these off. 

I used my favorite yarn for baby hats, Elsebeth Lavold Cool Wool, which is a soft worsted weight wool cotton blend and great for spring time southern weather. It has wonderful stitch definition, holds it’s shape, and is machine washable. It does have a smaller gauge than recommended in the pattern though so I had to work the larger size to get a nicely sized and stretchy hat.

Since the hats were going to be a gift, a little tag with fiber content and care instructions was in order. Anything worth doing, is worth doing well. So, I wanted the tag to match the hat and share a theme. A cute little bow made from the same yarn as the hat fit the bill wonderfully.   

      Materials

  • 2x4” piece of card stock (I used kraft paper)
  • 4-6” length of leftover yarn used to make the gift
  • Tapestry needle
  • 1/8” hole punch
  • Pen
  1. Using the hole punch, make 2 holes in the card stock a half inch apart and a half inch from the top.
  2. Under the holes, write the recipient’s name (I left this part blank), the fiber content, and care instructions underneath. 
  3. Thread the yarn though the needle and push it through the holes so that both ends are hanging on the same side as the writing.
  4. Tie a bow. Done!

How To Start Spinning Without A Leader

If this post could have a subtitle, it would be Process: Part 2. This series has taken a complete 180 from what I thought it was going to be. Take a few pretty photos of my process, write a few snippets, wax poetic about the whole thing, and put it on the blog. Turns out, I was making tutorials and didn’t even know it. I think this a lot better than my original idea.  

The first post in this series was all about how to prepare fiber (combed top in this case) for spinning. In this post I’m getting down to business of spinning, well, starting to spin yarn without a leader. I’ve used a leader in the past but there is something magical about making yarn out of thin air. Just add a bit of twist to some fiber and BAM! Yarn. Plus, drafting and spinning this short section of fiber helps me understand the characteristics of an individual batch of fiber which helps me spin better yarn.

| - | - | - | - |

The great thing about about starting without a leader, a length of already spun yarn that helps put twist in fiber at the beginning of the spinning process, is that you don’t need any extra material to pull it off. Also, if you’re a beginner and can get started without the leader, you’ll already have the basics of spinning under your belt.

To start, you’ll need a drop spindle - high or low whorl - with a hook and a bit of fiber. 

Pick an end and slowly pull the fibers straight out bit by bit using both hands. One hand pulls and the other holds the top. The top between your hands should get thinner and longer. This is drafting.  You can draft out just a few inches now and start spinning, drafting as you go, or draft large sections now to make it easier to handle.

Once at least 6” have been drafted, it’s time to put the fiber on the spindle. Place the drafted fiber through the hook and fold back the first 2-3” to form a loop. Pinch the two ends together. When you pick the spindle up by the fiber, it should hang without falling.

Time for twist! Singles, un-plied yarn, are traditionally spun in a clockwise direction and plied together counter-clockwise. So, give your spindle a clockwise spin - rotating to the left - with your fingers. There should be so much twist that the fiber kinks up on itself. To keep the spindle from spinning back and removing all the twist, catch it in your hand and hold it between your thighs. 

Loosen your grip and slowly pull back the hand pinching the fiber to let the twist move into more and more of the drafted fiber. If the newly spun single starts to give out, give the spindle a few more turns to add more twist.

Once there’s 1 to 2’ of single on the spindle, wrap it around your pinching hand until you get back to the hook. Keeping your fingers pinched and the everything tight, carefully take the single off the hook.

Wrap the single around the shaft close to the whorl. A few wraps should keep everything in place. 

If spinning on a low whorl spindle, wrap the single around the shaft and tie it off with a half hitch or pass through a hook. For a high whorl spindle, just pull it up over the whorl so that it comes up behind and then through the hook.

All there is to do now to keep spinning, is repeat the process with both hands this time. Pinch. Twist. Draft. Pinch. Twist. Draft.

This video by Abby Franquemont and this one from TheArtofMegan.com really helped me get handle on the process. Of course, there’s no substitute for actual practice.

| - | - | - | - |

Up next in the Process Series, is joining fiber and fixing breaks.

How to Spin Yarn: Prepping Combed Top

I can haz process?

Picking up spinning again was a lot like any other skill I’m trying to learn. First, I find this thing that sounds really cool and I would like to try. Prime examples: knitting, kumihimo, temari, origami, and bookbinding. Second, I hit the internet and research tools, tutorials, and techniques for days, weeks, and even months before I decide to make something a priority. Third, gather supplies. Fourth, actually do something. Anything to just get started. 

If I like that brand new started something, I keep doing it. I figure out how and why it works. I start experimenting. I get comfortable. I develop a process of how to do this awesome something from start to finish. With spinning, the realization that I knew what I was doing and that I had a process hit me all at once. I was absolutely giddy.  

So, I’m sharing my process. I hope that it will help you get started, come up with one of your own or, if you already know how to spin, see your process as something amazing and worth celebrating. 

| - | - | - | - |

Step 1: Stash Diving. Since my first, short-lived attempt at spindle spinning, I’ve been buying fiber. Not much. Just enough to have something to choose from when I came back to the spindle. The stash has served me well in that regard. For this attempt, I picked out 4 oz. of Blue Face Swirl (Naked) from Gale’s Art.

Step 2: Inspection. This batch of fiber was twisted up like a skein of yarn. So, I opened it up just like a skein of yarn. Then I spread everything out and got a sense of the color distribution and how much 4 oz. of fiber actually looks like.

Step 3: Division. I didn’t pick out this fiber with any particular project in mind. I just wanted to try my hand at a 2-ply yarn. So, I split the entire length of combed top down the middle. 

Step 4: Wrangling. There’s a brief pause for a little “eeny, meeny, miny, moe” to decide which half to use first. The “not it” bit is crochet chained to keep it whole and safe until I need it. I take one end, make a loop, and tuck in the tail to make a big circle.

Next, pull a loop through the circle. Pull a new loop loosely through the last loop and continue. Eventually, all the roving is gathered up and easy to handle. At the end, I just pull the roving through the last loop to keep it together. This is the only bit of crochet I know.

That giant circle I made at the beginning? That’s how I know to work from the opposite end since a crochet chain can only be pulled out from the end and not the beginning. Just pull the tail out and and take apart the chain as you need it.

| - | - | - | - |

Next post, I’ll get back to the other half of the fiber and start spinning. 

Hexipuff Complete

The Puff of Puffs @Ravelry

The Hexipuff is making all the other pillows on my couch feel inadequate. It’s 16” tall and 22” at the widest point. It used almost 6 balls of yarn or 190 yds, an entire bag of stuffing, and almost 3/4 a yard of black cotton for the form. It is the undisputed pillow king of the couch, at least, until I give it to my mom. Honestly, it’ll rule that couch too with an iron fist. 

Want to know the secret behind a giant and proportional hexipuff? The necessary evil known as swatching. You’ll need the yarn and needles you’ll be using as well as a scale. Also, the following numbers and modifications are in no way meant to be a replacement for the original Beekeeper’s Quilt by Stephanie Dosen of Tiny Owl Knits. Buy the pattern, use it, and you might even want to make a whole flock of tiny hexipuffs.

Cast on the same number of stitches and in the same way as a regular puff. Then, just knit a tube for a few inches to make the math easy. If your swatch is 20 stitches around, has a gauge of 5 rows to an inch, and is 3” long, your equation should look like this:

20 stitches x 5 rows x 3”= 300 stitches

Next measure how many grams of yarn are in the swatch with the scale. In this example, let’s say 5g. 

300 stitches / 5g = 60 stitches per gram

So, for every gram of yarn, you can knit 60 stitches. Let’s say you have 2 50g balls to make your puff. 

(2 x 50g) x 60 stitches = 6,000 stitches

This means that the total number of stitches in your puff is 6,000. Any more than that and you’ll run out of yarn. Now, you can figure out how many stitches to cast on and much to increase before decreasing. The original puff has twice the number of stitches at its widest point than at the cast on. 

Since the puff is symmetrical you only have to figure out how much to cast on and number of increases to use up half the number of stitches, 3,000 in this case. I wish I had a handy formula I could just plug numbers into for this next step, but it’s all trial and error. And on a spreadsheet.

Take a reasonable guess about how many stitches to cast on (62) and keep adding 4 until the number is twice the cast on (124). Multiply every number of stitches per row by 2 and sum the results. The answer, 2964 stitches, is almost 3000 stitches so you would cast on 62 and increase until you have 124.

Let the knitting begin! Don’t let the sheer number of stitches put you off of a puff or knitting in general. Just enjoy the process and the awesomeness that is a giant puff. Plus, you can use this method for more than just hexipuffs. Whenever you need to figure out how much yarn you’ll need for a project, you can follow the same basis steps.

When I first started this project, hand sewing a pillow form wasn’t even on the radar. Just knit and stuff and graft and gift it away. Easy peasy. As the pillow got bigger, however, a form seemed much more necessary. It added few more steps and time to the process but it’s totally worth it. I picked up 3/4 of a yard of black, cotton homespun and spent part of an afternoon cutting and sewing it up.

Over the past few days, The Bearded One, Shadow and I have put the puff through some rigorous testing. It’s still firm, has kept it’s shape, and isn’t leaking any stuffing. Pillow forms are officially win. Also, it’s so much easier to graft stitches together when you aren’t pushing stuffing out of the way every 5 seconds.

I know I said I was only going to make just one puff. Just one puff to rule them all. Now, I think I have to make two. They can duel for supremacy when I’m done.

Ah, still makes a nice hat.

Winners! Also, Kumihimo Tutorial: Part 2

Random.org has spoken! The two winners are GateArte and Katie M. of Brokeknits.com. Hope you have fun! Emails are on the way. 

-----

The focus of this tutorial is how to finish off your braid with crimps and a clasp. If you don't want to add any findings, you can just tie of the ends and go or just have fun experimenting. Anyway, here's what you'll need:

  • Your almost finished braid
  • Scissors
  • Super Glue
  • Scrap Thread
  • Clothes Pin
  • 1 Barrel Clasp
  • 2 8mm crimps
  • Small needle nose pliers

Once you’ve made the braid as long as you want, it’s time to finish it off. Make a little slack on the loom by pulling the working end of the braid straight up.

Then pull the braid and the extra thread back through the hole. Wrap the braid with the scrap thread several times and tie a double knot. Repeat until you have 3 or 4 knots.

Now for the scissors. Just past the wrap and all of the knots, cut off the excess floss but leave the scrap thread. Seal the ends with a drop of glue and pin the scrap thread up in the clothes pin. It makes a handy drying stand in a pinch.

While the glue dries, it’s time to join the crimps and the barrel clasp. The ends of the clasp that I’m using rotate freely so the two can go straight together. First, take apart the clasp so it’s easier to handle. Hold one half of the clasp’s eye with the pliers and pull back the other side until there’s enough space for the crimp. Slip the crimp on to the wire and bend the eye back into place. Repeat for the other half of the clasp and it’s time to attach it to the braid.

Cut off the scrap thread. Then put a drop of glue in the crimps and press in the braid ends. Do something fun while the glue dries.

Once everything is dry, crimp the crimps closed with the pliers.

Time to enjoy your handiwork!

Kumihimo Tutorial: Part 1

Seriously, I can’t stop wearing this thing. Everyday this past 2 weeks, I’ve found a way to wear it and make it work with my outfits. It’s so fun and practical that I can’t let it go. Now, if only I could come up with a name for it. Capital letters and “The” should definitely be involved. Lack of a proper name aside, I must make more. Kumihimo manages to keep my hands busy and give me something crafty to do when knitting isn’t an option but there’s still TV to watch. Rigorous testing has proved it to be a great companion to Buffy the Vampire Slayer.

I’ve fallen hard for Kumihimo and I want to share the love. So, I’m documenting the process with a tutorial and having a little giveaway. Included is almost everything you’ll need to make your own “thing.” The pliers, glue, and scrap thread are up to you. I’ve got two kits. So, just leave a comment - maybe suggest a name and which colors you want- and some way to contact you (email, ravelry ID) by July 30th.

There’s more than one type of braid. They can be round, flat, square, or hollow and, traditionally, they’re made on a round stand or marudai. In this post I’m going to focus on a particular kind of braid, an 8 strand round braid, that is made on a modern equivalent to the marudai - a foam disc. Let’s begin!

Supplies:

  • A kumihimo loom
  • 4 skeins embroidery floss (2 the same color)
  • Scrap thread
  • Yarn bobbins or clothes pins
  • Scissors

You won’t need these until after you’re finished braiding:

  • Super glue
  • 8mm crimps
  • Small barrel clasp
  • Pliers

The first thing to do is prepping your floss for braiding. You won’t a full skein for this project just most of one. Open the skein and make sure the ends are free to grab later. Stretch it around your fingers like yarn on a swift and pull both of the ends at the same time. The floss should come off your fingers tangle free and and nicely doubled.

Cut a nice long piece of thread about 18” and pull it through the loops. Tie the thread in a double knot and you’re ready for the next step - winding. 

Even doubled, the floss is way too long to braid without tangling. Separate the floss into 8 strands and wrap them around the bobbins or the clothes pins. As long as you tuck the working end of the floss into the tip of the clothes pin when you’re finished winding, it should hold itself in place while you braid.

Kumihimo looms and marudai are set up around the 4 cardinal points with numbers marking the individual slots. Pull the scrap thread through the center hole and place the 4 same colored strands (black in this case) on the North South Axis (slots 32:1 and 16:17). Both contrast colors go East to West (8:24 and 9:25).

Now that the floss has been doubled, tied, wound, and arranged on the loom, the hard part is over and you’re ready to braid. In one hand, hold the loom and scrap thread from underneath. Make sure to keep a snug hold on the scrap thread since it’ll help keep the loom in your hand and make it easier to start working.  With North at the top, move the North right strand (1) next to right South (15). There will be one strand at North and three at South.

Next, move left South (17) to left North (31). The strands should be be at two and two again.

Rotate the loom clockwise or you can turn counter-clockwise. Just keep the direction consistent.

Just keep repeating these steps - Right down. Left up. Rotate. - until the braid is as long as you want it. For me, the magic number for a chocker/necklace/bracelet/anklet thing is 45”. To figure out your length, take a piece of string and wear it around your neck (or wrist or ankle) exactly how you want to wear the finished braid. Cut the string at that length and use it to measure as you work.

Unless you’re making a much shorter braid, you probably won’t finish in one sitting. So you know where to begin when you pick up the loom again, move the right strand down and stop. When you’re ready to start again, move the left strand up and keep going as usual.

Good luck, have fun, and I’ll catch up with you next week with how to finish it off and add a handy clasp. Let’s see how many episodes of Buffy I can watch in the mean time. Hope you’re having a nice weekend!