I-Cord Necklace How To
/
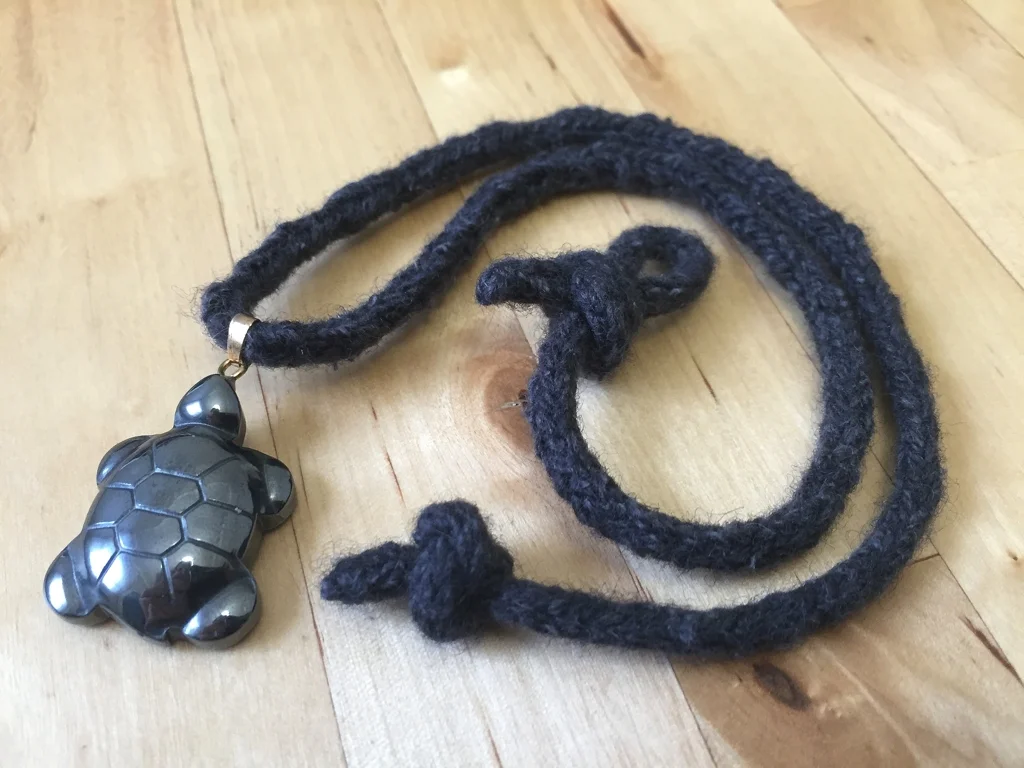
While I was shopping for beads for an upcoming project, I found a cute turtle pendant that ended up in my digital cart. It was still cute once I had it in hand, but I didn’t have a way to wear it. I knew if I put it away in drawer that I’d forget about it so it stayed on the table. My kitchen table, AKA my desk, is a jumble of books, yarn, knitting needles, spinning fiber, and tech. It wasn’t long before the pendant and the right yarn ended up next to each other. It be much easier to make a necklace for the pendant instead of forgetting to ever buy one.
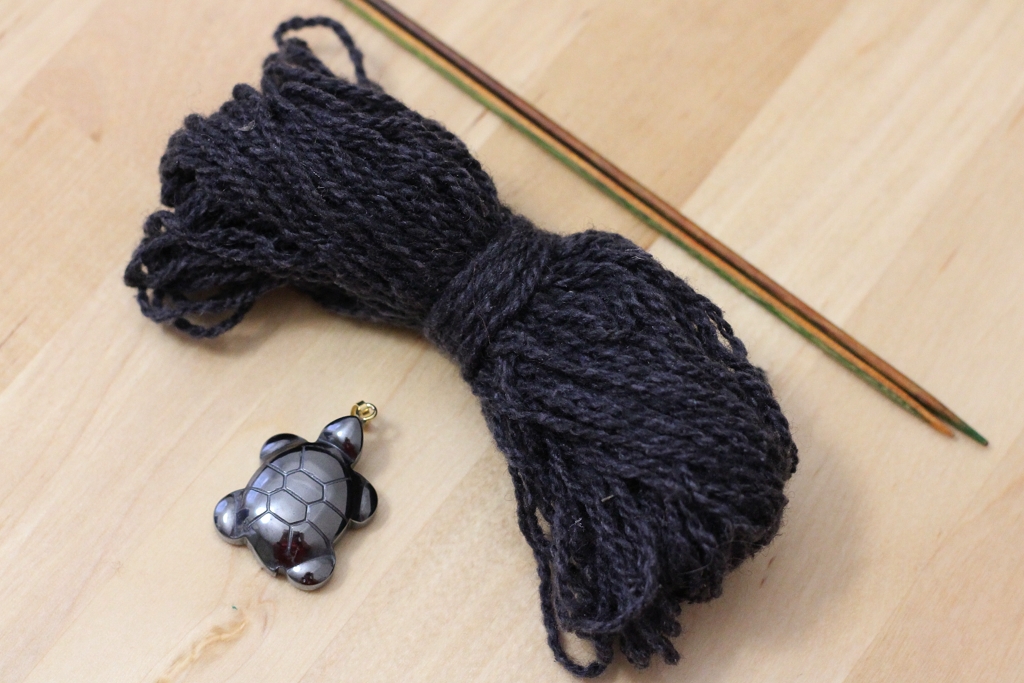
Materials
2-3 yds Sport Weight Yarn
2 2.75 mm double pointed needles OR a short circular needle
A pendant, charm, or bead
Tapestry needle
Knitting The Cord
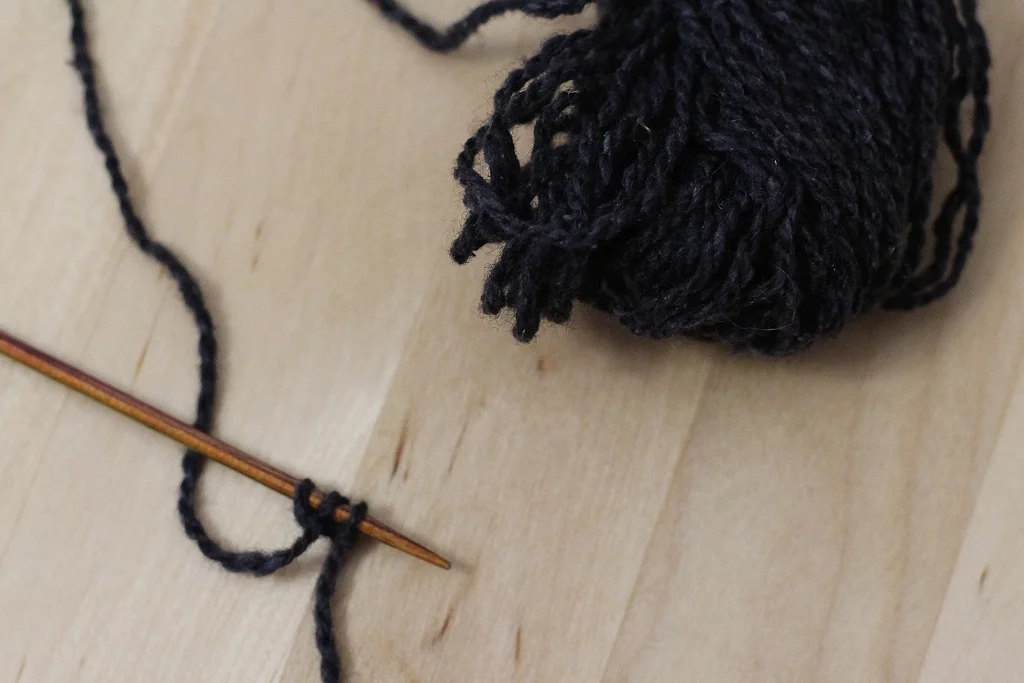
Cast on 3 stitches and slide them to the right tip of the needle.
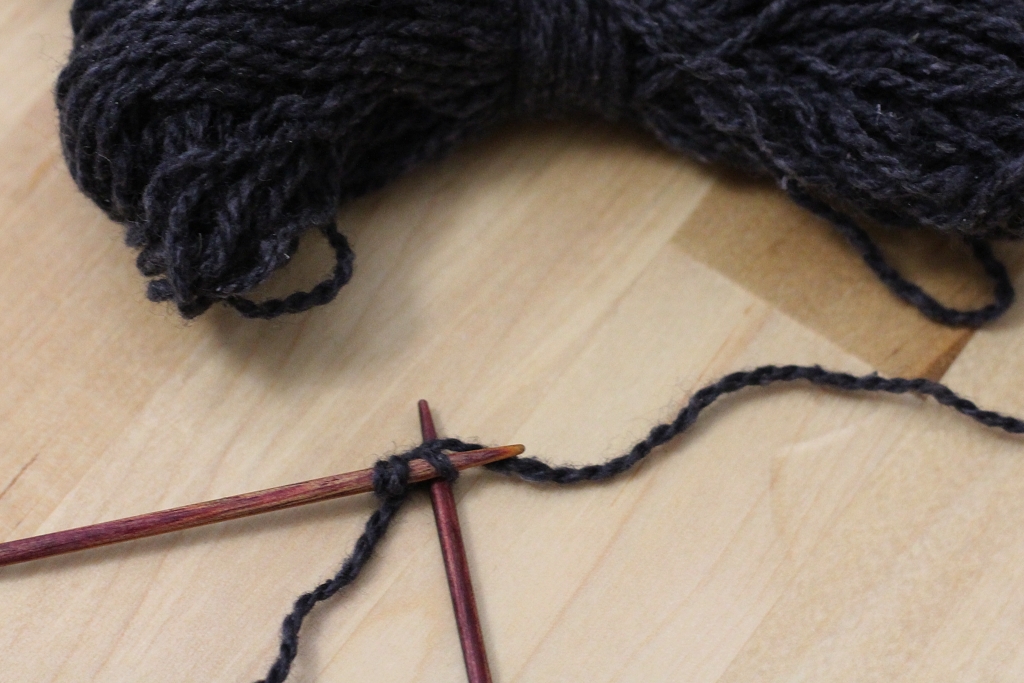
Pull the working end of the yarn behind the stitches from left to right. Knit the 3 stitches and slide them back to the right hand tip of the needle. This method allows you to work flat but still get a closed, round cord when you’re done.
Repeat until the i-cord is 19” long or the length you want plus 2” to tie the knots. I decided how long to make my i-cord by comparing it the length of one of my favorite necklaces.
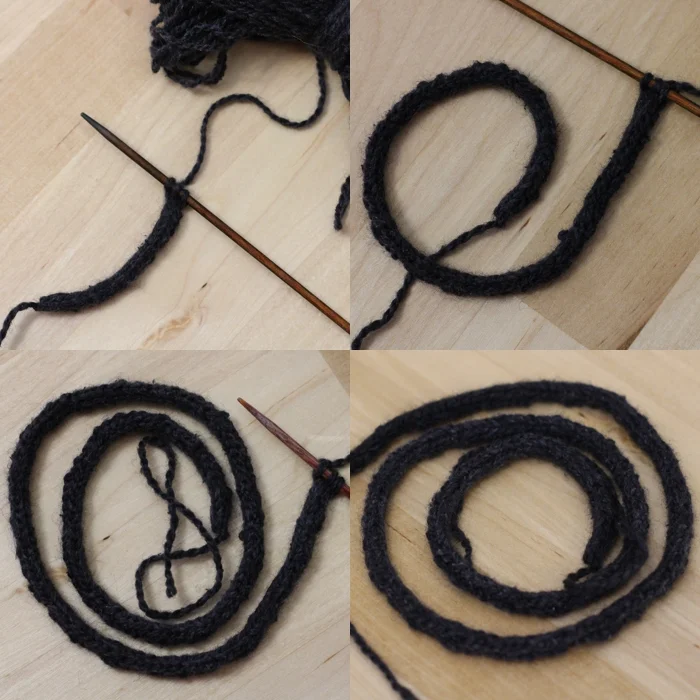
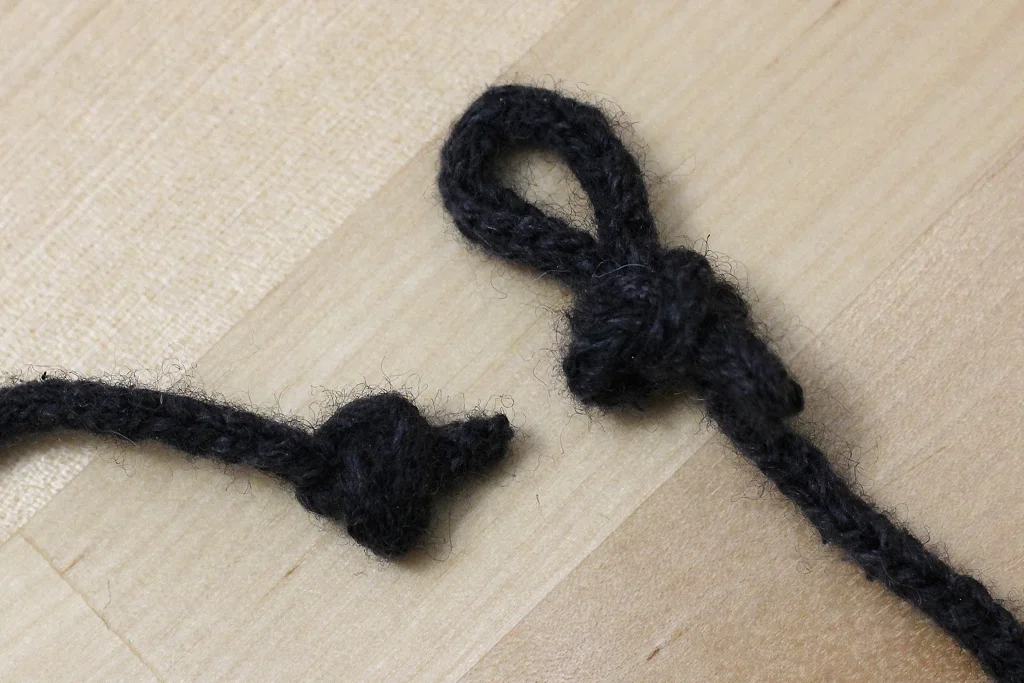
Bind off the 3 stitches and cut the working yarn. Weave in the ends by pushing the needle and thread through the center of the cord for an inch before pushing the needle out and cutting the thread. If your pendant has a small bail or opening, wait to weave in one of the ends.
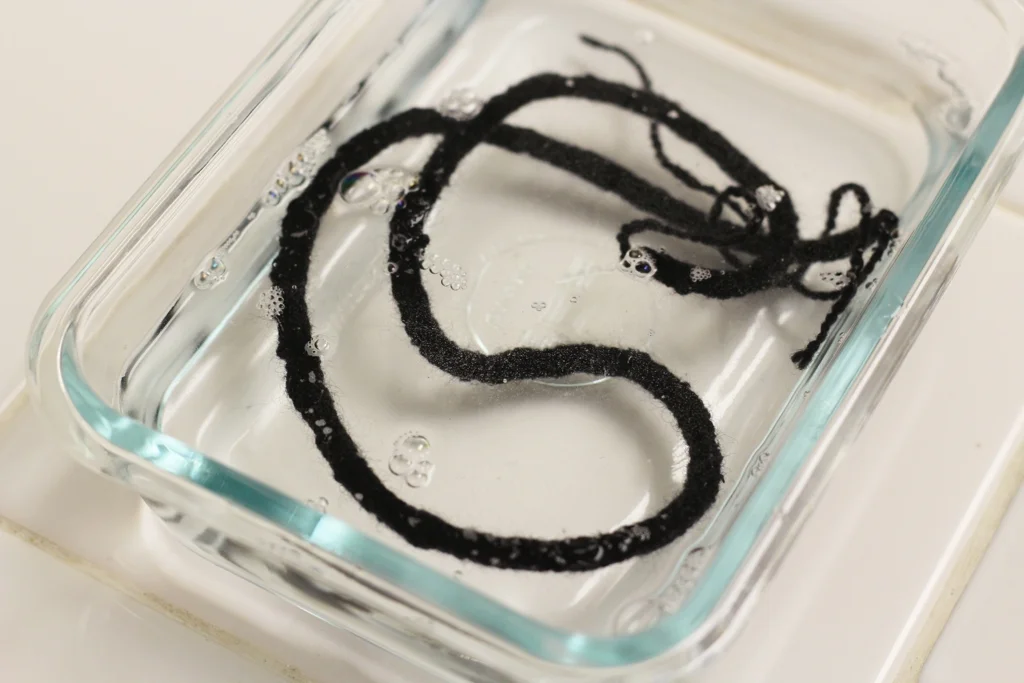
While not strictly necessary, blocking the i-cord will help even out the stitches and create a nicer looking necklace. To block, soak the i-cord in cool water for 15 minutes. Wrap it in a towel and squeeze out the excess water without wringing. Lay it flat to dry.
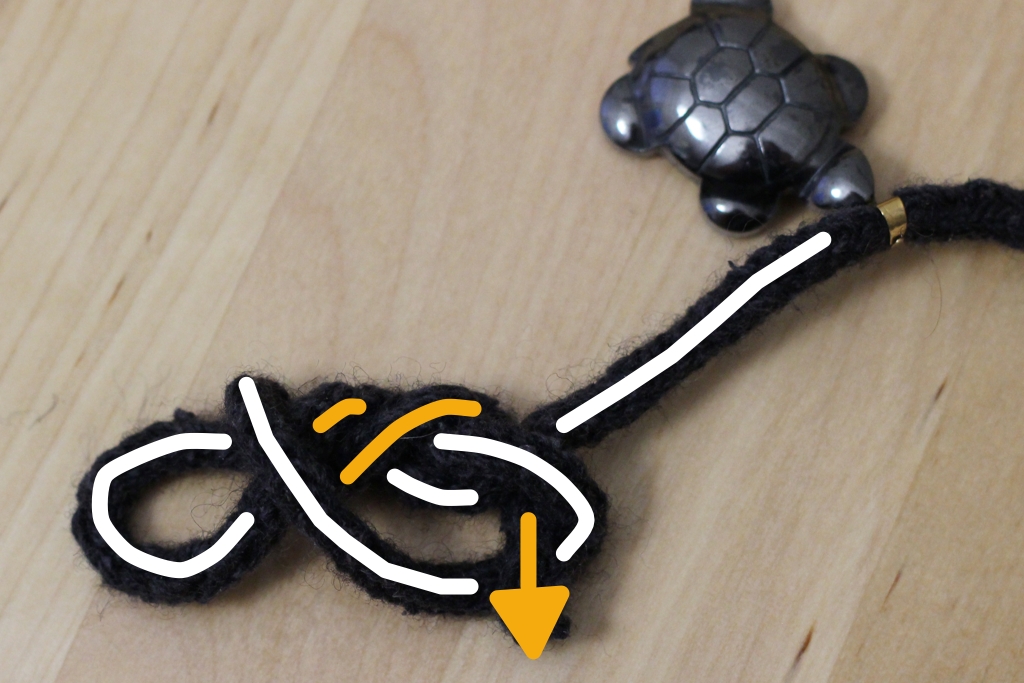
Tying the Stopper Knot
It might take a few attempts to get the knots in the right spot or looking just so. Keep the tapestry needle ready because it’s a big help unpicking the knots. I re-tied each several times to get the right tension and placement.
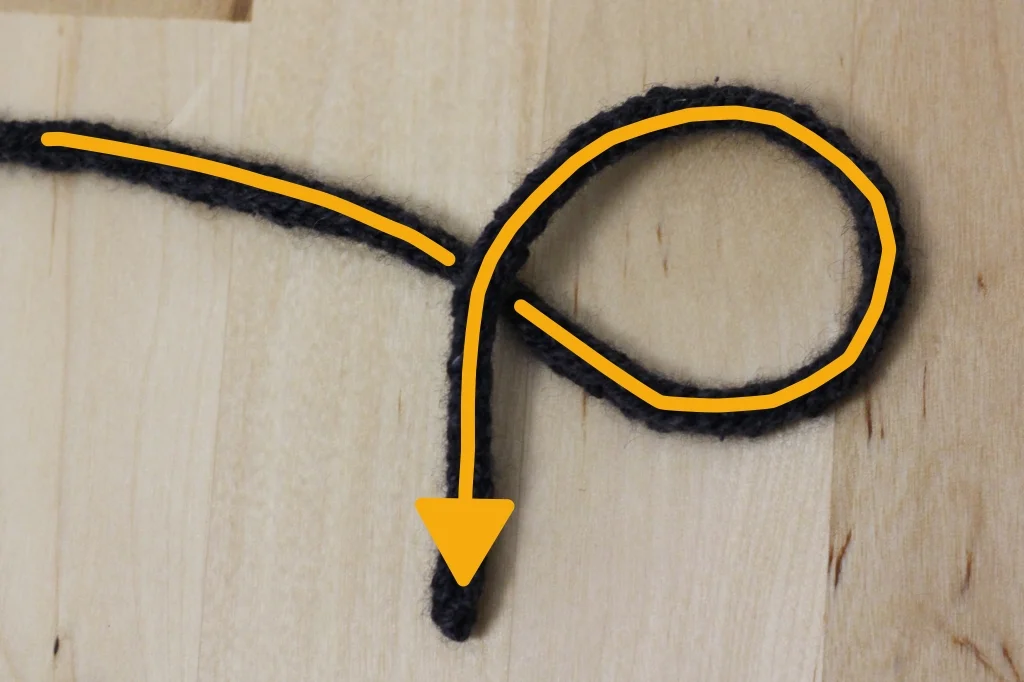
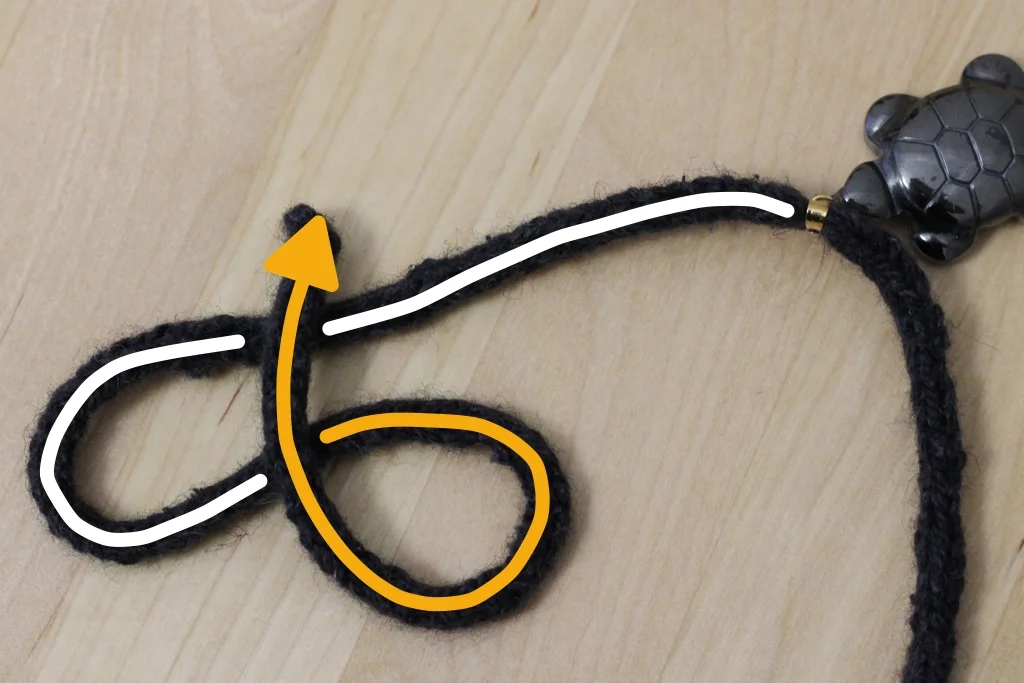
Make a loop with one end of the cord.
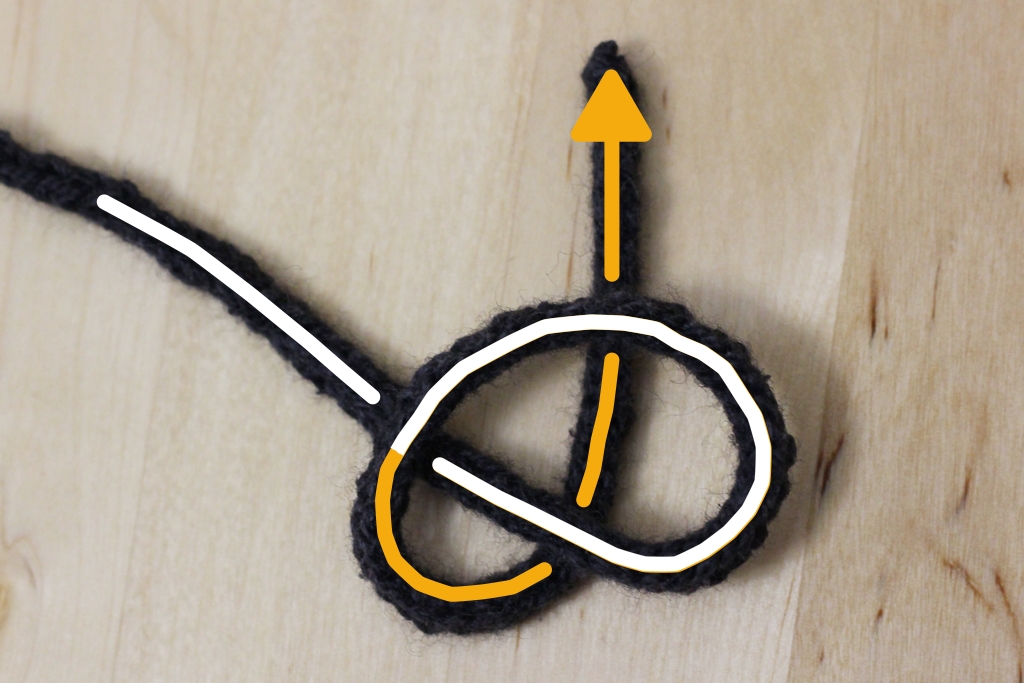
Bring the end of the cord behind both strands of the loop…
then pull it around the first loop and into the space between the loop and the wrapping end of the cord.

Pull the end through the first loop from behind and tighten the knot.
If the photos aren’t helping, check out this animation of how to tie the Stopper Knot.
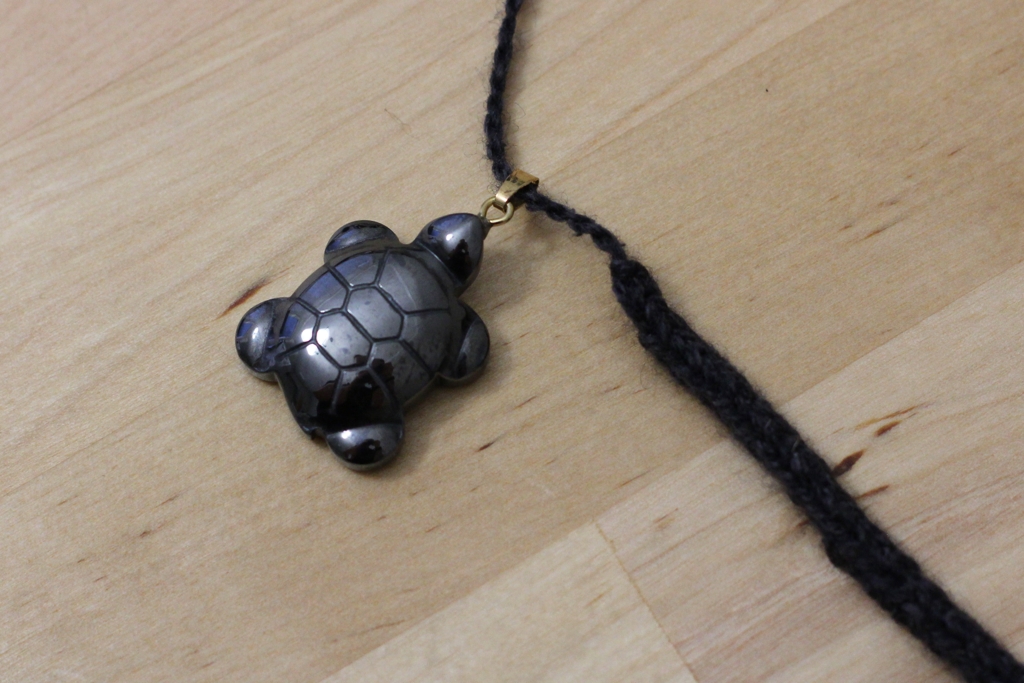
Before tying the next knot, string the pendant. If the bail is small, pull the unwoven end through the bail first and use it to pull the cord through. Weave in the end.
Tying the Slip Knot

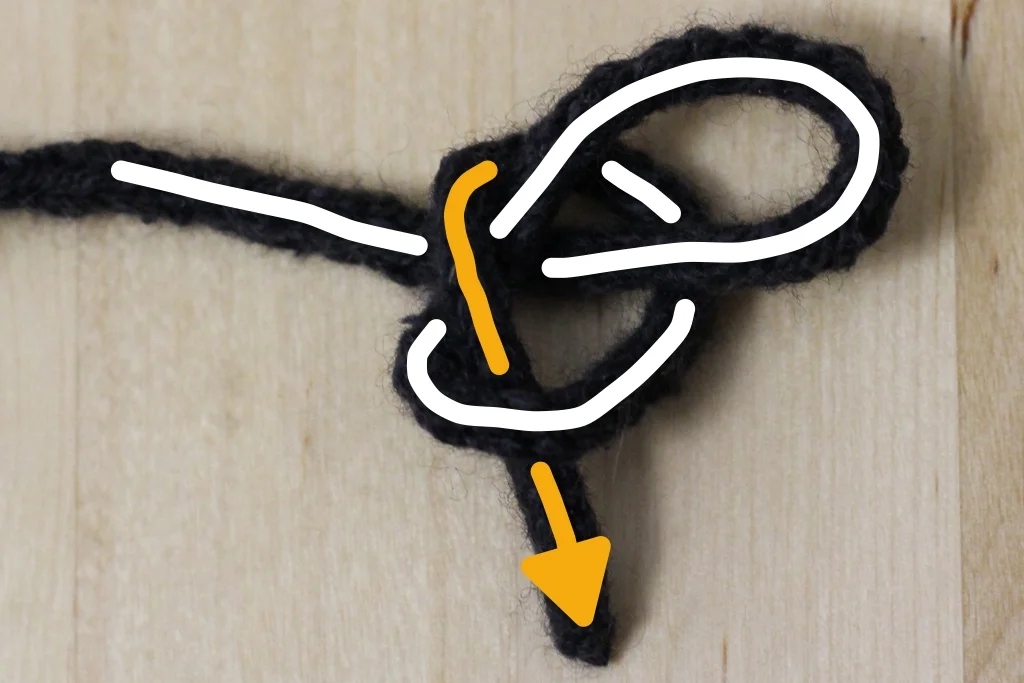
Make a loop with the opposite end of the cord.
Bring the end over the legs of the first loop and make a second loop.
Wrap the end around the first loop’s two legs twice and bring the end out through the second loop. Tighten the knot leaving the first loop open at the end. Done correctly, you’ll be able to shrink or grow the loop as needed. I like the pull the slip knot tight after pulling the stopper knot through to keep the necklace in place.
If the photos aren’t helping, check out this animation of how to tie the Slip Knot.
Done! Enjoy your new necklace!