Wooly Links: February 2022

I finally sorted through my massive trove of saved links from the past year that I never got around to reading/watching. Some left me asking why I bothered saving them in the first place. Others I set aside to reference for different projects. Some were about knitting and spinning I thought were worth sharing. So here are 10 awesome links about knitting, spinning, fun projects, owning a yarn shop, and dinosaurs.


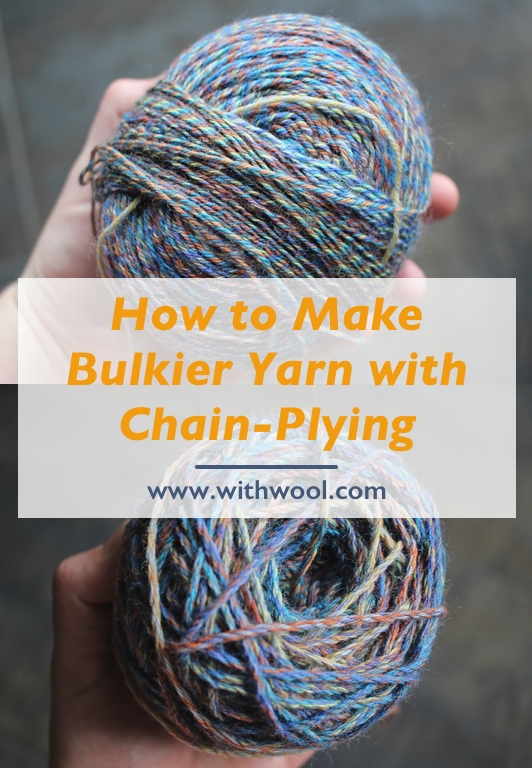
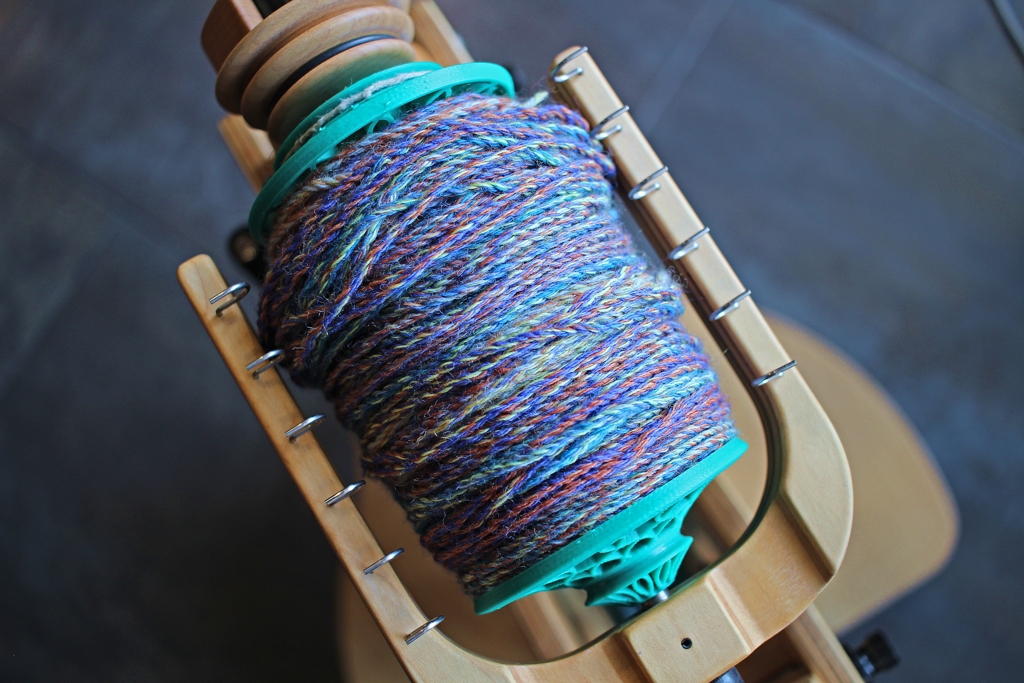
Is you handspun yarn hard and scratchy? Jacey Boggs has a few ideas to spin softer yarn.

While playing catch-up on with all my podcasts and vlogs, I really enjoyed this interview on The Long Thread podcast with Maggie Casey & Judy Steinkoenig.

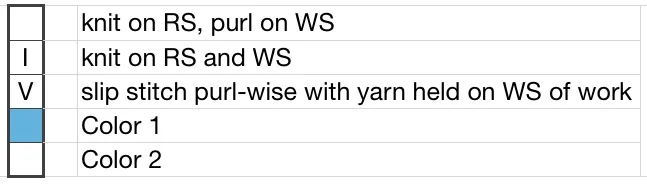
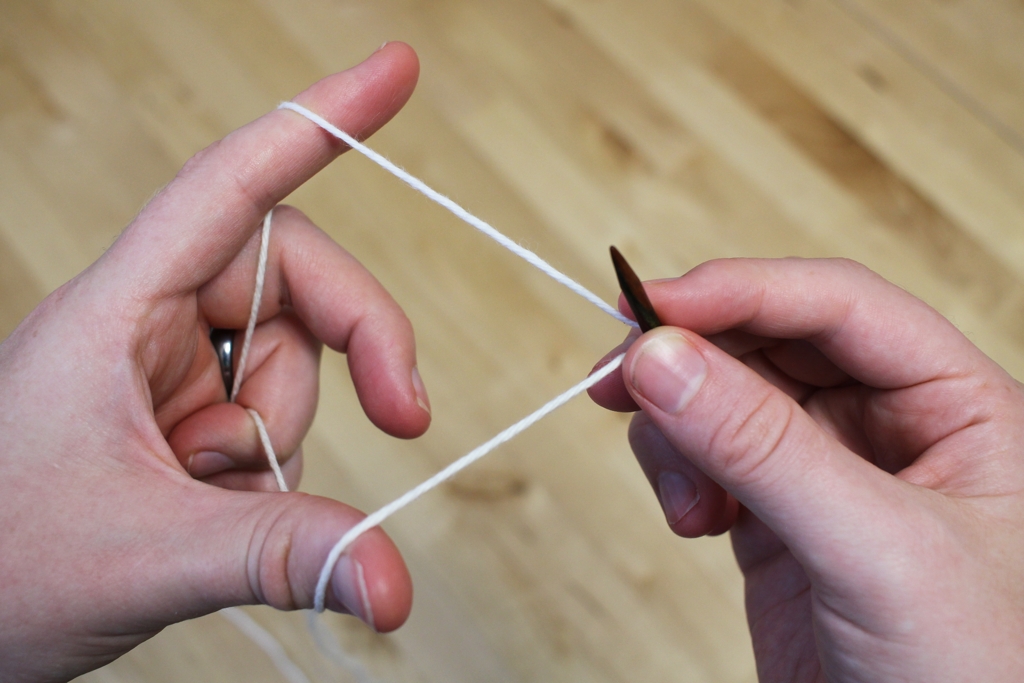
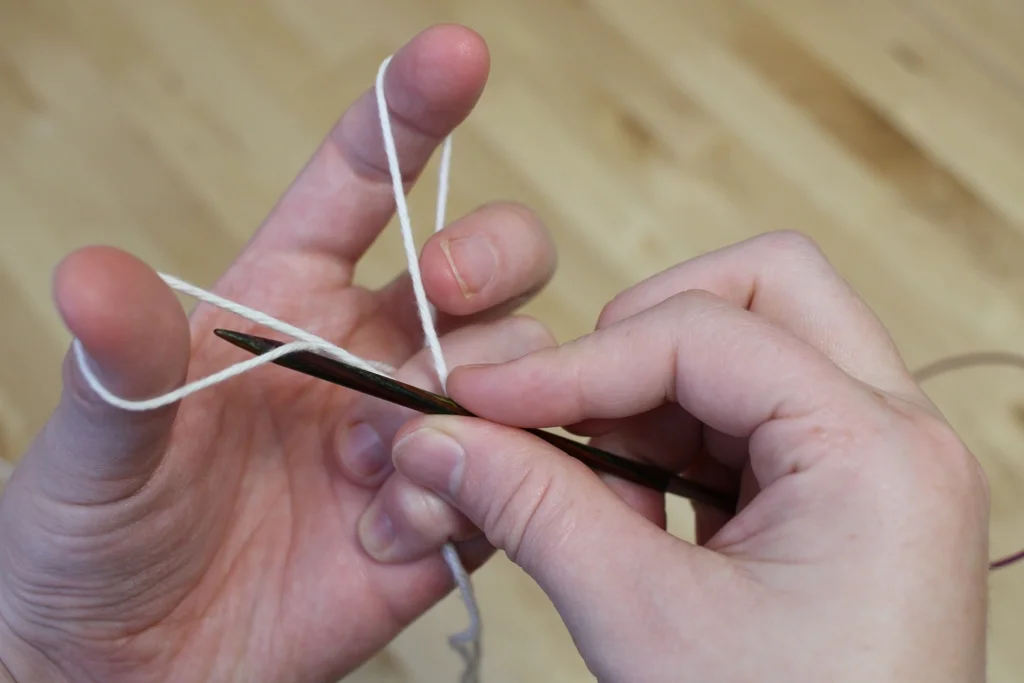
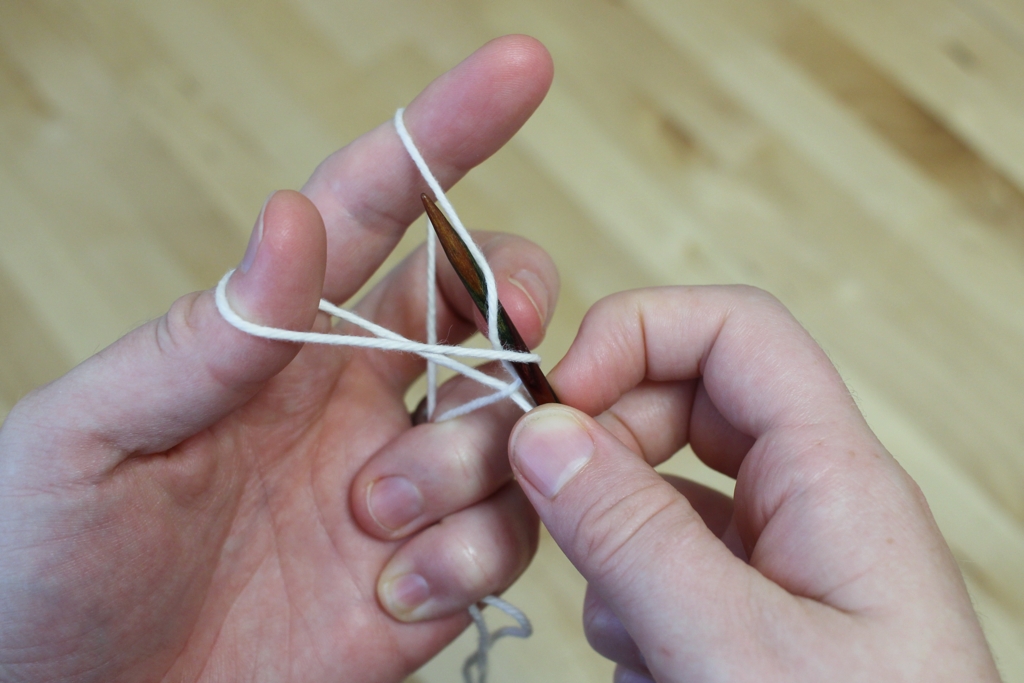
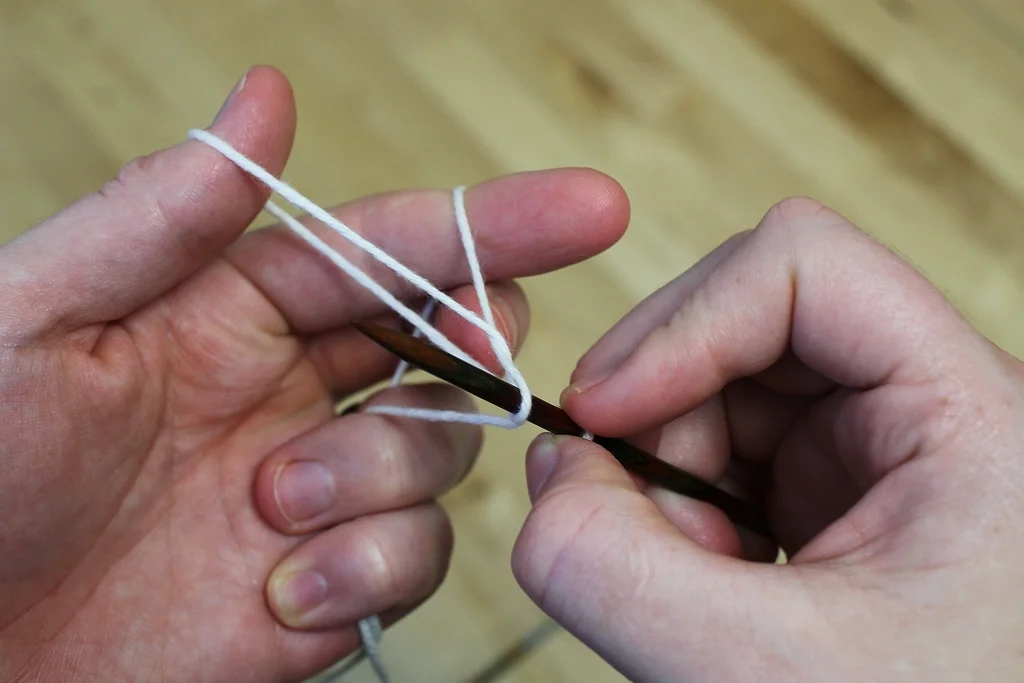
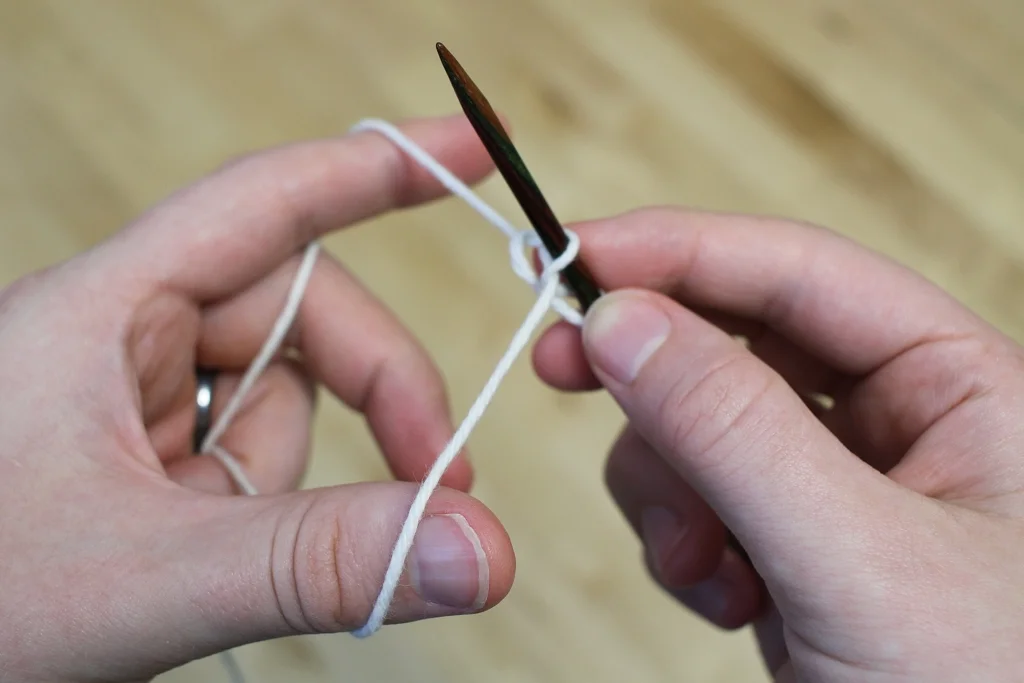
Huh. Here’s a tutorial mash up of the Long-Tail and German Twisted Cast-ons to make a stretchy edge for 2x2 rib.

A neat roundup of recent textile discoveries from around the world.

Great tips and questions to help you get started with your own yearly temperature blanket. The tutorial is focused on crochet, but would still work really well with knitting.

Toe-up or cuff-down, it is always helpful to know the anatomy of a sock. This post from Lattes & Llamas is clear, detailed, and has plenty of sock photos.

Seeing other people make fun, wild stuff with yarn is always great. Like this Yarniversal Championship Belt from Hands Occupied.

The Simply Scrappy Cowl seems like a good fit for those leftover bits and bobs of special yarns.

I love the everything about the color work Huddling Penguins hat pattern. (Ravelry Link)

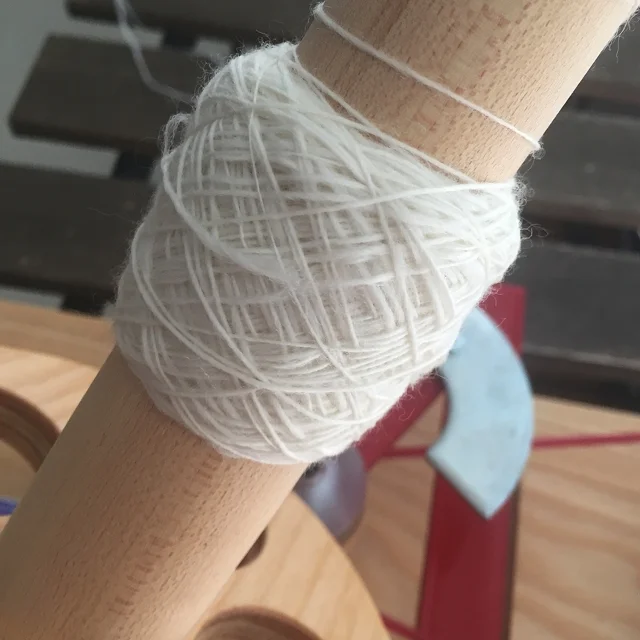
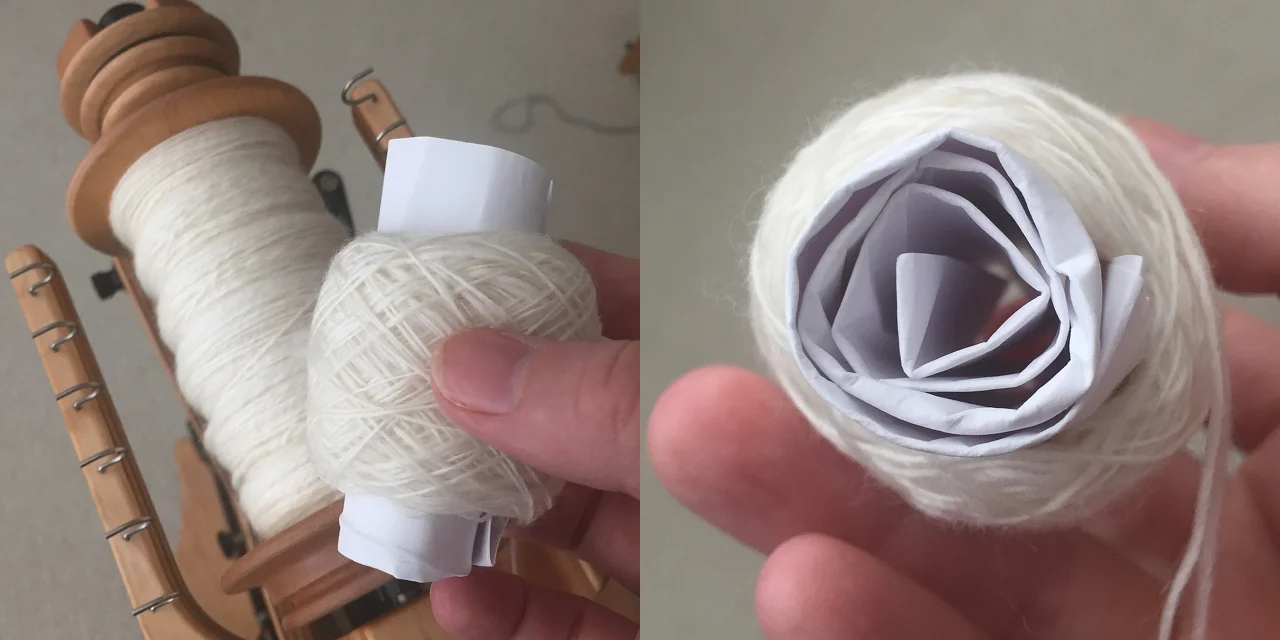
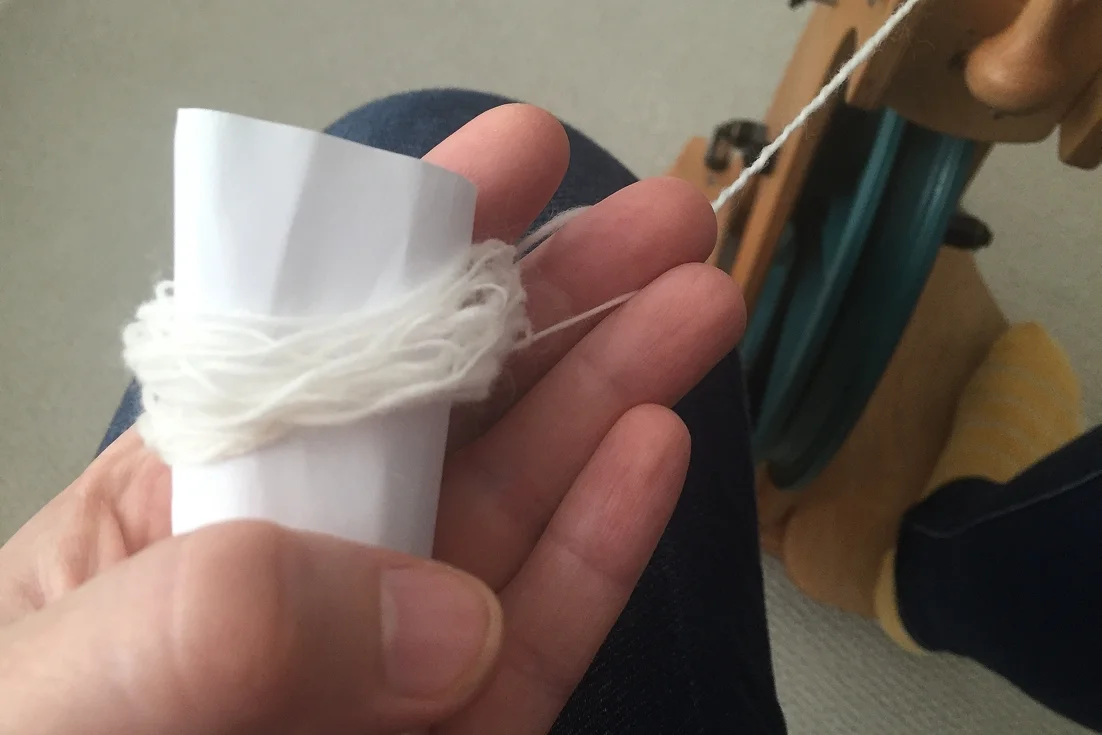
12 Yarn Ball Types and how to work from them.

And now for something different…

How to ride a Pterosaur, according to science

A zine library hidden in plain sight in a library book

How To Knit Cables Without A Cable Needle

How To Knit Cables Without A Cable Needle || withwool.com

I love the complexity and depth and texture that cables create. I love small simple cables and big complicated cables. For complicated cables and reversible cables, cable needles are my best friend, but for small cables - 6 stitches or smaller - I skip the cable needle. It makes the knitting faster and and there’s one less thing to fiddle with.

I knit the Old Friend hat without a cable needle which helped make the project a quick, easy knit.

Front Cross Cable

Knitting across a row and ready to cross a 4 stitch cable.How To Knit Cables Without A Cable Needle || withwool.com

In the photo above, I’m ready to work a front crossing cable, also called a left cross cable, across the next 4 stitches on the left needle. This means that the 2 right-most stitches will be crossing in front of the 2 left stitches.

The right 2 stitches hanging of the needles to prepare to cross a front cross cable without a cable needle.How To Knit Cables Without A Cable Needle || withwool.com

The first step is to slip the 2 right (front) stitches closest to the needle tip off the needle.

Slipping the left cable stitches onto the right needle to cross the cable. The other half of the cable stitches are hanging in the front of the work.How To Knit Cables Without A Cable Needle || withwool.com

Next slip the 2 left stitches purl-wise from the left needle to the right needle. The hanging stitches will stay in the front and you can hold them in place with your thumb.

Slipping the hanging cable stitches onto the left needle purl-wise.How To Knit Cables Without A Cable Needle || withwool.com

Slip the hanging stitches on to the left needle purl-wise.

Slipping cable stitches from right needle back to left needle. The cable is crossed and is now ready to be knit across.How To Knit Cables Without A Cable Needle || withwool.com

Slip the 2 cable stitches on the right needle back to the left needle. Now the hard part is done, and the cable is crossed.

Knitting across the cable stitches in pattern.How To Knit Cables Without A Cable Needle || withwool.com

Knit (or purl as the pattern requires) across the cable stitches. You’re ready to keep working across the row.

A complete front cross cable.How To Knit Cables Without A Cable Needle || withwool.com

Here’s what the knitting looks like after working the cable cross.

Back Cross Cable

The left stitches of a back cross cable handing off the needles and being held behind the left needle.How To Knit Cables Without A Cable Needle || withwool.com

Now I’m ready to work a back crossing cable, also known as a right cross cable - which means that the 2 right-most stitches will be crossing behind the 2 left stitches. The first step is to slip the 2 right stitches off and hold them behind the needle.

Slipping the left half of the cable stitches to the right needle. The hanging cable stitches are hidden behind the work in the photo.How To Knit Cables Without A Cable Needle || withwool.com

Next slip the 2 left stitches purl-wise from the left needle to the right needle. The hanging stitches will stay in the back which is why you can’t see them in this photo.

Slipping the hanging cable stitches purl-wise onto the left needle.How To Knit Cables Without A Cable Needle || withwool.com

Slip the hanging stitches on to the left needle purl-wise.

A complete back cross cable, also known as a right cross cable.How To Knit Cables Without A Cable Needle || withwool.com

Slip the cable stitches on the right needle back to the left needle and work across. Now you’re ready to keep knitting to your next cable.

Even Faster Cable Knitting

Now that you’ve seen the basics, are you ready to work cables even faster? Here’s a demo with a front crossing cable, but the basic process will be the same for a back crossing cable as well.

Inserting the right needle into the left half of the cable stitches on the back of the work to work a front cross cable.How To Knit Cables Without A Cable Needle || withwool.com

Slip the right needle purl-wise into the left half of the cable stitches from behind.

Cable stitches hanging off the needles at the front of the work after pulling out left needle. Other half of the cable stitches remain on the right needle.How To Knit Cables Without A Cable Needle || withwool.com

Pull the left needle out of the cable stitches. The two left stitches will be on the right needle with the other two stitches hanging out in front.

Left needle slipped into previously hanging cable stitches. Next step is to slip other cable stitches to left needle and work across.How To Knit Cables Without A Cable Needle || withwool.com

Slip the left needle back into the hanging stitches purl-wise and on the front side of the work. Then slip the 2 cable stitches on the right needle back to the left needle. Work across and you’re ready to cross more cables.


If you enjoyed this tutorial, buy me a coffee! Thank you for your support!

Buy Me a Coffee at ko-fi.com

How To Sew Soles Onto Knitted Slippers

Learn how to sew soles onto your slippers for extra grip and added durability. #knitting | withwool.com

Cosy slippers are wonderful things. I’ve made several pairs for other people, but this is the first pair that I’ve made for myself. The slippers are thick and cushy, and I can turn up the cuffs when I need the extra warmth. I want them to last a long time which means adding soles because all my socks (and some of my shoes) wear out underneath the balls of my feet. A sewn on sole will last much longer and be easier to repair than plain knitting. So, here’s how I like to attach soles to slippers.

I prefer using backstitch instead of whip stitch or blanket stitch when the sole is smaller than the bottom of the slipper. If I can’t see the sole from the side, I don’t want to see the stitches holding it in place either.

Learn how to sew soles onto your slippers for extra grip and added durability. #knitting | withwool.com

Materials

  • The Slippers

  • Pins

  • A narrow tapestry needle

  • Soles (I’m using Fiber Trends Suede Soles.)

  • Yarn that will fit through sole holes (try saying that three times fast.)

  • Scissors

Learn how to sew soles onto your slippers for extra grip and added durability. #knitting | withwool.com

1. Use the pins to pin the sole in place on the slipper. Since these suede soles come as a separate toe and a heel, I’m working with one piece at a time. I like to use as few pins as possible to not skew how I sew the fabric and the sole together.

Learn how to sew soles onto your slippers for extra grip and added durability. #knitting | withwool.com

2. Thread the tapestry needle and put the end of your yarn between the sole and the fabric. Burying the end between the sole and the slipper keeps the end in place and keeps you from feeling it during wear. I highlighted the end in pink so it would be easier to see.

Learn how to sew soles onto your slippers for extra grip and added durability. #knitting | withwool.com

3. It’s time to start sewing down the sole with backstitch. You can start anywhere you want. I picked a spot in the middle of the pins so I’d have plenty of room to work. Pull the needle through a hole from underneath and then down into the next hole in the line.

Learn how to sew soles onto your slippers for extra grip and added durability. #knitting | withwool.com

When it’s time to remove the pin, the completed sewing will hold the sole in place. You can also move the pin to a different spot if that helps.

Learn how to sew soles onto your slippers for extra grip and added durability. #knitting | withwool.com

4. Slip the needle through a stitch on the slipper - it shouldn’t go all the way through the fabric. Catching just the top of the loop in garter stitch or a leg of a stockinette stitch will be enough to secure the sole.

Learn how to sew soles onto your slippers for extra grip and added durability. #knitting | withwool.com

5. Push the needle back up through the last hole that has yarn. This will create a continuous line of stitches on the visible side of the sole.

Learn how to sew soles onto your slippers for extra grip and added durability. #knitting | withwool.com

6. To continue, push the needle through the next hole in the line and repeat steps 3-5.

Here’s what the sewn sole will look midway through.

Learn how to sew soles onto your slippers for extra grip and added durability. #knitting | withwool.com

When you’ve finished sewing and need to secure the end:

Learn how to sew soles onto your slippers for extra grip and added durability. #knitting | withwool.com

Push the needle through first sewn hole and bring the needle to the outside of the sole.

Learn how to sew soles onto your slippers for extra grip and added durability. #knitting | withwool.com

Then slip the needle between the sole and slipper and push it in as far as you can. It helps to have your hand inside to help guide the needle. Angle the needle through the fabric to the inside of the slipper. The yarn will both be slipped through a few stitches and buried underneath the sole.

Then turn the slipper inside out as best you can and cut the working yarn. Repeat for the other sole pieces. All done!

Learn how to sew soles onto your slippers for extra grip and added durability. #knitting | withwool.com

When you need more yarn:

Secure the working yarn between the sole and slipper by pulling it through a few slipper stitches before cutting. Then cut a new length of yarn. After threading the needle, pull it through a few stitches on the slipper and push it up from the bottom into the last used hole to continue sewing.


If you enjoyed this tutorial,

Buy Me a Coffee at ko-fi.com

Thank you for your support! It means so much! Happy knitting!

How I Organize My Knitting Needles and Notions

3-ring binders and zippered pockets are a great storage system for #knitting needles and notions! No more digging through drawers and bags to find that one thing I need right now. | withwool.com

My previous method for organizing my smaller knitting needles, extra interchangeable cables, and random crochet hooks was stuffing them in a plastic bag. This wouldn’t have been so bad if everything had a label marking it’s size or was even in it’s original packaging. Nope. It’s was a tangled mishmash and I had to pull out a needle gauge every time I needed a knitting needle. So I finally did something about it. I picked up three giant 3” 3-ring binders and zippered binder pockets* (yeesh, those were hard to find).

3-ring binders and zippered pockets are a great storage system for #knitting needles and notions! No more digging through drawers and bags to find that one thing I need right now. | withwool.com

The next question was how do I label everything so I know what it is. I thought about designing cute templates that I could print out, but that seemed like more work than I wanted to do. Eventually, I settled on something much simpler. Tape. Specifically, washi tape in a pattern that I liked and that wouldn’t distract from my labeling.

Even after figuring out how I was going to organize everything and getting all the materials, I was still shoving my needles right back into that plastic bag. Ugh. It wasn’t until I’d spread out the needles, and the cables, and crochet hooks on my desk for the 25th time that setting up the binders seemed like a better option than shoving everything back in the bag.

A few notes before we get to the knitty-gritty:

  • I coiled up all my circular needles and extra cables as shown in this tutorial.

  • I grouped everything by size. Size 4 needles with other size 4 needles, regardless of length or type. 4mm crochet hooks went in with the 4 mm knitting needles because I don’t want to have to dig through a separate pocket to find a match for a project. The only exception was my interchangeable needle tips because they already have their own organized pouch.

  • I did not do this all in one sitting. All my various needles and hooks and notions were scattered across my desk, my couch, and my floor. It was overwhelming so I did things in chunks when I felt like it or got frustrated about everything falling on the floor. Again.

  • As I went through years of accumulated knitting supplies, I got rid of what I didn’t need or wasn’t going to use again. Those circular needles with the metal cables that I got in a box at a garage sale did not make the cut.

  • The zipper pockets have different colored zips. I tried to keep things organized by color - needles in one color, extra cables in another - which worked until the end when I had more needles than I had pockets in that color.

Here’s what I did:

3-ring binders and zippered pockets are a great storage system for #knitting needles and notions! No more digging through drawers and bags to find that one thing I need right now. | withwool.com

First, I started with the extra interchangeable cables. I measured them, sorted them by length, and put each length in it’s own pocket. As I filled up a pocket, I added a strip of washi tape to the front and wrote down what was inside.

3-ring binders and zippered pockets are a great storage system for #knitting needles and notions! No more digging through drawers and bags to find that one thing I need right now. | withwool.com

Next up on the list were the fixed circular needles. I coiled them, sorted them by size, and made each size it’s own pocket. These stacked up pretty fast. Sizes that I had a lot of or where on the much smaller end, got there own pockets. I don’t want to have to sort a 2.0mm needle from a 2.5mm every time I start a pair of socks. Sizes that I don’t have many of were bundled together, US 10 and up for example, because its easier to tell them apart. Straights, DPN’s, and crochet hooks went in next.

3-ring binders and zippered pockets are a great storage system for #knitting needles and notions! No more digging through drawers and bags to find that one thing I need right now. | withwool.com

After the needles were contained, I gathered up random notions from various drawers, bags, and shelves. The pom-pom makers I can never find when I need them, they went in a pocket. If it was a needle or pin of any kind - tapestry, beading, cable, or t-pin - it went in a pocket. Extra scissors, needle gauges, tape measures, row counters, chart trackers, etc - you got it - went in a pocket. It is possible to fit a surprising amount of stuff into one of those.

3-ring binders and zippered pockets are a great storage system for #knitting needles and notions! No more digging through drawers and bags to find that one thing I need right now. | withwool.com

After corralling everything into their designated pockets, I sorted them into binders. Notions and interchangeable needle cables went into one binder. Needles and crochet hooks got their own binder. I added a needle gauge into the front of the needle and crochet hook binder to make it easy to put things away.

3-ring binders and zippered pockets are a great storage system for #knitting needles and notions! No more digging through drawers and bags to find that one thing I need right now. | withwool.com

I’ve been using this system for almost a year, and it is a massive improvement over shoving things into scattered bags and drawers then forgetting where they are. The two binders have their own shelf and they are impossible to miss. Whenever I need something, I know right where to look which makes to so much easier to start a project or finish one. If I ever need to expand, I have an extra binder and extra pockets. I am so happy that I finally organized my needles and notions and don’t have to go digging every time I need something.


If you enjoyed this tutorial,

 
Buy Me a Coffee at ko-fi.com
 

Thank you for your support! It means so much! Happy knitting!

*This post contains an affiliate link which means, if you decide to buy through that link, I’ll get a small commission. My opinions are my own, and formed after much use. Thanks!

How to Make Bulkier Yarn with Chain-Plying

Yarn thinner than you like? Learn how to chain-ply commercial yarn into the thicker, bulkier yarn you want!  #spinning #knitting | withwool.com

Way back when, at least on the internet time-scale, I wrote a tutorial about how to chain-ply commercial yarn to manipulate color which you can read here. The variegated yarn I used flashed and pooled no matter how I knit with it, and chain-plying it created a beautiful marled yarn. Then I used that yarn for an easy (and free) hat pattern. Now I’m chain-plying another commercial yarn because I wanted to make it bulkier. So consider this part 2.

Yarn thinner than you like? Learn how to chain-ply commercial yarn into the thicker, bulkier yarn you want!  #spinning #knitting | withwool.com

I’ve had the Opal Sock Yarn Bunny by Susan B. Anderson pattern in my Ravelry queue for months. It’s so cute, but I have had the hardest time picking out the right yarn. I wanted something durable and hard-wearing because I like to imagine that this would become THE favorite toy; however, I also wanted the colors to be something whimsical and fun. Turns out durable and whimsical is a hard combination to find.  I eventually found a ball of sock yarn hiding in the deep stash. Seriously, I bought this ball of Zitron Trekking XXL 9 years ago on vacation. I almost turned it into a pair of socks, but didn’t want to knit socks on size 0 needles.

I don’t want to knit this totally adorable bunny on size 0 needles either. Plus, I’d like the bunny to be a little bigger than the 6.5” height stated in the pattern. Chain-plying to the rescue. The first and most important step to chain-plying any commercial yarn is to figure out how the yarn is plied. Commercial yarn is generally plied to the left, AKA with S twist, so you’ll need to chain-ply to the right, AKA with Z twist. If you’re plying a single ply yarn, you’ll probably be plying to the left. You can find the full tutorial for how to chain-ply commercial yarn here.

Yarn thinner than you like? Learn how to chain-ply commercial yarn into the thicker, bulkier yarn you want!  #spinning #knitting | withwool.com

And a helpful tip: If you’re working on a wheel, and have the option, use a jumbo bobbin. The plied yarn will take up more space than you expect. I plied 459 yards of fingering weight yarn and just barely got it all on to a single regular bobbin.

Yarn thinner than you like? Learn how to chain-ply commercial yarn into the thicker, bulkier yarn you want!  #spinning #knitting | withwool.com

I finished the newly-plied yarn just like any other handspun yarn because you still have to set the twist. I skeined it and measured the results before dunking it in a bath. I had about 137 yards of worsted weight yarn. Then I soaked it in cool soapy water for 20 minutes, rolled it in a towel to squeeze out extra water, and snapped it out my arms to even out the twist one last time. Then I let it dry over night.

Yarn thinner than you like? Learn how to chain-ply commercial yarn into the thicker, bulkier yarn you want!  #spinning #knitting | withwool.com

The twist really really relaxed and evened out. There are still a few over twisted and kinked spots, but most of the yarn is well behaved and smooth. I measured the skein again to see if setting the twist changed anything. The yarn was still a worsted weight, but I did “lose” 23 yards to the yarn plumping up. So I’m down to 114 yds, and really hoping I have enough yarn because I love it even more now.

Yarn thinner than you like? Learn how to chain-ply commercial yarn into the thicker, bulkier yarn you want!  #spinning #knitting | withwool.com

Before you go, here’s a few things to keep in mind before chain plying for bulkier yarn.

  • Even though chain-plying a fingering weight yarn will make a worsted weight yarn, the “new” yarn won’t have the same feel as a commercial or handspun worsted weight skein. Why? It’s much heavier and denser than either.
  • Because of how chain-plying works, expect to reduce your yardage to at most a third of it’s original number. My original 459 yds turned into 114 yds.

  • Sample a small piece of yarn first to see if you like the weight, drape, and density of the chain-plied version. It’d be really frustrating to do all that work and turn out with something you don’t like or wish you could undo. Take it from me, undoing a chain-plied yarn is not quick or easy.

3 Tips for Easier Plying from a Center Pull Ball

Use these 3 tips to make plying yarn from a center pull ball easier and tangle free. #tutorial | withwool.com

Knowing how to ply from a center pull ball is a handy trick to know. It’s great for plying those leftover singles on a bobbin or spindle. It’s great for when you don’t want to have any leftover singles/plies at all. You could even ply yarn from 2 separate center pull balls, not just the ends of one ball.

All that said, you have to use the technique carefully because if can affect the original drafting twist of your plies. This post from Jillian Moreno shows why. Still, there might be cases where you want to affect the twist. Maybe your plies have been sitting for months and the original twist isn’t as active. Or you want to add more twist because there wasn’t enough during drafting.

Personally, I haven’t noticed a huge difference in yarns that I’ve plied from a center pull ball vs. yarns that I’ve plied from bobbins. But I’m not spinning lace weight. In fact, some of my favorite yarns that I’ve ever spun have been plied from center pull balls. So here are my favorite tips and tricks for plying from center pull balls that I’ve learned over the years.

Use something as a center support for the ball.

Use these 3 tips to make plying yarn from a center pull ball easier and tangle free. #tutorial | withwool.com

As you work, the ply that formed the center core of the ball is being pulled out and moving onto the bobbin or the spindle. When enough of the center is gone, the ball will collapse on itself which means tangles and knots and aggravation. Putting something into the middle of the ball when it comes off the winder gives the ball a core of support which prevents those frustrating tangles.

Use these 3 tips to make plying yarn from a center pull ball easier and tangle free. #tutorial | withwool.com

And even if the ball does collapse on itself, like mine did in the photo above, the core will keep the ball open enough to work from and help prevent knots. I was able to ply the rest of this yarn instead of calling the whole thing a loss.

The center core doesn’t have to be anything fancy. Just make sure that what you use is long enough to stick out from both ends of the ball.

  • Rolled up pieces of paper, like shown in this tutorial, work just fine. They’re also a good option if you’re taking a class or don’t have anything else close at hand.
  • A simple nostepinne is a great option for larger center pull balls and I'm using one in this example. They even come with a handle which makes holding onto them even easier.
  • And don’t forget about chopsticks, long handled spoons, or straight knitting needles. Whatever you’re using as a core doesn’t have to be big around, just smooth so it won’t snag.

Keep your hands farther back from the orifice.

How close you keep you’re hands to the orifice during plying seems to come down to personal preference; however, working farther back makes things a little easier. Keep your front hand about 8 - 12”, or 20 - 30 cm, from the orifice.  The extra space gives you more room to properly tension the plies and sort out tangles before there’s a problem.

Working farther back from the orifice also means that you can add twist at a slower rate since the twist will build up over the distance from the orifice to your hands. Then you’ll have a little more time and wiggle room to correct any issues.

One hand controls the plying twist, the other hand tensions the plies.

A post shared by April Klich (@aprilklich) on

I’m using my left hand, aka the front hand, to control when the twist enters the plies, and my right hand, aka the back hand, is holding the center pull ball on the nostepinne. Use which ever hand you prefer for each task.

The front hand only has 2 jobs: control when twist moves into the plies and to feed the yarn onto the bobbin.

The back hand holds the center pull ball and does all the work of keeping the plies evenly tensioned. You mainly want to hold the core support and just keep a thumb and a finger or two on the ball to hold it in place. The outer strand will be able to move more freely than if you’re holding it without the center core. Using this hold, I can angle and move my hand back and forth to evenly tension the plies. Think of it a dance you’re doing with the yarn.

The ball can sit farther back on the core so that the center ply wraps and feeds out slower. If the ball is closer to the tip, the center ply feeds out faster. One position isn’t better than the other. So experiment to see which spot works better for you and the yarn.

How To Block A Slouchy Hat

How to block a slouchy knitted hat the easy way! | withwool.com

Sometimes the hardest part of finishing a knitting project is figuring out how to wash and block it so that it looks its best, especially hats and slouchy hats. I stalled while trying to figure out how to block my Owl In The Thicket hat after not being able to put it down because the cables were so addicting to knit. How could I block it so that the cables and fabric relaxed evenly?  

How to block a slouchy knitted hat the easy way! | How To Block A Slouchy Hat - withwool.com

This is the hat after it came off the needles. Looks good, right? The cables are crisp. The shape and length are just right. So why would I need to block it?

How to block a slouchy knitted hat the easy way! | How To Block A Slouchy Hat - withwool.com

This is why. The needles I chose created beautiful cables, but also a firm fabric. It looked more like a gnome hat than the loose slouch that I had in mind when I cast on. The hat wasn't a knitting failure, just unfinished. Skipping blocking was not an option. But how to do it? The cables and fabric needed to relax evenly over the entire hat, so I didn’t want to use a balloon or a ball. And stretching the hat over a plate wouldn’t help since I wasn’t trying to make a beret or tam. So what else would work?

The perfect slouchy hat blocker turned out to be a smooth foam roller. What’s a foam roller? Basically, a dense foam cylinder used to help loosen tight muscles, tendons, and knots before or after exercise. They’re easy to find and not expensive. And when you’re not using them to block hats, you can still use them to work out those pesky muscle knots. The one I have is 18” around which makes it the perfect size for blocking most child and adult hats.

HOW TO BLOCK A SLOUCHY HAT ON A FOAM ROLLER

Step 1: Soak the hat in cool water with a squirt of no-rinse soap for 15 to 20 minutes. I use Eucalan (<<— affiliate link!*) and love it.

Step 2: Roll the hat up in a towel and squeeze out the excess water. Remember not to wring it out which will pull the hat out of shape.

How to block a slouchy knitted hat the easy way! | How To Block A Slouchy Hat - withwool.com

Step 3: Pull the hat over one end of the foam roller. Then you can move it around and make sure the hat and design details aren’t twisted. Plus, since this is foam and not a balloon, you can easily stretch and pin out any lace or crown decreases.

If you want to keep a ribbed brim as stretchy as possible, you can cut the foam to size so that the brim hangs below and un-stretched.  

Step 4: Let it dry, take it off the roller, and enjoy a perfectly slouchy hat.

How to block a slouchy knitted hat the easy way! | How To Block A Slouchy Hat - withwool.com

Here’s what my hat looked like after blocking and with the addition of a giant pom-pom. It’s a definite change for the better, and the slouchy hat I wanted from the beginning. Blocking isn’t magic, but it certainly seems like it could be.

*This post contains an affiliate link which means, if you decide to buy through that link, I’ll get a small commission. My opinions are unbiased, my own, and formed after years of use. I wouldn’t recommend this soap if I didn't think it worked well. Thanks!

How to Clean Stubborn Fiber Out of a Drum Carder

Chunks of fiber stuck in your drum carder? Get a pair of forceps to get those pesky fibers! | withwool.com

My drum carder has been sitting unused and unloved for the past few months. Why? All this green fiber stuck in the tines. I bought 4 ounces of Corriedale wool locks, AKA the green fiber, to practice making batts and figure out the carder’s quirks. Making the batts turned out to be a struggle because the locks were matted, but I didn’t realize how matted until it was time to feed them into the carder. I had to crank the drum while pulling back on the fiber to get them to open and pull apart instead of just feeding onto the main drum in one big clump. I made 2 batts before calling it quits because the all the  fiber stuck on the main drum. To make things even more aggravating, the stuck fiber only seemed to trap more fiber down there with it. The bent paper clip I attempted to pick the fibers out with didn’t do that great job and none of my other tools did a thing. So the carder went back on the shelf until I could figure out how to clean it.

The answer to my problem turned out to be in a blog post from 2009 (!) that listed the basic tools to use with your drum carder. Definitely worth a read if you’re thinking about getting your hands on a carder. Anyway, one of the recommended tools was a pair of long thin forceps, extra long tweezers, because they’re thin enough to get between the tines without damaging the carding cloth. So I picked up a pair at the hardware store.

This is what my carder looked like before:

Chunks of fiber stuck in your drum carder? Get a pair of forceps to get those pesky fibers! | withwool.com

And this is what the carder looked like after the 23 minutes I spent picking at with the forceps:

Chunks of fiber stuck in your drum carder? Get a pair of forceps to get those pesky fibers! | withwool.com

I didn’t pull off every bit of green since I’m going to try carding the rest of the fiber (it’s a point of pride and stubbornness now), but the difference is night and day. The forceps were great for picking up both small and large bits of fiber. Even better I was able to work them under the larger sections and push the fiber up so I could grab it.

Chunks of fiber stuck in your drum carder? Get a pair of forceps to get those pesky fibers! | withwool.com

Cleaning the the carder wasn’t quick, but the forceps did a great job. They grabbed every stuck strand big or small. Plus, I didn’t scrape or poke my fingers on the tines. Glad I’ve got the forceps as part of permanent drum carder cleaning kit. They’re cheap, work well, and don’t take up a lot of space. Get a pair.

Chunks of fiber stuck in your drum carder? Get a pair of forceps to get those pesky fibers! | withwool.com

How to Measure Knitting Gauge in Ribbing

How to check knitting gauge in ribbing, and what the pattern means when it says stretched, unstretched, and blocked. | withwool.com

Knowing your gauge for a knitting project is important. There’s no doubt about it. But how do you measure gauge when you’re not knitting something in stockinette? And why do patterns list gauge in stockinette when the project is covered in cables or ribbing or slip stitches?

Why is the gauge listed in stockinette?

Patterns usually measure gauge in stockinette because the author is assuming that if you can match their gauge in stockinette, then you’ll be able to match gauge in the pattern’s specific stitch. Plus, it’s also a lot easier to measure stitches and rows on stockinette than on a more complicated stitch pattern. Less room for a miscount that way.

&nbsp;How to check knitting gauge in ribbing, and what the pattern means when it says stretched, unstretched, and blocked. | withwool.com

How to measure gauge in a rib pattern

There are plenty of patterns that list gauge in the dominant stitch pattern of the project too. The specific stitch pattern to swatch will be mentioned with the gauge info. If there’s no stitch pattern listed, the gauge is taken over stockinette.

So what do you do when the stitch pattern is ribbing? Whatever the specific pattern - 1x1, 2x2, 4x2, etc - ribbing is stretchy and the purl stitches hide in the back. How you check gauge will depend on 1 of these 3 words: unstretched, stretched, or blocked. I’m going to include the usual caveat, washing and drying your swatch the same way as the final project will help you get a more realistic measurement.

If the pattern says to measure the ribbing gauge unstretched: Put the knitting on a flat surface and count both knit and purl stitches over the length listed with the gauge info. 2” and 4” are the most common.

If the pattern say to measure the ribbing gauge stretched (or slightly stretched): Generally, this instruction means to pull the ribbing apart enough so that the purl stitches become clearly visible, but they are not pulled tight. You’ll probably need to pin the swatch out to get a true stitch count. Then count the stitches to find your gauge.

There’s a little room for interpretation with this instruction because one knitter might find that the listed gauge too loose or too tight. Or, if you’re substituting a different yarn, said yarn might not behave the same way as the one used in the pattern sample.

If the pattern says to measure the ribbing pattern blocked:  Let’s not confuse the general definition of blocking - washing and drying your knitting to help it be a specific shape or size, not necessarily stretching it - with the word “blocked” as written here. In this specific case, blocking means to wash and dry the ribbing while pulling the ribbing out until it looses it’s stretchiness. It’s important to pin the swatch out to the measurements listed in the pattern while its drying. Then once the swatch is dry and the pins removed, measure the gauge.

An Example of Measuring Ribbing Gauge:

&nbsp;How to check knitting gauge in ribbing, and what the pattern means when it says stretched, unstretched, and blocked. | withwool.com

My Windbreaker hat pattern is based entirely in 2x2 rib, even the cables. So, I wrote the gauge like this:

13 sts and 13 rows = 2” in 2x2 rib, unstretched

The hat is worked in worsted weight yarn, and 13 stitches seems like way too many to be in 2” at first glance. “Unstretched” is the keyword here. Since the measurement is taken over unstretched ribbing, all those purl stitches hiding in the back are counted. The stitches per inch would be very different had the gauge been listed as “stretched”.

The Windbreaker hat knitting pattern by April Klich

Sign up to the With Wool Weekly newsletter to get the Windbreaker pattern for FREE. You’ll also get news about new patterns, blog posts, tutorials, and a roundup of fiber arts links. Plus, get special discounts and bonuses just for subscribers.

With Wool Weekly

Spam is bad. There's none of that here.

6 Tips for Finishing Last Minute Gift Knitting

Whether you’re just casting on or have a long knit list, follow these tips to get your #knitting wrapped and under the tree. | withwool.com 

There’s no denying it. We are smack dab in the middle of the holiday season. There’s not much time left to get those knitted gifts bound off and wrapped. Whether you’re just casting on or started early and still have a chunk of stuff to stitch, follow these tips to get that stuff under the tree.

Make a list, and check it twice.
I know it’s tempting to just get started, but a list of what you’re making and for whom is your best friend. The “knit this” list might not seem that long in your head, but could be a bit more daunting on paper. Trim as needed to save your sanity and make sure you get a few hours of sleep here and there. Plus, you’ll be able to make sure you have all your supplies ahead of time and skip late night trips to the store.

If you’ve got a lot of people to knit for, stick to small projects.
Hats, fingerless mitts, small toys, ornaments, washcloths, slippers/chunky socks are all fair game. T-minus twenty days and counting is not the best time to cast on for that heirloom lace weight shawl with patterning on every row.

Go big.
Thicker weight yarn, worsted and up, works up way faster than fingering weight. A cabled hat knit in worsted weight yarn can be quick project with big impact.

Give yourself some wiggle room.
That color work stocking might take more time than you think. Or you could run out of yarn and have to make a late night shopping trip. Or you want to enjoy the holiday season and parties without furiously stitching through every one of them. And you can take well needed breaks. Your wrists will thank you when they’re not sore and stiff on December 26th.

Monogamous knitting works.
Hear me out. Knitting one project all the way through goes so much faster than splitting your knitting time between 5 different WIPs. I stuck with monogamous knitting in November 2017 and rocketed through a scarf, two hats, the 2nd half of a shawl, and a bundle of ornaments.  If you really can’t stand the thought of one project at a time or need some out and about knitting, focus on just two projects. One can be simple and the other complex. A little variety can help get you over the “don’t want to work on this” hump.

You can quit.
Seriously, you can quit. Maybe there’s a point where you look at your knit list and know that there’s no way it’ll be finished, late nights or not. I’ve been there. It’s frustrating. The upside is that you’re in control of your knitting, goals, and plans which means you can decide what’s right for you and your time. And if you don’t tell people what you’re making them, they can’t be disappointed it’s not done. So get some sleep, go to that party, and ditch the added stress.

Stitch Markers Make Cables Easier

Losing count of cable rows? Use a locking stitch marker to keep track! #knitting | withwool.com

It is go time here on the holiday gift knitting. The current project is a cabled scarf with a hard deadline that I can’t miss. Much to my surprise, I’m already past the halfway point and might actually finish with time to spare. I’m attributing part of this speed to my favorite stitch marker trick. 

Losing count of cable rows? Use a locking stitch marker to keep track! #knitting | withwool.com

I can never pinpoint exactly which row I twist cables on which is frustrating when you have to work them every 8 rows or so. Locking stitch markers to the rescue! After I finish a cable row, I put a marker on that row. Then I keep knitting and can easily count the rows as I go. And it’s easy to put down and come back to a project because there’s no question about what row to work. 

I much prefer this method to row counters because I’m not always sure if I counted a row after I knit it. Maybe I did, maybe I didn’t. Without the marker, I’d have no way of knowing for sure.  

P.S. Stitch markers are some of my favorite knitting tools. Here’s 5 more ways that stitch markers can help with your knitting. 

How To Block A Ribbed Scarf

How to Block a Ribbed Scarf. And what does it mean to block knitting anyway? | withwool.com

I was thrilled to bind off the Melded Scarf, you can get the pattern here, but I knew I wasn’t done. The first few inches I reknit after frogging looked wonky. There were rows that stood out more than the rest. I could tell where I stopped knitting one night and picked it up again the next day. I knew I had to block the scarf to wash it and get it looking and feeling it’s best.

What is blocking?

Blocking is a finishing technique that makes a piece of knitting go from good to great. Blocking evens out stitches and gives the knitting - scarf, shawl, or sweater - it’s final shape. I think many knitters picture complicated lace shawls that have been stretched and pinned to the limit when someone mentions blocking.  But blocking doesn’t equal stretching. It’s wetting, laying out the knitting in the shape you want it to be, and letting the piece dry. 

Every natural fiber yarn benefits from blocking. Blocking can drastically change natural fiber yarns. Yarn can “bloom” and get softer. Stitches can grow and stretch. Gauge can definitely change and affect the size of a finished piece.  So always knit a big swatch and block it the way you’d block the finished project.  Blocking will even out stitches worked in synthetic blends like acrylic, but it won’t do much more then that.

There are several different ways to block knitting and different fibers do better with different methods. The Melded Scarf I’m working with is 100% non-superwash wool which reacts well to wet blocking, the method I’m using here. Check the care instructions for your yarn to choose the best method for your project.

Materials:

  • the scarf
  • a no-rinse wash (I use Eucalan. ) 
  • a large flat surface that you can put pins in (foam mats, carpet, or a DIY board
  • a towel
  • a tape measure
  • a ruler
  • a few rustproof pins

Step-by-Step

1. Fill a sink or small tub with cool water and add a capful or two of no-rinse wash. Submerge the scarf and let it soak for about 20 minutes. 

2. Take the scarf out of the water in one big lump. Squeeze out as much water as possible, but don’t wring it, before laying it out on a towel. Roll the scarf up in the towel, and squeeze out even more water. Standing on the scarf burrito works well for me. 

How to Block a Ribbed Scarf. And what does it mean to block knitting anyway? | withwool.com

3. Unroll the towel where you’re going to block. Then lay the scarf out flat, making sure that it’s in a straight line. Also make sure that there aren’t any parts of the ribbing that look more stretched out. 

If, like the Melded Scarf, your scarf has 2 distinct halves, use the tape measure to make sure both halves are the same length. If one half is longer than the other, carefully pull on small sections of the shorter side. Work from the middle to the end. The scarf is vary malleable at this point so you won’t have to do much to gain an extra inch or two. 

How to Block a Ribbed Scarf. And what does it mean to block knitting anyway? | withwool.com

4. Time to break out the ruler. Hold it across the scarf to make sure the width is the same from end to end. For this scarf, that’s about 6”. Where the scarf is narrower, pull out both edges to the width you want. Working an inch or two in from the edge will keep the ribbing from looking more stretched out than the rest of the scarf. 

How-to-block-a-ribbed-scarf-step-5.jpg

5. To get crisp corners at the ends, pull each corner to the shape you want and pin it. 

6. Let it dry, take out the pins, and you’ve got a cosy new scarf.

How to Block a Ribbed Scarf. And what does it mean to block knitting anyway? | withwool.com

Video Tutorial: Carrying Yarn Up The Side Of Your Knitting

&nbsp;Learn how to work stripes and carry yarn up the side of your knitting with this video tutorial. | withwool.com

With the release of the Melded Scarf pattern, which you can find here, I decided to create a video tutorial of how to carry yarn up the side of your knitting when working short and tall stripes. Why learn how? There won’t be near as many ends to weave in at the end. Plus the yarns neatly twist together and are ready to use when you need them.

If you’d like to learn how to carry yarn up the side from step-by-step photos instead, here’s a link to that tutorial.

Learn how to work stripes and carry yarn up the side of your knitting with this video tutorial. | withwool.com

The Melded Scarf is worked in 1x1 rib with a selvedge stitch on each edge which hides the carried yarn really well. You can see blips of the carried yarn on the taller stripes, but they don’t stand out. Definitely less noticeable and less work than weaving in a bunch of ends. 

How To Work "sl1 wyif"

What the knitting abbreviation “sl1 wyif” means and how to work it. | withwool.com

The Melded Scarf, get the pattern here, is a straight forward pattern to knit with 1x1 ribbing and stripes. So why is there a “sl1 wyif” worked at the end of each row and what does that mean? “sl1 wyif” is an abbreviation which means slip 1 stitch purl-wise with yarn in front. Because the "sl1 wyif" is worked at the end of the row, that slipped stitch creates a selvedge edge which gives the scarf a neat, finished edge. It also has the neat side effect of pushing and hiding the carried yarns from the stripes (video tutorial coming Thursday) away from the edge of the scarf. 

The "sl1 wyif" along with it's opposite "sl1 wyib" - slip 1 stitch purl-wise with yarn in back - is also a big part of Mosaic Knitting, which you can learn more about here.

What the knitting abbreviation “sl1 wyif” means and how to work it. | withwool.com

So how do you work a "sl1 wyif"?

A post shared by April Klich (@aprilklich) on

1. Bring yarn to the front of the stitch

2. Slip stitch purl-wise to the right needle

Since this stitch is sitting on the end of a row, you’ll turn the scarf and start knitting the next row. No other special techniques required.  

Odd Couple Tutorial: How to Pick Up + Knit(kfb)

Odd Couple shawl tutorial: How to "Pick Up + Knit(kfb)" | withwool.com

When I was in the early in the design process for the Odd Couple shawl - aka ripping back to nothing most of the time - I was trying to figure out how to work in increases that were invisible, but easy. Finicky and auto-pilot knitting don't really go together after all. The answer turned out to be pairing "pick up + knit" with the shawl's center spine of decreases.  The result is a lovely line with none of the aggravation that usually comes from picking up stitches. I'm no fan of picking up dozens and dozens of stitches myself, but this is different because you're only picking up one stitch at a time. Check out the video to see how it's done!

My Favorite Chain-Plying Trick

Mugs, cups, and cardboard tubes make it so easy to take a break when you’re in the middle of chain-plying handspun. | My Favorite Chain-Plying Trick - withwool.com

I love chain-plied yarn. I love how plump it is compared to 2-ply yarn. I love how it keeps the clear distinct color of the single and fiber. I love how I can take one single from one bobbin and ply it into something that looks like it came off of three. 

What I don’t love is stopping in the middle of chain-plying, and not because it breaks the rhythm. If you’ve never chain-plied yarn before, the process is a lot like making a crochet chain. Make a big loop from a single piece of yarn, use your fingers to pull another loop through the first, then add twist. Repeat until every single yard is plied. Making a new loop and pulling it though the old one allows you to work with 3 strands at a time instead of 1. The result is a plump, cushy yarn. Nifty, right?

The problem comes when you need to take a break and let go of the open loop. All the twist comes along and closes the loop which needs to be open so you can pull another loop through and keep plying. I always hated untangling that twisted mess, so I waited to chain-ply until I had long stretches of uninterrupted time. Sometimes the single had to sit on the bobbin for awhile until that Netflix marathon came along. Thankfully, I figured out a way around that on my last chain-ply project.

I couldn’t fit all 4 oz of fiber on one regular bobbin and had to finish drafting the single on a second. There was no way I could hold the loop open, get up, reach over to the lazy kate, find the end of the single on the next bobbin, sit back down, and join the two ends together. I don’t have enough hands for that. I needed something to hold the loop open for me and my favorite cup came to the rescue.

Mugs, cups, and cardboard tubes make it so easy to take a break when you’re in the middle of chain-plying handspun. | My Favorite Chain-Plying Trick - withwool.com

I slipped the loop over the bottom of the cup and put it on the table. Voila! The working loop stayed open and the next loop in the chain hung out of the way. Plus, that next loop could still be adjusted for length. Wish I thought of this earlier. Now I can ply for smaller chunks of time, take more breaks, and give my arms a rest.

If you’re getting to up to grab something to drink or calling it a night, a toilet paper tube or any lightweight tube works just as well. I’m keeping a cardboard tube in my spinning kit from now on for this exact purpose.

Happy spinning!

Mugs, cups, and cardboard tubes make it so easy to take a break when you’re in the middle of chain-plying handspun. | My Favorite Chain-Plying Trick - withwool.com

Easier Plying From A Center Pull Ball

A rolled up piece of paper makes it so much easier to to ply yarn from a center pull ball. No tangles!&nbsp;

I always forget how long it takes to ply a skein of fingering weight yarn until I’m halfway through. Silly me thought I could ply a skein over the course of 2 days. Took a bit longer than that. When I was almost finished, there was still a good chunk of yardage on the second bobbin. There’s no sense in letting cashmere singles wallow on the bobbin especially when I need to mail the finished skeins by the end of the week. Plying the leftovers from a center pull ball seemed like the best and quickest option.

A rolled up piece of paper makes it so much easier to to ply yarn from a center pull ball. No tangles!&nbsp;

Thankfully, the single held together during winding. I was about to pull the ball off the winder when I remembered a tip: slide the center pull call unto a toilet paper tube to keep it from collapsing on itself and tangling. I’ve lost plenty of yardage to tangled center pull balls and really didn’t want to lose a single yard of cashmere. The problem was that I was fresh out of toilet paper tubes. Instead, I folded a piece of regular printer paper into a strip and loosely rolled it up. Then I slipped the ball onto the paper directly from the winder.

A rolled up piece of paper makes it so much easier to to ply yarn from a center pull ball. No tangles!&nbsp;

The rolled up paper worked so much better than I expected. As I pulled out more and more yarn, the roll expanded to fill the center hole and kept the ball from falling apart. There were absolutely zero tangles, and I was able to ply every bit of the single. The only thing I’d do differently next time - and I will be using this trick every time I ply from a center pull ball - is to make sure there’s an even edge on the outside of the roll to keep the single from snagging.

Stripes and Carrying Yarn Up The Side

The Mosaic Sisters pattern- a set of colorful mosaic knit kitchen towels, washcloths, and coasters - is here! Meet the sisters and get the pattern.

Check out the other tutorials for the Mosaic Sisters: The Long Tail Cast On and Mosaic Knitting 101


Spend your time knitting, not weaving in ends!&nbsp;Here's the final tutorial celebrating the Mosaic Sisters pattern! Today's tutorial is about how to carry yarns up the side of your work when you're knitting stripes. Doesn't matter if the stripes a…

In Mosaic Knitting 101, I showed that mosaic knitting is just stripes and slipped stitches. Knitting stripes is fun, but weaving in ends for every color change is not. The first few times I knit stripes, I cut the yarn at the beginning and end of every color. Ugh. Thankfully, there’s a way to carry yarn up the side of the piece which means you don’t have to spend as much time weaving in ends as you did knitting. The carried yarns will twist together as you work and tuck themselves in nicely behind the edge stitches.

For Narrow Stripes

Spend your time knitting, not weaving in ends!&nbsp;Here's the final tutorial celebrating the Mosaic Sisters pattern! Today's tutorial is about how to carry yarns up the side of your work when you're knitting stripes. Doesn't matter if the stripes a…

If you’re working 2 row stripes there’s only one step to carry your yarns up the side. For the sake of clarity, yellow is Color 1 and white is Color 2. When it’s time to change colors, hold color 1 to the back of the work and start working the next stripe. You can drop Color 1 after you’ve got a few stitches of the new stripe on the needles because the two yarns are now twisted together. 

Is it possible to hold the yarn to the outside of the work instead of along the back? Definitely, but there is one benefit to holding the yarn to the inside. It’s faster because you always know what strand you just used and what strand to grab next. Plus, it easier to keep the yarns from tangling which means you get to spend your time knitting and not untangling yarn. Which ever direction you choose, be consistent and stick with it for the entire project.

For Stripes That Don’t Start At The Edge (And Wide Stripes Too)

Spend your time knitting, not weaving in ends!&nbsp;Here's the final tutorial celebrating the Mosaic Sisters pattern! Today's tutorial is about how to carry yarns up the side of your work when you're knitting stripes. Doesn't matter if the stripes a…

So what about when a stripe starts a few stitches in from the edge of work? The Middle Sister of the Mosaic Sisters pattern has a row that starts this way. You’ve got a couple options and neither of them involve cutting the yarn or weaving in more ends. Both choices equally effective, it’s just a matter of what you think looks better. 

Spend your time knitting, not weaving in ends!&nbsp;Here's the final tutorial celebrating the Mosaic Sisters pattern! Today's tutorial is about how to carry yarns up the side of your work when you're knitting stripes. Doesn't matter if the stripes a…

Option 1 is treating the stripes above and below the short stripe as one wide stripe. 

Begin by holding Color 1 to the back of the work just like with the narrow stripe. Slip the stitches at the beginning of the row and work the short stripe with Color 2. When you’re finished working the short stripe, twist the two colors together and start working with Color 1 again. Don’t forget to keep a little slack between the edge and the first knit stitches so the edge doesn’t pucker.

Spend your time knitting, not weaving in ends!&nbsp;Here's the final tutorial celebrating the Mosaic Sisters pattern! Today's tutorial is about how to carry yarns up the side of your work when you're knitting stripes. Doesn't matter if the stripes a…

Option 2 starts a little differently. When you start the short stripe with Color 2, hold Color 1 (green in this example) to the outside instead of against the back. Finish the short stripe.

Spend your time knitting, not weaving in ends!&nbsp;Here's the final tutorial celebrating the Mosaic Sisters pattern! Today's tutorial is about how to carry yarns up the side of your work when you're knitting stripes. Doesn't matter if the stripes a…

Now hold Color 2 to the the outside. When you start the next stripe by bringing up Color 1, it holds Color 2 in place. Go back to twisting yarns to the inside until the next short stripe. 

Spend your time knitting, not weaving in ends!&nbsp;Here's the final tutorial celebrating the Mosaic Sisters pattern! Today's tutorial is about how to carry yarns up the side of your work when you're knitting stripes. Doesn't matter if the stripes a…

I know I recommended earlier to twist to the inside, but twisting to the outside on stripes that start away the edge works well in this case. When paired with inside twists, the occasional outside twist prevents longer strands of yarn from being carried up the side and potentially snagging. 

Mosaic Knitting 101

The Mosaic Sisters pattern- a set of colorful mosaic knit kitchen towels, washcloths, and coasters - is here! Meet the sisters and get the pattern.

Check out the other tutorials for the Mosaic Sisters: The Long Tail Cast On & Stripes And Carrying Yarn Up The Side.

Mosaic-Knitting-101

Mosaic knitting is a technique that creates beautiful and intricate finished projects with the simple slip stitch. What it makes it different from other types of color work is that you’re only working with one strand of yarn at a time. For such a simple technique, mosaic knitting is quite versatile. It can be worked in garter stitch or stockinette. It can be smooth or textured. It can be worked flat or in the round. The patterns can be bold and geometric or create simple images and all manner of things in between. There’s no limit to the type of project it can create either. Mosaic knitting can create scrubby washcloths, cushy socks, warm shawls, slouchy hats, and colorful blankets.

How Mosaic Knitting Works

Aside from slipped stitches, the real reason why mosaic knitting works is that it's based on 2 row stripes.  So if you can knit stripes, you can mosaic knit.  

To work a stripe of mosaic knitting, you work across the first row and slip certain stitches purl-wise to create the pattern. On the second row, the stitches slipped on the first row are slipped again. Then it's time to make the next stripe. Drop the first color and work the next stripe with a second color and slip more stitches. As the stripes repeat, the slipped stitches build on each other. The below GIF shows the stripes and slipped stitches adding up to make the finished design. 

Standard Mosaic Knit Abbreviations

Mosaic patterns are presented as written, charted, or with a combination of the two. Small patterns might only be written.  The key abbreviations in written mosaic patterns are slX, wyib, and wyif.

sl means to slip a stitch purl-wise and the X afterward tells you how many stitches to slip. wyib and wyif are paired with slX.

wyib means to slip the stitch with the yarn held behind the work on the wrong side. wyif means to slip the stitch with the yarn held in front. If you don’t see wyib or wyif or any variant of them, it’s assumed that the yarn is always held to the back of the work. 

The other important abbreviations are MC, Main Color, and CC, Contract Color. The different colors might also be referred to as C1 and C2 or Color 1 and Color 2. 

Finished-Mosaic-101-Swatch.jpg

Here is a swatch of a simple mosaic pattern where there are slipped stitches on the garter rows (white) and a stockinette background (blue). The written pattern for the swatch reads like this:

Cast on 15 stitches (a multiple of 4+3) with C1.

Row 1: With C1, knit

Row 2: purl

Row 3: With C2, *k3, sl1wyib*, repeat between * * to end of row, k3

Row 4: *k3, sl1wyif* k3

Repeat the 4 rows until piece is desired length. End on Row 2 and bind off. 

How To Read Mosaic Charts

If the above pattern were charted, there are 2 fairly standard ways the chart could be presented and it’s designer’s choice. The difference between the two styles is in how the 2 row stripes are presented: a stripe, 2 worked rows, per chart row OR every row is charted. Personally, I prefer the chart where it’s one stripe to a row because it gives a better visual of the finished pattern. If I make a mistake early in the pattern, I find it easier to notice if I have the chart to compare it too. Also, it's easier to find my place again if I put the project down for a bit.  

The two styles do share some similarities. Both will show show what color to use either in column on the right side or on the chart row. Rows are usually numbered. Both charts will use the same symbols to show when to slip. There are 2 common versions of the slip symbol. Always read the instructions on the pattern though in case the designer has different instructions for a symbol. 

slip stitch definitions.jpg

V means to slip the stitch purl-wise with the yarn held on the on the wrong side to the back of the fabric.  A V with a horizontal line through the middle or underneath means to slip the stitch purl-wise with the yarn held in the front on the right side of the fabric. 

To work from the 1 stripe (2 rows) to a chart row style, you read the rows first from right to left and then backwards from left to right. This means that each row is worked twice; once forwards for the right side and once backwards for the wrong side. If the pattern is worked in the round than you’d work both rows from right to left because you’re always working on the right side of the fabric. 

To work from the 1 chart row equals 1 knit row style, you’ll always read from right to left. The 1 to 1 style chart is more common for mosaic patterns knit in the round. However, as is the case with the Pair-a-normal Socks, the same mosaic effect can sometimes be made with 1 row instead of 2. 

That’s everything you need to get started with mosaic knitting and start the Mosaic Sisters! Have fun and knit on! 

How To Do The Long Tail Cast On And Helpful Tips

The Mosaic Sisters pattern- a set of colorful mosaic knit kitchen towels, washcloths, and coasters - is here! Meet the sisters and get the pattern.

Check out the other tutorials for the Mosaic Sisters: Mosaic Knitting 101 & Stripes And Carrying Yarn Up The Side


The long tail cast on was was one of the first cast ons I learned after branching out from the backwards loop cast on that most new knitters learn right off the bat. After years of knitting, the long tail method has become one of my favorites and my default cast on when a pattern doesn’t ask for a specific method. It’s stretchy, makes a tidy edge, and works up quickly once you get the hang of it. It can be worked in knit, purl, or ribbing (this tutorial focuses on the knit version). 

The long tail cast-on creates the first row of your work - which is why I especially love this cast on when working with non-stretchy yarns like cotton or linen which can be hard to start from a backwards loop cast on. Having a row already made is also great for when you join to knit in the round because it’s much easier to check that the stitches haven’t twisted around the needle. Plus, if you mess up and knit too many rows like I did on a recent project, you can even un-pick the cast on to fix the mistake. The process is a little finicky, but completely doable. 

Even better, for all of this long-tail goodness, all you need are needles and yarn. 

Getting Started

Pull the yarn over the needle with the tail end to the front. There’s no need to tie a knot. The photos above show how to hold and position yarn on the needles with and without my fingers in the way. Hold the yarn in your left hand with the tail end of the yarn over your thumb and the working end over your pointer finger. The needle goes in the middle. The yarn over your thumb becomes the bottom edge and the yarn over your pointer finger becomes the first row.

How much yarn do you need to pull out? Eventually, you’ll be able to eyeball the amount, but a good trick is to cast on 10 stitches, then unravel to find out how much yarn they used. Multiply the amount and had a few inches to weave in later and you’ll have a good estimate. 

Here’s an interesting fact: if you reverse positions and hold the needle in your left hand and the yarn in your right, you’ll make purl stitches instead of knit stitches. 

The 4 Steps To Make A Stitch

How to make a stitch with the long tail cast on. Also, gifs are perfect for when you don't want to watch an entire video.

How to make a stitch with the long tail cast on. Also, gifs are perfect for when you don't want to watch an entire video.

There are 4 distinct steps to make a stitch which seem complicated at first, but your hands will learn. Cast on enough stitches and you won’t even have to think about doing them. I exaggerated the motions to make the steps clearer, but I usually work with much smaller and faster movements.

Step 1: Bring the yarn in front and up underneath the yarn in front of your thumb. This is the loop that will secure the stitch. 

Step 2: Move the needle behind the forward strand on your pointer finger from right to left.

Step 3: Move your thumb backwards which bring the the loop over the needle and the yarn.

Step 4: Take your thumb out of the loop and pull on the front piece of yarn to secure the stitch.

Repeat those 4 steps until you have all the stitches you need on the needles and your first row. If you’re working in stockinette, purl the next row.  

When Casting On Lots of Stitches…

The main complaint about the long-tail cast on is when making a lot of stitches. I’m going to be conservative and say 50 stitches and up. If your yarn estimate is off, you’ll have too little yarn and have to rip out to start again or too much yarn and have a long tail hanging off the end of your work. To avoid both of these hassles, work the cast on with two strands of yarn instead of one.

You don’t have to knot them together either. Just hold the ends in place on the needle with your fingers. Once the first 2 stitches are on the needles, the yarn is secure and isn’t going anywhere. When the cast on is finished cut the front strand of yarn long enough to weave in. Yeah, it’s another end to weave in but it’s still less time and energy than having to repeatedly redo the cast on.