Halfway Finished With 100 Days Of Sock Knitting

A pair of blue striped toe-up socks on sock blockers with one sock flipped inside out.

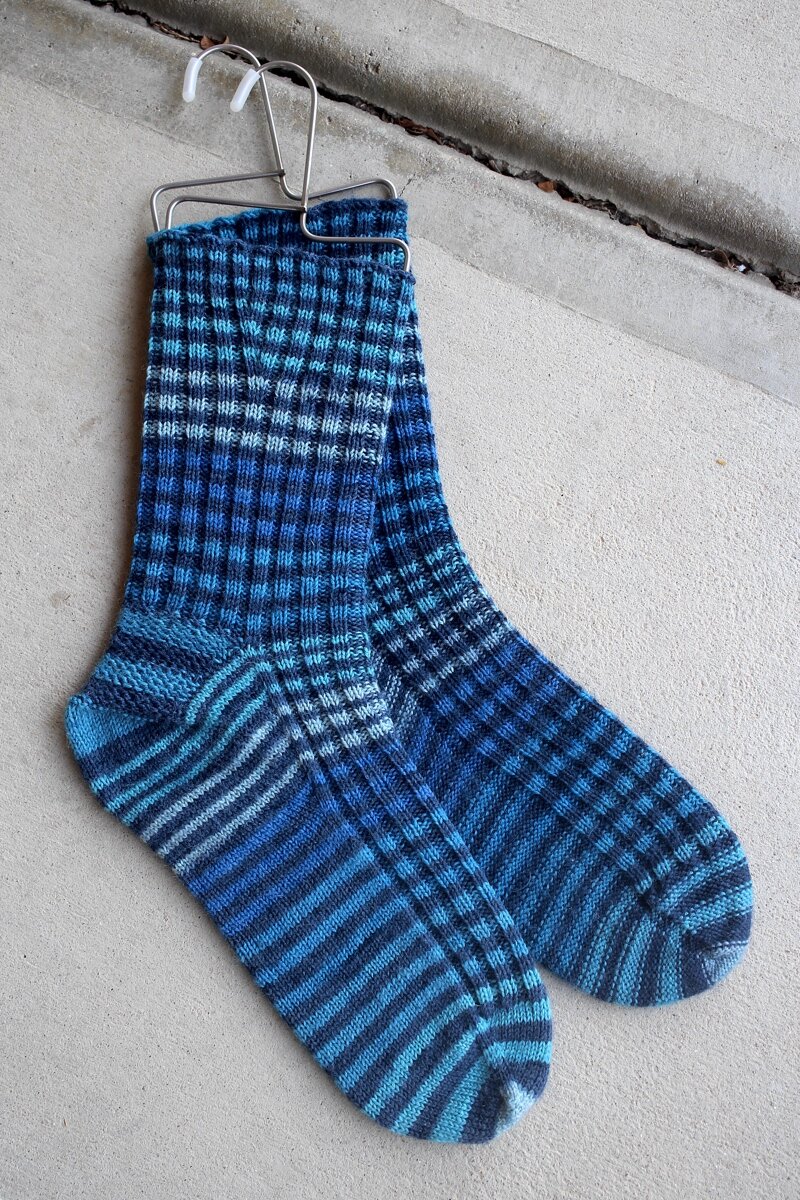
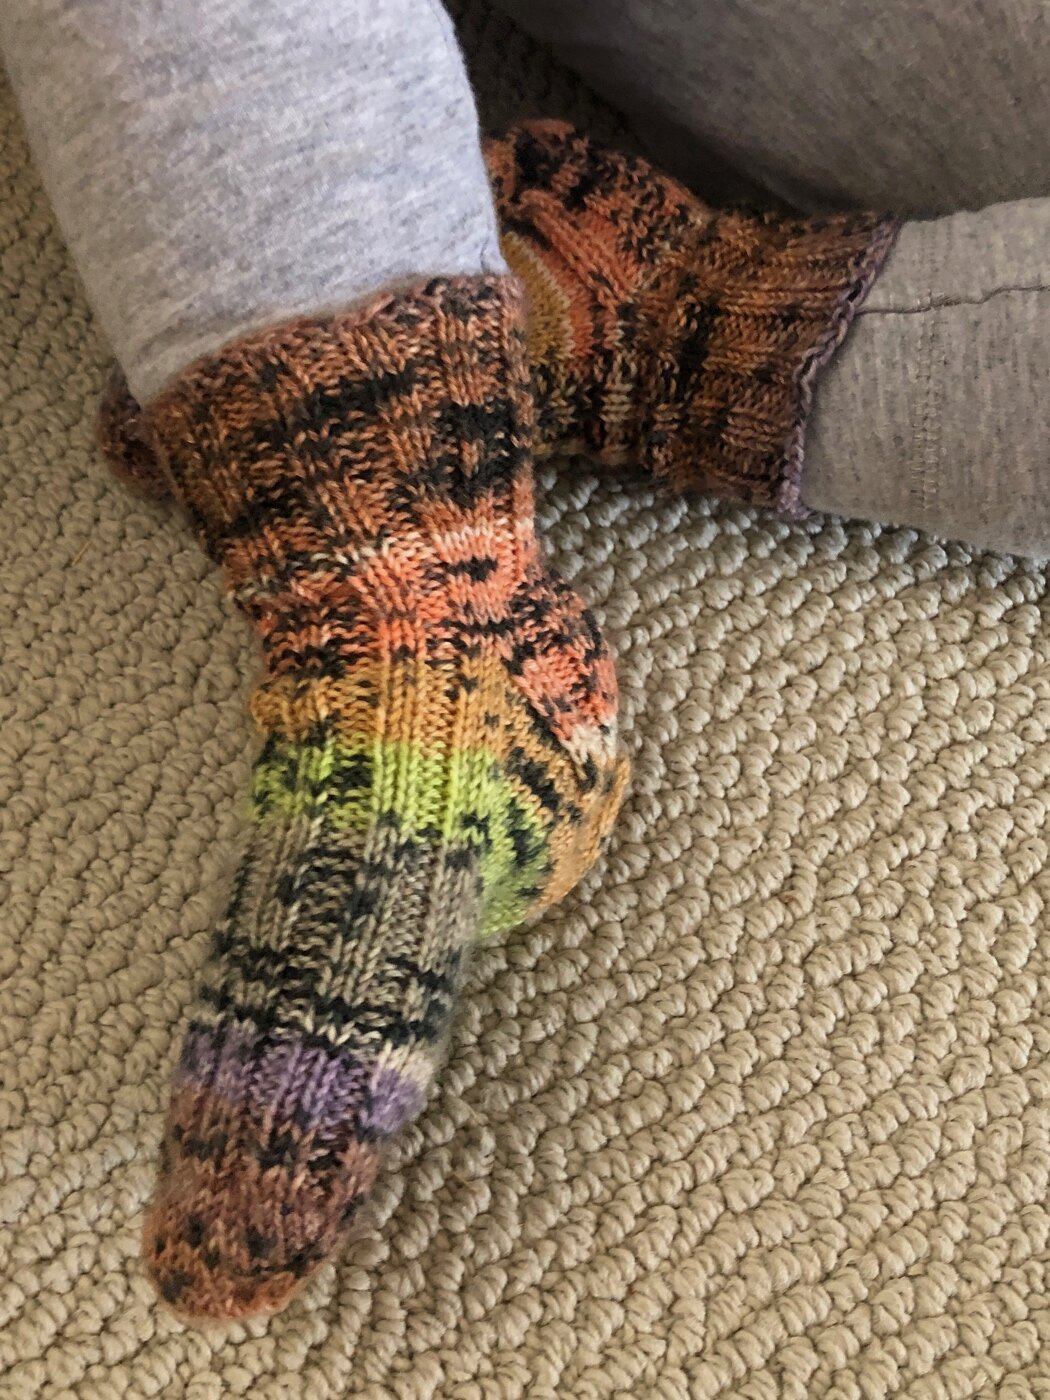
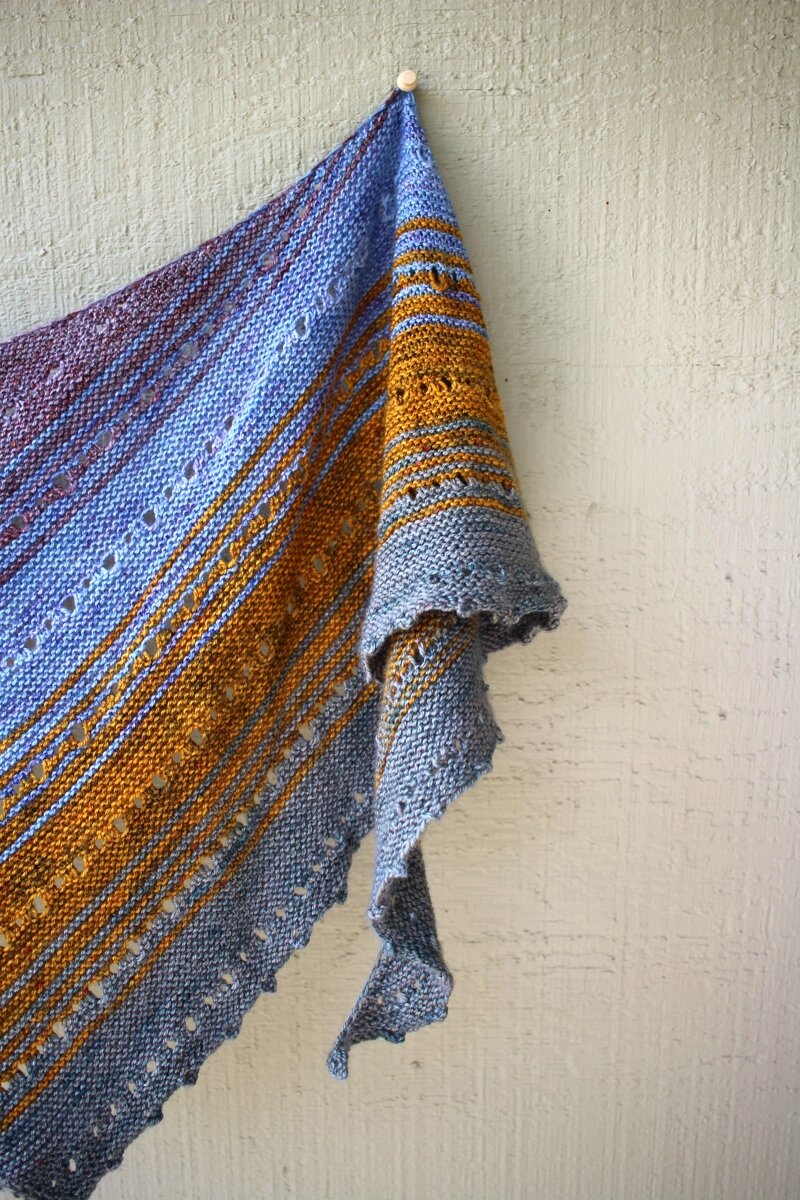
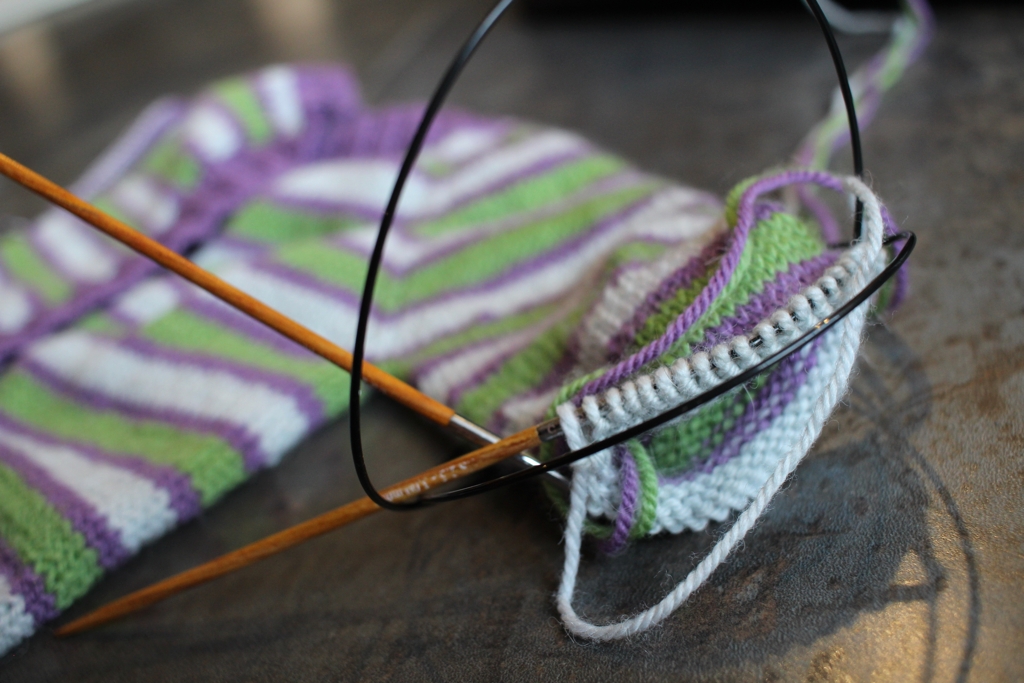
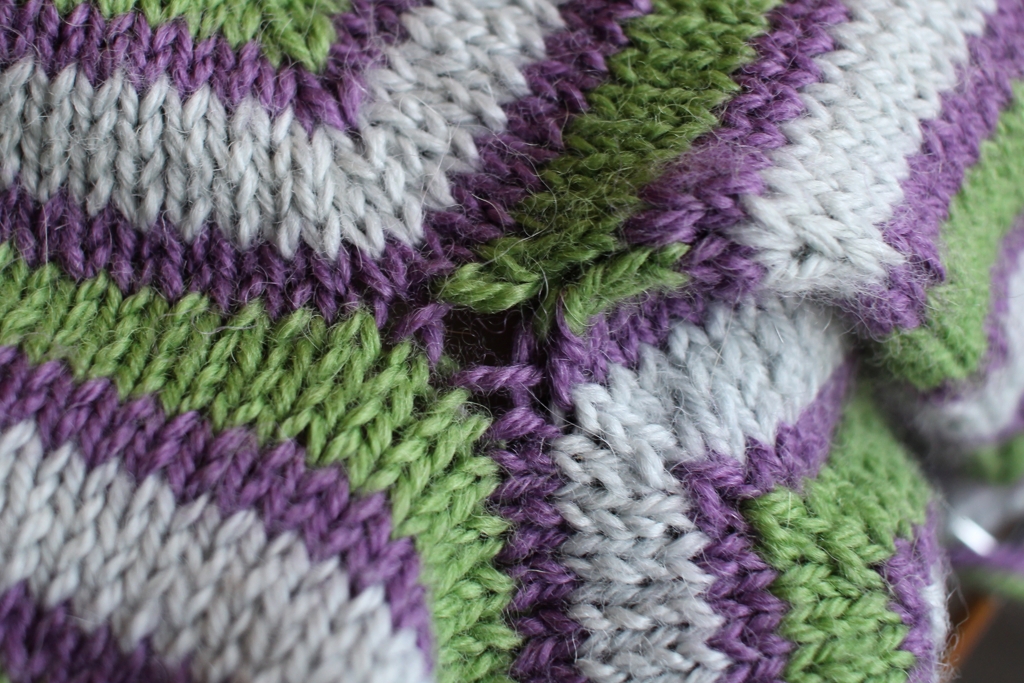
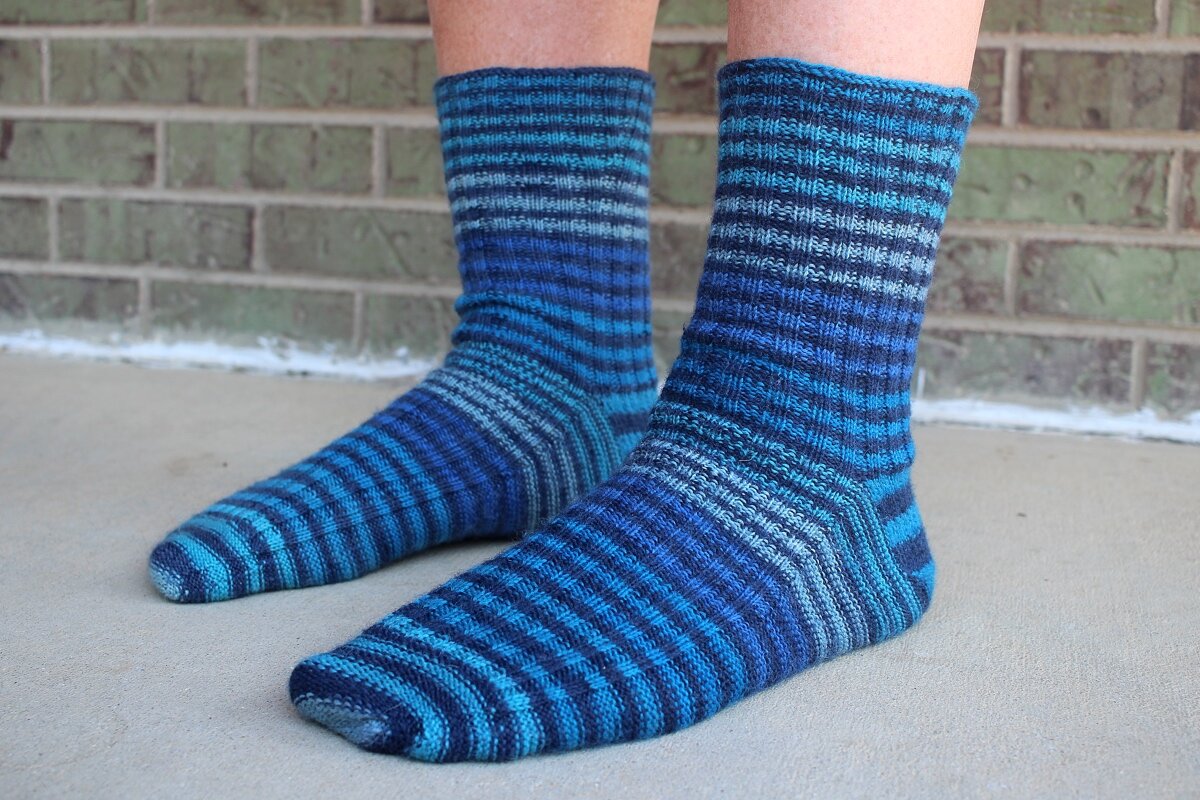
Back in 2019, I wanted to spend 2020 knitting socks. Socks for me. Socks for the Bearded One. Socks for the kiddo. Socks for friends. Did I knit socks in Janaury? Nope. Did I knit socks in February? Kind of. I started a pair of kid socks, and then they sat untouched for months after my own kiddo pulled out a needle’s worth of stitches. Ugh. Then the 100 Day Project kicked off and I made yarn for 100 Days which didn’t leave much room for sock knitting, but did get me some lovely new handspun. When that project ended, I wasn’t sure what to do next. I’d given up on a year of socks or even six months of socks. 100 days of sock knitting, though? That I could do. I quietly kicked off the project on July 28th, 2020 and got back to work on the lingering kid socks. Those only took a week to finish at a few rounds every day. What was next on the list? These blue-striped beauties for the Bearded One, which thanks to daily knitting, were knit in just under a month.

Blue-striped socks on feet and showing off the princess sole.

While they weren’t unceremoniously removed from their needles by a curious kiddo, knitting these socks wasn’t without aggravation. I’m a stickler for making self-striping yarn match up on each sock. The first step is matching up the yarns and making sure both skeins are in the same point in the color sequence. It’s a good thing I bought this yarn at a discount and got two balls because both of them came with knots. The stripe sequence was completely reversed in the middle of one ball! Thankfully, the largest chunks from both balls were enough to knit matched socks. And I’ve got enough leftovers to make a smaller matching pair for the kiddo. So, pulling the yarn balls apart, cutting, detangling, and spreading them all over the room for a few days was totally worth it.

The other big aggravation was finding two dropped gusset stitches that somehow escaped being knitted together with the edge of the heel flap. That part was all me, and easy enough to sew up at the end.

A close-up of the heel flap surrounded by the reverse stockinette of a princess sole.

The pattern is my own much tweaked and refined default toe-up sock pattern. Tweaking continued with this pair because I had to figure out how to knit the socks so I could flip them inside out after binding off to get a princess sole without purling. Totally worked though it did feel odd to knit a heel flap with the right side inside the sock. The pair got the Bearded One’s seal of approval so they must have turned out great. :D

I’m aiming to get the pattern written up properly in a wide range of sizes as I knit them. Figured I’d start with the biggest size and work my way down. It’s going to be awhile before this particular pattern is anywhere close to finished, but I will keep you updated.

With these socks complete, I’ve knit 2 pairs during my 100 Days of Sock Knitting project. Pair three is on the needles and there are cables afoot with 50 days of dedicated sock knitting time left. More on those socks later though.

The Specs:

Pattern: My own default toe-up sock pattern

Yarn: 437 yds (390.3 m) of Wisdom Yarns Stanza - 703 Burns

Needles: US 1.5 - 2.5 mm circular needles

Dates: August 6 - September 4, 2020

Ravelry Page and more notes here

New Pattern: Morticia's Surprise

The three-legged romper, titled Morticia’s Surprise, hanging on the wall above a large metal "A” and small Cthulu sculpture.

Last year, a cosplayer friend of mine commissioned me to make the three-legged baby romper from the end of 1991’s Addams Family movie. I loved this movie when it came out and I still regularly watch it. So, of course I was all in when she asked me to make it. Designing a pattern to replicate something from a movie that I’ve enjoyed for so long made the process a fun challenge. This definitely wasn’t how I expected to learn how to knit and construct a set-in sleeve or write instructions for a short-row heel, but I’m so glad I did.

For most of the pattern writing and knitting, the plan was to knit the romper and mail it off. That’d be the end of it. The Bearded One had other ideas, and kept pushing me to release the pattern for this wonderful bit of geekery. He finally convinced me, and after a few more months of work and tech editing, Morticia’s Surprise is now ready for your knitting pleasure.

The three-legged romper from the Addams Family hanging on the wall above a large A and a handful of knick-knacks.

The romper starts with the feet, moves up the legs, then the body, and the shoulders are grafted together. From there you’ll pick up the stitches at the arm holes, work a short row sleeve cap, and knit the sleeves down to the cuffs. There are three different neck options and instructions for adding yarn and needles to match what’s shown in the film.

Close up view of the three feet and striped legs hanging on the wall next to a big metal “A”.

I’m releasing Morticia’s Surprise under the value-for-value model which means you can pay what it’s worth to you.

You can download the pattern and get all the details by clicking the button below. Then show your support for this pattern and future patterns by making a donation or becoming a monthly subscriber on Ko-Fi.

You can also get the pattern through Ravelry. Pay what you want using the coupon codes on the pattern page.

The neck and set-in sleeve of the Morticia’s Surprise romper hanging on the wall.

FO: Kiddo's Socks

A pair of hand knit striped kid’s socks with a gusset and heel Flap. FO:Kiddo’s Socks || withwool.com

The Kiddo does not like wearing socks. If she has any choice in the matter, she’ll pull them off at her earliest convenience and leave them behind/under the nearest piece of furniture. When we’re short socks on laundry day I go check under the crib with a flashlight. Usually turns up at least a pair or two. This wouldn’t be much of a problem if not for cold toddler toes which should really be warm toddler toes. So I finally decided to knit kiddo a pair of wool socks.

Striped hand knit socks overlaying each other.FO: Kiddo’s Socks || withwool.com

I got started and kept right on knitting with the expectation that I’d be pulling these out from under the furniture just like all her other socks. Then she tried them on and surprised the hell out of me by actually liking them! She didn’t pull them off or chuck them under the coffee table. She wore them, walked around in them, and motioned for me to put them on again the next day. When I asked if she wanted mom to make her more socks, she nodded yes and I was positively verklempt. I hadn’t dared hope that she’d like these socks, but she did, and it felt like my heart was going to burst out of chest from happiness. Kiddo can have all the hand knit socks she wants.

She’s also a natural, if wiggly, sock model.

Toddler wearing a pair of striped hand knit socks.FO:Kiddo’s Socks || withwool.com

I made these socks long and oversized, which is probably why she likes them. Her feet have plenty of room to grow, and there’s time enough for me to eventually make another pair. The pattern is one of my own making and it uses lots of ribbing to stretch and fit wiggly growing feet.

Striped hand knit socks worn on briefly still toddler feet.FO: Kiddo’s Socks || withwool.com

While I am very happy with how this pair turned out, the pattern is definitely in need of some tweaks. Good thing I have at least one more pair to knit soon, and plenty of stashed leftover sock yarn to work with. This pair only took about 65 yards (60 m, 14g). Then it’ll be time to figure out how to write it for multiple sizes and lengths in a way that’s clear and easy to follow. It’s going to be awhile before the finished pattern sees the light of day, but that’s okay because it gives me more time to work on getting things right.

Around Here - November 2019

Two feet standing on a handwoven rag rug with labels attached.Around Here || withwool.com

There’s been lots of small great things happening around here. Let’s catch up!

Last weekend, I packed up the family and headed up to the Boulder Handweavers Guild and Sale. It’s always interesting walking around and seeing what all the different fiber artists in the area are getting up too. There were knitted items of all kinds from tiny baby booties to giant shawls. There were beautiful woven clothes, hand dyed silk scarves, felted bowls, as well as yarn and fiber. I also saw some really cool crocheted t-shirt yarn baskets which made me want to give crochet another try.

Beams of sunlight falling on a handwoven rag rug.Around Here || withwool.com

We spotted a beautiful handwoven rag rug that had to come home with us too. The rug is cushy to stand on, a good size, and has great colors. Said rug is also the first thing we bought for our new place! I’m looking forward to having more room to spread out, and plenty of space for the kiddo to play.

A half-finished sweater for a toddler sitting next to a ball of yarn.Around Here || withwool.com

Much progress has been made on kiddo’s Fall sweater. It’s taken a back seat the last few days to other overdue projects, but the sweater has still come a long way in the past week. The yoke is finished, the sleeves are bound off, and now I’m working through the body. It’s been great autopilot knitting to pick up at random moments throughout the day. Still looking for buttons though.

The first and second attempt at making the Cattywampus Hat look like the flag of Trinidad and Tobago. #knitting The second attempt is going much better, and in the right direction.Around Here || withwool.com

Remember the hat I was trying to make in the likeness of the Trinidad and Tobago flag? I finally figured out how to make the stripes slope in the correct direction! Charting out the rewrites really helped. Now I’m past the spot where I stopped on the first attempt and quickly moving towards the grafting. Who knew I’d be so excited about kitchener stitch.

Two skeins of Berroco Vintage DK in Cracked Pepper and Smoke. #knittingAround Here || withwool.com

I decided to take on a project for a friend that sounded so fun I couldn’t resist. That grey and dark grey yarn above? That’s the yarn I’m using, and I don’t think I’ve even been so excited to knit with so much grey. More details on that later.

Shawl Parade

A close up of the mesh section of a Curve of a Boat shawl knit with a variegated magenta yarn. #knitting #finished shawlShawl Parade | withwool.com

We got an early snow storm last week that dumped about 4” (that’s about 10 cm) and brought cold temps along with it. And I was ready thanks to my very prolific bout of knitting over the summer. All I had to do was wrap myself up in one of the two shawls I finished in August.

A finished Curve of a Boat shawl hanging from a wall. #knitting #knitshawlShawl Parade | withwool.com

The first shawl of the needles was Curve of a Boat by Larissa Brown. It had been a travel project in July, but I didn’t work on it much at all when I was traveling. Turned out to be just what I wanted when I got back home - interesting autopilot knitting that I could relax with at the end of the night.

A close up of the mesh and variegated colors of the Curve of the Boat shawl. #knitting #hedgehogfibersShawl Parade | withwool.com

As beautiful as the shawl was on the needles, washing and blocking really helped it bloom. The yarn plumped and lost the limp feel it had while I was working on it. The garter stitch and mesh sections opened up to make a wonderfully sized shawl with great drape. I love the extra points and different shape that arise from how this shawl is constructed. The only real mod I made was to skip the tassels since I wanted something more streamlined.

The color is definitely more magenta than I usually pick for myself, but it still has earthy tones that will match pretty much all of my jackets. I’ll be wearing Curve so much this Fall.

A finished Free Your Fade shawl hanging from a wall. #knitting #AndreaMowryShawl Parade | withwool.com

It took me a few years to join the fade trend, but I finally knit a Free Your Fade shawl. I don’t want to stuff this shawl in a closet when I’m not wearing it. I want to hang it on the wall as art. It’s got beautiful drape and luster, and curls just so. Plus, the colors speak to my usual muted earth tones palette. I haven’t had much luck hanging it up because wall space is at a premium, but it was the perfect thing to wear when I had to run errands through the snow. I can now see why people really love cashmere.

A close up of the bind off edge of the Free Your Fade shawl hanging and curling from a wall. #knitting #AndreaMowry #FreeYourFadeShawl Parade | withwool.com

The yarn kit I used added a little extra challenge to the project. While I loved the colors and the fiber blend, every color had the same yardage. So I had to spend a lot more time tracking yardage and “knitting” the shawl in a spreadsheet so I could get the most out of every color. It wasn’t exactly the autopilot knit I imagined but the end result is so worth it.

I had to make a few mods as I went. The biggest is that I started the color/fade sections at different spots in the repeat so I could make the most of the yarn. I also changed the picot bind off to have fewer points. Whenever I knit another one of these shawls, I’ll stick to just a regular yarn over because of the larger stitches sticking out all over the place.

A slightly out of focus look at the color progression of the Free Your Fade shawl. #knitting #FreeYourFade #AndreaMowryShawl Parade | withwool.com

Washing and blocking did wonders for this shawl. The stitches relaxed and I was able to stretch and shape the Fade just so. It went from dense and compact to big and drapey without losing warmth. Perfect for bundling up in the snow.

In typical Fall fashion, the weather is back to it’s sunny, warm, and windy self. The gusts, cold spells, and surprise snow storms are never far off though, and I am so ready.

Pattern: Curve of a Boat by Larissa Brown

Yarn: 429 yds Hedgehog Fibers Socks - Vengeance

Needles: US 4 (3.5 mm)

Dates: June 1 - August 2, 2019

@Ravelry

Pattern: Free Your Fade by Andrea Mowry

Yarn: Sun Valley Fibers MCN Gradient Set

Needles: US 4 (3.5 mm)

Dates: August 5 - 22, 2019

@Ravelry

Sideways Swatching

I don’t always swatch for hats which means I sometimes end up ripping out the first few inches because the hat is comically too big. It’s not a big deal because I know it’s an easy fix to rip out and start over with a few less stitches. The hat I’m knitting this time though is a little different. Instead of working in the round from the bottom up, Cattywampus is worked sideways, on the bias, with short rows. Ripping out because it’s too big or too tall is not an easy task. You better believe I swatched.

A close up view of a red, white, and black knitted swatch soaking in the sink.Sideways Swatching || withwool.com#knitswatch #darkmatterknits

The reason for working side-to-side is that I’m making a hat that resembles the flag of Trinidad and Tobago for a friend. I’m not keen on working intarsia, especially intarsia with cotton/linen blends, and working sideways was the easiest way to pull off the diagonal stripes. I worked two sections of the short row crown shaping with all three colors. My gauge was right on the money, and I’m really hoping the swatch wasn’t lying to me.

Red, white, and black swatch dry with ends hanging out.Sideways Swatching || withwool.com#knitswatch #darkmatterknits

The other reason I swatched was to see if the colors would bleed. I only have enough yarn to make one hat and it would be really aggravating if the red and black dye bled on the white stripes. After 20+ minutes in a warm soak with Eucalan, the water was still clear without the faintest tint of red. The problem came when I squeezed water out of the swatch. You can just see the the barest pits of pink where the red and white yarn got squished together. Hmmm…

My hope is that if I squeeze out the water in a different way that the colors won’t bleed. Maybe that’s just wishful thinking. Do you have any tips or recommendations for soap that would stop the excess dye in its tracks?

A partially knit hat in red and white with short row crown shaping and a provisional cast on.Sideways Swatching || withwool.com#knitswatch #darkmatterknits

I did start the hat, and worked several repeats. I was almost done with the black stripe that I added after taking this photo. Yarns had been cut and most of the ends woven in. Then I noticed a rather aggravating issue. The short rows slope in the opposite direction of the flag’s diagonal stripes. The only fix is ripping out, reworking the pattern to slope in the opposite direction, and casting on again. Ugh. Looks like I get to restart this hat despite my best efforts.

Marginalia and Spreadsheets

A close up view of my in progress Free Your Fade shawl with grey and green stripes.Marginalia and Spreadsheets || withwool.com

I remember taking a random knitting survey that asked if I preferred printed patterns or digital patterns. I am 100% in for printing my patterns. I’ll keep the file on my phone as a backup, but the paper version is what I’m going to work from. Why? Because it is so much easier to make notes, track repeats, and see the whole pattern at a glance. Plus, I don’t have to run the distraction laden gauntlet that is my phone every time I have a question about a stitch count.

A segment of the knitting pattern with my notes tracking row counts, yarn used, and when to switch colors.Marginalia and Spreadsheets || withwool.com

The Free Your Fade pattern, or the Yarn Chicken shawl as I’ve come to call it, is the perfect example. The margins are jam packed with notes. You can see where I’m counting row repeats, tracking how much yarn each section is using, and telling myself where to fade in new colors. All this marginalia is also a pretty handy indicator of how much I’ve knit these past weeks - AKA a lot. This is one case where working from a screen can’t beat paper.

A small segment of my spreadsheet used for tracking rows and yarn used per repeat. #FreeYourFadeShawlMarginalia and Spreadsheets || withwool.com

This is not to say that I’m not going to use a computer/phone when needed to enhance my knitting. My spreadsheets and knits are best friends. Take a gander at the screenshot above. Those strings of numbers are me “knitting” the shawl digitally. With enough IRL knitting and then weighing the yarn after each repeat, I was able to determine how much yarn is used per stitch. Armed with that minuscule number, I can work ahead in the spreadsheet, estimate how much yarn will be used, and figure out where to switch colors. There have been some leftovers, but I’m fairly confident I’m getting as much out of the yardage as I can.

An overall photo showing the #FreeYourFade shawl with 4 colors knit and and 2 yarn balls waiting to be knit.Marginalia and Spreadsheets || withwool.com

Even though this shawl isn’t the low key process knit I was expecting, it’s still really fun. It’s also a great excuse to watch other people play video games I’m not going to play myself. As much as I’ve been focusing on the stitch counts and row by row of this pattern, taking these photos is the first time I laid the shawl out and got a good look at all of it. I really like my Free Your Fade which is, you know, good since I’ve put so much time and energy into it already.

Yarn Chicken Shawl

As a happy birthday gift to myself I finally wound the yarn to knit a Free Your Fade shawl by Andrea Mowry. Dyed by Sun Valley Fibers, the colors are earthy and lovely. The merino/cashmere/nylon blend has been a joy so far. I really enjoyed casting on and knitting the first few repeats during a day trip to Rocky Mountain National Park. However, this shawl is going to be more stressful to knit than I originally thought. Why? I have already played yarn chicken and lost on the first fade!

Ran out of yarn with just a few stitches left in the row. Sock yarn leftovers to the rescue! Yarn Chicken Shawl || withwool.com

I was tracking how much yarn I used every repeat (small digital kitchen scales (<<— affiliate link!*) are awesome for this) and estimated I’d have just enough yarn to finish Color 1. I was right except for the 26 stitches left at end of the last row. Bah. It was late so I went to bed instead of ripping back.

Ran out of yarn with just a few stitches left in the row. Sock yarn leftovers to the rescue! Yarn Chicken Shawl || withwool.com

Getting some sleep turned out to be the best option because, in the morning, I remembered all the leftover sock yarn I have stashed away. Maybe I could find some that matched? Turns out that I did have something close, and can’t tell the difference between the two in the shawl. The extra ends are the only sign I had to take drastic measures. Whew!

Ran out of yarn with just a few stitches left in the row. Sock yarn leftovers to the rescue! Yarn Chicken Shawl || withwool.com

I’m going to rename the shawl Yarn Chicken because, while I have the required amount of yarn, all six colors are the same yardage. Those rows are only going to get longer and longer too. I did find a few other matching leftovers so I do have some insurance, but knitting this is going to be...interesting. The scale and a spreadsheet will be my constant companions.

*This post contains an affiliate link which means, if you decide to buy through that link, I’ll get a small commission. Thanks!

FO: The Long Awaited Mrs Watson

The Mrs Watson shawl was worth the wait, and will be great to wear this Fall. #knitting | withwool.com

Some projects just seem to take ages, and this Mrs Watson shawl was one of them. The pattern sat in my queue since it was first released 2015. It took me 3 years to get the pattern and buy the yarn to make it. At least I cast on less than a week later. The first stripes went pretty fast once I figured out what was going on. The rhythm of the short rows was soothing too. Then Mini Me joined the family, and I barely knit for months. Sure, I looked at my knitting but didn’t have the energy or brain space to actually pick it up.

Eventually the fog lifted and I did want to knit again. Plus, I could knit again. The Mrs Watson shawl was just what I needed too. There were some interesting bits, but the bulk of the shawl is garter stitch - and I could still count to 10 - so I was able to just knit and watch her play. In fact, that’s how I knit the bulk of this shawl. She crawled around and played, and I followed behind her with needles in hand and project bag hanging from my arm.

The Mrs Watson shawl was worth the wait, and will be great to wear this Fall. #knitting | withwool.com

Six months after casting on, I finally bound off. Blocking didn’t take long at all, but I did have to do some next level stacking to keep the Mini out of the wires and pins until the shawl was dry.

The real reason that it seems like this shawl took ages, was that it took me another 8 months to photograph it! What took me so long? I don’t even know anymore. It sat balled up in a box until I was photographing a hat. The light was good and the camera ready so Mrs Watson finally got her time in the spotlight.

The Mrs Watson shawl was worth the wait, and will be great to wear this Fall. #knitting | withwool.com

I used a fingering weight yarn instead of the recommended sport weight so the finished shawl is smaller than I expected. Yet it’s the right size to wrap around my neck and tuck into my coat. It’s cosy and geometric, but not bulky which I really appreciate. I’ll be wearing it a lot this Fall. Still, I’m tempted to make a second Mrs Watson in a sport or worsted weight yarn for a big, super warm shawl. Maybe that one won’t take another three years to start.

The Specs:

Pattern: Mrs Watson by Martina Behm

Yarn: MJ Yarns Tough Ram - Garnet and Pearl

Needles: US 6 (4mm)

Dates: April 20 - October 21, 2018

@Ravelry

The Mrs Watson shawl was worth the wait, and will be great to wear this Fall. #knitting | withwool.com

Big News + What's Next

The Pacific Coast sweater is finally done and I couldn’t be happier! | withwool.com

This sweater has shown up a lot during the past few months. I used it to test out a more truthful and accurate method of swatching.  When I was feeling overwhelmed by all of my knitting projects, I focused on this sweater to feel like I was making progress. Plus, there were the random WIP updates. In all that, I never shared who I was making this sweater for. Well, I’m not mailing it cross-country, and I’m not giving it away at a baby shower. This little beauty is staying right here with me for my own little one!

The Pacific Coast sweater is finally done and I couldn’t be happier! | withwool.com

Aside from a few fiddly details of my own making, the pattern - Pacific Coast - was a pretty easy knit. I made a few changes, but mostly followed the instructions since I haven’t knit a lot of sweaters of any size. You can check out all of my notes, mods, and more photos here on the sweater’s project page.

The Pacific Coast sweater is finally done and I couldn’t be happier! | withwool.com

Since it’s almost baby time, there’s going to be a few changes around here too. First, this will mostly likely be the last blog post for awhile. Second, I’m not sure when I’ll be back to regular posting or what that schedule will be. I’m just going to play it by ear. There might be a random post here and there over the summer or maybe not. We’ll see. Third, the With Wool Weekly newsletter will also be taking a break and will return eventually.

Happy knitting and happy spinning. I’ll see you on the other side and on Instagram.

A Solution to WIP Overwhelm

Feeling overwhelmed and stuck in your #knitting projects? Try working on them 20 minutes at a time. | withwool.com

Normally, I’m a knitter and spinner that has a lot of projects going at any one time because what I want to work on changes. I’ve got simple projects for autopilot knitting, small projects for travel knitting, and complicated projects for a challenge. The large number of these different project usually doesn’t bother me. Usually. At the moment though I’m feeling rather overwhelmed by them all. There’s the baby sweater that’s also a gauge swatch experiment. There’s the shark that still needs a sweater. There’s unfinished gift knitting leftover from the holidays. There’s a bunch of alpaca singles waiting to be plied. There’s all the knitting patterns that I’m in the middle of designing. And never mind the general day-to-day routine and work and projects that aren’t fiber related. Being stuck in the middle of all these different projects with all their deadlines has been weighing me down. So, last week, I took a break to watch tv, waste time online, and play games. The down time helped me think.

Feeling overwhelmed and stuck in your #knitting projects? Try working on them 20 minutes at a time. | withwool.com

The only way to finish these all these different projects is by focusing on just one of them at a time. Rushing to do bits and pieces on 20 things at the same time is just dragging things out. So I’m picking the baby sweater to work on until it’s done. While I can’t finish it in a night, the sweater is the closest to the finish line of everything. Plus, I didn’t have to tackle a bunch of other to-do’s first in order to get back to knitting.

Still, this grand decision didn’t make it any easier to get going again. Being in “the middle” is a slog. When I need a kick in the butt to get to work, I use the pomodoro technique to help me focus. The technique boils down to 20 minutes of work followed by a short break. And repeat. That’s it. I use an app called Focus Keeper which lets me set the length of my work sessions, breaks, repeats, and tailor lots of other nifty options. I use it when I need to get to work or just don’t want to do something necessary, like cleaning the bathroom.

Feeling overwhelmed and stuck in your #knitting projects? Try working on them 20 minutes at a time. | withwool.com

This time I used the app for my knitting. All I had to do was work on the sweater for 25 minutes. After that, I could stop or keep going. Surprise, surprise - I kept going and finished the decreases on the first sleeve. I’m glad I had the timer to keep me accountable because I would have put the sleeve down halfway through otherwise. Figuring out how to work jogless stripes that happened in the same spot as the decreases while I kept track of rounds and carried the other colors up the sleeve took all of my attention.

Feeling overwhelmed and stuck in your #knitting projects? Try working on them 20 minutes at a time. | withwool.com

I’m pleased with how the sleeve turned out except for this hole where I started knitting again. Picking up a stitch at the beginning and end of the round did nothing. I’m going to sew it up with a yarn tail when I weave in the ends. Do you know any tips or tutorials so this hole doesn’t happen on the second sleeve?

Feeling overwhelmed and stuck in your #knitting projects? Try working on them 20 minutes at a time. | withwool.com

Oh, I picked up some buttons too! I found these cute little wood hearts at my local yarn shop. They’re a cute match, and I’m glad they’re the right size since I had to guess if they'd fit.

There’s still a good chunk of knitting to do on the sleeves before I can get to washing and blocking this baby. And I’m going to keep using the timer because it’s helping me get through the slog. Maybe it’ll become a daily goal of one 25 minute session until the sweater is done and buttoned. If you’re stuck in the middle like I am, give the pomodoro technique a try. Even 5 or 10 minutes will get you closer to the finish line and out from under the overwhelm.

A Gauge Swatch Update and Yarn Chicken

Want to know if you’ve got enough yarn for your #knitting project? Here’s a simple way to find out. | withwool.com

I’ve been working on the Pacific Coast sweater for the past week. The “just one more row” litany has been good motivation to keep knitting. After regularly checking that the stitch counts were correct, I finished the raglan increases and put the sleeves on waste yarn. Now my little WIP is finally starting to look like a cute sweater! And I’m loving the stripes more and more with every row.

Since I’m using this sweater is part of a little swatching experiment, which you can read all about here, here’s an update. The sweater is about 6” from cast on to my current row, and my gauge has remained consistent across the entire length and width. Said gauge still matches up with swatch #3, the un-pinned chunk of stockinette. I was curious if the switch to working fewer body stitches would change my gauge after the constant increasing of the raglan. So far, no.

Want to know if you’ve got enough yarn for your #knitting project? Here’s a simple way to find out. | withwool.com

One thing that has been nagging me though is if I have enough yarn to knit all the stripes. I’ve got plenty of purple, but only one ball each of the green and grey. And I really don’t want to buy more. Before casting on, I made sure I had the required yardage, but I still couldn't help but wonder if I’m playing yarn chicken. So I’m falling back to my tried and true method for estimating yardage.

Want to know if you’ve got enough yarn for your #knitting project? Here’s a simple way to find out. | withwool.com

Step 1: Weigh the yarn ball in grams (the math is a lot easier in metric). I’ve got 35g of light grey.
Step 2: Knit a 4 row stripe and weigh the yarn again. Now I’ve got 32g of grey which means each 4-row stripe uses about 3g of yarn.
Step 3: Now it’s time to make math work for me. I’m knitting 10 more 4-row stripes so I’ll need a total of 30g of green and grey combined to finish the body. I’ve got 70g which leaves plenty of yarn to knit both the body and the sleeves. Definitely not playing yarn chicken and I’m rather pleased about that.

P.S. If you're not working by the stripe, work by the inch or centimeter and with the final length of the project instead. 

This is a simplified version of how I usually calculate and estimate yardage. I’ve written up a tutorial for the more detailed method which you can find here.

Now that I’m not worried about running out of yarn, I can get on with the rest of this sweater and enjoy the knitting. And since this is made with fingering weight yarn, there’s lots of knitting to enjoy.    


How To Block A Ribbed Scarf

How to Block a Ribbed Scarf. And what does it mean to block knitting anyway? | withwool.com

I was thrilled to bind off the Melded Scarf, you can get the pattern here, but I knew I wasn’t done. The first few inches I reknit after frogging looked wonky. There were rows that stood out more than the rest. I could tell where I stopped knitting one night and picked it up again the next day. I knew I had to block the scarf to wash it and get it looking and feeling it’s best.

What is blocking?

Blocking is a finishing technique that makes a piece of knitting go from good to great. Blocking evens out stitches and gives the knitting - scarf, shawl, or sweater - it’s final shape. I think many knitters picture complicated lace shawls that have been stretched and pinned to the limit when someone mentions blocking.  But blocking doesn’t equal stretching. It’s wetting, laying out the knitting in the shape you want it to be, and letting the piece dry. 

Every natural fiber yarn benefits from blocking. Blocking can drastically change natural fiber yarns. Yarn can “bloom” and get softer. Stitches can grow and stretch. Gauge can definitely change and affect the size of a finished piece.  So always knit a big swatch and block it the way you’d block the finished project.  Blocking will even out stitches worked in synthetic blends like acrylic, but it won’t do much more then that.

There are several different ways to block knitting and different fibers do better with different methods. The Melded Scarf I’m working with is 100% non-superwash wool which reacts well to wet blocking, the method I’m using here. Check the care instructions for your yarn to choose the best method for your project.

Materials:

  • the scarf
  • a no-rinse wash (I use Eucalan. ) 
  • a large flat surface that you can put pins in (foam mats, carpet, or a DIY board
  • a towel
  • a tape measure
  • a ruler
  • a few rustproof pins

Step-by-Step

1. Fill a sink or small tub with cool water and add a capful or two of no-rinse wash. Submerge the scarf and let it soak for about 20 minutes. 

2. Take the scarf out of the water in one big lump. Squeeze out as much water as possible, but don’t wring it, before laying it out on a towel. Roll the scarf up in the towel, and squeeze out even more water. Standing on the scarf burrito works well for me. 

How to Block a Ribbed Scarf. And what does it mean to block knitting anyway? | withwool.com

3. Unroll the towel where you’re going to block. Then lay the scarf out flat, making sure that it’s in a straight line. Also make sure that there aren’t any parts of the ribbing that look more stretched out. 

If, like the Melded Scarf, your scarf has 2 distinct halves, use the tape measure to make sure both halves are the same length. If one half is longer than the other, carefully pull on small sections of the shorter side. Work from the middle to the end. The scarf is vary malleable at this point so you won’t have to do much to gain an extra inch or two. 

How to Block a Ribbed Scarf. And what does it mean to block knitting anyway? | withwool.com

4. Time to break out the ruler. Hold it across the scarf to make sure the width is the same from end to end. For this scarf, that’s about 6”. Where the scarf is narrower, pull out both edges to the width you want. Working an inch or two in from the edge will keep the ribbing from looking more stretched out than the rest of the scarf. 

How-to-block-a-ribbed-scarf-step-5.jpg

5. To get crisp corners at the ends, pull each corner to the shape you want and pin it. 

6. Let it dry, take out the pins, and you’ve got a cosy new scarf.

How to Block a Ribbed Scarf. And what does it mean to block knitting anyway? | withwool.com

Video Tutorial: Carrying Yarn Up The Side Of Your Knitting

&nbsp;Learn how to work stripes and carry yarn up the side of your knitting with this video tutorial. | withwool.com

With the release of the Melded Scarf pattern, which you can find here, I decided to create a video tutorial of how to carry yarn up the side of your knitting when working short and tall stripes. Why learn how? There won’t be near as many ends to weave in at the end. Plus the yarns neatly twist together and are ready to use when you need them.

If you’d like to learn how to carry yarn up the side from step-by-step photos instead, here’s a link to that tutorial.

Learn how to work stripes and carry yarn up the side of your knitting with this video tutorial. | withwool.com

The Melded Scarf is worked in 1x1 rib with a selvedge stitch on each edge which hides the carried yarn really well. You can see blips of the carried yarn on the taller stripes, but they don’t stand out. Definitely less noticeable and less work than weaving in a bunch of ends. 

Stripes and Carrying Yarn Up The Side

The Mosaic Sisters pattern- a set of colorful mosaic knit kitchen towels, washcloths, and coasters - is here! Meet the sisters and get the pattern.

Check out the other tutorials for the Mosaic Sisters: The Long Tail Cast On and Mosaic Knitting 101


Spend your time knitting, not weaving in ends!&nbsp;Here's the final tutorial celebrating the Mosaic Sisters pattern! Today's tutorial is about how to carry yarns up the side of your work when you're knitting stripes. Doesn't matter if the stripes a…

In Mosaic Knitting 101, I showed that mosaic knitting is just stripes and slipped stitches. Knitting stripes is fun, but weaving in ends for every color change is not. The first few times I knit stripes, I cut the yarn at the beginning and end of every color. Ugh. Thankfully, there’s a way to carry yarn up the side of the piece which means you don’t have to spend as much time weaving in ends as you did knitting. The carried yarns will twist together as you work and tuck themselves in nicely behind the edge stitches.

For Narrow Stripes

Spend your time knitting, not weaving in ends!&nbsp;Here's the final tutorial celebrating the Mosaic Sisters pattern! Today's tutorial is about how to carry yarns up the side of your work when you're knitting stripes. Doesn't matter if the stripes a…

If you’re working 2 row stripes there’s only one step to carry your yarns up the side. For the sake of clarity, yellow is Color 1 and white is Color 2. When it’s time to change colors, hold color 1 to the back of the work and start working the next stripe. You can drop Color 1 after you’ve got a few stitches of the new stripe on the needles because the two yarns are now twisted together. 

Is it possible to hold the yarn to the outside of the work instead of along the back? Definitely, but there is one benefit to holding the yarn to the inside. It’s faster because you always know what strand you just used and what strand to grab next. Plus, it easier to keep the yarns from tangling which means you get to spend your time knitting and not untangling yarn. Which ever direction you choose, be consistent and stick with it for the entire project.

For Stripes That Don’t Start At The Edge (And Wide Stripes Too)

Spend your time knitting, not weaving in ends!&nbsp;Here's the final tutorial celebrating the Mosaic Sisters pattern! Today's tutorial is about how to carry yarns up the side of your work when you're knitting stripes. Doesn't matter if the stripes a…

So what about when a stripe starts a few stitches in from the edge of work? The Middle Sister of the Mosaic Sisters pattern has a row that starts this way. You’ve got a couple options and neither of them involve cutting the yarn or weaving in more ends. Both choices equally effective, it’s just a matter of what you think looks better. 

Spend your time knitting, not weaving in ends!&nbsp;Here's the final tutorial celebrating the Mosaic Sisters pattern! Today's tutorial is about how to carry yarns up the side of your work when you're knitting stripes. Doesn't matter if the stripes a…

Option 1 is treating the stripes above and below the short stripe as one wide stripe. 

Begin by holding Color 1 to the back of the work just like with the narrow stripe. Slip the stitches at the beginning of the row and work the short stripe with Color 2. When you’re finished working the short stripe, twist the two colors together and start working with Color 1 again. Don’t forget to keep a little slack between the edge and the first knit stitches so the edge doesn’t pucker.

Spend your time knitting, not weaving in ends!&nbsp;Here's the final tutorial celebrating the Mosaic Sisters pattern! Today's tutorial is about how to carry yarns up the side of your work when you're knitting stripes. Doesn't matter if the stripes a…

Option 2 starts a little differently. When you start the short stripe with Color 2, hold Color 1 (green in this example) to the outside instead of against the back. Finish the short stripe.

Spend your time knitting, not weaving in ends!&nbsp;Here's the final tutorial celebrating the Mosaic Sisters pattern! Today's tutorial is about how to carry yarns up the side of your work when you're knitting stripes. Doesn't matter if the stripes a…

Now hold Color 2 to the the outside. When you start the next stripe by bringing up Color 1, it holds Color 2 in place. Go back to twisting yarns to the inside until the next short stripe. 

Spend your time knitting, not weaving in ends!&nbsp;Here's the final tutorial celebrating the Mosaic Sisters pattern! Today's tutorial is about how to carry yarns up the side of your work when you're knitting stripes. Doesn't matter if the stripes a…

I know I recommended earlier to twist to the inside, but twisting to the outside on stripes that start away the edge works well in this case. When paired with inside twists, the occasional outside twist prevents longer strands of yarn from being carried up the side and potentially snagging.