Sideways Swatching

I don’t always swatch for hats which means I sometimes end up ripping out the first few inches because the hat is comically too big. It’s not a big deal because I know it’s an easy fix to rip out and start over with a few less stitches. The hat I’m knitting this time though is a little different. Instead of working in the round from the bottom up, Cattywampus is worked sideways, on the bias, with short rows. Ripping out because it’s too big or too tall is not an easy task. You better believe I swatched.

A close up view of a red, white, and black knitted swatch soaking in the sink.Sideways Swatching || withwool.com#knitswatch #darkmatterknits

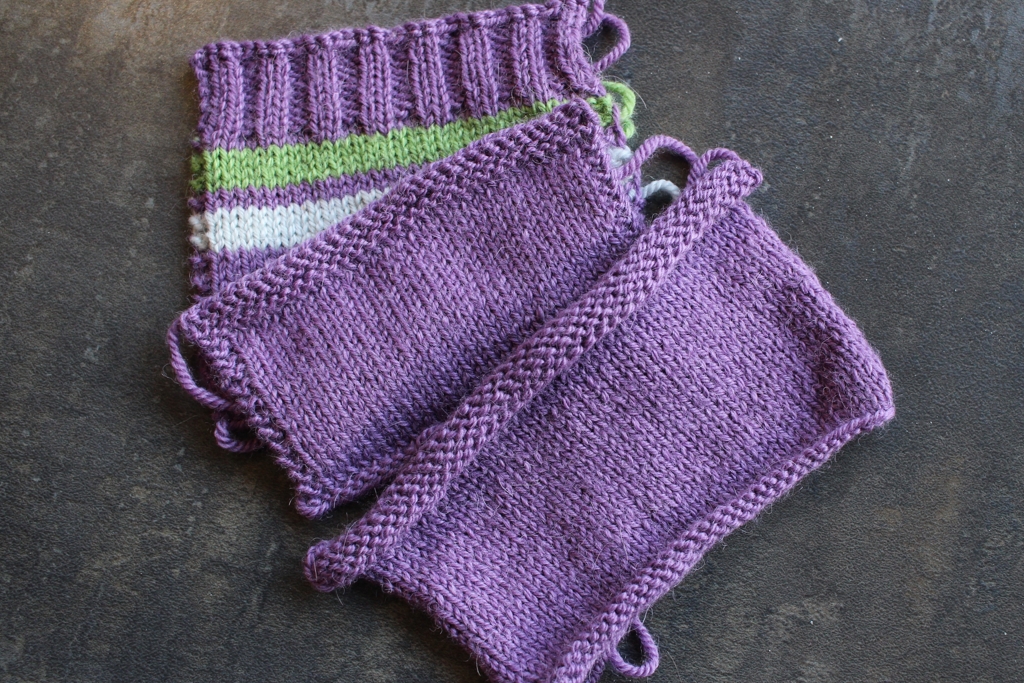
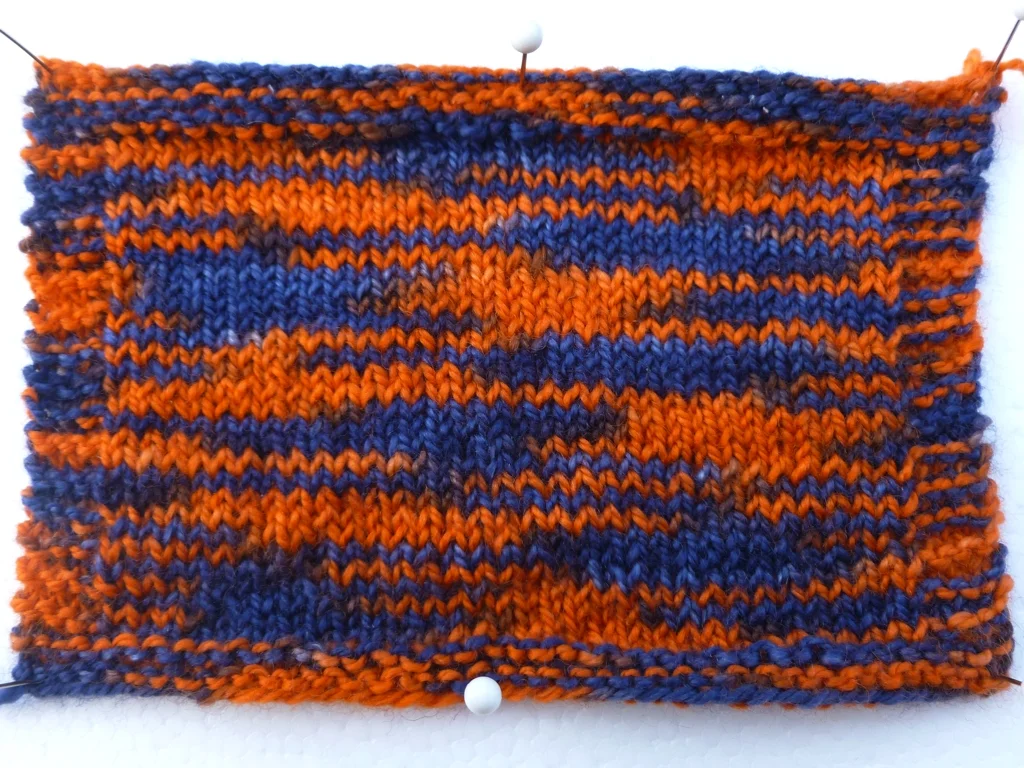
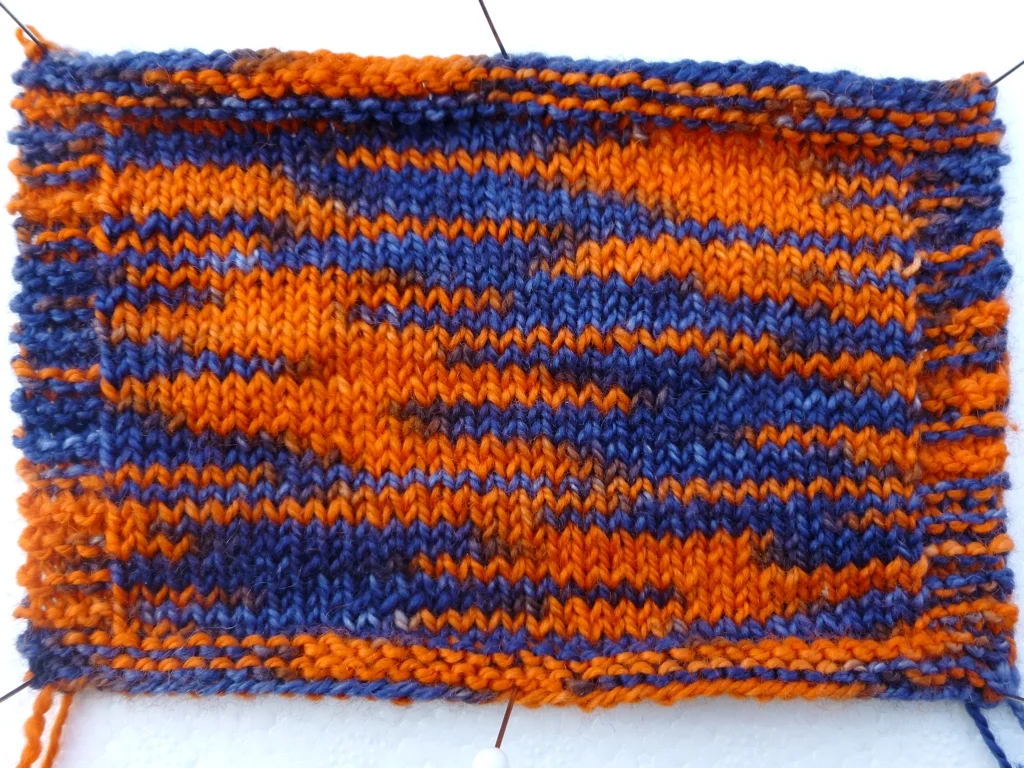
The reason for working side-to-side is that I’m making a hat that resembles the flag of Trinidad and Tobago for a friend. I’m not keen on working intarsia, especially intarsia with cotton/linen blends, and working sideways was the easiest way to pull off the diagonal stripes. I worked two sections of the short row crown shaping with all three colors. My gauge was right on the money, and I’m really hoping the swatch wasn’t lying to me.

Red, white, and black swatch dry with ends hanging out.Sideways Swatching || withwool.com#knitswatch #darkmatterknits

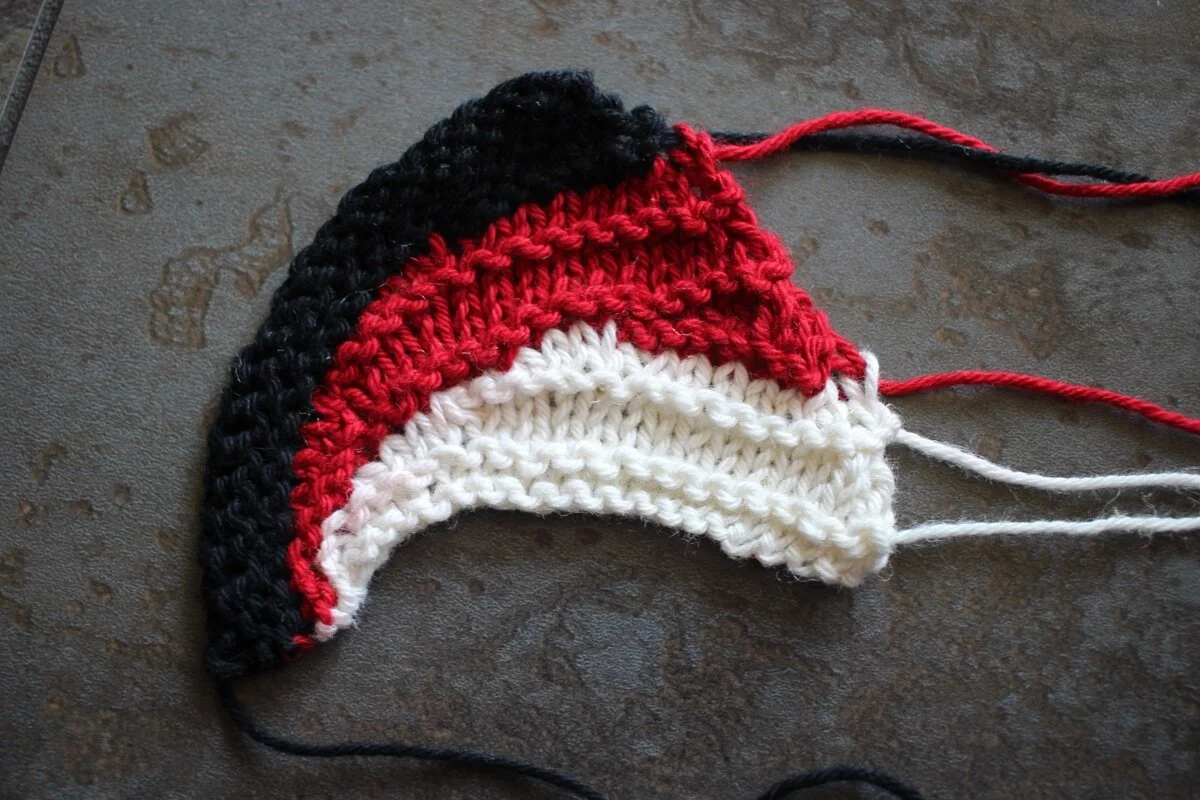
The other reason I swatched was to see if the colors would bleed. I only have enough yarn to make one hat and it would be really aggravating if the red and black dye bled on the white stripes. After 20+ minutes in a warm soak with Eucalan, the water was still clear without the faintest tint of red. The problem came when I squeezed water out of the swatch. You can just see the the barest pits of pink where the red and white yarn got squished together. Hmmm…

My hope is that if I squeeze out the water in a different way that the colors won’t bleed. Maybe that’s just wishful thinking. Do you have any tips or recommendations for soap that would stop the excess dye in its tracks?

A partially knit hat in red and white with short row crown shaping and a provisional cast on.Sideways Swatching || withwool.com#knitswatch #darkmatterknits

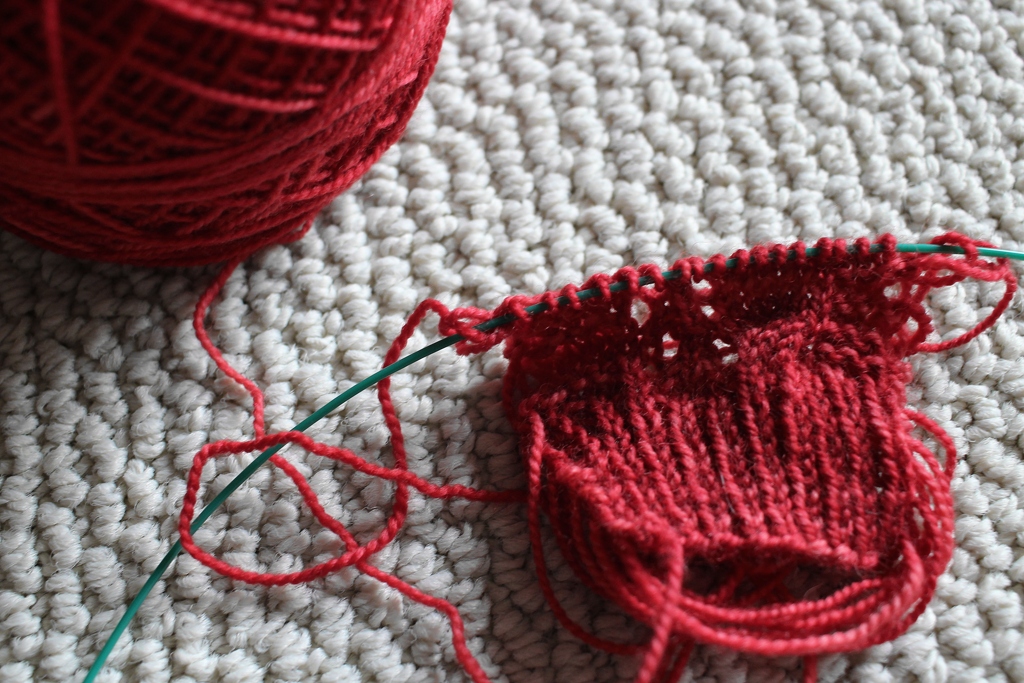
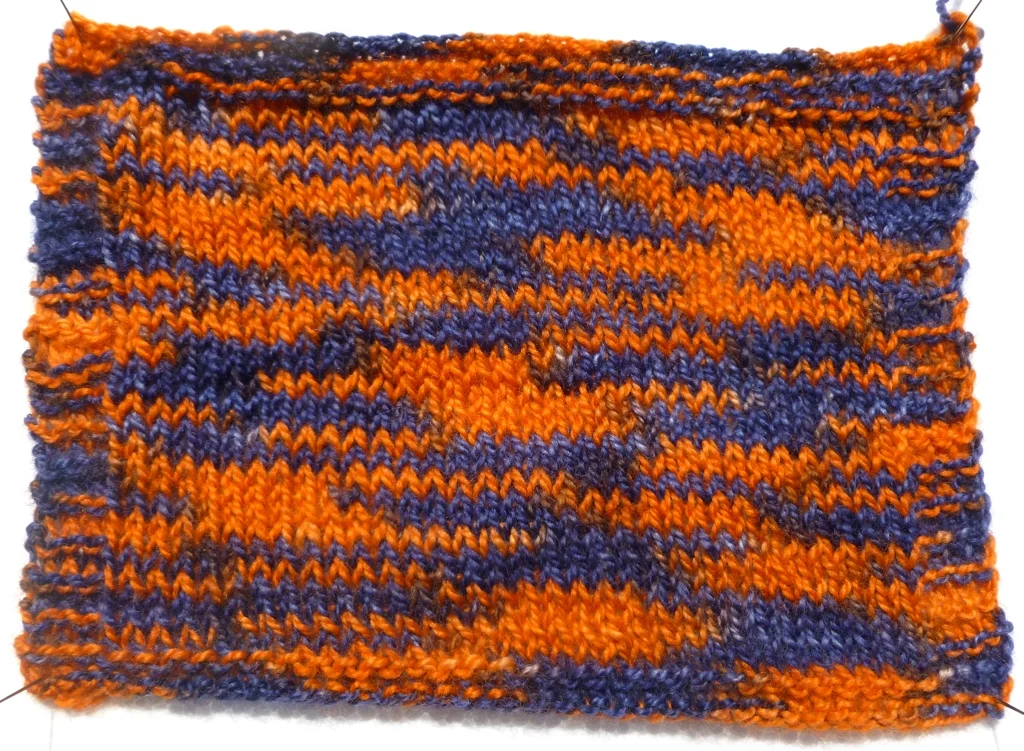
I did start the hat, and worked several repeats. I was almost done with the black stripe that I added after taking this photo. Yarns had been cut and most of the ends woven in. Then I noticed a rather aggravating issue. The short rows slope in the opposite direction of the flag’s diagonal stripes. The only fix is ripping out, reworking the pattern to slope in the opposite direction, and casting on again. Ugh. Looks like I get to restart this hat despite my best efforts.

Knitting A Gauge Swatch That Tells The Truth: The Results Are In

The sweater is washed and blocked. Did the different method of swatching tell the truth? Is my sweater the same size it was before washing? Yes and yes!  #knitting | withwool.com

I knit myself a sweater a few years ago and did all the things a “good” knitter is supposed to do. I knit a reasonably sized swatch on the same needles I was going to use for the sweater. I washed and blocked the swatch the same way I was going to wash and block the sweater. I liked the results and got gauge, so I cast on for the real thing. Said sweater was cute and fit perfectly until I washed it. Instead of the cute cropped cardigan I wanted, I ended up with an oversized sweater that I still wore and enjoyed. So not a total loss, but not really a success either. Blasted lying swatch.

Then a few months ago, I read an article which helped explain why my swatch didn’t react the same way as my sweater when it hit the water. Seeing as how I was about to knit a baby sweater, I decided to try out this different swatching method that skipped the garter edges and blocking pins for what seemed like very logical reasons. You can read all about the swatching attempts here and an update from when I was halfway though the sweater here.

A few notes before we get down to the knitty gritty: I did not knit this sweater all at once, but in bits and pieces over a few months. I knit it while watching tv and not watching tv. I knit it on the same needles I swatched with. I knit it when I was tired and when I was wide awake. I can’t remember if I knit it on road trips. All of this is too say that my gauge had the opportunity to change a lot during knitting even though the sweater was stockinette.

The sweater is washed and blocked. Did the different method of swatching tell the truth? Is my sweater the same size it was before washing? Yes and yes!  #knitting | withwool.com

I measured the stitch/row gauge and overall dimensions before dropping the sweater in the bath. Here are the numbers:

  • Stitch/row gauge (measured across the back): 29 sts and 38 rows = 4”
  • Stitch/row gauge of washed and blocked swatch: 28 sts and 37.5 rows = 4”
  • Sweater measurements across chest: 9.75”
  • Sweater length from neck cast on to body bind off: 11.5”
The sweater is washed and blocked. Did the different method of swatching tell the truth? Is my sweater the same size it was before washing? Yes and yes!  #knitting | withwool.com

I washed the sweater the same way as the swatch. I soaked them both in cool, soapy water (I like unscented Eucalan (<<— affiliate link!*)) for 20 minutes. I rolled them in a towel and squeezed out the excess water. Then I laid them flat to dry without pinning them down (this is one of the important parts of this swatching method). The only change I made when blocking the sweater was gently pulling the button bands and collar into place to make them lie flat and even up both sides. See what a difference blocking made to how neat and even the stitches look? After the sweater dried, this is what I found:

  • Stitch/row gauge (also measured across the back): 28 sts & 38 rows = 4”
  • Sweater measurements across chest: 10.25”
  • Sweater length from neck cast on to body bind off: 11.75”

Wow! The only gauge difference between the washed and blocked swatch and the washed and blocked sweater was half a row over 4”. The chest measurement changed too, but the stitch gauge changed to match the swatch so I’m calling it true. Overall, the length of the entire sweater only changed by .25” which could have happened for several reasons - me tugging out the edges, the ribbing growing, etc. I’m not worrying over an extra .25” on a baby sweater.

I also measured the sleeves. Their length and diameter stayed the same; however, I’m not counting this info towards the swatch experiment because they were knit in the round and not flat like the swatch.

I’d say this method of swatching - skipping the garter edging and not pinning the swatch into a rectangle - is the most accurate and truthful method of swatching I’ve ever tried. You can read about the full method and why it it works here. It’s definitely how I’m going to swatch for all my future sweaters and anything else that has to fit. Definitely give it a try.

I’m looking forward to seeing how truthful the swatches are when I knit a sweater for myself. I suppose that will be the true test, and I’m more than willing to give it a shot.

The sweater is washed and blocked. Did the different method of swatching tell the truth? Is my sweater the same size it was before washing? Yes and yes!&nbsp; #knitting | withwool.com

*This post contains an affiliate link which means, if you decide to buy through that link, I’ll get a small commission. My opinions are unbiased, my own, and formed after years of use. I wouldn’t recommend this soap if I didn't think it worked. Thanks!

Knitting A Gauge Swatch That Tells The Truth

#Knitting a gauge swatch is an important first step in making a sweater. So how do you make an accurate swatch? | withwool.com

This year’s knit list includes a sweater or two because I haven’t made very many of them, and I want to change that. I’ve only knit 1 sweater for myself in the *ahem* decade+ since I first learned to knit. It was the Amiga sweater, and it was cute and just the right size until I blocked it. Afterwards it was still cute, but had turned into an oversized cardigan. I definitely wore it, but it wasn’t what I set out to make or wear. I did all the things the knitting police said you’re supposed to do: knit a big swatch, used the same needles, and blocked the swatch the same as the finished sweater. I got gauge, or so I thought, but the swatch didn’t tell the truth. So for this first sweater of 2018, I’m taking a more rigorous and experimental approach to swatching. Instead of making just one swatch, I made three.

#Knitting a gauge swatch is an important first step in making a sweater. So how do you make an accurate swatch? | withwool.com

For swatch #1 I cast on enough stitches to equal 4” and a little extra for a garter stitch border. I added stripes as in the pattern and a section of 2x2 rib knit on smaller needles.  Then I washed and blocked the swatch the same way I would the finished sweater. The square was a little uneven at the sides so I pinned it out to straighten the edges. This first swatch answered a few different questions.

Would the dye bleed between the different colors? No.
Would I like knitting the fabric on the needles I had? Yes.
Would I like the fabric after washing and blocking? Yes
Did I like the stripe pattern? Yes
Did I have the right needles to knit the ribbing at a tighter gauge? Yes.
Did I get stitch and row gauge? No, my gauge was off on both counts.

#Knitting a gauge swatch is an important first step in making a sweater. So how do you make an accurate swatch? | withwool.com

With swatch #2 I was only trying to answer the gauge question. So I went down two needle sizes and tried again. Same stitch count. Same garter border. Same blocking method. This time my gauge was too tight. And I didn’t like the finished fabric - too stiff - or knitting it.

#Knitting a gauge swatch is an important first step in making a sweater. So how do you make an accurate swatch? | withwool.com

I didn’t cast on for swatch #3 right away because I didn’t have the right size needle. My needle collection has been lacking a 3mm circular for years and this was project the first reason I had to buy one. In between refreshing the package tracking, I happened to read this article on how to knit accurate swatches and how to keep them from lying to you. Contrary to a lot of what I’d read up to this point, the advice was to skip the garter stitch border and not pin the swatch at all during blocking. The article is definitely worth the read and explains the why’s behind all of these tips.

So I switched things up and followed the advice in the article: skipped the border, worked 6” worth of stitches instead of 4”, and plopped a swatch of stockinette in the sink to soak. I didn’t pin it out or even try to control the roll as it dried. Know what? I finally got both stitch and row gauge. The fabric was nice to knit and has good drape. Win win.

So why do I “trust” this method of swatching to tell the truth? It’s given me numbers and measurements that didn’t require pinning and pulling on the fabric. Plus, the accuracy for swatches knit with borders and pinned is far from 100%. There’s no reason to not try it out. And if the sweater does grow, at least it’s a baby sweater and a little extra room isn’t a bad thing. 

#Knitting a gauge swatch is an important first step in making a sweater. So how do you make an accurate swatch? | withwool.com

Since it seemed like I made an accurate swatch, I finally cast on for that sweater. It’s the Pacific Coast baby cardigan by Gabrielle Danskknit. It starts at the neck with a bit of ribbing before moving on to the stripes and raglan increases. My gauge is spot on. There’s still a lot of knitting to do before this beauty gets the blocking treatment, but I’ll let you know if gauge swatch #3 lied or told the truth.

Working Small and Fast with Handspun Samples

Working small and fast will tell you a lot about how to spin a specific yarn or for a big project. Like how to handle color, spin consistently, what to measure, and what not to do. | withwool.com

Time for an update on the epic green handspun project. When last we saw our fiber I shared why I bought this particular roving and my plans for sampling and spinning it. You can read more about that here. Our dashing roving has gone through quite a few transformations since then!

Okay, I’m ditching the transatlantic narrator accent, and getting back to business. I’ve learned a few things from spinning samples for this batch of handspun. The end goal is still the same: 500 - 600 yards of 2-ply fingering weight yarn that’ll look good as a lace shawl. I’m glad I started small and tested different techniques. Working fast and small let me refine the methods I’m going to use when I spin the real yarn.

Working small and fast will tell you a lot about how to spin a specific yarn. Like how to handle color, spin consistently, what to measure, and what not to do. | withwool.com

I had 3 questions I wanted to answer with the samples. How should I handle the color to prevent barber poles? How much fiber am I going to need to spin 500+ yards? How do I set up my wheel to consistently spin a fingering yarn? 

To keep the variables to a minimum, I used 5g of fiber for each sample with a more-or-less equal mix of light and dark green. I used the same ratio, 15.5 : 1 on the Schacht fast whorl, to draft and ply each sample. I set the twist and finished each skein with a 15 minute soak in cool water with Eucalan, and hung them to dry. 

Sample #1

Working small and fast will tell you a lot about how to spin a specific yarn. Like how to handle color, spin consistently, what to measure, and what not to do. | withwool.com

This first sample was my control and I did exactly what I don’t want to, spin a barber pole yarn. One ply was dark green and one ply was light green. It’s pretty and I like the variation of the light green ply, but it would only obscure a lace pattern. 

Sample #2

Working small and fast will tell you a lot about how to spin a specific yarn. Like how to handle color, spin consistently, what to measure, and what not to do. | withwool.com

Sample 2 is where I started changing things up. I split the roving down the middle to make smaller sections of color and pre-drafted the fibers. Then I held two strands of the roving together with the light and dark greens together. The photo below shows what this looks like. 

Working small and fast will tell you a lot about how to spin a specific yarn. Like how to handle color, spin consistently, what to measure, and what not to do. | withwool.com

I admit to being a little lazy on this sample because I spun just the one ply, wound it into a center-pull ball, and plied it with itself. So I’m not sure how much of the color variation is due to the dual drafting and how much is due to plying from a center pull ball. It also has way more twist than the other 2 samples because I had to fiddle with the ball to keep the plies evenly tensioned. All these factors considered, I think the color handling moved in the right direction.

Sample #3

Working small and fast will tell you a lot about how to spin a specific yarn. Like how to handle color, spin consistently, what to measure, and what not to do. | withwool.com

I wasn’t lazy this time and spun 2 separate plies. I split the roving in half and in half again to create even smaller portions of color. I gave dual drafting another try, making sure to pair light greens with dark greens as much as possible. The resulting yarn is much more even in tone and color. There are pops of light and dark, but the yarn reads as a semi-solid instead of a variegated. That’s a big difference from the original un-manipulated fiber. It’s also exactly the effect I was going for. 

Working small and fast will tell you a lot about how to spin a specific yarn. Like how to handle color, spin consistently, what to measure, and what not to do. | withwool.com

So I’ve got the color thing figured out. What about yardage and wheel set-up? My math tells me that I have more than enough fiber to spin the required 500 - 600 yards. As for wheel set-up, I’ve got the right ratios and tension to spin a fingering weight yarn so long as I’m careful. If I get lazy, it’ll turn into a sport weight like so many of my other attempts at spinning fingering weight yarn. That tells me I need to get better at measuring my plies during drafting. Jillian Moreno wrote some handy guides on the subject, A Spinner’s Compass: Measuring and Documenting Your Yarn and Keeping Track While Spinning and Lazy, that I’ll be using as guides. I’m specifically looking to measure ply diameter as well as twist and plying angle. So I’ve ordered a spinner’s control card and I’m making up an angle gauge to measure twist. 

There’s still one more step before I move on, swatching my samples. Seeing the yarn in the skein is one thing, and knitting with it is another. I’ll show you the results in the next progress report. 

And Now There's Swatching

Even when knitting swatch doesn’t work out the first time, there’s still plenty to learn from it. | withwool.com

I usually keep a knitting project in my bag for when I’m out and about, but not in the past few weeks. None of my other projects are suited for purse knitting. They’re too big, too complicated, or too bulky. So I’ve got to start something new so my bag doesn’t feel worryingly empty. 

I want to make a pair of mitts from my Sockhead leftovers but I can’t decide how just what I want the pair to look like. Plus it’s hard to design a pattern and write down the instructions standing in line at the grocery store. Socks, my usual travel project, aren’t all that exciting right now. What I really want to knit is another hat from fingering weight yarn. I even picked out a pattern, Regina by Alex Tinsley

Even when knitting swatch doesn’t work out the first time, there’s still plenty to learn from it. | withwool.com

Casting on willy-nilly for a fingering weight hat seemed like a bad idea so knit a small swatch last night. It went well until I started the pattern. I managed to muck up the lace on row 3. Not a good sign. And I definitely need a cable needle to work the cable twist. Plus, I’m not a fan of how firm the fabric is working up which means I need to go up a needle size or two. 

The swatch wasn’t a total waste though. The ribbing looks good and stretchy on the current needles which is a good start. I like how the yarn, Knit Picks Hawthorne Kettle Dye in Picnic, is working up too. It’s a good fit for the pattern and adds interest without overwhelming the lace and cables. 

After a bit more swatching with a larger needle or two, I’ll be able to cast on for real. The ribbing will be good purse knitting after all. Still not sure what I’m going to carry around in the mean time. 

Wander the Web 19

Marled-Chain-Ply-Yarn.jpg

Thanksgiving is sneaking up next week and I’m just sitting here with my Christmas knitting. 

The wooden Tryllemromler Installation looks like a giant strip of lace. 

Deconstructed Video Game Controllers by Ballen Photography - Part 1 & Part 2

A different take on the old fashioned Hot Chocolate Recipe

Why swatches (sometimes) lie.

How to Spin Variegated Top in Progression

Cauliflower with Brown Butter Crumbs

Partly Cloudy by Grant Snider 

Pooling Yarn and What To Do About It

BlueRide-Kaleidoscope_WarEagle1.jpg

It’s orange. It’s blue. It’s sock yarn and it’s been in my stash for years. I remember buying it way back when in 2009, folks. At the time, I wasn’t worried about how the colors would knit up because this yarn was going to socks. Simple socks too. Whether they were ribbed or plain stockinette, it didn’t matter if the colors pooled or flashed or did any other strange things. Skip forward 4 years to 2013 and the yarn that would be socks is going to be a shawl instead. That changes things a bit. Suddenly, how the colors knit up matters a lot. Pooling and flashing are things to be avoided at all costs. 

What exactly is pooling and flashing? Pooling is when colors clump together and knit up into big splotches, AKA pools or puddles, of color. Flashing is similar to pooling in that colors clump but will stripe and move around like a bolt of lightening in your knitting.

BlueRide-Kaleidoscope_WarEagle2.jpg

So, I swatched the yarn by casting on for a top down shawl just to see what the colors would do. Once I got a few rows into the pattern, there was pooling and puddling. Puddles so big you’d have to jump across them if you found them in a parking lot. Even then, you’d probably still end up in ankle deep water. So, I ripped out the shawl and started experimenting with different and easy ways to mess with the color repeats. 

The variegated yarn I’m using, Kaleidoscope, was dyed by Blue Ridge Yarns and has the very appropriate color name of ‘War Eagle’. Most of the skein is dyed with short repeats of orange and blue where each color is 3” - 4”. Then there is a long section where each color is 12” long.

THE FIRST SWATCH

VariegatedSwatch1.jpg


The first swatch and two other swatches were knit using the pattern below. Needle size was also the same except for the third swatch.

  • Cast on 40 stitches with the long tail cast on. 
  • Knit 4 rows of garter.
  • Knit 30 rows of stockinette.
  • Knit 4 more rows of garter and bind off.

The first swatch, knit on 2.75 mm needles, was knit to establish a baseline. It’s important to know how the yarn knits up if left to its own devices. Both colors make little pools but are interrupted by the longer sections of color. Certainly doesn’t look bad but what it doesn’t work for your project? First option, stripes.

THE SECOND SWATCH

VariegatedSwatch2.jpg

 Instead of knitting with one of the skein for the entire project, knit 2 rows with one end and 2 rows with the opposite end. If you have more than one ball of yarn, knit 2 rows with one ball and 2 rows with another ball. 

If the project is worked in the round, there’s one more option that is rather fiddly when knitting flat. Alternate the working yarn every row. You won’t have to worry about jogs or any of the other tell-tale signs of stripes since you’re working with the same colors. 

Switching the ends every 2 rows didn’t really work for this swatch since it created a textbook example of flashing; exactly what I’m trying to avoid. There is another option though.

THE THIRD SWATCH

VariegatedSwatch3.jpg

The third way to affect color in knitting: change the gauge. This last swatch is knit the same as the first but at a much larger gauge on 4mm needles. There’s a little pooling and a flashing but neither dominates the knitting. They kind of meld together to make a more cohesive whole. 

Just be aware that changing the gauge might not always work for a project. You could get away with adding 2 extra stitches per row to a garter stitch scarf. Adding or subtracting 2 extra stitches per 4” on a sweater is a recipe for disaster. So, if you like how a yarn knits up at a certain gauge don’t try to force the yarn and an incompatible pattern together. Find a different pattern that matches your preferred gauge and make something you truly enjoy.

CONCLUSION

The easiest options for combatting pooling and flashing in knitting are alternating the yarn ends every 1 or 2 rows and changing the gauge. All yarn is different, especially hand dyed yarn, and the only way to figure out the best option is to swatch. See what happens, experiment, and have a little fun with it. Don’t think of swatching as wasted knitting time. Swatching is like meeting someone new for coffee before going on a week long camping trip with them. There are some things you just need to know first.  


Swatches

CrochetSwatches1.jpg

I may or may not have watched a few video tutorials about crochet on CreativeBug.com. It started innocently enough. The hour was late. I was bored and looking for some entertainment. Yes, I watch how to videos for fun because I like learning and knowing how stuff works. Anyway, up to this point I had watched tutorials on making soap, double knitting, thrummed mittens, stamping, book binding, and whatever else looked interesting. One thing I hadn’t watched were the crochet videos. The first time, I had one eye on my knitting and one eye on the video. Something sparked my interest and, the second time around, I had a hook and cotton yarn in my hands.

CrochetSwatches2.jpg

Previously, all I knew about crochet was how to make a chain for a provisional cast on to use with knitting. I soon figured out how to hold the yarn and hook and set to working swatches. I practiced single crochet, double crochet, triple crochet, and even half double crochet. On other swatches I made spaces, increased, decreased, finished with a few rows of fan stitch. Thanks to this tutorial from The Dapper Toad, I got that whole Magic Circle thing to work but I’m sure I’ll still have look it up every time.

CrochetSwatches3.jpg

Crochet intrigues me because the resulting fabric is so different from knitting. Crocheted fabric is thicker and more structural. Crochet and knitting look nothing alike. After knitting for years, every row of crochet seems like binding off. It’s a fun thought even if it’s not necessarily true. With crochet, I want to make things that I would never consider knitting: sturdy baskets, trivets, mandalas, and cute little embellishments. The Bearded One is particularly excited about durable crocheted slipper soles. 

Surprisingly enough, I think learning to crochet has made me a better knitter. Crochet has given my hands a little extra training that should make continental knitting and two-handed color work much easier. If only knowing how to read a reading knitting pattern meant I could read a crochet pattern. They’re still greek to me. 

CrochetSwatches4.jpg