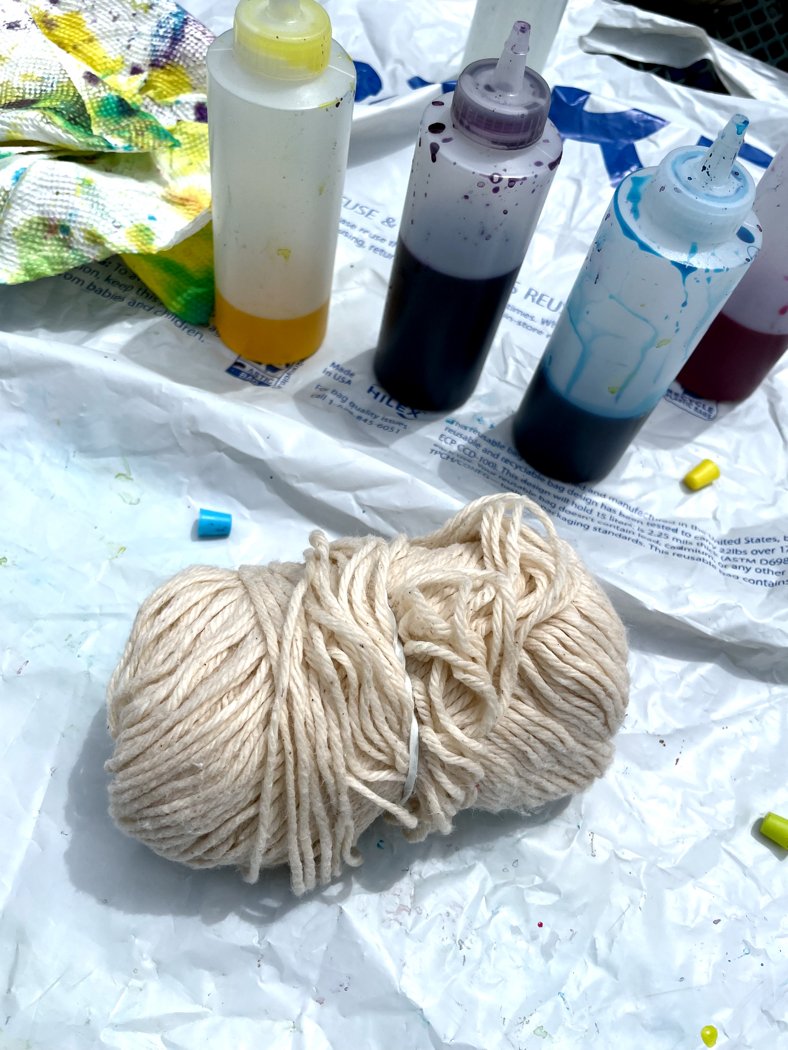
Fun With Tie-Dyed Yarn

I could only pass by the cotton yarn I tie-dyed (you can read all about that multi-step process here) for so long, before I couldn’t resist winding it up into a ball any longer. There had been plenty of time for me to pick out a pattern or two while I waited on this yarn to dry. Over the many years that I’ve been knitting washcloths and kitchen towels, I’ve definitely figured out what I like. Washcloths can be most any shape, lacey, or textured so long as they are just the right size. That sweet spot is about 7” (about 18cm) square. Kitchen towels I like long and narrow (around 8-9” [20-23cm]wide) so I can easily throw them over my shoulder or hang over the oven door handle. Even better if garter stitch is involved. Sounds boring to make, but hear me out. Garter stitch doesn’t curl, makes a thick fabric, and won’t have any annoying gaps in it (assuming you knit it at a tight-ish gauge). Plus, there’s so many ways to make a garter stitch kitchen towel look cool. It doesn’t have to be knit stitch across every row. Try mosaic knitting, entrelac, a log cabin motif, stripes, chevrons, or knitting on the bias. Throw solid and variegated yarns into the mix, and you’ve got a lot of possibilities to make a really great, functional kitchen towel. Didn’t expect to find my soap box just then, but there you go.

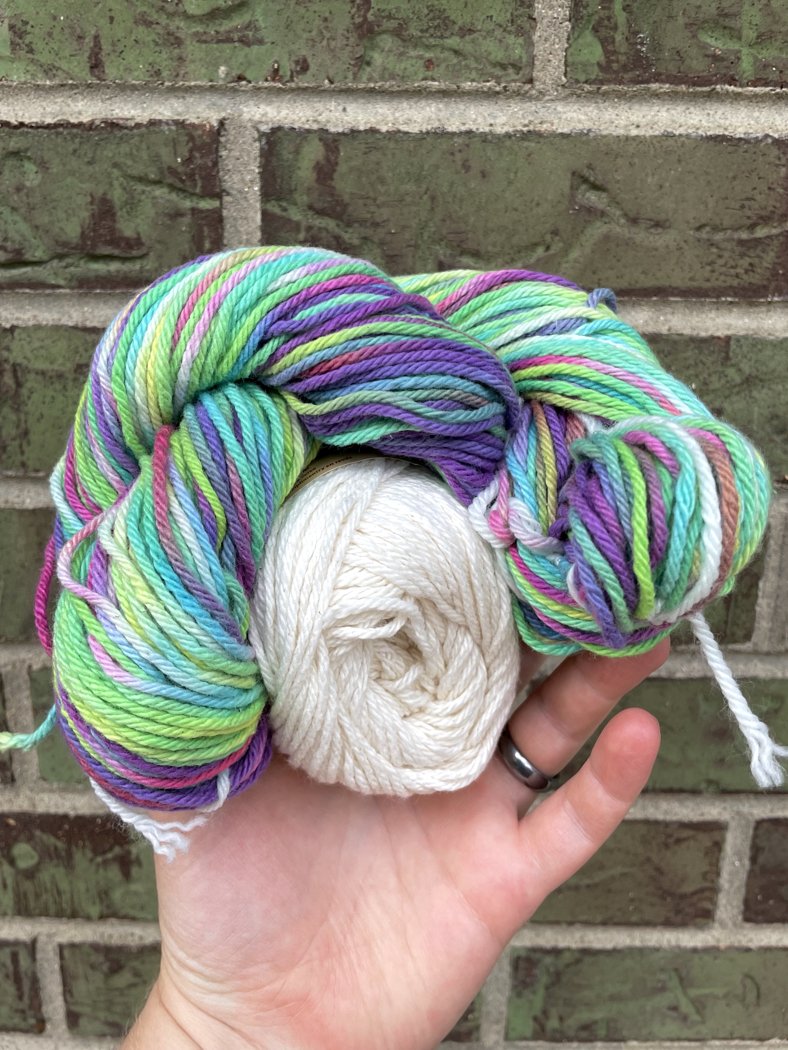
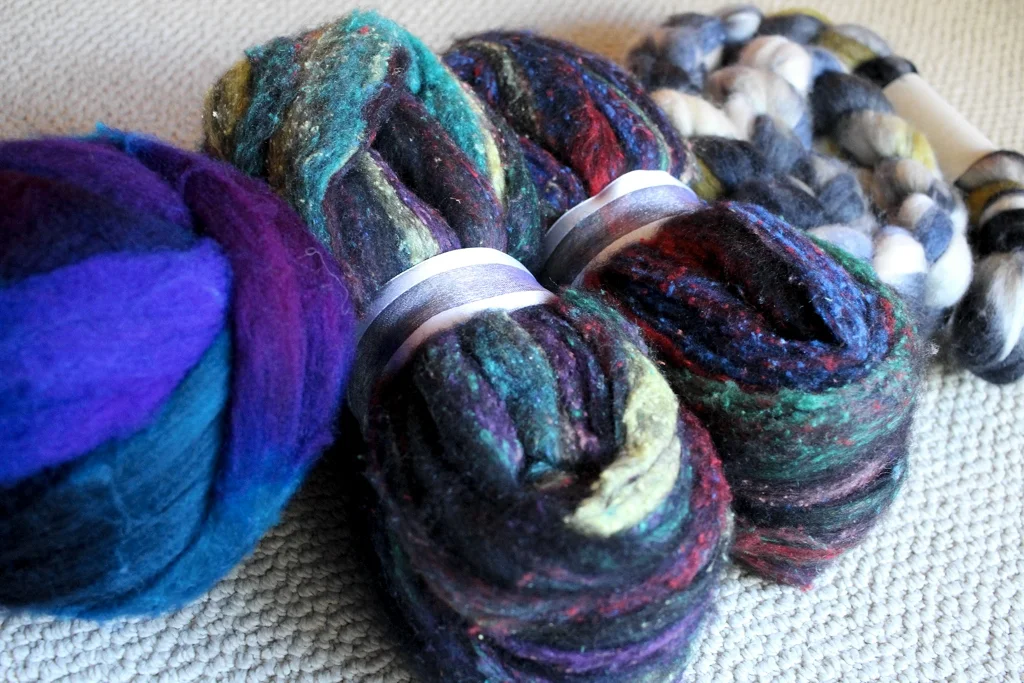
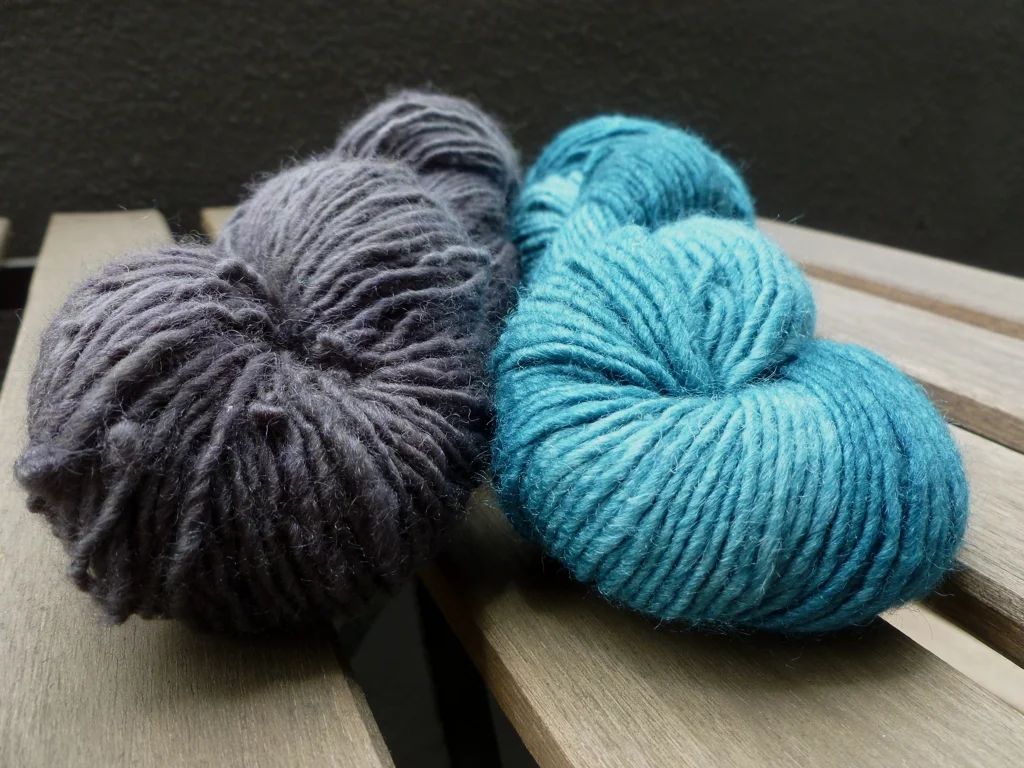
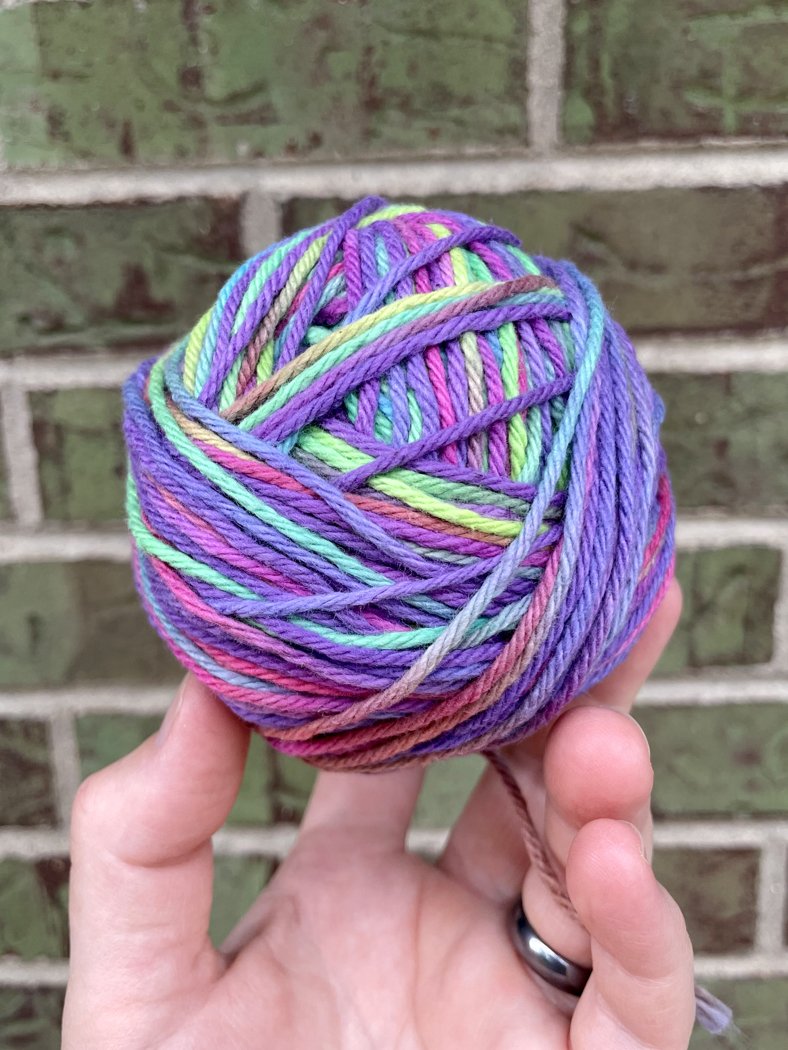
A hand holding up a skein of tie-dyed yarn and a ball of ecru cotton yarn.

My plan for this particular skein was to knit the Slip Stitch Dishcloth with this Lisa Frank-inspired skein and the ecru yarn. I’d get to see all the awesome colors, knit something fun from my queue, and use up some stash yarn. That’s all good stuff in my book.

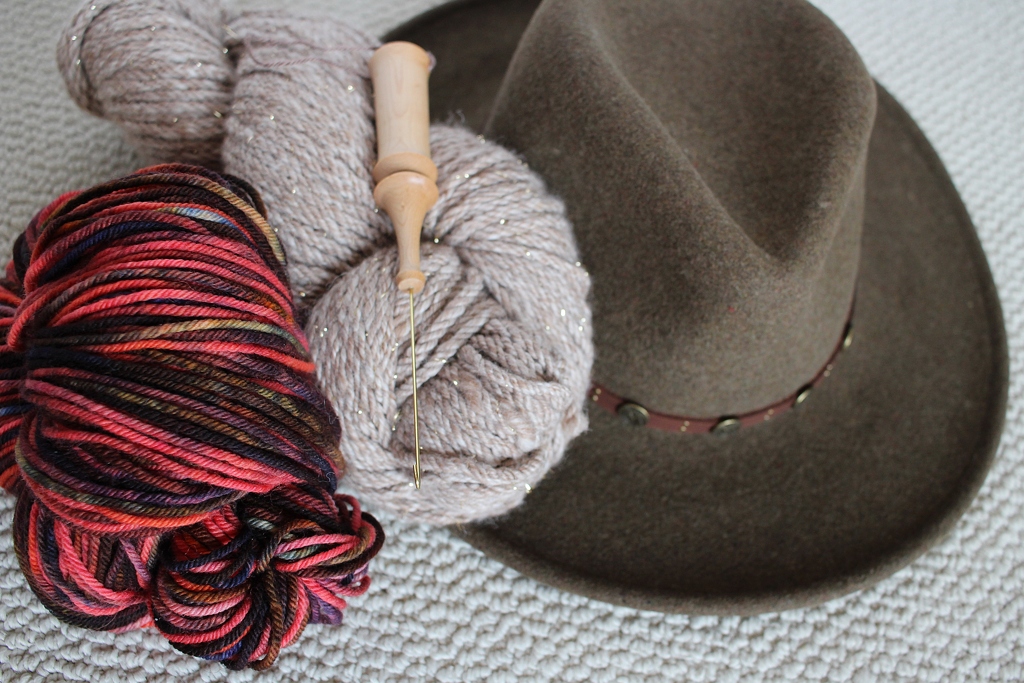
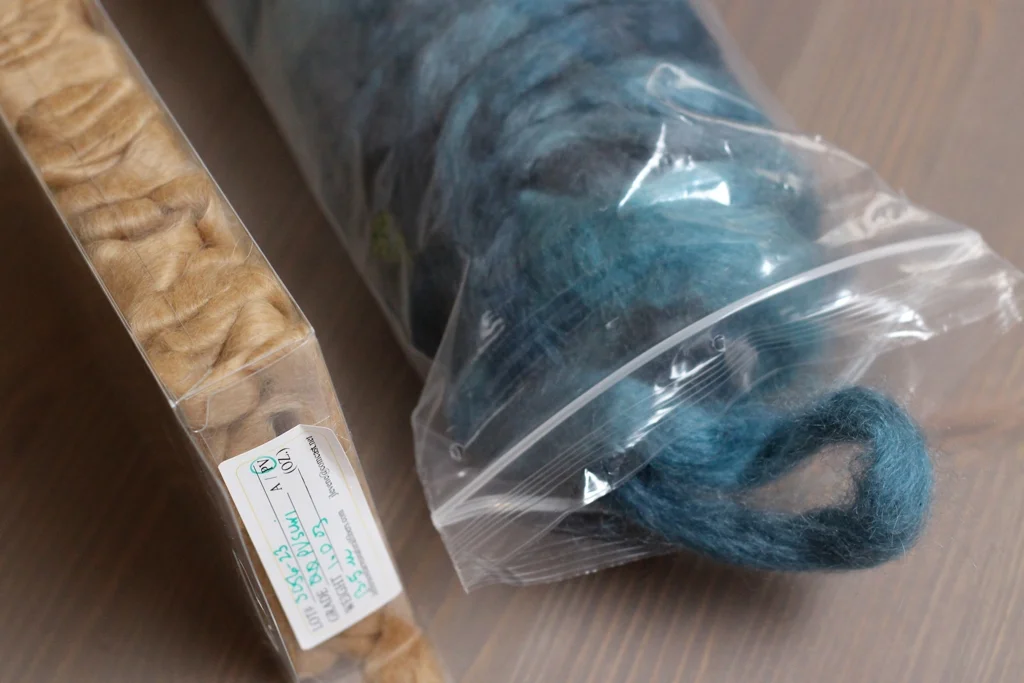
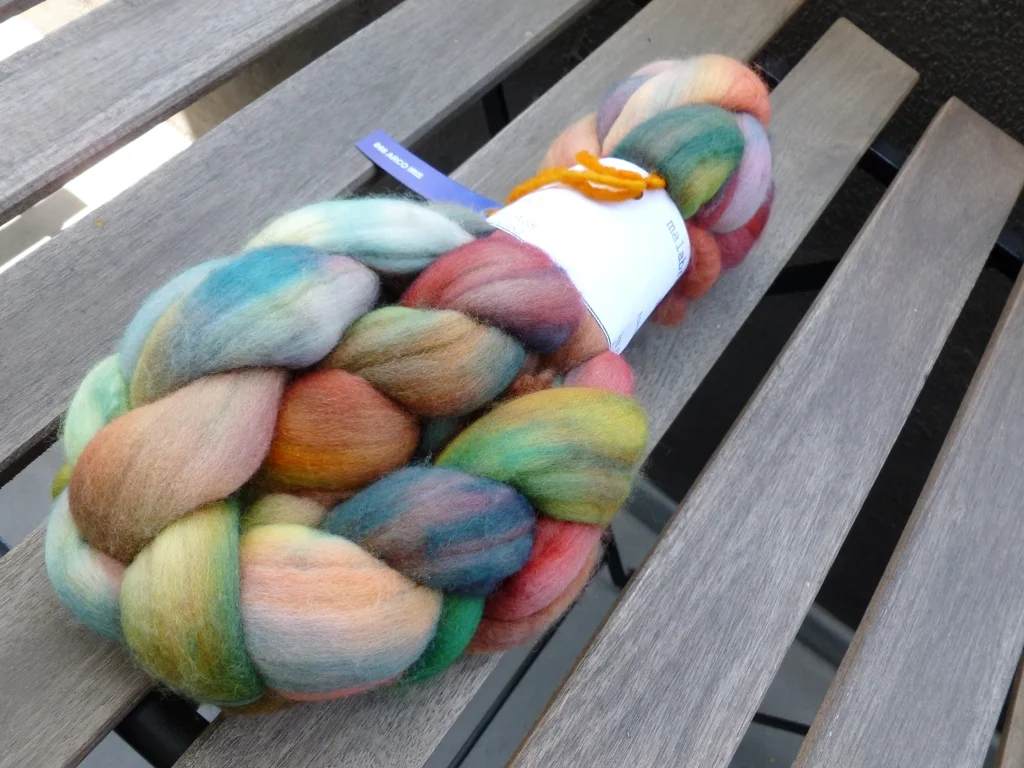
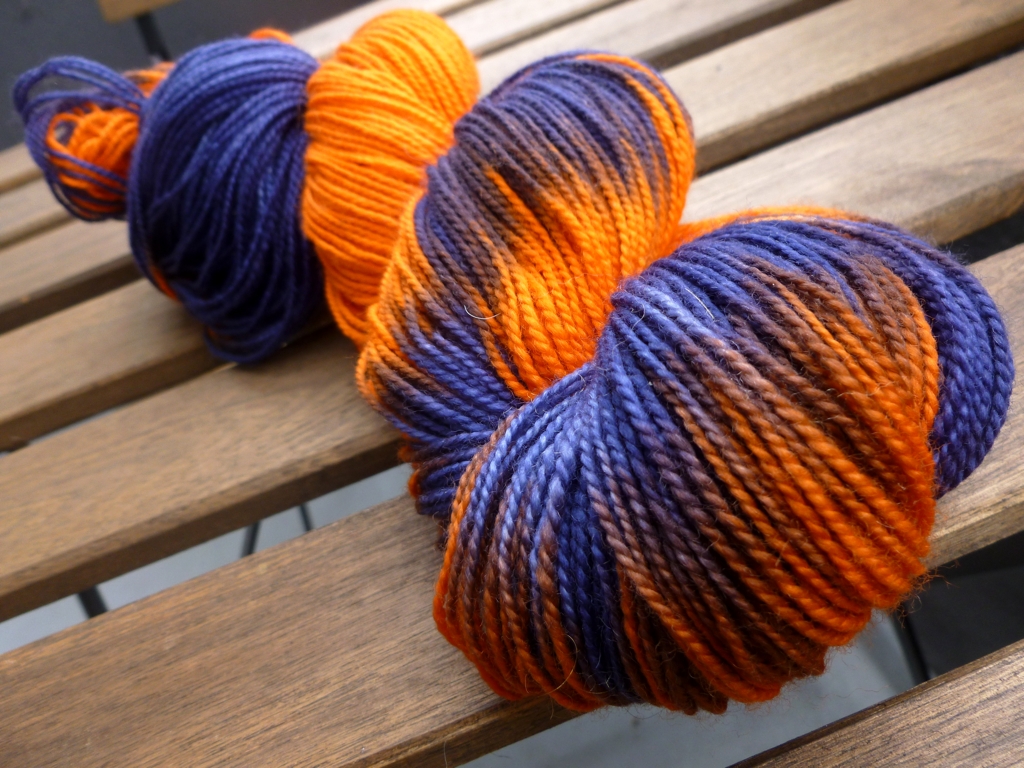
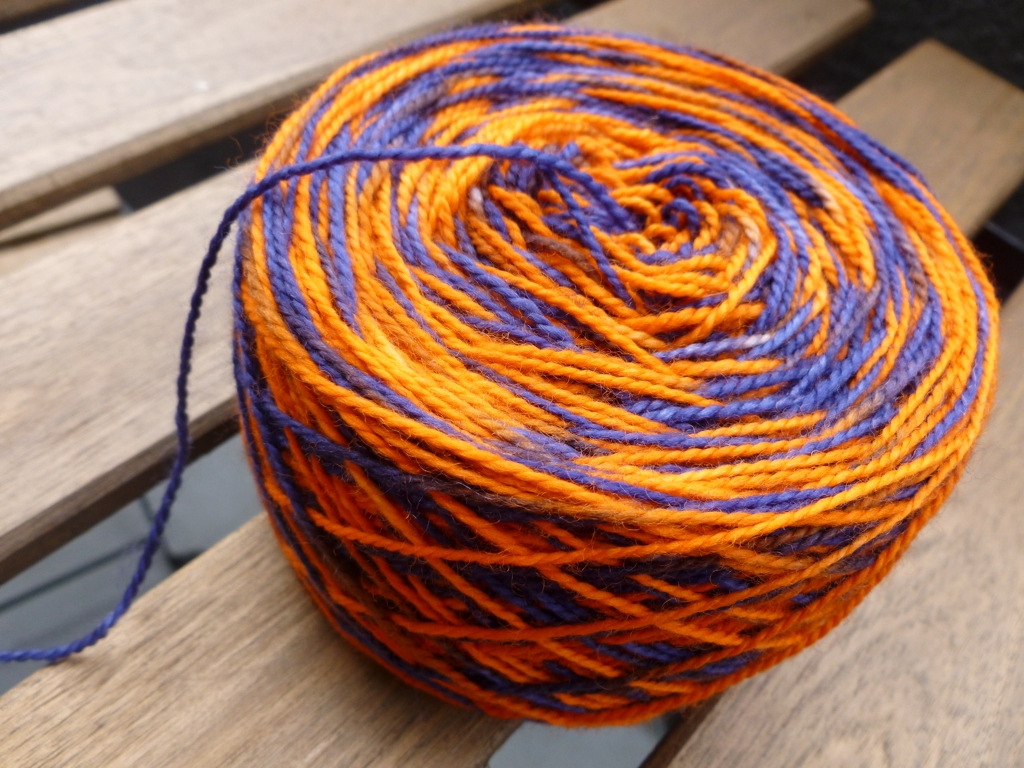
The skein of tie-dyed yarn wound into an equally pretty ball.

I wound the yarn by hand, a rarity for me, and am super happy I did. Even the ball is pretty, which made me even more excited to knit with it.

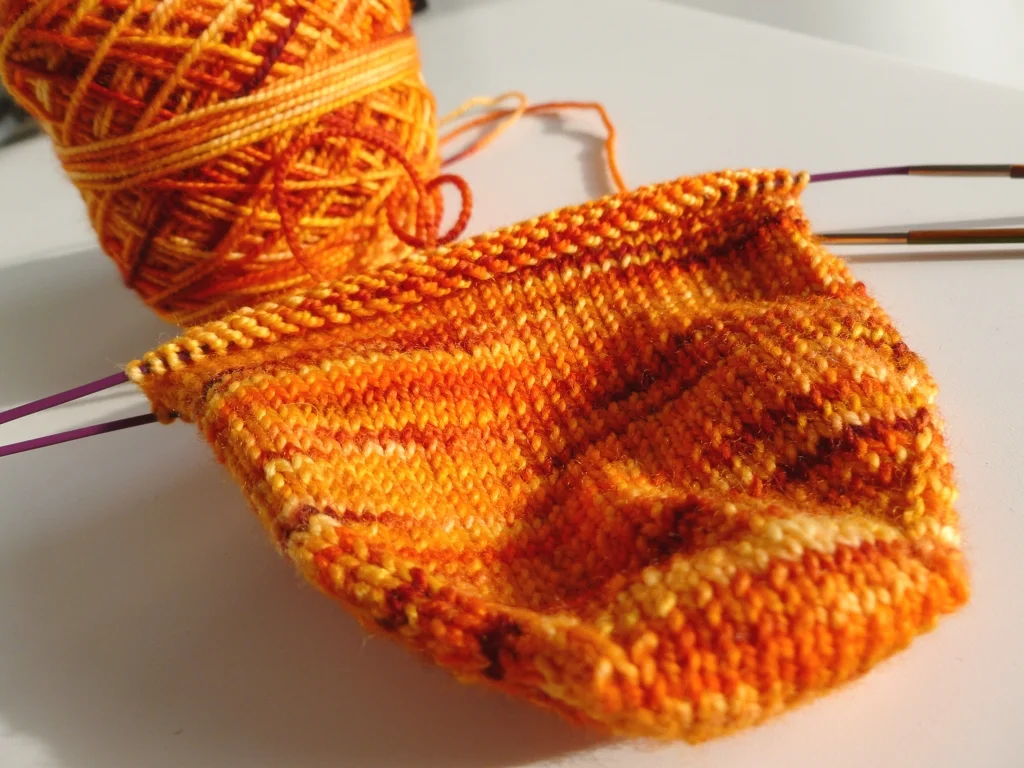
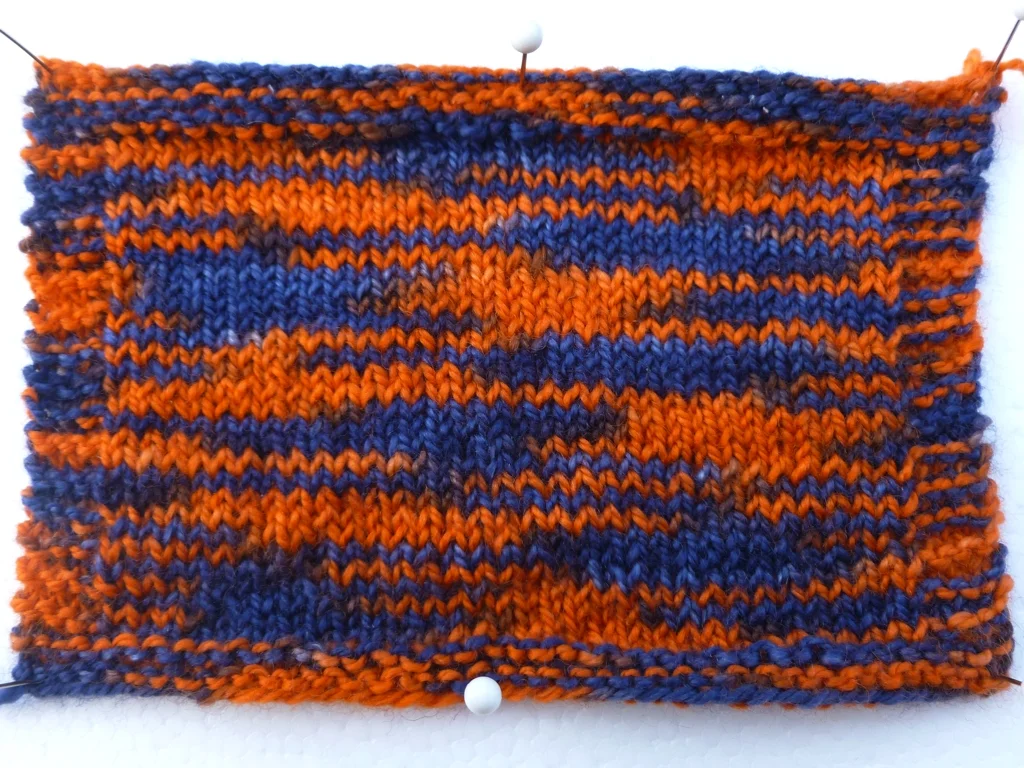
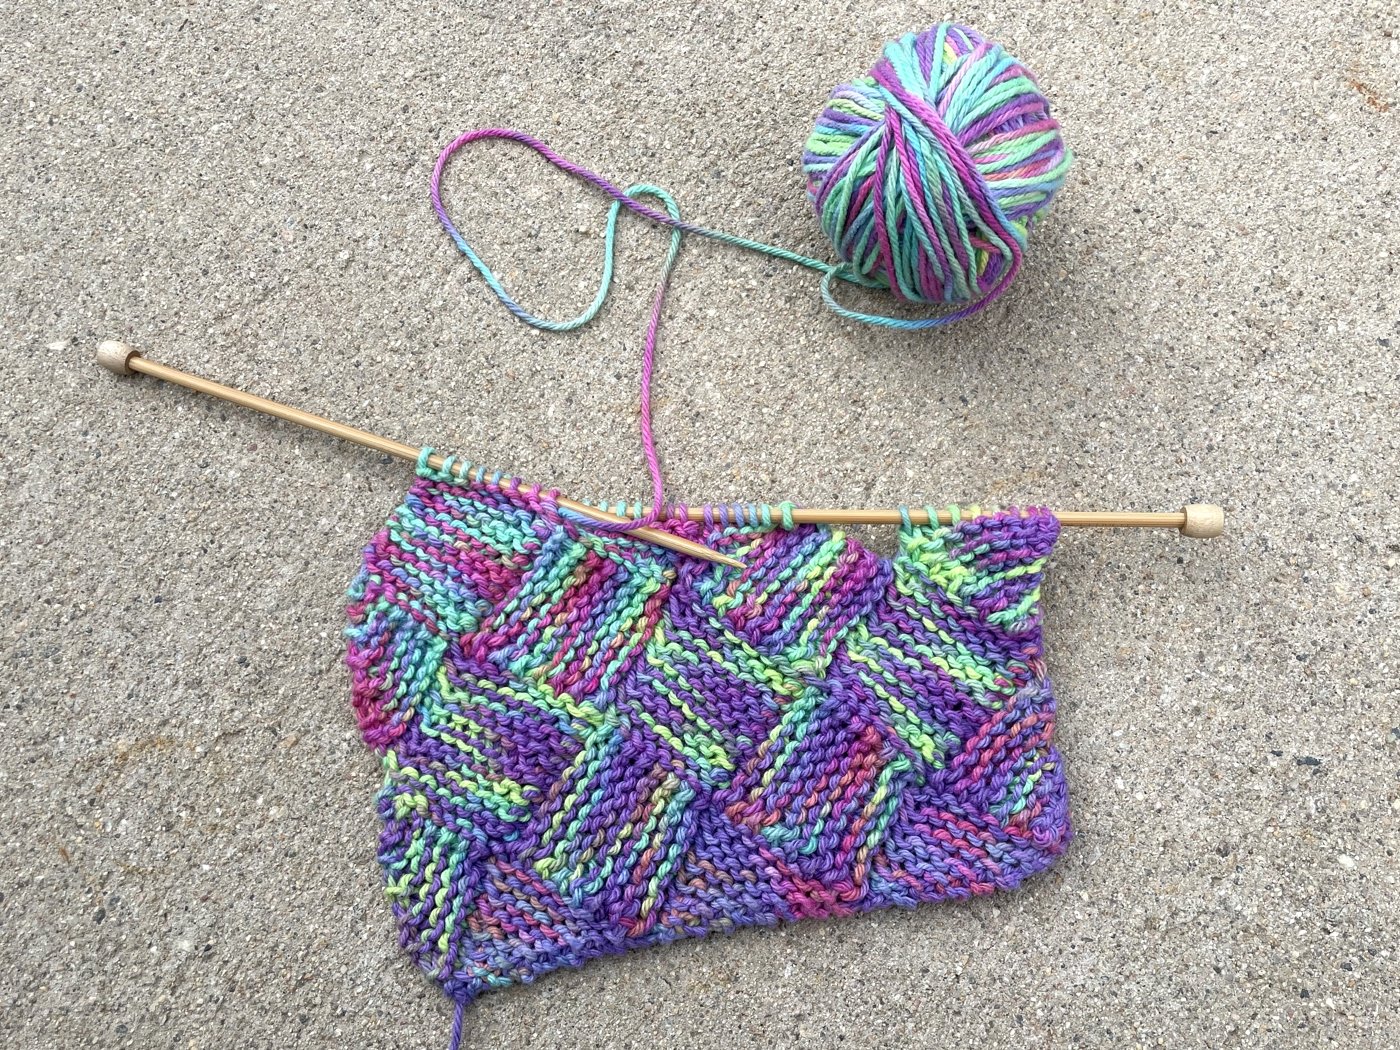
The first repeat of the Slip Stitch Dishcloth on the needle and sitting next to the balls of yarn.

So I cast on for the kitchen towel and knit the first repeat. And…meh. I usually like pairing a solid color with an over the top variegated yarn, but this just didn’t work. Knitting another repeat seemed like a waste of time which meant it was time to rip out the whole thing. Not even a little sad about it because I had another pattern in mind, The Garterlac Dishcloth(here’s a not Ravelry link). This will be the third time I’ve knit this pattern, and it’s great for showing off variegated yarn. Cast on when I had time to parse the directions and my previous mods. This time around, I’m completely smitten. The yarn gets to shine and I get to knit something really fun.

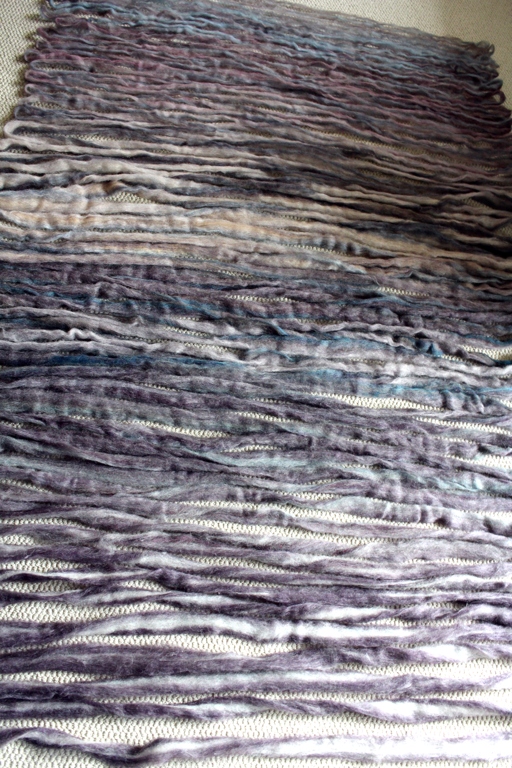
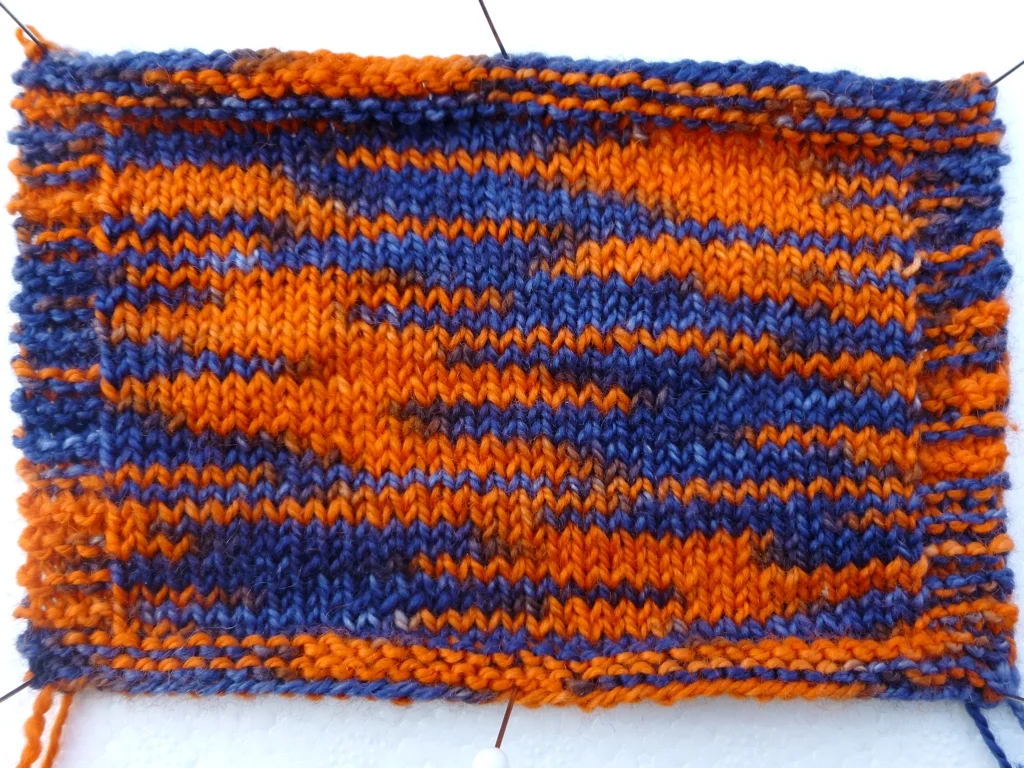
The first few repeats of the Garterlac Dishcloth on the knitting needles.

Just a few repeats in here and you can already see the ombre start with a deep purple and start fading to a more recognizable tie-die aesthetic.

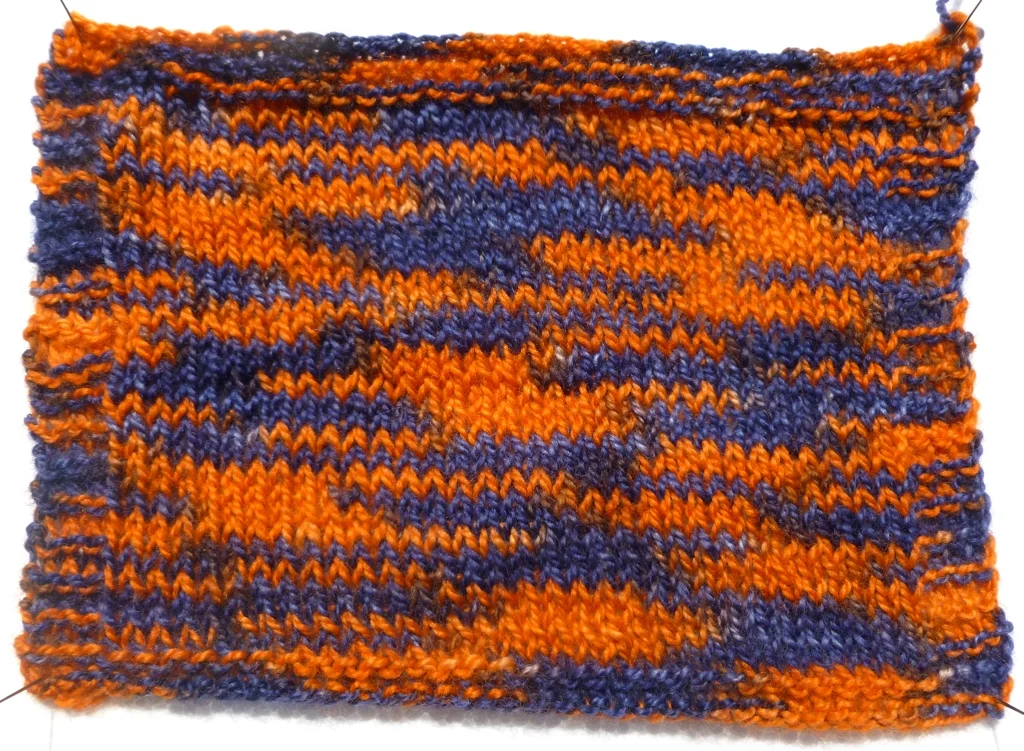
The almost finished Garterlac cloth with a noticeably curving shape.

I was happy to be knitting this (and I finally got the chance to watch The Bob’s Burgers Movie) that I kept on knitting through the weekend. I had a really hard time putting this WIP down. It wasn’t until I was working the top edge that I noticed something was a little off. Okay, way off. I know knitting can look a little wonky until it gets a good wash, but a trip through the washing machine isn’t going to fix this very skewed kitchen towel. That’s when I noticed this:

A close up of the towel with an outline around the messed up area with an extra square.

See this spot with the star? I added an extra square to one of the rows without realizing which threw off every row above it. Ugh. Explains that weird gap that was bothering me too. The Bearded One votes to leave it the way it is, but I just know that I’m going to go “ugh” every time I see it. I can’t not rip it out. Plus, I’m pretty sure I didn’t quite follow the instructions correctly for the first few rows anyway. And that wobbly side edge is bothering me too. This kitchen towel’s fate is sealed. On the upside, I get to knit this pretty yarn again. Can’t be angry about that. Still irritated about ripping it out though.

Adventures In Tie-Dyeing Yarn

A bare ball of cotton yarn sitting next to bottles of dye on a plastic work surface.

I’ve been slowly scribbling out a Summer Bucket List for the past few weeks. There’s a few of the usual things - making popsicles, going to the pool, having a picnic at the park - and tackling some tie-dye. The kiddo was all in when I suggested the idea, and helped pick out a few things cover in bright neons. There were bags, shirts, a dress, and yarn of course. I dug through the stash and pulled two balls of dishcloth cotton and the last few grams of cotton from a giant cone. Spoiler alert: I could have pulled out an extra ball or two.

I kept the yarn prep pretty minimal. I skeined the yarn from the cone and kept the balls as they were. My only attempt to keep the balls from tangling was to put a rubber band around the middle. Then everything got a soak in some warm water and Eucalan to wash off the leftover oils from the spinning process. That soak probably lasted about 45 minutes because I got distracted. So all the yarn was good and damp when I got to work on it.

Next came the fun part: dyeing! I used a Tulip One Step Tie-Dye Kit in Ultimate. I saved the yarn for last so I could use up any leftover dye.

A skein of cotton yarn dyed with blue, pink, and purple.

I swirled up the skein into a loose spiral before drizzling the dye over the top. Pink in the middle with purple and blue on opposite sides. Coiling it up ended up creating a lot of short sections of color which will look super cool in a washcloth.

A ball of cotton yarn dyed with green, blue, purple, and pink sitting next to a teal paper towel soaked with extra dye.

Another ball of cotton dyed with blue, green, pink, and purple.

The other two balls I drenched in dye. One half of a ball got a big chunk of color while the other half got smaller sections of different colors. I tried to get as much dye as I could in the center of the balls. Probably over did it with one because dye started pouring out when I picked up the ball. At least it was a pretty color. When I was done, each bundle of yarn went into its own bag.

A third ball of cotton dyed with blue, green, and yellow dyes that were several days old.

There was still a little bit of dye left, but I was out of yarn. I made a second trip to the stash a day or two later and prepped one more ball of cotton the same as the others. This ball did not get as thoroughly saturated with dye as the other balls, and I’m really curious to see how it turns out.

Washing the excess dye from the ball in the sink.

After the dye sat for about 24 hours - way more than the recommended 8 - I rinsed out as much of the excess dye as I could under cold water. The water was still running purple, blue, pink, and green after rinsing and and lots of squishing. So they got two baths with Eucualan. The first cold and the second hot.

The first soak with all the dyed yarn turned the cold water purple.

The water in this first cold bath was purple. And the bottom ball of yarn was just barely holding together. The second bath, and the third, were blue. Washing the third ball did exactly the same thing. In all the videos I watched about tie-dyeing yarn, no one mentioned how long or how hard it would be to rinse out the excess dye, especially when working with a yarn cake/ball. The general advice was rinse and skein the yarn to dry. That’s it. So, I had to experiment a bit to find something that worked.

Step 1: Drying the yarn. I so did not want to put a bunch of wet, dye-bleeding yarn on my swift. Thankfully, there was another option. I have a rack for the inside of my dryer that lets me dry stuff flat without tumbling it around. So, the yarn, even balls that were falling apart, went on the rack in the dryer. They didn’t get perfectly dry, but dry enough to not stain my wood swift when I wound them into skeins.

Step 2: Winding skeins. The only bit of yarn I dyed in a skein, was the only bit of yarn that wasn’t constantly bleeding more dye after multiple rinses. So, all the balls of yarn are getting turned into skeins of yarn.

The outer strands (top) and inner strands (bottom) of one of the dyed yarn balls.

This was my first chance to see how the inside of the yarn balls took up the dye! The outer most strands are on top with the inner strands on the bottom. As expected, the yarn from the outside of the ball has a deeper, more saturated color. The inner strands are more pastel, and remind me of a tie-dyed Easter egg. I’m not sure if this difference is because less dye reached the center or because the pre-soak wasn’t able to wash out as much of the spinning oils. Maybe a little of both? This gradient effect occurred across all three of the balls I dyed, no matter how much dye I used.

Step 3: One more rinse with the right soap. When I realized that just rinsing it with my usual soap wasn’t going to cut it, I ordered a bottle of Synthrapol, a special soap that catches any excess dye from yarn/fabric and suspends it in the rinse water.

By the time I got to washing and rinsing the yarn with Synthrapol a week later, I was wondering if I was being a little too cautious. Maybe the regular soap had washed the dye out already. Turns out, the extra steps were totally necessary. This is what the water looked like after soaking the yarn for 40 minutes in hot water.

All dyed yarn in a hot water rinse with Synthrapol. The water turned slightly blue.

This time, the water ran clear during a rinse with cold water.

Step 4: Hang it up to dry. Since I wasn’t worried about the yarn staining everything around it blue and purple, it went on drying rack. I rolled the yarn up in a towel and stomped on it a few times to squish out as much water was possible first, but that was all the special treatment it got this time around.

All four dyed yarns washed, dried, and put up in hanks.

The finished yarn looks like it’ll be fun to work with. The colors aren’t as eye-searingly bright and saturated as they looked before washing and rinsing which I’m actually really happy with. The muted (by comparison) tones are much more my jam. I’m also curious to see how well the color holds up after multiple trips through the wash.

Now that there are 4 finished skeins in front of me, would I use a tie-dye kit to dye yarn again? Yeah. I even have a second kit in a darker color palette when I’m ready to give it a go.

Will I dye yarn again in balls? Probably not. The yarn dyed as a skein was way easier to wash and finish than the yarn balls. The skeined yarn also had a more consistent color. I had hoped for a more even color through the whole ball - just with more blank spots in the middle - which was not what happened. The ombré effect is cool, sure, but not enough of a reason for me to go through the extra steps and hassle.

The other thing I would do differently next time is prep more yarn, even if there were a few skeins that didn’t get dyed. The yarn dyed with fresh dye has a deeper color than the yarn I dyed two days later at the end of the dyes’ life span. I’d also wash the yarn with Synthrapol from the first rinse and save a lot of time and water.

Dyeing yarn with a tie-dye kit was a fun experiment. It’s been a long time since I’ve dyed yarn, and it was nice to scratch that itch after so many years. Now I’m excited to knit all this up and make some cool new kitchen towels and washcloths.


This post contains an affiliate link which means, if you decide to buy through that link, I’ll get a small commission. Thanks!

Excited About Knitting Again

After spending so much time spinning yarn, I’m thrilled to be knitting with it again! | withwool.com

I have not touched my spinning wheel since Tour de Fleece. Well, that's not entirely true. I did move it to a different spot where I wouldn't trip over it all the time. After spinning everyday for more than 100 days, it's weird to realize that I haven't spun anything for weeks. Making yarn was such a big part of my routine, and now it's not. I'm sure I'll get back to my wheel soon, but all my creative mojo has gone towards using yarn instead of making it. I have been knitting so much recently. And planning a bunch of future knitting. I even started writing up my Christmas and holiday knit list. And we're only halfway through August!

I’ve finished and blocked both the Regina hat and the Feeling Groovy shawl. More on those later. 

After spending so much time spinning yarn, I’m thrilled to be knitting with it again! | withwool.com

I bought a sweater's worth of Cascade 220 Superwash Effects and the Ease sweater pattern! The package arrived this morning and I am positively smitten with the yarn. Can’t wait to get swatching.

I finished a swatch for a new design, but I haven’t figured out all the details. I'm not sure where to take the pattern next because I have many questions and ideas about what to try next. 

After spending so much time spinning yarn, I’m thrilled to be knitting with it again! | withwool.com

The Bearded One has been patiently waiting for a new pair of socks so I pulled out some yarn to make that happen. This is a long term purse project right here. I tried knitting him a pair of socks with this yarn before, but ripped them out for some reason. Hopefully, I’ll have better luck with the yarn this time around.

On the holiday knit list is a scarf for the Red Scarf Project. Probably going to knit another Melded Scarf and mix up the color scheme a bit. Red and blue, maybe? Or 2 different shades of red?

After spending so much time spinning yarn, I’m thrilled to be knitting with it again! | withwool.com

The most recent project on the needles is a new kitchen towel. Dug into the stash, pulled a couple balls of cotton out, and cast on for the Lizard Ridge Dishcloth. It's been a really fun knit, and now I really want to make the Lizard Ridge blanket

The Tour de Fleece yarn has been calling my name too. Pretty sure I’ll be casting on for a Boneyard Shawl soon, because why not?

I haven’t forgotten about my big spinning projects. There’s the 4 alpaca singles waiting on the bobbins, and writing up my notes so I can move to the next step of the Epic Green Spin. I’m really enjoying and excited about my knitting right now so I’m not rushing back to my wheel just yet. 

What about you? Is there a project you’re really excited about?

Estes Park Wool Market

I went to the Estes Park Wool Market and had a great time with yarn, sheep, and border collies. | withwool.com

Early this year I started putting together a list of 100 things I wanted to do. There are small things like riding my bike around town and big things like taking a trip to Yellowstone. I am no where close to even having 100 things I want to do written down, let alone completed, but a big chunk of that list is fiber arts related. No surprise, right? Well, I wrote “Go to a fiber festival” and I was finally able to do just that on Saturday at the Estes Park Wool Market.

I went to the Estes Park Wool Market and had a great time with yarn, sheep, and border collies. | withwool.com

There were sheep, goats, llama, and alpacas. Some of them really hammed it up for the camera.  

I went to the Estes Park Wool Market and had a great time with yarn, sheep, and border collies. | withwool.com

I tempted the Bearded One to come with me with the promise of herding dogs. We were able to see amazing Border Collies at work, and then we got to pet them! They were such a sweet bunch too. This handsome guy’s name is Bruiser.

I went to the Estes Park Wool Market and had a great time with yarn, sheep, and border collies. | withwool.com

There were so many venders with beautiful yarn and fiber, and I couldn’t resist enhancing the stash. I fell hard for 200 yards of bulky 100% alpaca spun together with metallic thread. So soft and cuddly. Then I broke from my usual color scheme and bought a wild variegated skein of pinks mixed with dark, muted colors by Traci Bunkers. And I got an awesome wool/bison felt hat from The Buffalo Wool Co. It kept the sun out of my face for the rest of the day. Looks good too. 

I went to the Estes Park Wool Market and had a great time with yarn, sheep, and border collies. | withwool.com

The last thing I bought was an orifice hook for my wheel. I’ve only been trying to find one that would comfortably fit my hand for literally years. I found this one at Clemes & Clemes. It’s made of hand turned maple with a long hook and a spot to attach a charm or lanyard. Tried it out when I got home and it’s perfect. 

Wool Market was a great first fiber festival and I’m looking forward to going again next year. Hopefully, I’ll remember to sign up for a class or two before the deadline. I’m also thinking about submitting a skein or two to the handspun competition.     

Saturday also happened to be World Wide Knit In Public Day. I made sure to get my knit on during a side trip to Rocky Mountain National Park. 

I went to the Estes Park Wool Market and had a great time with yarn, sheep, and border collies. | withwool.com

A Handspun Purple Gradient

8 handspun skeins, 6 ounces of roving, and 1 beautiful color gradient. I spent almost 2 months spinning this yarn, and it was worth the effort. | withwool.com

And done! The extra long purple gradient I’ve been working on since mid March is finally yarn and ready to knit. I tackled the last bit of spinning and plying last week, and got the handspun off the bobbins on Sunday. Then the later skeins got a bath to set the twist before I hung them up to dry. In fact the bigger skeins were still a wee bit damp when I took these photos.

8 handspun skeins, 6 ounces of roving, and 1 beautiful color gradient. I spent almost 2 months spinning this yarn, and it was worth the effort. | withwool.com

This felt like such a big project when I was in the middle of it. I usually spin 4 ounces at a time and keep it as one big skein. Working with 6 ounces and splitting it into 8 mini-skeins definitely changed things up. There was more upfront prep. More bobbins. More plying. More letting the twist rest overnight. More baths to set the twist (otherwise I would have mixed up the gradient order).  All that extra work tricked me into thinking it was a much larger project than it was.  An additional 2 ounces of fiber isn’t all that much, nor is 6 ounces anywhere close to a sweater quantity of handspun. When I look at the skeins all lined up, they still seem like a big project because I know just how much work, time, and brain space when into making them. Because of that, I’m proud of all 8 of these skeins. They’re the same weight and have the same finished texture. I feel like I can move onto bigger and more involved spinning projects now. Might not be all that long before I start spinning yarn for a sweater. Or a giant blanket.

8 handspun skeins, 6 ounces of roving, and 1 beautiful color gradient. I spent almost 2 months spinning this yarn, and it was worth the effort. | withwool.com

I really enjoyed spinning this fiber, and I wish I could remember the vendor I bought it from. All I know is that it’s wool and that it was one of the last things that caught my eye at Interweave Yarn Fest 2016. I wish I’d put all the details up on the Ravelry stash page when the info was fresh in my mind. Maybe I’ll find the receipt, but I doubt it. 

8 handspun skeins, 6 ounces of roving, and 1 beautiful color gradient. I spent almost 2 months spinning this yarn, and it was worth the effort. | withwool.com

Now for the technical details. Since it had been so long since I saw what was in the middle of the roving ball, I laid it all out flat. Wasn’t sure what I wanted to do before, but seeing the complete color gradient made my decision easy. I split the gradient into its 8 major color sections and wound them into nests, making sure to keep the colors moving in the same direction. I wanted to preserve the colors and variation within each section as much as possible so I decided to chain ply. 

I started with the smallest nest of fiber which just so happened to be at one end of the gradient. Then I treated this first skein as a sample to figure out how I wanted to spin the 7 other bigger skeins. You can read more about that process here.

Once I figured out which drafting method worked for the fiber and the finished yarn, the only thing left to do was to get spinning. This fortunately coincided with the start of #the100DayProject where I dedicated myself to making yarn everyday for 100 days. That little bit of daily spinning, even if it was only 10 minutes, really added up. And the 100 Day Project kept me spinning even on busy days when I would have skipped it otherwise. 

A post shared by April Klich (@aprilklich) on

Almost 2 months later, I’ve got about 560 yards of sport weight yarn. I’m sure that number shrunk when I set the twist, but there’s still plenty of yardage to make a cosy shawl. I have an idea in my head for what that will look shawl will like, and I’m almost ready to get that down on paper. I think it’s time to get swatching.  

Interweave Yarn Fest 2017 Haul

I had a blast at Interweave Yarn Fest 2017, and came home with some great goodies for the stash. | withwool.com

I made it 72 days without buying yarn or fiber for myself before breaking my Cold Sheep streak at Interweave Yarn Fest. Besides from 2 skeins I bought to knit a baby gift, all of my knitting and spinning has come from the great stash repository that is Yarn Fort.

I had a blast at Interweave Yarn Fest 2017, and came home with some great goodies for the stash. | withwool.com

So what did I get at Yarn Fest? Just the stuff that absolutely called out to me and that I had a plan for. I’m always enthralled by the colors in the Western Sky Knits booth and couldn’t walk away without at least one skein. Her grays are incredible, and how could I turn down lustrous green on a BFL/silk blend. They’re destined to be shawls or cowls. The skein on the right is Brown Sheep Lana Worsted and I couldn’t resist the colors. My first idea was that it would become a hat or mitts, but now I’m thinking about slippers. Either way, that yarn will turn into something cosy. The mini-skein kit I bought as a gift only now I want to keep it for myself. I’m still waffling about what to do about it. Knitting it up and giving that away counts too, right?

I had a blast at Interweave Yarn Fest 2017, and came home with some great goodies for the stash. | withwool.com

One of my main fiber buying goals was to find fiber to spin for a friend of mine. I couldn’t find the right colors though. Still found stuff for myself though, so I didn’t go home empty handed. In a big departure from my usual color picks, I bought a lot of black mixed up with bright colors. 8 oz is a Rambouillet/Columbia cross from Brown Sheep. 4 oz is a beautiful carded prep of Shetland, Alpaca, and silk noil, perfectly named Stained Glass, by The Natural Twist. My last pick is 8 oz of BFL and Tussah Silk. It was the first roving that caught my eye when I wandered the booths and I kept coming back to it. I had no plan for it, still don’t, but I’m not going to let it languish.

I had a blast at Interweave Yarn Fest 2017, and came home with some great goodies for the stash. | withwool.com

I got some not yarn too: two beautiful project bags from Sincere Sheep, a yew wood shawl pin, and buffalo/merino socks.   

All in all, I’m thrilled with what I got. And as someone doing the Cold Sheep thing, I regret nothing about my purchases. Going to Yarn Fest and other local fiber festivals has been part of my Cold Sheep plan from the beginning. I went knowing what I already had and what I wanted which really curbed the urge to buy all the things. Telling myself I didn’t have to spend every cent I brought helped too. The stash got some fresh new additions that I’m excited about and don’t feel overwhelmed by. That’s a win and the ultimate end goal of Cold Sheep for me.    

Going Cold Sheep

After coming to terms with the overwhelming enormity of my yarn stash, I’m going cold sheep. Going Cold Sheep | withwool.com

Let’s play a game called “Find The Knitter”.  

Done? Awesome. That’s my 5’6” self standing behind the majority of my yarn and spinning stash and I can only just see over the top. I’m not standing on my tippy-toes either. Had I piled on those WIP bags and roaming skeins, I’d be well hidden. 

Hello, my name is April and I have a yarn…storage problem. After several years of separation and a recent road trip, the bulk of my yarn stash, my recent yarn and fiber acquisitions, and I have finally been reunited. I knew I had a lot of yarn thanks to my Ravelry catalog, but I’d gotten a bit fuzzy about the exact scale of the stash. The boxes are currently stacked behind me and they make a rather impressive wall. All the clear tubs are full of yarn. The two bags at the very top are stuffed with handspun. The green bins are holding my fiber stash. Plus, there are those 3 bags of poly-fil I’ve picked up over the years. 

I’m glad to have it all but, honestly, it’s a bit overwhelming. Though I do like the idea of being able to build a literal yarn fort. Fort Yarn would be quite cosy too. That said, effective immediately, I’m going cold sheep. The only rule is don’t buy more yarn or fiber. I might give myself a few more rules and an exception or two as time goes on but not yet. 

I’m also trying to let go of the idea that I have to knit or do something with every skein and cone of yarn. It is perfectly okay to give the stash a good toss and donate/sell/give-away the yarn that I’m not in love with anymore. Like some of that stuff that I bought when I first started knitting and don’t want to use anymore. I want a well-curated stash off yarn and fiber that I can’t wait to play with, not something I feel obligated to use. 

Wish me luck and a bit of will power too.   

Frogging Day

Ripping out knitting get a bad rap, but it's worth the aggravation. - Frogging Day | withwool.com

The first half of the week was full of marathon knitting sessions. I worked up a lot of yarn but was still left with several tangle-prone balls. To save me from later headaches, I busted out the winder to rewind the yarn into tidier packages. The before and after is always super satisfying. That done, I decided to rip out a few projects I was never going to finish. First up was a striped cat that's been without a head for years. Then a pair of socks that had been waiting for me to turn the heels for at least a year. 

A video posted by April Klich (@aprilklich) on

I decided to film the sock frogging on a lark. Then I couldn't resist editing the video to make it look like it was magically knitting and frogging itself. I love living in the future.

Ripping out knitting get a bad rap, but it's worth the aggravation. - Frogging Day | withwool.com

When all was said and done, I'd reclaimed 3 balls of Koigu KPPPM, two balls of mystery yarn, 2 stitch markers, and my missing 2.0 mm circular. Ripping gets a bad rap, but this just goes to show that you can get good results - and more yarn - once you're past the aggravation. 

Ripping out knitting get a bad rap, but it's worth the aggravation. - Frogging Day | withwool.com

Before I put the winder away, there was one last skein to take care of. I picked up this skein of Happy Fuzzy Corrie Sock last year and have been trying to decide what to do with it. Well, its time has come and I've got big plans for this yarn. More on that soon. 

Yarn Storage - Boxes To The Rescue

Cardboard boxes to the rescue! I don’t have shelves yet, but these boxes will do the job until in the meantime. Yarn Storage - Boxes To The Rescue | withwool.com

Know what I had stacks of after I unpacked from moving? Boxes. Know what I had none of after unpacking? Shelves. 

I was so happy to get my yarn, spinning fiber, and tools unpacked that I was completely fine dumping it all out on the floor. The giant piles of yarn and fiber, pretty as they were, got old fast. What’s the point of unpacking if you still have to rummage around for 5 minutes to find something? So everything went back into the boxes with one big change.

I taped up the bottoms, pushed the top flaps in, and stacked the boxes along the wall. The boxes aren’t pretty - and are far from Pinterest perfect - but they’re functional which is what matters. There’s a spot for fiber and handspun. There’s room for notions, and yarn, and WIPs. There’s room for the bigger stuff like my Sidekick and yarn swift too. I even have a dedicated shelf for knitting and spinning books above the stack. I can see everything and get to everything. After years of having to having to put stuff wherever I could find the space, it’s amazing to have it all in one spot. I’ll get some real shelves eventually, but these boxes work perfectly for now. 

Interweave Yarn Fest 2016

I had an great time at Interweave Yarn Fest 2016 and my stash is pretty happy too. :) - Interweave Yarn Fest | withwool.com

Normally I hear about an interesting yarn/spinning convention/festival, find out it’s a day’s drive away, decide NOPE, and do my best to forget about it. Not this time. I’ve been looking forward to The Interweave Yarn Fest since I realized I’d be able to go without needing to spend a day in the car or book a hotel room. Unfortunately I wasn’t able to take any classes this year - and a few of them were really tempting - but that didn’t stop me from doing a little stash enhancement. 

I walked into the marketplace with a vague plan. I was looking for yarn and buttons for 2 projects and new types of fiber to spin. There was no shortage of yarn or fiber, but after doing my first walk around it was all fiber that really caught my eye. Then I got caught up in a whirlwind of yarn fumes until I escaped out the front door. I stuck to my shopping list, but looking at all of my fiber purchases now, I’ve realized that I bought something that satisfies every reason why I love to spin. 

I had an great time at Interweave Yarn Fest 2016 and my stash is pretty happy too. :) - Interweave Yarn Fest | withwool.com

I love trying my hand at spinning new fibers. I’ve spun lots of wool but only a few ounces each of cashmere and alpaca. So, one of my goals for this year is to expand my fiber repertoire, and now I’ve built the stash to do it. I’ve got yak/silk, llama/silk, and merino/silk. Apparently, I really wanted to spin silk this year and didn’t know it until now. The blue roving is 100% mohair. I even splurged on an ounce of ultra soft paco-vicuna. Looks like I’ve got a pretty full year ahead of me.

I had an great time at Interweave Yarn Fest 2016 and my stash is pretty happy too. :) - Interweave Yarn Fest | withwool.com

I love spinning color. I was walking by the 100th Sheep booth when I spotted this amazing blue and rust colored roving. There was no way those colors weren’t coming home with me. The 6oz of blended roving looked amazing spun up and I couldn’t resist it either. Note: The ball of roving is a big as my head.

I had an great time at Interweave Yarn Fest 2016 and my stash is pretty happy too. :) - Interweave Yarn Fest | withwool.com

I love learning new yarn constructions and new techniques. The handy Fiber Preparedness Kit packed full of punis, dyed locks, and roving seemed like a good way to branch out from my usual 2-ply. As for the firestar, there’s a drum carder coming my way and I want to make some sparkly batts. 

The market was also full of handspun and handspun-looking yarns. Inspiration and motivation was everywhere you looked. There was handspun with beads and coils. There was handspun that showcased color. There were absolutely gorgeous crepe constructed yarns that I want need to learn to spin. 

I had an great time at Interweave Yarn Fest 2016 and my stash is pretty happy too. :) - Interweave Yarn Fest | withwool.com

I love fun spinning and batts are fun spinning. This absolutely giant 8 oz batt (Ysolda’s Mousie for scale) fit the bill perfectly. I can’t wait to start tearing into that thing. 

I had an great time at Interweave Yarn Fest 2016 and my stash is pretty happy too. :) - Interweave Yarn Fest | withwool.com

I only bought 3 skeins of yarn and none of them were for projects on my list. One of them was a secret gift and the other two, well, I’m a sucker for beautiful grey -  Stone Walk by Western Sky Knits - and a good gradient - white to purple by OgleDesign. Enough said. 

Now that the yarn fumes have faded, I’m happy I went. I came home with yarn, fiber, ideas, a ton of inspiration, and even a pair of earrings. Looking forward to going back to Yarn Fest next year. Until then I’m going to keep an eye for other fiber events to go too. What are your favorite festivals?

How To Measure Yardage And Stop Playing Yarn Chicken

How to Measure Yardage and Stop Playing Yarn Chicken | withwool.com

The urge to finish all the things bit me hard in August. I’ve finished a sweater and a cabled scarf, and have moved on to the Norma Blanket that I cast on in 2012. Part of the reason Norma still isn’t finished is because I’m knitting the expanded version. The other reason is that I wanted to use every yard of nature’s brown Fisherman’s Wool I had in my stash. That’s a grand total of 1,860 yards and the expanded version calls for only 1,500 yards. 

Well, I finished the extended charts and still had a skein leftover which meant I had to chart the extra rows. But how many? To answer that question, I’ve been tracking my yardage. I use this trick a lot to figure out both how big I can knit something before binding off and when I need to stop to knit edging. It’s also pretty handy when you’re working on a pattern with growing repeats. Shawls, blankets, socks, sweaters, hats, and anything you can knit or crochet are all fair game.

How to Measure Yardage and Stop Playing Yarn Chicken | withwool.com

To track your yardage, you’re going to need a scale that can measure in grams. I use a basic digital kitchen scale.

How often you weigh your yarn depends on what you’re making:

  • If you’re making something where the stitch count stays the same, like a scarf, you only have to measure once. After you’ve cast on and worked a few rows, weigh the yarn ball, and knit a few more rows. 

  • If you’re making something small, - say a pair of stockinette socks or a hat - weigh, work at least 4 rows, and weigh the yarn again. The numbers will be more accurate over a larger number of rows than just one.

  • If you’re making something with a larger stitch count, like a shawl, you can knit a single row or pair of rows between weigh-ins. 

  • If making something with repeats, measure the yarn before and after working one repeat. Even if the repeats get larger as you go, you’ll have a better idea of the amount of yarn required. 

  • Weigh the yarn when the stitch pattern changes. A section of straight stockinette isn’t going to need the same about of yarn as a section of elongated stitches, cables, or slipped stitches.

  • Tracking yardage for projects where the stitch counts increase or decrease is a little more complicated. The good news is that, in most cases, the amount of yarn it takes to knit a row isn’t going to change that quickly. You don’t have to measure after every single row like I did for 100 or so rows of the Norma blanket. Maybe you measure yardage every 5, 10, or 15 rows. Just check regularly and keep your notes handy.

How to Measure Yardage and Stop Playing Yarn Chicken | withwool.com

Once you have the numbers, it’s time to do the math. There are two options. The first is a little easier and gives an estimate. The second is more precise but requires more math.

Option 1: Divide the grams of remaining yarn by grams per row. The answer is the max number of knit-able rows, including the bind off. Next subtract the bind off and number of edge rows, if any, from the max row number. That answer is how many rows to work before starting an edging or binding off. If you’re working a repeat, divide the number of workable rows by the number of repeat rows. 

As an example, here’s the math I did to find out how many more rows I needed to chart out for Norma. At the end of the chart I had 268 grams of yarn and was using 7-8 grams per row. Thanks to my meticulous measuring, I knew it would take a lot more stitches to need 9 or more grams per row.

268 grams / 7grams per row = 38.2 rows

268 grams / 8 grams per row = 33.5 rows

Since I’m going to be using more and more yarn with every row, I went with the 8 gram result which means 33 rows in the maximum I have yarn for. 

33 rows - 7 edge rows - 1 bind off row = 25 rows

25 rows / 8 rows per repeat = 3.1 repeats. 

So, I can knit 3 full repeats before starting the edging. Plus, I have a little wiggle room with the yardage, and hopefully not have to play yarn chicken during the bind off. 

How to Measure Yardage and Stop Playing Yarn Chicken | withwool.com

Option 2: Instead of working with row counts, this option focuses on finding stitches per gram. 

Why worry with the number stitches per gram of yarn? It’s great for estimating the yarn required for patterns where the stitch count changes from row to row. If you’re designing a pattern, you can use stitches per gram of a swatch to estimate how much yarn the pattern will need before you cast on. The only downside is that you need to have a fairly accurate stitch count. In the example below, stitch count could refer to the number of stitches per row, per repeat, or the number of stitches worked between weigh-ins. 

Stitch Count / Grams Worked= Stitches Per Gram

732 stitches / 7 grams = 104.5 stitches per gram

Armed with the number of stitches you can knit per gram and a spreadsheet of stitch counts, you can figure out exactly how much yarn a row, repeat, or bind off with need. Take the numbers with a grain of salt though because gauge changes and yarn isn’t always evenly spun. You can also follow the steps in the first method with stitches per gram as well. 

Wander the Web 54

Things are rapidly disappearing into boxes as The Bearded One and I prep to move home base to our new home. My spinning wheel is packed and ready to go but I still need to decide what knitting is going to stay in arm’s reach. See you on the other side when I have internet again. 

Inspiring, fun, thought-provoking, and crafty links to round out the week and jumpstart your brain.

Sheep to Sweater - I’ve wasted way too much time playing this game. It’s awesome. 

Frozen Almond Chai

Weaving on a metal rack - Fun idea!

How to Tie-Die Tissue Paper - Looks like an easy project but creates an amazing result. I wonder how this would work with fabric.

Urban Farming Classroom by Colorado Building Workshop

Simple Yarn Garland - A cute idea fro what to do with all those little leftover bits of yarn. 

What A Soldier Carries - Bristith military kit from the Battle of Hastings to Helmand.

Wander the Web 53

Inspiring, fun, thought-provoking, and crafty links to round out the week and jumpstart your brain.

Travel “By The Silent Line”, an abandoned Paris rail line; by Pierre Folk

Not a tutorial but an excellent Steek 101 from Kate Davies

Time Spent Consuming vs. Creating

If I knew this cabin was waiting for me, I’d go skiing. 

A behind the scenes look at Kramer yarn mill.

Art On The Loose; London’s National Art Gallery hid 45 replicas of their most famous paintings around London. Wouldn’t it be fun to track them all down? 

I’ve been blogging for 8 years. Pretty great, especially the part about shouting into the void. (via Elise Blaha)

I’m a sucker for good sorbet. This recipe just happens to be from Alton Brown and involve watermelon.

Corrections; Hits close to home.

Wander the Web 46

Inspiring, fun, thought-provoking, and crafty links to round out the week and jumpstart your brain.

 Take a peak into a 1950’s sewing cabinet

How to wind yarn into a center pull ball; a handy trick when you don’t have a winder handy

Love this textured summer braid

The 3-Dimensional Weaving Machine

These stitched leaves by Hillary Fayle are amazing. 

Surprise Stash

Last week, entirely of his own free will, The Bearded One went to a yarn shop to buy me an anniversary gift. That’s love for you. The people working there made sure he knew all about the shop’s return policy. Don’t worry, yarn shop people, he knows what I like and I’m not returning a single thing.

The first thing I unwrapped was a bump of Malabrigo Nube in Arco Iris. It is unbelievably soft and the colors are lovely. Can’t decide if I should spin it up as soon as the current proto-yarn is finished or wait until Tour de Fleece. Should probably figure out what I want the end project to be first. Cowl? Shawl? Hat?

Next up, 2 skeins of Malabrigo Silky Merino. Just like the Nube, it is ridiculously soft and the colors are wonderful. The added silk gives the yarn a beautiful luster. Couldn’t help perusing Ravelry to find the perfect pattern and I didn’t need to search long. The Duotone Cowl is a simple striped cowl that’ll show off the yarn and be great mindless knitting. Really, I’m surprised I haven’t cast on already.

Wander the Web 35

Will Rogers State Beach

Will Rogers State Beach

Fun and interesting links from the week.

Labyrinth Room Series by Matthew Borrett

The hand embroidery on this quilt label is wonderful.

The amazing Pinch Library and Community Center in Yunnan, China.

A brief tour of the Ístex Fiber Mill.

It’s so interesting to look into other people’s Bullet Journals.

Create Marled Yarn with Chain Plying

How To Chain Ply Variegated Yarn To Create Marled Yarn | withwool.com

Ever fallen hard for a skein of variegated yarn? Yarn that’s beautiful in the skein, but, when knit, turns into a pooling and flashing mess. There are several ways to combat pooling yarn. You can stripe with another yarn or knit from alternate ends every 2 rows. You can change the gauge or slip stitches or do all manner of finicky things. What happens when none of that works and you’re ready to stuff into the very back of the closet?

How To Chain Ply Variegated Yarn To Create Marled Yarn | withwool.com

I had about reached that point with a beautiful skein of orange and blue fingering weight yarn. The reason it didn’t end up forgotten in a closet was because my closet isn’t that big. Besides, my yarn stash is a bit too small to intentionally lose yarn. I tried tons of different tricks to get the colors not to pool but nothing really worked. I was about to move along to another project and a solid yarn when I came across Amy Christoffer’s Moxie Pullover. The sweater is knit with two different colors of yarn held together to create a lovely marled fabric. Why not ply that stubborn skein to create a marl? 

How To Chain Ply Variegated Yarn To Create Marled Yarn | withwool.com

After starting a movie, I sat at my wheel and decided to chain-ply the yarn instead making a 2-ply. Didn’t want to risk the color repeats matching up in a 2-ply and creating a thicker yarn with the exact same pooling problems. Less than an hour later, I had a wonderful marled yarn that I wanted to knit with instead of intentionally misplacing. 

Short and Sweet Directions for Chain-Plying Marled Yarn

How To Chain Ply Variegated Yarn To Create Marled Yarn | withwool.com

1. Figure out which way the yarn is plied. Commercial yarn is usually plied to the left, S twist, so you’ll need to chain ply to the right, Z twist. If you’re plying a single, spin to the left.

2. Wind the yarn into a center-pull ball.

3. Chain-ply. Use a wheel or a spindle, both work just fine. 

4. Once your finished plying, let the yarn rest for a day so the twist can settle into the yarn.

How To Chain Ply Variegated Yarn To Create Marled Yarn | withwool.com

5. Wind the yarn into a skein.  Never mind the crazy tendrils.

6. Soak the skein in a cool water bath with wool wash or gentle soap. Rinse carefully if the yarn isn’t superwash.

7. Hang to dry.

How To Chain Ply Variegated Yarn To Create Marled Yarn | withwool.com

Now the yarn is ready to be wound and knit up into marled goodness. FYI, chain plying will reduce the yardage by a third. This fingering yarn’s original 400 yards turned into about 133 yards of aran weight. So, instead of socks or a shawl, there’s enough yardage to knit a slouchy hat or a small cowl or fingerless mitts. Could even squeak out a small pair of slippers.  Bring on the marl!

How To Chain Ply Variegated Yarn To Create Marled Yarn | withwool.com

Pooling Yarn and What To Do About It

BlueRide-Kaleidoscope_WarEagle1.jpg

It’s orange. It’s blue. It’s sock yarn and it’s been in my stash for years. I remember buying it way back when in 2009, folks. At the time, I wasn’t worried about how the colors would knit up because this yarn was going to socks. Simple socks too. Whether they were ribbed or plain stockinette, it didn’t matter if the colors pooled or flashed or did any other strange things. Skip forward 4 years to 2013 and the yarn that would be socks is going to be a shawl instead. That changes things a bit. Suddenly, how the colors knit up matters a lot. Pooling and flashing are things to be avoided at all costs. 

What exactly is pooling and flashing? Pooling is when colors clump together and knit up into big splotches, AKA pools or puddles, of color. Flashing is similar to pooling in that colors clump but will stripe and move around like a bolt of lightening in your knitting.

BlueRide-Kaleidoscope_WarEagle2.jpg

So, I swatched the yarn by casting on for a top down shawl just to see what the colors would do. Once I got a few rows into the pattern, there was pooling and puddling. Puddles so big you’d have to jump across them if you found them in a parking lot. Even then, you’d probably still end up in ankle deep water. So, I ripped out the shawl and started experimenting with different and easy ways to mess with the color repeats. 

The variegated yarn I’m using, Kaleidoscope, was dyed by Blue Ridge Yarns and has the very appropriate color name of ‘War Eagle’. Most of the skein is dyed with short repeats of orange and blue where each color is 3” - 4”. Then there is a long section where each color is 12” long.

THE FIRST SWATCH

VariegatedSwatch1.jpg


The first swatch and two other swatches were knit using the pattern below. Needle size was also the same except for the third swatch.

  • Cast on 40 stitches with the long tail cast on. 
  • Knit 4 rows of garter.
  • Knit 30 rows of stockinette.
  • Knit 4 more rows of garter and bind off.

The first swatch, knit on 2.75 mm needles, was knit to establish a baseline. It’s important to know how the yarn knits up if left to its own devices. Both colors make little pools but are interrupted by the longer sections of color. Certainly doesn’t look bad but what it doesn’t work for your project? First option, stripes.

THE SECOND SWATCH

VariegatedSwatch2.jpg

 Instead of knitting with one of the skein for the entire project, knit 2 rows with one end and 2 rows with the opposite end. If you have more than one ball of yarn, knit 2 rows with one ball and 2 rows with another ball. 

If the project is worked in the round, there’s one more option that is rather fiddly when knitting flat. Alternate the working yarn every row. You won’t have to worry about jogs or any of the other tell-tale signs of stripes since you’re working with the same colors. 

Switching the ends every 2 rows didn’t really work for this swatch since it created a textbook example of flashing; exactly what I’m trying to avoid. There is another option though.

THE THIRD SWATCH

VariegatedSwatch3.jpg

The third way to affect color in knitting: change the gauge. This last swatch is knit the same as the first but at a much larger gauge on 4mm needles. There’s a little pooling and a flashing but neither dominates the knitting. They kind of meld together to make a more cohesive whole. 

Just be aware that changing the gauge might not always work for a project. You could get away with adding 2 extra stitches per row to a garter stitch scarf. Adding or subtracting 2 extra stitches per 4” on a sweater is a recipe for disaster. So, if you like how a yarn knits up at a certain gauge don’t try to force the yarn and an incompatible pattern together. Find a different pattern that matches your preferred gauge and make something you truly enjoy.

CONCLUSION

The easiest options for combatting pooling and flashing in knitting are alternating the yarn ends every 1 or 2 rows and changing the gauge. All yarn is different, especially hand dyed yarn, and the only way to figure out the best option is to swatch. See what happens, experiment, and have a little fun with it. Don’t think of swatching as wasted knitting time. Swatching is like meeting someone new for coffee before going on a week long camping trip with them. There are some things you just need to know first.