Pattern: Mosaic Sisters

Colorful and geometric, the Mosaic Sisters are textured mosaic knit cloths perfect for the kitchen or the bathroom. Each cloth is made with garter stitch and slipped stitches that are simple to knit, but create complex patterns. All of the sist…

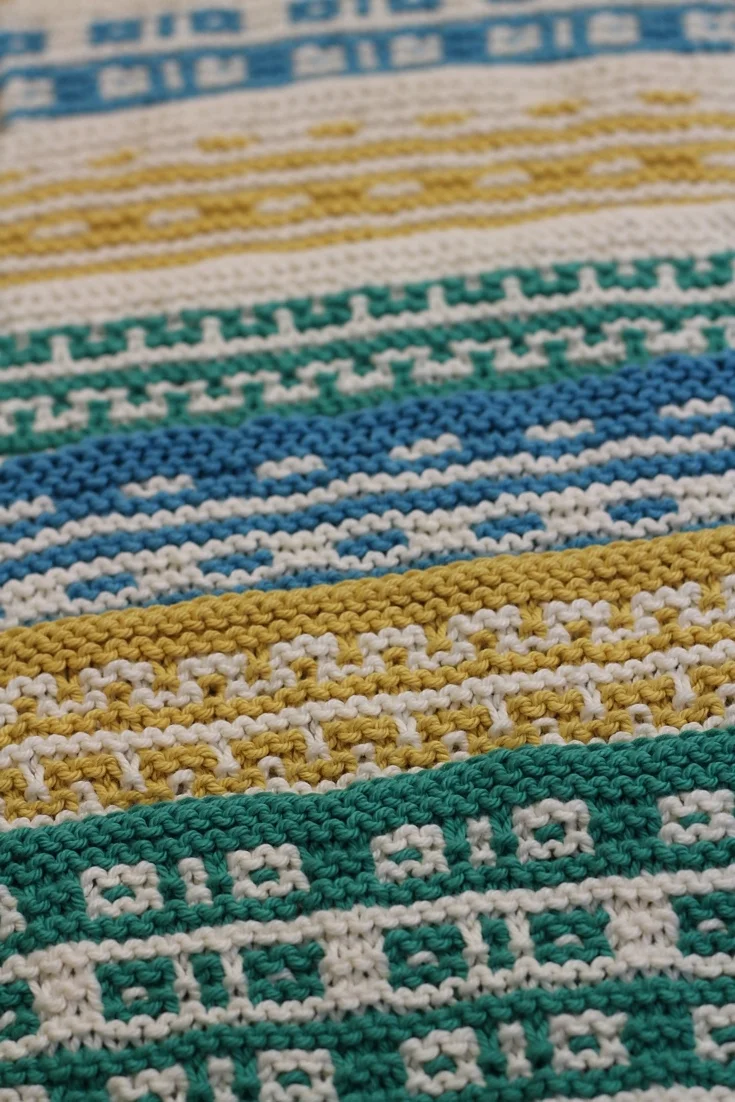
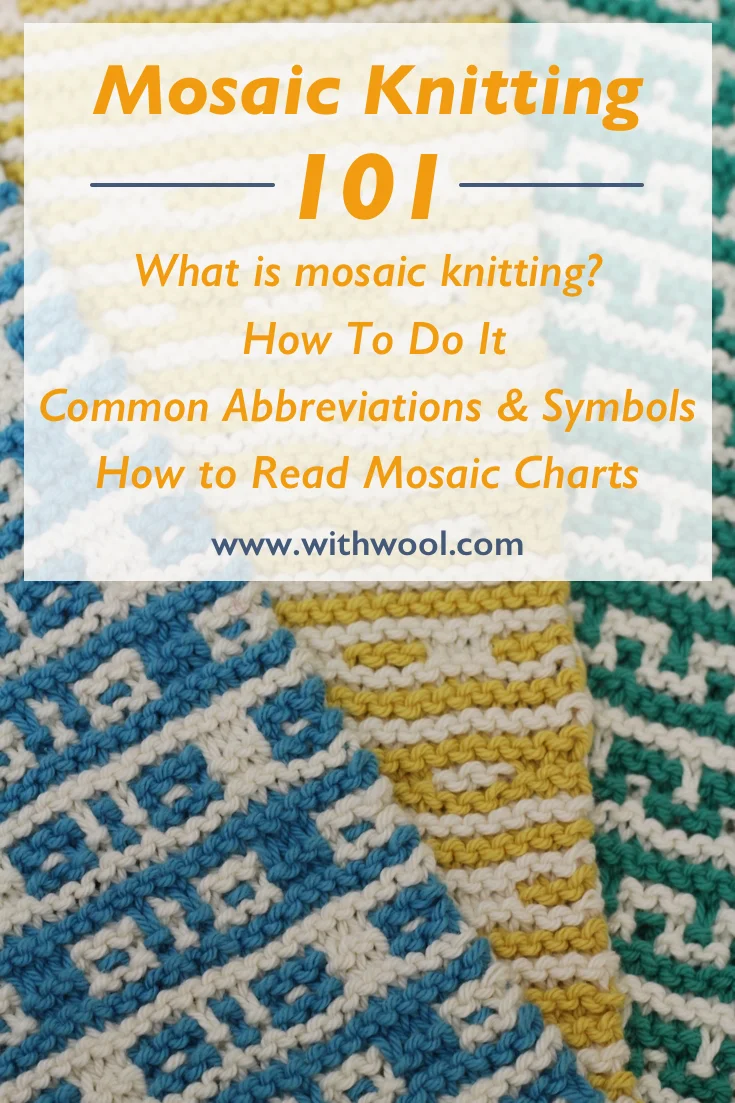
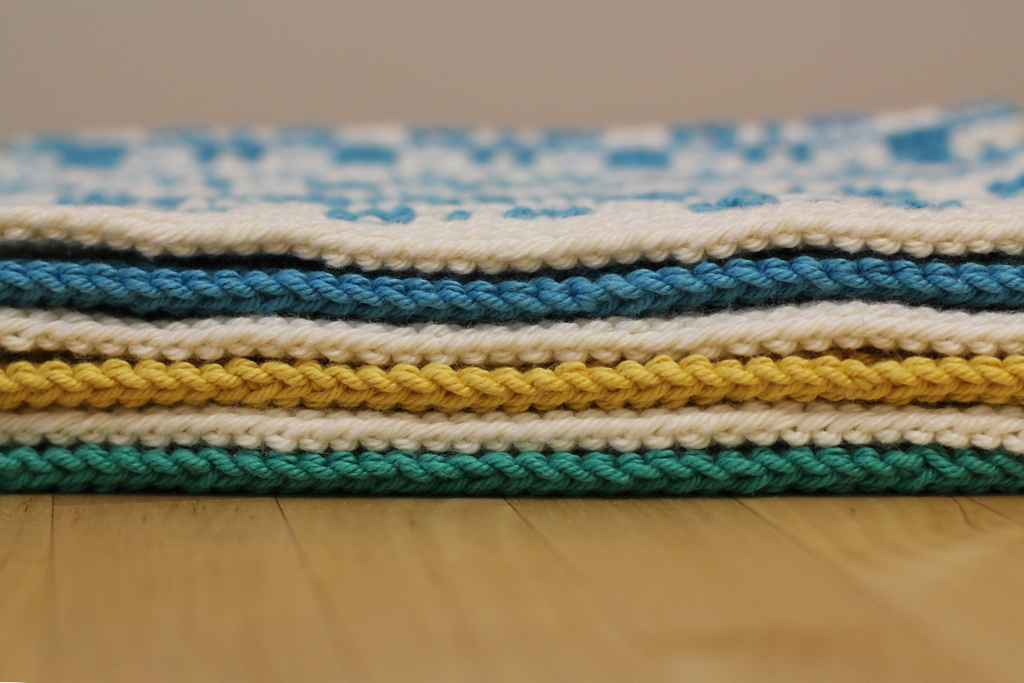
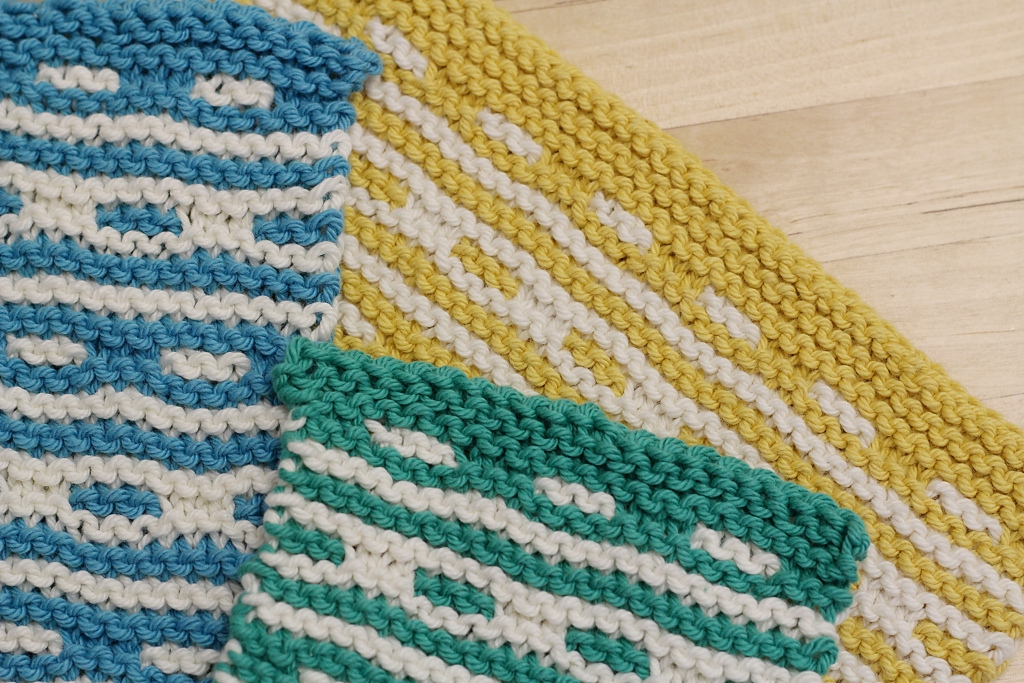
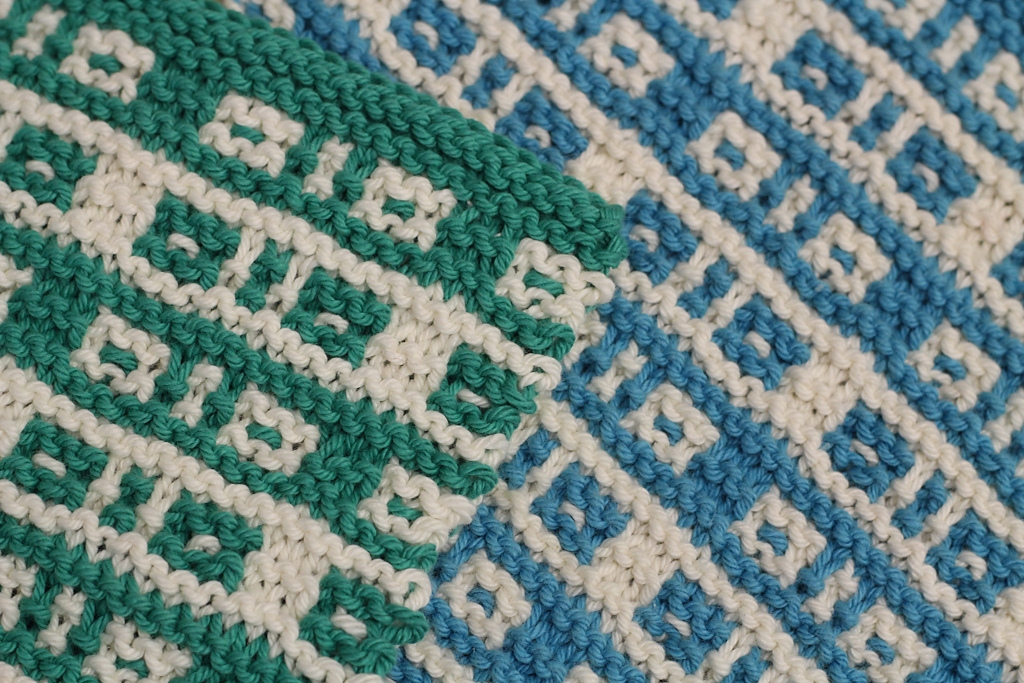
I am thrilled to finally share the Mosaic Sisters! Why sisters? Because each mosaic design, though unique, shares several traits. They all have wide stripes, are knit in garter stitch, and have geometric designs. The pattern is a set 3 three different designs that can be turned into kitchen towels, washcloths, and coasters. Or anything else your needles desire. Mosaic knitting makes the cloths the perfect thickness and texture to be useful in both the kitchen and the bathroom. Since the basis of the patterns is garter stitch, the cloths won't twist or curl. Since they're all sister designs, you can make them in as many or as few colors as you want. Make a whole set in 2 colors or mix and match for maximum rainbow. 

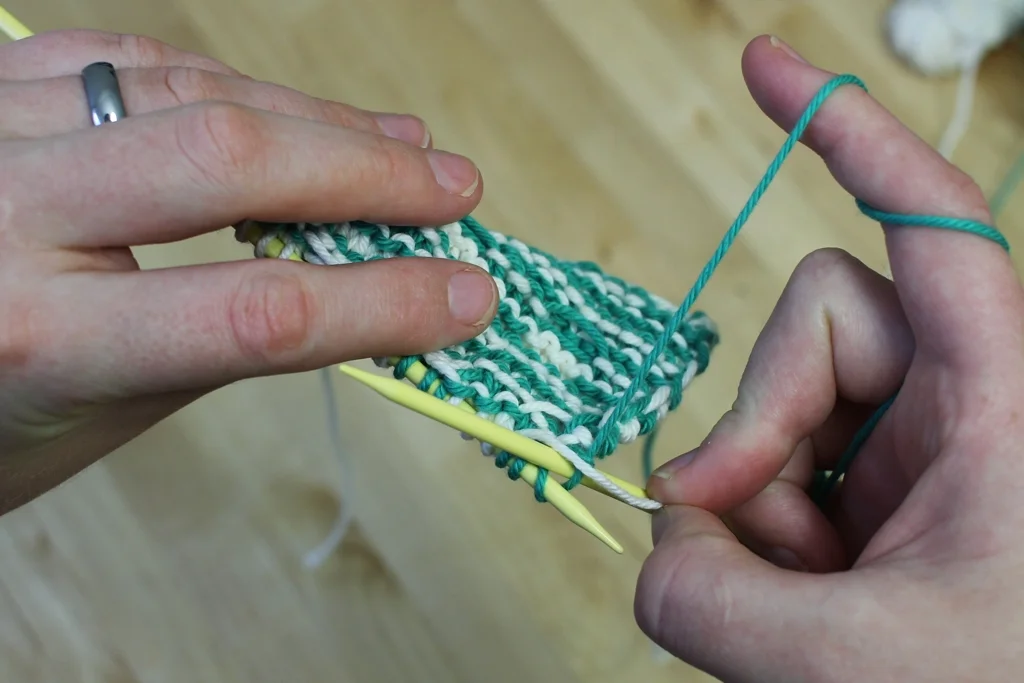
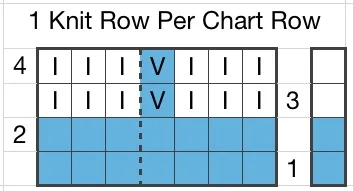
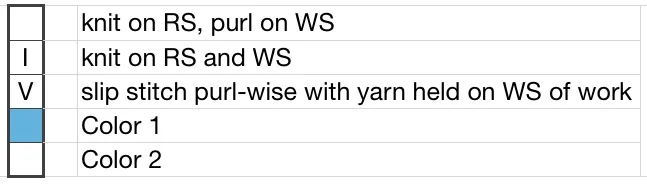
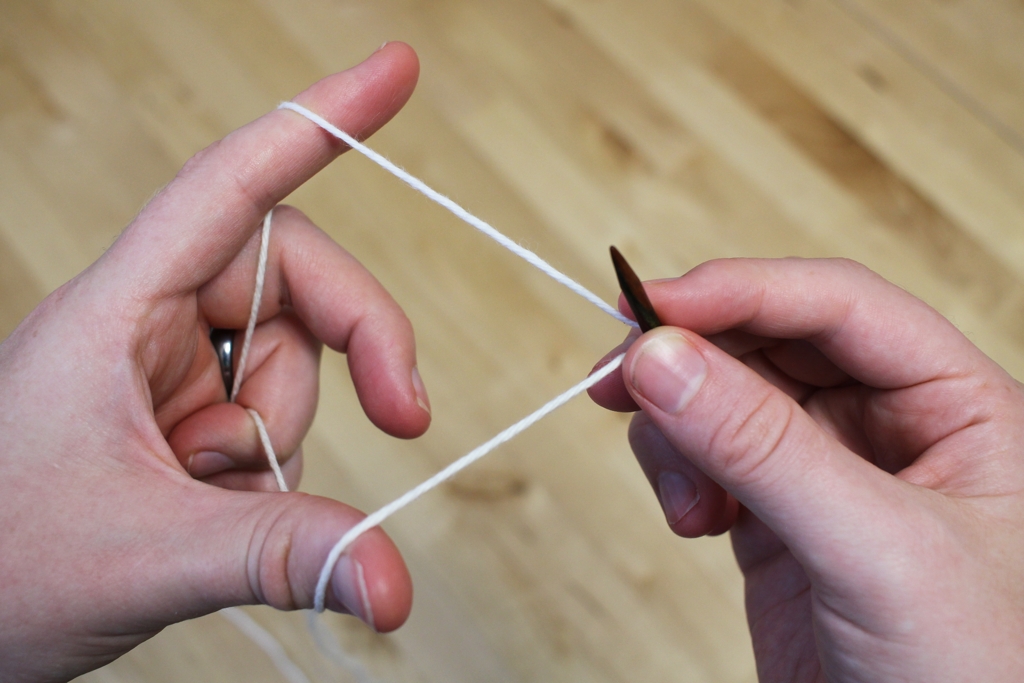
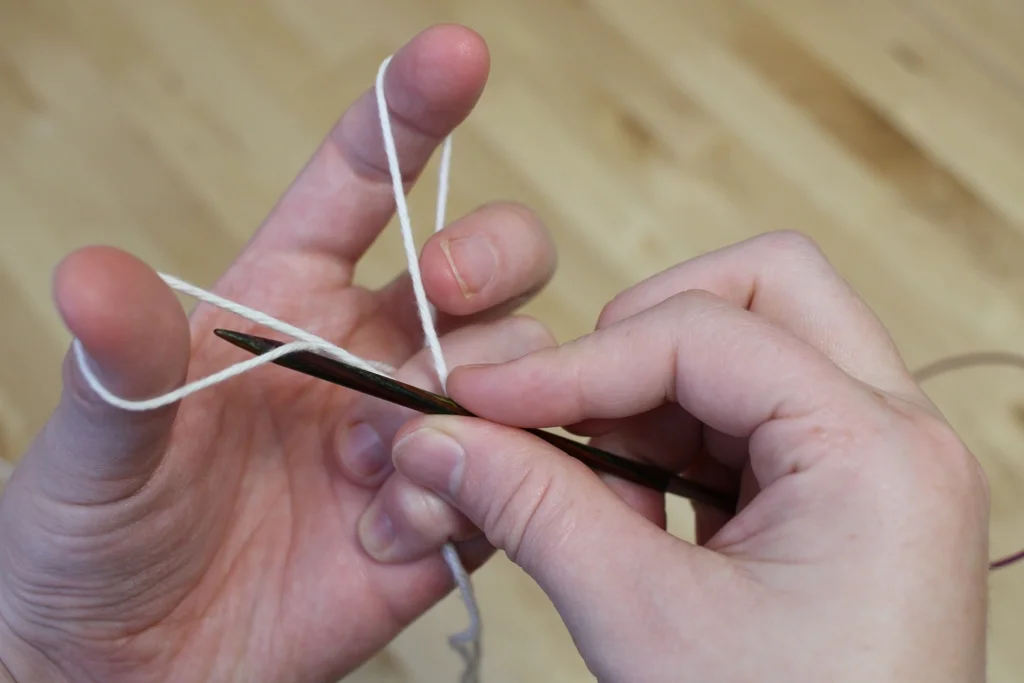
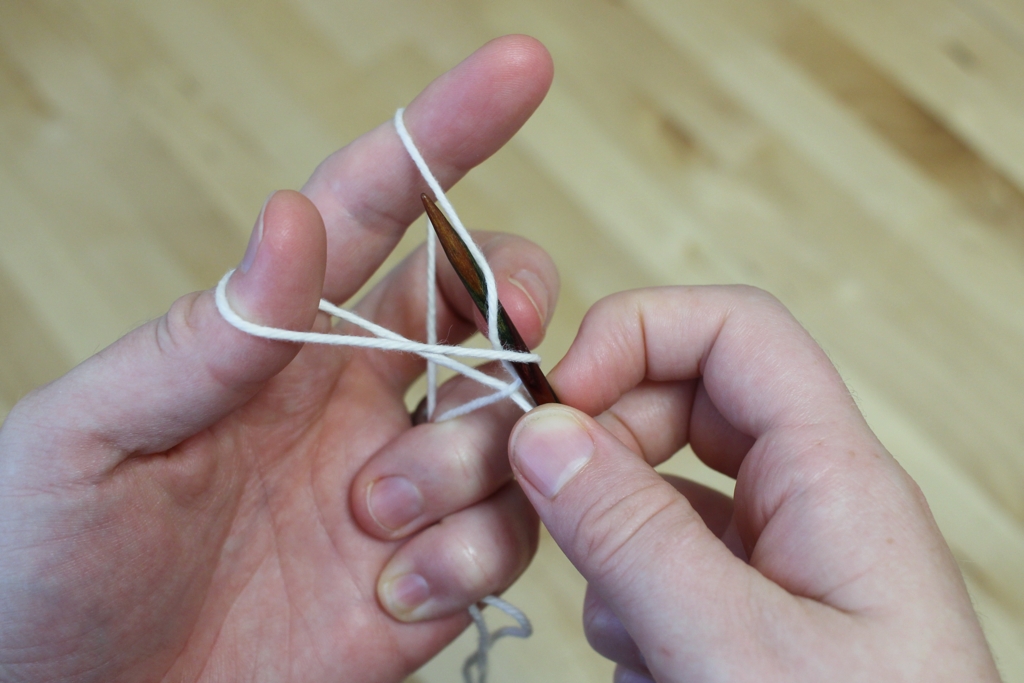
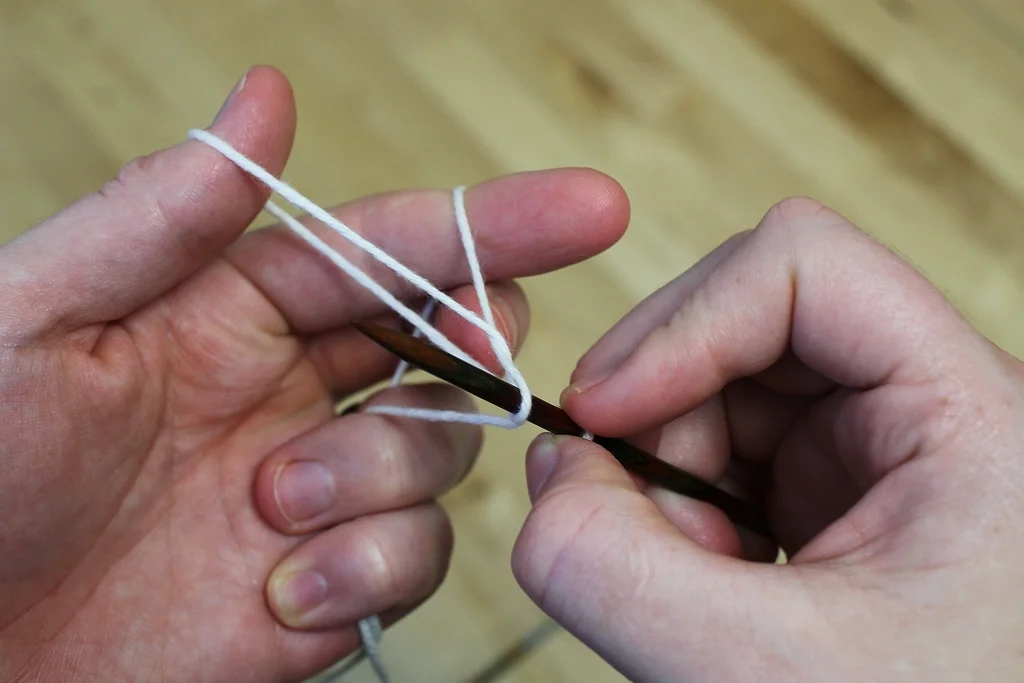
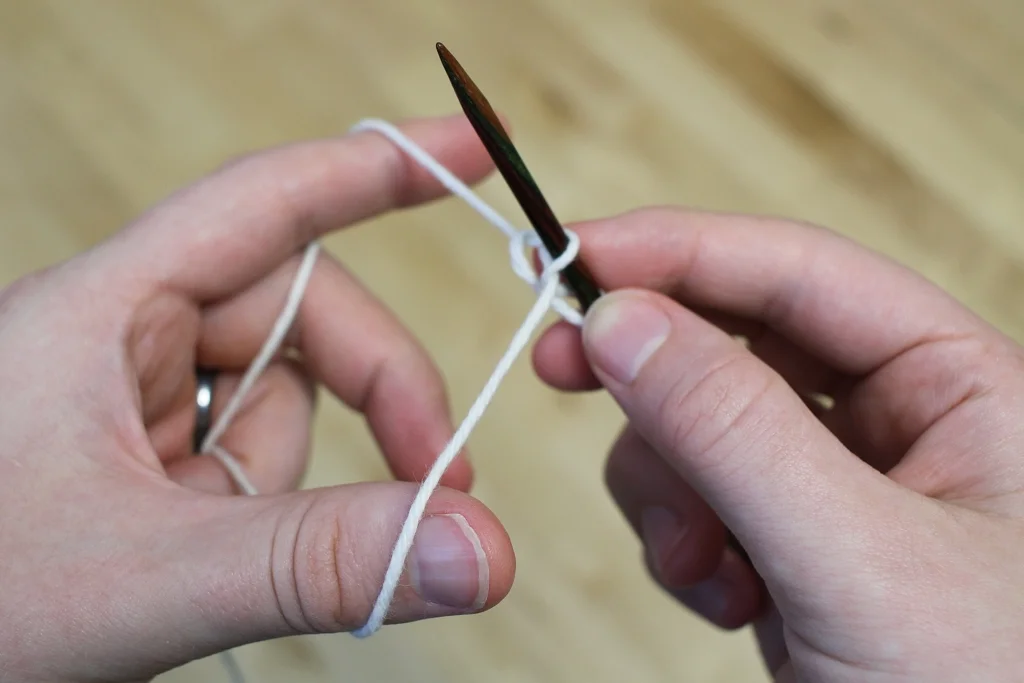
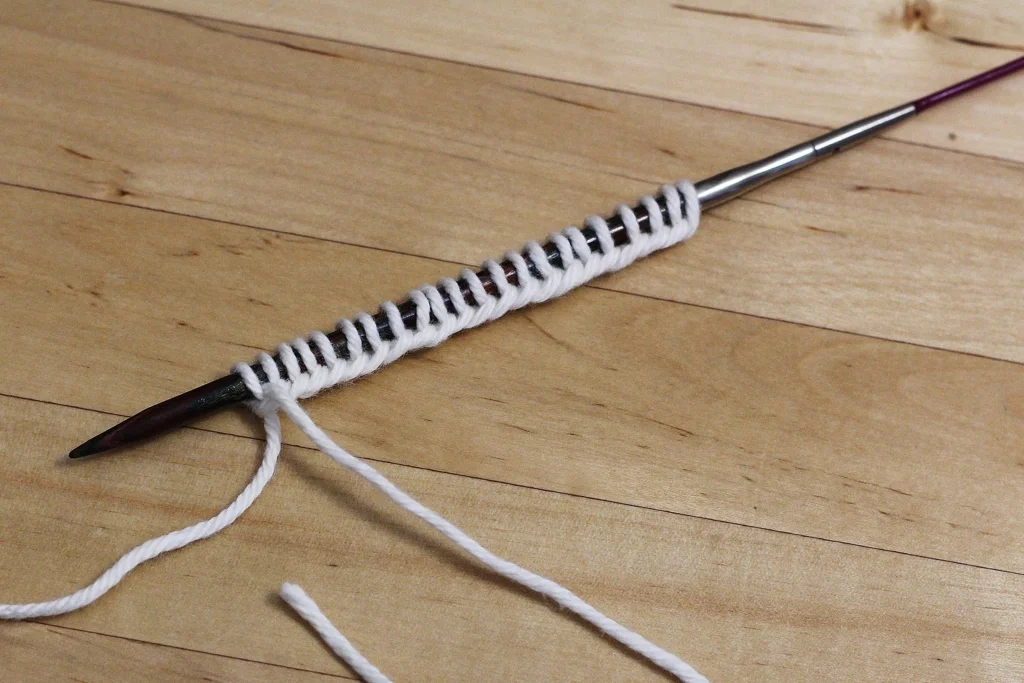
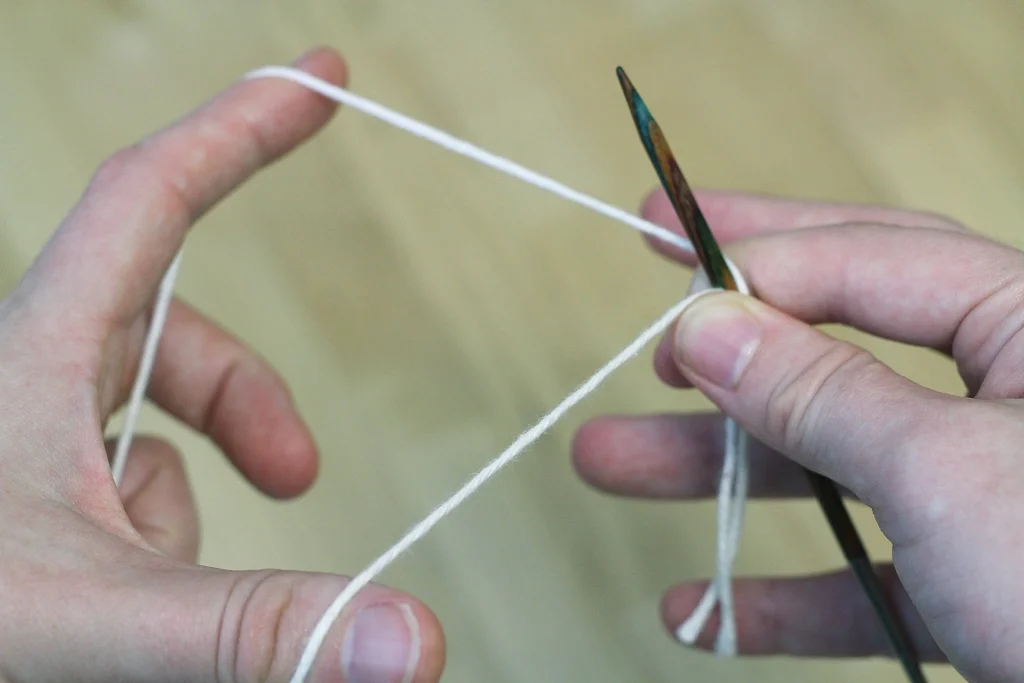
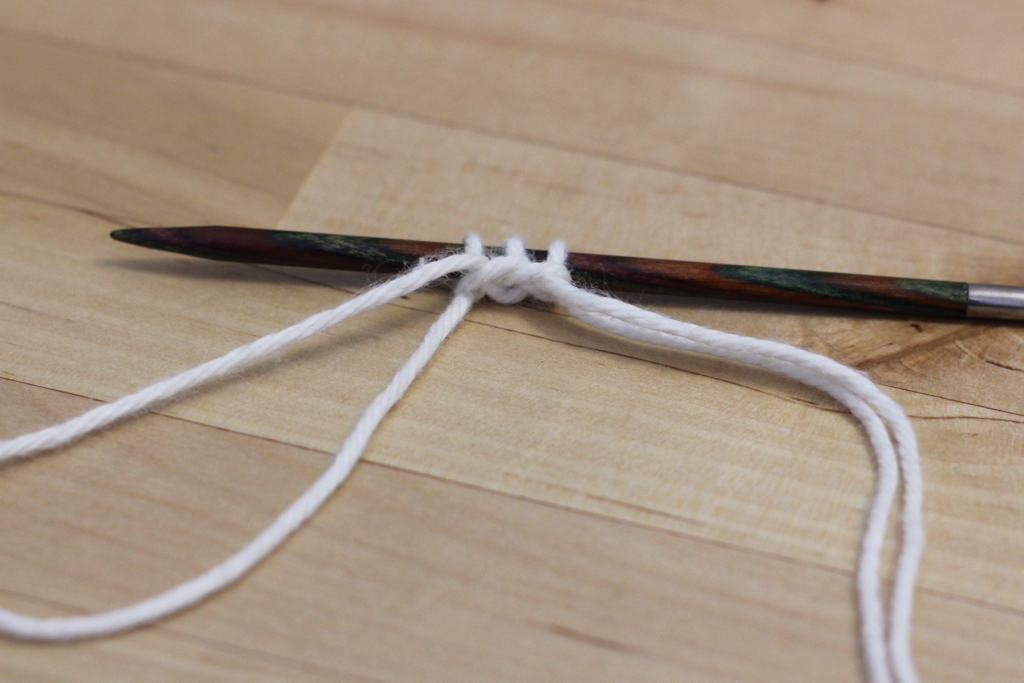
If you're nervous about working mosaic knitting for the first time, I wrote a few tutorials to help. Mosaic Knitting 101 will show you the basics, and the next tutorial shows how to carry yarn up the side of the work. To cast on, I recommend the long-tail cast on - it's great with cotton.

Colorful and geometric, the Mosaic Sisters are textured mosaic knit cloths perfect for the kitchen or the bathroom. Each cloth is made with garter stitch and slipped stitches that are simple to knit, but create complex patterns. All of the sist…

I had the idea for the Mosaic Sisters years ago. At the time there was only one cloth, the oldest sister of course, and it had a different name. I knit the first sample, wrote the pattern, and made the chart. For one reason or another I never published it. Years later I saw a call to submit designs for home related patterns. The oldest sister came to mind, but I knew I couldn't just submit one - that's when the middle sister came along. Spoilers - the submission wasn't accepted. Now two designs were hanging out on my hard drive. Once the sting of disappointment wore off, I looked at them again and decided to add a third pattern to the set, the youngest sister. I've been swatching, charting, knitting, and putting the pattern together ever since. It's been a long road, but I'm glad that the sisters are finally getting their debut. 

To celebrate the Mosaic Sisters release, the pattern is free until Sunday, December 6 11:59 PM PST. Afterwards, it'll go to it's regular price of $5. No coupon or Ravelry account required. Happy knitting! 

Mosaic Sisters

Sizes: Kitchen Towel - 8.5" x 14"; Washcloth - 8.5" x 8"; Coaster - 4.25" x 4"

Gauge: 5 sts = 1" in pattern

Needles: US 6 (4mm) straight or circular needles 

Yarn:  Worsted Weight Cotton Yarn in 4 colors

Shown in Knit Picks Dishie - Swan, Azure, Crème Brulee, and Tranquil

For the kitchen towels: 37g / 70 yds each color

For the washcloths: 20g / 39 yds each color

For the coasters: 7g / 14 yds each color

Mosaic-Sister-3.jpg


Stripes and Carrying Yarn Up The Side

The Mosaic Sisters pattern- a set of colorful mosaic knit kitchen towels, washcloths, and coasters - is here! Meet the sisters and get the pattern.

Check out the other tutorials for the Mosaic Sisters: The Long Tail Cast On and Mosaic Knitting 101


Spend your time knitting, not weaving in ends! Here's the final tutorial celebrating the Mosaic Sisters pattern! Today's tutorial is about how to carry yarns up the side of your work when you're knitting stripes. Doesn't matter if the stripes a…

In Mosaic Knitting 101, I showed that mosaic knitting is just stripes and slipped stitches. Knitting stripes is fun, but weaving in ends for every color change is not. The first few times I knit stripes, I cut the yarn at the beginning and end of every color. Ugh. Thankfully, there’s a way to carry yarn up the side of the piece which means you don’t have to spend as much time weaving in ends as you did knitting. The carried yarns will twist together as you work and tuck themselves in nicely behind the edge stitches.

For Narrow Stripes

Spend your time knitting, not weaving in ends! Here's the final tutorial celebrating the Mosaic Sisters pattern! Today's tutorial is about how to carry yarns up the side of your work when you're knitting stripes. Doesn't matter if the stripes a…

If you’re working 2 row stripes there’s only one step to carry your yarns up the side. For the sake of clarity, yellow is Color 1 and white is Color 2. When it’s time to change colors, hold color 1 to the back of the work and start working the next stripe. You can drop Color 1 after you’ve got a few stitches of the new stripe on the needles because the two yarns are now twisted together. 

Is it possible to hold the yarn to the outside of the work instead of along the back? Definitely, but there is one benefit to holding the yarn to the inside. It’s faster because you always know what strand you just used and what strand to grab next. Plus, it easier to keep the yarns from tangling which means you get to spend your time knitting and not untangling yarn. Which ever direction you choose, be consistent and stick with it for the entire project.

For Stripes That Don’t Start At The Edge (And Wide Stripes Too)

Spend your time knitting, not weaving in ends! Here's the final tutorial celebrating the Mosaic Sisters pattern! Today's tutorial is about how to carry yarns up the side of your work when you're knitting stripes. Doesn't matter if the stripes a…

So what about when a stripe starts a few stitches in from the edge of work? The Middle Sister of the Mosaic Sisters pattern has a row that starts this way. You’ve got a couple options and neither of them involve cutting the yarn or weaving in more ends. Both choices equally effective, it’s just a matter of what you think looks better. 

Spend your time knitting, not weaving in ends! Here's the final tutorial celebrating the Mosaic Sisters pattern! Today's tutorial is about how to carry yarns up the side of your work when you're knitting stripes. Doesn't matter if the stripes a…

Option 1 is treating the stripes above and below the short stripe as one wide stripe. 

Begin by holding Color 1 to the back of the work just like with the narrow stripe. Slip the stitches at the beginning of the row and work the short stripe with Color 2. When you’re finished working the short stripe, twist the two colors together and start working with Color 1 again. Don’t forget to keep a little slack between the edge and the first knit stitches so the edge doesn’t pucker.

Spend your time knitting, not weaving in ends! Here's the final tutorial celebrating the Mosaic Sisters pattern! Today's tutorial is about how to carry yarns up the side of your work when you're knitting stripes. Doesn't matter if the stripes a…

Option 2 starts a little differently. When you start the short stripe with Color 2, hold Color 1 (green in this example) to the outside instead of against the back. Finish the short stripe.

Spend your time knitting, not weaving in ends! Here's the final tutorial celebrating the Mosaic Sisters pattern! Today's tutorial is about how to carry yarns up the side of your work when you're knitting stripes. Doesn't matter if the stripes a…

Now hold Color 2 to the the outside. When you start the next stripe by bringing up Color 1, it holds Color 2 in place. Go back to twisting yarns to the inside until the next short stripe. 

Spend your time knitting, not weaving in ends! Here's the final tutorial celebrating the Mosaic Sisters pattern! Today's tutorial is about how to carry yarns up the side of your work when you're knitting stripes. Doesn't matter if the stripes a…

I know I recommended earlier to twist to the inside, but twisting to the outside on stripes that start away the edge works well in this case. When paired with inside twists, the occasional outside twist prevents longer strands of yarn from being carried up the side and potentially snagging. 

Mosaic Knitting 101

The Mosaic Sisters pattern- a set of colorful mosaic knit kitchen towels, washcloths, and coasters - is here! Meet the sisters and get the pattern.

Check out the other tutorials for the Mosaic Sisters: The Long Tail Cast On & Stripes And Carrying Yarn Up The Side.

Mosaic-Knitting-101

Mosaic knitting is a technique that creates beautiful and intricate finished projects with the simple slip stitch. What it makes it different from other types of color work is that you’re only working with one strand of yarn at a time. For such a simple technique, mosaic knitting is quite versatile. It can be worked in garter stitch or stockinette. It can be smooth or textured. It can be worked flat or in the round. The patterns can be bold and geometric or create simple images and all manner of things in between. There’s no limit to the type of project it can create either. Mosaic knitting can create scrubby washcloths, cushy socks, warm shawls, slouchy hats, and colorful blankets.

How Mosaic Knitting Works

Aside from slipped stitches, the real reason why mosaic knitting works is that it's based on 2 row stripes.  So if you can knit stripes, you can mosaic knit.  

To work a stripe of mosaic knitting, you work across the first row and slip certain stitches purl-wise to create the pattern. On the second row, the stitches slipped on the first row are slipped again. Then it's time to make the next stripe. Drop the first color and work the next stripe with a second color and slip more stitches. As the stripes repeat, the slipped stitches build on each other. The below GIF shows the stripes and slipped stitches adding up to make the finished design. 

Standard Mosaic Knit Abbreviations

Mosaic patterns are presented as written, charted, or with a combination of the two. Small patterns might only be written.  The key abbreviations in written mosaic patterns are slX, wyib, and wyif.

sl means to slip a stitch purl-wise and the X afterward tells you how many stitches to slip. wyib and wyif are paired with slX.

wyib means to slip the stitch with the yarn held behind the work on the wrong side. wyif means to slip the stitch with the yarn held in front. If you don’t see wyib or wyif or any variant of them, it’s assumed that the yarn is always held to the back of the work. 

The other important abbreviations are MC, Main Color, and CC, Contract Color. The different colors might also be referred to as C1 and C2 or Color 1 and Color 2. 

Finished-Mosaic-101-Swatch.jpg

Here is a swatch of a simple mosaic pattern where there are slipped stitches on the garter rows (white) and a stockinette background (blue). The written pattern for the swatch reads like this:

Cast on 15 stitches (a multiple of 4+3) with C1.

Row 1: With C1, knit

Row 2: purl

Row 3: With C2, *k3, sl1wyib*, repeat between * * to end of row, k3

Row 4: *k3, sl1wyif* k3

Repeat the 4 rows until piece is desired length. End on Row 2 and bind off. 

How To Read Mosaic Charts

If the above pattern were charted, there are 2 fairly standard ways the chart could be presented and it’s designer’s choice. The difference between the two styles is in how the 2 row stripes are presented: a stripe, 2 worked rows, per chart row OR every row is charted. Personally, I prefer the chart where it’s one stripe to a row because it gives a better visual of the finished pattern. If I make a mistake early in the pattern, I find it easier to notice if I have the chart to compare it too. Also, it's easier to find my place again if I put the project down for a bit.  

The two styles do share some similarities. Both will show show what color to use either in column on the right side or on the chart row. Rows are usually numbered. Both charts will use the same symbols to show when to slip. There are 2 common versions of the slip symbol. Always read the instructions on the pattern though in case the designer has different instructions for a symbol. 

slip stitch definitions.jpg

V means to slip the stitch purl-wise with the yarn held on the on the wrong side to the back of the fabric.  A V with a horizontal line through the middle or underneath means to slip the stitch purl-wise with the yarn held in the front on the right side of the fabric. 

To work from the 1 stripe (2 rows) to a chart row style, you read the rows first from right to left and then backwards from left to right. This means that each row is worked twice; once forwards for the right side and once backwards for the wrong side. If the pattern is worked in the round than you’d work both rows from right to left because you’re always working on the right side of the fabric. 

To work from the 1 chart row equals 1 knit row style, you’ll always read from right to left. The 1 to 1 style chart is more common for mosaic patterns knit in the round. However, as is the case with the Pair-a-normal Socks, the same mosaic effect can sometimes be made with 1 row instead of 2. 

That’s everything you need to get started with mosaic knitting and start the Mosaic Sisters! Have fun and knit on! 

How To Do The Long Tail Cast On And Helpful Tips

The Mosaic Sisters pattern- a set of colorful mosaic knit kitchen towels, washcloths, and coasters - is here! Meet the sisters and get the pattern.

Check out the other tutorials for the Mosaic Sisters: Mosaic Knitting 101 & Stripes And Carrying Yarn Up The Side


The long tail cast on was was one of the first cast ons I learned after branching out from the backwards loop cast on that most new knitters learn right off the bat. After years of knitting, the long tail method has become one of my favorites and my default cast on when a pattern doesn’t ask for a specific method. It’s stretchy, makes a tidy edge, and works up quickly once you get the hang of it. It can be worked in knit, purl, or ribbing (this tutorial focuses on the knit version). 

The long tail cast-on creates the first row of your work - which is why I especially love this cast on when working with non-stretchy yarns like cotton or linen which can be hard to start from a backwards loop cast on. Having a row already made is also great for when you join to knit in the round because it’s much easier to check that the stitches haven’t twisted around the needle. Plus, if you mess up and knit too many rows like I did on a recent project, you can even un-pick the cast on to fix the mistake. The process is a little finicky, but completely doable. 

Even better, for all of this long-tail goodness, all you need are needles and yarn. 

Getting Started

Pull the yarn over the needle with the tail end to the front. There’s no need to tie a knot. The photos above show how to hold and position yarn on the needles with and without my fingers in the way. Hold the yarn in your left hand with the tail end of the yarn over your thumb and the working end over your pointer finger. The needle goes in the middle. The yarn over your thumb becomes the bottom edge and the yarn over your pointer finger becomes the first row.

How much yarn do you need to pull out? Eventually, you’ll be able to eyeball the amount, but a good trick is to cast on 10 stitches, then unravel to find out how much yarn they used. Multiply the amount and had a few inches to weave in later and you’ll have a good estimate. 

Here’s an interesting fact: if you reverse positions and hold the needle in your left hand and the yarn in your right, you’ll make purl stitches instead of knit stitches. 

The 4 Steps To Make A Stitch

How to make a stitch with the long tail cast on. Also, gifs are perfect for when you don't want to watch an entire video.

How to make a stitch with the long tail cast on. Also, gifs are perfect for when you don't want to watch an entire video.

There are 4 distinct steps to make a stitch which seem complicated at first, but your hands will learn. Cast on enough stitches and you won’t even have to think about doing them. I exaggerated the motions to make the steps clearer, but I usually work with much smaller and faster movements.

Step 1: Bring the yarn in front and up underneath the yarn in front of your thumb. This is the loop that will secure the stitch. 

Step 2: Move the needle behind the forward strand on your pointer finger from right to left.

Step 3: Move your thumb backwards which bring the the loop over the needle and the yarn.

Step 4: Take your thumb out of the loop and pull on the front piece of yarn to secure the stitch.

Repeat those 4 steps until you have all the stitches you need on the needles and your first row. If you’re working in stockinette, purl the next row.  

When Casting On Lots of Stitches…

The main complaint about the long-tail cast on is when making a lot of stitches. I’m going to be conservative and say 50 stitches and up. If your yarn estimate is off, you’ll have too little yarn and have to rip out to start again or too much yarn and have a long tail hanging off the end of your work. To avoid both of these hassles, work the cast on with two strands of yarn instead of one.

You don’t have to knot them together either. Just hold the ends in place on the needle with your fingers. Once the first 2 stitches are on the needles, the yarn is secure and isn’t going anywhere. When the cast on is finished cut the front strand of yarn long enough to weave in. Yeah, it’s another end to weave in but it’s still less time and energy than having to repeatedly redo the cast on.