A Sock Restart

A partially knit yellow cabled sock sitting next to a yarn cake.

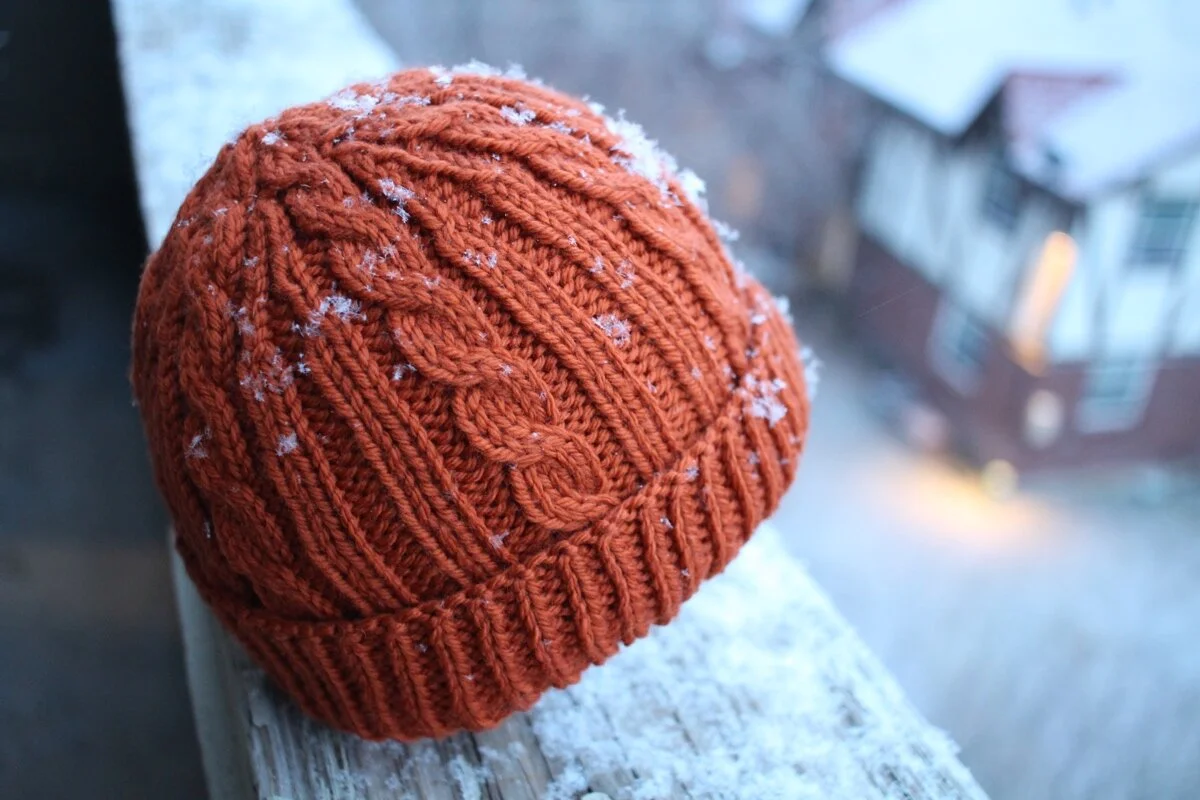
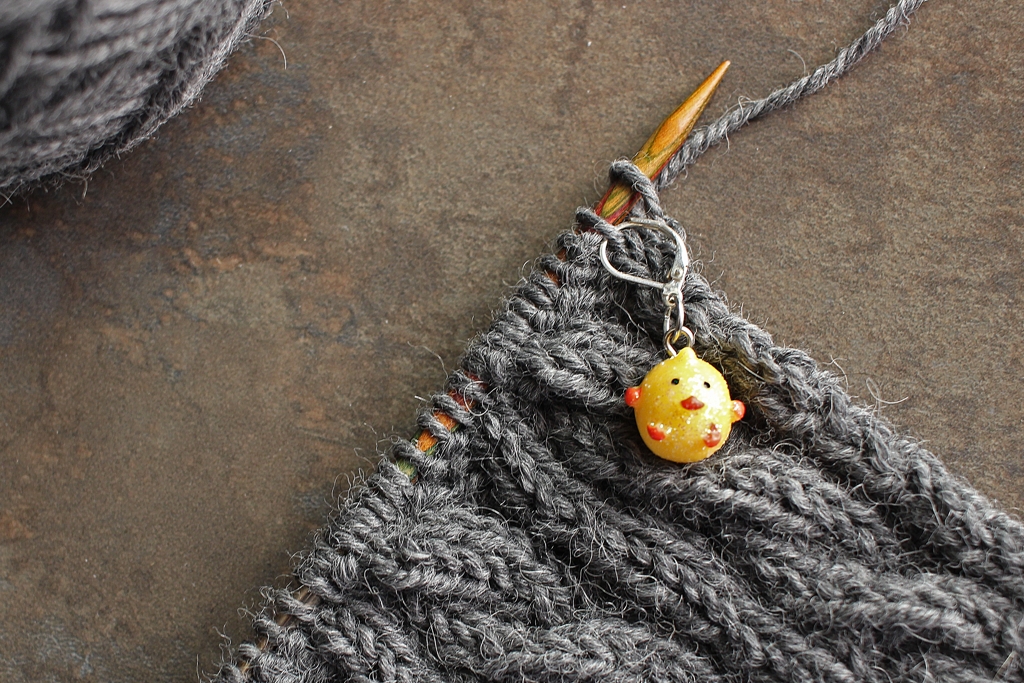
This is the beginning of a beautiful sock. It’s a combination of a good yarn, good cables, and good color. But...it’s too small. All those cable twists (sometimes six a round) really sucked up all the give and stretch usually present in knit fabric.

So, this sock is yarn again and has the potential to be a beautiful sock that actually fits.

Was it frustrating to rip out 20+ rows of a plaited cable knit with fingering weight yarn? Most definitely, but totally worth it to have a comfortable sock that gets worn instead of stuffed in the back of a drawer. Now that I’m starting over, I have a better idea of how I can add ribbing and extra stitches for a better fit. And having a little extra time to figure out how to work around a stiff cable that sucks up stitches doesn’t hurt either. Here’s hoping 80 stitches will be enough this time around.

Crinkled yellow yarn sitting on a table after ripping out a too small sock.

New Pattern: The Old Friend Hat

Old-Friend-Hat-Side-View.jpg

It all started with a hat I knit for the Bearded One nine years ago. He saw a hat he liked on an old British tv show from the 70’s*, and said he would totally wear a hat like that. I, a knitter with a little too much time on her hands, said I could make that happen. After taking a few screen caps, I got to work. The hat wasn’t an exact recreation since I had to guess at some of the details, but it was close and a big success. He wore that hat everywhere and usually kept it in his back pocket just in case he’d need it.

Old-Friend-Hat-Crown-Portrait.jpg

Well, after nine years of constant wear, the hat was an old friend but also showing it’s age. So it was time to knit him another one. While I worked on the new hat, I couldn’t help but imagine a longer slouchier version for me. And how could I not whip up a matching hat for the kiddo too. So I took the opportunity to clean up and expand the pattern to fit small baby heads all the way up to big adult noggins. There’s both a snug fitted version and a long slouchy version. And how could I not name the pattern “Old Friend”. The hat has been with us for 9 years already, and I’ve got the yarn to knit several more. Sounds like this hat is going to be sticking around for a long time.

Old-Friend-Group-Horizontal.jpg

While I’ve only been wearing my Old Friend hat for a few months, I am absolutely in love. The cables look great with pretty much everything. I wear it slouchy most of the time, but am really glad of the extra ribbing when I want an extra layer over my ears. Even the kiddo, who won’t wear most hats for more than five seconds at a time, wears her Old Friend hat when it’s cold. Though our hats are all different colors and lengths, they still match without having to be exactly the same.

Oh, and after nine years, I am so happy to finally share the pattern with you! Whether you choose to knit it short and fitted or long and slouchy, this cabled hat is sure to become an old friend that’s always by your side.

To celebrate the release of Old Friend, the pattern will be on sale October 13 - 20th, 2019 MST . Use code FRIENDLY when you check out to get 20% off the pattern!

Sizes:

Baby/Toddler: (16 - 18”) [41 - 46 cm]

Child: (18 - 20”) [46 - 51 cm]

Adult S/M: (20 - 22”) [51 - 56 cm]

Adult L: (22 - 24”) [56 - 61 cm]

Gauge: 4 sts and 6 rows = 1” in pattern

Yarn:

For Fitted Hat: 60 (85, 120, 140) yds / 55 [78, 104, 119] m worsted weight yarn

  • Shown in Knit Picks Swish Worsted - Allspice, and Stonehedge Fiber Mill Shepherd’s Wool Worsted - Garnet

For Slouchy Hat: 70 (100, 140, 172) yds / 64 [91, 128, 157] m worsted weight yarn

  • Shown in Knit Picks Swish Worsted - Dove Heather

Needles and Notions:

  • US 7 (4.5mm) 32” circular needles OR 16” circular needles/DPN’s

  • Tapestry Needle

  • Regular and Locking Stitch Markers (Optional)

*Said show is “Last of the Summer Wine”, and I’m totally guessing that the episodes I was watching were from the 70’s.

How To Knit Cables Without A Cable Needle

How To Knit Cables Without A Cable Needle || withwool.com

I love the complexity and depth and texture that cables create. I love small simple cables and big complicated cables. For complicated cables and reversible cables, cable needles are my best friend, but for small cables - 6 stitches or smaller - I skip the cable needle. It makes the knitting faster and and there’s one less thing to fiddle with.

I knit the Old Friend hat without a cable needle which helped make the project a quick, easy knit.

Front Cross Cable

Knitting across a row and ready to cross a 4 stitch cable.How To Knit Cables Without A Cable Needle || withwool.com

In the photo above, I’m ready to work a front crossing cable, also called a left cross cable, across the next 4 stitches on the left needle. This means that the 2 right-most stitches will be crossing in front of the 2 left stitches.

The right 2 stitches hanging of the needles to prepare to cross a front cross cable without a cable needle.How To Knit Cables Without A Cable Needle || withwool.com

The first step is to slip the 2 right (front) stitches closest to the needle tip off the needle.

Slipping the left cable stitches onto the right needle to cross the cable. The other half of the cable stitches are hanging in the front of the work.How To Knit Cables Without A Cable Needle || withwool.com

Next slip the 2 left stitches purl-wise from the left needle to the right needle. The hanging stitches will stay in the front and you can hold them in place with your thumb.

Slipping the hanging cable stitches onto the left needle purl-wise.How To Knit Cables Without A Cable Needle || withwool.com

Slip the hanging stitches on to the left needle purl-wise.

Slipping cable stitches from right needle back to left needle. The cable is crossed and is now ready to be knit across.How To Knit Cables Without A Cable Needle || withwool.com

Slip the 2 cable stitches on the right needle back to the left needle. Now the hard part is done, and the cable is crossed.

Knitting across the cable stitches in pattern.How To Knit Cables Without A Cable Needle || withwool.com

Knit (or purl as the pattern requires) across the cable stitches. You’re ready to keep working across the row.

A complete front cross cable.How To Knit Cables Without A Cable Needle || withwool.com

Here’s what the knitting looks like after working the cable cross.

Back Cross Cable

The left stitches of a back cross cable handing off the needles and being held behind the left needle.How To Knit Cables Without A Cable Needle || withwool.com

Now I’m ready to work a back crossing cable, also known as a right cross cable - which means that the 2 right-most stitches will be crossing behind the 2 left stitches. The first step is to slip the 2 right stitches off and hold them behind the needle.

Slipping the left half of the cable stitches to the right needle. The hanging cable stitches are hidden behind the work in the photo.How To Knit Cables Without A Cable Needle || withwool.com

Next slip the 2 left stitches purl-wise from the left needle to the right needle. The hanging stitches will stay in the back which is why you can’t see them in this photo.

Slipping the hanging cable stitches purl-wise onto the left needle.How To Knit Cables Without A Cable Needle || withwool.com

Slip the hanging stitches on to the left needle purl-wise.

A complete back cross cable, also known as a right cross cable.How To Knit Cables Without A Cable Needle || withwool.com

Slip the cable stitches on the right needle back to the left needle and work across. Now you’re ready to keep knitting to your next cable.

Even Faster Cable Knitting

Now that you’ve seen the basics, are you ready to work cables even faster? Here’s a demo with a front crossing cable, but the basic process will be the same for a back crossing cable as well.

Inserting the right needle into the left half of the cable stitches on the back of the work to work a front cross cable.How To Knit Cables Without A Cable Needle || withwool.com

Slip the right needle purl-wise into the left half of the cable stitches from behind.

Cable stitches hanging off the needles at the front of the work after pulling out left needle. Other half of the cable stitches remain on the right needle.How To Knit Cables Without A Cable Needle || withwool.com

Pull the left needle out of the cable stitches. The two left stitches will be on the right needle with the other two stitches hanging out in front.

Left needle slipped into previously hanging cable stitches. Next step is to slip other cable stitches to left needle and work across.How To Knit Cables Without A Cable Needle || withwool.com

Slip the left needle back into the hanging stitches purl-wise and on the front side of the work. Then slip the 2 cable stitches on the right needle back to the left needle. Work across and you’re ready to cross more cables.


If you enjoyed this tutorial, buy me a coffee! Thank you for your support!

Buy Me a Coffee at ko-fi.com

How To Block A Slouchy Hat

How to block a slouchy knitted hat the easy way! | withwool.com

Sometimes the hardest part of finishing a knitting project is figuring out how to wash and block it so that it looks its best, especially hats and slouchy hats. I stalled while trying to figure out how to block my Owl In The Thicket hat after not being able to put it down because the cables were so addicting to knit. How could I block it so that the cables and fabric relaxed evenly?  

How to block a slouchy knitted hat the easy way! | How To Block A Slouchy Hat - withwool.com

This is the hat after it came off the needles. Looks good, right? The cables are crisp. The shape and length are just right. So why would I need to block it?

How to block a slouchy knitted hat the easy way! | How To Block A Slouchy Hat - withwool.com

This is why. The needles I chose created beautiful cables, but also a firm fabric. It looked more like a gnome hat than the loose slouch that I had in mind when I cast on. The hat wasn't a knitting failure, just unfinished. Skipping blocking was not an option. But how to do it? The cables and fabric needed to relax evenly over the entire hat, so I didn’t want to use a balloon or a ball. And stretching the hat over a plate wouldn’t help since I wasn’t trying to make a beret or tam. So what else would work?

The perfect slouchy hat blocker turned out to be a smooth foam roller. What’s a foam roller? Basically, a dense foam cylinder used to help loosen tight muscles, tendons, and knots before or after exercise. They’re easy to find and not expensive. And when you’re not using them to block hats, you can still use them to work out those pesky muscle knots. The one I have is 18” around which makes it the perfect size for blocking most child and adult hats.

HOW TO BLOCK A SLOUCHY HAT ON A FOAM ROLLER

Step 1: Soak the hat in cool water with a squirt of no-rinse soap for 15 to 20 minutes. I use Eucalan (<<— affiliate link!*) and love it.

Step 2: Roll the hat up in a towel and squeeze out the excess water. Remember not to wring it out which will pull the hat out of shape.

How to block a slouchy knitted hat the easy way! | How To Block A Slouchy Hat - withwool.com

Step 3: Pull the hat over one end of the foam roller. Then you can move it around and make sure the hat and design details aren’t twisted. Plus, since this is foam and not a balloon, you can easily stretch and pin out any lace or crown decreases.

If you want to keep a ribbed brim as stretchy as possible, you can cut the foam to size so that the brim hangs below and un-stretched.  

Step 4: Let it dry, take it off the roller, and enjoy a perfectly slouchy hat.

How to block a slouchy knitted hat the easy way! | How To Block A Slouchy Hat - withwool.com

Here’s what my hat looked like after blocking and with the addition of a giant pom-pom. It’s a definite change for the better, and the slouchy hat I wanted from the beginning. Blocking isn’t magic, but it certainly seems like it could be.

*This post contains an affiliate link which means, if you decide to buy through that link, I’ll get a small commission. My opinions are unbiased, my own, and formed after years of use. I wouldn’t recommend this soap if I didn't think it worked well. Thanks!

Finished: The Owl In The Thicket Hat

The Owl In the Thicket is my new favorite hat! Cables, owls, beads, cashmere - what’s not to love? | withwool.com

It seems like I say this every year when I finish a new hat, but this is my new favorite hat. It’s soft, warm, and perfectly slouchy. There’s even cables and owls with beaded eyes for good measure. The only thing I’m kicking myself about is that I didn’t cast on until a year after I’d bought the yarn! Still I’m glad it’s finished and just in time for weird spring weather. Will it rain? Will it snow? Look out the window to find out.

The Owl In the Thicket is my new favorite hat! Cables, owls, beads, cashmere - what’s not to love? | withwool.com 

The pattern, Owl in the Thicket by Sara Huntington Burch, was a great challenge. This hat is all about the details and required lots of attention. Aside from the ribbing, there were only a handful of rows that were the same in the entire pattern. I had a lot of fun knitting it, and now I want work on more complicated projects. It’s nice to break out of the auto-pilot knitting every once in a while. And the knitting didn’t actually take all that long because I had a hard time putting it down. I just got hung up on how to block the thing which I’ll show in more detail in my next post.

I splurged on a skein of the recommended yarn, Anzula Cricket in the Lenore colorway, which I don’t do often. The benefit and responsibility of having a large stash means I usually shop from it first. The reason I splurged is that Cricket is a blend of merino and cashmere with a beautiful luster. The yarn was wonderful to work with and the semi-solid dye job added the right amount of detail. I’m glad I didn’t pick out a darker color because then all the cables would have gotten lost which would have been a complete waste.

The Owl In the Thicket is my new favorite hat! Cables, owls, beads, cashmere - what’s not to love? | withwool.com 

The yarn and cables certainly go a long way towards making this my favorite hat, but the pom-pom is what really makes it. I add pom-poms to stuff on a case-by-case basis. They’re cool, but not always necessary. Not this time. The pattern sample looked so good with a pom-pom, and my hat just looked so lacking without one. So I made a very large and in charge pom-pom, but how to put it on? This pom was pretty weighty and used 5 yds of yarn! I didn’t want it to pull the hat out of shape or for it to look tacked on. The answer turned out to be a .5” button. I used this tutorial for how to attach a removable pom-pom. Now, I have no intention of wearing the hat without the pom or taking it off (except maybe to wash it). The button gives the pom somewhere to sit, and that little bit of extra structure makes all the difference.

Now to wait for the weather to get cold enough to wear this beauty. I might not have to wait long with this random weather.

The Specs:
Pattern: The Owl In The Thicket by Sarah Huntington Burch
Yarn: 190 yds Anzula Cricket - Lenore
Needles: US 4 - 3.5 mm
Dates: January 11 - March 11, 2018
@Ravelry

New (Free) Pattern: The Windbreaker Hat

The Windbreaker hat is a ridiculously stretchy cabled hat. Quick and easy to knit, the free pattern uses less than 1 skein of worsted weight yarn and is a great gift. #knitting | withwool.com

The Windbreaker hat got the chance to live up to it’s name this weekend. The Bearded One and I trekked through the falling snow, wind, and 19 degree temps to run errands and grab lunch. Every minute outside, the hat kept his head warm and the wind out. No cold ears here.
 
Windbreaker is a ridiculously stretchy cabled hat. Seriously. It fits both me (22") and the Bearded One’s 24” noggin. The secret to this stretch is that the hat, even the cables, are based in 2x2 rib. This has the added bonus of making the hat an easy knit while the cables keep things interesting. And thanks to the long brim, Windbreaker can be worn as a slouchy hat or with the brim folded for an extra layer against the cold.

The Windbreaker hat is a ridiculously stretchy cabled hat. Quick and easy to knit, the free pattern uses less than 1 skein of worsted weight yarn and is a great gift. #knitting | withwool.com

The pattern uses worsted weight yarn, and this hat is made with less than one skein of Berroco Ultra Alpaca (Oceanic Mix). Both written and charted instructions are included for the cables and crown decreases. The pattern includes two sizes, medium and large, and an option to work a longer section of cables and a shorter brim.

Add it to your queue and favorites on Ravelry!

Sizes: Medium (Large) - Shown in size Large which fits a head circumference up to 24" (61 cm)

Needles: US 7 (4.5 mm) 40" circular needle (for magic loop) OR 16" circular needle and DPN's

Gauge: 13 sts and 13 rows = 2" (5 cm) in 2x2 rib, unstretched

Yarn: 130 (145) yds / 119 (133) m worsted weight yarn. Shown in Berroco Ultra Alpaca - Oceanic Mix.

Notions: Cable Needle, Tapestry Needle

Sign up to the With Wool Weekly newsletter to get the Windbreaker pattern for FREE. You’ll also get news about new patterns, blog posts, tutorials, and a roundup of fiber arts links. Plus, get special discounts and bonuses just for subscribers.

With Wool Weekly

Spam is bad. There's none of that here.

A Half-Finished Hat

Cables, owls, and beautiful yarn make a hat that’s hard to put down. #knitting | withwool.com

I’ve been planning and working on other projects this past week, but the Owl In The Thicket hat has been my go-to knitting. The complicated chart means it’s not great for travel knitting so I’ve been using it as reward knitting instead. Got 5 minutes before the next pomodoro timer starts? Put a round on the hat. Crashing on the couch at the end of the day with some tv? This WIP is going to be in my hands. At first glance the chart and instructions look really complicated, and they do require attention. The secret is that the hat is worked in bite-sized repeats which makes even complex rounds doable. So all those random chunks of time have added up rather quickly. Knitting to see the owls and leaves appear in the stitches might have had something to do with it too. I’m not far from the crown decreases when I was sure that I’d be working on this hat for at least a month instead of a few weeks.

Cables, owls, and beautiful yarn make a hat that’s hard to put down. #knitting | withwool.com

While I love the complexity of this pattern, the yarn is another big reason that I’m enjoying this knit. For once I’m actually using the recommended yarn, Anzula Cricket. It’s a DK weight yarn and a blend of merino, nylon, and cashmere. It is wonderfully soft and feels great moving through my fingers. Plus it was a lovely luster and a semi-solid dye job that I really love. The yarn adds interest to the pattern without detracting from it.

Working on this hat has also come with one unexpected benefit. It’s given me a perfect opportunity to practice cabling without a cable needle. There are lots of different cable twists, even on the same rounds, but they’re all easy to do. The hardest part was just getting all the symbols straight in my head. After a few dozen rounds, I have twisting cables without a cable needle down pat. Those complicated sections are definitely going a lot faster without that extra needle in the mix.

Cables, owls, and beautiful yarn make a hat that’s hard to put down. #knitting | withwool.com

I missed my chance to wear this hat during the most recent snow fall, but it was also nice to work on this project and watch the snow coming down. Pretty sure the hat will be ready for the next storm though at the speed I'm going .

Stitch Markers Make Cables Easier

Losing count of cable rows? Use a locking stitch marker to keep track! #knitting | withwool.com

It is go time here on the holiday gift knitting. The current project is a cabled scarf with a hard deadline that I can’t miss. Much to my surprise, I’m already past the halfway point and might actually finish with time to spare. I’m attributing part of this speed to my favorite stitch marker trick. 

Losing count of cable rows? Use a locking stitch marker to keep track! #knitting | withwool.com

I can never pinpoint exactly which row I twist cables on which is frustrating when you have to work them every 8 rows or so. Locking stitch markers to the rescue! After I finish a cable row, I put a marker on that row. Then I keep knitting and can easily count the rows as I go. And it’s easy to put down and come back to a project because there’s no question about what row to work. 

I much prefer this method to row counters because I’m not always sure if I counted a row after I knit it. Maybe I did, maybe I didn’t. Without the marker, I’d have no way of knowing for sure.  

P.S. Stitch markers are some of my favorite knitting tools. Here’s 5 more ways that stitch markers can help with your knitting.