Winners! Also, Kumihimo Tutorial: Part 2
/Random.org has spoken! The two winners are GateArte and Katie M. of Brokeknits.com. Hope you have fun! Emails are on the way.
-----
The focus of this tutorial is how to finish off your braid with crimps and a clasp. If you don't want to add any findings, you can just tie of the ends and go or just have fun experimenting. Anyway, here's what you'll need:

- Your almost finished braid
- Scissors
- Super Glue
- Scrap Thread
- Clothes Pin
- 1 Barrel Clasp
- 2 8mm crimps
- Small needle nose pliers
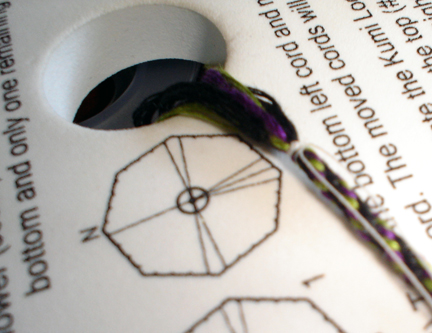
Once you’ve made the braid as long as you want, it’s time to finish it off. Make a little slack on the loom by pulling the working end of the braid straight up.

Then pull the braid and the extra thread back through the hole. Wrap the braid with the scrap thread several times and tie a double knot. Repeat until you have 3 or 4 knots.
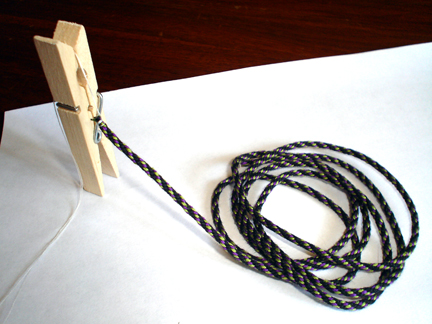
Now for the scissors. Just past the wrap and all of the knots, cut off the excess floss but leave the scrap thread. Seal the ends with a drop of glue and pin the scrap thread up in the clothes pin. It makes a handy drying stand in a pinch.
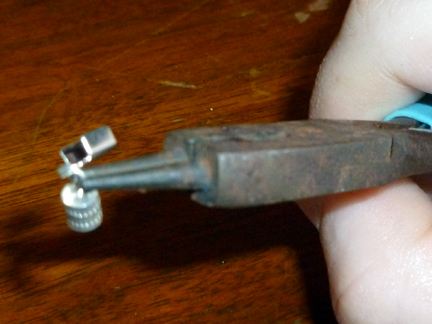
While the glue dries, it’s time to join the crimps and the barrel clasp. The ends of the clasp that I’m using rotate freely so the two can go straight together. First, take apart the clasp so it’s easier to handle. Hold one half of the clasp’s eye with the pliers and pull back the other side until there’s enough space for the crimp. Slip the crimp on to the wire and bend the eye back into place. Repeat for the other half of the clasp and it’s time to attach it to the braid.
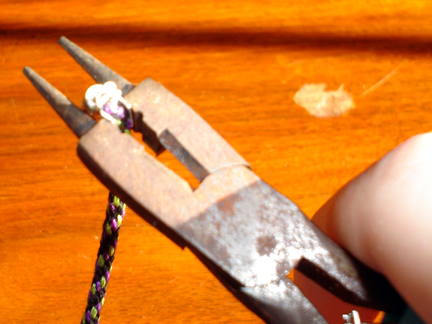
Cut off the scrap thread. Then put a drop of glue in the crimps and press in the braid ends. Do something fun while the glue dries.

Once everything is dry, crimp the crimps closed with the pliers.
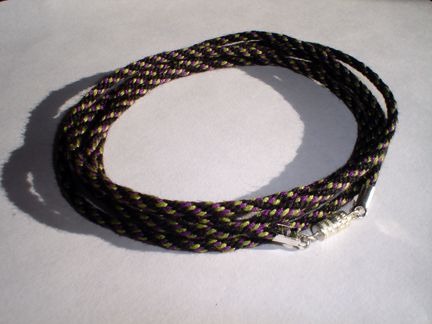
Time to enjoy your handiwork!