
How To Weave In Ends Without A Tapestry Needle
/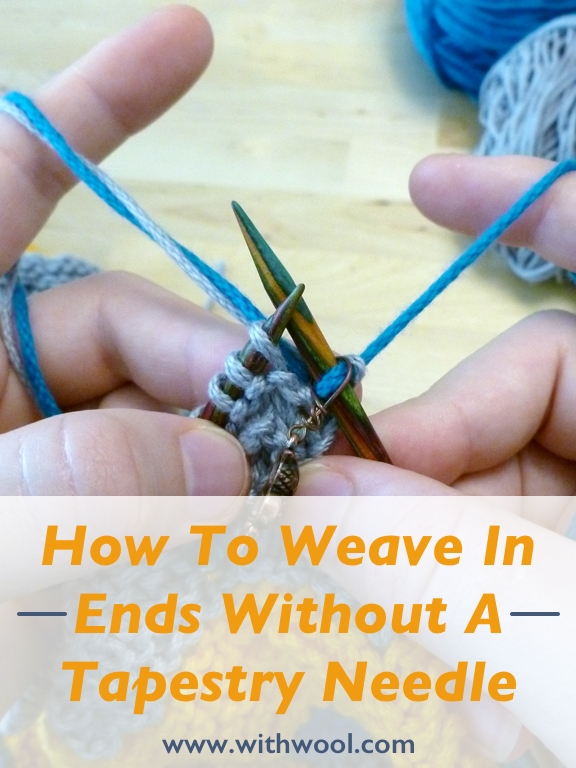
There are two great reasons to learn how to weave in ends without a tapestry needle. One, you don’t have to stop knitting to look for that one tapestry needle which has probably wandered off already. Where do they go? Ahem. Two, you can weave in ends as you go instead of putting it off until after the bind off or, if you really loathe working them in, never doing it all.
Learning to weave in ends without a tapestry needle can be finicky the first few times you do it, especially if you’ve never done color work, but it’s worth the effort. Not only does it save time during finishing but it’s also versatile. You can use it with stockinette, garter, and in pattern. It still works if you’re increasing and decreasing. The ends will follow the curves and angles of short rows and chevrons without creating extra bulk. While it is noticeable on the wrong side, weaving in ends sans needle is neat and tidy. Plus, it even works with slippery yarns.
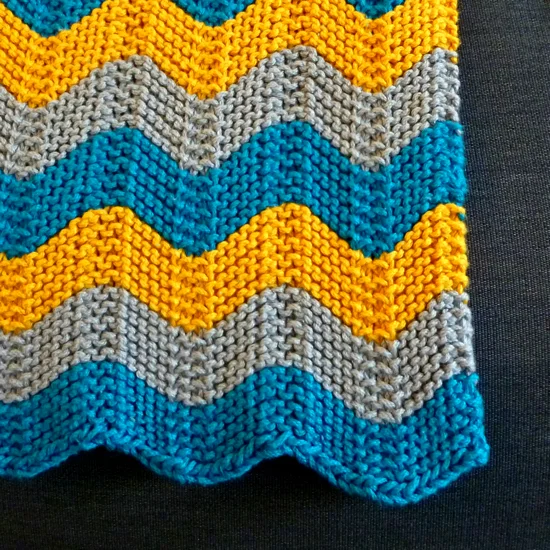
Sounds pretty cool so far, right? I thought so too which was why I used this method to weave in the ends when I switched colors on the Cuddly Chevron Baby Blanket. The deadline for that blanket left me in a dust with half finished knitting and weaving in the ends without a needle as I went cut out one last step at the end.
Step By Step

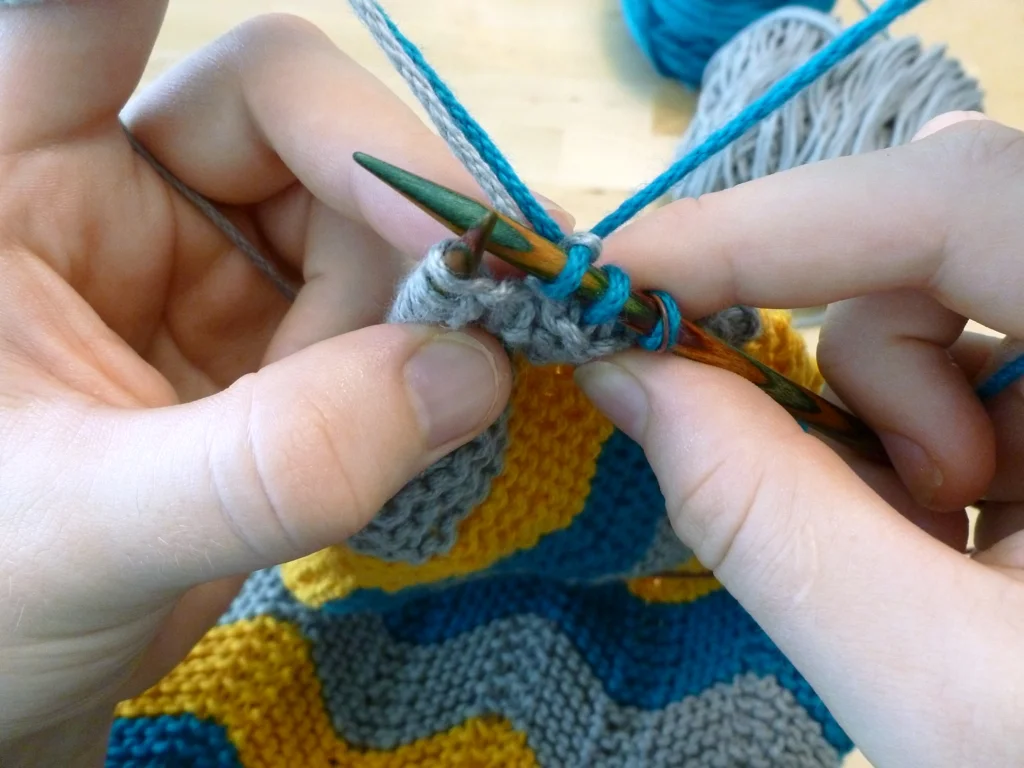
efore we get started, there’s one you need to know that’ll make learning this technique much easier. It might seem like you’re just knitting as usual with the new yarn but it’s actually wrapping around the tails as you move them back and forth.

When it’s time to switch colors (or time to add another ball of yarn), work one stitch in the new color. The tail should be about 6” so you have enough yarn to hold on to.
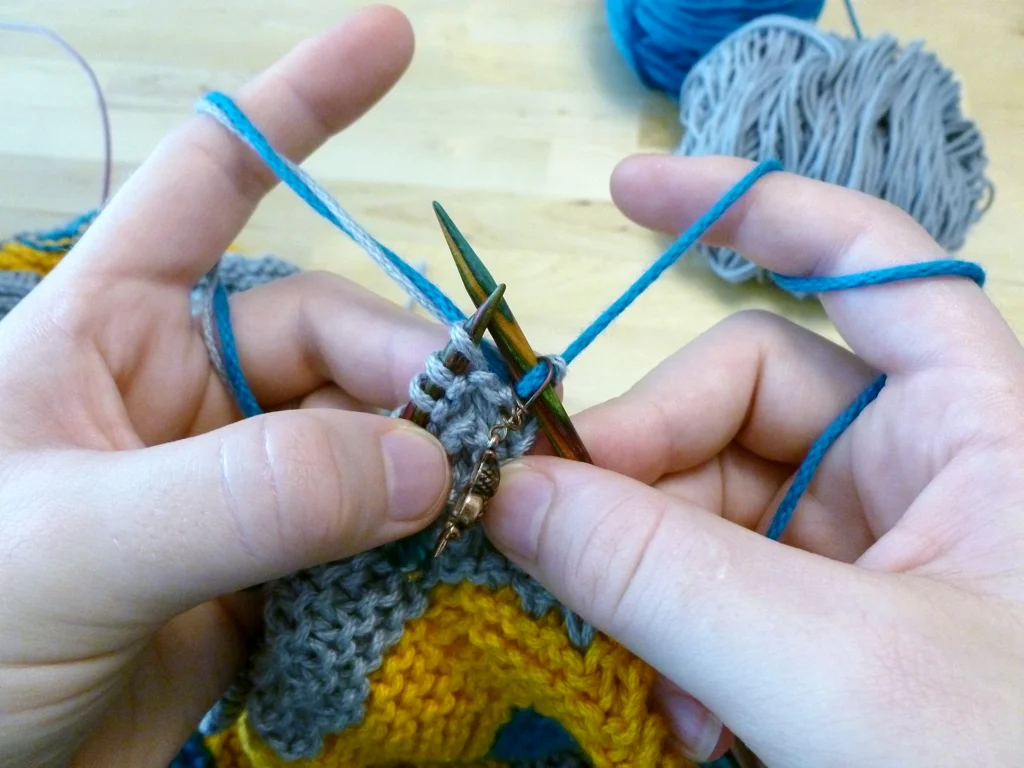
In the opposite hand of your new yarn (if you have the dexterity to do all this with one hand, mad props), hold the tails of both colors together.
Wrap the tails around the right needle from top to bottom.

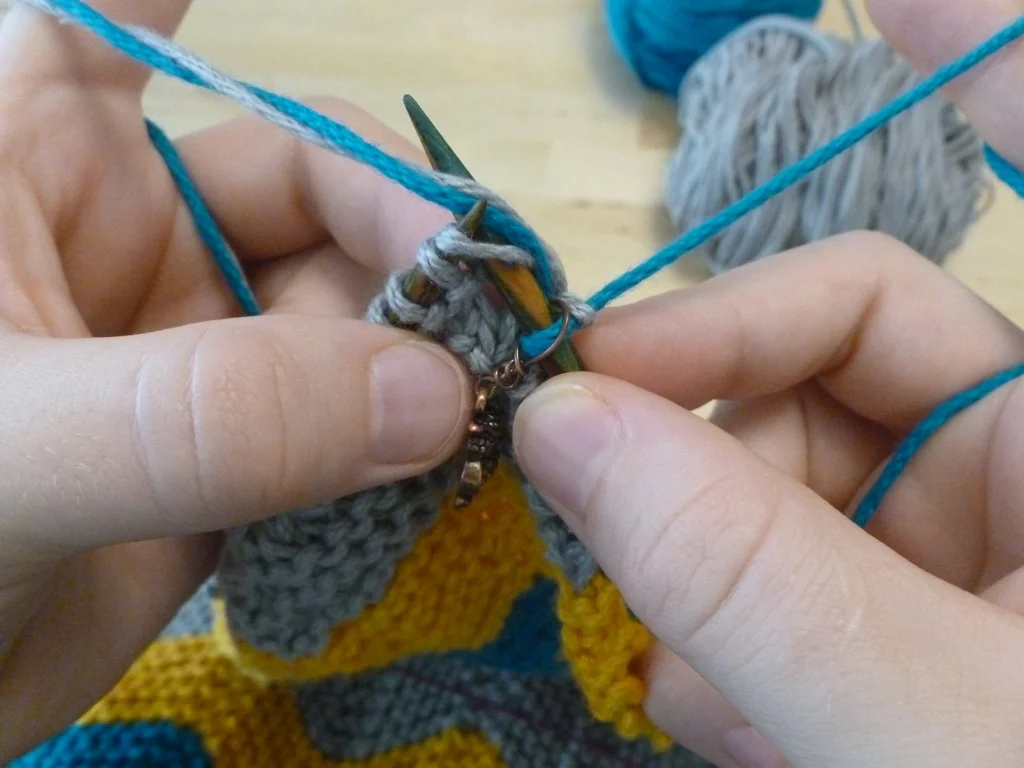
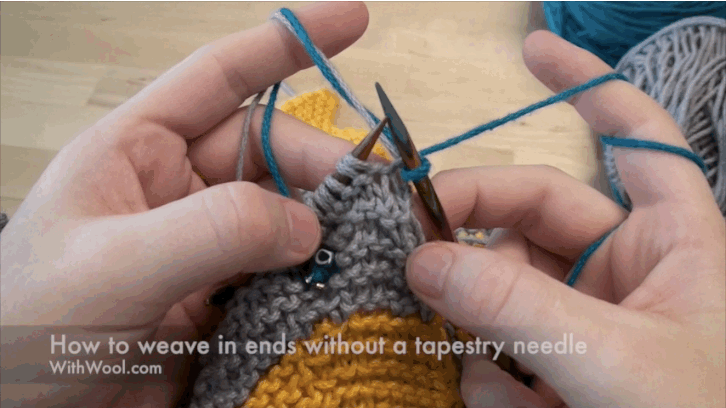
Work the stitch normally with the new yarn. Just the new yarn will be caught in the stitch and the tails will fall to the back. This is exactly what you want.
Work the next stitch with the tails held behind the needle.
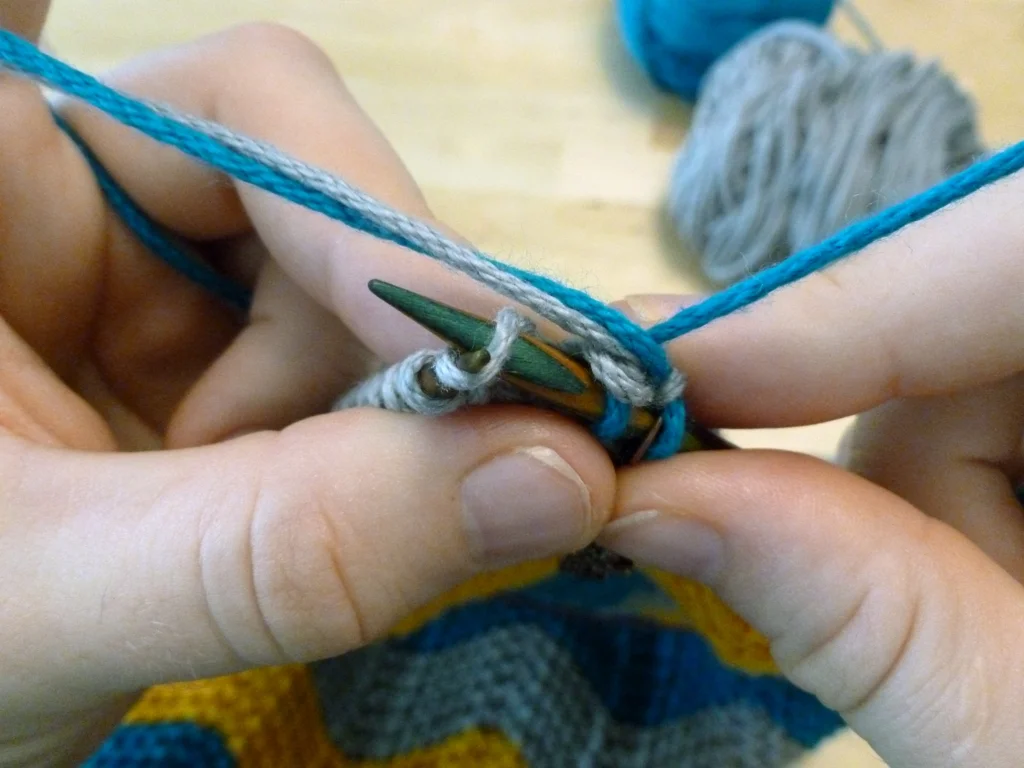
Repeat steps 4 and 5 until you’re satisfied with how much you’ve woven in. I usually aim for 1 - 2”. Drop the tails, cut the old color, and keep on knitting with nary a tapestry needle in sight.
See how all the steps come together below.
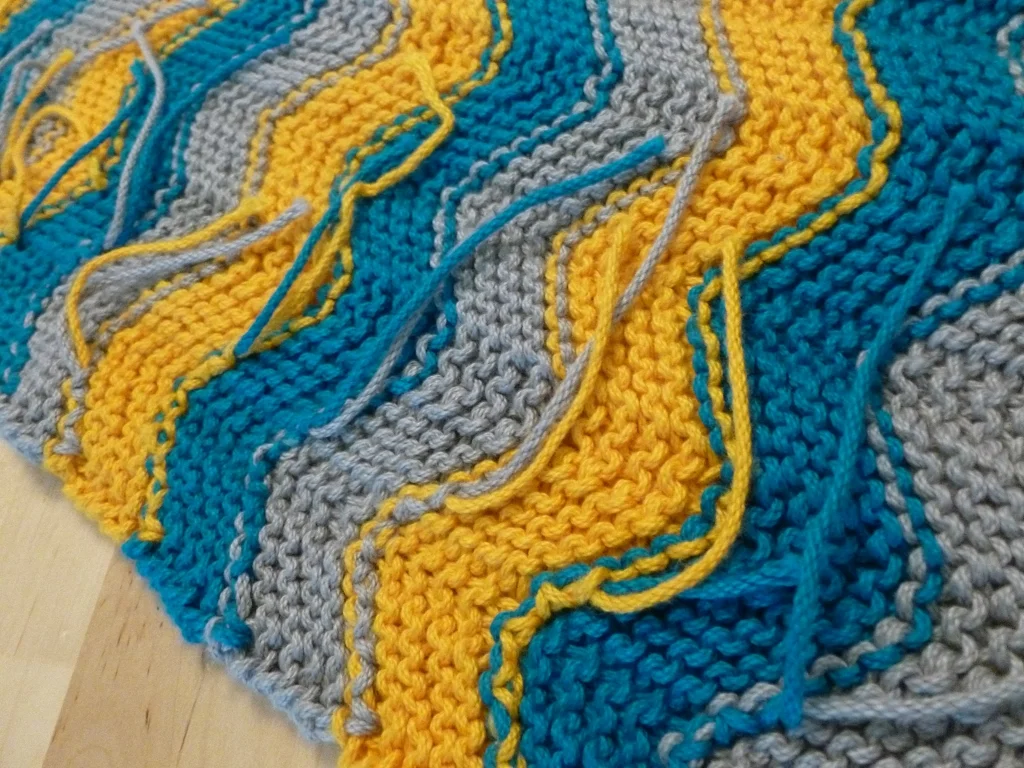
Here’s what the woven in ends look like on the wrong side of the knitting. The tails follow the curve of the chevron with no problem and are quite secure. A quick note: I waited to cut the tails until after the blanket came out of the washer and dryer.
Tips & Tricks
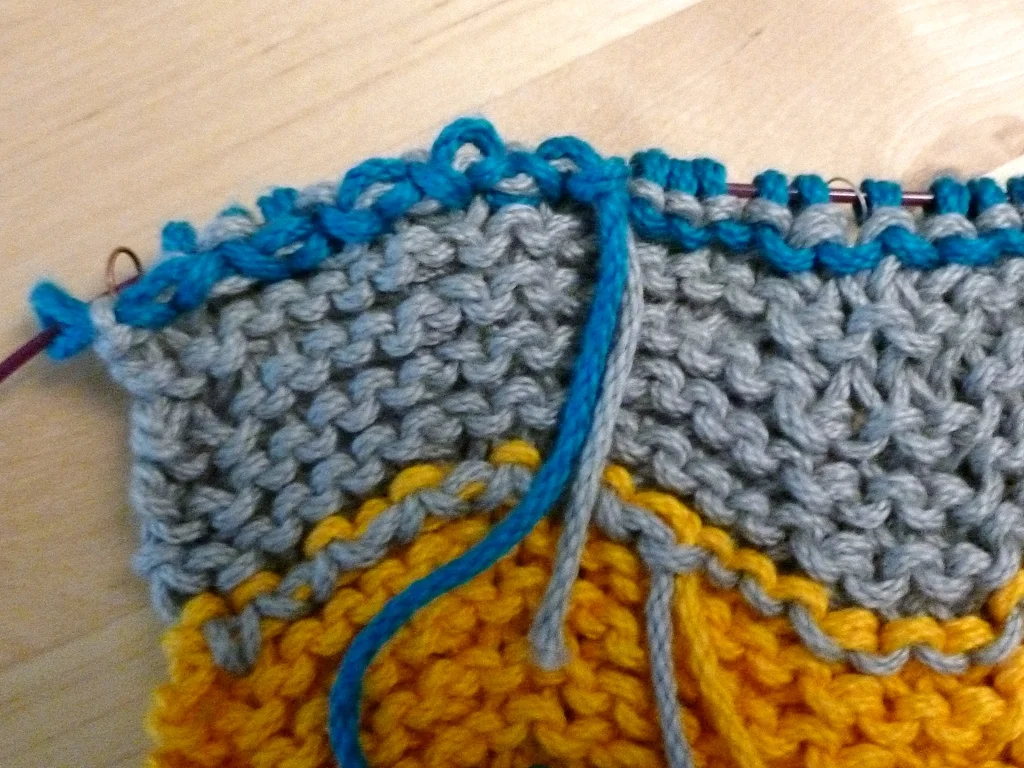
t the switch between the grey and the blue, the blue yarn isn’t evenly woven in. Since the tails are just wrapped in the working yarn, there’s no need to redo it. Just tug on the tail until it’s neatly in place.
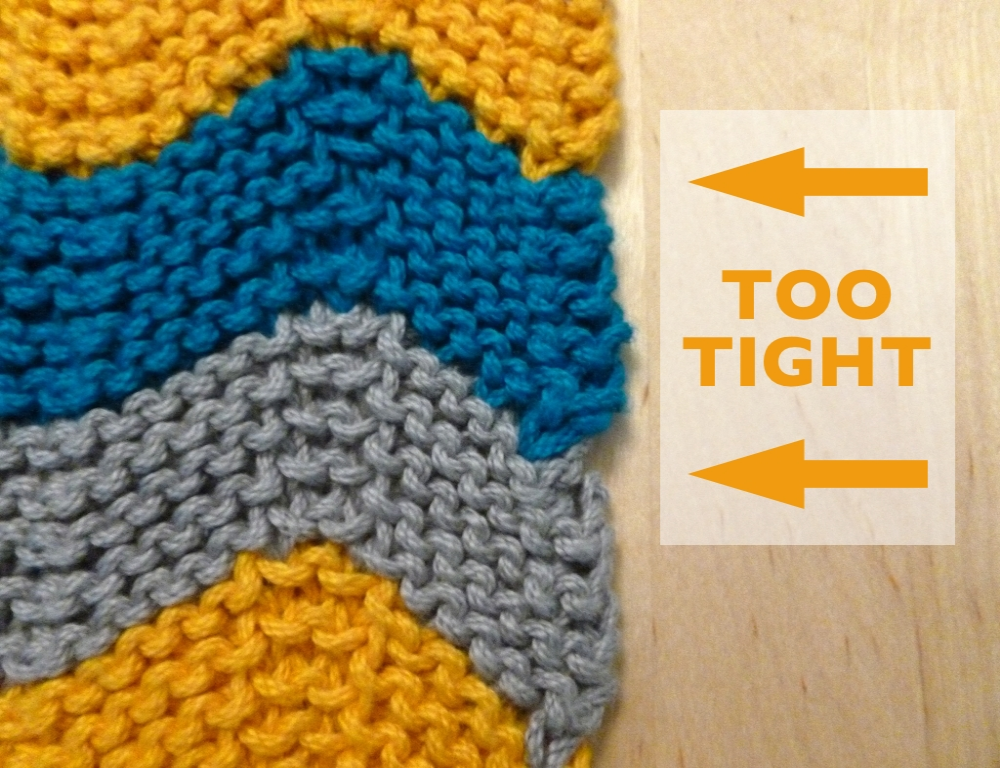
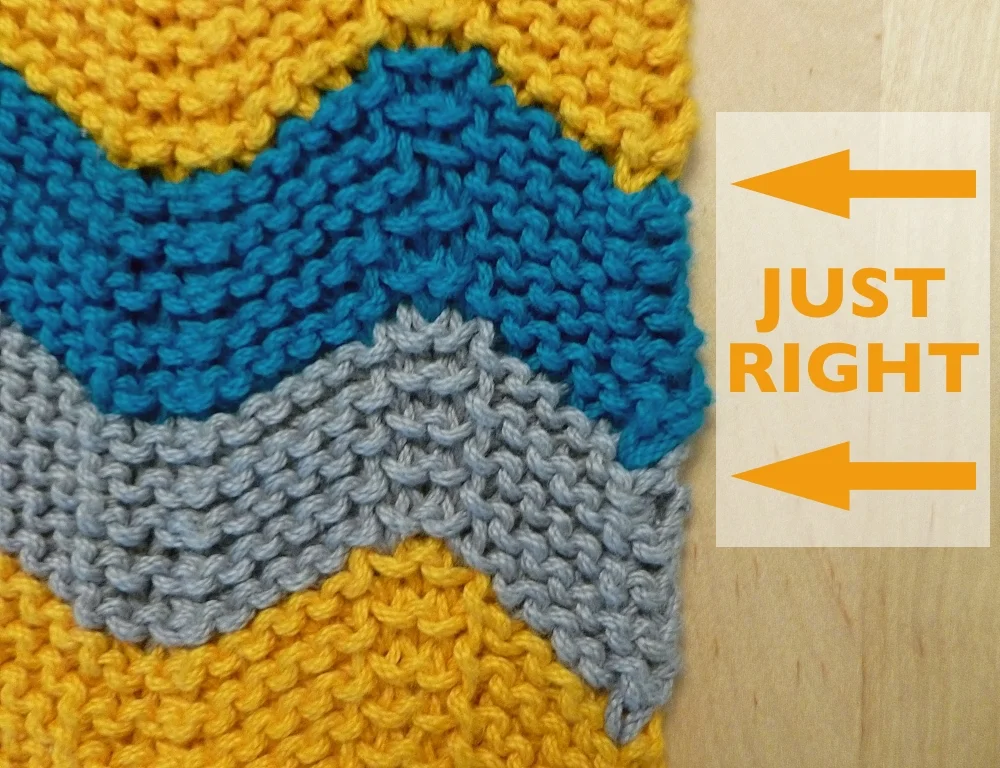
What if the tails were woven in too tightly? As shown above on the left, the stripes will pull in and pucker at the change but it’s easy to fix. Gently pull the edge out until to loosen up the tails and straighten the edge like in the right photo. If the tails get pulled out to far, just tug them back into place.
Tutorials
How To Work Lifted Increases In Garter Stitch
How To Weave In Ends Without A Tapestry Needle

