Spinning Blues

spinning-pencil-roving.jpg

Thanks to birthday gifts and great sales, I’ve been expanding my spinning library. The most recent additions are The Spinner’s Book of Yarn Designs by Sarah Anderson and Spin Art by Jacey Boggs. Both books are wonderful, inspiring resources and I’m reading them cover to cover. My fingers have been twitching to start spinning but I’ve kept reading on for more info.

paper-wrapped-spindle.jpg

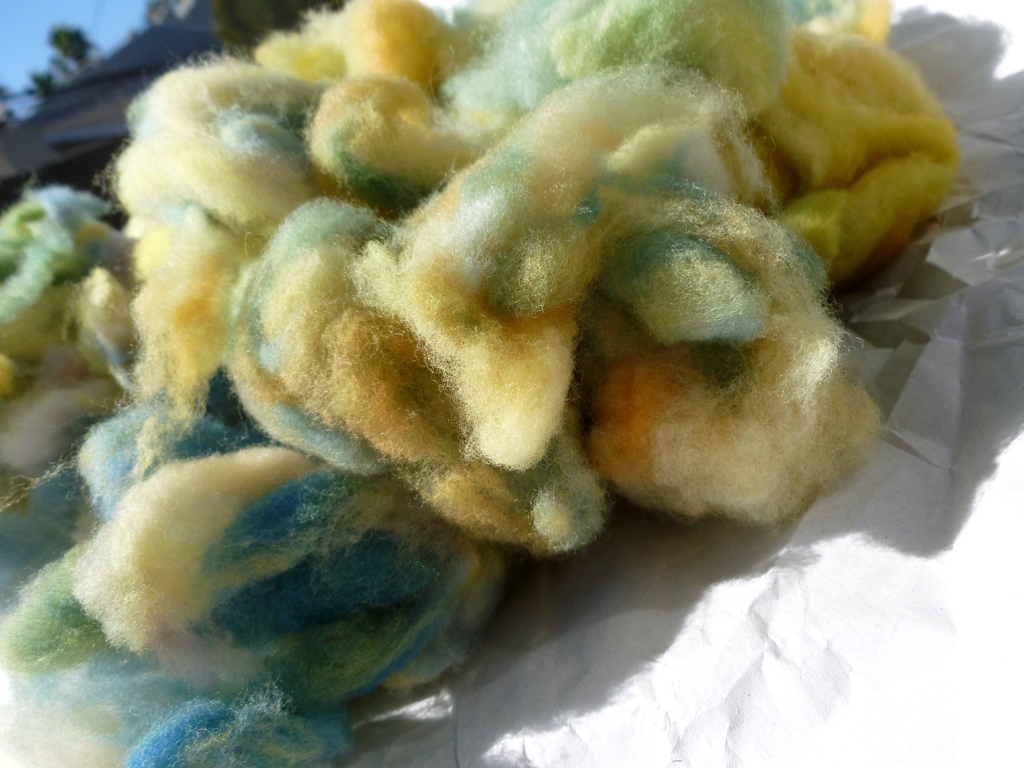
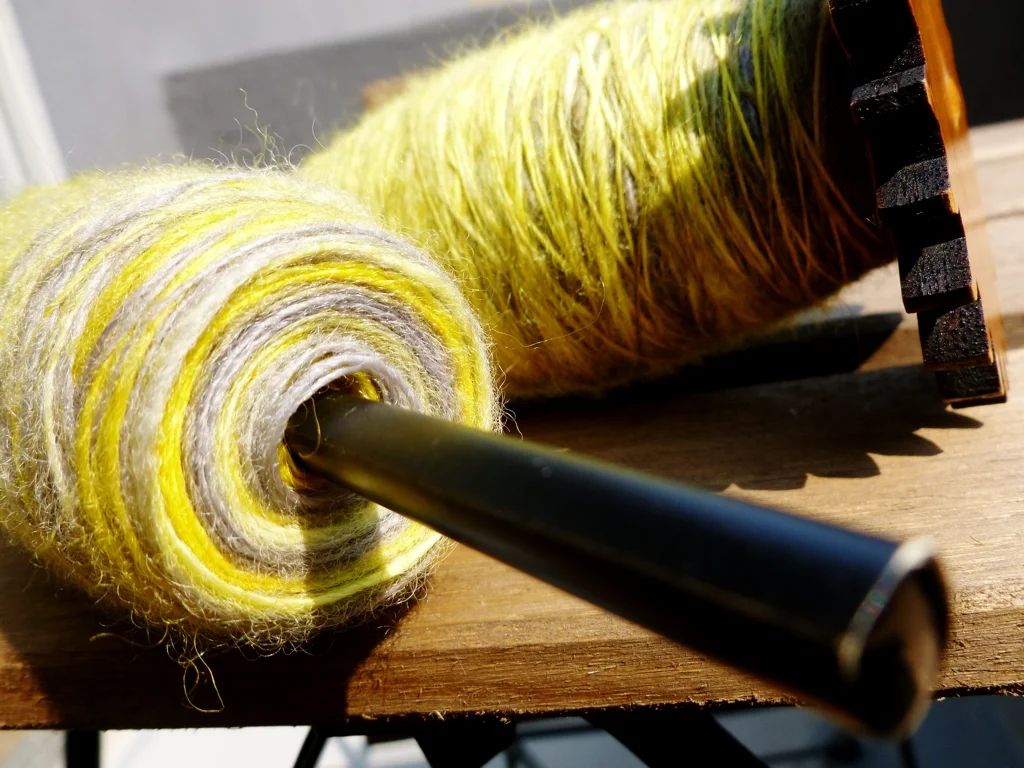
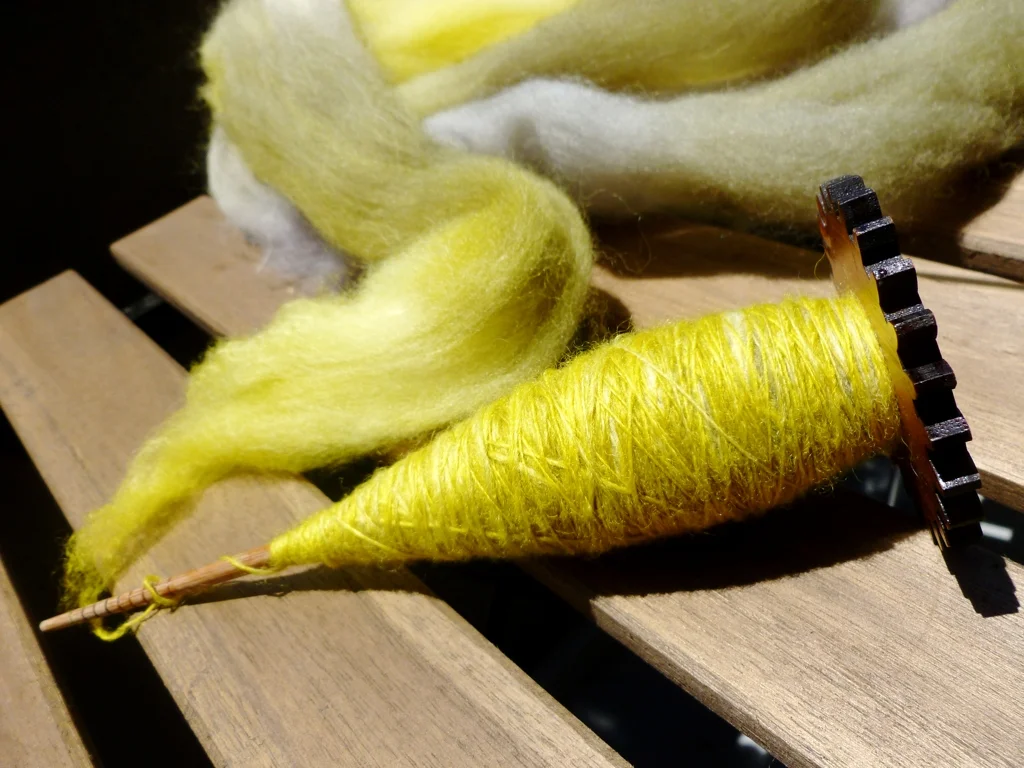
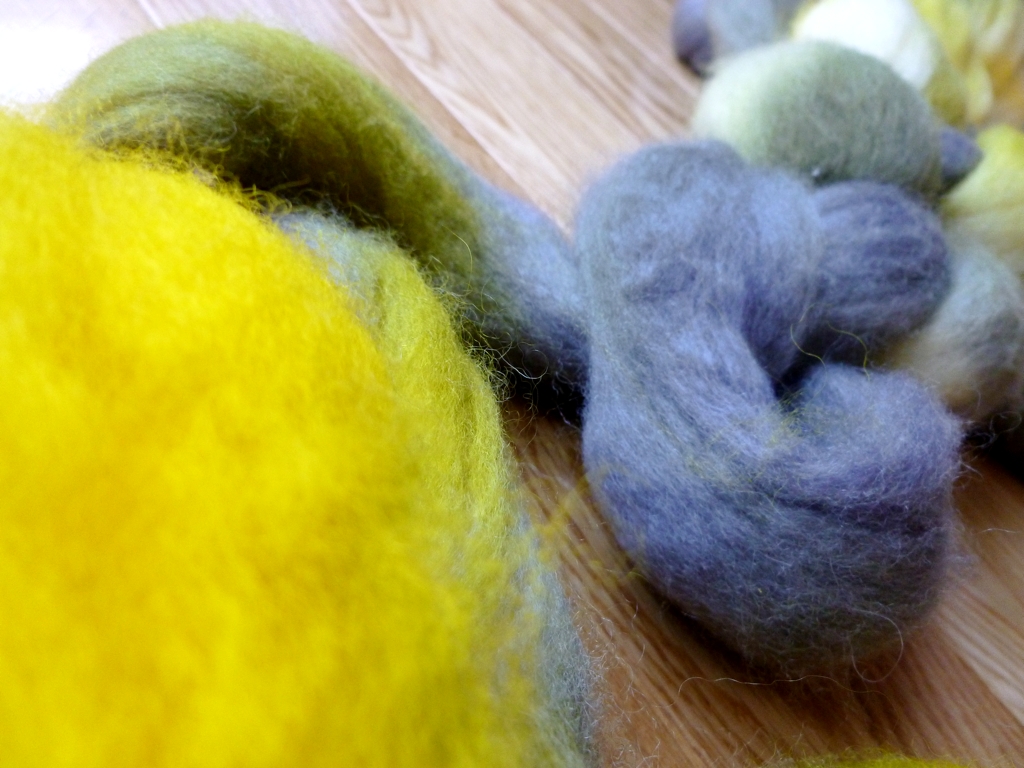
It was until last Friday I realized that I haven’t spun in weeks! My most recent project was half of the pencil roving I bought during Tour de Fleece. What’s the hold up? The roving was turning my spindle and hands blue. After I cleaned the spindle, posted a tutorial about it,  and the dye finally faded from my hands, I wanted to find a way to protect the spindle from more dye. I thought I had found a solution in a hardy strip of paper. Friday, before the arms went on my favorite turkish spindle, I wrapped the shaft completely with a piece of heavy paper. I could finally spin again and finish this yarn.  The problem was that every time I set the spindle turning, I was slowly unwrapping the paper. Not even tape held it in place. Eventually, I ripped off the paper and wound another strip in the opposite direction. That strip wouldn’t stay in place either. Completely fed up with the whole attempt, I ripped the paper off and just kept spinning.

blue-pencil-roving.jpg

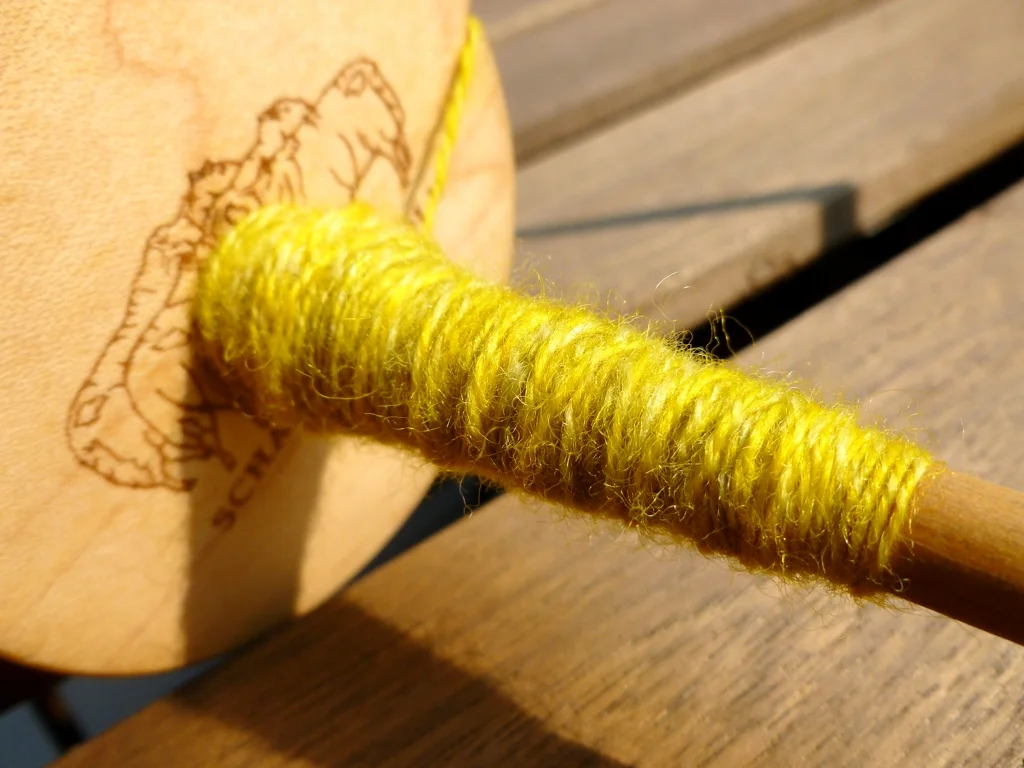
My fingers and spindle are blue again but the spinning is easy and it isn’t as hard to draft a heavier single the second time around. I’m pretty sure using paper to protect a spindle can work but not for bottom whorl or turkish spindles. The method would probably be best for top whorl spindles if you left enough of the shaft unwrapped; there would be room to flick the spindle without touching the paper and releasing the wrap. 

Well, my first idea for protecting my spindle from extra dye didn’t work. The second attempt might involve latex gloves. Any suggestions or ideas to save my spindle and hands from unset dye?

Grab Bag Goodness

GrabBag1.jpg

Reason 3,548 to love the internet: You can see something you absolutely love and, after a few clicks, it’ll show up on your doorstep. That’s exactly how I ended up with these little bits and bobs of fiber from GwenErin. I slightly stalk her Etsy shop and, when she posted about having grab bags of fiber for sale on the cheap, I couldn’t resist. That was last week. This afternoon, the package was waiting for me when I opened the door.

GrabBag2.jpg

The longer lengths I’m going to spin and use for a  few of the constructions in The Spinner’s Book of Yarn Designs which is horribly inspiring. As for these smaller bits, I’m not sure since they’re not in large enough pieces to spin. Maybe I’ll use them for felted balls or take another try at needle felting. Hell, if none of that works, I can just use them as stuffing. Waste not, want not. 

Do you have any suggestions for what to do with small, leftover bits of wool roving? I’d love to read your suggestions.

Sampling Perendale Wool

Perendale1.jpg

The planets aligned a few weeks ago and I won something through a Twitter giveaway. I never expect to win anything through online contests. Usually, I’ll leave a comment or retreat and promptly forget about the whole thing. So, on the rare occasion I actually win, it’s a nice surprise. The something I won this time was a half pound of Perendale wool fiber from Louet in celebration of their new website. 

The fluffy bundle arrived last week and I pulled off a little bit to sample since I’ve never spun Perendale. The top is think, fluffy, and definitely smells of sheep. The scent isn’t overwhelming but noticeable compared to a more processed fiber. There’s a few bits of vegetable matter but, on the whole, the top is very clean. While the Perendale isn’t Merino soft, it isn’t scratchy either. It’d make a good pair of mitts or a hat.

Perendale2.jpg

On a folded up piece of paper was information about the farm and location where the lovely sheep who grew the wool live. It’s a nice touch and I’m glad to know a bit more about where the wool came from. Info about the staple length, color, and style was included as well. 

Knowing the staple length, 3-5”, made it much easier start spinning up a sample single. Drafting was a lot easier too once I reminded myself to keep my hands further apart. Overall, Perendale is pretty easy to spin and I’m looking forward to plying the single. As for the remainder of the 8 oz, well, I have a grand plan. There’s a spinning wheel in my not-too-distant future and I’m going to use the Perendale to learn how to use it.

Perendale3.jpg

Review: Ply Issue One

PlyReview1.jpg

I first heard about Ply in January 2013 when the magazine’s Kickstarter campaign was making its rounds. Edited by Jacey Boggs, the magazine’s goals were both simple and bold: inspire new spinners, teach in-depth techniques, celebrate the diversity of spinning, support handspinning around the world, and act as a record for the spinning community. Ply met its funding goal and then passed it to raise a total of $34,455. Six months later in June, Ply was released to the world. 

In July, I finally signed up for a subscription and I blame Tour de Fleece for pushing me over the edge. My main goal for this year’s Tour was to learn and practice new techniques. Subscribing to a magazine that promised to teach, inspire, and document spinning seemed like just the ticket to keep my own personal Tour de Fleece going. So, I spent the remainder of my Paypal funds, plus a little extra, and waited for the magazine to show up in my mailbox. 

 When the first issue arrived, I was pleasantly surprised since it seemed more like a book than something you’d buy from a newsstand. The cover and paper are heavier than the everyday magazine. It felt weighty and full of information. Time to read it cover to cover. 

I’m usually guilty of skipping the first few pages of a magazine and going straight for the more interesting articles or knitting patterns. Not this time. Reading through “From The Editor” and later “Behind the Curtain: Why PLY?”, I was struck by how much passion Boggs and the rest of the team have for spinning as well as creating a top notch magazine. The enthusiasm isn’t limited to just those two articles but shows on every page. It’s infectious. Half of me wanted to keep reading and the other half wanted to get spinning. Sadly, reading while spinning is not a skill I’ll probably ever master. Or even attempt. I stuck with the reading. 

Ply’s first issue follows the appropriate theme of firsts. The articles cover everything from the very first spinners to buying your first fleece to the development of spinning wheels. The various articles are enough to grab the attention of new and experienced spinners alike. They are detailed without being boring and accompanied by useful photos. “Corriedale: The Ideal First Spin” covers a number of prep and drafting methods. Each sample and its knitted swatch is clearly photographed to show the differences.

PlyReview3.jpg

Besides from the 13 articles, not counting tips and reviews, in this issue, there are 3 separate spinning tutorials. There’s a 2-ply color progression yarn, corespinning with goat locks, and a simple worsted 2-ply. The only true in-depth tutorial is for the corespun yarn which includes step by step photos and instructions. The other two tutorials assume that you know already know what you’re doing. You’re given the complete material list, the basic process, and the finished yarn’s stats. Basically, a jumping off point to do your own thing. 

Each of the three yarns is paired with a knitting pattern. A shawl, sweater, and baby sweater, respectively. I really like this idea because even if you don’t want to knit the pattern, you still get some idea of what to knit with those precious skeins of handspun which might be one of the harder parts of spinning. 

Now that I’ve had a few weeks to read the first issue cover to cover and repeatedly flip through it, Ply meets its goals. It’s inspiring and, undoubtedly, a strong reference not just for spinning but for history and community as well. Definitely forwards my Tour de Fleece goal of learning new things. These magazines will have a prominent place on my shelves and I’m looking forward to the next issue. 

In a post from September 1, Boggs wrote that Issue 1 was officially sold out. The good news is that Issue 2 will be mailed out starting September 6. Get one while you can. It’s worth the price.

PlyReview2.jpg

Winter Pinoak Reveal

PinworthHandspun3.jpg

I finished this skein of handspun several months ago and I’m finally getting around to showing it off. I spun it before I got married and before I moved cross-country. I only finished spinning it in March 2013 but this yarn already seems like a relic of a different age. Maybe it is.

PinworthHandspun1.jpg

Whatever time this yarn marks in my life, it was the first handspun that I wanted to knit as soon as it was off the spindle. I even wound it by hand while traveling over bumpy roads during the move. It was going to be road trip knitting and the first yarn I worked with after weeks and weeks without knitting. Unfortunately, I couldn’t find just the right pattern and I still haven’t. Will the yarn turn into a Trillian? Or a Freesia? I just don’t know. The handspun is waiting patiently for me to decide. For now.

PinworthHandspun2.jpg

The Specs:

462 yds of fingering/sport weight yarn

4 oz of Bluefaced Leicester 

Dyed by Yarn Geek Fibers 

Colorway: Winter Pinoak

PinworthHandspun5.jpg
PinworthHandspun4.jpg

How To Ply Leftover Singles

PlyingLeftovers1.jpg

 In a perfect world, we would spin singles with equal yardage and have none left over after plying. I’ve heard tales of this happening to a few lucky individuals but, for the rest of us, there’s going to be extra. Those last few, or not so few, yards sit on bobbins or spindles or straws or chopsticks while we forget about them completely for the next project. That is until we need that spindle or ran out of straws for extra yarn. I know that I have plenty of un-plied singles from when I first started spinning and had no idea what to do with the extra. My last few spinning projects have also left me with leftovers and I’m tired of them taking up space in my spinning box. The remaining yardage can easily be turned into a 2-ply yarn since the hard work of drafting is already done. 

The leftover single can have a lot more yardage than you think. A plied mini-skein can give you a little breathing room on the final rows of a project or be enough to knit a small trinket - like a Christmas ornament or bookmark. Plus, the mini skeins are cute and perfect for petting on a stressful day.

PlyingLeftovers2.jpg

Wind the yarn off the spindle (or bobbin or straw) into a center pull ball. You can use a ball-winder, a nostepinne, or your hand. Just go slowly or risk snapping more delicate singles.

PlyingLeftovers3.jpg
PlyingLeftovers4.jpg

Once wound, pull out the end from the center and the outside. Tie them together in a knot and you’re ready to start plying with a spindle or a wheel.

PlyingLeftovers5.jpg

The ends will pull out smoothly in the beginning but, as more of the singles move to the spindle, the ball will start to collapse. Go slowly and keep an eye out for potential tangles.


PlyingLeftovers6.jpg

Let the fresh yarn rest for 24 hours before picking something small to skein up the yarn before dunking it in a bath. I used two small lamps and a book for a third un-pictured, mini skein.

PlyingLeftovers7.jpg

Finally plied and finished, the yellow skein has 13 yds and the blue has 29 yds. I haven’t quite figured out what I’ll do with these skeins but, in the meantime, they’ll look cute on my desk.

How to Clean Dye Off Spindles

SpindleCleaning1.jpg

Dye bleeds. It’ll cover your hands, your clothes, and perfectly innocent yarn. Not even spindles are immune. The pencil roving I started spinning last week has been great to spin except for the fact that it’s been turning my hands and favorite spindle blue. Once the first single was finished, I finally had the chance to take my spindle apart and see how drastic the color change had been.

SpindleCleaning2.jpg

Blue, very blue. My blue “Smurf” fingers clued me in that the change would be severe but it was still disappointing to see the difference. It’s pretty, I’ll admit that, but the shaft is not the amazing amber color that it was when I first received the spindle as a gift a year ago. I’d rather have the amber back and, if fiber has turned your spindle an unwelcome color, you probably want it looking like its original self too. Plus, I want to get rid of any dye that might rub off on future projects. Here’s how I removed the extra dye.

SpindleCleaning3.jpg

Dr. Bronner’s Castille Soap to the rescue. I keep Dr. Bronner’s around because it’s a gentle, mild soap that can still get the job done. Plus, you can use it for cleaning just about anything.

SpindleCleaning4.jpg

Wet a paper towel and squeeze out the excess water. Add a few drops of soap and start rubbing the stains. If the dying was recent, you should see a difference right away. Switch to a clean, damp cloth or paper towel to remove the soap. Pat dry.

SpindleCleaning5.jpg

 The shaft still has a blue tint along with a few blue spots where the dye got into the grain but the spindle is much closer to its original color. Now I just need to find a way to keep the roving from turning the wood blue again. 

What's up, pencil roving?

PencilRoving1.jpg

Tour de Fleece may be over for the year and I’ve finished the Tour’s spinning but that doesn’t mean I’m leaving my goals behind. I’m spinning most everyday and I’m working up to spinning in public again. I’m still eager to try new things too. The closest, new thing at hand was the pencil roving I bought during the Tour. Time to satisfy my curiosity.

SpinningPencilRoving1.jpg

Once I got the label off, the roving was packaged just like a skein of yarn unlike other bumps of roving that come braided or chained. There’s no need to put it on a swift before it can be used though.

SpinningPencilRoving2.jpg

Looking closer, the roving is actually 2 smaller strands that were easily pulled apart. I’m not sure if this is how all pencil roving is packaged or something unique to Pagewood Farms but I like it. The strands were obviously dyed together and have the same color variations. Being able to easily split the strand in half makes it easier to spin color matching singles. This hank is a semi-solid blue so being able to spin matching singles doesn’t matter much but it would be a big help with a more variegated hank. Having 2 strands is also less work too since I don’t have to figure out where to split the fiber in half. 

SpinningPencilRoving3.jpg

Separating the two strands seemed like the right thing to do, so I got right to work. Then I wound the strands into cakes for easy access during spinning and for pre-spinning storage.

SpinningPencilRoving4.jpg

I’ve often read that pencil roving is great for beginners since the fibers all run in the same direction and there’s not a lot of excess fiber to worry with. These reasons make pencil roving easy to draft for the beginner and advanced spinner alike. I’ve only spun a bit over an ounce of the stuff so far, but my experience is that both of these things are true. The spinning it is quite easy and I’d recommend it if you’re still trying to teach your hands how to draft. Muscle memory is such a large part of spinning that can easily be overlooked in the beginning for the theory of adding twist to fiber. Making yarn is a physical process that uses your hands but also entire body. You must train yourself well.

SpinningPencilRoving5.jpg

I’m taking advantage of pencil roving’s qualities to spin a heavier yarn. After spinning so much fingering weight, I want to make sure I can still spin a worsted weight or thicker yarn. It was a bit of struggle to get my fingers to relax and not keep such a death grip on the fiber. The beginning of the single is pretty fine but has gotten thicker over the following yards. Only the plied yarn will tell, but it seems like I can still spin a worsted weight yarn. If only my fingers weren’t turning blue in the process.

Finished Fractal

FinishedFractal4.jpg

My Tour de Fleece yarn is finally finished. Only took 1 extra week, 2 skeining attempts, 2 washes, and 3 days of drying time. Seems like I could have saved a few days if I’d had the patience to re-skein the yarn correctly the first time around. To reiterate, bicycle handbars are not the best option for skeining yarn. Over turned laundry baskets, on the other hand, do a decent job.

FinishedFractal5.jpg

All that extra time working with the yarn did have some benefits though. Not only is the yarn well blocked and balanced, I really want to knit it. NOW. Usually, my handspun likes to marinate in the stash for a bit since I don’t spin with an eventual project in mind. The yarn, itself, is the project. If I want to spin a fingering weight yarn, I spin a fingering weight yarn. That’s all there is to it. Any potential pattern comes much later. With this yarn, I just wanted to try my hand at fractal spinning for Tour de Fleece. Spending double the time finishing the yarn, let me better appreciate the final yarn and absolutely fall in love with the colors. Sometimes the colors stripe, sometimes they barber pole, and sometimes they create an amazing gradient. Knitting this skein up is the only way left for me to truly appreciate it. 

FinishedFractal2.jpg

 What was it like spinning a fractal yarn? No different than spinning any other yarn. Certainly nothing to be afraid of. The hard part is finding a bump of fiber dyed just the right way. Splitting it and spinning it are the easy parts. Just remember that you might have to pre-draft the undivided half of the fiber to get a matching single for the divided half. 

FinishedFractal3.jpg

The Finished Specs

Fingering Weight Yarn with 18 - 22 Wraps per Inch

512 yards

4 oz of Bluefaced Leicester 

Dyed by Yarn Geek Fibers

Colorway: Big Yellow Taxi

512 yards is a lot to work with and I really don’t want to split it up in a bunch of smaller project. Shawl, it is then.

FinishedFractal1.jpg

How to Not Skein Yarn

SkeinUp1.jpg

Desperate times came for desperate measures, my friends. There I was with my finally plied Tour de Fleece yarn ready and waiting for its bath. Unfortunately, my swift didn’t make into the car for the cross country trip (too big) and  my niddy-noddy, which I meant to bring, didn’t either. Both might as well be in another dimension right now. With my swift I could have easily wound it up in a skein, see this tutorial. Same with the niddy-noddy. So, I went looking for alternatives.

SkeinUp3.jpg

Say hello to Allie, my new bike. The handlebars seemed like the perfect thing to wrap fresh yarn around. Alas, this was not the case though that wasn’t apparent until much later.

SkeinUp4.jpg

I put the spindle into the front basket for easy yarn dispersal and got to work. It didn’t take me too long to empty the spindle and tie off the skein. 

SkeinUp5.jpg

Now that it was time to take the yarn off the handlebars, things went south. See, the handlebars don’t go straight back but angle to the side . I had hoped that if I wound loosely, getting the skein off the handles would be pretty easy. Nope. I had to slide the skein off a few too tight strands at a time.  Nothing snapped, thankfully. Just for good measure, add in a few too long stands that accidentally got wrapped around the break grip too. The skein was a mess.

SkeinUp7.jpg

A more patient person would have re-skeined the yarn around something else but I was not feeling particularly patient. There was yarn to wash! and, adding insult to injury, I had to first wash dishes to free up the sink. I had no patience to spare after doing the dishes. So, the yarn got its bath and I got the pleasure of thwacking it afterward. 

Now that the yarn is dry, I’m not sure I did the right thing. The accidentally too long strands are still kinked and curling on themselves. Looks like the yarn wasn’t properly finished the whole skein through. At least I know I managed to spin a nice fingering weight, which was my goal, instead of a lace weight. With today’s bolstered patience reserves, I’m going to re-skein the yarn but not around the bike’s handlebars. I’m going to do what I should have done yesterday and wrap the yarn around an upturned laundry basket.  Wish me luck.


Tips for Spinning Yarn on the Beach

BeachSpinning2.jpg

One of my goals for Tour de Fleece was spinning in public. I knit in public all the time but hadn’t worked up the courage to spin in public until last week. Honestly, I didn’t think I’d actually do it which is what finally made me suck it up and get it over with. If I was going to spin beyond my front door, I was going to enjoy my surroundings. So, spindle in hand, I headed to the beach. There was all the sun, sand, and waves that I enjoyed on my daily walks. A spot was found and the only thing left to do was actually spin. I started spinning reluctantly but lost any thought of nervousness once I found my rhythm. People stared but it wasn’t the end of the world. It was actually pretty nice and I’m looking forward to spinning on the beach (and in public) again. If you want to try spinning on the beach too, here are a few things I learned:   

BeachSpinning3.jpg
  1. Sand is everywhere, so bring a towel. It’s the beach and sand will end up in places you didn’t know existed. A big, oversized towel will provide some (relatively) sand free space to spin. If the spindle drops, the towel will be there to catch it and spare your yarn from the sand.
  2. Use the wind to your advantage. Part of the reason to visit the beach is to enjoy the sea air. Make it work for you. Stand at an angle that will keep your fiber or singles blowing away from you and your work. Not having to hold your fiber out of the way might make drafting easier too. 
  3. Use the sky and the sand! The sky and the sand are great, uninterrupted backdrops to inspect your spinning. Analyze your plying or just admire your handiwork.
  4. Mind the tide. Waves are great to listen to but they like to travel. If you start spinning near the waves at low tide, they could be at your feet before you know it. Don’t forget about the spray either. Wet wool is hard to work with.
  5. Be prepared for stares. Yes, stares. Seeing someone zoned out with their phone is far more common than seeing someone spin yarn. It’s only natural that people will be curious. Don’t get nervous. Instead, smile and maybe even say hello. 

As always, bring along all the regular beach necessities; like sunscreen, a hat, and a snack, too. Spinning is fun but sunburn is not.

BeachSpinning1.jpg

Tour de Fleece Complete

FractalPlying1.jpg

 Tour de Fleece is over and done for another year but I don’t have any finished yarn to show for it; however, I do have some lovely, almost yarn. Half of it is plied on the spindle and the other half is still wrapped up in a plying ball. All of that last minute plying just wasn’t enough. 

Despite my lack of finished yarn, Tour de Fleece 2013 was a big success. Thankfully, I skipped any yardage requirements and stuck with 3 simple things: spin everyday, practice new techniques, and spin in public. I thought spinning everyday would be the easy goal but I didn’t manage it this year. Still, spinning almost everyday got me a lot of proto-yarn. As for practicing new techniques, I just stuck with one and tried out fractal spinning. I’ve never attempted to spin yarn or affect color this way before. We’ll see if I pulled it off once I actually finish the yarn and knit it. I also bought pencil roving which I’ve never spun before. Totally counts towards practicing a new technique.

FractalPlying2.jpg

The one goal I made, that I was 90% sure wouldn’t happen, was spinning in public. I’ve spun at knit night before and at fiber guild meetings but none of that counts. All of those people understand the attraction of yarn. Out in the knitter sparse public, who knew what the reaction would be. Last Friday, I sucked up my potential embarrassment, packed a towel, and headed to the beach with my spindle. I enjoyed the sun and the sound of the waves. I got quite a bit of plying done and got quite a few stares too. Once I found the rhythm of spinning, I was too relaxed to be embarrassed. If anything, people were embarrassed when I noticed them staring at me. Who knew? One man stopped fishing to watch but quickly went back to the fish when I looked in his direction. At least no one came up to me and commented that spinning was a “dying art”.

How did your Tour de Fleece go? Meet all of your challenges are you still plying, like me?

FractalPlying3.jpg

Just Plying Along

FractalPlyingBall1.jpg

There are 3 more days of Tour de Fleece and I’m just started plying. It’s highly improbable that I’ll have a finished skein by Sunday night but I’m going to try anyway. If only the yarn would expertly ply itself while I’m asleep. 

To make the whole plying process run a lot smoother, I’m falling back on my favorite technique, the plying ball. It does take longer to start since you have to wind the singles together around a core but it’s worth it. A plying ball is portable, doesn’t require a Lazy Kate, and makes tensioning the singles during plying so much easier. Plying balls also give you one last chance to fix any breaks or weak spots before they snap during plying. One extra, added bonus is that you get to see how all the colors line up which is great if you’re spinning a fractal yarn, like I am. For more info on how to actually wind a plying ball, check out this tutorial.

PlyingBallCollage.jpg

All wound and ready to ply! My attempt at dividing the fiber for fractal colors seems to have worked. I was also exceedingly happy to see that one single wasn’t much longer than the other. It’s the small things in life. 

I’m a few yards into plying and seeing the colors change as they move through my fingers is wonderful. When I first picked out this fiber and my lightest spindle, I was aiming for a fingering weight yarn but, so far, it looks more like a lace weight. Maybe a bath and a good thwacking will bulk it up a bit. If not, that’ll teach me not to spin samples first.

FractalPlyingBall11.jpg

Still Spinning Along With Tour de Fleece

FractalSpinning5.jpg

Somehow, I was under the impression that Tour de Fleece is a lot longer that 3 weeks. I read the dates and wrote them down but my mind kept telling me that I had months and months to spin. I had this same mistaken thought last year too. So, I let myself be distracted by Steam Summer Sales, new video games, and long walks on the beach. So much for my goal of spinning everyday of the Tour. Well, Tour de Fleece ends this Sunday and I’m still spinning the second single. It is for a fingering weight yarn, in my defense, but I’m still got to get my butt spinning, spinning, spinning.

Spinning the second ply for a fractal spun yarn turned out to a bit harder than I thought. I spun the first ply from all the small divided chunks of fiber. My hands adjusted to all that thin fluff and switching to the bulkier, undivided roving threw my hands for a loop. It was hard to spin a matching, consistent single to match the first. My spindle kept dropping and my frustration kept rising.

FractalSpinning6.jpg

The only solution was to break down and predraft, aka thinning without adding twist to, the roving. When I first taught myself to spin, I always predrafted the fibers. Once my hands learned the motions of drafting and I could keep up with the spindle, I didn’t have to predraft before spinning anymore. Not predrafting became a source of pride. I thought that if I had to predraft fiber that I was taking a step backward and would lose all my spinning cred. The truth is that predrafting is just another technique in the spinner’s tool box. Sometimes you’ll need it and sometimes you won’t. When you’re first learning to spin, predrafting can be be a huge help but it isn’t strictly necessary. Using it later down the road to create consistent, matching singles won’t get your spinner’s license revoked. Just like there’s no knitting police, there’s no spinning police either. Do what works for you and the yarn you’re creating.

FractalSpinning7.jpg

There are just 5 days left in the tour and I’m going to make the most of them. I’m going to finish the second single today and then there will be ALL the plying. It’s definitely a race to the finish. How’s your Tour spinning along?


Stash Enhancement

PencilRoving1.jpg

When I was perusing Wild Fiber last weekend, I found something new. Something that I’d only seen in photos, written about in blog posts, and occasionally added to my Etsy cart: pencil roving. It’s basically thin roving that’s about the thickness of a pencil. Hence the name. You can either knit it as is or you can spin it. Me, I’m going to spin it.

PencilRoving2.jpg

For this year’s Tour de Fleece I wanted to practice new techniques which means trying new materials as well as learning new skills. Pencil roving is new to me so it’s a suitable addition to the stash. I might not get to spin until after the tour but I’m still on the path to try new things.

I also found some teal roving while I was at the shop. Not sure about the fiber type it is but it’s soft with a long staple length. It’s nothing I haven’t spun before but, sometimes, you just need some good old fashioned stash enhancement.

TealFiber1.jpg

A Fractal Tour de Fleece

FractalSpinning1.jpg

Tour de Fleece spinning continues with one single down and one to go for my first skein of fractal yarn. I’m pleasantly surprised that it’s only taken me just over a week to spin 2 oz of what’s essentially a lace weight single. Let’s hear it for daily progress and getting stuff done! I hope I can keep up the pace since Tour de Fleece waits for no one. Part of what made the spinning go so quickly was because there where 3 little chunks of fluffy goodness to work with. I’d finish spinning one section, feel accomplished, and be raring to go with the next one. Seeing the beautiful colors rush through my fingers didn’t hurt either.

FractalSpinning3.jpg

Turns out that the hard part of Fractal Spinning is all at the front before you actually start turning wool into yarn. It’s in picking out the batt or top or roving with the colors arranged just so.  It’s in splitting the fiber evenly to get the best color repetition. It’s in rolling all the split fiber to start at the same color or end.  Once you begin spinning, it’s just like spinning any other 2-ply yarn. Nothing scary about that. Makes it easy to focus, find a rhythm and, maybe, zone out a little too. Might even be easy enough for me to go spinning in public. Let’s see if I don’t wuss out on that goal this year.

FractalSpinning4.jpg

Tour de Fleece 2013

YarnGeek_TaxiCab.jpg

Tour de Fleece has officially begun! How’s your Tour going? I got a late start on Day 2 and was finally able to prep my fiber and get to the business of spinning. Today, Day 3, I’m just enjoying the process and putting a few more yards on my spindle between mundane tasks. Washing all those dirty dishes  really cuts into my spinning time. 

I’m keeping my goals short and simple this year. 

Spin everyday.

Spin in public. 

Practice new techniques.

Spinning everyday should be easy as long as I don’t have to spend another day acquiring and assembling furniture. Spinning in public will be something completely new and strange for me but doable. Learning and practicing new techniques is something I try to do all the time and have a long list of things to pull from.


YarnGeek_TaxiCab1.jpg

Near the top of spinning techniques list is Fractal Spinning which I’ve wanted to try since I first read about it. Fractal spinning is a way of dividing fiber to spin for self repeating colors. Knitty published a helpful article on the process in their Winter 2011 issue. Whenever I open up a bump of fiber, I check to see if the colors were well arranged for fractal spinning. This happy bump of yellow, grey and white fiber from Yarn Geek Fibers was the first to really fit the bill.

YarnGeek_TaxiCab2.jpg

I spit the fiber lengthwise in half and then split one half lengthwise three more times. The smaller strips are working their way onto my spindle first. Since I’m aiming for a fingering or sport weight yarn, this is probably going to probably going to take me the entire Tour to spin. Such a difference from last year and its 5 finished skeins!

We’re just 3 days into 3 weeks of Tour de Fleece and there’s lots of yarn to spin. I wish you the best of luck!

YarnGeek_TaxiCab3.jpg

Ready for Tour de Fleece 2013?

TourDeFleece2013.jpg

Tour de Fleece is a fun and ever growing spin-along that runs every year alongside the Tour de France. Doesn’t matter if you’re new to spinning or have miles of your own handspun stashed away, you can participate. You could even use the Tour de Fleece as a reason to learn how to spin yarn if you’ve been too afraid to start. Both Tours start tomorrow, June 29, and finish on July 21. The guidelines are simple. Every day that the tour rides, spin yarn. When the cyclists rest, take a break too. Most importantly, challenge yourself. Don’t be afraid to ride right out of your comfort zone. 

One of the great things about Tour de Fleece is that you don’t have to go it alone. You can join a team and show off your successes as well as ask for help. There are tons of groups and teams on Ravelry and elsewhere dedicated to Tour de Fleece. The main Ravelry group is Tour de Fleece which is very active with over 6,000 members. 

Don’t worry if you don’t have a wheel. Spindles are wonderful, productive tools in their own right. I’ll be using them to spin all of my yarn again this year. 

I still haven’t picked my spinning goals for this year’s Tour but there’s still one more night to decide. Should be just enough time, right? Are you participating? What are your goals for this year?

How to Skein Handspun Yarn with a Swift

Skeining-Yarn-On-An-Umbrella-Swift.jpg
SkeiningYarnHowTo.jpg

Ah, the niddy-noddy. Why does such as simple tool have such a strange name? In all the research I did before taking the plunge and finally learning to spin, I never found the origin of its name. Only that I needed one to make skeins. A niddy-noddy is basically a bar with an offset handle at each end. So, I bought one before I started spinning to pad out a yarn order. I did finally use my niddy-noddy and it was fine for small skeins; however, as I started producing more yardage, using the noddy became cumbersome and took a good chunk of time. Time I would rather have spent spinning.

I also had a swift but never thought to use it to skein handspun because all I saw people using were niddy-noddys. You want to know what makes an umbrella swift perfect for skeining yarn? A loop of string and a clothespin. That’s it. With a swift you can make large skeins and small skeins, know the exact yardage, and spend less time doing it. Using a swift instead of niddy-noddy is also easier on your arms and shoulders too.

CordMaterials.jpg

To make the loop, you’ll need:

  • a button
  • string that won’t stretch (I used baker’s twine)
  • scissors
  • marker
  • tape measure
  • tapestry needle

SkeiningYarn1.jpg
SkeiningYarn2.jpg

You can make any size loop you want as long as it will fit on your swift. I made mine really long so I could double and triple it for smaller skeins without having to make another loop. 

Tie a loop large enough to fit around the button at one end of the string. From the end of the loop, measure the string to the length you want and mark that spot. I wanted a cord 72” long so I measured to 36” twice. Cut the string plus a few extra inches. Thread the string through the button holes till the mark is between them and tie a double knot. A button with a shank works well too. Optionally, you can dap some glue on the knot to help keep it together. All that’s left is to write the length of the loop on the button.

SkeiningYarn4.jpg

Now you’re almost ready to skein your handspun! Set up your swift and slip the buttoned loop around the arms just like a skein of yarn. Here’s where the clothespin comes in. Use the clothespin to clip one end of the yarn to an arm. The pin will hold the end in place and make it easy to find when it’s time to tie up the yarn. Now, just spin the swift and get all that wonderful handspun off the spindle or the bobbin. You don’t need to put tension on the yarn just don’t give it any slack. When you’re finished, tie up the skein at the ends. If you tie up the loop with the skein like I do half the time, just unbutton the loop and pull it out

SkeiningYarn6.jpg

Knowing the size of the finished skein makes it easy to determine how many yards you’ve spun. Just count how many times the yarn went around the swift and multiply by the length of your loop. You’ll also need to divide by 36” if your measurement is in inches so you’ll get the total in yards.

For example, my loop is 72” (2 yards) long and the handspun went around the swift 59 times.

(72” x 59)/36” = 118 yards

Now that I know that skein has 118 yards, it’ll be much easier to find just the pattern to show it off.

SpinningTarghee10.jpg

Spinning Winter Pinoak

Winter Pinoak on BFL by Yarn Geek Fibers

Winter Pinoak on BFL by Yarn Geek Fibers

I am a sucker for the color green. The socks I’m knitting on and off are green. My last batch of handspun was green. Last week, I bought green yarn. I have overloaded on green and need something to cleanse my palette. The only new project I’ve started - well, the only I can write about at the moment - is definitely not green. 

After finishing the last handspun, I was ready to start spinning again and picked something from the not green segment of the fiber stash. Didn’t take long to go through that scant selection and I should probably change that at some point. Careful deliberation led me to a lovely bump of fluff called Winter Pinoak from Yarn Geek Fibers. Winter Pinoak looks exactly like it sounds. There are blues, dark greys, brown, cream, and a wonderful bit of orange at the end. I can’t help but think of the orange as that one stubborn leaf that won’t fall off a tree even in the dead of winter. The orange is what first grabbed my attention in the Etsy photos and pulls all those cooler colors together. Plus, I was reminded of my alma mater's colors which didn’t hurt.

YarnGeek_WinterPinoak2.jpg

Unchaining the roving didn’t make the fiber figuratively jump up and tell me what it wanted to be. That’s what usually happens so the fiber and I had to get to know each other a little better first. After looking at the colors and gauging the softness, I, or rather the fiber, decided it wanted to be a shawl. Quite possibly the Trillian Shawl too. Being the good fiber mama that I am, it was time to fulfill that wish.

YarnGeek_WinterPinoakSplit.jpg

The fiber was split lengthwise down the middle so I could spin 2 singles to ply for a 2-ply yarn. There was a problem. The orange. It was all the way at the end and that just wouldn’t do. It could end up on a cast-on row. It could end up on the bind off row. It might not make the finished project at all. The orange is what I love about this bump and it deserved to be celebrated. So, I split the fiber at the midpoint and ended up with 4 happy coils.

YarnGeek_WinterPinoakSingle1.jpg

Finished spinning the first single on Wednesday. It started off blue and grey and ended with blue and cream. In the middle is this amazing section of red orange that I cannot wait to uncover in the plying. Instead of following the color progression as dyed, tearing the fiber in half let me put the orange right in the middle. It will be boltstered and framed by the cooler colors around it. At least, that’s what I hope happens. I also hope I’m up to the task of spinning 400 yards of fingering weight yarn. That may not happen but 300+ yards of sport weight is also a pretty great thing to get off the spindle too.

YarnGeek_WinterPinoakSingle2.jpg