How To Start Spinning Without A Leader

If this post could have a subtitle, it would be Process: Part 2. This series has taken a complete 180 from what I thought it was going to be. Take a few pretty photos of my process, write a few snippets, wax poetic about the whole thing, and put it on the blog. Turns out, I was making tutorials and didn’t even know it. I think this a lot better than my original idea.  

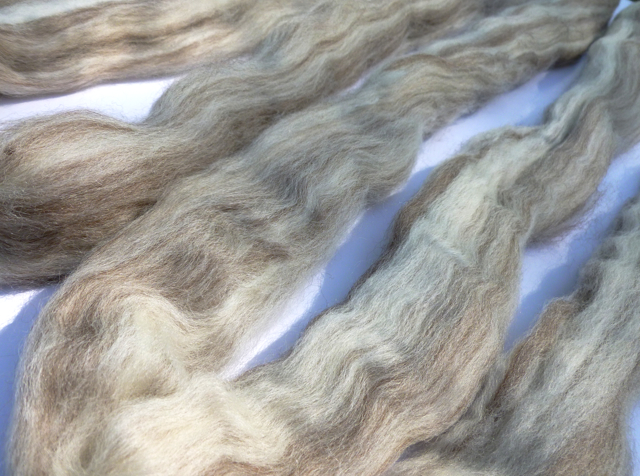
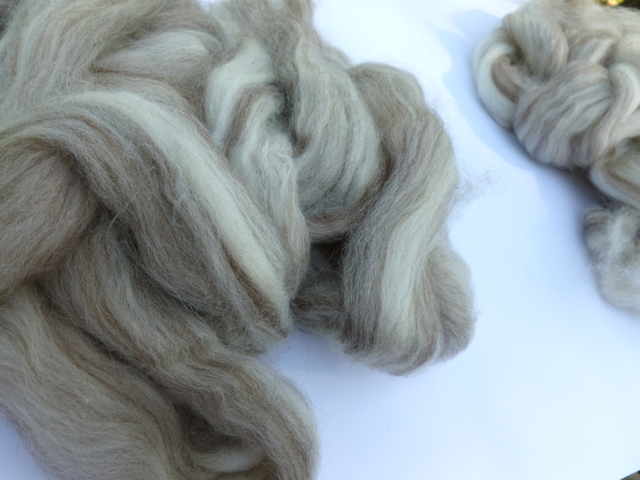
The first post in this series was all about how to prepare fiber (combed top in this case) for spinning. In this post I’m getting down to business of spinning, well, starting to spin yarn without a leader. I’ve used a leader in the past but there is something magical about making yarn out of thin air. Just add a bit of twist to some fiber and BAM! Yarn. Plus, drafting and spinning this short section of fiber helps me understand the characteristics of an individual batch of fiber which helps me spin better yarn.

| - | - | - | - |

The great thing about about starting without a leader, a length of already spun yarn that helps put twist in fiber at the beginning of the spinning process, is that you don’t need any extra material to pull it off. Also, if you’re a beginner and can get started without the leader, you’ll already have the basics of spinning under your belt.

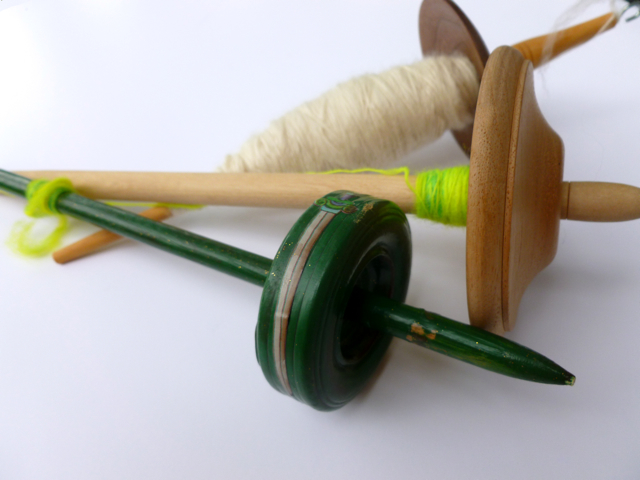
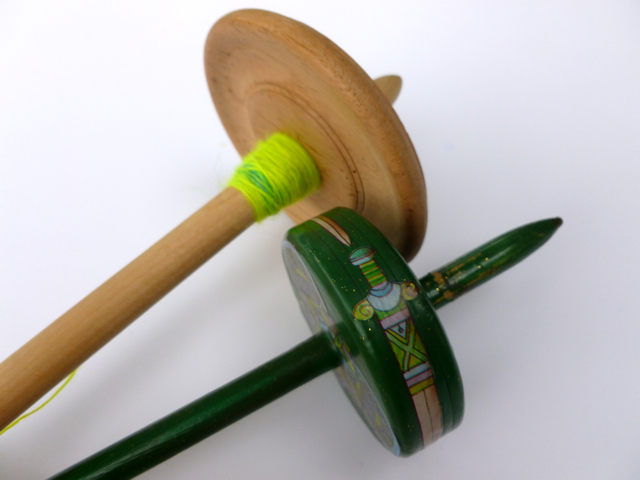
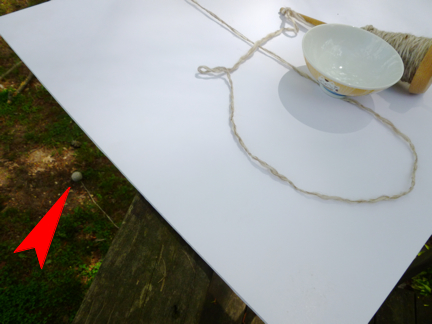
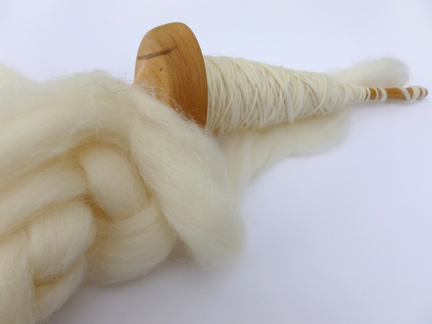
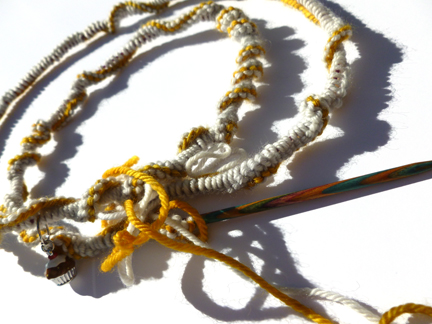
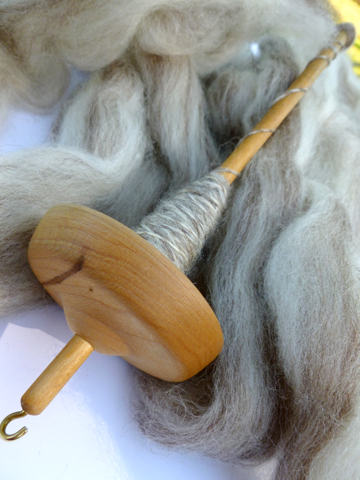
To start, you’ll need a drop spindle - high or low whorl - with a hook and a bit of fiber. 

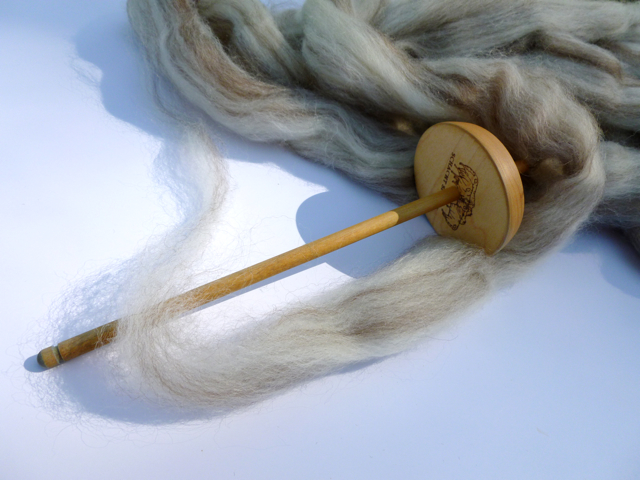
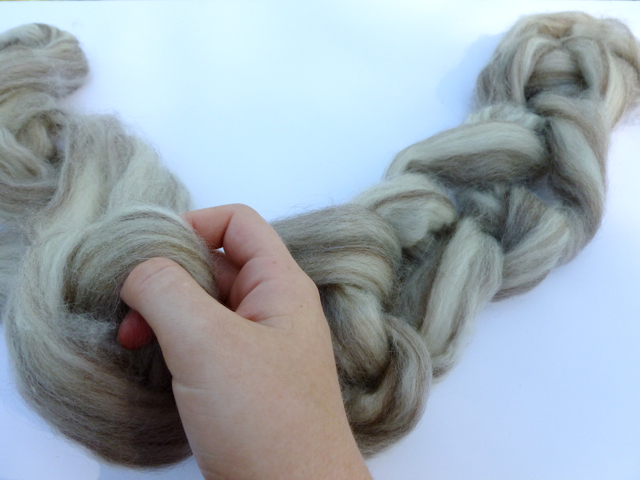
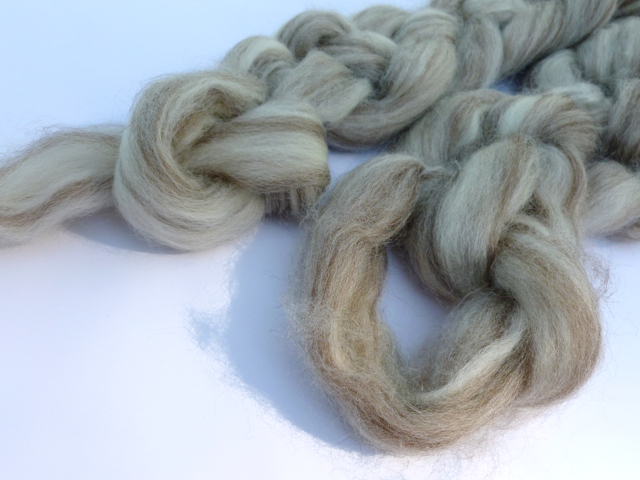
Pick an end and slowly pull the fibers straight out bit by bit using both hands. One hand pulls and the other holds the top. The top between your hands should get thinner and longer. This is drafting.  You can draft out just a few inches now and start spinning, drafting as you go, or draft large sections now to make it easier to handle.

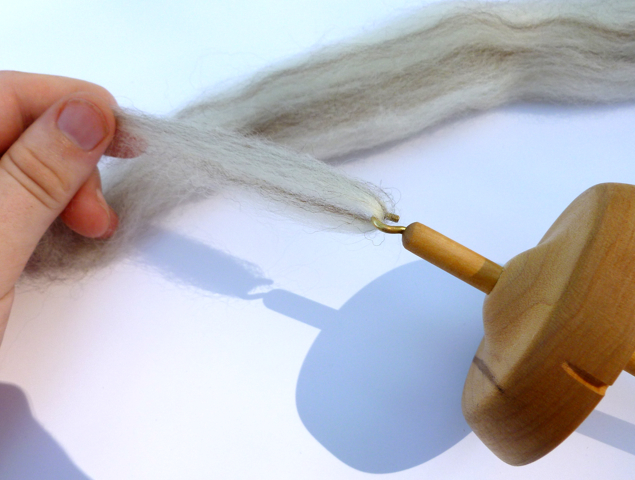
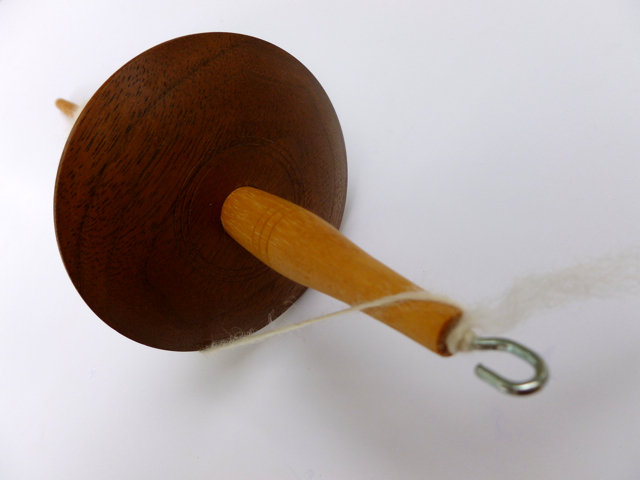
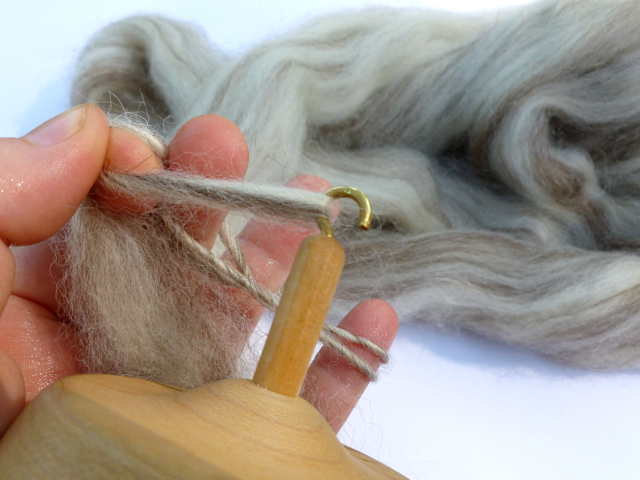
Once at least 6” have been drafted, it’s time to put the fiber on the spindle. Place the drafted fiber through the hook and fold back the first 2-3” to form a loop. Pinch the two ends together. When you pick the spindle up by the fiber, it should hang without falling.

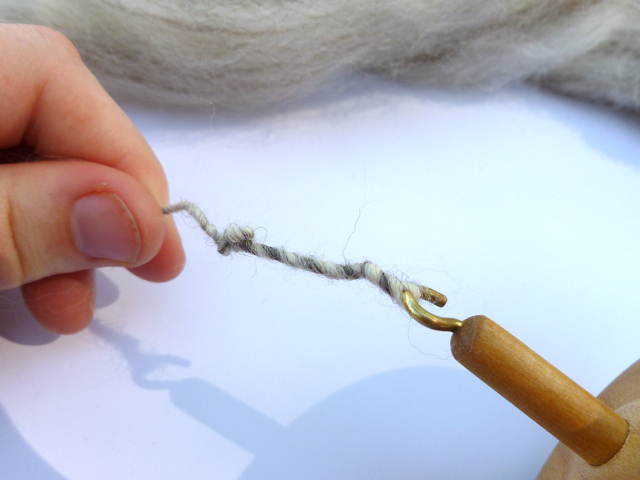
Time for twist! Singles, un-plied yarn, are traditionally spun in a clockwise direction and plied together counter-clockwise. So, give your spindle a clockwise spin - rotating to the left - with your fingers. There should be so much twist that the fiber kinks up on itself. To keep the spindle from spinning back and removing all the twist, catch it in your hand and hold it between your thighs. 

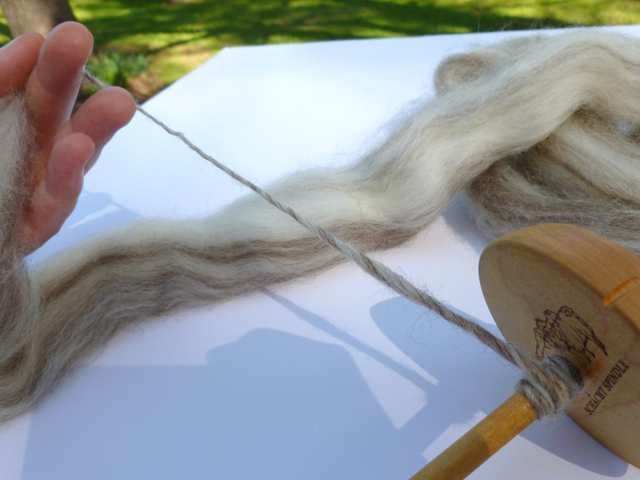
Loosen your grip and slowly pull back the hand pinching the fiber to let the twist move into more and more of the drafted fiber. If the newly spun single starts to give out, give the spindle a few more turns to add more twist.

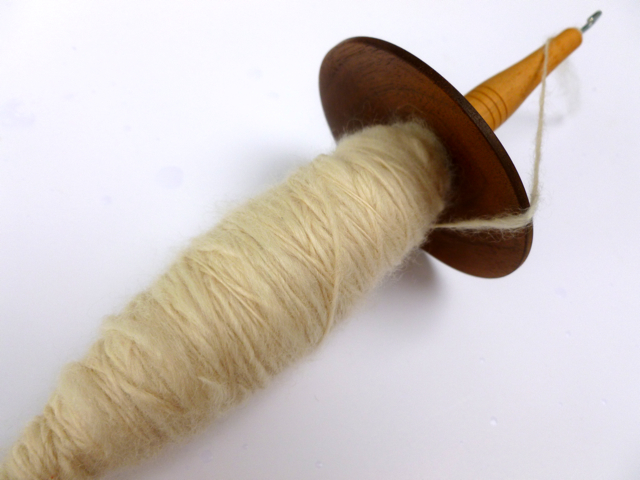
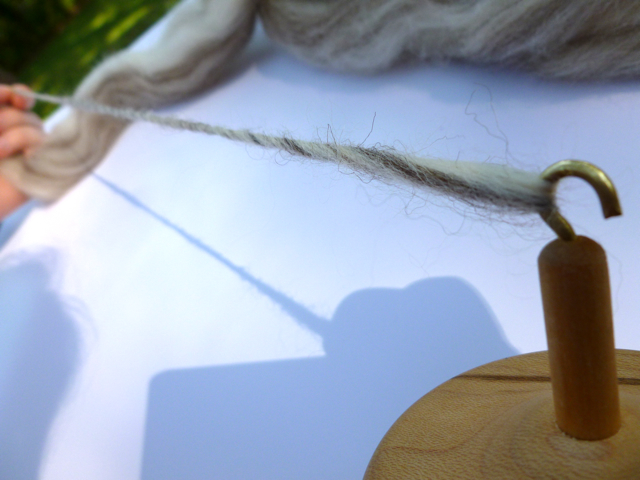
Once there’s 1 to 2’ of single on the spindle, wrap it around your pinching hand until you get back to the hook. Keeping your fingers pinched and the everything tight, carefully take the single off the hook.

Wrap the single around the shaft close to the whorl. A few wraps should keep everything in place. 

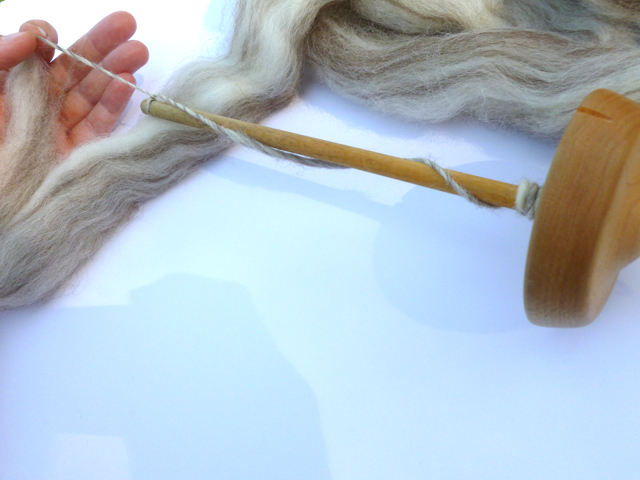
If spinning on a low whorl spindle, wrap the single around the shaft and tie it off with a half hitch or pass through a hook. For a high whorl spindle, just pull it up over the whorl so that it comes up behind and then through the hook.

All there is to do now to keep spinning, is repeat the process with both hands this time. Pinch. Twist. Draft. Pinch. Twist. Draft.

This video by Abby Franquemont and this one from TheArtofMegan.com really helped me get handle on the process. Of course, there’s no substitute for actual practice.

| - | - | - | - |

Up next in the Process Series, is joining fiber and fixing breaks.

Still Spinning!

This past weekend was the latest meeting for my favorite fiber guild. Once again, the meeting was worth getting up for at 8:15 on a Saturday morning. That’s one of the highest honors I can give. The topic this month was how to spin yarn on a drop spindle and I was so excited about it last month that I started early. So, I packed my spindle, some wool, and my finished yarn and headed over to the meeting.

The teacher had brought a few spindles from her collection and encouraged everyone to try them out.  I tried a few high whorl spindles and a few bottom whorls. I tried out light spindles and heavy spindles.    Part of the reason I went was try out different varieties of spindles and see if I actually liked what I liked. The verdict, low whorl spindles were and still are the way to go for me. I still like what I liked before so I came home with a few more. 

The one exception to the low whorl love is this wonderful high whorl that I couldn’t resist taking home with me. It’s the first high whorl spindle that I’ve actually liked. Plus, I can remove the whorl to pack it down for traveling. If only I could remember who made it. 

The second reason I went was to refine my technique a bit. Every single I’ve spun so far has been has been consistently worsted with a mix of really thin and really thick bits thrown in for good measure. When plied, the resulting yarn is bulky and wonderful but I want some variety. I don’t knit much with bulky yarn after all. The secret to thin singles and lighter yarn: a lighter spindle and a lot more prep work than I’ve been doing. My latest attempt is consistently thin and I might come up with a sport to worsted weight yarn this time. Let the plying begin!

What are your favorite ways to spin? Top whorl or bottom or wheel? Bulky yarn or fingering?    

Shadow, My Shadow

This is Shadow, the resident cat here at Chez Strategos. He is a complete the task master and fancies himself quite the creative director. He’s talkative, friendly, and quite fluffy. One could even say that he’s quite a handsome cat. Never mind the extra fluff on his head. If he looks a bit freaked, that’s because...

...when I went out to feed him this morning, he was on the roof!

This is a cat that generally comes when called and meows at your feet when he arrives. He meowed when I called his name alright. I didn’t find him though until I looked up and behind me. After I got the expletives and required photographs out of the way, it was time to get him down. 

Next to the backdoor, Shadow has a little house of his own with wobbly, uneven legs and a wide flat roof. I climbed on top and could get my hands over the gutter. He wouldn’t come close enough for me to grab him. The next step up was the porch railing. (Note to self: get a step ladder.) Running through my mind at this point was that scene in Dead Like Me where the woman is trying to coax a cat out of a tree with a can of food while standing on a fence post. Spoiler Alert, she slips and she dies. She was also dressed far better than I was in my hoodie, pajama pants and sock monkey slippers. All I could think was:

Oh God, I’m going to fall and die or be horribly injured and they’re going to find me hours from now wearing sock monkey slippers.

Then I climbed up on to the railing. I could actually reach Shadow now and he came over. Happy as he was too see me, he wasn’t particularly pleased when I grabbed him and lifted him over the edge. There was plaintive meowing and mad scrabble to latch his claws onto the gutters. You’d think he didn’t want to get down. After my third attempt to unhook him, I succeeded and stepped back down to the porch. Once Shadow was within a few inches of solid ground, he started purring instead of crying for his life. 

Then we both had breakfast and all was right in our little corner of the world. Still, I can’t help thinking that I could’ve died while wearing sock monkey slippers. Truth be told, I’m still wearing them. They’re comfy, warm, and rather cute. So it wouldn’t have been all bad, you know, except for the dying part. That would suck.

How to Spin Yarn: Prepping Combed Top

I can haz process?

Picking up spinning again was a lot like any other skill I’m trying to learn. First, I find this thing that sounds really cool and I would like to try. Prime examples: knitting, kumihimo, temari, origami, and bookbinding. Second, I hit the internet and research tools, tutorials, and techniques for days, weeks, and even months before I decide to make something a priority. Third, gather supplies. Fourth, actually do something. Anything to just get started. 

If I like that brand new started something, I keep doing it. I figure out how and why it works. I start experimenting. I get comfortable. I develop a process of how to do this awesome something from start to finish. With spinning, the realization that I knew what I was doing and that I had a process hit me all at once. I was absolutely giddy.  

So, I’m sharing my process. I hope that it will help you get started, come up with one of your own or, if you already know how to spin, see your process as something amazing and worth celebrating. 

| - | - | - | - |

Step 1: Stash Diving. Since my first, short-lived attempt at spindle spinning, I’ve been buying fiber. Not much. Just enough to have something to choose from when I came back to the spindle. The stash has served me well in that regard. For this attempt, I picked out 4 oz. of Blue Face Swirl (Naked) from Gale’s Art.

Step 2: Inspection. This batch of fiber was twisted up like a skein of yarn. So, I opened it up just like a skein of yarn. Then I spread everything out and got a sense of the color distribution and how much 4 oz. of fiber actually looks like.

Step 3: Division. I didn’t pick out this fiber with any particular project in mind. I just wanted to try my hand at a 2-ply yarn. So, I split the entire length of combed top down the middle. 

Step 4: Wrangling. There’s a brief pause for a little “eeny, meeny, miny, moe” to decide which half to use first. The “not it” bit is crochet chained to keep it whole and safe until I need it. I take one end, make a loop, and tuck in the tail to make a big circle.

Next, pull a loop through the circle. Pull a new loop loosely through the last loop and continue. Eventually, all the roving is gathered up and easy to handle. At the end, I just pull the roving through the last loop to keep it together. This is the only bit of crochet I know.

That giant circle I made at the beginning? That’s how I know to work from the opposite end since a crochet chain can only be pulled out from the end and not the beginning. Just pull the tail out and and take apart the chain as you need it.

| - | - | - | - |

Next post, I’ll get back to the other half of the fiber and start spinning. 

Three Weeks

I’m still spinning yarn over here on mostly daily basis. Still spinning to spin, to catch a rhythm, to move my hands, to make yarn. Since I only have one spindle that I like to use, I wind the freshly spun single off onto to a dowel to free up the spindle. My singles get to rest and I get to keep spinning. It’s a win-win. Three weeks and I’ve covered all 13 of my dowels with half-finished yarn. Time to free up some storage space.

This bit of purple wool was the first thing I spun when I picked up the spindle again. So many questions were going through my head. How much yardage would I get? Should I ply it and should it be 2-ply or Navajo? I hadn’t the slightest idea what to do which worried me but eventually decided I’d figure it out later. Three weeks have gone by and the decision was no where near as stressful. It’s staying a single. No second thoughts about it.

Finally had a reason to dig out my niddy-noddy. It’s been wrapped in plastic for far too long.

While winding the first skein, I decided my second bit of spinning would get the single treatment too.

They both got their own bath and were set out to dry. A drying rack and cans of assorted coconut products “blocked” the yarn and helped balance the twist. 

I have a question. Does weighting yarn while it dries actually balance twist or just hide it until the yarn is knitted?

Dry! Finally! You have no idea how much I wanted to used a hair dryer to speed up the process. Also, the yarn is no longer doing its best “Z” impression. 

They’ve been a long time coming but these are my first two skeins since I picked up the spindle again. I’ve petted them. I’ve squeezed them. I’ve buried my face in them them and inhaled. That last bit probably made me look a bit crazy but I can’t be the only one that does that. Right? Someone, please tell me you do that too. If not, you should.

What I’m trying to say is that I don’t regret trying my hand at spindling and spending my time learning to spin. I love it. I want to keep doing it. I want to research and experiment and go wild. I want to keep making yarn and, occasionally, wearing it like a mustache. That’s just the kind of lady I am.

Pro Tips

Good natural light can be hard to catch at Chez Strategos. So, I usually chasing it down in the yard with my camera and a handy sheet of foam board in tow. Sometimes I’m on the front porch. Sometimes the driveway. Never in the grass though since all the bugs have to have their 15 minutes of fame. These are all my fallback options though since the best light is usually on the far corner of the back porch. The foam board goes catty-corner on the railing and I get to shooting.  This generally goes off without a hitch. Until today.    

Today, I was plying some yarn and documenting the process. I had my ball of singles, a bowl to hold said ball, my spindle, a sheet of foam board, and the camera. Everything is going well. My spindle is filling up with luscious, freshly plied yarn and I was getting photos of the entire process. I took a photo and put down the camera on some freed singles. Then I start plying again. Ever so briefly I wondered what the singles were caught on before I looked down to see them helping the camera over the edge. 

I dropped the spindle to grab the camera.

Saved the camera but bumped into the board. 

The board and everything starts going over the side.

Grabbed the bowl.

Grabbed the board.

Grabbed the camera again. 

Lost the singles over the 10’ side.

Learn from my mistakes people. Wear the blasted camera from a strap around your neck. Also, photograph on the edge only as a last resort. These are your Pro Tips for the day.

Howlcat

The versatility of a knitted tube and the creativity of the people designing them never fails to amaze me. Add heels and a toe and it’s a sock. Add in a few crown decreases and it’s a hat. Join one tube to two other tubes and it’s a sweater. Or just a tube. It can be a mug cosy, a pair of fingerless gloves, leg warmers, a pencil grip, or a pillow. I could go on but then I’d have to break out the bullet points. In this case, the humble tube of knitting is a Howlcat which is both a hat and a cowl by Alex Tinsley.

Pattern: Howlcat by Alex Tinsley of Dull Roar

Yarn: Knit Picks Swish (Dark Navy) and Knit Picks Stroll (Pumpkin)

Needles: US 7 (4.5 mm)

Dates: February 6 - 20, 2012

@Ravelry

This bit of knitting is for the Bearded One who, when I asked if he wanted a scarf or a cowl, said both.  I fiddled around with designing a cowl pattern to match his favorite hat but no luck. I am having better luck with the scarf though. Anyway, at one fateful knit night, someone reminded me of this pattern and the cowl dilemma was solved. The knitting was simple, good for running about town, and great for when I wanted to knit without thinking. 

It’s been a big hit too. Warm, cosy, and infinitely wearable. The following are Bearded One approved ways to wear the Howlcat.

As a hat with a twist and the bottom layer folded over.

As a cowl with one color folded over scrunched up.

A hungry, hungry stocking cap.

When he annoys me.

20 Minutes

People, I have been spinning. At least 20 minutes everyday since the Monday before last and today is Day 11. I haven’t spun with a project in mind or even a plan but I do have a purpose. 

Practice. Learn. Just make yarn.

I’m not worrying about what to make with it or about the yardage I’m adding to my stash on a daily basis. Seriously, I haven’t even decided if I’m going to ply any of it or keep it as singles. I’m just spinning to spin. Building up a little muscle memory doesn’t hurt either.

Can I just say how powerful it is to do something everyday? It hasn’t even been two weeks and my spinning is more consistent and more comfortable. I can set the spindle turning and start drafting fiber. I don’t have to “park and draft” anymore. It was an amazing moment when that switch flipped over in my brain and it still is. I have more rhythm drafting and I’m not always fighting the twist. Less than two weeks and I’ve leveled up. It’s awesome. Makes me want to throw a daily 20 minutes at a few other things I’ve been meaning to get back to. Sketchbook and kettle bells, I’m looking at you. 

So, pick 20 minutes a day to spin, to draw, to knit, to write, to practice, to meditate, to workout even. Do something you’ve always wanted to try or something you want to get back to. Pretty soon, you’ll level up too and you won’t regret it. 

Speedline

The first knit of 2012 has long been finished but never blogged. Let’s just say that it went through an extensive and rigorous testing period. Passed with flying colors too.

Pattern: Speedline by Alexandra Tinsley

Yarn: Madelinetosh Vintage: Silver Fox (~2 skeins) and Candlewick (~1 skein) 

Needles: US 6 (4 mm) circulars

Final Size: 66” x 23”

January 2 - 16, 2012

@Ravelry

Testing approved modes of wear include: wrapped up like a cowl under a jacket/hoodie, pulled up over your nose when the wind is biting, and worn like a giant bandana with the tips tucked under. That last one is my personal favorite since it keeps me cosy and shows off my handiwork at the same time.

Cast on 400 stitches using 2 different yarns and you’d want to show off your handiwork too. Plus, it does make a lovely edge detail. My main modification was to just keep knitting in pattern since I had a lot of yarn left when over when it came time to bind off. The widest grey stripe had 18 rows or 9 repeats. My detailed notes on the subject say I had 86 stitches on the last grey row. Then it was just repeating rows 2 and 3 until I had 4 stitches left. Bind off. 4 stitches are a lot more manageable than 400. 

There was other result of the testing which I should feel I should warn you about. People will want it. My very own mother said she would make off with it at her earliest opportunity. Gotta keep my guard up. 

The Creative Spark

On the second Saturday of most every month, I head over to the Greater Birmingham Fiber Guild for our regular meetings. I know I’ve said it before and I probably will again but I love getting together with people who share this passion for fiber and art and knitting and making. It sets off this happy little creative spark in my brain. Plus, it’s just fun.

At this month’s meeting, we had a visit from the lovely Gale Evans of Gale’s Art and her also lovely fiber. The topic was fiber and handspun yarn. What can you use it for? Anything. What’s the best fiber to learn to spin with? Blue Faced Leicester was a favorite. How many yards can you get from 4 oz. of fiber? It depends on the weight and the spinner.

Along with the usual knitting in public component of the meetings, people also brought their wheels and were happily spinning along. There goes that creative spark.  

Besides from a variety of different wools, alpaca, and blends, Gale also brought a colorful bunch of silk hankies. I’d heard of silk hankies before and the fact that can actually knit straight from them but I didn’t give it much thought at the time. Just filed it away in my brain for later. It wasn’t until Gale demonstrated how to pull them apart, stretch them out, and cast on that my eyes got all big and round. Creative spark number two. 

Of course, I couldn’t leave without picking up a few supplies. How could I resist the silk, the colors, and a name like ‘Velvet Elvis’?

Next month’s meeting is going to focus on spinning yarn with a spindle and I am so excited. I’ve been meaning to get back to my spinning for months and this is just the push I needed. I’ve already started practicing. Creative spark number three.

Hexipuff Complete

The Puff of Puffs @Ravelry

The Hexipuff is making all the other pillows on my couch feel inadequate. It’s 16” tall and 22” at the widest point. It used almost 6 balls of yarn or 190 yds, an entire bag of stuffing, and almost 3/4 a yard of black cotton for the form. It is the undisputed pillow king of the couch, at least, until I give it to my mom. Honestly, it’ll rule that couch too with an iron fist. 

Want to know the secret behind a giant and proportional hexipuff? The necessary evil known as swatching. You’ll need the yarn and needles you’ll be using as well as a scale. Also, the following numbers and modifications are in no way meant to be a replacement for the original Beekeeper’s Quilt by Stephanie Dosen of Tiny Owl Knits. Buy the pattern, use it, and you might even want to make a whole flock of tiny hexipuffs.

Cast on the same number of stitches and in the same way as a regular puff. Then, just knit a tube for a few inches to make the math easy. If your swatch is 20 stitches around, has a gauge of 5 rows to an inch, and is 3” long, your equation should look like this:

20 stitches x 5 rows x 3”= 300 stitches

Next measure how many grams of yarn are in the swatch with the scale. In this example, let’s say 5g. 

300 stitches / 5g = 60 stitches per gram

So, for every gram of yarn, you can knit 60 stitches. Let’s say you have 2 50g balls to make your puff. 

(2 x 50g) x 60 stitches = 6,000 stitches

This means that the total number of stitches in your puff is 6,000. Any more than that and you’ll run out of yarn. Now, you can figure out how many stitches to cast on and much to increase before decreasing. The original puff has twice the number of stitches at its widest point than at the cast on. 

Since the puff is symmetrical you only have to figure out how much to cast on and number of increases to use up half the number of stitches, 3,000 in this case. I wish I had a handy formula I could just plug numbers into for this next step, but it’s all trial and error. And on a spreadsheet.

Take a reasonable guess about how many stitches to cast on (62) and keep adding 4 until the number is twice the cast on (124). Multiply every number of stitches per row by 2 and sum the results. The answer, 2964 stitches, is almost 3000 stitches so you would cast on 62 and increase until you have 124.

Let the knitting begin! Don’t let the sheer number of stitches put you off of a puff or knitting in general. Just enjoy the process and the awesomeness that is a giant puff. Plus, you can use this method for more than just hexipuffs. Whenever you need to figure out how much yarn you’ll need for a project, you can follow the same basis steps.

When I first started this project, hand sewing a pillow form wasn’t even on the radar. Just knit and stuff and graft and gift it away. Easy peasy. As the pillow got bigger, however, a form seemed much more necessary. It added few more steps and time to the process but it’s totally worth it. I picked up 3/4 of a yard of black, cotton homespun and spent part of an afternoon cutting and sewing it up.

Over the past few days, The Bearded One, Shadow and I have put the puff through some rigorous testing. It’s still firm, has kept it’s shape, and isn’t leaking any stuffing. Pillow forms are officially win. Also, it’s so much easier to graft stitches together when you aren’t pushing stuffing out of the way every 5 seconds.

I know I said I was only going to make just one puff. Just one puff to rule them all. Now, I think I have to make two. They can duel for supremacy when I’m done.

Ah, still makes a nice hat.

Puff Phase 3

The Giant Hexipuff continues to hold power over me. Friday night, I stayed up late to finish the decreases. Saturday morning, the puff had a luxurious bath while I assembled my blocking tool kit: pins, blocking wires, a yard stick, and a sheet of pink insulation sheathing.

Saturday afternoon, the puff came out of the bath and moved to the sheathing which has more than made up for the aggravation it took to get home.* Blocking wires made the whole process really easy. I just poked a wire from one corner to the next and let it pull the edges straight from the inside. Adjusting angles and measurements was a piece of cake. Plus, none of those annoying points from using just pins.

Sunday, the puff dried.

Monday, I made a pillow form which I’d never done before. Flew by the seat of my pants for the whole thing too. After I unpinned the puff and removed the wires, I pinned it back down on top of 3/4 of a yard of black cotton. I completely eyeballed the cutting of a half inch seem allowance. Unpinned everything again and re-pinned the fabric together to roughly mark where the seams should go.

Wonky hand stitching go!

Stitching the entire form didn’t actually take as long as I thought it would. I was imaging the process taking place over a few days. Probably didn’t even take an hour. I even flipped it inside out, put it in the puff, and started stuffing it. If only I hadn’t run out of stuffing halfway through. Retrieving more stuffing will have to be Phase 3, I guess. 

If you decide to follow in my footsteps, this last step is entirely optional. When you’re ready to start sewing, move half your work to a table in another room. Return and find a cat requisitioning the rest of it. Like I said, entirely optional.

*Back when it was time to block my Hemlock blanket, I had to find something big enough to pin it out on. The sheer number of blocking boards required were a bit out of my budget. That’s when giant sheets of foam insulation came to mind. The next day I was hauling two 4” x 8” sheets of the stuff out to my car in a Home Depot parking lot. Not that they even remotely fit in my car. So, on a 90˚ day in the middle of summer, I’m slicing giant sheets of foam into quarters and trying not to stew in my own juices. Still, the heat wasn’t as bad as the high-pitched ‘nails on a chalkboard’ sound that came from dragging a knife through foam. Just thinking about that sound makes my head hurt. 

Hexipuff

I came across the The Beekeeper’s Quilt and the tiny little hexipuffs while searching for the perfect project to use up 20 yards of bulky weight yarn. Still looking for suggestions by the way. I don’t know how long I looked at mods people made to the puffs - fair isle patterns, Star Trek uniforms, Nintendo characters, flowers, animals, etc. What really intrigued me though were the puffs that people made into giant pillows and I just had to make one.

In the perilous depths of what I like to refer to as The Deep Stash, I had two balls of Lion Brand Fettucini. They were a gift and I had no idea what to do with them...until now. I would snag the two other balls that my mom had to a make a giant pillow. Plan in hand, I cast on and happily used up two balls of yarn. Turns out, Mom had, not two balls or even three, but four balls worth. Too much yarn* and too many increases for the puff to be proportional and shapely. I did the only thing I could do - ripped out and did some math. Also, there was swatching. With the help of a friendly spreadsheet, I figured out how many stitches I could get out of one ball and multiplied that by six. The next step was determining how many stitches were in an ordinary hexipuff and how many stitches would be in a hexipuff if I cast on 40 stitches, or 50, or even 60. 50 turned out to be the magic number and I cast on once again.

More than 3 skeins later, here’s what I have: a Giant! There are still 2.5 balls to go and I’m a long way from 50 stitches but the decrease rounds give me hope. 

Here’s Shadow for scale. He only looks mostly put upon by the whole thing.

And here’s me wearing the hexipuff as a giant, oversized hat. 

Note to self: make a giant, oversized hat/hood for next winter.

*First world problem, I know. 

Potential

Yarn. It should come as no surprise that I have it. Lots of it in fact. I track its acquisition and usage on Ravelry and in a giant, handy spreadsheet. I photograph it. I pet it. Hell, I even sniff it. There’s nothing like yarn fumes to start off knit night. Of course, I knit with it too. 

When I look at yarn I see a pair of socks, or a blanket, or a hat, or a scarf that can change someone’s day. Sometimes, I just see yarn and that’s okay because I can still see its potential. Yarn will become anything you or I put our minds to making. This is why I can’t get rid of leftovers. I might have only have a yard or even 10 or 20 but I know it has potential. That it can still be used and made into something new. I can’t just throw it away. That’s why I snapped these balls up at Knit Night from a friend that was getting rid of them. They have potential even if I don’t quite know what it is.

I have a few ideas though.

Any suggestions? What would you make with 20 yards of bulky yarn?

In The Works

Today I was the strange neighbor. The one that you watch through a slit in the blinds and wonder just what the hell they’re doing on the back porch. The answer, my friends, if photographing knitting. Lots and lots of knitting. I’ve got stuff in the works after all. 

This bit of the work in progress is a Howlcat (@Ravelry) for the Bearded One. Yes, that is orange and navy blue.* It’s been my travel knitting of late and I’m rather enjoying the process. First, it was a bunch of ribbing and now it’s a bunch of stockinette. Just stitch, after stitch, after stitch. Nothing mind blowing or extravagant but amazing and happy all the same. Isn’t it great how one stitch builds on another to make something larger than itself?

*War Eagle!

Did you hear something?

Maybe it was the wind in the trees or a squirrel walking across the roof. Or, the most likely possibility, ninjas.

See? Ninjas. I knew it was ninjas. They’re everywhere. You just can’t see them most of the time. 

Pattern: Wasabi the Gregarious Pug by Rebecca Danger

Yarn: A mix of Patons Kroy Sock 4-Ply and Knit Picks Stroll

Full details @Ravelry

Silliness aside, I made these as gifts and, as far as I’m concerned, they are the pièce de résistance of 2011’s Christmas knitting. The idea to turn a dog and a llama (technically, the pattern is for an alpaca but close enough) into ninjas was really fun right off the bat. I only laughed maniacally most of the time. It wasn’t all roses though. They took a lot longer to knit then I thought they would. Plus, besides from the knitting, stuffing, sewing, and faces both of them have round braid kumihimo belts and katanas made from pipe cleaners covered with i-cord. For future reference, making braids out of sock yarn will take way longer than you think. 

Pattern: Zeke the Aloof Alpaca also by Rebecca Danger

Yarn: Also a mix of Patons Kroy Sock 4-Ply and Knit Picks Stroll

Full details also @Ravelry

Making a llama into a ninja was pretty cool but figuring out how to make a removable emo coif (after this first style) was even better. A few steps:

  1. Once you have knit enough of said llama’s (or some other creature’s) head, insert a small, yet powerful magnet inside and hold it in place with another magnet on the outside. You might have to adjust them a bit before stuffing but they’ll stay in place once the llama has stuffing for brains.
  2. Embroider the face with the magnets still holding on to each other.
  3. Remove the outside magnet and knit a case for it. I cast on with Judy’s Magic Cast On, knit and increased in the round. When it was big enough I started decreasing and then pulled the yarn through the remaining stitches. If the magnets are strong enough they should hold through 2 layers of knitting. 
  4. Cut lots of 6” strands of yarn for the hair. You’re going to need them.
  5. Thread a needle with both ends of a stand and push it part way through a stitch on the case to make a loop. Pull the ends through the loop. Repeat until your llama has a nice, full coif. 
  6. Give it a trim and appreciate the awesomeness. 

While I was making these, I was a bit nervous about how they’d be received. Shouldn’t have worried though since they were a big hit. Does a knitter’s heart good. 

The Lacy One

Before 2012 gets any further along, here’s something else I knit as a Christmas present. It’s another Baktus but lacy. Not quite as addictive as the first but still great and a fun knit. We haven’t had much of a winter this year so I don’t know how useful it’s been. Seriously, plants are blooming and I keep hearing tree frogs at night. Someone needs to tell them it’s January.

Pattern: Lacy Baktus by Terhi Montonen

Yarn: Claudia Hand Painted Yarns Fingering Silk 55 in Mardi Gras

Full details @Ravelry

Deux Hats

Not long ago, I would never have written this post. Never. It’s not offensive or a rant or even remotely political. It’s just not from the now. I’ve made so many things and never posted them because they just seemed old by the time I got around to writing about them. Like my Damson shawl which I wear all the time. Or my extra giant Daybreak that I worked on while sitting out on the swing with a fluffy, black cat for company. Is there any merit at all to this way of thinking? I don’t know anymore. So, before December 2011 recedes any further from our minds, here’s some hats I made.

Mairead by Tara-Marie Phillips of Shipwrecks & Bravery

Full details @ravelry

Don’t let my picture fool you, this is a pretty awesome hat. Pretty fun to knit too since the lace panel adds just enough spice to keep the stockinette interesting. I might even make it again too which is high praise since I rarely knit anything twice. Besides from socks that is. This hat was also the first bit of Christmas knitting which started way back in July.*

Torunn by Tron Anfinnsen from Hat Heads

Full mods @ravelry

Speaking of knitting things twice, this is the second time I’ve made this hat. Kind of. Technically, this is the second time I’ve used this chart but the first time I used it on a slouchy hat. The “pattern” is over in my ravelry notes if you want to make a slouchy, fair isle hat too. Anyway, the chart is great and, eventually, I’ll make myself something that uses it. Hat Heads, the source for said chart, in general is also a pretty cool and inspiring book. Makes me want to knit all sorts of fair isle hats. Check it out.

Have I beaten my proclivity towards hiding away the “old” stuff? Probably not but I’m trying. After all, I’ve still got a few more things to show you. 

*See what I mean about old? I made it and have been keeping it to myself for 5 months. My brain keeps telling me that if I didn’t do it within the last week, it isn’t interesting anymore. I keep telling it to shut up.

2012

It’s now 5 days into 2012 and I’ve managed to successfully write 2012 on everything requiring a date. Except for that last form but it did become a very exuberant ’12 afterward. I’m still easing into the whole idea of 2012 and trying to get myself running at full speed. Maybe it’s all this talk of resolutions or those to-do lists I write every day that are only half done but I feel like I should have already accomplished so much in the past 4.5 days. My goals should be reached. My to-do lists all done. Instead, I feel woefully unprepared. Feh.

Thankfully, my goal for this year doesn’t revolve around 24-hour productivity. It isn’t a manifesto and it isn’t even a list. It’s one sentence: 

Get out there. 

No more hiding. No more worrying. No more wussing out. Just get out there and do stuff. I think this is going to be a great year.

Besides from that whole ‘I should have 20 million things done by now’ feeling, 2012 was been pretty awesome. I spent New Year’s Day with the Bearded One and a few friends and had a good time doing as little as possible. January 2nd, I decided to kick off my knitting year with a bang and cast on for a brand new scarf/shawl thing: Speedline by Alexandra Tinsley of dull-roar.com.

That’s 2 rows of about 400 sts each in Tosh DK (Silver Fox and Candlewick for the curious among you). I love how dramatic the two color long tail cast on comes out. I’m also kicking myself for not thinking of it before. Anyway, 400 stitches. One row takes a long time and it hardly seems like I have anything to show for it; however, one row builds on another and I’m making steady, if slow, progress. In the end, I’ll have a great shawl (scarf?) that I’ll enjoy wearing all the more because of how effort I put in to it. This is a lesson I need to work into the rest of endeavors.

Any New Year’s goals on your side? I’d love to hear about them. Manifestos and lists welcome.