Tour de Fleece 2014 Recap

Tour-de-Fleece-2014-Handspun.jpg

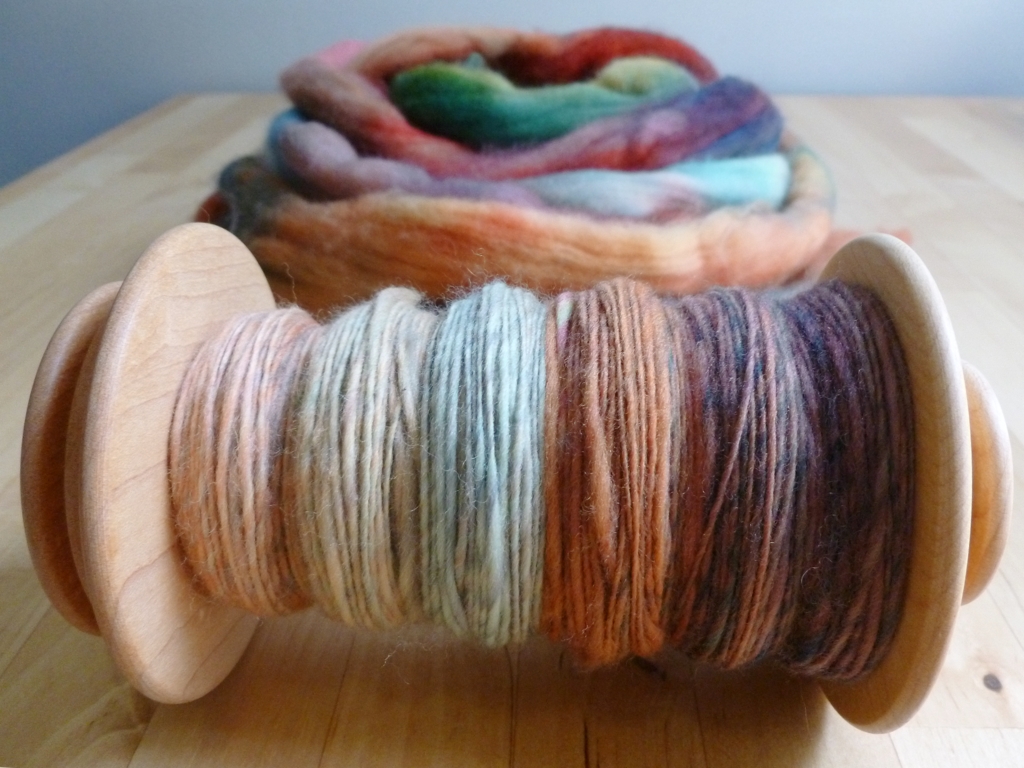
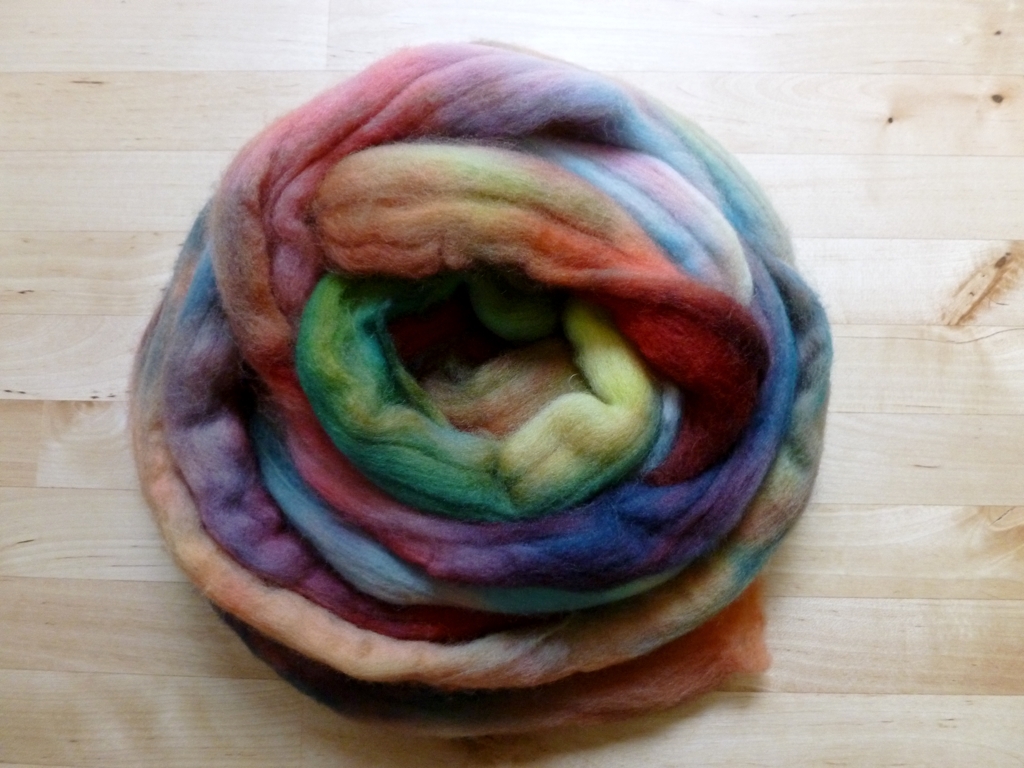
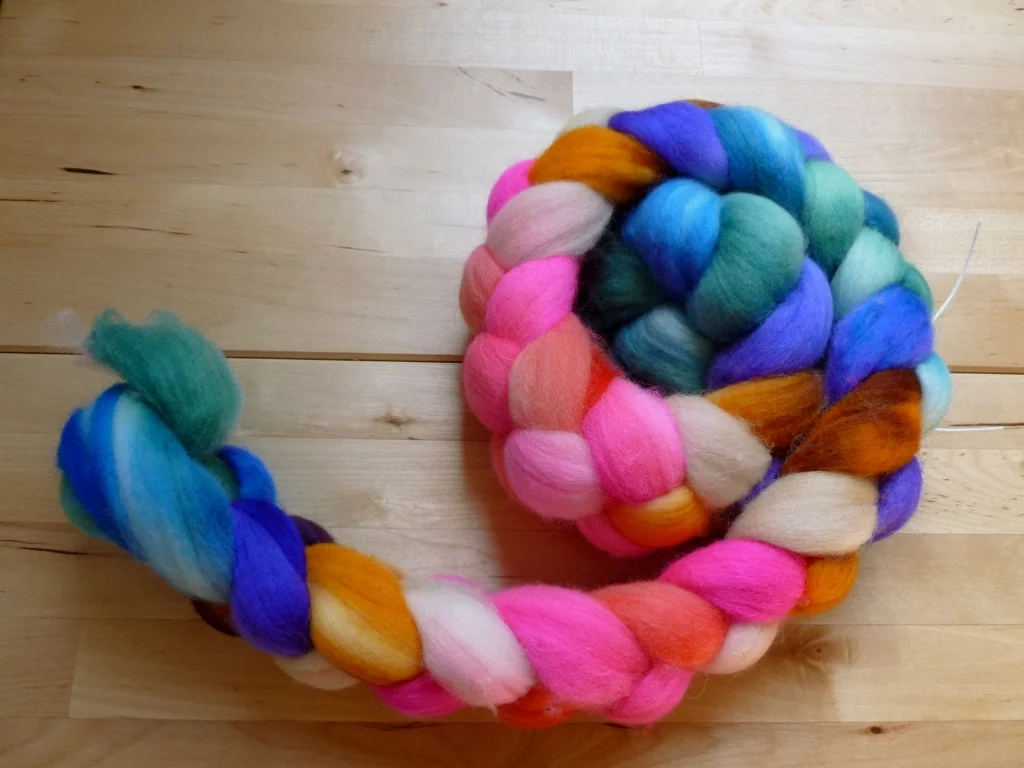
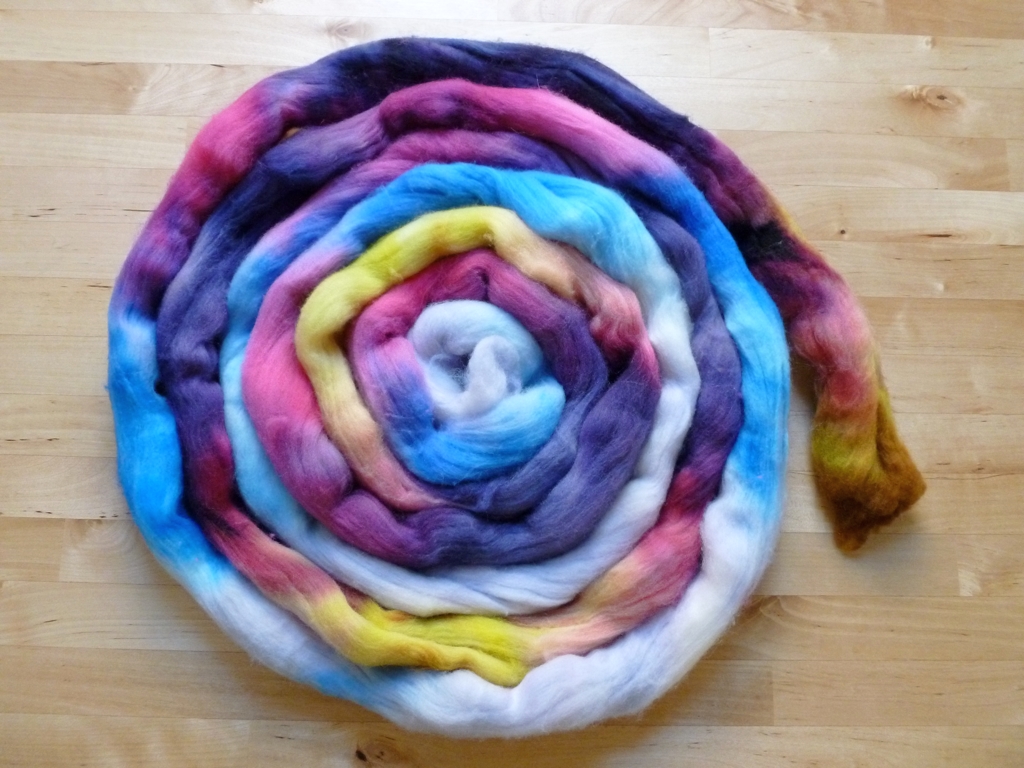
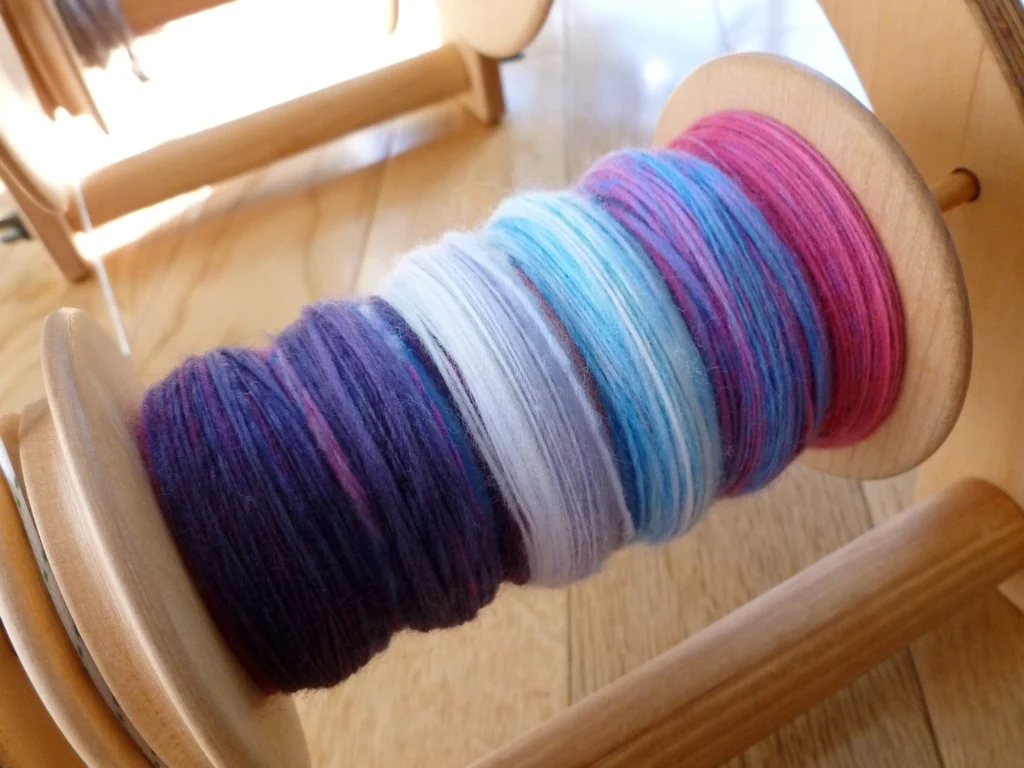
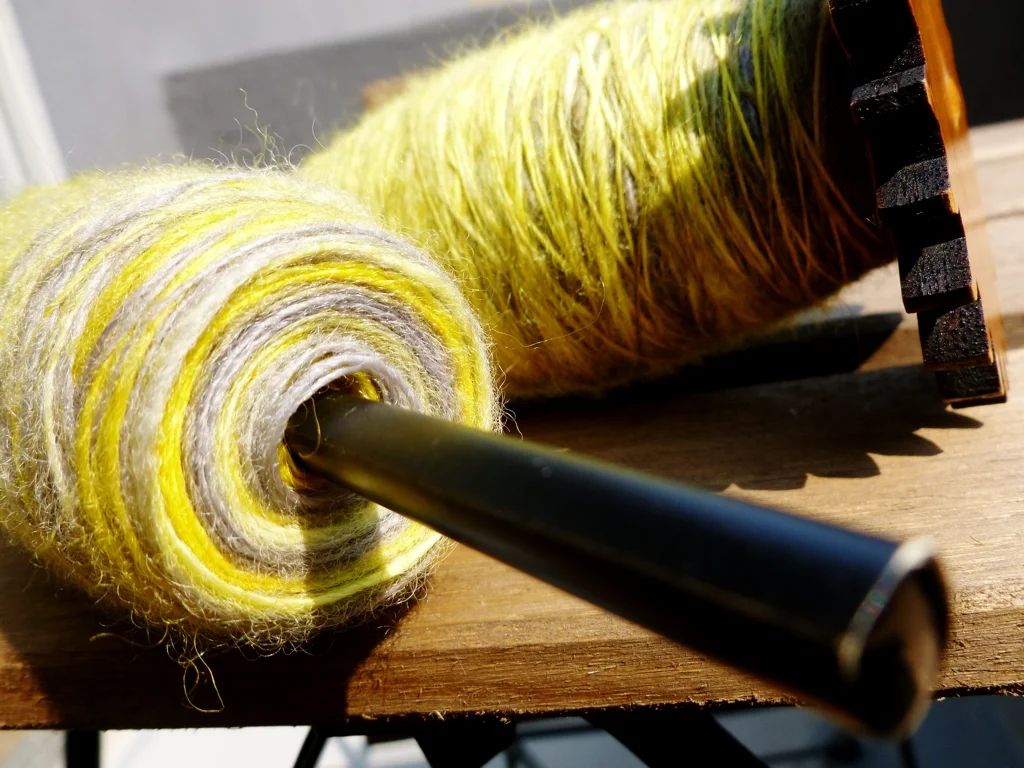
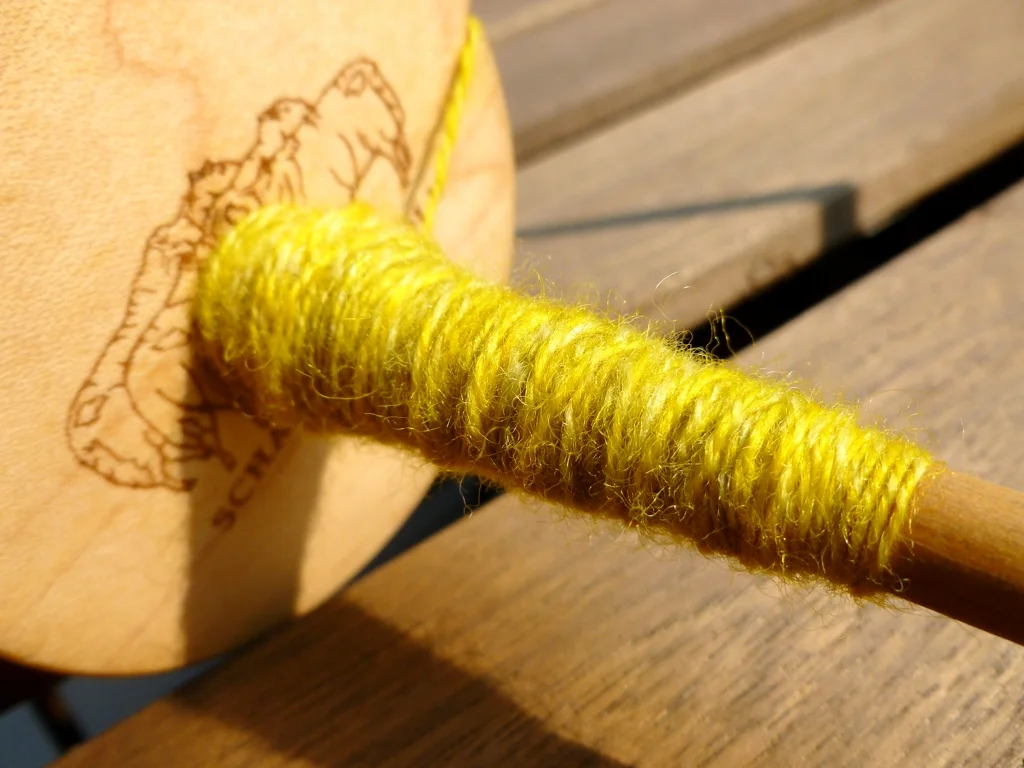
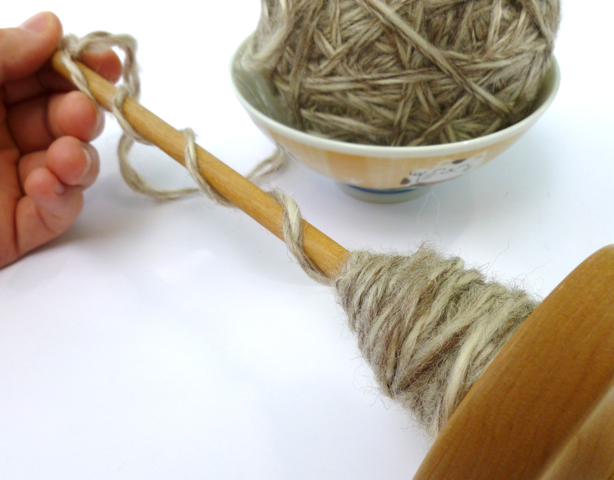
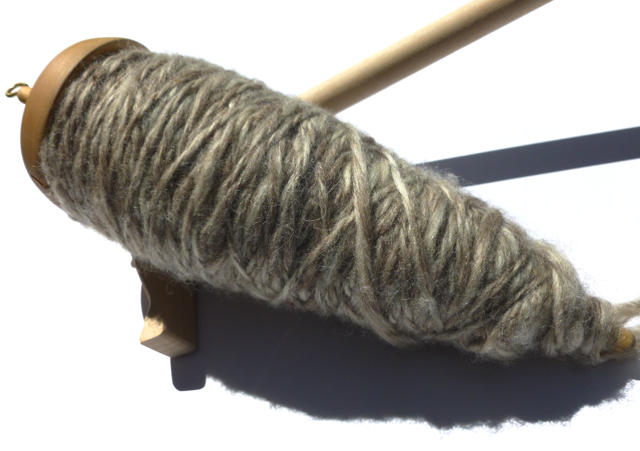
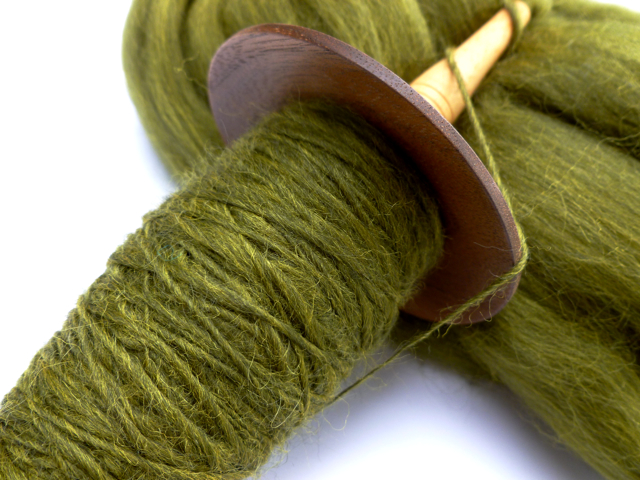
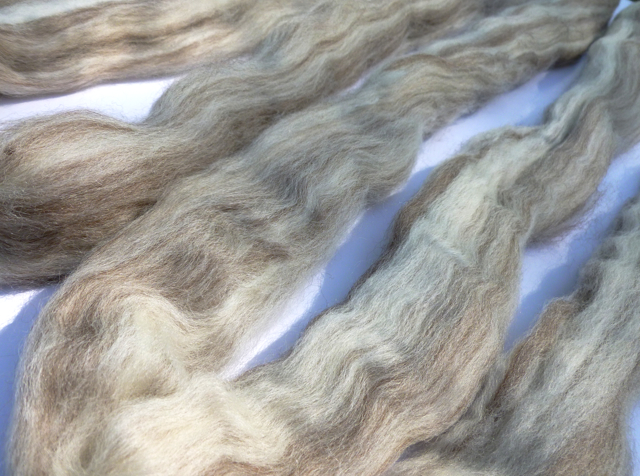
I knew it was going to be a photo finish. There were only 6 days remaining of Tour de Fleece and I still had ounces left to spin. Color Bot was starting to fill up a bobbin but I still hadn’t drafted my way through the first of 4 color repeats. If everything went just right, I’d be able to finish the first single Thursday. On Saturday, I’d haul the wheel to the spinning guild meeting and finish the second single. Sunday, the last day, I would ply. It was going to be tight but I could pull it off unless there were some major hiccups. Instead of hiccup, it was twinge in my shoulder that moved down to my elbow and finally to my wrist. Didn’t take long for my left wrist and hand to swell up and hurt to move. I was officially out of the race.

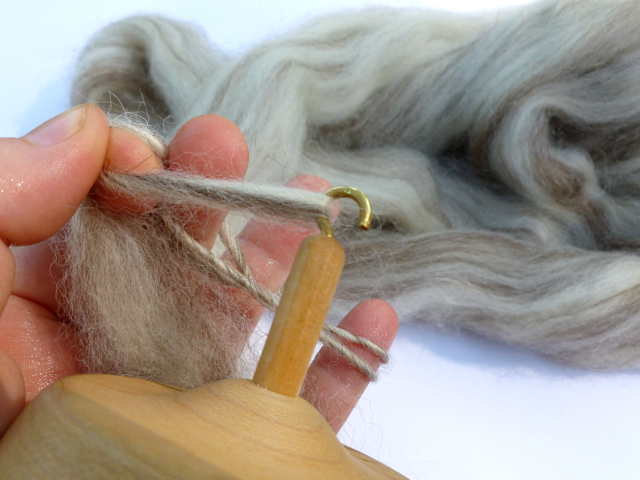
How did I do this to myself? Well, yoga’s downward dogs and planks didn’t help but the main culprit is how I spin. No matter how I draft, long-draw or otherwise, I usually end up twisted to the left with my arm sticking straight out behind me. Knew this wasn’t the most ergonomic posture and it finally came back to bite me. So, until my arms heals up, no spinning and no yoga.

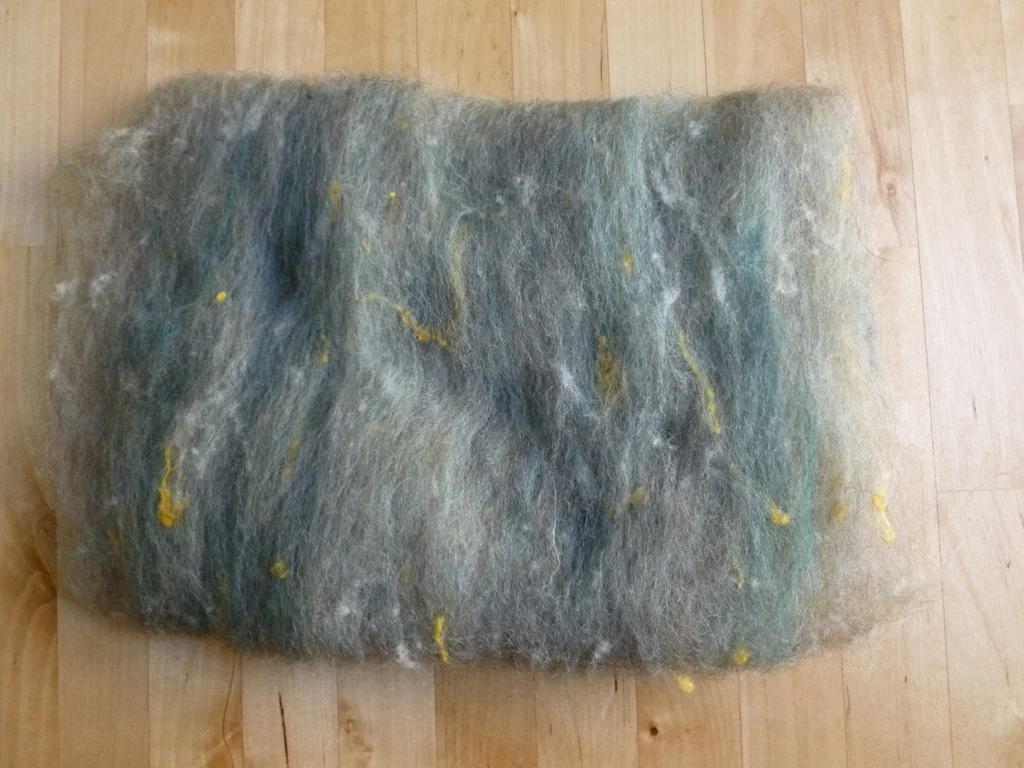
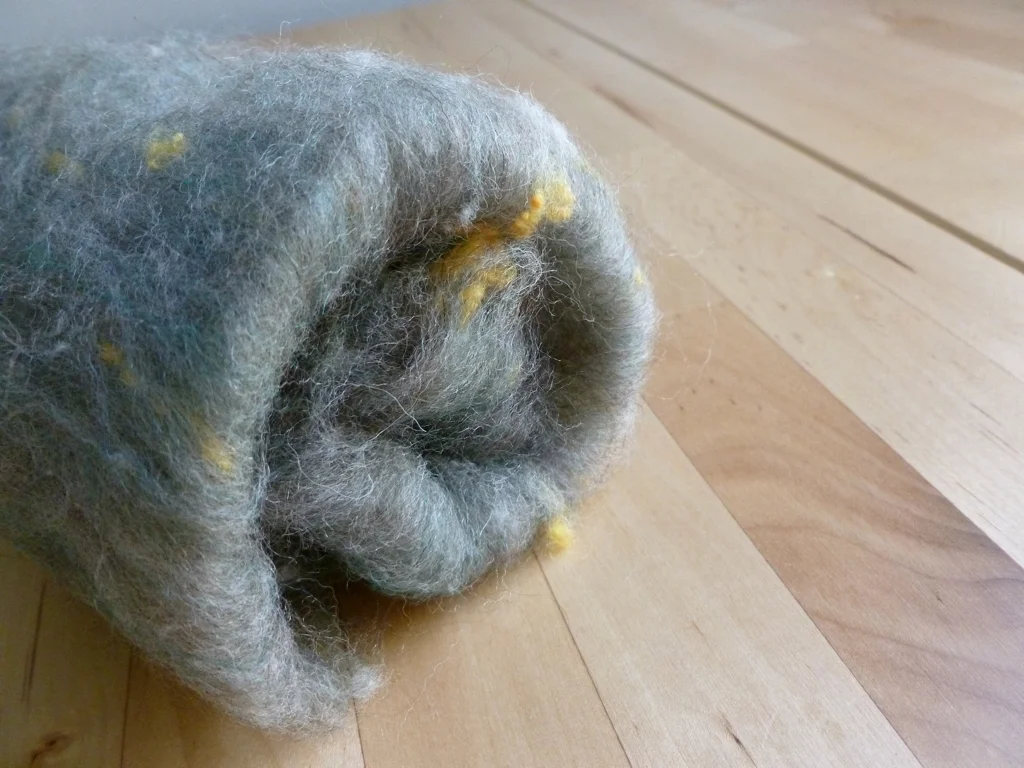
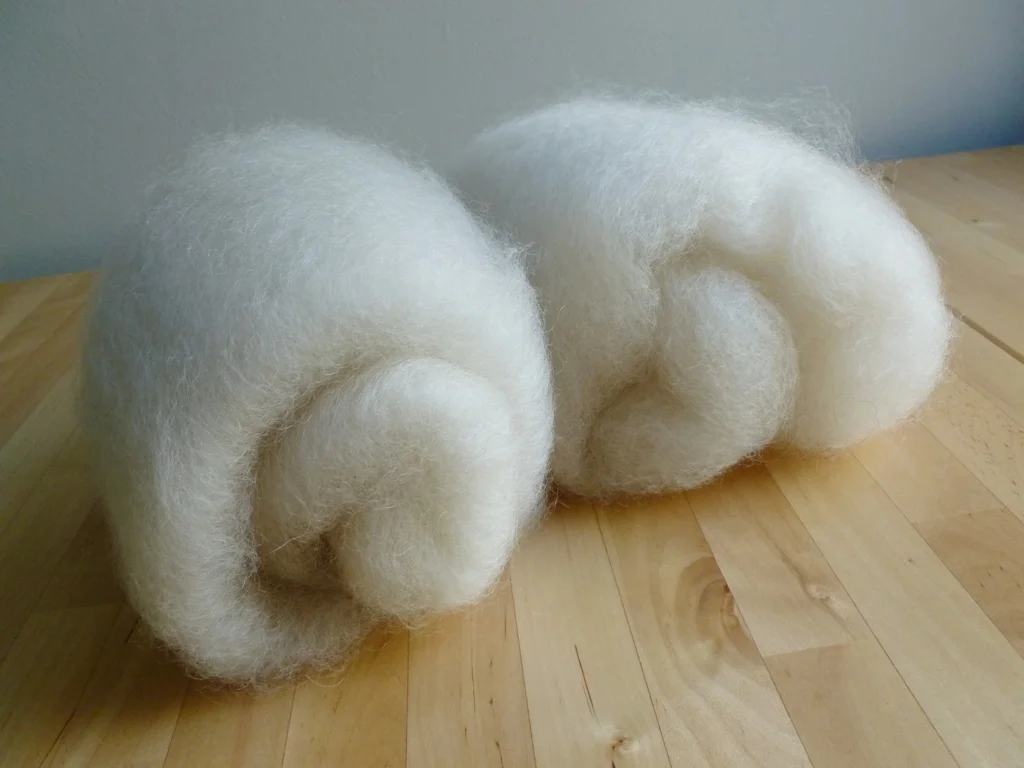
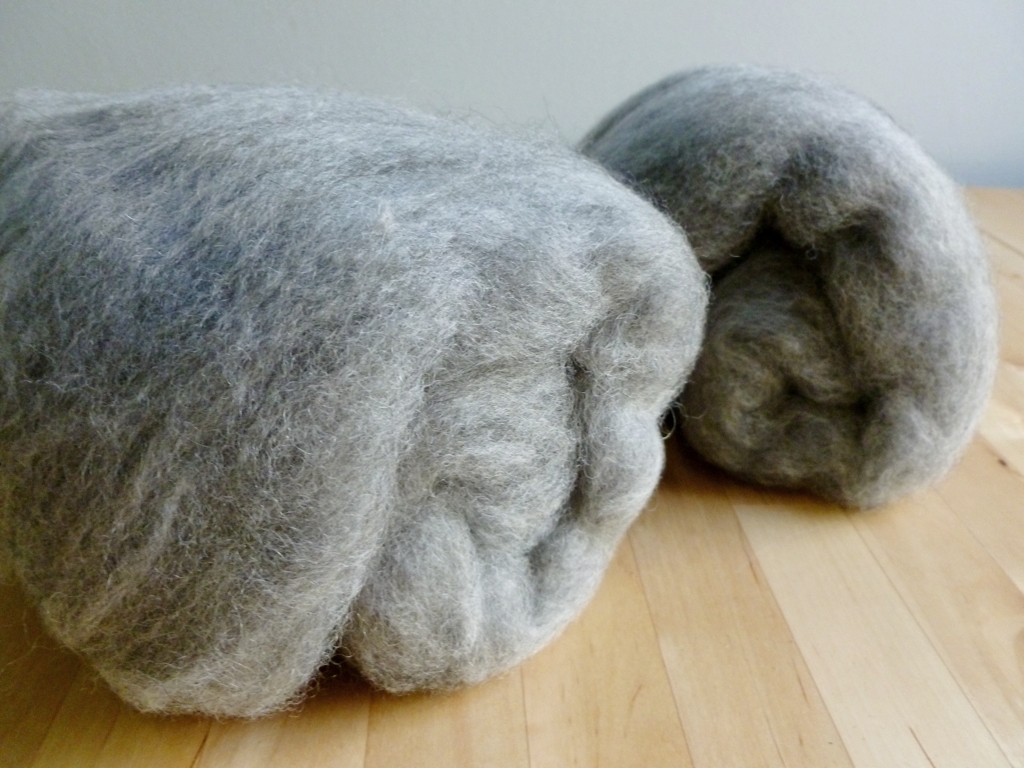
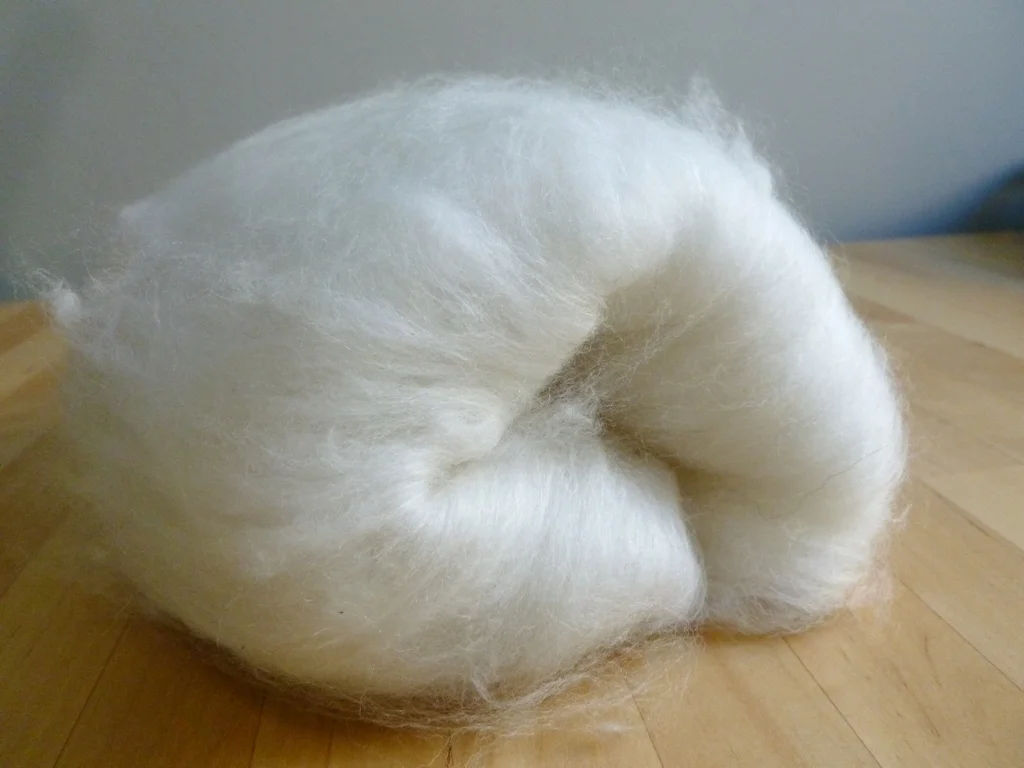
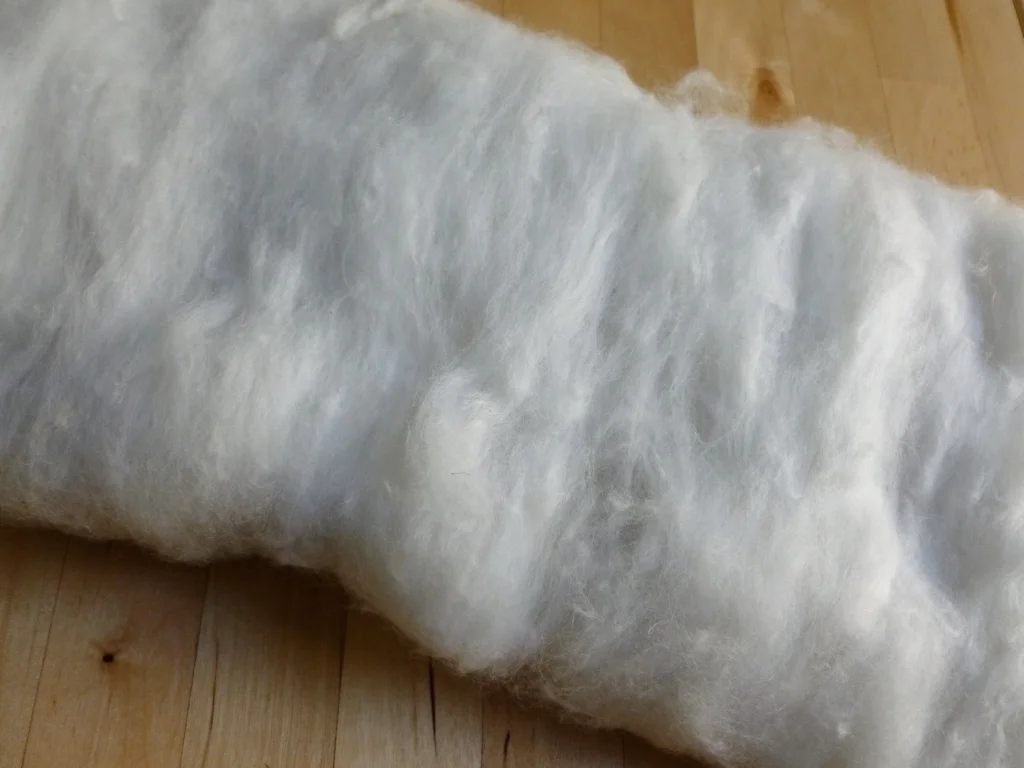
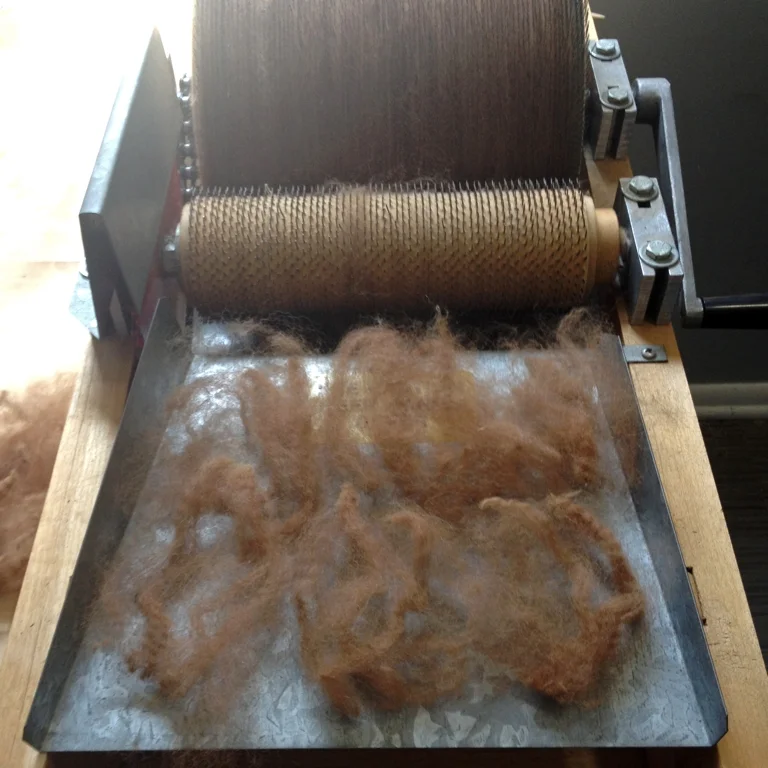
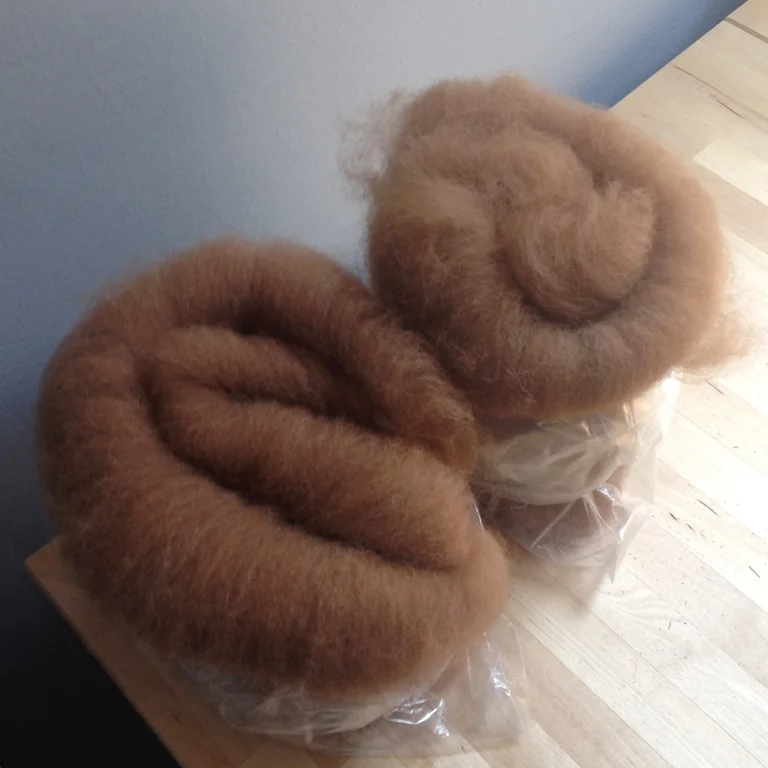
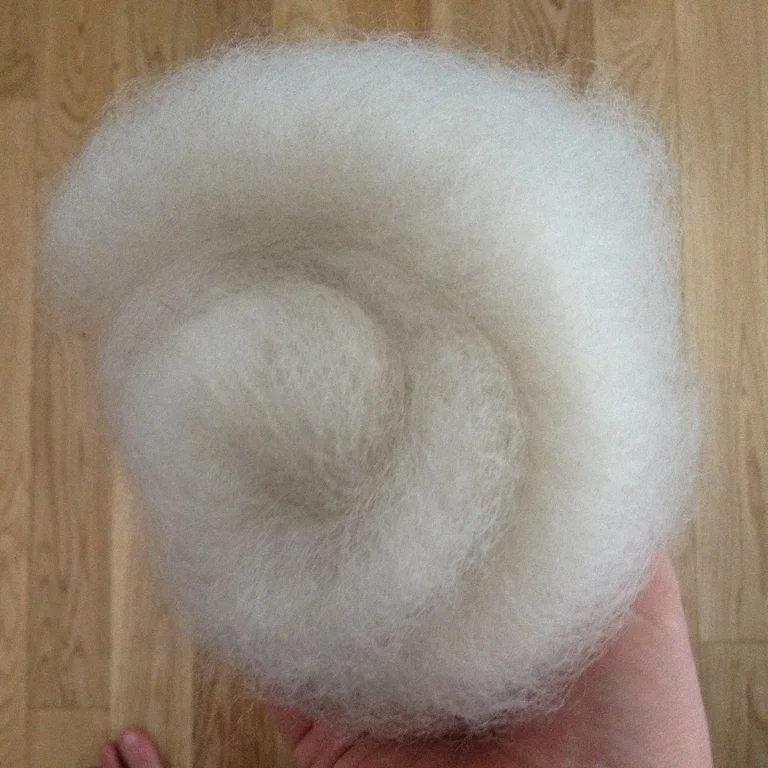
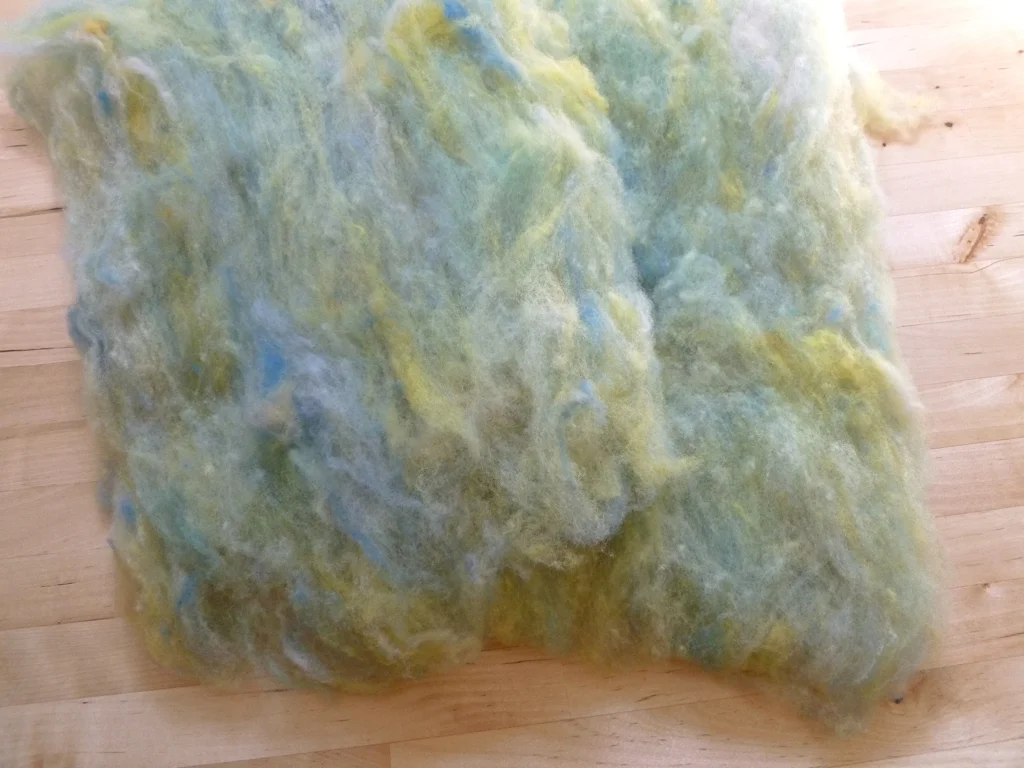
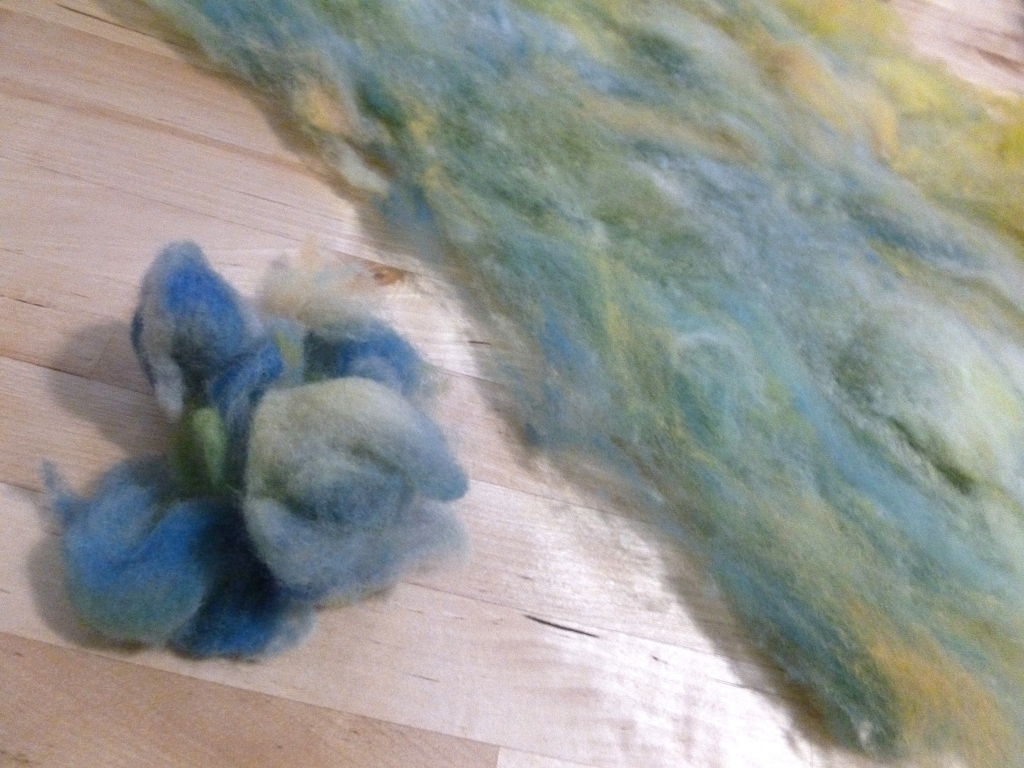
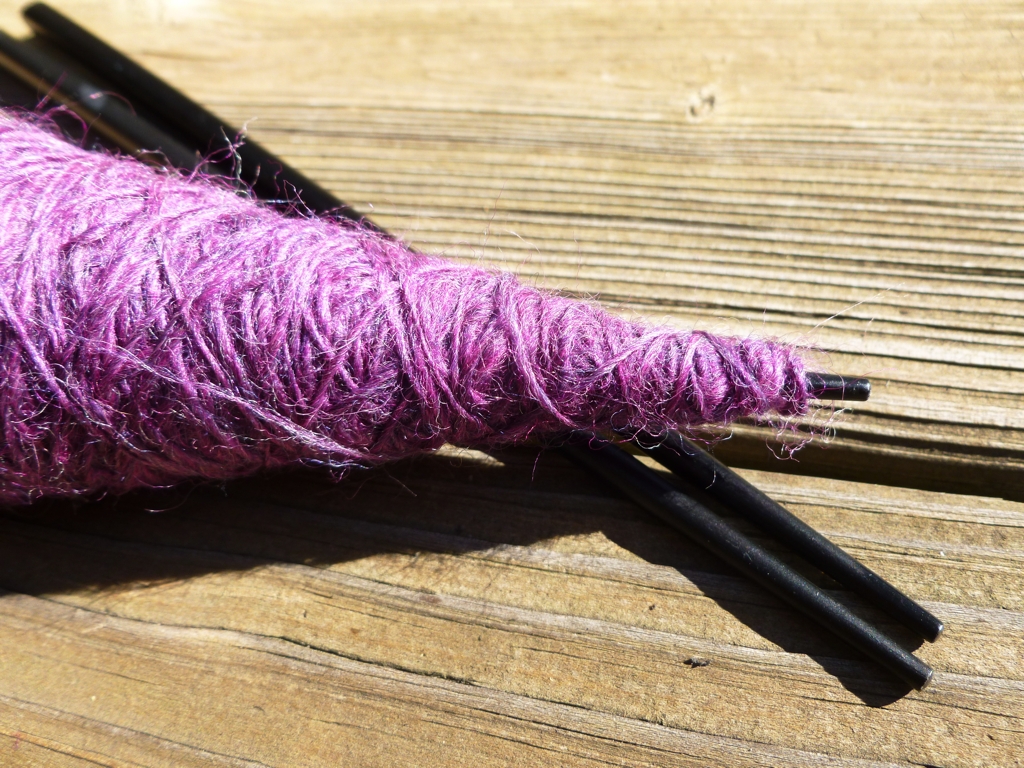
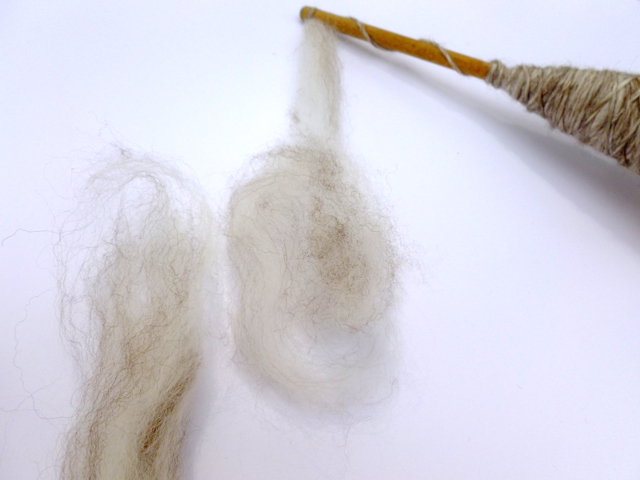
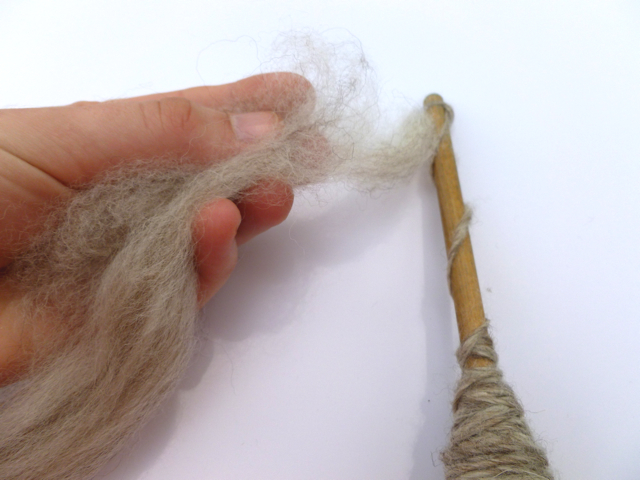
Not spinning for the past few days, especially the last of the Tour, has been annoying and the knitting has been scant; however, my shoulder and arm are all the better for it. Wrist braces don’t exactly make that stuff easy anyhow. The swelling has gone down and everything hurts  much less now. At least I was able to reach the majority of my Tour de Fleece goals before my arm called it quits. I spun a few of the batts I made on the drum carder. I tried new a new technique for spinning fine singles and it actually worked. Not being able to spin gave me the time to read about spinning, specifically spinning ergonomics. FYI, the articles in Ply have been especially helpful. Didn’t get around to spinning new fibers but nothing’s stopping me from trying once my arm heals.

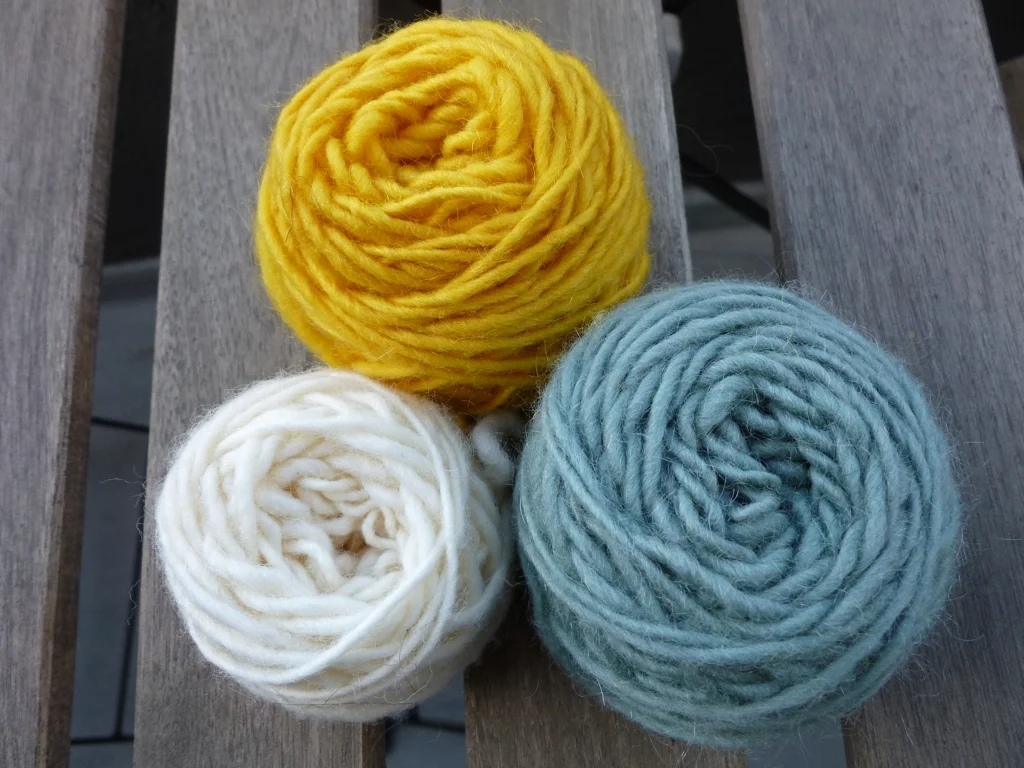
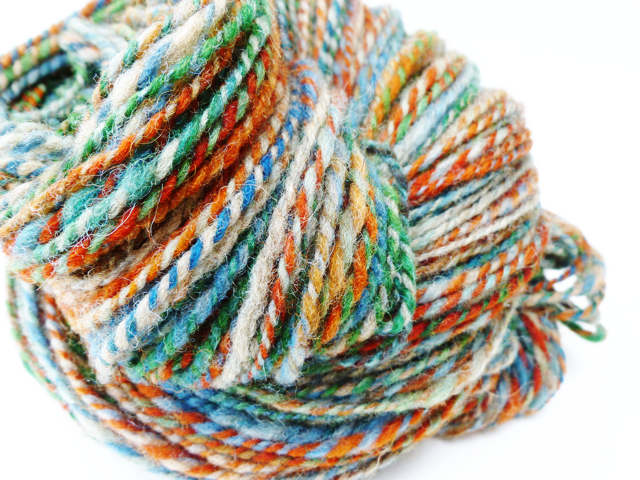
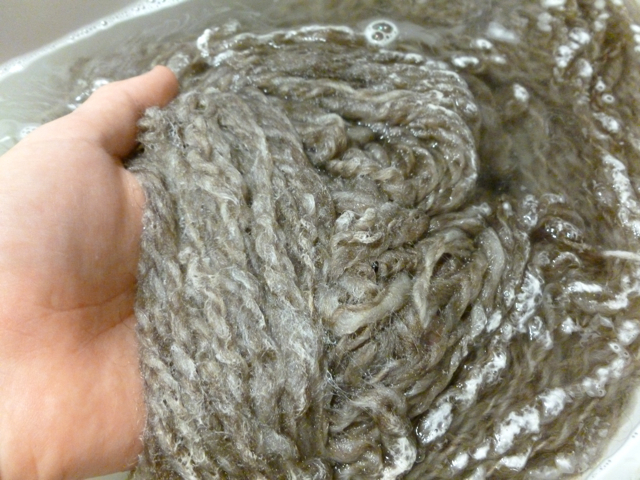
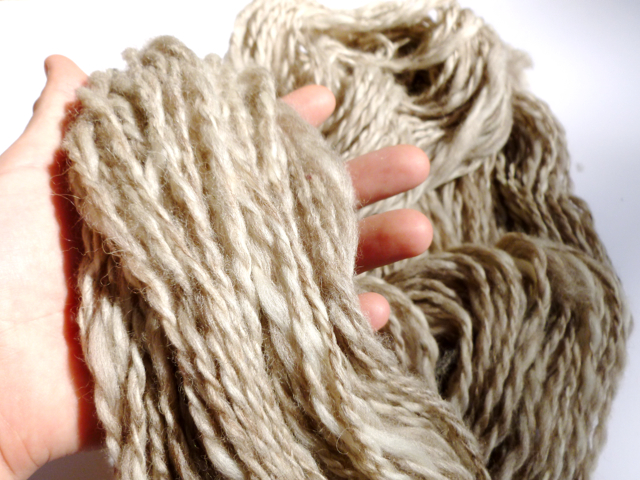
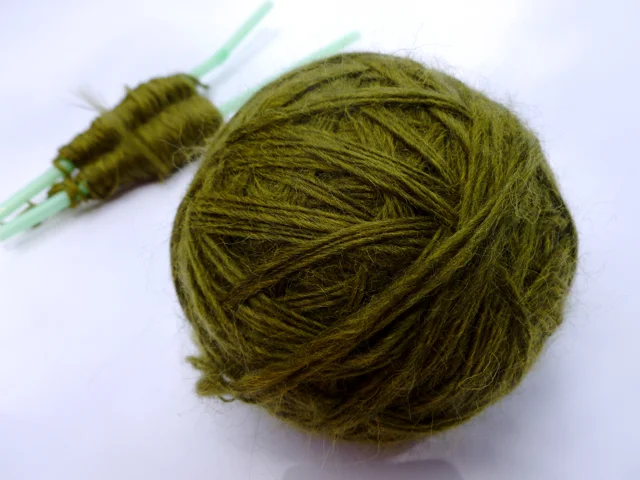
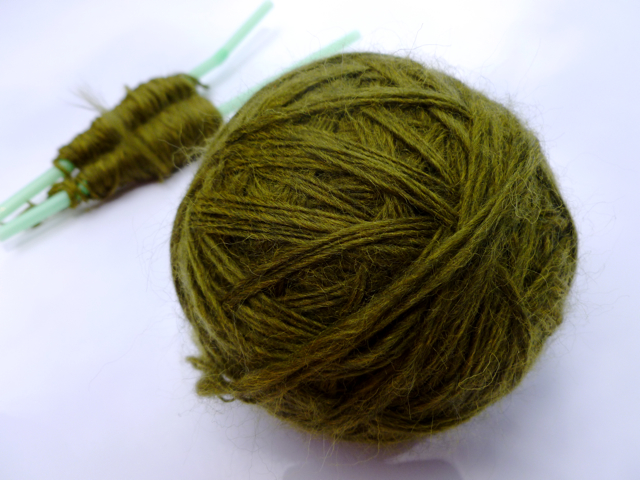
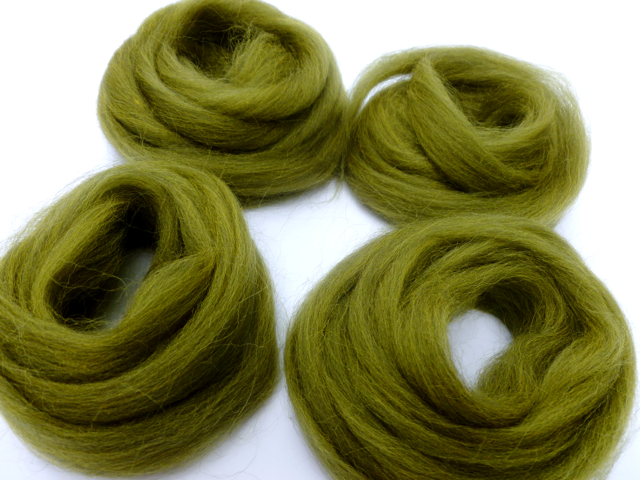
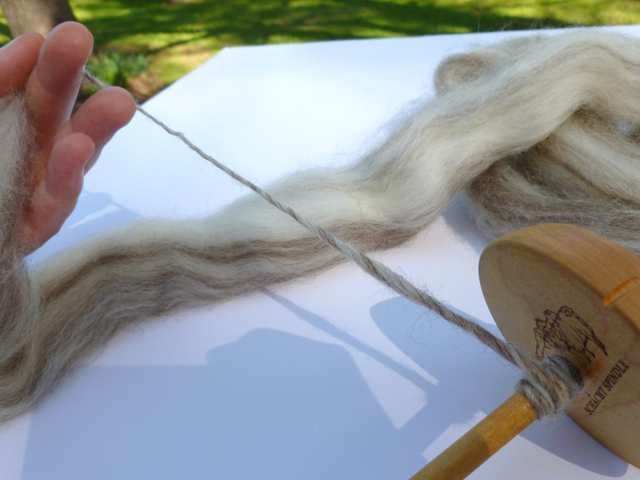
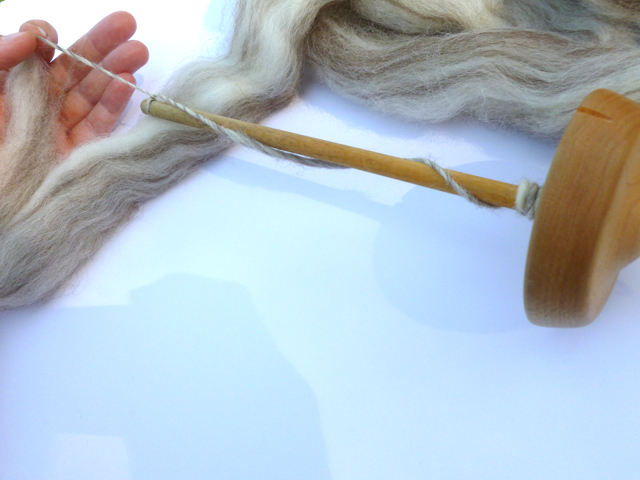
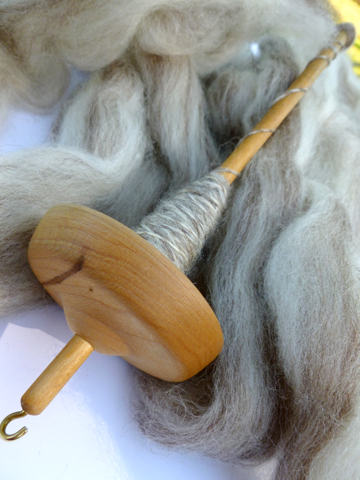
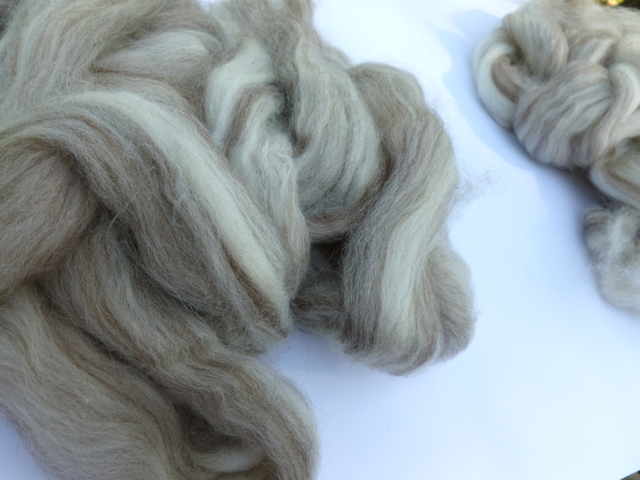
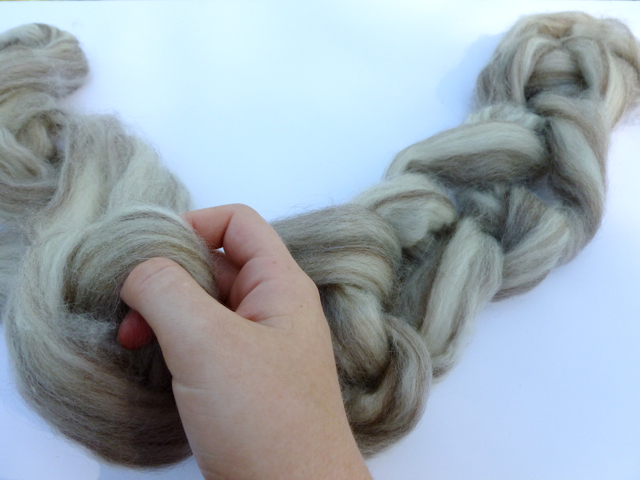
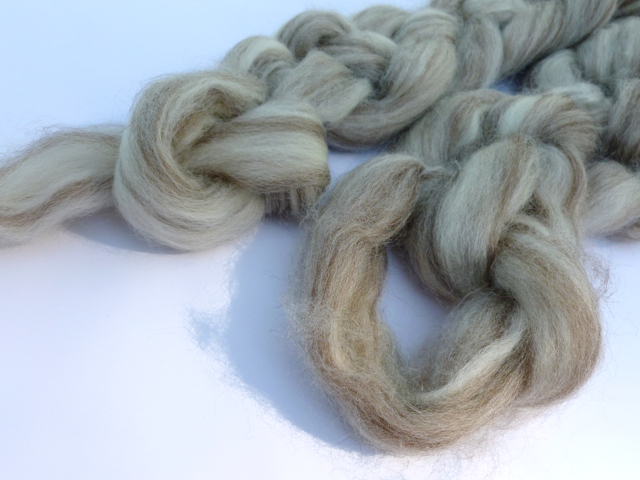
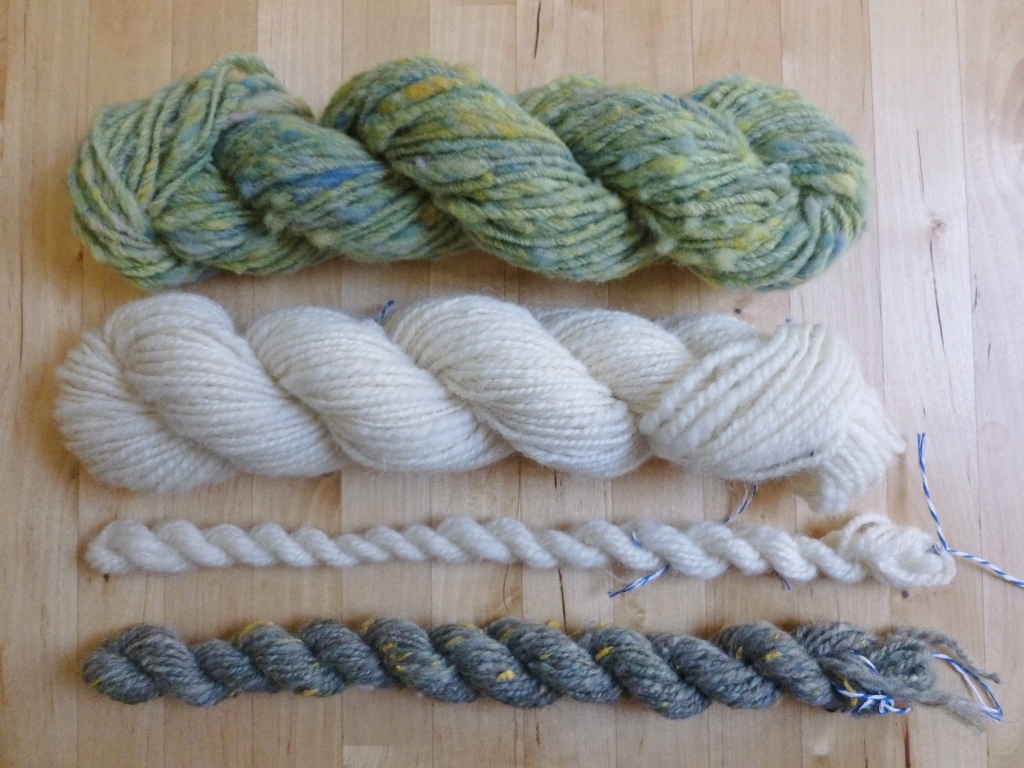
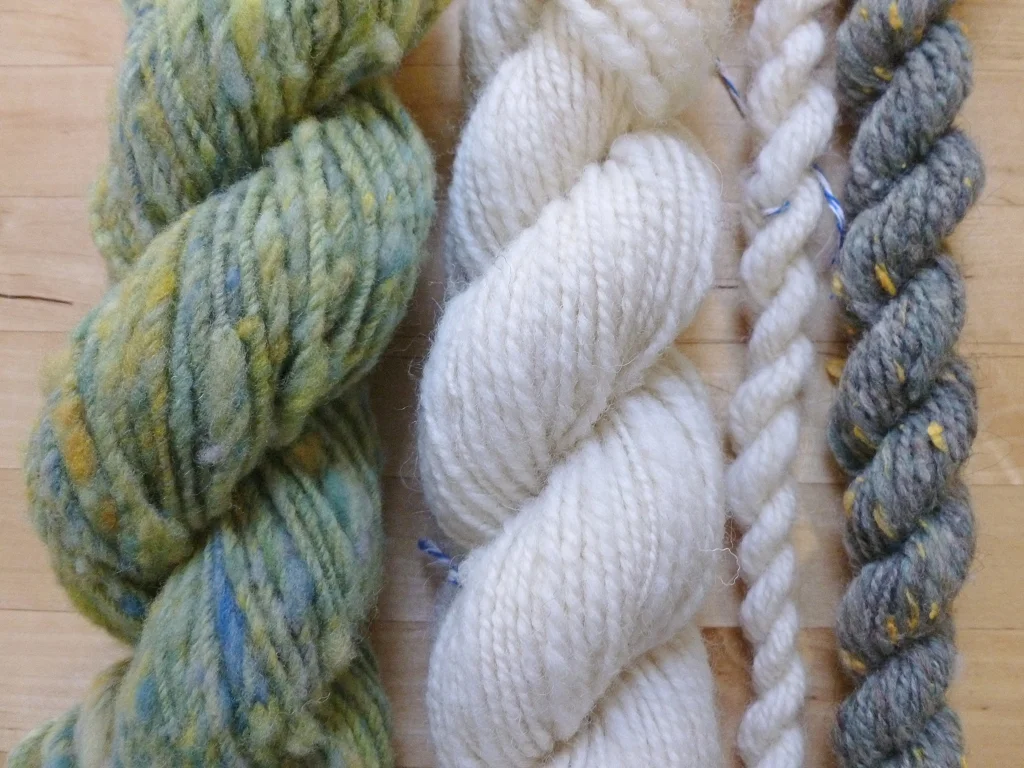
Aside from messing up my arm and shoulder, this year’s Tour de Fleece was a good one. I learned and tried new things, had fun, and got some great handspun out of it. Keeping a relaxed pace was nice too and not spinning every day probably saved me some pain and stress in the long run. Not including Color Bot, I spun 3.2 oz (90g) into 4 skeins and 206 yds. Not much but still worthwhile. 

How did your Tour go for you? Injury free, I hope.

5 Training Tips for Tour de Fleece

Spinning along with Tour de Fleece? Here are 5 tips to help get you started. | withwool.com

It’s almost time for Tour de Fleece which runs alongside the Tour de France. Starting July 5, there will be 3 weeks of spinning, watching the Tour de France, and more spinning. 2014 will be my third time take part. For my first Tour in 2012, I spun with a spindle and turned 18.9 ounces of wool into 5 skeins and 1,040 yards. I wasn’t as prolific in 2013 when I only spun 1 skein but it was 512 yards. I’m looking forward to this year since it’ll be the first Tour I’ll be spinning on my trusty sidekick. With a wheel, I’m hoping to leave my previous numbers in the dust and put a serious dent in my fiber stash. Also on the list is learning new yarn constructions and spinning new fibers. But first, there must be prep and training to make the most of and, more importantly, enjoy the Tour. So, a few tips for training before the Tour officially kicks off on July 5th:

Spinning along with Tour de Fleece? Here are 5 tips to help get you started. | withwool.com

Make a game plan. What are you going to spin? A sweater’s worth of wool? All those one off bumps of indie-dyed fiber? Do you want to learn a new technique? Try a new yarn construction? Spin a different fiber like silk or linen? Spin sock yarn or yarn for a specific project? If you’re spinning a sweater’s worth, sample the fiber and knit a swatch to make sure the final yarn matches the project. Also a good time to find out if you like spinning the yarn before devoting 3 weeks to it. 

Prep your fiber. If you’re spinning for a large project, split the fiber into manageable chunks, 1 oz or smaller. Take a break after spinning each ounce and your wrists will thank you. Plus, plying singles spun at the beginning with singles spun at the end will create a more consistent yarn.

Spindle or wheel, clean your gear. Spinning wheels need a good cleaning on a regular basis and prepping for Tour de Fleece is the perfect time. Give the wheel a good dusting and a little wax to keep the wood happy. Oil moving parts as necessary. This also a good time to inspect the wheel for any damage or replace loose drive bands and stretched out springs. If you need help, check out these links on wheel maintenance. As simple as spindles are, they need care and wood wax too. Now is also a good time to readjust bent hooks. 

Empty those bobbins. Or in the case of spindles, those straws and chopsticks. The more empty bobbins you have, the longer and more you can spin before you need to ply.

Find your team. I'm not saying that you have to sign up for any specific team to spin with. Just find a place where you feel comfortable sharing your progress, getting a pat on the back, and asking for help. Could be the Tour de Fleece group on Ravelry or Instagram or your own blog.

Spinning along with Tour de Fleece? Here are 5 tips to help get you started. | withwool.com

Batt Showcase

My time with the drum carder is over. It went back at last months and the 4 weeks that I had it were a crash course in carding. I made the first batt because I wanted to see what would happen and it turned out pretty despite my complete lack of knowledge. With one batt under my belt, I decided to do a little research and figure out how to actually use a drum carder. What could you make with one? What could be carded? Maybe more importantly, how do you clean one? I watched videos, read articles, and came across people that knew what they were doing. People that threw in disorganized fiber and had art come out the other side.

Up to this point, from the lone batt I’d spun and most of the listings I’ve seen on Etsy, I had the idea that batts were an everything and the kitchen sink kind of thing.The kind that was 3 types of wool, sparkly bits, silk noil, and some angora for good measure. After my research, I found out differently. Sure, there are kitchen sink batts but batts can also be smooth and uniform. They can focus on color instead of texture. Batts can be bold or subtle. Fibers can be carefully blended or smashed all together. Variation is awesome stuff. 

My batts got better was the weeks went on. They’re all on the subtle side since I just wanted to prep my stash of unprocessed fiber to spin - several ounces of alpaca, locks, angora, and random mystery wool. I wanted to play with color too but ran out of time. Well, I can always rent it again.

The very first batt was 40g of mystery wool from a Gwen Erin grab bag.

Second batt was made from 40 g of Corriedale roving.

This batt is my attempt at duplicating a rolag given to me at a previous guild meeting. Looks similar but I won’t know for sure until I spin it.

These 4 soft and lovely batts were carded from the very first ounces of my fiber stash, 4 oz of light rose grey alpaca. Took me years to prep this fiber and I’m glad I finally did.

The Romney, and reason I rented the carder, turned into 2 batts.

More alpaca from the stash which got a good wash before going on the carder. 

Had a small sample of a BFL and Silk roving that I decided to blend with half its weight in Angora. The batt is wonderfully soft with great luster.

Last batt off the carder was 14g of 100% Angora. Working with straight Angora was more difficult than blending it with wool but not impossible. 

It’s nice to have my kitchen table back but I kind of miss having the drum carder around. I still want to play around with color and blending fibers. Plus, using the carder was just fun and I enjoyed it. Before I had one to my spinning wish list though, I’m going to spin up a few of the batts I made. If I like working with them and the finished yarn, I’ll do some research to pick out the perfect drum carder. Any suggestions on where I should start looking? 

Drum Carding Weekend

This was what my kitchen table looked like pretty much all of Saturday and Sunday. See, this is the last week I’ve got the drum carder and I’m determined to make the most of it.

I spent a good chunk of Saturday feeding 3 oz of light rose grey alpaca through the carder. It was amazing to see the fiber go from crimped locks to a soft and fluffy batt. Don’t think I’ll ever get tired of seeing that transformation. 

On Sunday, I carded the 2 oz of Romney bought at April’s spinning guild meeting. The very same Romney that prompted my last minute decision to rent the drum carder.  Locks went in and a fluffy cloud came out. If it looks like a cloud, it has to be a cloud right?

In total, I processed 5 oz over the weekend and I’m still not done. There’s more alpaca and angora coming from my distant stash. Until that arrives, I’ve got grand plans for this bump of fiber from Spun Right Round. Going to use it to try something new, The Monet Effect Technique from Grace Shalom Hopkins. Interested to see how carding recombines the pink, blue, and green together.

Spinning Up Olivia

Spun-Right-Round-Ramboillet-Olivia.jpg

2 weeks ago, I couldn’t decide what to spin so I asked Instagram to pick for me. Olivia, the April shipment from the Spun Right Round Fiber Club, was the unanimous choice. Then it was time to take a closer look at the bump.

SRR-Olivia-Unchained.jpg

Freshly unchained, the colors seemed to be all over the place…

...but a little organizing set them right…

...before I coiled them up again.

The steady repeats would have been perfect for fractal spinning but I wanted to try something new, yet still simple. The easiest thing to do turned out to be splitting the roving in half lengthwise and spinning the singles from opposite ends. Seems like articles and spinning tutorials always always mention spinning from the same direction when it comes to manipulating color. I’m interested to see what happens when you go in the opposite direction. With the first single finished and the second underway, I’m hoping the long repeats turn into a spectacular barber pole. 

Wander the Web 38

The first single from April's Spun Right Round Fiber Club. 

The first single from April's Spun Right Round Fiber Club. 

Inspiring, fun, thought-provoking, and crafty links because there’s more to the internet than knitting and spinning. 

I’ve always wondered how people wind such beautiful and orderly spindle cops

Check out this beautiful spiral staircase

What Really Happens When You Start Over

About DIY Projects

Love these Retro Tech Lego Kits, especially the old school computers.

A Puppeteer’s Advice from Jim Henson

Bradley Hart’s Bubble Wrap Paintings

Adventures With A Drum Carder

I blame the Romney I bought at last Saturday’s spinning guild meeting. The fiber is lovely, soft, and clean but it still needs to be prepped for spinning. Unfortunately, I have no way to prep said fiber which prompted the last minute decision to rent the guild’s drum carder. It’s definitely large and in charge. So large, in fact, that I brought it home in a rolling duffle bag. Just what exactly I’d gotten myself into? Then guilt set in because there were only 2.5 ounces of Romney compared to the enormity of this hungry machine. The guilt didn’t last long because I started to remember all the alpaca, angora, and random bits of wool that have been sitting un-prepped and un-spun in my stash for years. And what about all that roving? Maybe I could experiment with that too. See ya later, Guilt.

The first thing to hit the drum was some random bits of practice grab bag wool. Before feeding it through the drums, I pulled the chunks apart to thin them down a little. Didn’t worry about color or anything else. The wool went in until the drum was full and there still half a bag left to play with.

The colors blended beautifully though there are still random spots of solid blue after 3 passes through the carder. Looking forward to spinning it up and seeing the finished yarn.

Since this was my first time using a drum carder, or a carder of any kind, I’m amazed at the transformation. Before, there were just squishy clumps of wool I didn’t know what to do with. Now, I’ve got something that I can’t wait to spin. Also, the process was a blast. Get to play with wool and fiber? Check. Get to play with color? Check. Get to make stuff? Double check. Me thinks that I’ve fallen down the rabbit hole and I have no idea how deep it goes.

Since making those first 2 batts, I’ve done a little more research on how to properly use a drum carder. How to clean one too. The best info I’ve found is a 3-part series from vampy.co.uk. Part 1 is all about the basics of how a drum carder works and the necessary accoutrements. Part 2 is about carding raw fleece. Part 3 is about how to blend fibers. Now that I’m armed with a little more knowledge, I’m ready to play around, experiment, and make more batts. 

Checking In

Way back in January, which isn’t as far away as it seems, I shared my pattern design goals for 2014.  The last day of March seemed like as good a time as any to check in, take stock, and stay accountable.

I only had one major goal, to design and release 1 pattern every 2 months. We’re 3 months into 2014 and I haven’t released a single knitting pattern. Good thing I didn’t push myself to release a pattern a month or I’d be really dejected right now. The thing is, I’ve been putting in the work. The first pattern I worked on this year is finished aside from the final necessary steps - the layout, proofreading, editing, and photography stuff. Still a lot of work to be done but those tiny little balls of yarn are proof that the knitting is finished. The pattern itself won’t be released until Summer is on it’s way out. Maybe I can come up with a name by then. Why does coming up with a good name have to be so hard?  

The second pattern of the year was a set of kitchen towels and washcloths that I submitted to Holla Knits. These towels were the first pattern that I’ve ever submitted for publication by someone else. Submitting a design was a goal I’ve had for a long time and a hidden goal for this year. Dropping the swatches in the mail box was exciting and nerve-racking at the same time. The set wasn’t accepted but it’ll be showing up here just as soon as I finish the samples and put the finishing touches on the pattern. Just might be my first release of the year. 

As for other patterns, I’ve been sketching and taking notes as soon as the ideas popped into my head. A few skeins of my recent handspun have been brilliant inspiration. I’ve even resurrected a few older patterns from my notes and WIP bin. Some of them I’m ripping out because they’re just not as exciting or likable since the novelty wore off. Still others have reclaimed some brain space so I can get back to puzzling out the details. The next few months are going to be busy with pattern knitting and writing. Plenty of ripping too. I’m sure of that. 

Even after 3 months, I still feel like I’m just getting started but at least I’ve got some momentum. There have been more small successes behind the scenes to keep me going then there have been disappointments to hold me back. When I was feeling complacent and lazy, this interview with Alex Tinsley over on the Loopy Ewe blog was a swift kick in the pants. I’ve read it several times and I’m sure I’ll be coming back to it when I would rather be be a giant, lazy lump. Until then, there’s no time like the present to get serious and get things done. So, I’m sticking with my original goal of releasing 1 pattern every 2 months. It’s not going to be easy or quick but it’s worth the effort. 

Design Goals

After reading numerous “Best Of” and 2013 showcase posts, I was inspired to make up a little gallery of my 2013 patterns. Here’s what I have to show off: The Cornered Slouch Hat.

Cornered-Slouch-Hat-Profile.jpg

And that’s it. Just one measly pattern. I had all these ideas in my head; some of which I sketched and swatched and started knitting. Out of all of these, the only pattern that saw the light of day was this hat. Disappointing? Yes. A kick in the pants? Definitely.

So, this year I’m setting a goal. My realistic side wants to design and release 6 patterns. That’s 1 pattern every 2 months. The crazy, overachiever part of me wants to push 1 pattern a month. I’m going to aim for something in the middle and see what happens. Some of the patterns will be ones that have been lingering on my needles and some will be the ones that I just have to cast on for right that second. 

YarnTrio.jpg

The pattern currently dancing around on my needles is definitely one that I wanted to cast on for as soon as the idea popped into my head. Unfortunately, I wasn’t even in the same state as the yarn at the time and had to wait a few days. Turned out to be a good thing since I was able to mull the project over and work out a few details. Well, as well as details can be worked before the yarn hits the needles. Now I’m one swatch in and the whole thing is still a good idea. 2014 is off to a great start. 

Just Plying Along

FractalPlyingBall1.jpg

There are 3 more days of Tour de Fleece and I’m just started plying. It’s highly improbable that I’ll have a finished skein by Sunday night but I’m going to try anyway. If only the yarn would expertly ply itself while I’m asleep. 

To make the whole plying process run a lot smoother, I’m falling back on my favorite technique, the plying ball. It does take longer to start since you have to wind the singles together around a core but it’s worth it. A plying ball is portable, doesn’t require a Lazy Kate, and makes tensioning the singles during plying so much easier. Plying balls also give you one last chance to fix any breaks or weak spots before they snap during plying. One extra, added bonus is that you get to see how all the colors line up which is great if you’re spinning a fractal yarn, like I am. For more info on how to actually wind a plying ball, check out this tutorial.

PlyingBallCollage.jpg

All wound and ready to ply! My attempt at dividing the fiber for fractal colors seems to have worked. I was also exceedingly happy to see that one single wasn’t much longer than the other. It’s the small things in life. 

I’m a few yards into plying and seeing the colors change as they move through my fingers is wonderful. When I first picked out this fiber and my lightest spindle, I was aiming for a fingering weight yarn but, so far, it looks more like a lace weight. Maybe a bath and a good thwacking will bulk it up a bit. If not, that’ll teach me not to spin samples first.

FractalPlyingBall11.jpg

Store Singles on Chopsticks

I love chopsticks. Have for years and I’ve got quite the collection now. I have chopsticks made of wood, plastic, metal, and ceramic. I have lacquered chopsticks, orange chopsticks, and red chopsticks. The collection has chopsticks that say Happy Birthday, that are inlayed with Mother of Pearl, and others that are decorated with ukiyo-e samurai. I took a selection of these off to college with me. Based on the look on my roommate’s face, you’d think eating fruit cups with chopsticks was weird or something. Also part of the collection are several sets of plain, black chopsticks. They sat in the silverware drawer for years and I always picked more decorative pairs instead. Well, I found a much better use for those plain jane chopsticks: storing singles.

Chopsticks1.jpg

A chopstick and the shaft of a spindle aren’t that different. The two share similar and compatible lengths and diameters. Both have been sanded, perhaps finished with paint or stain, and are smooth to the touch. A finished cop - the mass of single wrapped around the shaft - slides easily without snags or tangles along both. A chopstick is more durable than a straw and can even be used as part of an improvised lazy kate. As a bonus, chopsticks are fairly cheap and come in a range of styles so you can afford to pair up all your spindles with a few sets.

Chopsticks3.jpg

To transfer, all you have to do is slide the cop off the spindle and on to the chopstick. If the spindle has a tapered shaft, slide the cop onto a straw first and then the chopstick so that the diameters match. With the chopstick full of proto-yarn, the spindle is free and clear for more spinning.

Afterthought Heels the Cat Bordhi Way

After making several pairs of socks with afterthought heels, Cat Bordhi’s method is my absolute favorite for adding afterthought heels. Works really well for afterthought Cuffs too. Afterthought Heels The Cat Bordhi Way | withwool.com

It’s only been a month and a half since I cast on for these socks in Atlanta and the pair is almost finished. The first sock, in all its toe-up, self-striping, 3x1 rib glory, is bound off. The second sock is not. The first sock has a heel. The second sock does not but soon will thanks to an awesome technique called the Afterthought Heel.

When it comes to socks, I’m usually a big fan of the gusset and heel flap since the combo fits my feet really well; however, the socks I’ve made from Cat Bordhi’s Personal Footprints for Insouciant Sock Knitters have shown me that I don’t need a gusset to have a well fitting sock. So, when I started the socks and wanted even stripes all the way up, I decided to try an afterthought heel with 3x1 ribbing on the instep to help the fit. The rows would stay the same width, and I wouldn’t have to worry about where to start the gusset increases or measure the sock every 5 minutes while stuck in Atlanta traffic. I could just knit and put my mind on other things. 

Most afterthought heels call for knitting in a half row of waste yarn where the heel should go which leaves a gap in each of the corners. In Personal Footprints, Bordhi has a great alternative that prevent gaps and is very easy to knit from. You just can’t be afraid to cut your knitting. Honestly, it’s not as scary as it sounds.

After making several pairs of socks with afterthought heels, Cat Bordhi’s method is my absolute favorite for adding afterthought heels. Works really well for afterthought Cuffs too. Afterthought Heels The Cat Bordhi Way | withwool.com

When you reach the spot for the heel (Most patterns mark this as 2” or 2.5” less than the total length but I only needed an 1.5”. My sock came out .5” short but still fits well so the measurements are forgiving.) or come back to it after a few more inches of knitting, thread a lifeline through through the sole stitches on one row of the sock and the sole stitches two rows up.

After making several pairs of socks with afterthought heels, Cat Bordhi’s method is my absolute favorite for adding afterthought heels. Works really well for afterthought Cuffs too. Afterthought Heels The Cat Bordhi Way | withwool.com

Come back and slip your needles back into stitches on the lifeline. Pull out the lifeline.

After making several pairs of socks with afterthought heels, Cat Bordhi’s method is my absolute favorite for adding afterthought heels. Works really well for afterthought Cuffs too. Afterthought Heels The Cat Bordhi Way | withwool.com

Pick a stitch in the middle of the middle row and snip.

After making several pairs of socks with afterthought heels, Cat Bordhi’s method is my absolute favorite for adding afterthought heels. Works really well for afterthought Cuffs too. Afterthought Heels The Cat Bordhi Way | withwool.com

Unravel the remaining middle stitches but leave the last 2 at each corner. They prevent those annoying gaps. You’ll knit the corner stitches just like normal stitches.

After making several pairs of socks with afterthought heels, Cat Bordhi’s method is my absolute favorite for adding afterthought heels. Works really well for afterthought Cuffs too. Afterthought Heels The Cat Bordhi Way | withwool.com

With new yarn, start knitting a toe. I went for a standard wedge toe and to help the “toe” fit better I decreased on the last 2 rows to round out the shape. Then, I grafted the remaining stitches. Feel free to drop in any toe you like. 

Cat Bordhi has a great video demonstrating this technique on a pair of Houdini Socks (Afterthought Legs!) that I highly recommend.

After making several pairs of socks with afterthought heels, Cat Bordhi’s method is my absolute favorite for adding afterthought heels. Works really well for afterthought Cuffs too. Afterthought Heels The Cat Bordhi Way | withwool.com

Sock one is all finished and I am in love. The stripes are even, the heel looks great, and the fit is wonderful. Now I just need to finish up sock number two before the weather turns much colder.

Drawing Incrementally: Week 1

Every month I’m picking one skill to practice everyday for a month and updating my progress every Monday. I call it Project Incremental.Read up on how it all got started.

| - | - | - |

It’s officially Monday and I have sketched 5 different objects. On Day 1, I waited until there were 8 minutes left in the day before finally putting pencil to paper. I kept putting it off because it had been so long since I’d tried to draw anything and I was pretty sure I’d screw it up. Plus, what in the whole wide world was I going to draw. In those last few minutes, I just picked something on my desk and got started. If it was horrible, it would just have to be horrible. Half an hour later, I finished. Did it suck? Well, it wasn’t great.

Here’s the thing I have grudgingly come to terms with, nothing I do will ever be perfect the first time or after a long bit of inactivity. Constant practice and refinement is absolutely required. I will not be amazingly talented and skilled at every single little thing I try my hand at. Doesn’t matter how much I wish it were true. The truth is that I will make mistakes and I will have to practice and both of those things are totally okay. It’s fine to make mistakes in the beginning so long as you learn and improve because of them. Don't give up because the first attempt wasn't everything you thought it would be. 

And that whole question of what to draw? I picked a theme. Last week the theme was: Stuff On My Desk. I know, original, but it got the job done. I drew my glass of water, then my mouse, my favorite pen, my hard drive, and my phone charger. This week’s theme: Stuff In The Kitchen. Maybe I’ll start with the knife block or the pots I use most. Drawing a whisk sounds fun too. I’ll probably still wait until the last minute but one problem at a time. I’ll let you know how it goes next Monday. 

The Incremental Project

Tour de Fleece got me thinking about the small things, about daily effort, and about progress. How one small thing done everyday can lead to big things. For those not in the know, Tour de Fleece is an annual event that runs alongside the Tour de France. Everyday that the Tour rides over the course of three weeks, people spin and make yarn. Since I was a new spinner (does four months still count as new?) and up for a challenge, I decided to join in. By the end of the Tour I had gained/refined skills, played with a lot of great fiber, made 5 skeins, and spun 1,040 yards. 1,040 yards! That number still makes me happy since I never dreamed or dared to set such a grandiose goal for myself.

After I stopped squeeing for happiness, I wondered how I managed this great thing I didn’t think I could do in the beginning. The answer is simple: incremental progress. Every day of the tour, I practiced, I researched, and I just spun yarn. Some days I only managed a couple minutes and other days a few hours but it all added up to something good that I wanted but couldn’t imagine doing. One would think years of knitting one stitch after another and making hundreds of items would have taught me the true meaning of incremental. The light bulb just didn’t turn on until the last few days.

So, here’s the plan for something I’m calling The Incremental Project

  1. Pick some skill/goal that I’ve been meaning to improve but just haven’t gotten around to yet. 
  2. Every day for a month, take the time to practice, practice, practice even if it’s just for five minutes at a time. Small steps add up after all. 
  3. To stay accountable, post about your progress once a week. Maybe on Monday?
  4. Rinse and repeat next month.

Who's with me? 

This month I’m focusing on getting back my drawing fingers. Drawing is something that I’ve always wanted to do and have done from time to time. Time to get doing again and clean up my rusty skills. My goal is to finish one drawing or sketch a day. I’ll let you know how it’s going in a week. 

How To Ply Yarn

...or Process Part 5 of Spinning Yarn on a Spindle. Part 1. Part 2. Part 3. Part 4.

| - | - | - | - |

After how much time it took my hands to learn how to draft fiber and flick a spindle, plying yarn seemed like such a simple thing. Put two or more singles together (or one single that’s been doubled or tripled) and spin them together counter-clockwise to make one intertwined strand. That’s it. The only thing I had to think about was how much twist to add. It seemed so much simpler than spinning up the singles but I knew there was more to it. At the same, I wasn’t worried about the details because I knew I’d figure them out eventually.

So, if you’re worried about ruining your singles, just jump in and go for it. As long as you ply opposite the singles and add enough twist, you’re golden.  

A spindle, 2-ply plying ball, and a bowl for wrangling.

Tie the singles together in a knot. If you’re using a top whorl spindle, slip the hook between the plies. For a bottom whorl, tie the singles around the shaft.

Flick the spindle counter-clockwise to add twist since singles are typically spun clockwise.

Once there’s at least an arm’s length of yarn and you’re happy with the amount of twist, wrap the yarn around the shaft. Bring the yarn back around to the hook or tie a slip knot and leave just yarn enough free to get the spindle going again. 

Repeat until you have one very full spindle and all the singles are plied. Woot!

To get your new yarn off the spindle and into a skein, you can wrap the yarn around your arm from palm to wrist or use a niddy noddy. Add a few ties around the skein to keep it from tangling.

Wash the skein to set the twist (I like Eucalan for this part) and hang it up to dry after a few good thwacks.  In this case, a thwack is pulling at both ends of the skein to make the fibers bloom and even out the twist. You don’t have to be about it gentle either. 

Ready to knit.

Now that I’ve gotten a little more practice under my belt, I’m beginning to see more of the nuances of plying. I’m refining my technique and experimenting with different methods (chain plying, anyone?). I’m making yarn that I love and can’t wait to knit with once I find that perfect pattern. This never would have happened I hadn’t thrown caution to the wind, and just tried in the first place. The first skein isn’t perfect but it’s still yarn and a first step.

How to Wind a Plying Ball

Plying Ball.jpeg

...or Process Part 4 of Spinning Yarn on a Spindle. Part 1. Part 2. Part 3.

| - | - | - | - |

I have finally finished plying all three singles for my little experiment making a 3-ply yarn. The first single flew off my spindle. The second single ate all my mojo. The third single brought back my mojo with some to spare. I used a smaller spindle that weighs just over an ounce and is just the right size to slide the cop - the mass of single or plied yarn wrapped around the shaft - off to a straw.

It’s really funny how quickly a new tool can change a process. My first favorite spindle weighs 2.2 oz and has a shaft too large to slide a straw over. Every time I finished a single, I’d let it rest overnight and then wind the single onto a small dowel (a ball would work too). It’s more time consuming but worth the effort to get an empty spindle.

Trying to ply three separate singles from three separate straws is just a recipe for disaster but all three plies on a single ball is much more manageable. This method also works well with two singles but I’d hesitate to wrap more than four since it would be harder to keep all the strands evenly tensioned. Also, just wrapping a single around a ball would be a nice way to store it for later since the ball is an easy and tangle free way to start wrapping. 

I’m using a styrofoam ball since I have them on hand but tennis balls and felted beads work too.

Gather up all your ends and start wrapping. A pail or box will keep the singles from running off to the four corners of the world. 

Keep wrapping until you come to the end of a single and cut the rest to match. If you have extra like I do, you can wind them onto another ball to make a cute little mini skein. 

Next up, plying!

Inspiration

Spinning blogs are slowly taking over my RSS reader post by post. Thankfully, they play nice with all the knitting, art, comics, recipes, cute animal photos, quick laughs, and architectural glamour shots that also clamor for my attention.

I’ve given up on the idea of visiting Reader everyday and knocking the unread count down to 0. With the current count at 909 items that is never going to happen short of just marking all as read. Instead, I’ve been just been reading and taking the time to enjoy good posts and good photos without worrying about the X number of blogs to read today. It freed up my mind to be inspired by and act on the things I saw instead of just filing ideas away for later. 

I read this post by the Yarn Harlot where she writes about tearing roving apart between color repeats to make self striping yarn. It totally blew my mind because I had never thought about using roving that way. So, I had to try it out. Photos will be forthcoming. 

On a new to me blog, Weekend Knitter, I read a post about the author knitting with some of her hand spun 3-ply. She described the yarn as plump and full. I’ve spun a lot of 2-ply but no 3-ply yarn and I wanted to try it out. Does 3-ply knit up differently than a 2-ply? How would processing the roving be different than for a 2-ply? How much longer would it take to spin a 3-ply?

So, I took the plunge. 3.5 oz of combed top was separated into 3 equal parts and those 3 parts were divided lengthwise 4 more times. Then a bit of pre-drafting was in order for a thinner single. The only thing that changed in the processing was how I split the roving and a greater amount of pre-drafting (aiming for a worsted or heavy worsted weight yarn). 

I’ve just finished spinning the second single and it’s taken a bit longer than spinning for a 2-ply. Is it because I’m spinning finer singles on a lighter spindle? Maybe. Probably. Only more experimentation will tell.  

Fixing Breaks and Making Joins

...or Process Part 3 of Spinning Yarn on a Spindle. Part 1. Part 2

There are days when spinning comes easy. I can pick up the spindle and find my rhythm immediately. Yarn just seems to spring from my fingers and all I have to do is wind it on the spindle before things touch the ground. The only time I have to make a join is when I need more fiber. I’m in the zone. 

Then are days where the spindle drops every 30 seconds and I’ve got a pile of loose, under spun fiber that couldn’t hold a paperclip off the ground. Bah. Once I get so frustrated that I want to jumble up everything into a giant felted ball, I put the spindle down and walk away. Better to calmly fix something the next day than rip it to shreds in frustration. Thankfully, fixing breaks isn’t a difficult, drawn out process.

| - | - | - | - |

When it’s time for more fiber, fan out the end of the fiber coming off the spindle and the end of the new fiber.

Overlap the two ends by about 3” and start drafting and adding twist. If you just add twist without drafting the join will be lumpy and bulkier than the surrounding single.

Keep spinning and keep joining and, soon enough, you’ll have a full spindle. 

| - | - | - | - |

Joining new fiber and fixing a broken single on a spindle are, essentially, the same process. Usually, a single breaks because there isn’t enough twist to hold it together. The ends won’t immediately untwist and become a frazzled mess but they won’t always salvageable. Sometimes, you just have to pull out the weak parts and get back to business. When joining two ends of single back together, just overlap the ends by about 6 to 12” and add more twist. Wind the join onto the spindle and keep going. That’s all there is to it.

If you have a broken single and need to join it a bit of un-spun fiber, draft out the fiber and overlap the two pieces by 12”. Wind yarn off the spindle to work with if need be. “Park and Draft” is your best friend here since it lets you slowly add twist and test the join to see if it holds. Plus, it might be more difficult to draft if the single was tightly spun. 

Good luck and don’t be afraid of a little practice.

How To Start Spinning Without A Leader

If this post could have a subtitle, it would be Process: Part 2. This series has taken a complete 180 from what I thought it was going to be. Take a few pretty photos of my process, write a few snippets, wax poetic about the whole thing, and put it on the blog. Turns out, I was making tutorials and didn’t even know it. I think this a lot better than my original idea.  

The first post in this series was all about how to prepare fiber (combed top in this case) for spinning. In this post I’m getting down to business of spinning, well, starting to spin yarn without a leader. I’ve used a leader in the past but there is something magical about making yarn out of thin air. Just add a bit of twist to some fiber and BAM! Yarn. Plus, drafting and spinning this short section of fiber helps me understand the characteristics of an individual batch of fiber which helps me spin better yarn.

| - | - | - | - |

The great thing about about starting without a leader, a length of already spun yarn that helps put twist in fiber at the beginning of the spinning process, is that you don’t need any extra material to pull it off. Also, if you’re a beginner and can get started without the leader, you’ll already have the basics of spinning under your belt.

To start, you’ll need a drop spindle - high or low whorl - with a hook and a bit of fiber. 

Pick an end and slowly pull the fibers straight out bit by bit using both hands. One hand pulls and the other holds the top. The top between your hands should get thinner and longer. This is drafting.  You can draft out just a few inches now and start spinning, drafting as you go, or draft large sections now to make it easier to handle.

Once at least 6” have been drafted, it’s time to put the fiber on the spindle. Place the drafted fiber through the hook and fold back the first 2-3” to form a loop. Pinch the two ends together. When you pick the spindle up by the fiber, it should hang without falling.

Time for twist! Singles, un-plied yarn, are traditionally spun in a clockwise direction and plied together counter-clockwise. So, give your spindle a clockwise spin - rotating to the left - with your fingers. There should be so much twist that the fiber kinks up on itself. To keep the spindle from spinning back and removing all the twist, catch it in your hand and hold it between your thighs. 

Loosen your grip and slowly pull back the hand pinching the fiber to let the twist move into more and more of the drafted fiber. If the newly spun single starts to give out, give the spindle a few more turns to add more twist.

Once there’s 1 to 2’ of single on the spindle, wrap it around your pinching hand until you get back to the hook. Keeping your fingers pinched and the everything tight, carefully take the single off the hook.

Wrap the single around the shaft close to the whorl. A few wraps should keep everything in place. 

If spinning on a low whorl spindle, wrap the single around the shaft and tie it off with a half hitch or pass through a hook. For a high whorl spindle, just pull it up over the whorl so that it comes up behind and then through the hook.

All there is to do now to keep spinning, is repeat the process with both hands this time. Pinch. Twist. Draft. Pinch. Twist. Draft.

This video by Abby Franquemont and this one from TheArtofMegan.com really helped me get handle on the process. Of course, there’s no substitute for actual practice.

| - | - | - | - |

Up next in the Process Series, is joining fiber and fixing breaks.

How to Spin Yarn: Prepping Combed Top

I can haz process?

Picking up spinning again was a lot like any other skill I’m trying to learn. First, I find this thing that sounds really cool and I would like to try. Prime examples: knitting, kumihimo, temari, origami, and bookbinding. Second, I hit the internet and research tools, tutorials, and techniques for days, weeks, and even months before I decide to make something a priority. Third, gather supplies. Fourth, actually do something. Anything to just get started. 

If I like that brand new started something, I keep doing it. I figure out how and why it works. I start experimenting. I get comfortable. I develop a process of how to do this awesome something from start to finish. With spinning, the realization that I knew what I was doing and that I had a process hit me all at once. I was absolutely giddy.  

So, I’m sharing my process. I hope that it will help you get started, come up with one of your own or, if you already know how to spin, see your process as something amazing and worth celebrating. 

| - | - | - | - |

Step 1: Stash Diving. Since my first, short-lived attempt at spindle spinning, I’ve been buying fiber. Not much. Just enough to have something to choose from when I came back to the spindle. The stash has served me well in that regard. For this attempt, I picked out 4 oz. of Blue Face Swirl (Naked) from Gale’s Art.

Step 2: Inspection. This batch of fiber was twisted up like a skein of yarn. So, I opened it up just like a skein of yarn. Then I spread everything out and got a sense of the color distribution and how much 4 oz. of fiber actually looks like.

Step 3: Division. I didn’t pick out this fiber with any particular project in mind. I just wanted to try my hand at a 2-ply yarn. So, I split the entire length of combed top down the middle. 

Step 4: Wrangling. There’s a brief pause for a little “eeny, meeny, miny, moe” to decide which half to use first. The “not it” bit is crochet chained to keep it whole and safe until I need it. I take one end, make a loop, and tuck in the tail to make a big circle.

Next, pull a loop through the circle. Pull a new loop loosely through the last loop and continue. Eventually, all the roving is gathered up and easy to handle. At the end, I just pull the roving through the last loop to keep it together. This is the only bit of crochet I know.

That giant circle I made at the beginning? That’s how I know to work from the opposite end since a crochet chain can only be pulled out from the end and not the beginning. Just pull the tail out and and take apart the chain as you need it.

| - | - | - | - |

Next post, I’ll get back to the other half of the fiber and start spinning.