Three

SaplingWIP2.jpg

Three is the magic number. It’s the number of dedicated projects I can focus on at one time and still get things done. Anything more than that and things start to go off the rails. I lose focus, get bored, and generally accomplish nothing. Eventually, I’ll come to center and shove all the extra projects off to the side. It’s an “out of sight, out of mind” kind of thing. When I do finish something, it’s time pick a new project or come back to something on the to-do list. Then the cycle begins again.

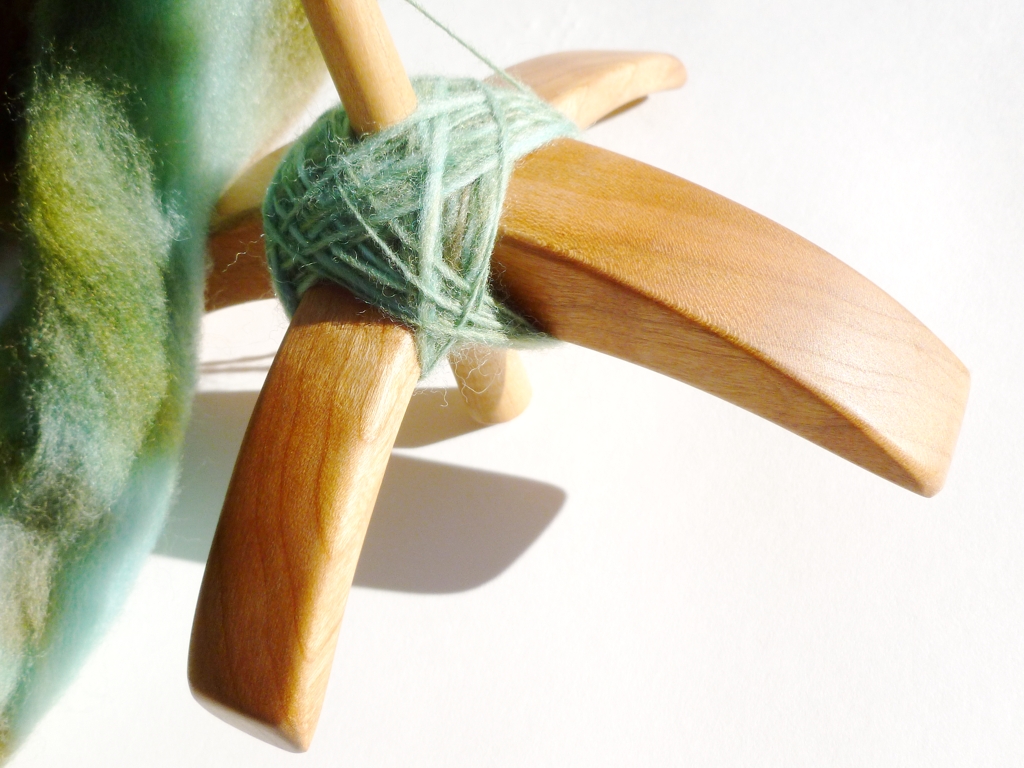
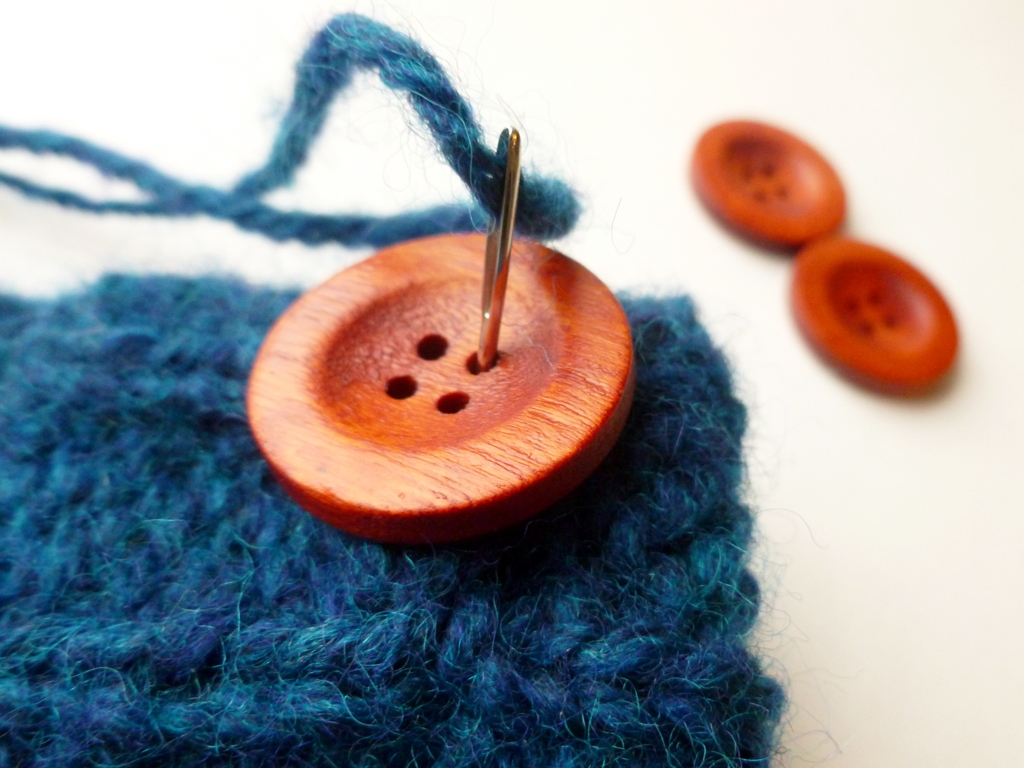
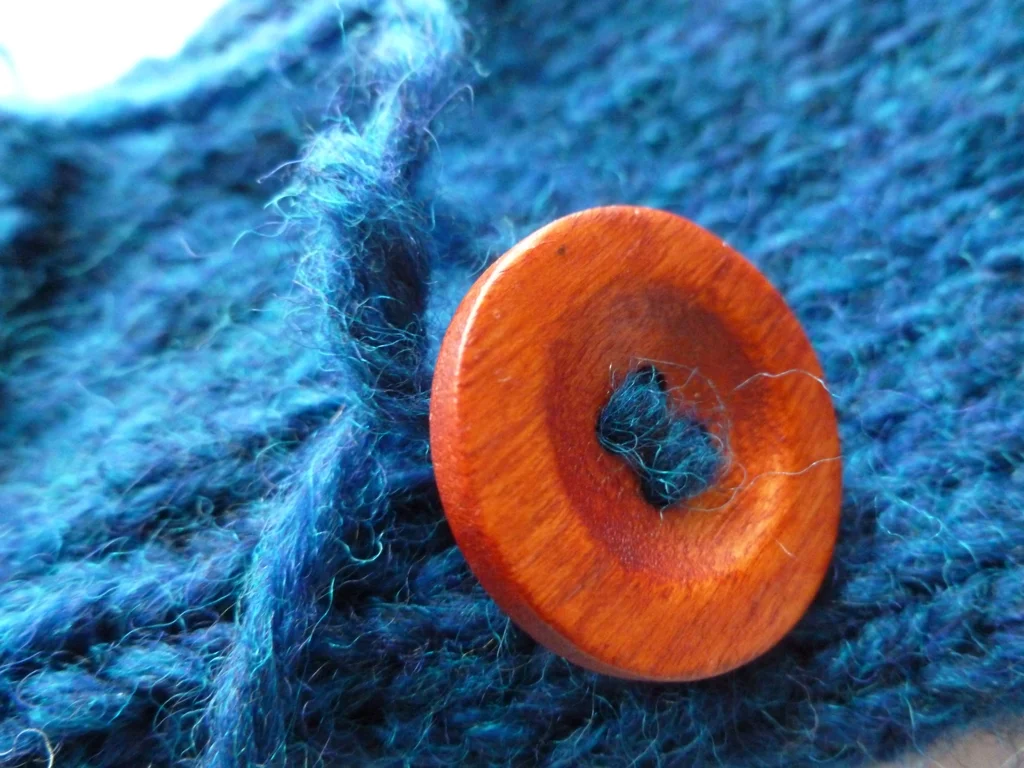
Right now the three major projects are daily photography practice, the sixth Sapling Hat, and a bit of covert cross stitch. Putting a concerted effort into improving my photography throughout this month is still a very new project. I’m researching and experimenting. I’m also trying to find the timing of how to fit regular photography into my day. We’re still getting to know each other. 

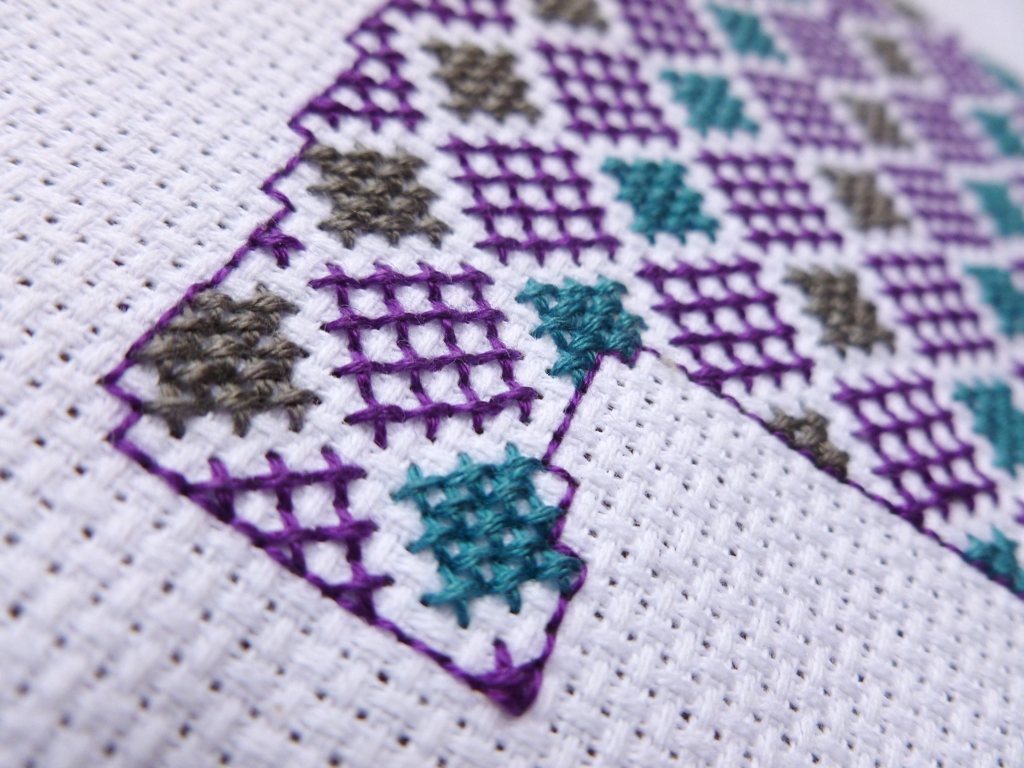
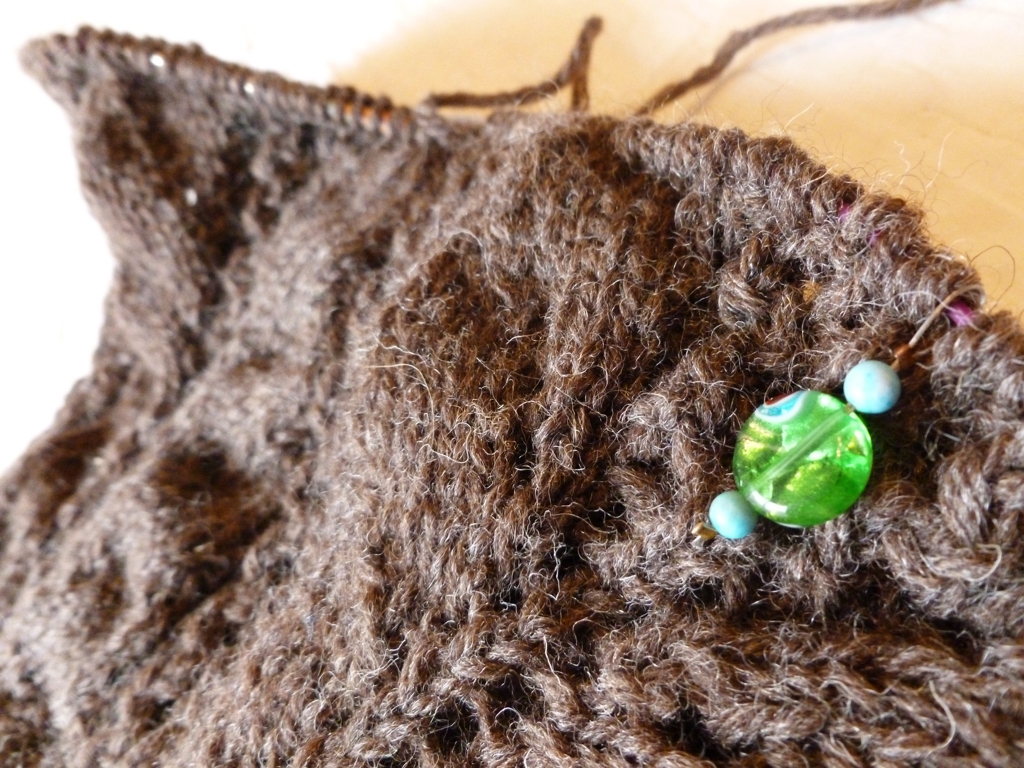
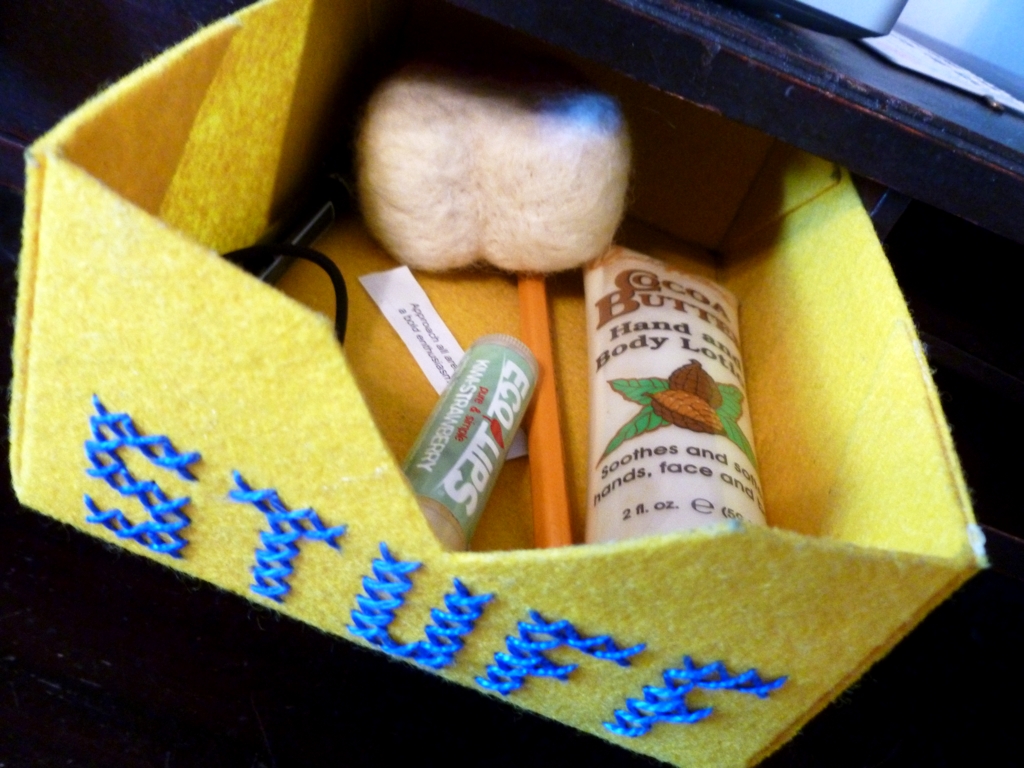
The other two projects aren’t so long term. The hat is bound off and drying after a good bath. The cross stitch just needs a bit of finishing and a frame. Can’t wait to be done with both of these projects because I’ve already got a few more lined up. There may or may not be a few more knitting patterns, tutorials, and random goodness coming up. 

E_Progress.jpg

March is for Photography: Week 1

​March 1 - L is for...lion!

​March 1 - L is for...lion!

Every month I’m picking one skill to practice everyday for a month and updating my progress every Monday. I call it Project Incremental. Read up on how it all got started. 

| - | - | - |

In like a lion and out like a lamb. We’re only four days in to March and, so far, the idiom stands true. After the outright pleasant Spring-like weather in February, the temperatures dropped and March has seen fit to grace us with snow flurries. Nothing stuck but the snow did it’s best to cling to the windshield while The Bearded One and I were driving around town. I’m hoping that the weather returns to its pleasant self by the end of the month. I’m also doing my best not to get sick. Bring on the vitamins and warm, wooly layers!

Besides from snow, March also brings with it my new incremental project. February was all about yoga which I have come to love and greatly enjoy. Have no doubt, that a daily yoga practice will continue behind the scenes here at Chez Strategos; however, March’s main focus will be on photography. Almost every thing I’ve learned about photography up to this point has been completely through trial and error. Some of my photos, I’m very happy with. The rest, well, I pretend they don’t exist. It’s time to level up. 

​March 2 - I Made This

​March 2 - I Made This

Usually when I start these projects, I have a decent idea of how I’m going to spend the month and what resources I’ll be using to learn. I’m coming up a little short this month. So far, there’s Shoot It! Craftsy class with Caro Sheridan to learn from. I bought it months ago when it was on sale but haven’t done anything with it. I think it will be helpful but I’m not sure if it’s exactly what I’m looking for. Also on the to-do list for this month is finally reading the manual that came with my camera. 

Know of any good sources to learn photography? I’d love some recommendations.

​March 4 - Lucky

​March 4 - Lucky

The one thing I know that will help me improve my photography skills is practice, practice, practice. Sunday, I found out about Fat Mum Slim’s March Photo-A-Day Challenge from Leethal. The daily prompts should help me focus and keep me motivated through the month. Now, I’m playing catch up. It was a happy accident that two of the practice photos I took day yesterday - the lion head and my hand knit socks - match the prompts for the first two days.  Hey, Neighbor Cat counts for today - Lucky. This is an unintentional win. The blossoms don’t count towards the challenge but I like them. 

Onward to better photos!

​Blossoms

​Blossoms

Little Things: Scissors

LittleThings_Scissors.jpg

Little Things: Celebrating the tiny, sudden joys in life

I’ve never understood the need for teeny-tiny scissors. Well, until I started dabbling in cross-stitch and temari, that is. I had my craft scissors and the ubiquitous pair of scissors that seemed to spend 20% of the time in the junk drawer and the remaining 80% gallivanting around the world. At least, I like to imagine my scissors out having a good time. Takes the sting out of not being able to find them more than once a week. My scissors were good for cutting paper or attacking those annoying, plastic clamshell packages that seem to have a death grip on their contents; however, those same scissors always seemed a little hungry for fine threaded handiwork. 

So, I broke down and bought a small pair of embroidery scissors and finally understood the need for them. The smaller scissors allowed me to more precise and get to closer to the surface of my work. No more worries about hungry scissors eating all of my stitches. That first pair didn’t stay sharp for very long and I eventually splurged on the beautiful Lantern Moon Rococo Embroidery Scissors. They’re sharp, fit well on my fingers, and work wonderfully in either hand. Plus, I am absolutely smitten with how the scissors feel when I cut yarn or embroidery floss. It’s very satisfying. 

If you’re on the fence about the usefulness of tiny little scissors, I recommend trying out a pair. You might just be surprised at how handy they are. 

Have any notions or tools that you enjoy using?

Growing

SaplingWIP1.jpg

The babies are coming! The babies are coming! So, it’s time to knit some hats. 

I’ve knit quite a few Sapling hats in the past three years - Ravelry tells me this will be the sixth hat - and will probably continue to do so. In fact, the whole reason I came up with this pattern was to make a pair of hats for a friend’s nieces. The hat is complicated enough that I’m not bored knitting it for the sixth time but still small enough that I don’t have to slog through it. Also, I just like being able to start at the crown of a hat instead of the bottom. Only have to cast on a fraction of the stitches that way. 

I’m using Elsebeth Lavold Cool Wool which is a slightly thinner yarn than called for in the pattern. To compensate, I working the larger size and knitting the hat entirely on the smaller needles rather than switching needles partway through. No other mods are necessary. 

Time to get back to knitting. Can’t let baby have a cold head after all.

February is for Yoga: Week 4

YogaMatFiveFingers.jpg

With three weeks down and one to go, learning yoga this February has been a success so far. I’m stronger. I’m more flexible. I’m more aware of how I move and how I breathe. When I started the month, I was looking forward to all of those things; however, what I didn’t expect was how much of an influence yoga would have on me. When I step off the mat, I’m not packing up my practice and putting it away for the day. The thought and the focus travel with me. After I climb out of my car, I do a quick check to make sure I’m standing up straight with relaxed shoulders and not hunched over. Hello, Tadasana. Sitting at my desk, I’m constantly relaxing my shoulders since they tend to tense and creep up when I’m knitting or perusing the web. Before yoga, I never really noticed what my shoulders were doing. Just that they were tense and needed some love. I love this newfound awareness and control. 

In this last week of February, I hope to keep this awareness going strong and continue my daily practice with gusto. I’m going to keep learning. I’m going to keep pushing myself. I’m going to keep breathing. Though March is fast approaching and I’ll be picking a new incremental project to focus on, yoga will continue flowing through the background.

Little Things: Starting Out

Supplies.jpg

Little Things: Celebrating the tiny, sudden joys in life

I love starting new projects. I love researching ideas and variations and all the little details that make up the whole. I love picking colors and gathering supplies. I love finally committing to something and jumping in with both feet. I love casting on, drawing the first line, making the first stitch, and taking the first step.

In the thread, the pencils, the yarn, and the paper, I imagine all the potential just floating around in the ether. When I make that first step, it’s like plucking a bit of that wonderful possibility from the air and solidifying it with my actions and my intent. Doesn’t matter if I’m going for a walk or knitting a new hat, acting on that potential is an great and happy thing.

My latest project is some covert cross stitch. There are just 3 colors but this checkered pattern will be the largest cross stitch project I’ve attempted. Can’t wait to see it finished because I like finishing things just as much as I like starting things. 

So, have you started anything new lately?

EBeginning.jpg

To Frog, or not to frog

To frog, or not to frog--that is the question:

Whether 'tis nobler in the mind to suffer

The knits and purls of tedious ribbing

Or to take needles from a pair of tiresome socks

And by ripping, end them. *

SocksWIP2.jpg

That’s the rub, folks. Should I just suck it up and keep knitting this pair of socks or rip them out and use the yarn for something else? Here’s a little background to help out:

  • I started knitting these socks on my trip to Denver but didn’t get much further than a toe and a few rows of ribbing. So, it’s hard to call them souvenirs. The only thing I remember about Denver when looking at them is waiting for busses that didn’t always arrive. 
  • I’m not all that fond of the yarn, either. The colors are nice but the yarn itself is kind of scratchy. I’ve made socks from this yarn before but they’re not my first, or even second choice, when I’m picking out a pair to wear for the day. 
  • I’ve already come up with some alternate projects for the yarn. It could turn into an i-cord garland, pom-poms, a temari ball, or some sort of crochet goodness. 
  • I have put a bit of work into them. The original plan was to knit tubes and add afterthought heels. One sock is past the heel point and on the cuff. The other sock still has a few inches before it’s time to mark the heel. 

Sounds like I’ve already made up my mind to rip out these socks but, even knowing I probably won’t finish them, I’m having a hard time committing to ripping. Help! 

* I couldn’t resist writing a short parody of Hamlet’s soliloquy.  Check out Shakespeare’s original version at Wikipedia.

Yoga February: Week 3

Every month I’m picking one skill to practice everyday for a month and updating my progress every Monday. I call it Project Incremental. Read up on how it all got started. 

| - | - | - |

Two weeks ago, I packed large duffle bag and took to the road for some much needed fun and time in Atlanta. The weather was nice and the traffic light during the two and a half hour drive. Still, I was thrilled to get out and stretch my legs after being in the driver’s seat for so long. Last month, before my daily yoga practice, “stretching my legs” amounted to plopping into a different chair and stretching my arms and legs out as far as possible while looking for a tv remote. The process didn’t really work but at least I wasn’t stuck in a car anymore. Now that I’ve got a few different yoga postures, asana, rattling around in my brain, I put them to use and actually stretched. Child’s Pose, aka Balasana, did wonders for my back and relaxing in Corpse Pose, aka Shavasana, eased away tension. It was nice to feel refreshed after a long drive instead of longing for a nap.

YogaWeek3.jpg

I kept up with my practice while I was in Atlanta. After following along with different flows, I practiced individual postures daily. It’s been great getting to know the specifics and figuring out the proper way to do and which muscles to use for each pose. Every day I’d pick 2 or 3 poses to practice so I could put them to good use later. After watching tutorials on different postures, I can tell you that there is so much more going on than what meets the eye. It’s definitely worth the time to learn the postures outright and you’ll get so much out of your own practice once you do. I’ve learned a lot from YogaWithAdriene and really enjoy her videos. 

I’m back at home this week and yoga practice continues. I’m still focusing on learning the individual postures but I’m also going to try learning the proper sequences of Ashtanga yoga. Maybe this is the week I’ll finally remember how to do a full sun salutation.

How To Tie A Turkish Spindle Leader

MooseMoss.jpg

In the last installment of my spinning misadventures, I was trying to decide what to spin from a lovely bump of Targhee wool. Since this is my first time working with Targhee, I decided to keep things simple and go with a solid 2-ply yarn. The fiber gets to lead the rest of the way and do its wooly thing. The spindle of choice - a 33g Jenkins Swan which I haven’t used anywhere near enough. Time to fix that.

Turkish spindles can be tricky to start without a hook to help the process and leaders knotted to the spindle can be finicky when there’s a few yards of new handspun wrapped around your hand. I came across a solution quite by accident after I had the used the same leader, a piece of yarn or thread that helps add twist to fiber at the very beginning of spinning, to start several different singles. 

TurkishLeader2.jpg

Tying the leader is simple. I used craft thread because I had it at hand but you can use yarn, twine, or any string in your junk drawer. Take a piece of string at least 18” long - length can vary based on the size of your spindle - and put the ends together. Tie an overhand knot near the end and a second knot about 2” from the first. That‘s it.

TurkishLeader3.jpg

When you’re ready to start spinning, slip the larger spindle arm through the space between the knots. Insert the smaller spindle arm through the notch and the open loop at the same time. 

TurkishLeader4.jpg

Once the shaft is in place, the loop will be secure around the arms of the spindle. Wrap the leader around the shaft and tie a slip knot at the top. To add fiber, draft out a few inches from your top or roving  and put it through the loop hanging off the spindle. Fold the roving back on itself and start spinning. It’s the same process as starting without a leader when the spindle has a hook which you can check out in this tutorial.

TurkishLeader5.jpg

When it’s time to wind the single on to the arms, just wrap 2 over, 1 under as usual. No special treatment required. Nothing special to do when taking the single off the arms either. Just slide everything apart since the single isn’t tied, just wrapped, around spindle. 

TurkishLeader6.jpg

The Targhee and I are getting along well so far. I’m still learning a lot from spinning it though and looking forward to the rest of the process. Hey, I alway look forward to new yarn.  

Little Things

StitchMarkers.jpg

Little Things: Celebrating the tiny, sudden joys in life

Last December, after all the Christmas hubbub was over, I got an unexpected gift in the mail. Inside was a collection of handmade stitch markers from a far away friend. One set looked like obsidian and the other is painted green glass. The markers use flexible wire instead of jump rings to hang on to the needles which, after using them on my Norma blanket, I put my knitter’s stamp of approval on. Now I want to make some too. 

Besides from being really helpful and snag-free, the stitch markers make me smile because a friend made them just for me. A friend who is really busy making games and going to school and being completely awesome took the time to make me some stitch markers. I love that. I appreciate that. I can’t help but be happy and smile whenever I see them arranging my knitting. 

All the markers fit in the palm of my hand. They may be small but they do big things. 

What little things are making you happy today?

Yoga February: Week 2

Every month I’m picking one skill to practice everyday for a month and updating my progress every Monday. I call it Project Incremental. Read up on how it all got started. 

| - | - | - |

Really, we’re on week 2.25 of February, instead of Week 2, since this month just had to start on a Friday but lets not get caught up in technicalities. With the exception of this past weekend, which I took off from yoga to give myself a chance to recover, I’ve done yoga everyday this month - 9 days. Doesn’t sound like much much these little steps are combining into larger things.

Week2.jpg

For me, a daily yoga practice goes something like this:

  • Dig through the folder of links to youtube videos of various yoga flows
  • Move furniture out of the way so I can see my laptop screen from the floor
  • Consider vacuuming...eventually
  • Yoga!
  • Return furniture to it’s original starting position
  • Back to the daily grind

While the routine stays the same, timing varies. Sometimes I’ll start yoga when I wake up and sometimes in the afternoon after I’ve run errands. The actual yoga part of the routine can last 10 minutes or 40 minutes. Depends on my mood and how many other things are on my to-do list. I’ll also randomly add on extra stretching that focuses on my shoulders, arms, and wrists to prevent any knitting or spinning related mishaps.

Even after just 9 days of a daily yoga routine, I can already notice a difference. Yoga isn’t just about stretching or increasing flexibility and mobility though it certainly helps. Practicing yoga trains you to be more aware of your body and the way that you move. For example, I thought I was standing and sitting up straight. In reality, not so much. There were a few days of soreness as my back finally got with the program and stopped slouching.

Now that I’m experiencing yoga’s positive effects, I’m looking to learn more. I don’t want to be blindly dependent on youtube video or podcasts. The two can be great, helpful sources but I want to practice yoga somewhere where I don’t have to move furniture around, in places without wifi, where I don’t have to look up at a screen, or worry about following someone else’s pace. I want to learn the individual poses and the proper form. I want to move through my own flows. I want to be able to do a Sun Salutation all the way through without looking up what comes next. Looks like the rest of the month is going to be fun.

No Clue

SpunkyEclectic_MooseMoss.jpg

I have a confession to make. I have been a very bad spinner this year. With the exception of a tiny mini skein (not even 10 yards after plying), I haven’t touched my spindles since 2012. The fact that I’ve been starring at bump after bump of beautiful fiber only makes things worse. 

The problem is that I want to spin but I have no idea what the finished yarn should be. Should it be 2-ply, 3-ply, or a chain-ply? Should I aim for fingering weight, worsted, or bulky? Indecision, you are not helpful. Usually, I’ll pick up a bump of fiber and know exactly what I what to do with it. This time, I have no clue.

SpunkyEclectic_MooseMoss2.jpg

At least my indecision hasn’t spread to what fiber to spin. Number 1 in the queue is 4 oz of Targhee wool, dyed in the “Moose Moss” colorway, from SpunkyEcletic.com. I’ve never spun Targhee before but I’m curious. Wikipedia tells me interesting trivia about the Targhee Sheep’s range and size but not much about their wool. The only way to really learn, is to start spinning. But what to spin? I’m at a complete loss. Any suggestions or tips?

Untangled and Complicated

SuretugalYarn.jpg

Generally, winding yarn - the process of turning unruly skeins into handy little center-pull contraptions - is a handy thing to know once one has acquired any amount, prodigious or restrained, of yarn. A swift and ball winder are especially helpful if your stash is of a more impressive size. Winding yarn generally goes something like this:

Step 1. Remove the swift and ball winder from their respective containers. 

Step 2. Attach said items to various overhanging surfaces - the edge of a table or a countertop. 

Step 3. Find the chosen yarn, remove the label, untwist the skein, and place it on the swift. 

Step 4. Free an end of yarn, feed it through the coiled metal arm of the ball winder, and slip it into the notch.

Step 5. Turn the handle and wind the yarn until you have a handy little cake of earth-toned goodness. Or jewel-toned. Or neon. Whatever float’s your boat. 

I ran afoul of these necessary procedures around Step 2 since I’m lacking in a good place to attach a swift. It is much more likely to make a brazen swan dive onto a hard tiled floor then hold yarn for me. Jerk. So, I decided to wind yarn on the ball winder with the open skein hanging over my arm. As you might guess, this did not go as I had hoped. A task that should have taken less than 10 minutes went on for hours as the yarn tangled and was generally uncooperative. One end of the yarn was on the on  the ball winder while the middle trailed off into a giant loop hanging from a bed post. I sat on the other end and was slowly freeing yarn from the giant, tangled mess I had created. When I said I was in the mood for something more complicated, wrangling tangled yarn was not what I had in mind. 

SuretugalWIP1.jpg

What I was aiming for, after knitting several pairs of plain socks, was some more complicated knitting.  The pattern, Shur’tugal by Alice Yu, has been a long time resident of my Ravelry queue. The yarn, Sweet Georgia Tough Love Sock - Lettuce Wrap, is a more recent addition to the stash. I knew the second I opened the package that the skein was destined to become a pair of socks. Too awesome, sturdy, and beautiful for anything else.  

SuretugalWIP2.jpg

So far, the pattern and yarn are a great combination. I can’t wait to knit full fledged socks with heel flaps and everything.

February Is For Yoga

YogaMat.jpg

Every month I’m picking one skill to practice everyday for a month and updating my progress every Monday. I call it Project Incremental. Read up on how it all got started. 

| - | - | - |

Halfway through January - the month of boring but utterly necessary de-cluttering and cleaning - I started wondering what the goal would be for February.  Cleaning will continue since it creates the ever important mise en place for doing great things; however, cleaning is now a routine and not the focus of the day. I kept trying to think of potential goals, none of which sounded appealing, but it wasn’t until I was finding a spot for my new yoga mat that I decided. Of course, yoga. Why didn’t I think of this sooner? Insert face into palm.

I’m not new to yoga. I’ve done the DVD thing and the Wii Fit thing and even the occasional class but nothing serious in the past year. The urge to learn and practice yoga seriously has been growing in the back of my head for months. The Bearded One only encouraged this thought by getting me a new mat for Christmas.

DownwardDog.jpg

Part of my preparation for daily yoga has been hitting up the internet for a little research. I had no idea there were so many branches and variants. My previous conceptions of yoga were of something slow, quiet, and meditative. It was really exciting to find examples of strong, vigorous, and active yoga practices. I’m really interested in Ashtanga Yoga but I’m also going to try the other branches to see what works best for me. Regardless of what I choose, if the last few days are any indication, February is going to be a great month for yoga. 

Afterthought Heel Tips & Tricks

Tips & Tricks to take the guesswork out of knitting afterthought heels. | withwool.com 

What happens when I get bored knitting a pair of socks? I start another pair. If the next pair just so happens to be self-striping and knit with heavier yarn, said pair is even more entertaining. I just couldn’t resist. The last in-progress pair or, more specifically, the 3x2 ribbing on the last pair, became mind-numbing. Not even knitting along to the cheesiest and most hilarious of horror movies made the socks any more appealing. Nor did waiting in slow moving lines. Thankfully, stash yarn came to the rescue.

Tips & Tricks to take the guesswork out of knitting afterthought heels. | withwool.com

Yarn: Knit Picks Felici Sport Self Striping - Kingpin

Needles: 2.5 mm

Date: January 7 - 29, 2013

@Ravelry

Self-striping sock yarn was a lot more fun to work than just plain 3x2 ribbing. No, the irony of a plain vanilla sock being more interesting than ribbing is not lost on me. Uninterrupted striping yarn really is that good. Just knit, adding in a few increases/decreases as needed, and the yarn does most of the work.

Tips & Tricks to take the guesswork out of knitting afterthought heels. | withwool.com

There were a few “Why didn’t I think of this during the last pair of afterthought socks,” moments that I’m sharing to save you the trouble.

1. When figuring out where to open the heel, measure the length of the toe. If you’re working toe-up measure the toe once it reaches the final stitch count. If you’re working cuff down, measure from where you started decreasing. Toe length and heel length will usually be the same unless you make the toe very pointed. Subtract the toe length from the total foot length measurement for where to place the heel. 

For these socks, the toe length was 1.75”  

10.25” - 1.75”= 8.5”  

From the tip of the toe, I measured 8.5” and marked the rounds with thread to follow Cat Bordhi’s afterthought method. The finished sock came out just the right length and fits wonderfully. 

2. Weigh the finished toe to know how much yarn to put aside for the heel. This trick requires a scale but removes all the guess work. When knitting toe-up, measure the weight of the ball before and after you finish the toe. The difference, multiplied by 2, is how much yarn is needed for the heels. 

If you’re working from the cuff, this trick isn’t as helpful since knitting the toe is one of the last steps. Instead, you could pause to knit the heel, measuring the difference in weight, and leave that much yarn to work the toe.   

If you’re using self-striping yarn and want the colors to match, like I did with this pair, wait to cut the yarn until you know which color the heel falls on. This is easier to do with toe-up socks than cuff down unless you’re knitting the cuff to a certain length. Either way, keep an eye on the stripes and finish before you knit up all of that color.

Begbie

Begbie1.jpg

Deep stash yarn and quick, repetitive knitting, by your powers combined, I have the first Christmas* gift of 2013 ready and waiting. Whoever saw this coming, it definitely wasn’t me.

Begbie2.jpg

Pattern: Begbie Cowl by Jane Richmond

Yarn: Noro Kochoran - 40

Needles: US 10.5 (6.5 mm)

Dates: October 27, 2012- January 27, 2013

@Ravelry

This is not the part of the post when I write with smug satisfaction about my dedication to getting a head start on my holiday knitting. This is the part of the post when I tell you about last year’s holiday gift knitting that just wasn’t given away. Every year, the fiber guild I belong to has a big party and a gift exchange in December. Last year’s exchange was scarves. I decided to start early and cast on in October. Multiple episodes of Twin Peaks later, I had a bound off scarf that just needed a good block to be finished. Then said scarf sat in a box until January because I went out of town instead of going to the party. Oh well, it’s blocked and ready to be gifted now. 

Begbie3.jpg

This scarf has been much improved by blocking. The stitches are even and lay quite flat. I was also able to stretch it out and make it a bit longer. Even better, all the angora in the yarn bloomed and created this beautiful (and I’m assuming warm) halo. 

All finished, this beauty gets to hang out in a box waiting for just the right occasion or just the right person. Might have to wait until Christmas or just next week. Either one is just fine.  

* or Birthday/Mother’s Day/Solstice/Flag Day/Random Gift Exchange gift

Incremental January: Week 5

LandOctopus.jpg

Every month I’m picking one skill to practice everyday for a month and updating my progress every Monday. I call it Project Incremental. Read up on how it all got started. 

| - | - | - |

Last December, I received a package from a good friend that was full of all sorts of wrapped goodness. The first gift I opened was this cute little octopus. He still doesn’t have a name but he’s taken up residence on the dresser and protects my stuff from marauding pirates. Doing a pretty nice job of it too.

While the Octopus has been on guard, I’ve been cleaning and de-cluttering for my January Incremental Project. Over the past month, I’ve donated, traded-in, trashed, and hacked my stuff. My space is cleaner and more organized. I can easily use, admire, and enjoy what’s important to me - the land-lubbing octopus, for example - which was a big reason for the clean up. Now it’s just a matter of keeping things neat. 

During these last few days of January, I’m focusing on building, refining, and keeping routines to stay organized. I’m using the magic of schedules and recurring tasks to keep me on track. All the annoying but necessary stuff - vacuuming, I’m looking at you - goes into my task manager. The current program of choice is Firetask. Each annoying little chore gets a due date and is scheduled to appear on a daily, weekly, or monthly basis. If need be, I can adjust the timing or delete a task entirely. Creating a timeline for all the little chores makes it easier for me to focus on the big stuff because I don’t have to worry about the underlying routine. Plus, I get the satisfaction of checking something off my to-do list everyday. 

With January’s cleaning finished, it’s time to decide what to focus on in February.  I’m looking forward to learning and leveling up.

Swatches

CrochetSwatches1.jpg

I may or may not have watched a few video tutorials about crochet on CreativeBug.com. It started innocently enough. The hour was late. I was bored and looking for some entertainment. Yes, I watch how to videos for fun because I like learning and knowing how stuff works. Anyway, up to this point I had watched tutorials on making soap, double knitting, thrummed mittens, stamping, book binding, and whatever else looked interesting. One thing I hadn’t watched were the crochet videos. The first time, I had one eye on my knitting and one eye on the video. Something sparked my interest and, the second time around, I had a hook and cotton yarn in my hands.

CrochetSwatches2.jpg

Previously, all I knew about crochet was how to make a chain for a provisional cast on to use with knitting. I soon figured out how to hold the yarn and hook and set to working swatches. I practiced single crochet, double crochet, triple crochet, and even half double crochet. On other swatches I made spaces, increased, decreased, finished with a few rows of fan stitch. Thanks to this tutorial from The Dapper Toad, I got that whole Magic Circle thing to work but I’m sure I’ll still have look it up every time.

CrochetSwatches3.jpg

Crochet intrigues me because the resulting fabric is so different from knitting. Crocheted fabric is thicker and more structural. Crochet and knitting look nothing alike. After knitting for years, every row of crochet seems like binding off. It’s a fun thought even if it’s not necessarily true. With crochet, I want to make things that I would never consider knitting: sturdy baskets, trivets, mandalas, and cute little embellishments. The Bearded One is particularly excited about durable crocheted slipper soles. 

Surprisingly enough, I think learning to crochet has made me a better knitter. Crochet has given my hands a little extra training that should make continental knitting and two-handed color work much easier. If only knowing how to read a reading knitting pattern meant I could read a crochet pattern. They’re still greek to me. 

CrochetSwatches4.jpg

How to Sew on a Button with Handspun Yarn

How to Sew on a Button with Handspun Yarn | withwool.com

The snow made me do it. Seriously, the only reason I finally sewed the buttons on my latest pair of mitts was because it was cold and snowing. Being able to take photos of said mitts in the snow might also have had something to do with it.  Part of the reason for the wait was that I could never find thread to match the handspun. The thread was too blue, too purple, not blue enough, or not even close. The yarn itself was made of so many different shades of blues and purple that I couldn’t find a good match. Thankfully, I still had a few useable scraps of leftover yarn. Then it was a just problem of attaching the buttons in a way that looked finished instead of just tied on. Solved.

How to Sew on a Button with Handspun Yarn | withwool.com

1. Gather your supplies: buttons, yarn, scissors, your almost finished object, and a tapestry needle to fit through the button holes.

How to Sew on a Button with Handspun Yarn | withwool.com

2.  Decide where the button will go and push the threaded needle through the button and fabric.

3. Sew through all the buttons holes, into the fabric, and finish with both yarn ends on the wrong side of the piece.

How to Sew on a Button with Handspun Yarn | withwool.com

4. Pull both ends through the fabric underneath the button but do not go through the button holes again.

How to Sew on a Button with Handspun Yarn | withwool.com

5. With the ends, tie a double knot and trim off the extra yarn. 

6. Repeat as necessary.

How to Sew on a Button with Handspun Yarn | withwool.com

If you’re having trouble threading the yarn through the tapestry needle, fold the yarn in half to form a loop. Tightly hold the top of the loop and push it through the eye of the needle. 

How to Sew on a Button with Handspun Yarn | withwool.com

Incremental January: Week 4

Every month I’m picking one skill to practice everyday for a month and updating my progress every Monday. I call it Project Incremental. Read up on how it all got started. 

| - | - | - |

Last week was all about clearing up the digital clutter - no more unnecessary emails, unsubscribing from overwhelming RSS feeds, and gaining more hard drive space - but I’m back to the physical world this week. I’ve sorted and donated and trashed a lot of stuff to meet my January goal of de-cluttering and prepping for the rest of the year. Lots left to do but the list is shorter.

StuffThings2.jpg

Now that I have less stuff to worry about, I’ve started thinking about how to hack the stuff I have to work better for me. I encourage you do this too. One, you get to make things. Two, you can personalize and upgrade your space. Three, you get to have some fun. 

Over the course of a day, I spend a lot of time in front of the computer which means I spend a lot of time at my desk. It’s a nice desk with lots of drawers, space for all my tech, and enough room to make something when I feel the need. There’s even a raised section with two more drawers and two open spaces that I barely use because they are not drawers. Well, I’ve fixed that.

StuffThings3.jpg

I’ve made drawers for my “Things” and for my “Stuff”. The drawer of things holds all the crafty stuff I need on a regular basis: scissors, buttons, a knitting needle gauge, a tape measure, and random tapestry needles. The drawer of stuff keeps pens, pencils, hair ties, lotion, lip balm, and a needle felted heart. You know, the necessities. Everything I need is at hand and easy to find.

StuffThings1.jpg

To make the drawers, I measured the dimensions to be filled and adapted this handy stiffened felt box tutorial from How About Orange to fit. Next, I drew up the cross stitch charts, stabbed the necessary holes in the felt, and got to stitching. The last step was gluing the sides together to finish the boxes. As a bonus, whenever I move to a new desk, I can just make lids for the drawers and use them a boxes instead. Win win. 

Just in case you feel like labeling any of your possessions with a bit of cross stitch, here’s “Stuff” and “Things” to the rescue. 

StuffChart.jpg
ThingChart.jpg