Winter Pinoak Reveal

PinworthHandspun3.jpg

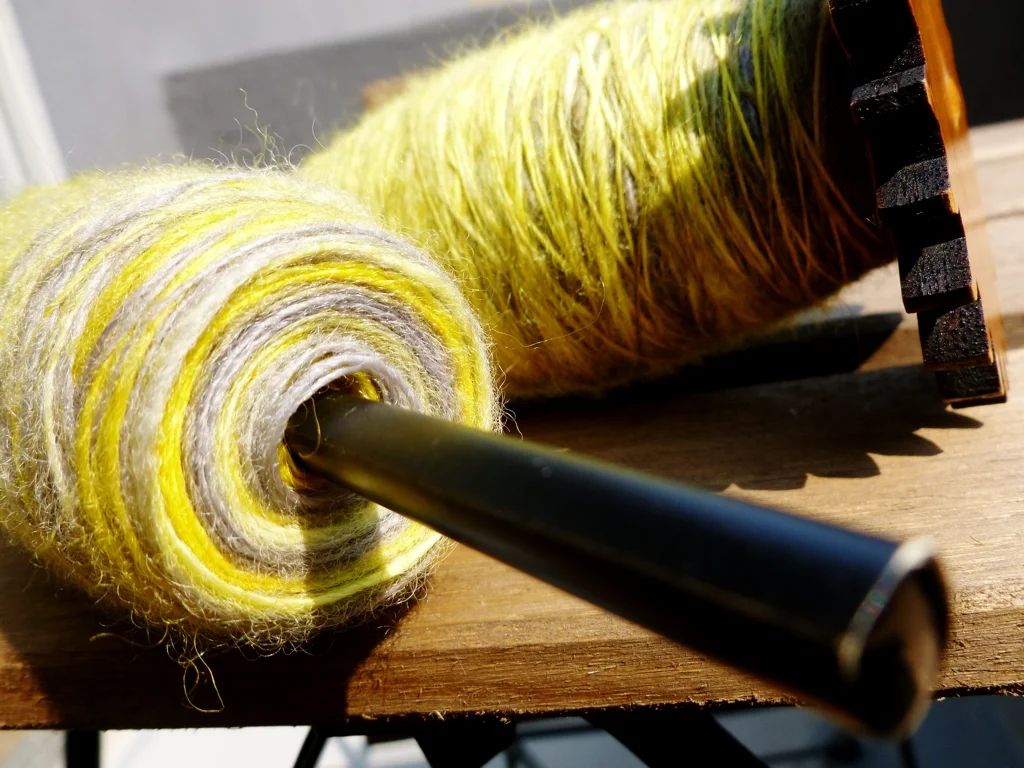
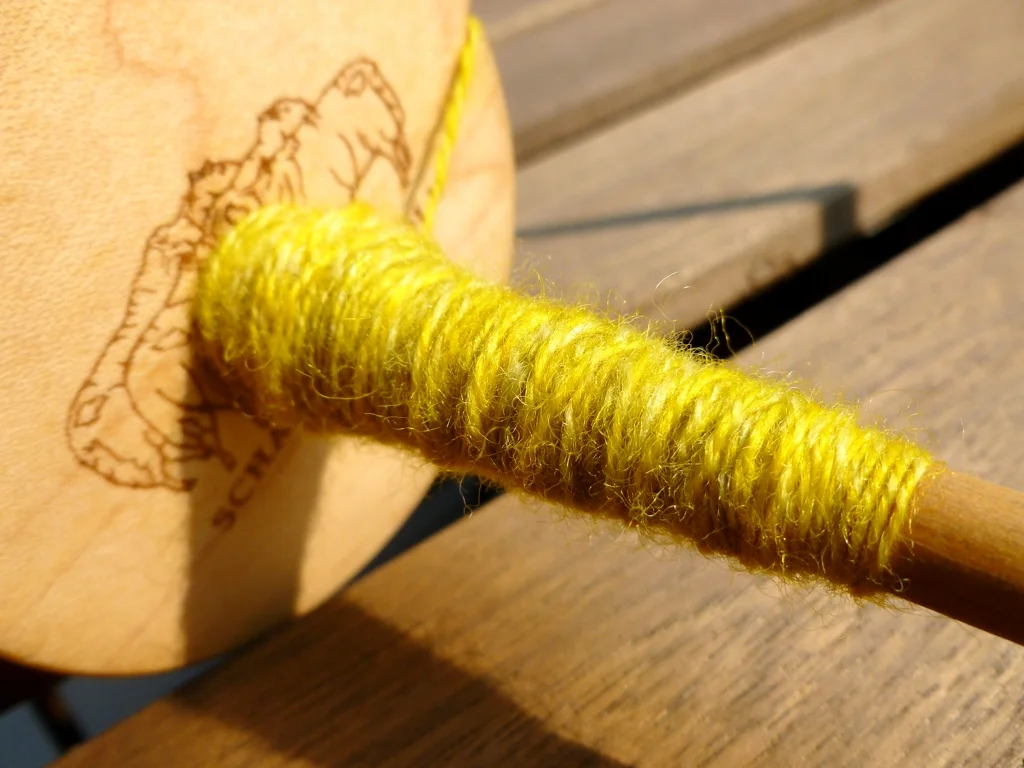
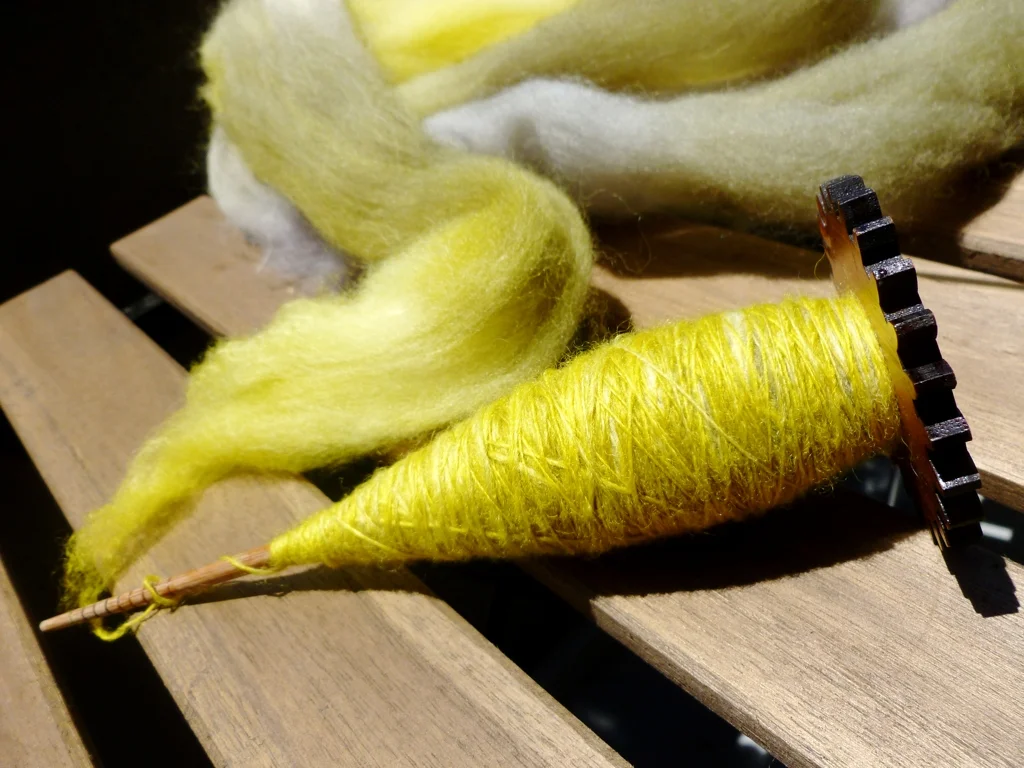
I finished this skein of handspun several months ago and I’m finally getting around to showing it off. I spun it before I got married and before I moved cross-country. I only finished spinning it in March 2013 but this yarn already seems like a relic of a different age. Maybe it is.

PinworthHandspun1.jpg

Whatever time this yarn marks in my life, it was the first handspun that I wanted to knit as soon as it was off the spindle. I even wound it by hand while traveling over bumpy roads during the move. It was going to be road trip knitting and the first yarn I worked with after weeks and weeks without knitting. Unfortunately, I couldn’t find just the right pattern and I still haven’t. Will the yarn turn into a Trillian? Or a Freesia? I just don’t know. The handspun is waiting patiently for me to decide. For now.

PinworthHandspun2.jpg

The Specs:

462 yds of fingering/sport weight yarn

4 oz of Bluefaced Leicester 

Dyed by Yarn Geek Fibers 

Colorway: Winter Pinoak

PinworthHandspun5.jpg
PinworthHandspun4.jpg

Wander the Web 6: Link Love Edition

Once again joining up with Crafty Pod and Link Love to share goodness from across the web. This week’s theme stays close to home and focuses on the most popular posts from yours truly. When I first read through the schedule several weeks ago, it got me thinking about how I haven’t made many tutorials in the past few months. That had to change so I started brainstorming and writing and photographing and editing. In the past two weeks I’ve managed to post two tutorials, How to Ply Leftover Singles and How to Clean Dye Off Spindles, and have a few more in the works. 

While I’m working on the new stuff, check out my most popular tutorials.

ButtonTutorial2.jpg

How To Sew On A Button With Yarn - Can’t find matching thread? Use yarn from your knitting or crochet project to sew on buttons without extra bulk. 

KumihimoBraid.jpg

Kumihimo Tutorial: Part One and Part Two - A step-by-step tutorial for making a round kumihimo braid complete with clasp.

PlyingOrigami.jpg

Origami For Plying - Learn how to fold a simple origami star to help ply yarn off a spindle.

AfterthoughtHeel.jpg

How to Knit Afterthought Heels - A how-to and tips for knitting afterthought heels that won’t suffer from gaps or require picking up stitches. Bring your scissors!

Make A Bow Label.jpg

Make a Bow Gift Tags - Use leftover yarn and bits of cardstock to make care labels and tags for knitted and crocheted gifts. 

August Break - Week 2

My attempt at August Break 2013, or telling stories through photos, continues. I thought I was going pretty well until I compiled the last week’s photos and thought I’d missed a day. Turns out that I just misspelled the hashtag. 

Check out week 1 of August Break, here, or get the daily feed by following along on Twitter.


It was melting faster than I could eat it!

It was melting faster than I could eat it!

Finally walked along the Santa Monica Pier.

Finally walked along the Santa Monica Pier.

Sometimes, you just need a sweet treat. 

Sometimes, you just need a sweet treat. 

Decisions, decisions. Which skein should I choose?

Decisions, decisions. Which skein should I choose?

There are always colorful things to find on afternoon walks.

There are always colorful things to find on afternoon walks.

The “ca-chink” of the row counter makes me feel all accomplished.

The “ca-chink” of the row counter makes me feel all accomplished.

The start of something new on the needles.

The start of something new on the needles.

How To Ply Leftover Singles

PlyingLeftovers1.jpg

 In a perfect world, we would spin singles with equal yardage and have none left over after plying. I’ve heard tales of this happening to a few lucky individuals but, for the rest of us, there’s going to be extra. Those last few, or not so few, yards sit on bobbins or spindles or straws or chopsticks while we forget about them completely for the next project. That is until we need that spindle or ran out of straws for extra yarn. I know that I have plenty of un-plied singles from when I first started spinning and had no idea what to do with the extra. My last few spinning projects have also left me with leftovers and I’m tired of them taking up space in my spinning box. The remaining yardage can easily be turned into a 2-ply yarn since the hard work of drafting is already done. 

The leftover single can have a lot more yardage than you think. A plied mini-skein can give you a little breathing room on the final rows of a project or be enough to knit a small trinket - like a Christmas ornament or bookmark. Plus, the mini skeins are cute and perfect for petting on a stressful day.

PlyingLeftovers2.jpg

Wind the yarn off the spindle (or bobbin or straw) into a center pull ball. You can use a ball-winder, a nostepinne, or your hand. Just go slowly or risk snapping more delicate singles.

PlyingLeftovers3.jpg
PlyingLeftovers4.jpg

Once wound, pull out the end from the center and the outside. Tie them together in a knot and you’re ready to start plying with a spindle or a wheel.

PlyingLeftovers5.jpg

The ends will pull out smoothly in the beginning but, as more of the singles move to the spindle, the ball will start to collapse. Go slowly and keep an eye out for potential tangles.


PlyingLeftovers6.jpg

Let the fresh yarn rest for 24 hours before picking something small to skein up the yarn before dunking it in a bath. I used two small lamps and a book for a third un-pictured, mini skein.

PlyingLeftovers7.jpg

Finally plied and finished, the yellow skein has 13 yds and the blue has 29 yds. I haven’t quite figured out what I’ll do with these skeins but, in the meantime, they’ll look cute on my desk.

How to Clean Dye Off Spindles

SpindleCleaning1.jpg

Dye bleeds. It’ll cover your hands, your clothes, and perfectly innocent yarn. Not even spindles are immune. The pencil roving I started spinning last week has been great to spin except for the fact that it’s been turning my hands and favorite spindle blue. Once the first single was finished, I finally had the chance to take my spindle apart and see how drastic the color change had been.

SpindleCleaning2.jpg

Blue, very blue. My blue “Smurf” fingers clued me in that the change would be severe but it was still disappointing to see the difference. It’s pretty, I’ll admit that, but the shaft is not the amazing amber color that it was when I first received the spindle as a gift a year ago. I’d rather have the amber back and, if fiber has turned your spindle an unwelcome color, you probably want it looking like its original self too. Plus, I want to get rid of any dye that might rub off on future projects. Here’s how I removed the extra dye.

SpindleCleaning3.jpg

Dr. Bronner’s Castille Soap to the rescue. I keep Dr. Bronner’s around because it’s a gentle, mild soap that can still get the job done. Plus, you can use it for cleaning just about anything.

SpindleCleaning4.jpg

Wet a paper towel and squeeze out the excess water. Add a few drops of soap and start rubbing the stains. If the dying was recent, you should see a difference right away. Switch to a clean, damp cloth or paper towel to remove the soap. Pat dry.

SpindleCleaning5.jpg

 The shaft still has a blue tint along with a few blue spots where the dye got into the grain but the spindle is much closer to its original color. Now I just need to find a way to keep the roving from turning the wood blue again. 

Wander the Web 5: Link Love Edition

In this week’s special edition of Wandering the Web, the focus is on sharing five favorite topics along with Crafty Pod and Link Love. It’s more than just knitting and spinning around here.

Knitting: I enjoy making things and knitting fits the bill well since it’s useful, portable, uses wonderful materials, and is easy to fix. Also important is that knitting can be as simple or complex as I want it to be. Too tired for anything complicated? Knit some stockinette in the round. Want something complex. Bring on the Fair Isle. 

  • How to Evenly Pick Up Stitches from Juniper Moon Farms - This tutorial has some great tips for those rare occurrences when you need to even pick up a few hundred stitches.

Spinning Yarn: I probably would never had started spinning my own yarn if I hadn’t started knitting. Seeing all the other amazing hand spun yarn people made was enough to make me want to try making and knitting with my own.

  • Checking Spinning Consistency from KnittyBlog - The usual method for checking consistently is letting a short length of the singles ply back on itself to check that the amount of twist is same. This method, illustrated by Jillian, wraps the singles around a piece of card stock.

Architecture and Design: I am fascinated by what people make and design to improve the world and daily life. I’m drawn to how changes in space and environment can create something profound or disastrous for the people who live in those places.

  • Dezeen.com - News, project showcases, and product design from around the world. 

Dairy Free Dessert: Not being able to eat dairy makes it hard to eat out and finding sweet treats that don’t involve milk is even harder. So, I’m always on the lookout for tasty recipes that fill that void.

  • Chai Popsicles from La Spelonca Vegetariana - A blend of coconut milk, chai tea, and spices, these popsicles sound quite tasty and don’t need a blender to mix everything together. 

Bookbinding: I’m a sucker for nice paper and beautiful books. Making books just helps me appreciate them a little bit more and replenish my collection of sketchbooks. 

  • Basic Stab Stitch Bookbinding from Tuts+Hub - A tutorial for a simple binding method that covers all the details for making a quick book. No need to worry about glue or presses. 

August Break, Not

No worries. I’m not taking a break for the month of August. I already had enough of a blogging break during May and June. August Break is a photo-a-day prompt by Susannah Conway. The idea is that for the month of August, you skip the words and let a photo do all the talking. I liked the idea but skipping posting for a month didn’t sound like a great idea. So, I took the photos to Twitter instead. It’s been a nice change. For the last week, I’ve ignored the prompts but went on the look out for interesting details to document from my day. Things that I would ordinarily pass by with a smile, got a little more recognition.

For daily updates, follow me on Twitter


My favorite spot for summer knitting.

My favorite spot for summer knitting.

Doing a different kind of spinning today.

Doing a different kind of spinning today.

Sometimes, this is what designing knitting patterns looks like. 

Sometimes, this is what designing knitting patterns looks like. 

Making tiny, adorable mini skeins!

Making tiny, adorable mini skeins!

So far, reading subtitles while spinning singles has not been a bad idea.

So far, reading subtitles while spinning singles has not been a bad idea.

Another day, another walk on the beach.

Another day, another walk on the beach.

Found a beautiful shell at low tide. 

Found a beautiful shell at low tide. 

What's up, pencil roving?

PencilRoving1.jpg

Tour de Fleece may be over for the year and I’ve finished the Tour’s spinning but that doesn’t mean I’m leaving my goals behind. I’m spinning most everyday and I’m working up to spinning in public again. I’m still eager to try new things too. The closest, new thing at hand was the pencil roving I bought during the Tour. Time to satisfy my curiosity.

SpinningPencilRoving1.jpg

Once I got the label off, the roving was packaged just like a skein of yarn unlike other bumps of roving that come braided or chained. There’s no need to put it on a swift before it can be used though.

SpinningPencilRoving2.jpg

Looking closer, the roving is actually 2 smaller strands that were easily pulled apart. I’m not sure if this is how all pencil roving is packaged or something unique to Pagewood Farms but I like it. The strands were obviously dyed together and have the same color variations. Being able to easily split the strand in half makes it easier to spin color matching singles. This hank is a semi-solid blue so being able to spin matching singles doesn’t matter much but it would be a big help with a more variegated hank. Having 2 strands is also less work too since I don’t have to figure out where to split the fiber in half. 

SpinningPencilRoving3.jpg

Separating the two strands seemed like the right thing to do, so I got right to work. Then I wound the strands into cakes for easy access during spinning and for pre-spinning storage.

SpinningPencilRoving4.jpg

I’ve often read that pencil roving is great for beginners since the fibers all run in the same direction and there’s not a lot of excess fiber to worry with. These reasons make pencil roving easy to draft for the beginner and advanced spinner alike. I’ve only spun a bit over an ounce of the stuff so far, but my experience is that both of these things are true. The spinning it is quite easy and I’d recommend it if you’re still trying to teach your hands how to draft. Muscle memory is such a large part of spinning that can easily be overlooked in the beginning for the theory of adding twist to fiber. Making yarn is a physical process that uses your hands but also entire body. You must train yourself well.

SpinningPencilRoving5.jpg

I’m taking advantage of pencil roving’s qualities to spin a heavier yarn. After spinning so much fingering weight, I want to make sure I can still spin a worsted weight or thicker yarn. It was a bit of struggle to get my fingers to relax and not keep such a death grip on the fiber. The beginning of the single is pretty fine but has gotten thicker over the following yards. Only the plied yarn will tell, but it seems like I can still spin a worsted weight yarn. If only my fingers weren’t turning blue in the process.

One Unique Basketweave

UniqueBasketweave3.jpg

Sometimes, I just want to knit something simple. I want to knit, just to knit, without worrying about complicated details or evenly spacing decreases. Times like these, I wander through my 18-page* Ravelry queue looking for something that catches my eye. The last time this happened was way back in May when the Unique Basketweave Washcloth grabbed my attention. I did the only thing I could do - grabbed a skein of colorful cotton and cast on. It only seemed right to keep going until I ran out of  yarn.

UniqueBasketweave2.jpg

I vaguely recall knitting this washcloth while also watching a great anime that I can’t remember the name or the plot of. Mostly what I remember about making this cloth is how different my life was at the time. It was before I got married and before I picked up everything to move across the country. All that stuff was in the works though so this cloth was made with the intention of making a new place feel like home. The basketweave cloth is only the latest in a long standing tradition of knitting to warm a new place. I’ve done it for dorm rooms, new houses, and apartments for myself, family, and friends. What can I say, it works.

UniqueBasketweave4.jpg

Whether it’s a set of washcloths, a toy, or a blanket; a hand knitted item helps bring warmth and love into a house to make it a home.

The Specs

Pattern: Unique Basketweave Washcloth by Anna Peck Maliszewski ( @Ravelry )

Yarn: Lily Sugar'n Cream Ombres & Prints

Needles:  US 6 (4 mm)

UniqueBasketweave1.jpg

*Or more. At it’s longest, the queue was 24 pages long. I try to prune it more regularly now. 

Wander the Web 4: Link Love Edition

Trying something a little different and joining up with CraftyPod for Link Love for the remainder of August. Instead of random goodness from across the web, I’ll be sharing some of my favorite tutorials. No crafty goodness or Pinterest board of mine is off limits. This week, I’m sharing five of my favorite tutorials from across the web. 

Transparent Bookmarks from Two Bee - A cute, little tutorial for making transparent bookmarks with a sheet of overhead. The tutorial is in Portuguese but the photos are self-explanatory.

Invisibly Seam Stockinette from Anonyknits - An oldie but a goodie from 2006. Invisibly seam two knit edges together without fooling around with any pesky, live stitches. Tapestry needle and yarn to the rescue.

Delicious Salt Scrub Recipe from Deliciously Organized - Salt scrubs are amazing for your skin and so easy to make. This recipe only calls for a handful of ingredients.

8-Bit Popup Cards from Minieco - How to cut your own pop-up cards. A great minimal design using Space Invaders and skulls but you can use the tutorial to cut any design you please. All you need is colorful paper, a craft knife, metal ruler, and a cutting matt.

Home Made Gift Boxes from Creative in Chicago - I’ve lost track of how many times I’ve used this tutorial for simple, origami gift boxes folded from scrapbook paper. Customize the box to match your gift or any holiday you can find the paper for.

To join in on the fun, check out CraftyPod for all the details.


Time to Design

LeftoverYarn.26.jpg

It’s been far too long since I’ve put my needles to yarn and designed a knitting pattern. Feeling just a bit rusty but ready for the challenge. My first opponent, 80 yards of Noro Taiyo leftover from a Doublish Shawl, has only been mocking me from the stash since April 2012. I don’t know what it is about this particular cake of yarn but I just have to knit it all up. Other leftover balls have sat in my stash for years but they haven’t enticed me to knit them up with the same fervor. Maybe it’s the way the colors are presented or the silky hand of the cotton but I’ve been racking my brain to come up with a pattern for this yarn. 80 yards of fingering weight isn’t much to work with, after all, but I’ve relished the constraint. It’s made things so much more interesting. After much swatching and ripping (and even more swatching and ripping), I finally have a workable idea.  Folks, I’m running with it. See you at the finish line.

Finished Fractal

FinishedFractal4.jpg

My Tour de Fleece yarn is finally finished. Only took 1 extra week, 2 skeining attempts, 2 washes, and 3 days of drying time. Seems like I could have saved a few days if I’d had the patience to re-skein the yarn correctly the first time around. To reiterate, bicycle handbars are not the best option for skeining yarn. Over turned laundry baskets, on the other hand, do a decent job.

FinishedFractal5.jpg

All that extra time working with the yarn did have some benefits though. Not only is the yarn well blocked and balanced, I really want to knit it. NOW. Usually, my handspun likes to marinate in the stash for a bit since I don’t spin with an eventual project in mind. The yarn, itself, is the project. If I want to spin a fingering weight yarn, I spin a fingering weight yarn. That’s all there is to it. Any potential pattern comes much later. With this yarn, I just wanted to try my hand at fractal spinning for Tour de Fleece. Spending double the time finishing the yarn, let me better appreciate the final yarn and absolutely fall in love with the colors. Sometimes the colors stripe, sometimes they barber pole, and sometimes they create an amazing gradient. Knitting this skein up is the only way left for me to truly appreciate it. 

FinishedFractal2.jpg

 What was it like spinning a fractal yarn? No different than spinning any other yarn. Certainly nothing to be afraid of. The hard part is finding a bump of fiber dyed just the right way. Splitting it and spinning it are the easy parts. Just remember that you might have to pre-draft the undivided half of the fiber to get a matching single for the divided half. 

FinishedFractal3.jpg

The Finished Specs

Fingering Weight Yarn with 18 - 22 Wraps per Inch

512 yards

4 oz of Bluefaced Leicester 

Dyed by Yarn Geek Fibers

Colorway: Big Yellow Taxi

512 yards is a lot to work with and I really don’t want to split it up in a bunch of smaller project. Shawl, it is then.

FinishedFractal1.jpg

How to Not Skein Yarn

SkeinUp1.jpg

Desperate times came for desperate measures, my friends. There I was with my finally plied Tour de Fleece yarn ready and waiting for its bath. Unfortunately, my swift didn’t make into the car for the cross country trip (too big) and  my niddy-noddy, which I meant to bring, didn’t either. Both might as well be in another dimension right now. With my swift I could have easily wound it up in a skein, see this tutorial. Same with the niddy-noddy. So, I went looking for alternatives.

SkeinUp3.jpg

Say hello to Allie, my new bike. The handlebars seemed like the perfect thing to wrap fresh yarn around. Alas, this was not the case though that wasn’t apparent until much later.

SkeinUp4.jpg

I put the spindle into the front basket for easy yarn dispersal and got to work. It didn’t take me too long to empty the spindle and tie off the skein. 

SkeinUp5.jpg

Now that it was time to take the yarn off the handlebars, things went south. See, the handlebars don’t go straight back but angle to the side . I had hoped that if I wound loosely, getting the skein off the handles would be pretty easy. Nope. I had to slide the skein off a few too tight strands at a time.  Nothing snapped, thankfully. Just for good measure, add in a few too long stands that accidentally got wrapped around the break grip too. The skein was a mess.

SkeinUp7.jpg

A more patient person would have re-skeined the yarn around something else but I was not feeling particularly patient. There was yarn to wash! and, adding insult to injury, I had to first wash dishes to free up the sink. I had no patience to spare after doing the dishes. So, the yarn got its bath and I got the pleasure of thwacking it afterward. 

Now that the yarn is dry, I’m not sure I did the right thing. The accidentally too long strands are still kinked and curling on themselves. Looks like the yarn wasn’t properly finished the whole skein through. At least I know I managed to spin a nice fingering weight, which was my goal, instead of a lace weight. With today’s bolstered patience reserves, I’m going to re-skein the yarn but not around the bike’s handlebars. I’m going to do what I should have done yesterday and wrap the yarn around an upturned laundry basket.  Wish me luck.


Tips for Spinning Yarn on the Beach

BeachSpinning2.jpg

One of my goals for Tour de Fleece was spinning in public. I knit in public all the time but hadn’t worked up the courage to spin in public until last week. Honestly, I didn’t think I’d actually do it which is what finally made me suck it up and get it over with. If I was going to spin beyond my front door, I was going to enjoy my surroundings. So, spindle in hand, I headed to the beach. There was all the sun, sand, and waves that I enjoyed on my daily walks. A spot was found and the only thing left to do was actually spin. I started spinning reluctantly but lost any thought of nervousness once I found my rhythm. People stared but it wasn’t the end of the world. It was actually pretty nice and I’m looking forward to spinning on the beach (and in public) again. If you want to try spinning on the beach too, here are a few things I learned:   

BeachSpinning3.jpg
  1. Sand is everywhere, so bring a towel. It’s the beach and sand will end up in places you didn’t know existed. A big, oversized towel will provide some (relatively) sand free space to spin. If the spindle drops, the towel will be there to catch it and spare your yarn from the sand.
  2. Use the wind to your advantage. Part of the reason to visit the beach is to enjoy the sea air. Make it work for you. Stand at an angle that will keep your fiber or singles blowing away from you and your work. Not having to hold your fiber out of the way might make drafting easier too. 
  3. Use the sky and the sand! The sky and the sand are great, uninterrupted backdrops to inspect your spinning. Analyze your plying or just admire your handiwork.
  4. Mind the tide. Waves are great to listen to but they like to travel. If you start spinning near the waves at low tide, they could be at your feet before you know it. Don’t forget about the spray either. Wet wool is hard to work with.
  5. Be prepared for stares. Yes, stares. Seeing someone zoned out with their phone is far more common than seeing someone spin yarn. It’s only natural that people will be curious. Don’t get nervous. Instead, smile and maybe even say hello. 

As always, bring along all the regular beach necessities; like sunscreen, a hat, and a snack, too. Spinning is fun but sunburn is not.

BeachSpinning1.jpg

Tour de Fleece Complete

FractalPlying1.jpg

 Tour de Fleece is over and done for another year but I don’t have any finished yarn to show for it; however, I do have some lovely, almost yarn. Half of it is plied on the spindle and the other half is still wrapped up in a plying ball. All of that last minute plying just wasn’t enough. 

Despite my lack of finished yarn, Tour de Fleece 2013 was a big success. Thankfully, I skipped any yardage requirements and stuck with 3 simple things: spin everyday, practice new techniques, and spin in public. I thought spinning everyday would be the easy goal but I didn’t manage it this year. Still, spinning almost everyday got me a lot of proto-yarn. As for practicing new techniques, I just stuck with one and tried out fractal spinning. I’ve never attempted to spin yarn or affect color this way before. We’ll see if I pulled it off once I actually finish the yarn and knit it. I also bought pencil roving which I’ve never spun before. Totally counts towards practicing a new technique.

FractalPlying2.jpg

The one goal I made, that I was 90% sure wouldn’t happen, was spinning in public. I’ve spun at knit night before and at fiber guild meetings but none of that counts. All of those people understand the attraction of yarn. Out in the knitter sparse public, who knew what the reaction would be. Last Friday, I sucked up my potential embarrassment, packed a towel, and headed to the beach with my spindle. I enjoyed the sun and the sound of the waves. I got quite a bit of plying done and got quite a few stares too. Once I found the rhythm of spinning, I was too relaxed to be embarrassed. If anything, people were embarrassed when I noticed them staring at me. Who knew? One man stopped fishing to watch but quickly went back to the fish when I looked in his direction. At least no one came up to me and commented that spinning was a “dying art”.

How did your Tour de Fleece go? Meet all of your challenges are you still plying, like me?

FractalPlying3.jpg

Just Plying Along

FractalPlyingBall1.jpg

There are 3 more days of Tour de Fleece and I’m just started plying. It’s highly improbable that I’ll have a finished skein by Sunday night but I’m going to try anyway. If only the yarn would expertly ply itself while I’m asleep. 

To make the whole plying process run a lot smoother, I’m falling back on my favorite technique, the plying ball. It does take longer to start since you have to wind the singles together around a core but it’s worth it. A plying ball is portable, doesn’t require a Lazy Kate, and makes tensioning the singles during plying so much easier. Plying balls also give you one last chance to fix any breaks or weak spots before they snap during plying. One extra, added bonus is that you get to see how all the colors line up which is great if you’re spinning a fractal yarn, like I am. For more info on how to actually wind a plying ball, check out this tutorial.

PlyingBallCollage.jpg

All wound and ready to ply! My attempt at dividing the fiber for fractal colors seems to have worked. I was also exceedingly happy to see that one single wasn’t much longer than the other. It’s the small things in life. 

I’m a few yards into plying and seeing the colors change as they move through my fingers is wonderful. When I first picked out this fiber and my lightest spindle, I was aiming for a fingering weight yarn but, so far, it looks more like a lace weight. Maybe a bath and a good thwacking will bulk it up a bit. If not, that’ll teach me not to spin samples first.

FractalPlyingBall11.jpg

Still Spinning Along With Tour de Fleece

FractalSpinning5.jpg

Somehow, I was under the impression that Tour de Fleece is a lot longer that 3 weeks. I read the dates and wrote them down but my mind kept telling me that I had months and months to spin. I had this same mistaken thought last year too. So, I let myself be distracted by Steam Summer Sales, new video games, and long walks on the beach. So much for my goal of spinning everyday of the Tour. Well, Tour de Fleece ends this Sunday and I’m still spinning the second single. It is for a fingering weight yarn, in my defense, but I’m still got to get my butt spinning, spinning, spinning.

Spinning the second ply for a fractal spun yarn turned out to a bit harder than I thought. I spun the first ply from all the small divided chunks of fiber. My hands adjusted to all that thin fluff and switching to the bulkier, undivided roving threw my hands for a loop. It was hard to spin a matching, consistent single to match the first. My spindle kept dropping and my frustration kept rising.

FractalSpinning6.jpg

The only solution was to break down and predraft, aka thinning without adding twist to, the roving. When I first taught myself to spin, I always predrafted the fibers. Once my hands learned the motions of drafting and I could keep up with the spindle, I didn’t have to predraft before spinning anymore. Not predrafting became a source of pride. I thought that if I had to predraft fiber that I was taking a step backward and would lose all my spinning cred. The truth is that predrafting is just another technique in the spinner’s tool box. Sometimes you’ll need it and sometimes you won’t. When you’re first learning to spin, predrafting can be be a huge help but it isn’t strictly necessary. Using it later down the road to create consistent, matching singles won’t get your spinner’s license revoked. Just like there’s no knitting police, there’s no spinning police either. Do what works for you and the yarn you’re creating.

FractalSpinning7.jpg

There are just 5 days left in the tour and I’m going to make the most of them. I’m going to finish the second single today and then there will be ALL the plying. It’s definitely a race to the finish. How’s your Tour spinning along?


Stash Enhancement

PencilRoving1.jpg

When I was perusing Wild Fiber last weekend, I found something new. Something that I’d only seen in photos, written about in blog posts, and occasionally added to my Etsy cart: pencil roving. It’s basically thin roving that’s about the thickness of a pencil. Hence the name. You can either knit it as is or you can spin it. Me, I’m going to spin it.

PencilRoving2.jpg

For this year’s Tour de Fleece I wanted to practice new techniques which means trying new materials as well as learning new skills. Pencil roving is new to me so it’s a suitable addition to the stash. I might not get to spin until after the tour but I’m still on the path to try new things.

I also found some teal roving while I was at the shop. Not sure about the fiber type it is but it’s soft with a long staple length. It’s nothing I haven’t spun before but, sometimes, you just need some good old fashioned stash enhancement.

TealFiber1.jpg

How to Find Yarn Shops Using Ravelry

Whenever I needed yarn or just felt the urge, I’d pop over to my favorite yarn shop. Now that I’ve moved, my favorite shop is over 2,100 miles away! That’s a bit too far away to satisfy my yarn cravings, unfortunately.  Having a great yarn shop to visit is such a big help and I’m desperate to find a shop near my new home. I looked for yarn shops with Google Maps and found a few options but there wasn’t much information available for most beyond a name, an address, and maybe a website. So, I turned to Ravelry which has proven itself to be a great knitting (and crochet and spinning and weaving) resource. I found so many more shops and so much more information than with Google. If you’ve just moved, are looking for yarn shops to visit on a trip, or just want to go somewhere new, Ravelry is the place to start looking.

ShopTutorial1.jpg

Once you’re logged in, click on the “Yarns” tab at the top of the page.

ShopTutorial2.jpg

Right under the “popular new yarns” box is the Local Yarn Shop Directory. You can search by shop name, city, address, or zip code. I’m going with zip code since I want to see all of the shops in my general area. If you’re visiting, typing in the city’s name might give you better results.

ShopTutorial3.jpg

After you click search, the next page lists all of the yarn shops within the area. You get their name, address, website, and distance from search address. To narrow down the results, change the mile filter near the top of the screen if you’re getting pages and pages of results. You can also choose to view the shops on a map when you click the “Location Map” tab.

ShopTutorial4.jpg
ShopTutorial5.jpg

When you click on a shop, you’ll go to a page that tells you all you need to know: name, address, contact info, and hours. If the shop has a website or a twitter account, those links will be there too. You can even see a map and get directions. Just as helpful, you’ll be able to see individual yarns that people have bought at the shop and brands the shop carries. Definitely useful information when you’re trying to decide if a shop is worth visiting.  

Have fun finding your new favorite yarn shop!

Zen in the Fog

 6 days out of 7, the weather along the coast of Los Angeles is gorgeous with perfect temps, cool breezes, and clear skies. That seventh day, though, makes me feel like I’m on another planet. The fog rolls in off the Pacific and covers everything in a fine mist. You can barely see the sun in the sky let alone 100 feet ahead. I love walking the beach in this kind of weather. The grey mist, the sound of the waves, and wet sand under my bare feet combine in the perfect moment of zen. Still, I wouldn’t be the least bit surprised if Cthulian monsters walked out of the depths or zombies slowly shambled into view. 

ShoreFog1.jpg
ShoreFog2.jpg
ShoreFog3.jpg
ShoreFog4.jpg
ShoreFog5.jpg