Spinning Batts

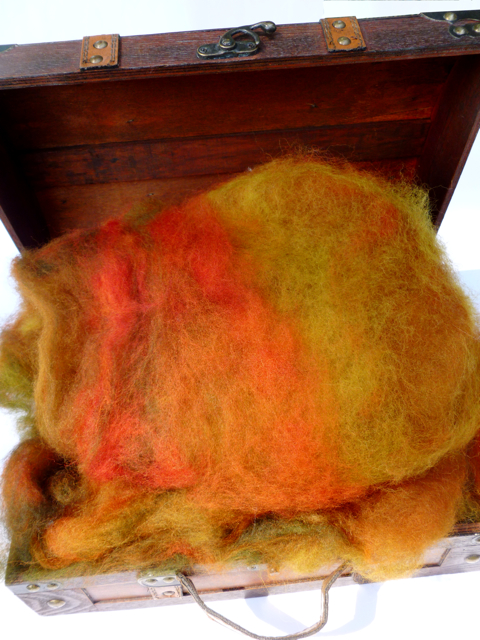
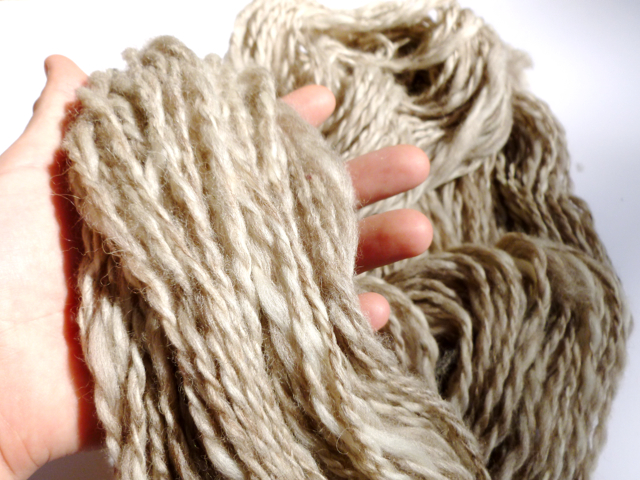
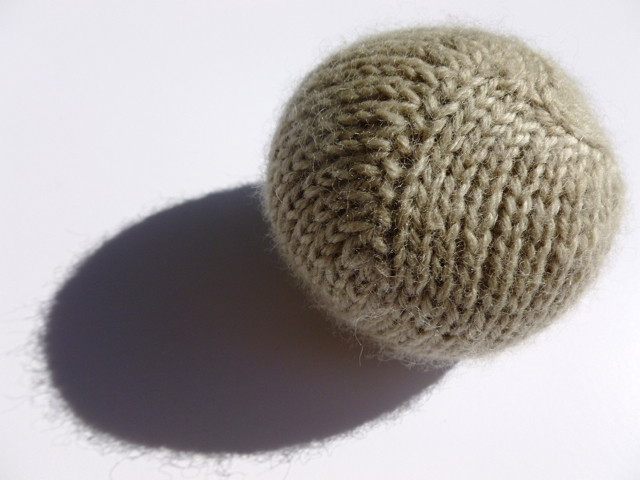
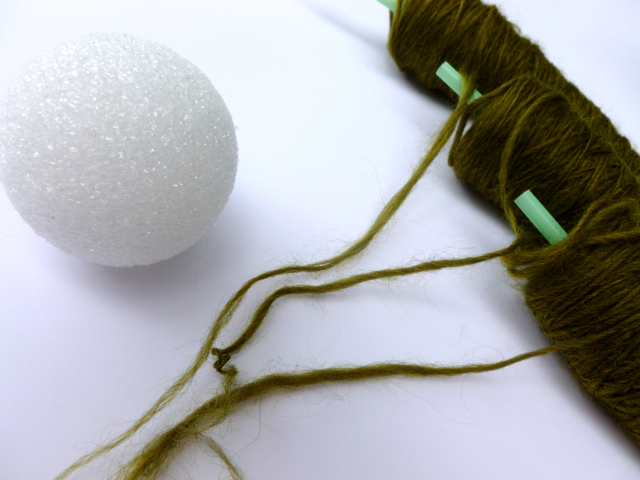
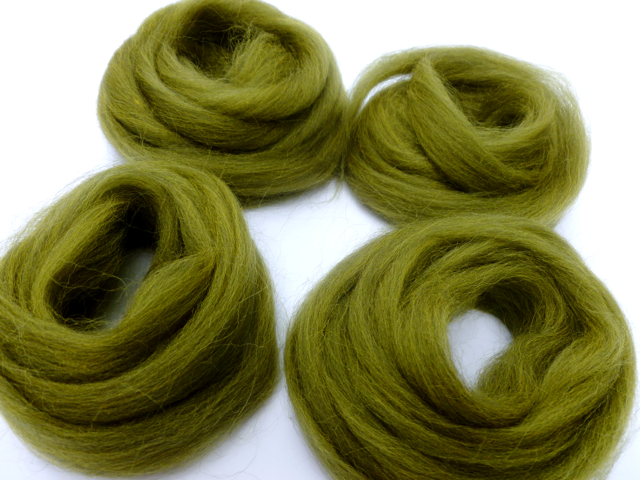
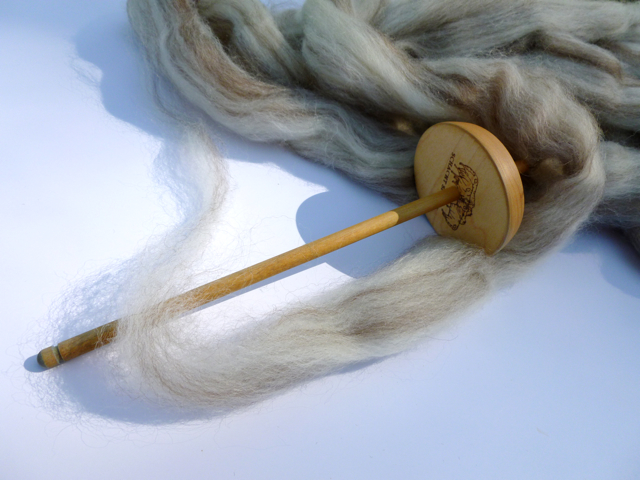
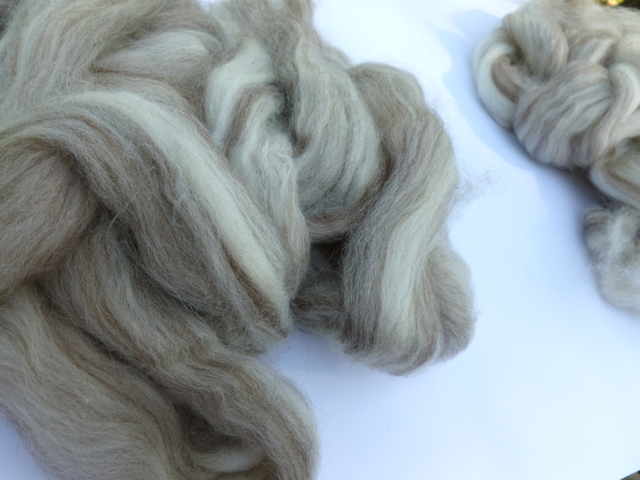
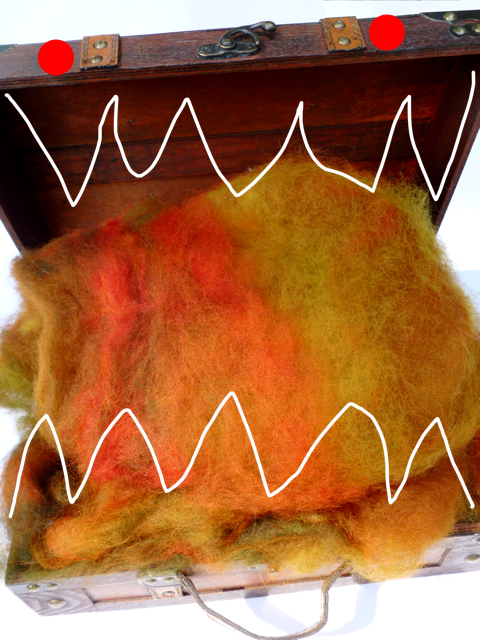
Once I pulled this batt out of the envelope and decided it was good, my second thought was that it was larger than my head. Then, how am I supposed to make this into yarn? For all I knew it might as well have been a monster waiting for my to let down my guard so it could eat me. 

Since Tour de Fleece waits for no spinner, I went looking for tutorials on spinning from batts and the internet came to my rescue. 

How to Spin from Batts by Vampy

The post lists five different ways to prep batts for spinning with clear photos and written instructions.

How to Spin a Batt from the Knit Girllls

This video covers four ways to spin from a batt. The yarn is being made on a spinning wheel but the prep still applies for a spindle. 

A Batt? What’s that? by St Seraphina Knits

Another informative video but this covers how to open the packaged batt and focuses on tearing the batt into strips for easy spinning.

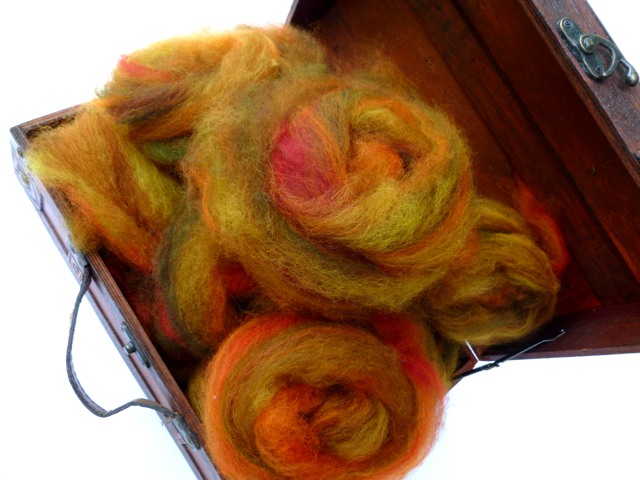
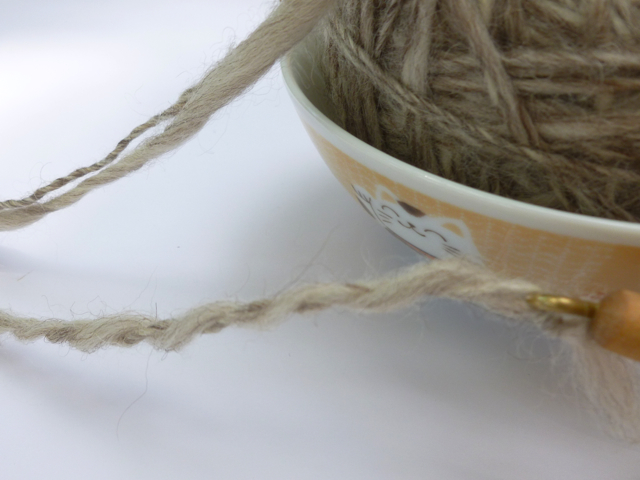
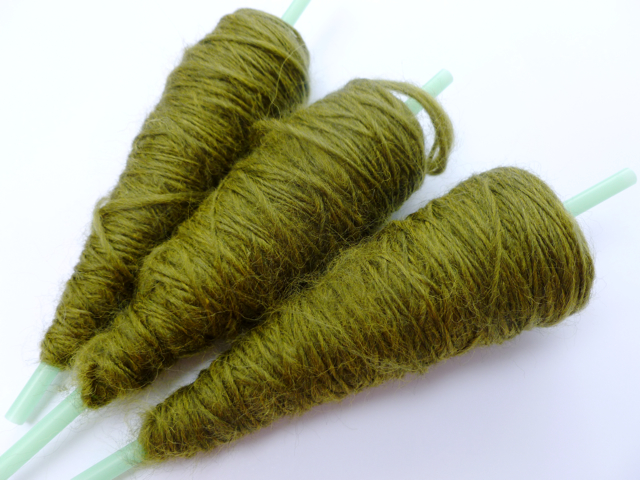
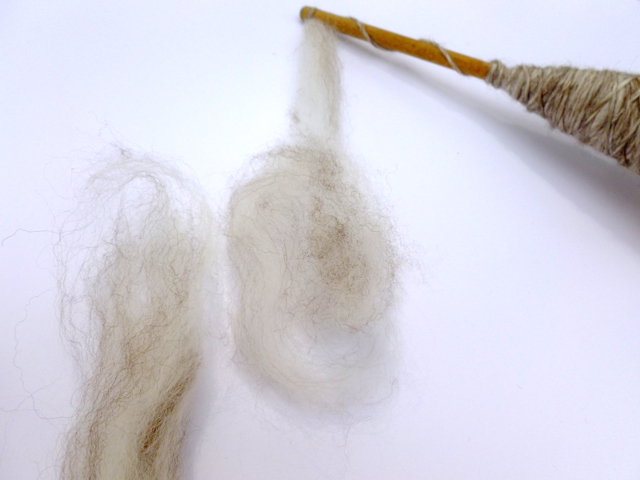
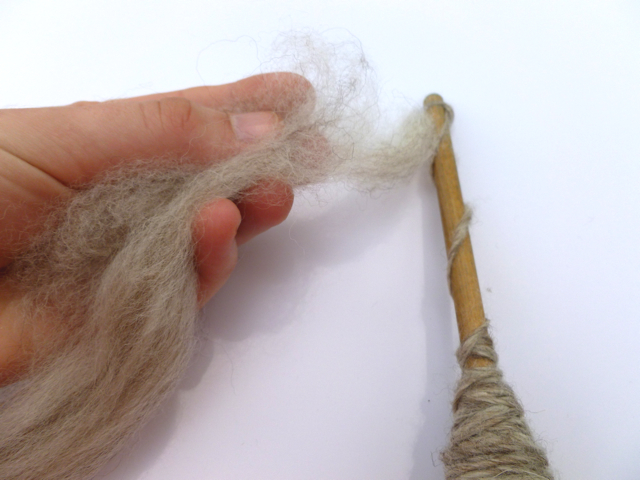
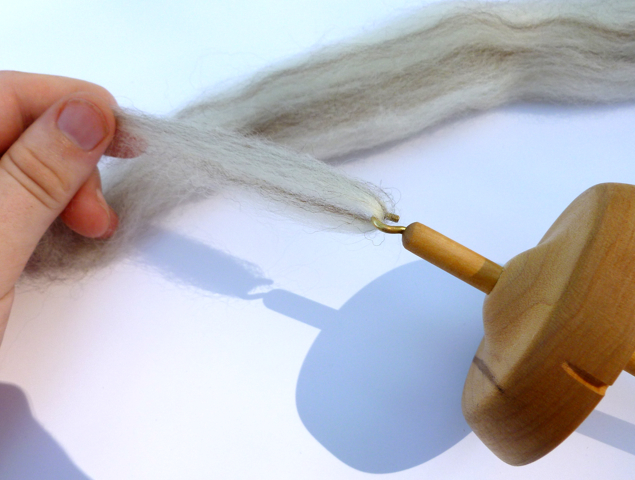
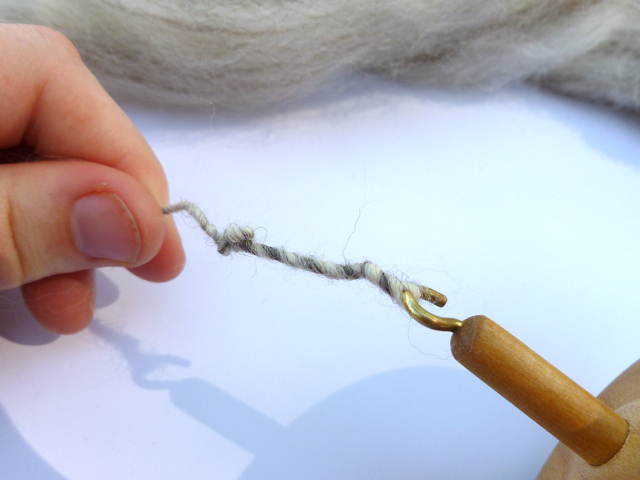
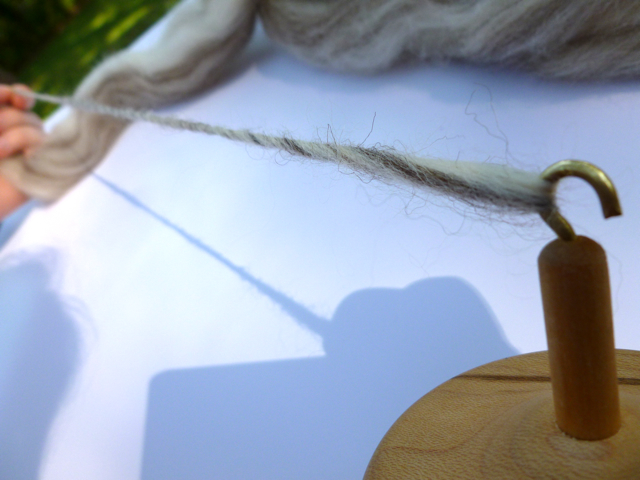
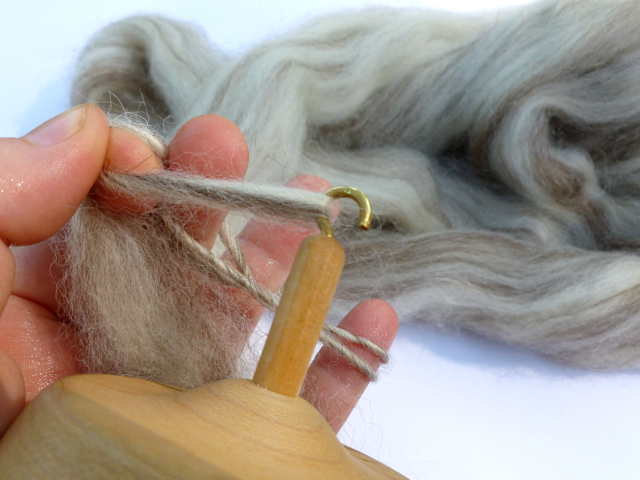
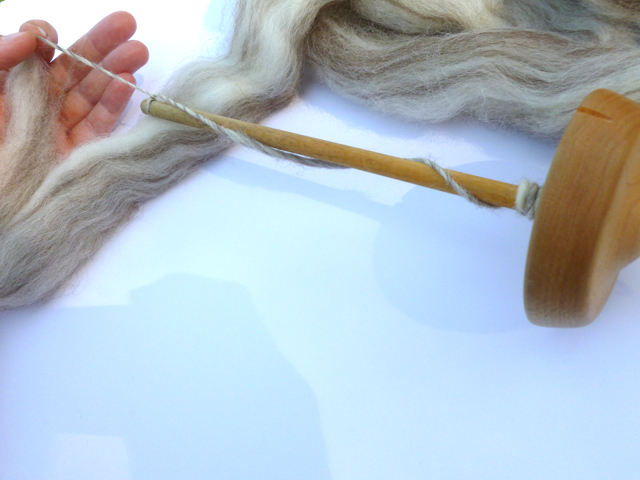
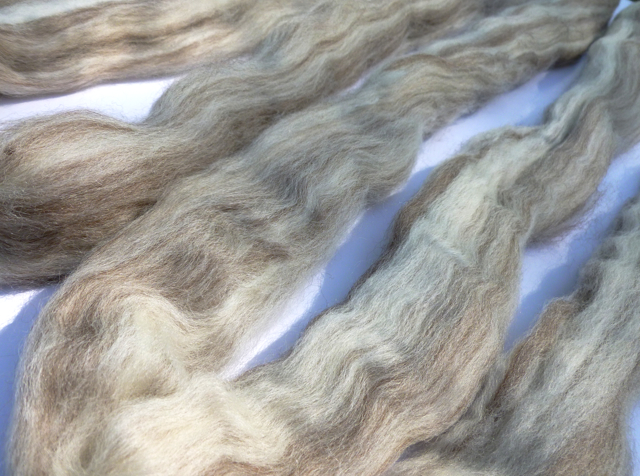
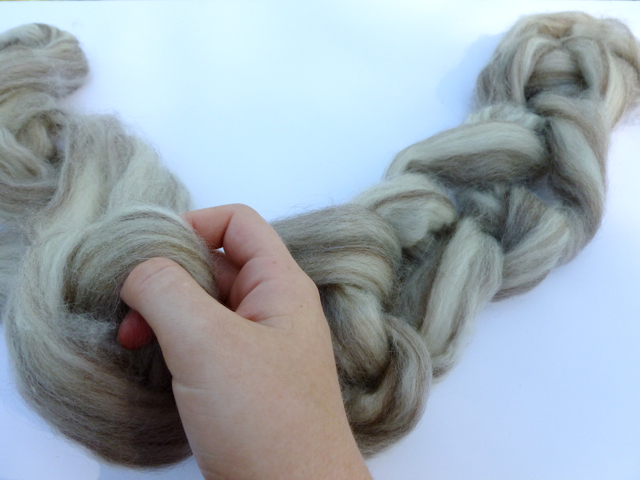
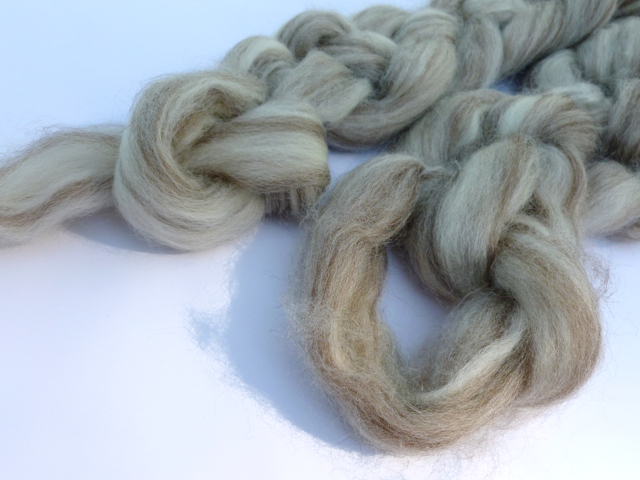
Eventually, I decided to tear the batt into strips and pre-drafted the fibers down to a manageable size. After all the uncertainty, this seemed like cheating since the prep work was so easy and nothing to fear. Now I want to get more batts and experiment with different prep methods. 

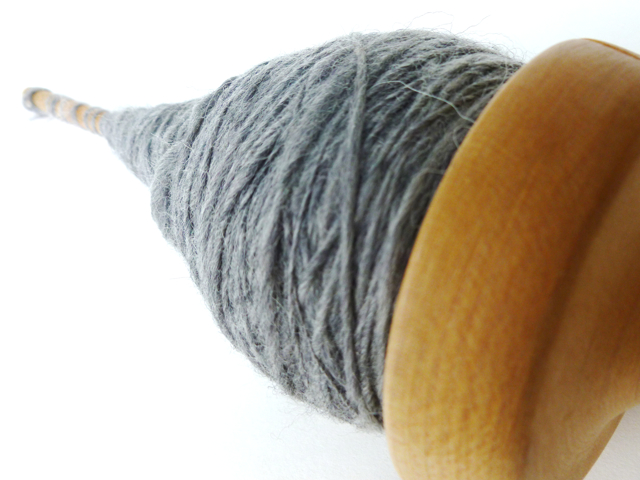
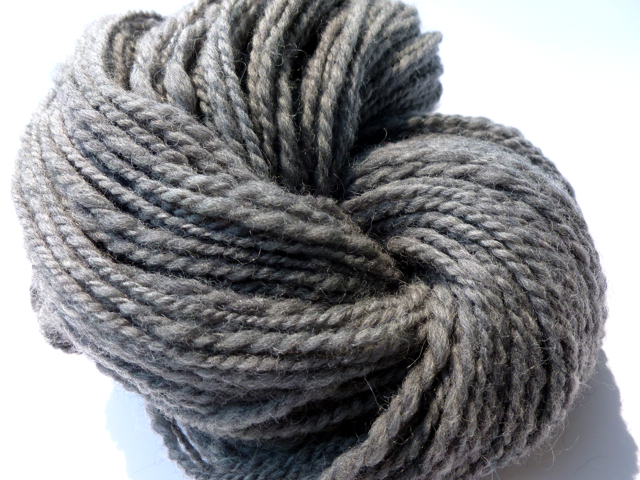
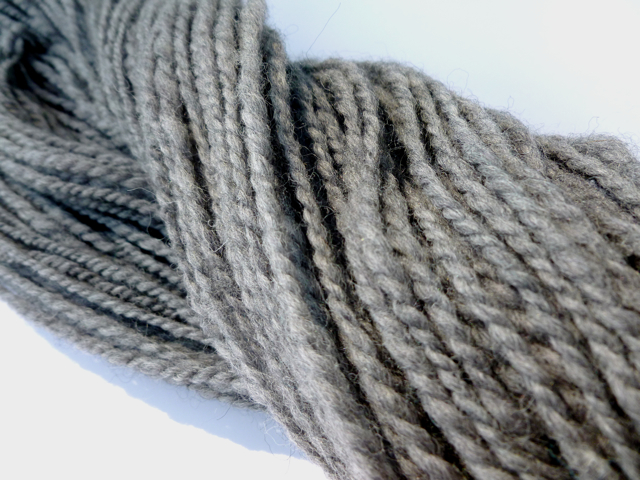
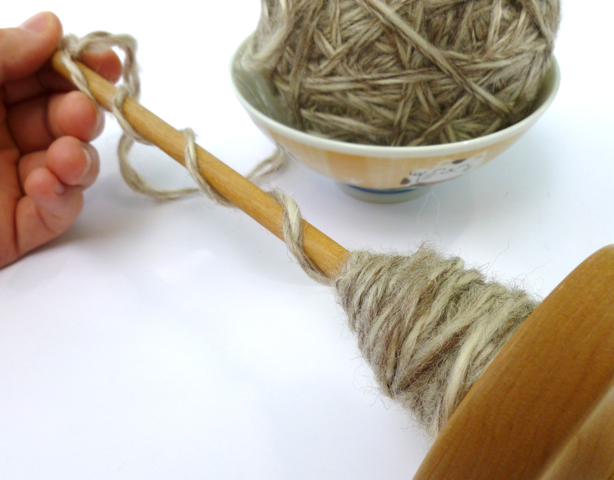
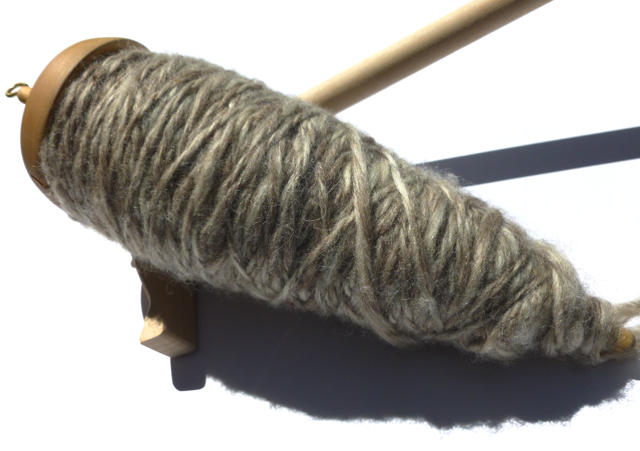
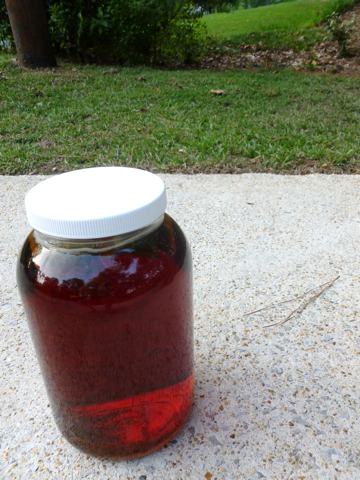
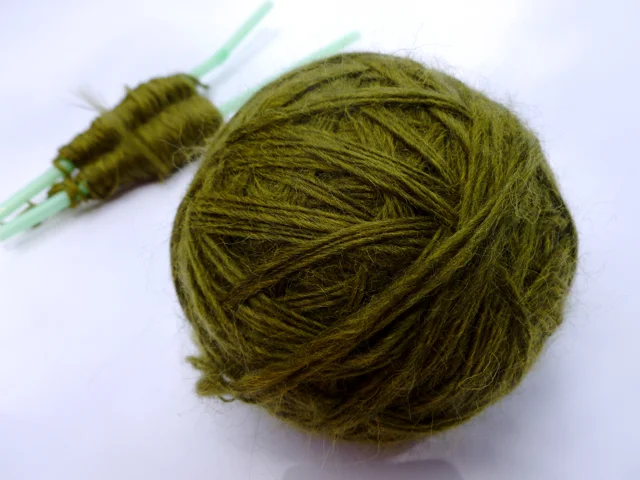
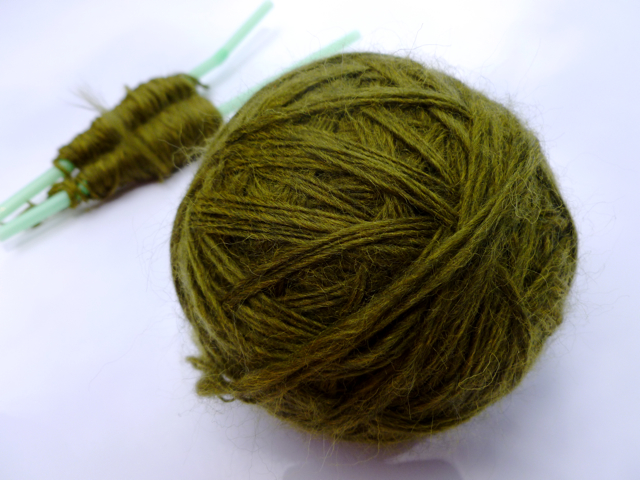
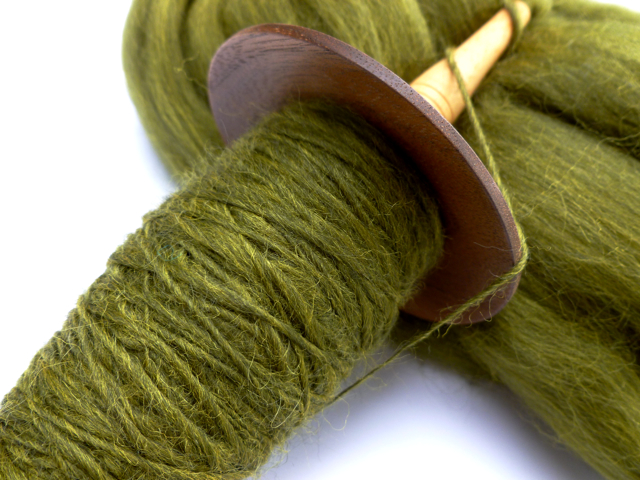
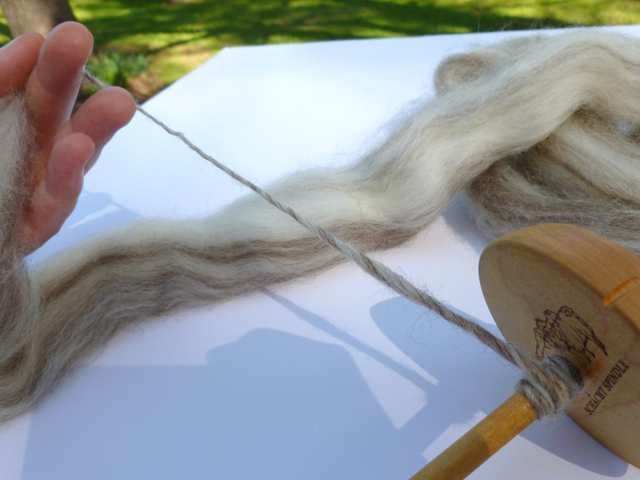
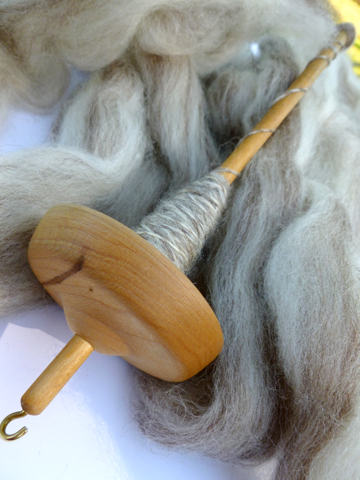
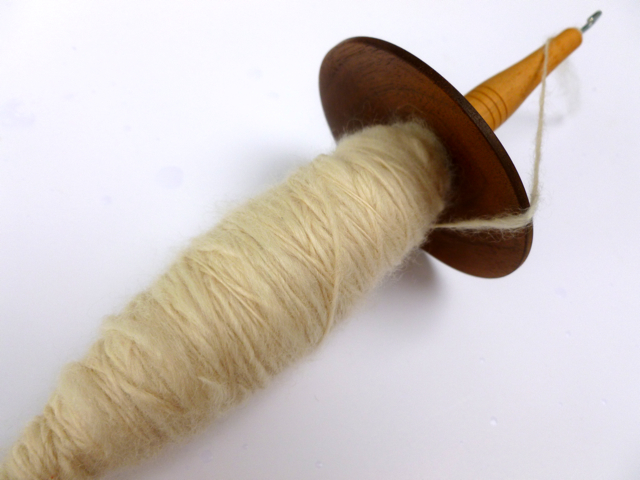
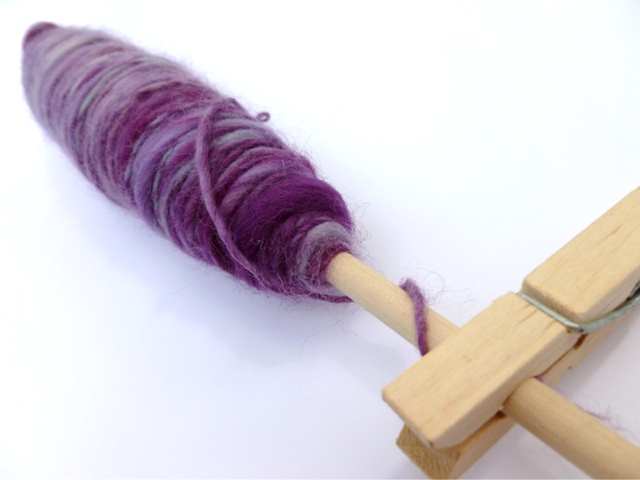
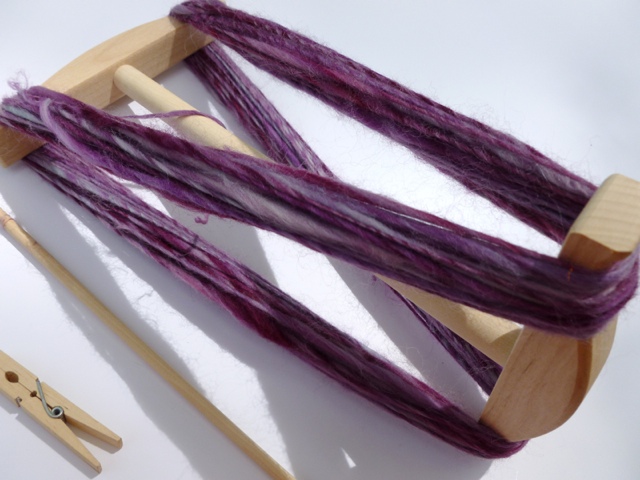
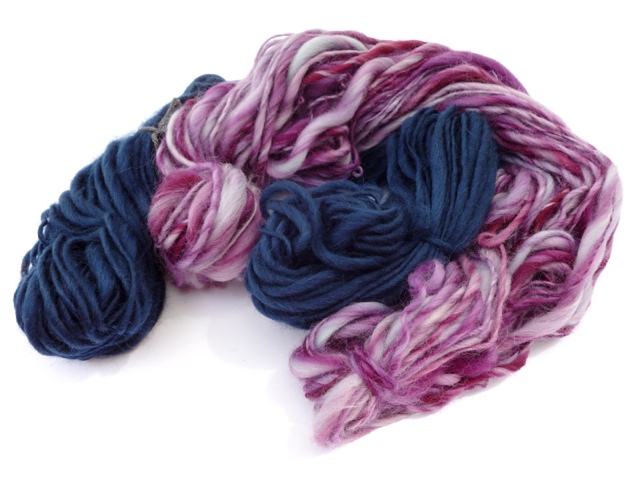
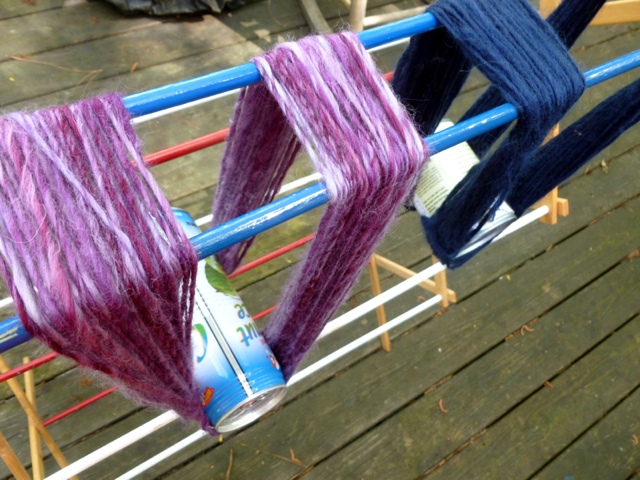
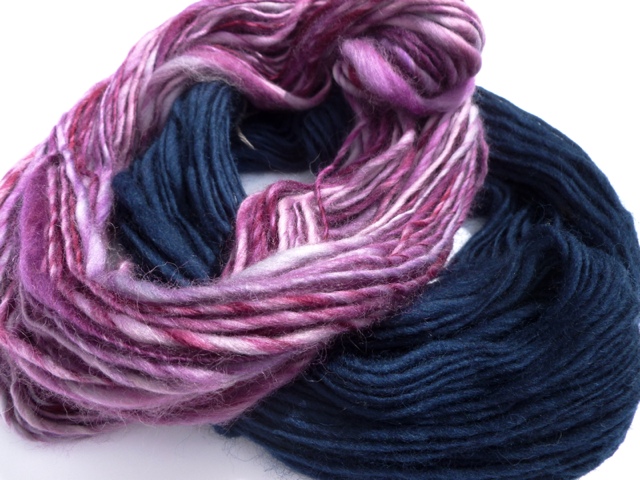
Now that the monster had been tamed, it was time to spin and it was no harder than working from roving. If only the single didn’t look like upchucked bodily fluids.  Any suggestions for what to do with 3.5 oz of fiber that you don’t want to spin anymore?

The First Skein

It was Friday afternoon and my latest skein of yarn was dry and sitting pretty. All my spindles were empty which was something I could no longer abide. So I sifted through my fiber stash - it’s not big enough for me to dig through, yet - and found some lovely grey top. Once it was split into eighths, I got started. Then Tour de Fleece happened. I set my goals, found Le Tour de France on television, and kept spinning.

Signing up for the tour flipped a switch in my head. I joined because I wanted expand my skills and challenge my complacency. First on the list, how I wind my singles/yarn on the spindle. Lately, I’ve fallen into a cone shape because my attempts at a beehive always fell short. Not this time. This cop was one of the most voluptuous I’ve ever made. The trick is too start wrapping next to the whorl and build out the diameter of the cop faster than the length.  

Besides from being pretty, I was surprised how much of a difference the beehive cop made to my spinning. Not only was I able to store more yarn on the spindle, but the singles didn’t shift up the shaft    and into the working, twisting section above the hook. The larger the cop’s diameter became, the larger the moment of inertia, and the longer the spindle would spin. I could focus more on my drafting and less on keeping things moving.

The result is a single 336 yards long that I plied back on itself to make 168 yards of worsted-ish weight 2-ply yarn. It’s already whispering that it wants to be a pair of socks when it grows up. It’ll need a buddy though for the heels and toes.

The Numbers thus far:

1 Skein

168 yards

As far as goals go, I’ve figured out to wind better cops/learn new skills,started spinning all the things, and made some new yarn. Tour de Fleece is off to a strong start.

Tour de Fleece 2012

Tour de Fleece, the annual spin - along to the Tour de France, has been in the back of my head for a couple of months. I kept hearing about it every few weeks and kept not deciding whether or not to join. Turns out, today, June 30th, is the first day of Tour de France and the Tour de Fleece. I thought I was out of the running this year until I checked the mail.

Waiting for me was a 4 oz. Spinner’s Hill Batt aptly named Garden Vegetable. I’ve never spun or even bought a batt before, so I wasn’t sure what to expect. Honestly, I was thrown for a complete loop. What am I supposed to do with this thing?

It’s huge and fluffy, and almost the size of my cat. (He’s also very fluffy by the way.) I’ve never tried to spin from anything like this before. Since the Tour de Fleece is all about challenging yourself and spinning yarn, I’m in. 

I might be going a bit overboard on my goals/challenges the first time around but why not? Whether I meet them all or not, I still be better than when I started.

  1. Learn new skills. I still pretty new to the whole spinning yarn thing and there is so much to learn and experiment with, and refine. This means that some days I might just watch tutorials and read articles. Then, the next day is all practice, practice, practice.
  2. Try new fibers. Till now, I’ve been spinning with nondescript wool, Bluefaced Leicester, and a little bit of Polworth. In my stash, there’s Corriedale, Faulkland, Alpaca Blends, and Silk Mawatas. It’s time to branch out.
  3. Expand my toolset. I’ve got a few heavier spindles, a niddy-noddy, a knitted plying ball, and a few dowels I’m using as bobbins. Turns out, I’m actually serious about this whole spinning thing,  so it’s time for a few more tools - a WPI gauge and a lighter spindle, for example. Any suggestions?
  4. Understand? Good. Play! I’ve spun a lot of the past few months and I’m light years ahead of where I was in March but I’m still afraid to pull out the good, hand dyed stuff because I might mess it up. Time to nip that in the bud, pull out the good stuff, and make some yarn.

How To Ply Yarn

...or Process Part 5 of Spinning Yarn on a Spindle. Part 1. Part 2. Part 3. Part 4.

| - | - | - | - |

After how much time it took my hands to learn how to draft fiber and flick a spindle, plying yarn seemed like such a simple thing. Put two or more singles together (or one single that’s been doubled or tripled) and spin them together counter-clockwise to make one intertwined strand. That’s it. The only thing I had to think about was how much twist to add. It seemed so much simpler than spinning up the singles but I knew there was more to it. At the same, I wasn’t worried about the details because I knew I’d figure them out eventually.

So, if you’re worried about ruining your singles, just jump in and go for it. As long as you ply opposite the singles and add enough twist, you’re golden.  

A spindle, 2-ply plying ball, and a bowl for wrangling.

Tie the singles together in a knot. If you’re using a top whorl spindle, slip the hook between the plies. For a bottom whorl, tie the singles around the shaft.

Flick the spindle counter-clockwise to add twist since singles are typically spun clockwise.

Once there’s at least an arm’s length of yarn and you’re happy with the amount of twist, wrap the yarn around the shaft. Bring the yarn back around to the hook or tie a slip knot and leave just yarn enough free to get the spindle going again. 

Repeat until you have one very full spindle and all the singles are plied. Woot!

To get your new yarn off the spindle and into a skein, you can wrap the yarn around your arm from palm to wrist or use a niddy noddy. Add a few ties around the skein to keep it from tangling.

Wash the skein to set the twist (I like Eucalan for this part) and hang it up to dry after a few good thwacks.  In this case, a thwack is pulling at both ends of the skein to make the fibers bloom and even out the twist. You don’t have to be about it gentle either. 

Ready to knit.

Now that I’ve gotten a little more practice under my belt, I’m beginning to see more of the nuances of plying. I’m refining my technique and experimenting with different methods (chain plying, anyone?). I’m making yarn that I love and can’t wait to knit with once I find that perfect pattern. This never would have happened I hadn’t thrown caution to the wind, and just tried in the first place. The first skein isn’t perfect but it’s still yarn and a first step.

Afternoon Swim, Afternoon Snack

This is Bob. He’s going for a swim in his brand new blue bikini.

This is not Bob’s lucky day.

This is Meg. She’s in the mood for an afternoon snack. 

Meg, meet Bob.

He’s tasty! Now Meg’s off to watch whales before dinner.

| - | - | - | - |

I made Bob and Meg for my Dad as a Father’s Day gift. The pair was a big hit and Dad’s reaction definitely kept him on the knit-worthy list.

Bob is a modified Groom from Teeny-Tiny Mochimochi by Anna Hrachovec. He’s knit from Knit Pick Palette and Paton’s Kroy Sock on 2.25 mm needles. I stuffed him entirely with his own yarn ends and a magnet. Bob’s magnet is in his back and Meg’s magnet is in her mouth. It’s never really isn’t Bob’s day since he won’t escape. Ever. The magnets make sure he’s always sucked into Meg’s mouth.

Meg is Clare Doornbos’ Shark. She’s knit from Knit Picks Wool of the Andes on 3.5 mm needles, has 10 mm safety eyes, and is stuffed with poly-fill. The pattern was very well written and I especially like how she solved pectoral fin placement. No guess work required. Full mods and details @Ravelry

The part of the sea is played by my own 3-ply handspun.

I had no idea how Bob’s size would compare to Meg’s when I first cast on. Turns out that Bob fits perfectly in Meg’s mouth and I couldn’t have planned it better if I tried. So, if we assume that Bob is 6’ tall, then Meg isn’t a Great White Shark (20’). She’s a C. Megalodon which current estimates put at 52’ long. Scale is everything. Now I want to knit a sailboat for Meg to chomp on. 

The Sweet Tomato Heel

I could wax poetic about how I started these socks last December when it was cold and when I needed purse knitting. I could write about how much I wanted to knit this pattern and have a new pair of socks. I could write about how fun it was to knit them despite having to slog through the cuffs. I could write all of those things but the main reason I knit these socks was to knit another set of Cat Bordhi’s Sweet Tomato Heels.

Pattern: modified Willamette Socks by Sara Morris

Yarn: Cascade Heritage Paints - 9872

Needle: US 2.25 mm

December 14, 2011 - May 16, 2012

@Ravelry

Cat Bordhi, I like the way you think. 

The process for knitting this short row heel isn’t hidden away in a pattern and you don’t have to be able to divine the mysteries of the universe to figure it out. The Quick Start Guide at the beginning of the book gives you everything needed to knit a a pair of socks this way and even a bit of troubleshooting help before diving into the patterns. Later in the ebook, she works out how to knit a padded, reinforced heel using this method. There are numerous diagrams, clear step-by-step instructions, and lots of helpful tips.  For example, instead of wrapping and turning when working the short rows, she uses a lifted increase to close the gap between stitches. Two versions of short row heels that can be knit from the cuff or the toe and numerous patterns aside, just that epiphany was worth the cost of this ebook to me. This video shows the technique off nicely. 

Reinforced heel flaps with a short row turn are still my favorite heel, but the Sweet Tomato is such a close second. It’s relatively easy to knit, uses less yarn, and - best of all - fits so well. The question of fit was the main reason I stayed away from short row heels to begin with but the tomato is so easy to modify on a foot by foot basis.

The first few pairs of Sweet Tomatoes that I knit taught me a few things. The first pair I made for myself and got the method in my brain. The second pair I knit for the Bearded One’s giant feet and they fit him just as well. The third pair - this pair - I knit in a fingering weight and decided to add a mini gusset to get a little more room in the gusset. The gusset made the fit all the better and saved the instep pattern from disruption since the heel is knit over more than 50% of the stitches. I also needed a fourth wedge instead of the three I needed in worsted weight socks. Such an easy change to make. 

I think I’ll be using this heel for a long time and for many, many pairs of socks. 

Summer Mint Sun Tea

How is it already June? And how was Memorial Day a week ago already? What’s the rush 2012? 

It’d be hard for me to believe it was already Summer if not for the humidity, the 85°+ temperatures, and the frequent, passing rain storms. On Memorial Day weekend, I made sun tea which counts as my official declaration of Summer. It just isn’t Summer without a glass of tea close at hand or a jug of it sitting ready in the fridge. 

The Bearded One and I used to drink our tea sweet. While the tea was still hot, I’d stir in a sizable scoop of sugar and revel in the sweetness. After so many gallons of sweet tea, I started adding less and less sugar to every batch until we drank it plain. Then, on a lark and my longstanding love of spearmint tea, I threw some mint into the mix. Haven’t looked back since.

Summer Mint Sun Tea

  • 1 Gallon of water in a covered Jar
  • 2 “Family Size” black tea bags
  • 2 bags of of Spearmint tea
  • A few hours of bright, uninterrupted sunlight

On a sunny day, put all the ingredients together and find a back porch, driveway, or doorstep in the sun to let the tea brew. I’ve even put the jar on a windowsill so it will get the most sun and it’s really easy to keep an eye on it that way. A few hours later there will be strong, dark, tasty tea and you don’t even have to turn the stove on to make it. 

 On another Summer note, naps. Shadow has the right idea on this one.

Testing Sophiti-cuffs

I like test knitting even though I don’t do it too often because of schedule conflicts or being waist deep in my own designs and projects. When the opportunity presents itself, I sign up whole heartedly because I like supporting people and designers that I like. I also get to knit the cool stuff before anyone else.

The latest bit of testing was for the Squares Sophiti-Cuffs from Gwen Erin. I’ve been following Gwen’s blog for years now and I’ve never once considered culling it from my RSS feeds. She recently started spinning yarn and dying fiber full time and it’s been to resist. I have a few ounces of her fiber and it’s been elevated to such high status that I can’t help but feel the urge to improve my spinning skills so I can do the fiber justice.

The cuffs turned out to be a quick little project. I might have spent more time picking out buttons than knitting. The grey yarn is leftover from a few different projects and the cream is some of my very own handspun. First time I’ve knit with my own handspun too. Full technical details on Ravelry.

Besides from being quick, the pattern’s pretty versatile too. I think the cuffs would be cute buttoned around gifts, flower pots, or naked table legs. I’m looking at you, Ikea table legs. 

Diablo Trio

On May 15th, I was one of those people who stayed up to 12:01 AM Pacific Time (3:01 Central) to play Diablo III. I ended up knitting for an hour instead. Error 37, anyone?  After finishing a pair of socks and getting a few inches done on a hat, I went to bed. I spent the next couple of days alternating between trying to log on - AKA knitting a hat - and fighting my way through Sanctuary. My Demon Hunter did eventually level up enough to wear a pair of pants.

Pattern: Pup Tent by Catherine Gamroth

Yarn: Araucania Nature Wool

Needles: US 6 (4mm)

I should call this hat Tristram Cathedral since that’s where I spent my time when I wasn’t knitting. I didn’t modify the pattern since I just wanted to knit. The cable rows where fun and I learned a new way to do work two stitch cables just by working from a k2tog or ssk. Can’t wait to try it out on something else.

Pattern: Waffle Hat by Gail Bable

Yarn: Araucania Nature Wool

Needles: US 6 (4mm)

While Hat #1 served to keep me entertained because I couldn’t log in, Hat #2 exists because I could log on. I cast on while waiting to play with friends and got a few inches of ribbing. I knit on it to keep me from playing 30 mins after I just logged out to cross chores of my to-do list. I knit on it to give my hands a break. I also knit on it to use up the rest of the skein. Cast on 96 sts, knit 24 rows of ribbing, and worked the waffle stitch for 5.5” before decreasing. It’s a big, warm hat and I still had 5g of yarn leftover.

Pattern: Stuffed Ball Cord Pull by Lee Meredith

Those remaining 12 yards turned into palm sized ball that I’m going to use for plying yarn. 

Isn’t it amazing how much is possible with 242 yards of wool? I got 2 hats, a plying ball, stress relief, patience, and hours of entertainment. Wool is awesome.

Anyway, back to killing demons for me. Iskatu is going down. 

For Mom

Pattern: Doublish by Alexandra Tinsley

Yarn: Noro Taiyo Sock

Needles: US 4 (3.5 mm) circulars

Dates: April 4 - 24, 2012

@Ravelry

Wandering around my LYS back in September, this yarn was the only thing that caught my eye. I imagined it as a cute little shawl that would match most of my shirts and and upgrade my usual minimalist style. This idea lingered through Holiday Knitting 2011 and through a prolonged bit of finish-itis. Several projects fewer on the needles, I cast on for this shawl. After I got through the first few rows, I was a woman obsessed. The colors were gorgeous and the pattern was easy enough to knit around town; however, the more rows I knit, the more I knew this shawl wasn’t for me. It was for my Mom. I think I knit a little bit faster after that because my Mom is awesome and totally knit worthy.

I also made one other thing for her and it stole the show. I’m going to have a hard time topping this one.

Almost Socks

Today was the monthly fiber guild meeting and I had a blast. Instead of our usual meeting and class, we had a picnic. The weather cooperated with mostly sunny skies, a nice breeze, and a comfy 70° temperature. There was a ton of tasty food and none of the cookies I brought made it back home. People brought their knitting, weaving, spindles, and wheels. I was kicking myself for not bringing my spindle along. I guess I just haven’t reached the SIP - Spinning in Public - Achievement yet. I did bring my current bit of travel knitting though: socks.

These are the Willamette Socks by Sara Morris. I’ve only been carrying them around in my purse since December 2011. Do not take the months I’ve been working on these socks as an indication of ill will. I love the pattern and the book, Shibui Socks, it came in. I fell in love with the patterns when I first saw them online and literally pounced on this book when I saw it at my LYS. The the photos are inspiring and the patterns are beatiful. Alameda and Ankeny are swiftly moving to the top of my sock knitting queue. 

Shibui Socks isn’t just a pretty book. The socks range from simple to complex and are a mix of toe-up and cuff down. The photos are large, clear, and show off the important details. The patterns have a nice layout and are easy to read. The charts are large and in charge. For the Willamette Socks, the charts take up an entire page. Full page charts make me so happy.

Okay, I’m done gushing. Back to my socks.

I am so close to binding off. A few more inches between the pair and I will be finished. Can’t wait. Even though it will be a few months before I can wear them.

Before you click over to something, here’s my knitting tip for the day: When you want to be absolutely sure that you’re knitting the same amount of ribbing on each sock, mark the first row with a locking stitch marker and keep knitting. Count the rows when you’ve reached your limit and repeat on the second sock. 

How to Wind a Plying Ball

Plying Ball.jpeg

...or Process Part 4 of Spinning Yarn on a Spindle. Part 1. Part 2. Part 3.

| - | - | - | - |

I have finally finished plying all three singles for my little experiment making a 3-ply yarn. The first single flew off my spindle. The second single ate all my mojo. The third single brought back my mojo with some to spare. I used a smaller spindle that weighs just over an ounce and is just the right size to slide the cop - the mass of single or plied yarn wrapped around the shaft - off to a straw.

It’s really funny how quickly a new tool can change a process. My first favorite spindle weighs 2.2 oz and has a shaft too large to slide a straw over. Every time I finished a single, I’d let it rest overnight and then wind the single onto a small dowel (a ball would work too). It’s more time consuming but worth the effort to get an empty spindle.

Trying to ply three separate singles from three separate straws is just a recipe for disaster but all three plies on a single ball is much more manageable. This method also works well with two singles but I’d hesitate to wrap more than four since it would be harder to keep all the strands evenly tensioned. Also, just wrapping a single around a ball would be a nice way to store it for later since the ball is an easy and tangle free way to start wrapping. 

I’m using a styrofoam ball since I have them on hand but tennis balls and felted beads work too.

Gather up all your ends and start wrapping. A pail or box will keep the singles from running off to the four corners of the world. 

Keep wrapping until you come to the end of a single and cut the rest to match. If you have extra like I do, you can wind them onto another ball to make a cute little mini skein. 

Next up, plying!

Inspiration

Spinning blogs are slowly taking over my RSS reader post by post. Thankfully, they play nice with all the knitting, art, comics, recipes, cute animal photos, quick laughs, and architectural glamour shots that also clamor for my attention.

I’ve given up on the idea of visiting Reader everyday and knocking the unread count down to 0. With the current count at 909 items that is never going to happen short of just marking all as read. Instead, I’ve been just been reading and taking the time to enjoy good posts and good photos without worrying about the X number of blogs to read today. It freed up my mind to be inspired by and act on the things I saw instead of just filing ideas away for later. 

I read this post by the Yarn Harlot where she writes about tearing roving apart between color repeats to make self striping yarn. It totally blew my mind because I had never thought about using roving that way. So, I had to try it out. Photos will be forthcoming. 

On a new to me blog, Weekend Knitter, I read a post about the author knitting with some of her hand spun 3-ply. She described the yarn as plump and full. I’ve spun a lot of 2-ply but no 3-ply yarn and I wanted to try it out. Does 3-ply knit up differently than a 2-ply? How would processing the roving be different than for a 2-ply? How much longer would it take to spin a 3-ply?

So, I took the plunge. 3.5 oz of combed top was separated into 3 equal parts and those 3 parts were divided lengthwise 4 more times. Then a bit of pre-drafting was in order for a thinner single. The only thing that changed in the processing was how I split the roving and a greater amount of pre-drafting (aiming for a worsted or heavy worsted weight yarn). 

I’ve just finished spinning the second single and it’s taken a bit longer than spinning for a 2-ply. Is it because I’m spinning finer singles on a lighter spindle? Maybe. Probably. Only more experimentation will tell.  

Fixing Breaks and Making Joins

...or Process Part 3 of Spinning Yarn on a Spindle. Part 1. Part 2

There are days when spinning comes easy. I can pick up the spindle and find my rhythm immediately. Yarn just seems to spring from my fingers and all I have to do is wind it on the spindle before things touch the ground. The only time I have to make a join is when I need more fiber. I’m in the zone. 

Then are days where the spindle drops every 30 seconds and I’ve got a pile of loose, under spun fiber that couldn’t hold a paperclip off the ground. Bah. Once I get so frustrated that I want to jumble up everything into a giant felted ball, I put the spindle down and walk away. Better to calmly fix something the next day than rip it to shreds in frustration. Thankfully, fixing breaks isn’t a difficult, drawn out process.

| - | - | - | - |

When it’s time for more fiber, fan out the end of the fiber coming off the spindle and the end of the new fiber.

Overlap the two ends by about 3” and start drafting and adding twist. If you just add twist without drafting the join will be lumpy and bulkier than the surrounding single.

Keep spinning and keep joining and, soon enough, you’ll have a full spindle. 

| - | - | - | - |

Joining new fiber and fixing a broken single on a spindle are, essentially, the same process. Usually, a single breaks because there isn’t enough twist to hold it together. The ends won’t immediately untwist and become a frazzled mess but they won’t always salvageable. Sometimes, you just have to pull out the weak parts and get back to business. When joining two ends of single back together, just overlap the ends by about 6 to 12” and add more twist. Wind the join onto the spindle and keep going. That’s all there is to it.

If you have a broken single and need to join it a bit of un-spun fiber, draft out the fiber and overlap the two pieces by 12”. Wind yarn off the spindle to work with if need be. “Park and Draft” is your best friend here since it lets you slowly add twist and test the join to see if it holds. Plus, it might be more difficult to draft if the single was tightly spun. 

Good luck and don’t be afraid of a little practice.

Make A Bow

Despite what all those posts about spinning might have told you, I do still knit. Some of is secret, some of it for commission, and some of it I just haven’t gotten around to photographing yet. These two little Saplings fall into the commission pile. Now that they’re finished and delivered I can show these off. 

I used my favorite yarn for baby hats, Elsebeth Lavold Cool Wool, which is a soft worsted weight wool cotton blend and great for spring time southern weather. It has wonderful stitch definition, holds it’s shape, and is machine washable. It does have a smaller gauge than recommended in the pattern though so I had to work the larger size to get a nicely sized and stretchy hat.

Since the hats were going to be a gift, a little tag with fiber content and care instructions was in order. Anything worth doing, is worth doing well. So, I wanted the tag to match the hat and share a theme. A cute little bow made from the same yarn as the hat fit the bill wonderfully.   

      Materials

  • 2x4” piece of card stock (I used kraft paper)
  • 4-6” length of leftover yarn used to make the gift
  • Tapestry needle
  • 1/8” hole punch
  • Pen
  1. Using the hole punch, make 2 holes in the card stock a half inch apart and a half inch from the top.
  2. Under the holes, write the recipient’s name (I left this part blank), the fiber content, and care instructions underneath. 
  3. Thread the yarn though the needle and push it through the holes so that both ends are hanging on the same side as the writing.
  4. Tie a bow. Done!

How To Start Spinning Without A Leader

If this post could have a subtitle, it would be Process: Part 2. This series has taken a complete 180 from what I thought it was going to be. Take a few pretty photos of my process, write a few snippets, wax poetic about the whole thing, and put it on the blog. Turns out, I was making tutorials and didn’t even know it. I think this a lot better than my original idea.  

The first post in this series was all about how to prepare fiber (combed top in this case) for spinning. In this post I’m getting down to business of spinning, well, starting to spin yarn without a leader. I’ve used a leader in the past but there is something magical about making yarn out of thin air. Just add a bit of twist to some fiber and BAM! Yarn. Plus, drafting and spinning this short section of fiber helps me understand the characteristics of an individual batch of fiber which helps me spin better yarn.

| - | - | - | - |

The great thing about about starting without a leader, a length of already spun yarn that helps put twist in fiber at the beginning of the spinning process, is that you don’t need any extra material to pull it off. Also, if you’re a beginner and can get started without the leader, you’ll already have the basics of spinning under your belt.

To start, you’ll need a drop spindle - high or low whorl - with a hook and a bit of fiber. 

Pick an end and slowly pull the fibers straight out bit by bit using both hands. One hand pulls and the other holds the top. The top between your hands should get thinner and longer. This is drafting.  You can draft out just a few inches now and start spinning, drafting as you go, or draft large sections now to make it easier to handle.

Once at least 6” have been drafted, it’s time to put the fiber on the spindle. Place the drafted fiber through the hook and fold back the first 2-3” to form a loop. Pinch the two ends together. When you pick the spindle up by the fiber, it should hang without falling.

Time for twist! Singles, un-plied yarn, are traditionally spun in a clockwise direction and plied together counter-clockwise. So, give your spindle a clockwise spin - rotating to the left - with your fingers. There should be so much twist that the fiber kinks up on itself. To keep the spindle from spinning back and removing all the twist, catch it in your hand and hold it between your thighs. 

Loosen your grip and slowly pull back the hand pinching the fiber to let the twist move into more and more of the drafted fiber. If the newly spun single starts to give out, give the spindle a few more turns to add more twist.

Once there’s 1 to 2’ of single on the spindle, wrap it around your pinching hand until you get back to the hook. Keeping your fingers pinched and the everything tight, carefully take the single off the hook.

Wrap the single around the shaft close to the whorl. A few wraps should keep everything in place. 

If spinning on a low whorl spindle, wrap the single around the shaft and tie it off with a half hitch or pass through a hook. For a high whorl spindle, just pull it up over the whorl so that it comes up behind and then through the hook.

All there is to do now to keep spinning, is repeat the process with both hands this time. Pinch. Twist. Draft. Pinch. Twist. Draft.

This video by Abby Franquemont and this one from TheArtofMegan.com really helped me get handle on the process. Of course, there’s no substitute for actual practice.

| - | - | - | - |

Up next in the Process Series, is joining fiber and fixing breaks.

Still Spinning!

This past weekend was the latest meeting for my favorite fiber guild. Once again, the meeting was worth getting up for at 8:15 on a Saturday morning. That’s one of the highest honors I can give. The topic this month was how to spin yarn on a drop spindle and I was so excited about it last month that I started early. So, I packed my spindle, some wool, and my finished yarn and headed over to the meeting.

The teacher had brought a few spindles from her collection and encouraged everyone to try them out.  I tried a few high whorl spindles and a few bottom whorls. I tried out light spindles and heavy spindles.    Part of the reason I went was try out different varieties of spindles and see if I actually liked what I liked. The verdict, low whorl spindles were and still are the way to go for me. I still like what I liked before so I came home with a few more. 

The one exception to the low whorl love is this wonderful high whorl that I couldn’t resist taking home with me. It’s the first high whorl spindle that I’ve actually liked. Plus, I can remove the whorl to pack it down for traveling. If only I could remember who made it. 

The second reason I went was to refine my technique a bit. Every single I’ve spun so far has been has been consistently worsted with a mix of really thin and really thick bits thrown in for good measure. When plied, the resulting yarn is bulky and wonderful but I want some variety. I don’t knit much with bulky yarn after all. The secret to thin singles and lighter yarn: a lighter spindle and a lot more prep work than I’ve been doing. My latest attempt is consistently thin and I might come up with a sport to worsted weight yarn this time. Let the plying begin!

What are your favorite ways to spin? Top whorl or bottom or wheel? Bulky yarn or fingering?    

Shadow, My Shadow

This is Shadow, the resident cat here at Chez Strategos. He is a complete the task master and fancies himself quite the creative director. He’s talkative, friendly, and quite fluffy. One could even say that he’s quite a handsome cat. Never mind the extra fluff on his head. If he looks a bit freaked, that’s because...

...when I went out to feed him this morning, he was on the roof!

This is a cat that generally comes when called and meows at your feet when he arrives. He meowed when I called his name alright. I didn’t find him though until I looked up and behind me. After I got the expletives and required photographs out of the way, it was time to get him down. 

Next to the backdoor, Shadow has a little house of his own with wobbly, uneven legs and a wide flat roof. I climbed on top and could get my hands over the gutter. He wouldn’t come close enough for me to grab him. The next step up was the porch railing. (Note to self: get a step ladder.) Running through my mind at this point was that scene in Dead Like Me where the woman is trying to coax a cat out of a tree with a can of food while standing on a fence post. Spoiler Alert, she slips and she dies. She was also dressed far better than I was in my hoodie, pajama pants and sock monkey slippers. All I could think was:

Oh God, I’m going to fall and die or be horribly injured and they’re going to find me hours from now wearing sock monkey slippers.

Then I climbed up on to the railing. I could actually reach Shadow now and he came over. Happy as he was too see me, he wasn’t particularly pleased when I grabbed him and lifted him over the edge. There was plaintive meowing and mad scrabble to latch his claws onto the gutters. You’d think he didn’t want to get down. After my third attempt to unhook him, I succeeded and stepped back down to the porch. Once Shadow was within a few inches of solid ground, he started purring instead of crying for his life. 

Then we both had breakfast and all was right in our little corner of the world. Still, I can’t help thinking that I could’ve died while wearing sock monkey slippers. Truth be told, I’m still wearing them. They’re comfy, warm, and rather cute. So it wouldn’t have been all bad, you know, except for the dying part. That would suck.

How to Spin Yarn: Prepping Combed Top

I can haz process?

Picking up spinning again was a lot like any other skill I’m trying to learn. First, I find this thing that sounds really cool and I would like to try. Prime examples: knitting, kumihimo, temari, origami, and bookbinding. Second, I hit the internet and research tools, tutorials, and techniques for days, weeks, and even months before I decide to make something a priority. Third, gather supplies. Fourth, actually do something. Anything to just get started. 

If I like that brand new started something, I keep doing it. I figure out how and why it works. I start experimenting. I get comfortable. I develop a process of how to do this awesome something from start to finish. With spinning, the realization that I knew what I was doing and that I had a process hit me all at once. I was absolutely giddy.  

So, I’m sharing my process. I hope that it will help you get started, come up with one of your own or, if you already know how to spin, see your process as something amazing and worth celebrating. 

| - | - | - | - |

Step 1: Stash Diving. Since my first, short-lived attempt at spindle spinning, I’ve been buying fiber. Not much. Just enough to have something to choose from when I came back to the spindle. The stash has served me well in that regard. For this attempt, I picked out 4 oz. of Blue Face Swirl (Naked) from Gale’s Art.

Step 2: Inspection. This batch of fiber was twisted up like a skein of yarn. So, I opened it up just like a skein of yarn. Then I spread everything out and got a sense of the color distribution and how much 4 oz. of fiber actually looks like.

Step 3: Division. I didn’t pick out this fiber with any particular project in mind. I just wanted to try my hand at a 2-ply yarn. So, I split the entire length of combed top down the middle. 

Step 4: Wrangling. There’s a brief pause for a little “eeny, meeny, miny, moe” to decide which half to use first. The “not it” bit is crochet chained to keep it whole and safe until I need it. I take one end, make a loop, and tuck in the tail to make a big circle.

Next, pull a loop through the circle. Pull a new loop loosely through the last loop and continue. Eventually, all the roving is gathered up and easy to handle. At the end, I just pull the roving through the last loop to keep it together. This is the only bit of crochet I know.

That giant circle I made at the beginning? That’s how I know to work from the opposite end since a crochet chain can only be pulled out from the end and not the beginning. Just pull the tail out and and take apart the chain as you need it.

| - | - | - | - |

Next post, I’ll get back to the other half of the fiber and start spinning. 

Three Weeks

I’m still spinning yarn over here on mostly daily basis. Still spinning to spin, to catch a rhythm, to move my hands, to make yarn. Since I only have one spindle that I like to use, I wind the freshly spun single off onto to a dowel to free up the spindle. My singles get to rest and I get to keep spinning. It’s a win-win. Three weeks and I’ve covered all 13 of my dowels with half-finished yarn. Time to free up some storage space.

This bit of purple wool was the first thing I spun when I picked up the spindle again. So many questions were going through my head. How much yardage would I get? Should I ply it and should it be 2-ply or Navajo? I hadn’t the slightest idea what to do which worried me but eventually decided I’d figure it out later. Three weeks have gone by and the decision was no where near as stressful. It’s staying a single. No second thoughts about it.

Finally had a reason to dig out my niddy-noddy. It’s been wrapped in plastic for far too long.

While winding the first skein, I decided my second bit of spinning would get the single treatment too.

They both got their own bath and were set out to dry. A drying rack and cans of assorted coconut products “blocked” the yarn and helped balance the twist. 

I have a question. Does weighting yarn while it dries actually balance twist or just hide it until the yarn is knitted?

Dry! Finally! You have no idea how much I wanted to used a hair dryer to speed up the process. Also, the yarn is no longer doing its best “Z” impression. 

They’ve been a long time coming but these are my first two skeins since I picked up the spindle again. I’ve petted them. I’ve squeezed them. I’ve buried my face in them them and inhaled. That last bit probably made me look a bit crazy but I can’t be the only one that does that. Right? Someone, please tell me you do that too. If not, you should.

What I’m trying to say is that I don’t regret trying my hand at spindling and spending my time learning to spin. I love it. I want to keep doing it. I want to research and experiment and go wild. I want to keep making yarn and, occasionally, wearing it like a mustache. That’s just the kind of lady I am.