FO: Gramps Cardigan

Adorable baby sweaters and adorable! I made the Gramps Cardigan as a gift and am absolutely thrilled with how it turned out. FO: Gramps Cardigan | withwool.com

My secret knitting is no longer secret! The sweater can get its time in the spotlight now that it’s arrived at its new home. If I hadn’t been keeping this a surprise, it would have shown up several times and probably with a poem titled ‘An Ode To Ripping’. I haven’t written said poem but could have thanks to all the inspiration knitting the sweater gave me. All the frogging aside, the Gramps cardigan turned out to be a lovely sweater that I was proud to give to a very good friend and her new baby.

Adorable baby sweaters and adorable! I made the Gramps Cardigan as a gift and am absolutely thrilled with how it turned out. FO: Gramps Cardigan | withwool.com

When I was trying to decide what to make, I had to cross blankets off the list because I didn’t have the time. A hat or booties didn’t seem like enough, but a sweater seemed just right. After a couple hours looking through baby sweater patterns on Ravelry, I picked the Gramps Cardigan by Kate Oates. The finished sweaters all looked really cute. Plus, I like the idea of dressing up babies in vintage “old-man” style sweaters. Sold. I ordered the yarn, knit a swatch, and cast on. 

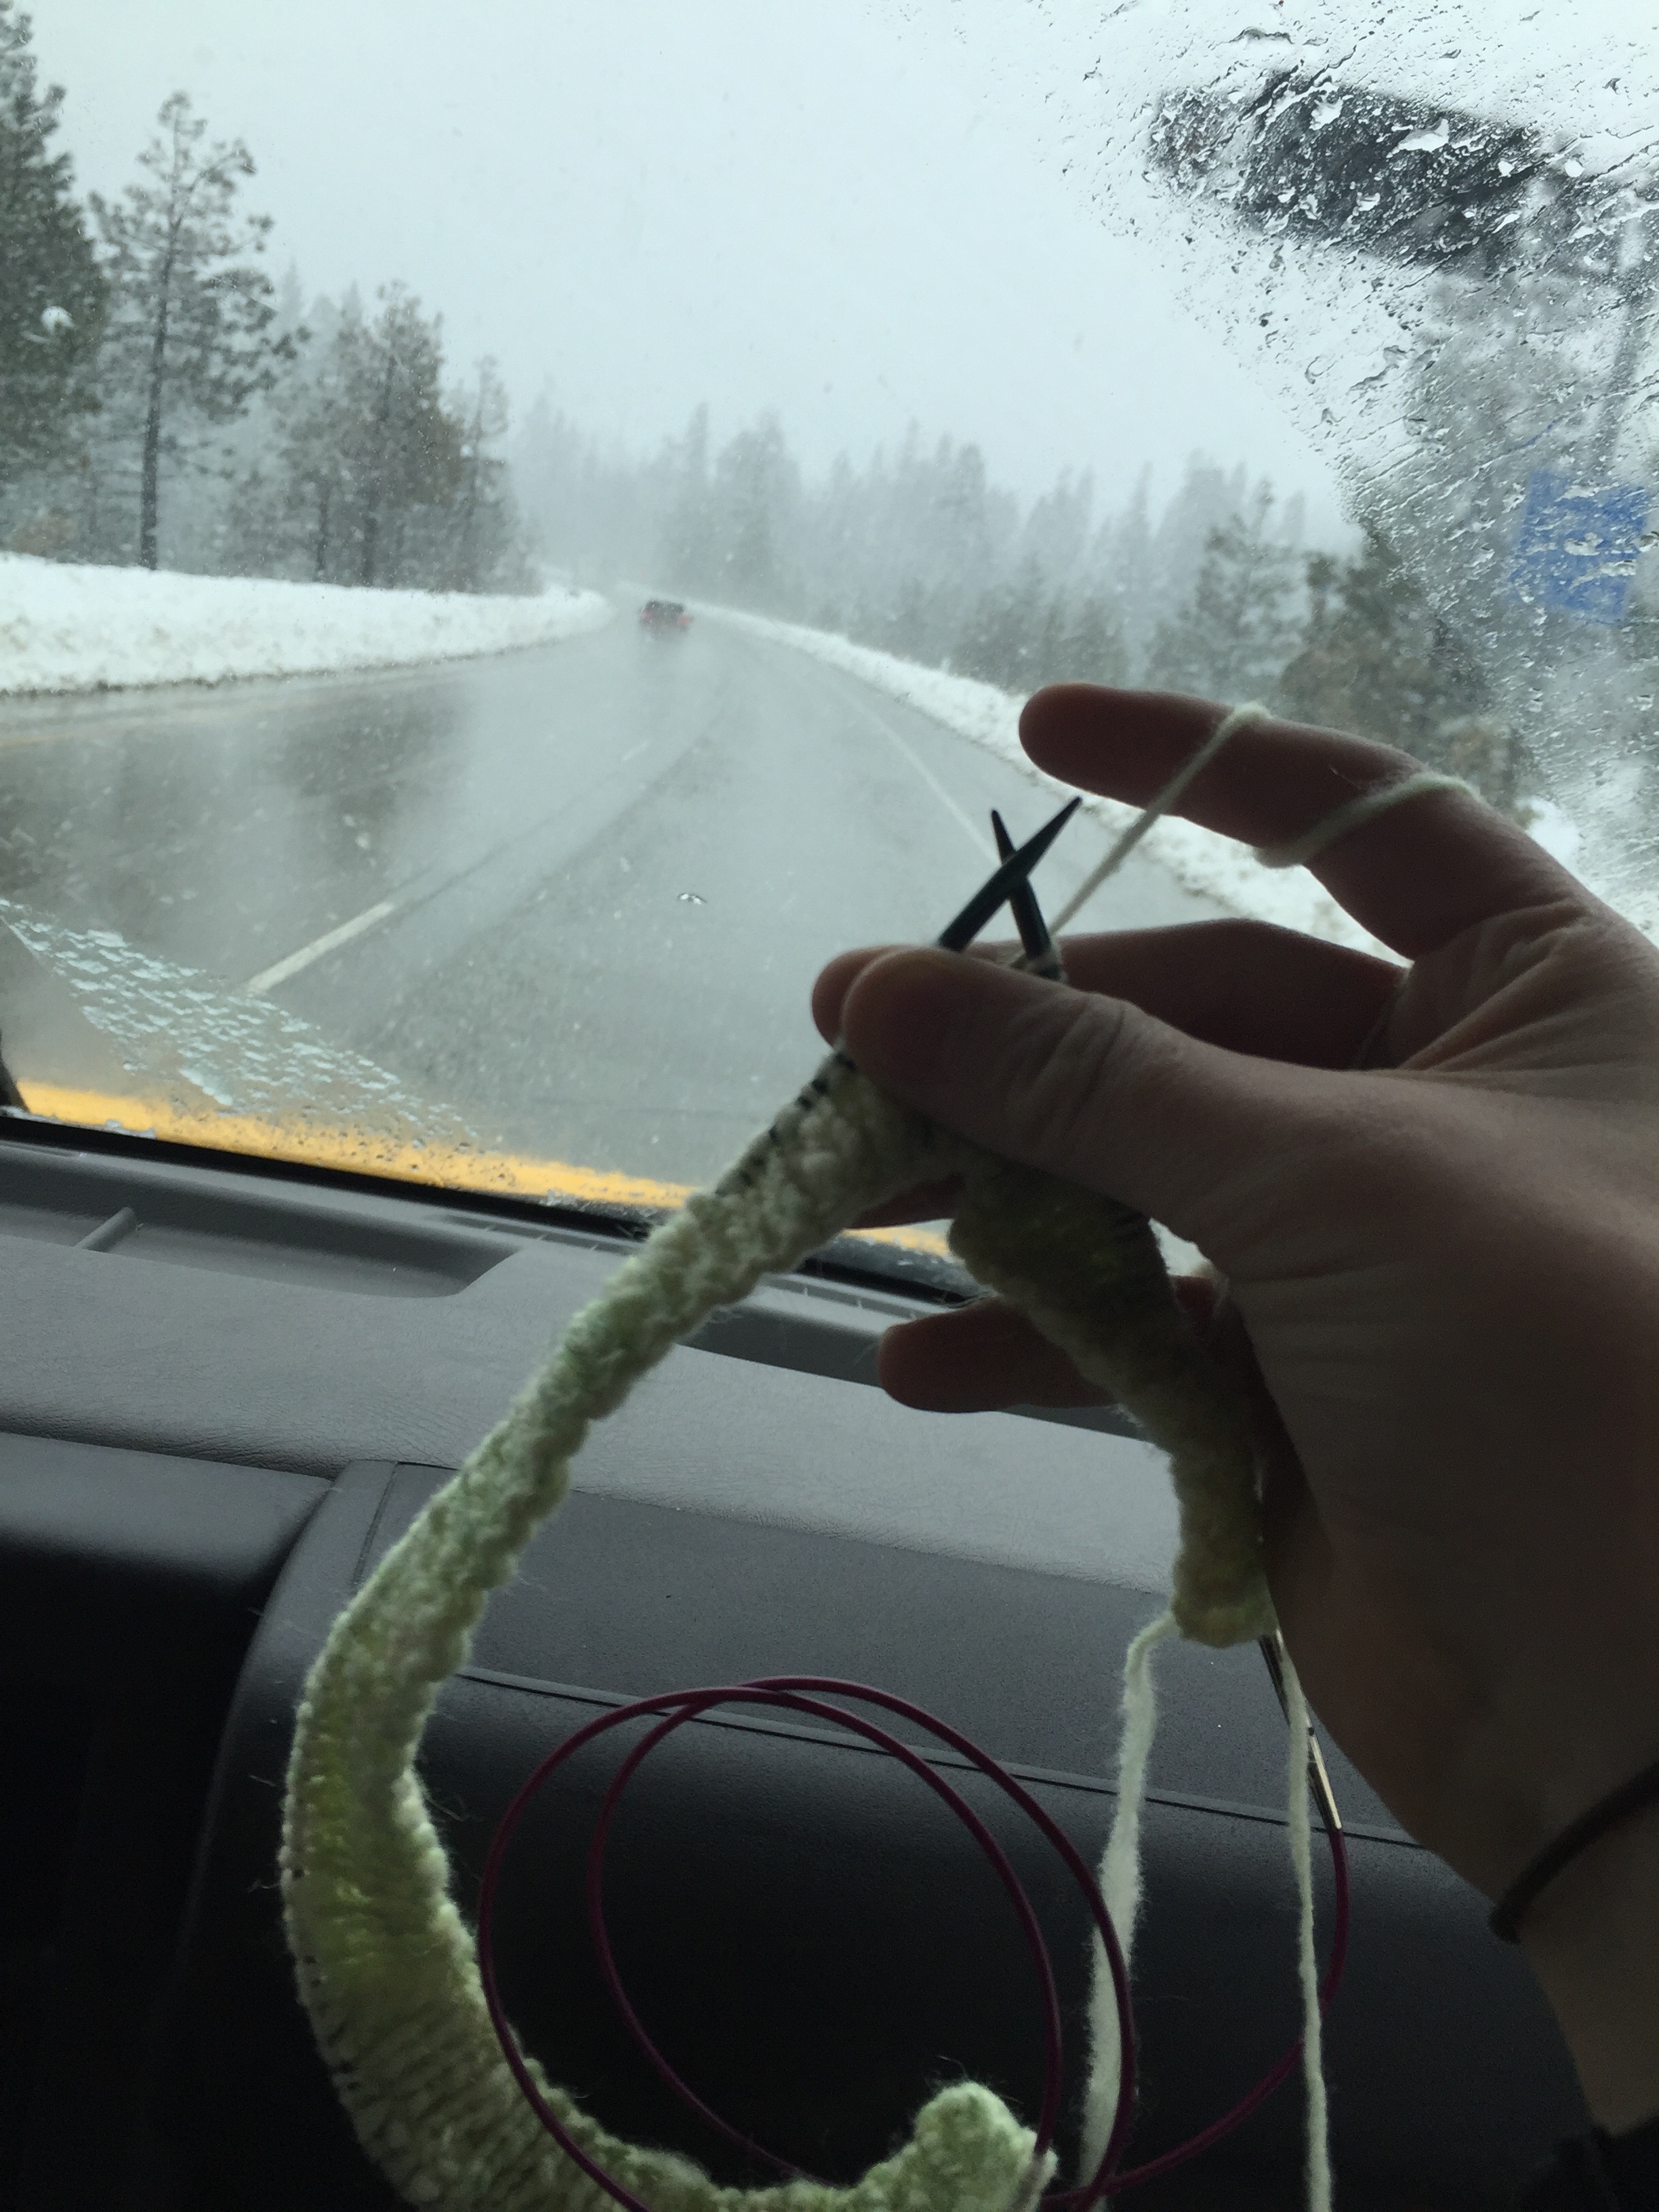
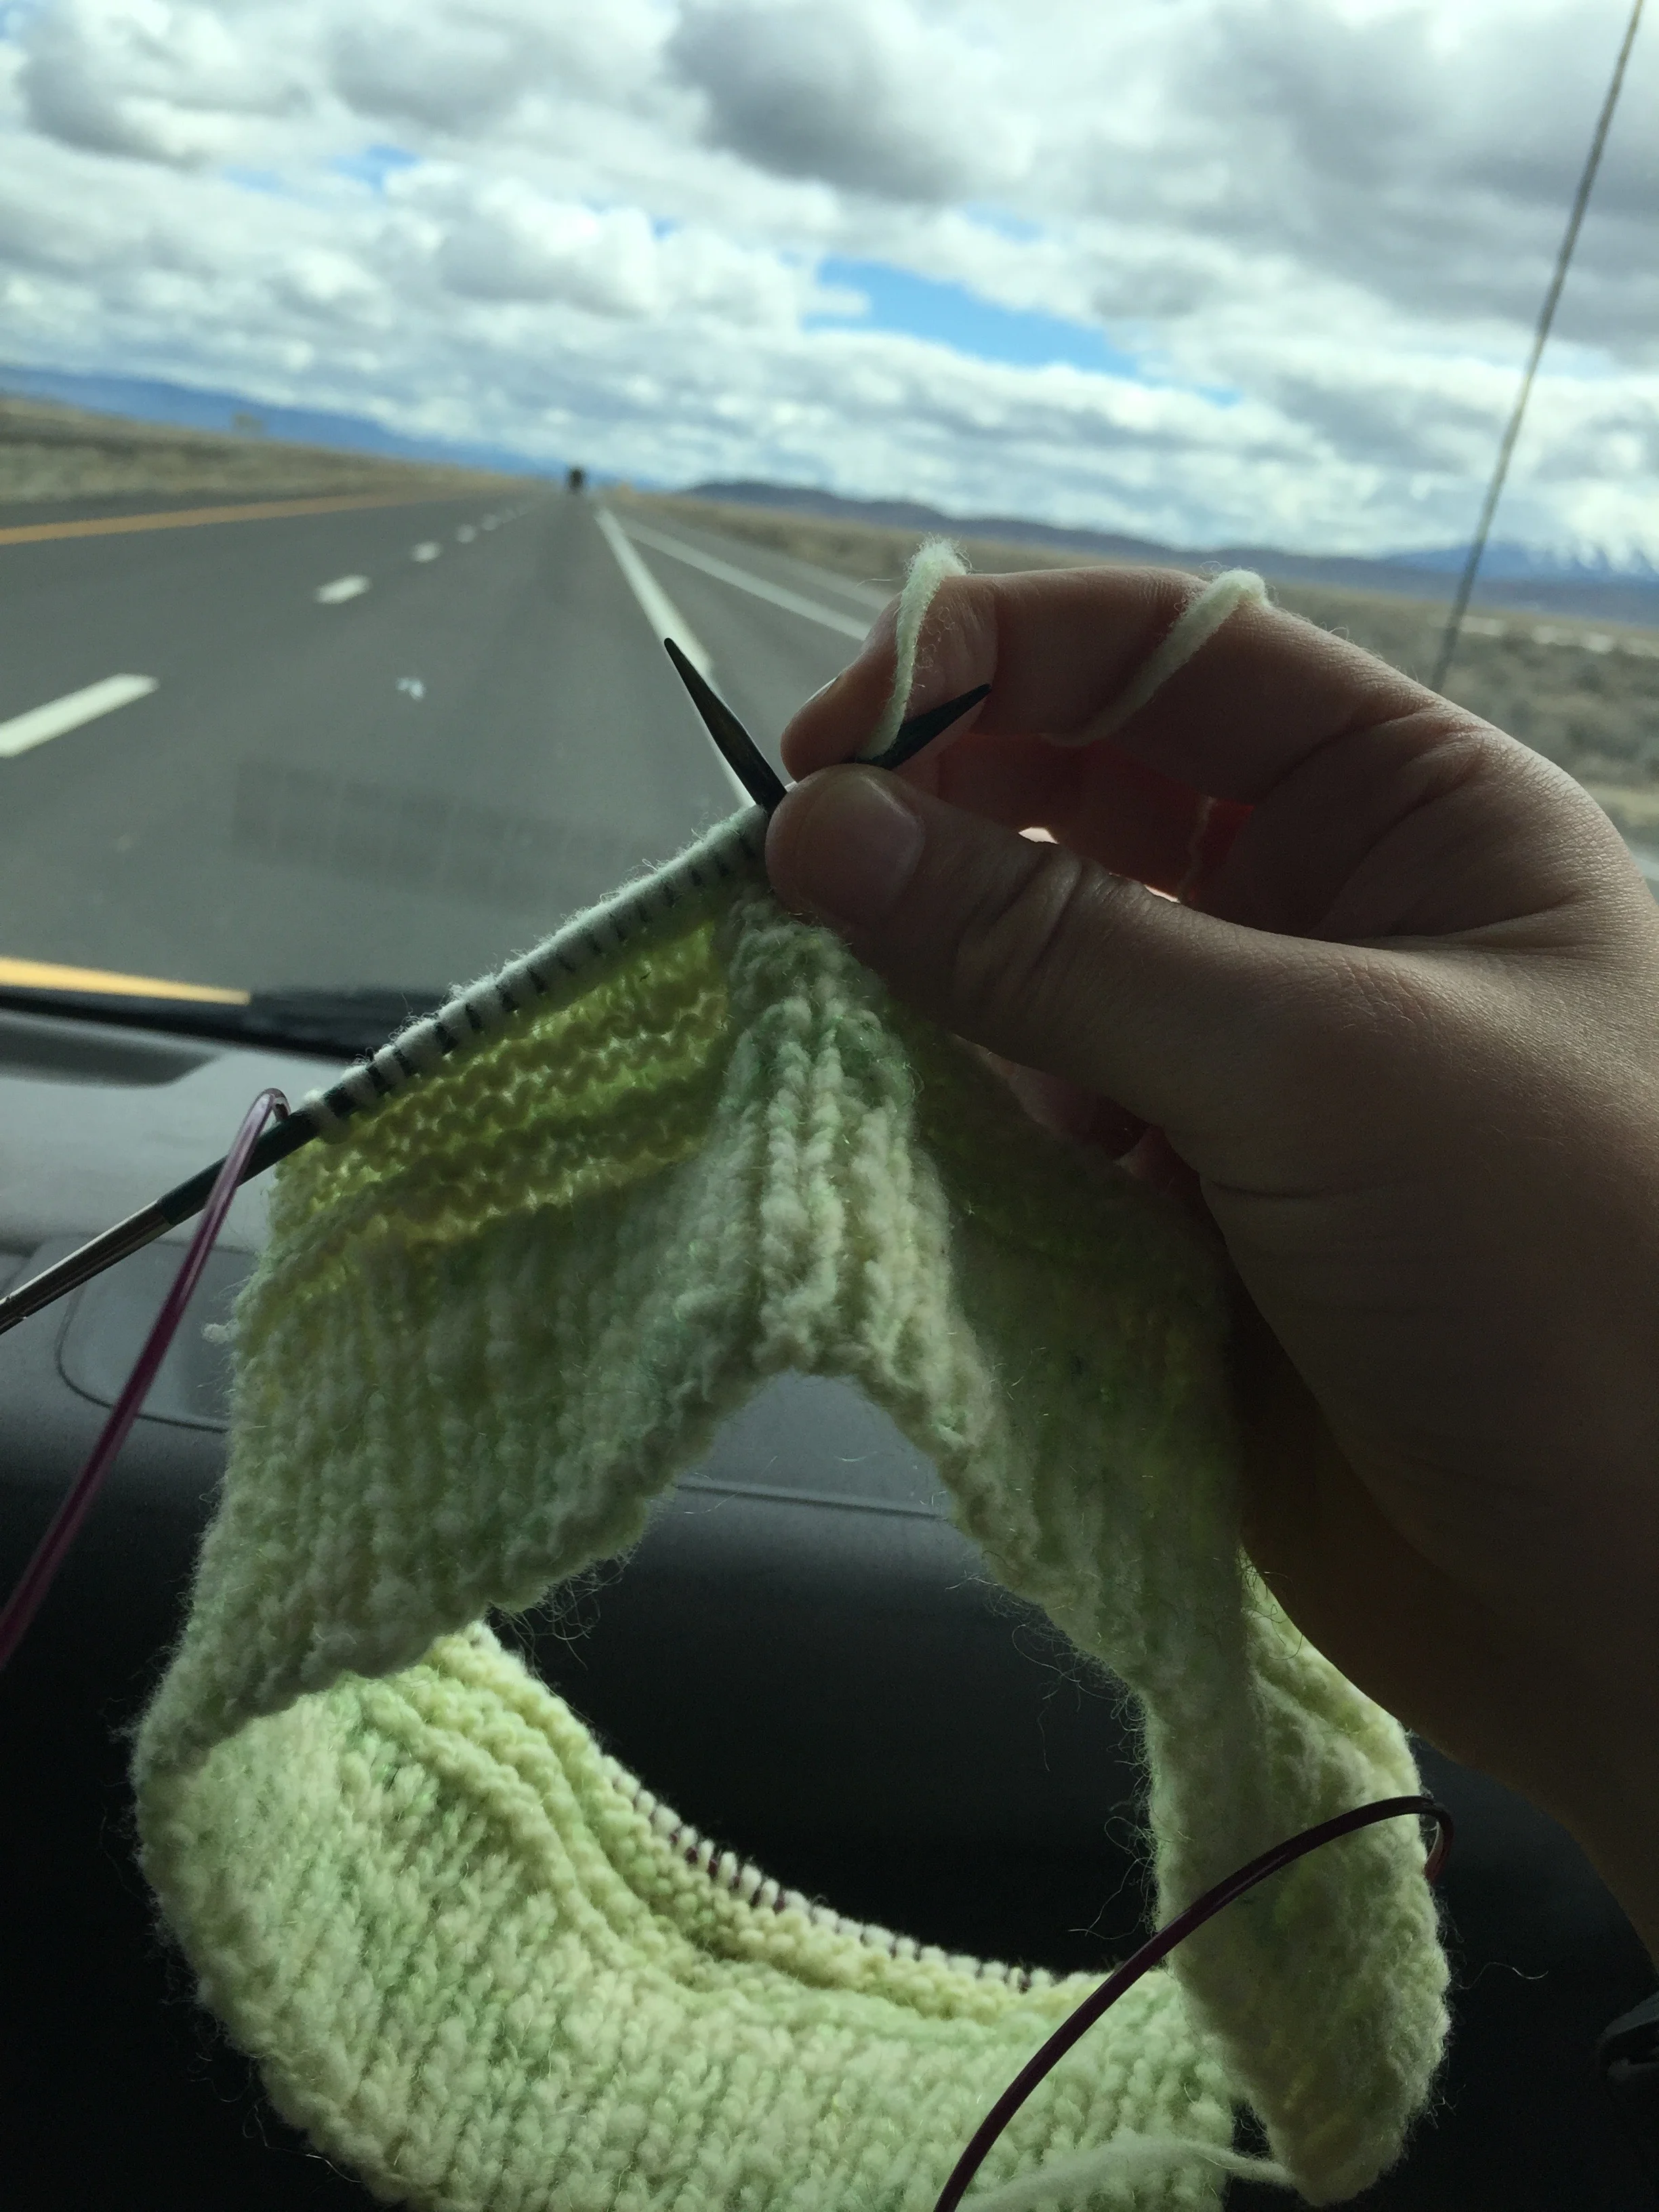
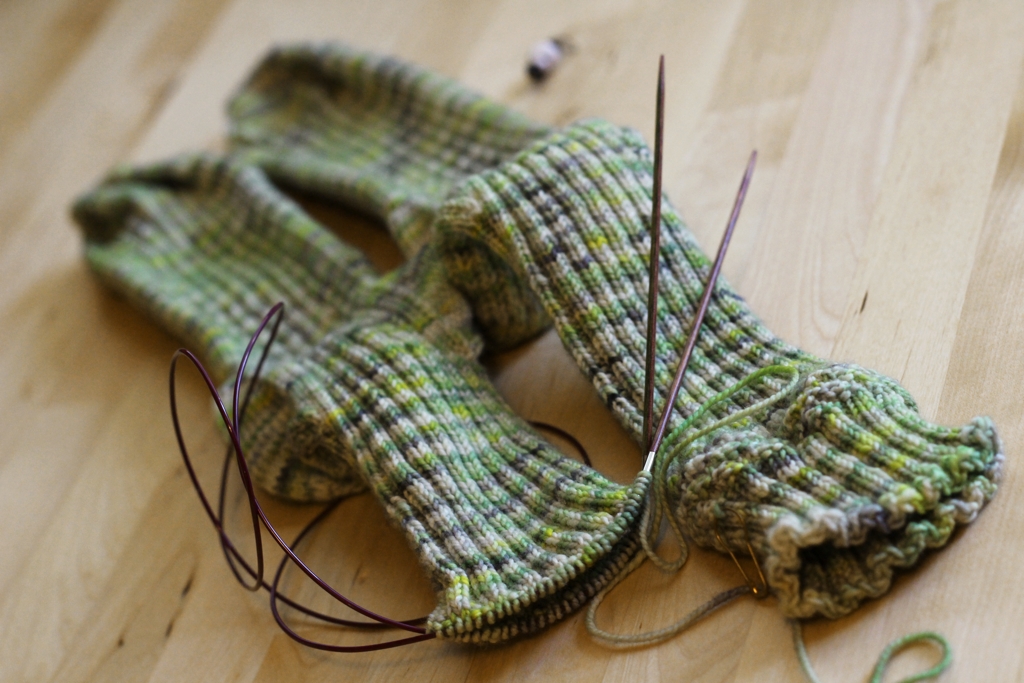
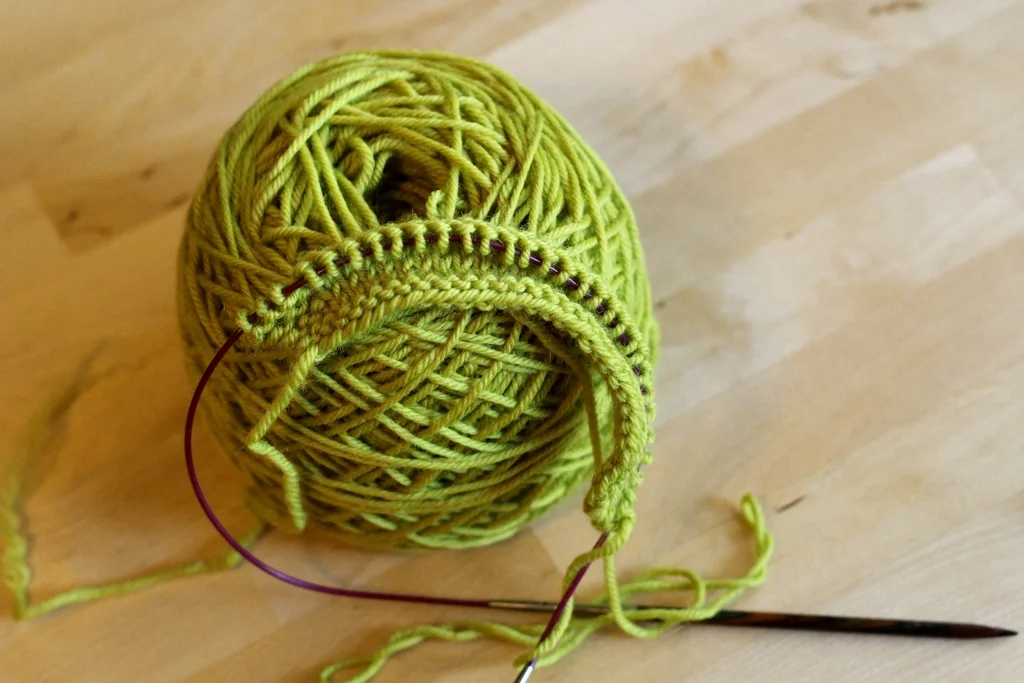
The knitting was pretty easy and the cables were fun to work once I got the pattern in my head. All the times I had to rip were my own fault for not reading ahead. I ripped because I didn’t like how I’d handled the cable pattern next to the neck decreases. I ripped again because I knit the first sleeve before knowing where I’d have to match up the cable patterns and said sleeve turned out way too long. I ripped a third and forth time because I kept messing up the short row shawl collar. Tinking short rows worked in 2x2 rib is not my jam, but binge watching Haven helped get me through it. 

Adorable baby sweaters and adorable! I made the Gramps Cardigan as a gift and am absolutely thrilled with how it turned out. FO: Gramps Cardigan | withwool.com

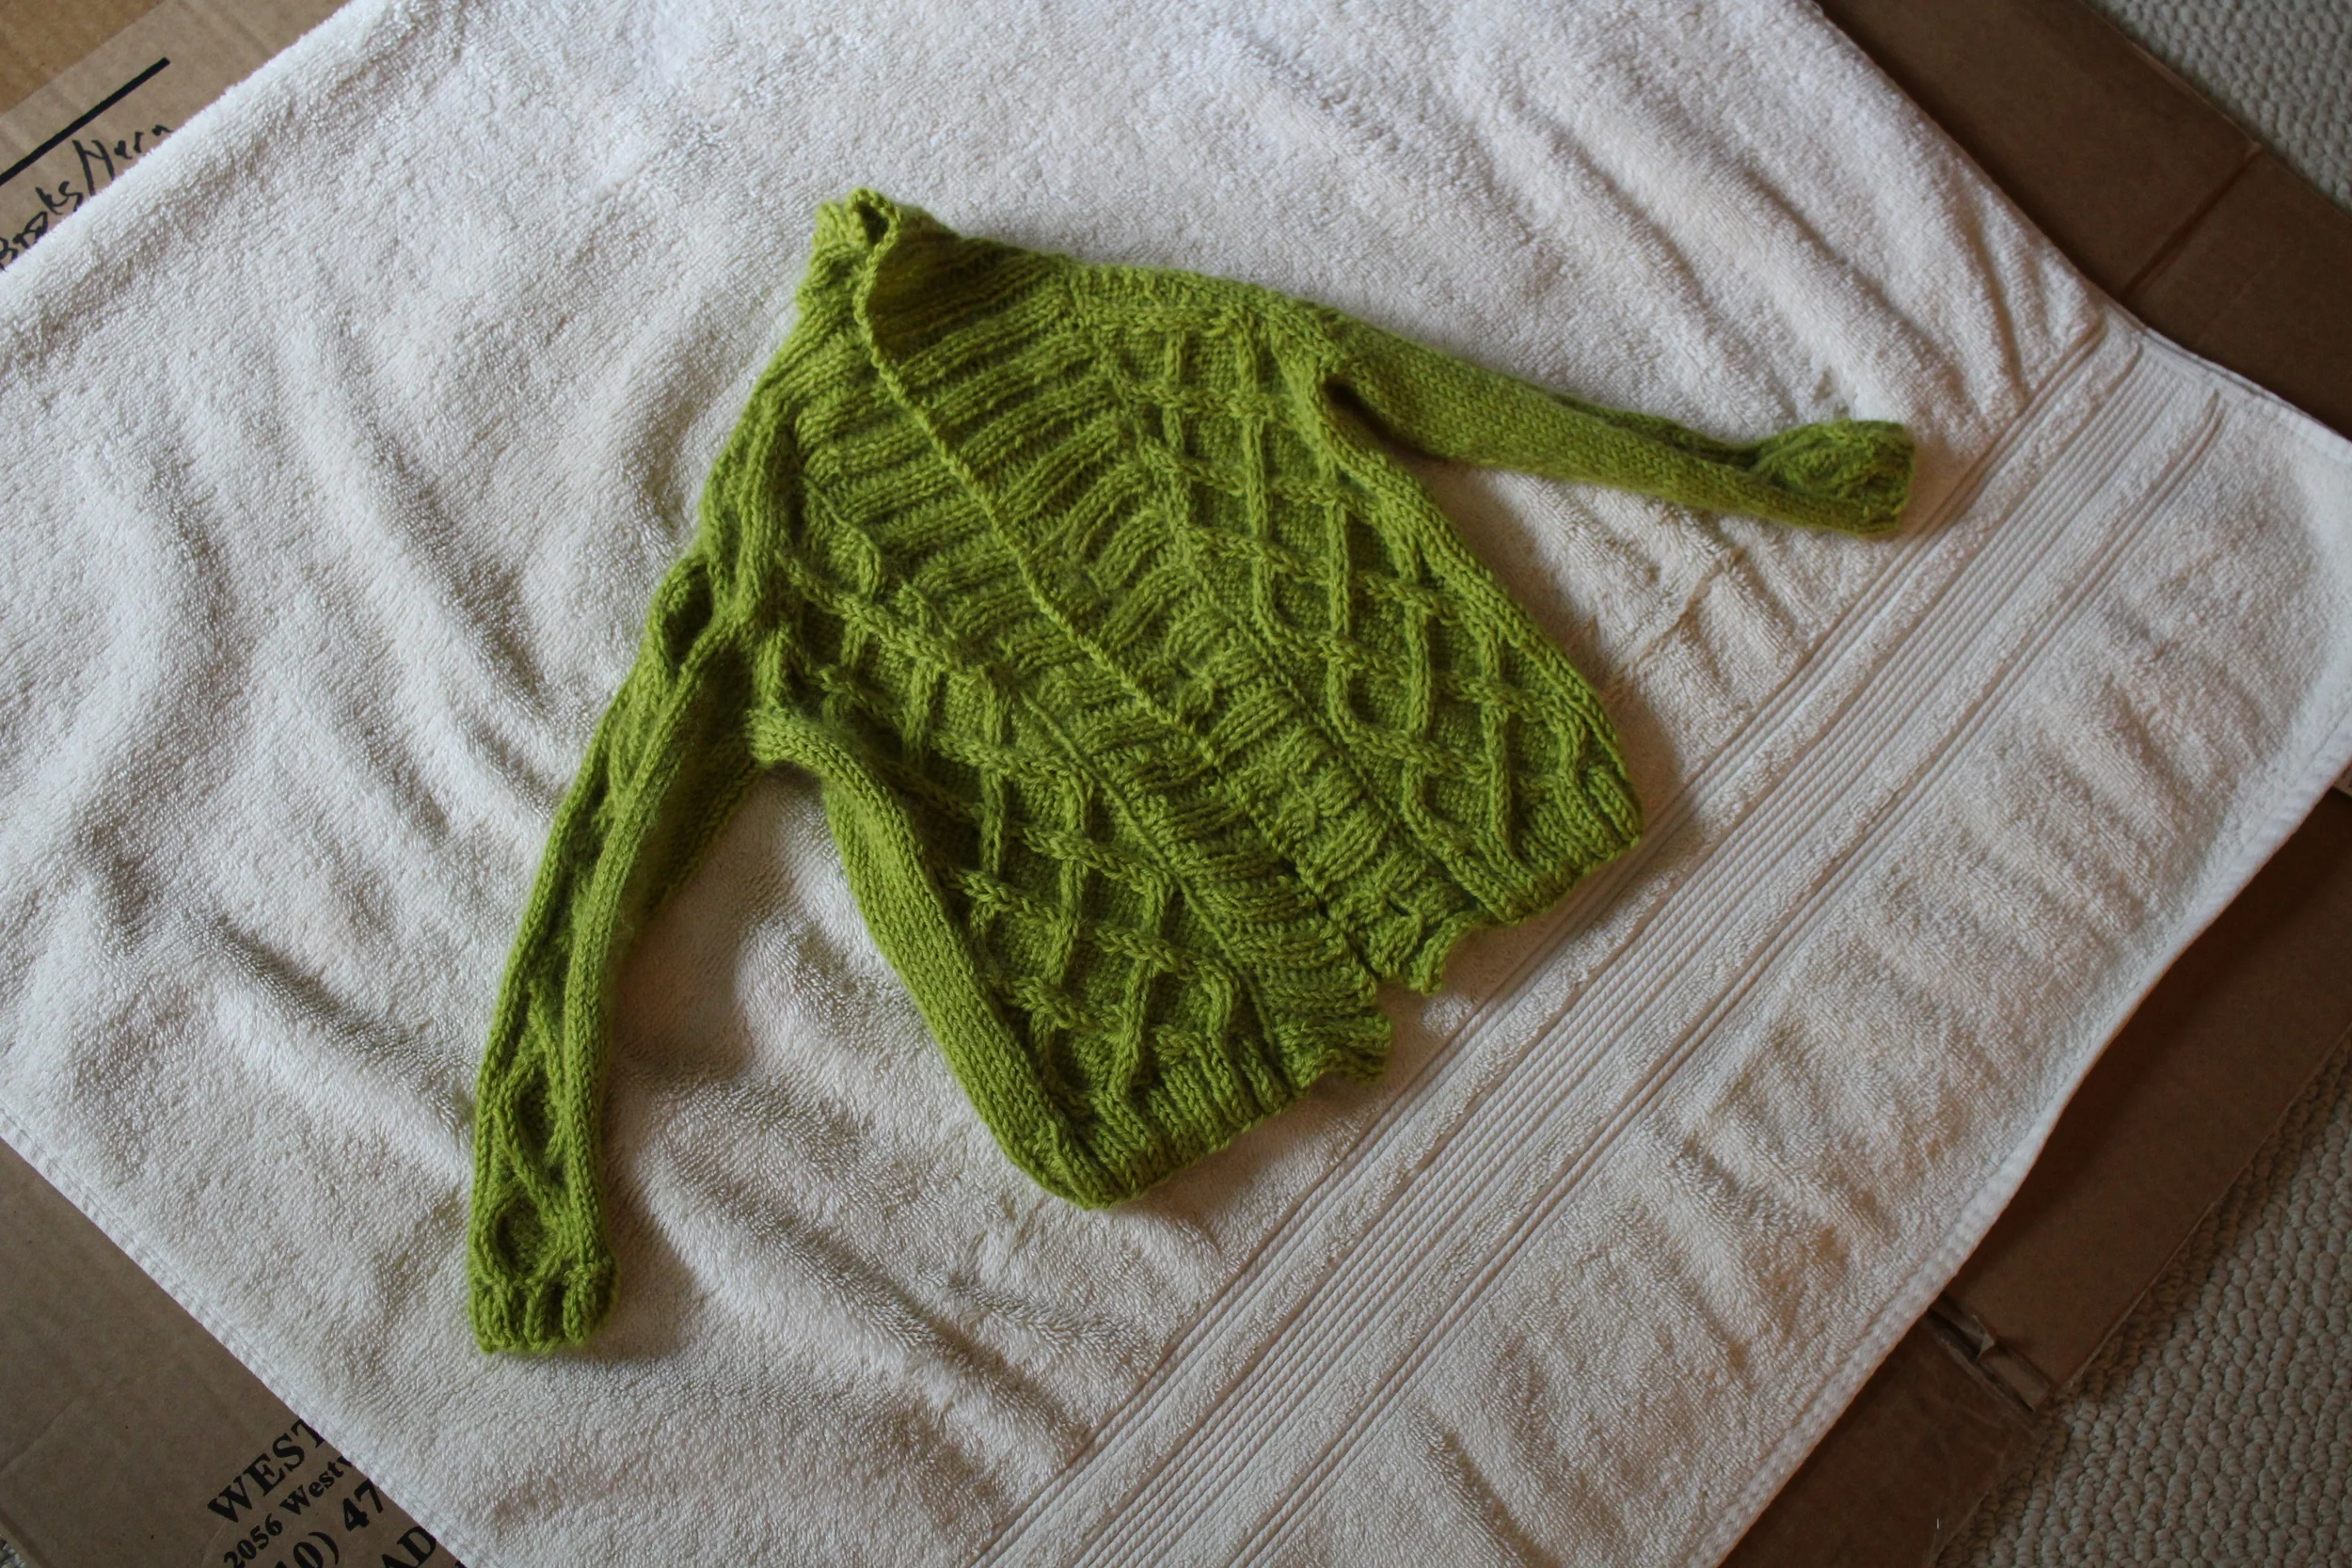
It’s been awhile since I’ve blocked a sweater and it wasn’t as complicated as this one. The cables definitely needed some tidying up and the shawl collar needed a little preening too. It got a good bath with a capful of Eucalan before I squeezed all the water out that I could. I was holding my breath when I unrolled it and did my initial measurements so I could block it to size. It hadn’t grown, or shrunk, and the sleeves hadn’t added any extra inches. Whew. I used my blocking wires and this tutorial from Tin Can Knits to get the cables looking crisp and even. The wires also added just the right amount of structure to support the shawl collar while it dried. 

Adorable baby sweaters and adorable! I made the Gramps Cardigan as a gift and am absolutely thrilled with how it turned out. FO: Gramps Cardigan | withwool.com

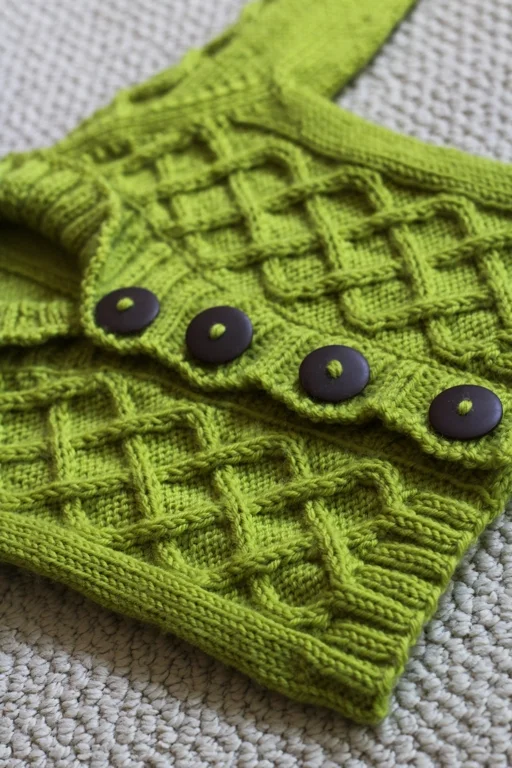
The last step was sewing on the buttons which I did after the sweater had dried. Then I just had to mail it and it got there just in time. Now, I’m not saying this sweater has baby summoning powers but I’m not going to explicitly deny it either. 

The Specs

Pattern: Gramps Cardigan by Kate Oates 

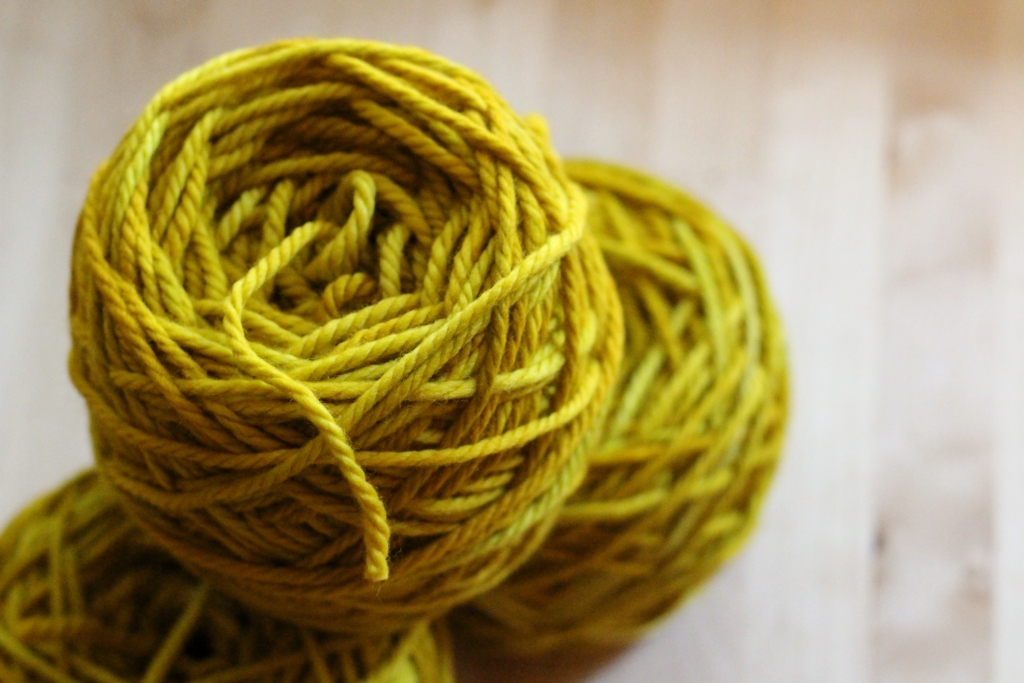
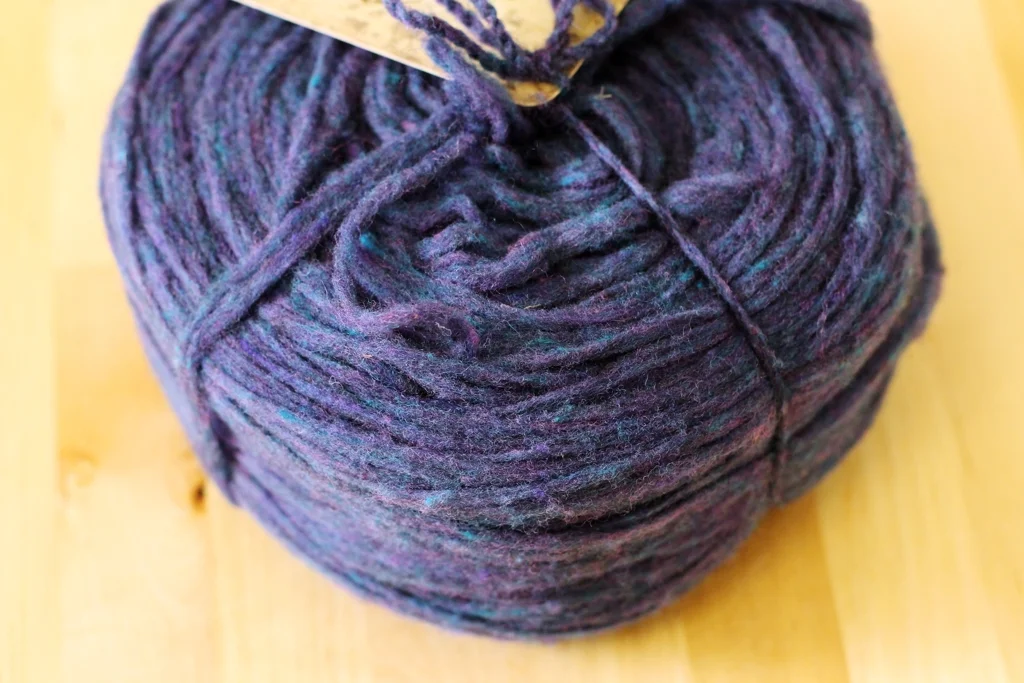
Yarn: 363 yds Cascade 220 Superwash - Citron

Needles: US 6 (4mm) Circulars

Date: April 12 - May 12, 2016

@Ravelry

FO: Colorado Socks

After months of knitting I’m so happy to have these socks on my feet instead of my needles.   FO: Colorado Socks | withwool.com

The yarn I used for these socks has taken a very long, circuitous journey. I bought it on a trip to Denver way back when in 2012 and it came back home with me to Birmingham. It hung out in my stash for years and made good friends with all my other sock yarn. I can’t remember whether it was the part of the travel-stash I hauled cross-country when I moved to LA or if I hauled it out later. Either way, it was a beautiful part of the stash. However, it wasn’t until I knew The Bearded One and I were moving to Colorado that the yarn was ready to be a pair of socks. 

After months of knitting I’m so happy to have these socks on my feet instead of my needles.   FO: Colorado Socks | withwool.com

I had this grand idea that I’d cast on, knit the pair up in a flash, and wear them the day we drove into the state. I totally could have done it too if I’d actually worked on them more than once in a blue moon. The yarn was gorgeous and the pattern simple so the socks hung out in my purse. They made pretty good waiting in line knitting and stuck in traffic knitting too. I put a few rounds on them and turned the heels while binge watching Netflix, but they were mostly purse knitting. Other yarn and patterns kept me busy at home. When we finally did drive across the Colorado state line, one sock was finished and I was lackadaisically knitting the cuff of the second. Then there was there that 2 week period where I couldn’t knit at all. Boo. 

After months of knitting I’m so happy to have these socks on my feet instead of my needles.   FO: Colorado Socks | withwool.com

When I could knit again the urge to finish all the things took over. The last few inches went fairly quickly at fiber guild meetings, in line at the DMV, and binge watching Haven. I didn’t even even in the ends before I pulled the pair on. After all the waiting, they were just as warm and cosy as I’d hoped.

I did eventually weave in the ends and wash the socks. The pair went on a set of blockers after I squished out all the water which I don’t usually do with non-patterned socks. The ribbing definitely wasn’t as giving when I put them on afterwards - expected, but surprising annoying. Turns out I really like pulling on snug socks. I’m hoping another bath will return the ribbing to a stretchier state. 

After months of knitting I’m so happy to have these socks on my feet instead of my needles.   FO: Colorado Socks | withwool.com

Even through I didn’t finish these socks in time to wear them for the move, I’m really glad they’re done. Now the grand plan is to wear them tromping around Denver.  

After months of knitting I’m so happy to have these socks on my feet instead of my needles.   FO: Colorado Socks | withwool.com

The Specs:

Pattern: My own toe-up vanilla sock with 2x2 ribbing and an alternating band on the cuff

Yarn: 364 yds Sleep Season Goods Sock Yarn - Two Sugars

Needles: 2.5 mm circulars 

Dates: December 13, 2015 - May 9, 2016

@Ravelry 

After months of knitting I’m so happy to have these socks on my feet instead of my needles.   FO: Colorado Socks | withwool.com

Review: Stranded Magazine #1: Warm Weather Issue 2016

Stranded’s first issue, Warm Weather 2016, was released in April and it’s a wonderful new knitting e-mag. Check it out!  Review: Stranded Magazine: Warm Weather 2016 | withwool.com

I first heard about Stranded Magazine back in March when I was reading Andi Satterlund’s blog Untangling Knots. I’ve enjoyed reading Untangling Knots for years and I’m always interested in knitting magazines, so I signed up for the Stranded mailing list. When the first issue was released I went through the look book. The photos were beautiful and the styling hooked me since it reminded me of my own recent cross-country trek through the Southwest desert. There was a good variety of patterns ranging from shawls to tops to mitts. A few clicks later and it was downloading.

On The Pages

Stranded opens with all the usual magazine content and then gets down to business with an interview with Cirilia Rose about designing commercial yarn. There’s a tutorial about cabling without a cable needle, an essay about the perils of packing the right knitting for trips, and a 101 about how to start English Paper Piecing. The photos for the tutorials are clear and large enough that I can zoom in to get all the un-pixelated details. There are also ads but there only 6 in the entire issue.

The bulk of the magazine is all about patterns. It is very clear, even just skimming through, that the 6 patterns are part of a collection. There is a unified color palette of warm oranges, yellows, and blues that definitely evoke a summery vibe. They’re also geared toward’s being road trip knitting. There are small and large projects, simple and complicated projects. That said, the patterns appeal to both warm and cold weather knitters. 

Stranded’s first issue, Warm Weather 2016, was released in April and it’s a wonderful new knitting e-mag. Check it out!  Review: Stranded Magazine: Warm Weather 2016 | withwool.com

The Rabbitbrush - a cropped, short-sleeved cardigan - is exactly what I picture when I hear Andi Satterlund’s name. It’s perfectly styled as an extra layer over a dress. Satturlund has one other pattern in the collection, Median, which looks plain from the front but has a lace panel running down the back. 

Stranded’s first issue, Warm Weather 2016, was released in April and it’s a wonderful new knitting e-mag. Check it out!  Review: Stranded Magazine: Warm Weather 2016 | withwool.com

The Route 99 - a turban-inspired hat that uses slipped stitches - couldn’t be from anyone except Lee Meredith. It’s a bold and graphic take on a simple technique that’s been pushed to a new level by an interesting construction. 

Stranded’s first issue, Warm Weather 2016, was released in April and it’s a wonderful new knitting e-mag. Check it out!  Review: Stranded Magazine: Warm Weather 2016 | withwool.com

I’m usually drawn to triangular and crescent-shaped shawls, but Bottle Cap by Erin Birnel has gotten my attention. The lacy stripes seem like the perfect showcase for a variegated yarn or one with a long gradient. Pit Stop, a pair of fingerless mitts also by Birnel, have grown on every time I’ve flipped through the mag. The pattern uses less than 100 yards and I can’t help but think I’d like a pair for when my hands get cold at the keyboard. Plus, I can think of a few people that would like a pair.  

Stranded’s first issue, Warm Weather 2016, was released in April and it’s a wonderful new knitting e-mag. Check it out!  Review: Stranded Magazine: Warm Weather 2016 | withwool.com

The Interchange Socks by Ariel Altaras was the first pattern to catch my eye in this issue. I am firmly in the toe-up sock knitting camp and the socks are cuff-down but the pattern seems easy enough to flip around if you’re so inclined.

Every single one of the patterns includes a clear schematic in metric and imperial as well as several “lifestyle” and close-up detail photos. It’s nice to see that all the pieces actually seem to fit the model too. There’s no weird bunching or sagging where there shouldn’t be. The patterns are written in a mix of line-by-line instructions and charts as needed. Thankfully, the more complex charts take up an entire page so they’re easy to read. If you hate working from charts, fear not, they’re all written out line-by-line too. With the exception of the mitts and shawl, all the patterns include a number of sizes. Both tops are written in 7 sizes from XS to 3X and the Route 99 hat is easily customizable for both circumference and depth. I would have liked to see a third size on the Interchange socks though. 

When you want to print the patterns and stuff them in your project bag, all the ink eating, extraneous stuff - photos, schematics, descriptions, and supplies - is kept to the first few pages so you can print just the instructions. There’s even a handy note in the table of contents so you can print what you want without scrolling through the entire magazine - that’s a small detail that I really like. 

Screen Time

So, since this is a digital magazine, how does this all look on the screen? Initially, I set it up to view as a 2-page spread on my 13” laptop and full-screened it so I could get the magazine experience. The photos were beautiful, but the text seemed small and occasionally cramped. I had to zoom in to comfortably read the articles, then zoom out to see the full-page photos which killed the typical magazine experience for me. However, reading the magazine on a tablet or phone as the 1 page spread was a much better experience. The photos were beautiful and easy to read. On a tablet, the text was much easier to read and I’m used to zooming in to read text on my phone anyway. 

Final Thoughts

There were two reasons that I bought this issue. The most obvious is that I liked the patterns and wanted to make a few of them. Good, relatable styling helped too. The second is that I wanted to support a magazine with a model that I would like to see flourish more often in the knitting industry. When you buy a copy of Stranded, you get every article, tutorial, and pattern included in it’s pages for $16. Getting 6 patterns for $16 is a pretty good deal with you do the math. What’s more, is that every designer get’s a portion of that $16 from every magazine sold in addition to their flat payment for creating the pattern. Yes, it’s a more expensive than the usual knitting magazine but both the knitters and the pattern designers win.

I’m looking forward to the second issue, Mild Weather 2016, and to see how Stranded evolves in the future. Definitely take a look whether you like to knit for warm or cold temps.


Title: Stranded Magazine: The Warm Weather Issue 2016

Released: April 2016

Schedule: Published 3 times a year

Format: Available only as a PDF download - no print option - and only through April 2017

Price: $16

Where to Buy: Directly from their website, strandedmag.com, or through Ravelry (no account required)

*All photos copyright Andi Satterlund. 

FO: Precipitous Cuffs

The kind of yarn you use matters! I used 2 different yarns to make 2 pairs of Precipitous cuffs on the same needles, and got two wildly different finished projects. - FO: Precipitous Cuffs | withwool.com

I’ve been a little lazy updating Ravelry with project details and recent stash enhancements. Part of the plan for this week is to photograph fiber and update my stash catalog. I’m bribing myself into doing the work with knitting on a fun new project which is working pretty well.  As I was scrolling through my project page, I realized that I’ve never talked about the last few things I made as gifts in 2015. That’s the problem with secret knitting - sometimes it easy to forget to talk about it after it’s been given away and the festivities are over. Fixing that right now. So, here’s the Precipitous Cuffs I knit for my Mom and a friend.  

The kind of yarn you use matters! I used 2 different yarns to make 2 pairs of Precipitous cuffs on the same needles, and got two wildly different finished projects. - FO: Precipitous Cuffs | withwool.com

I had some difficult criteria to match while picking out stuff to knit for gifts. The pattern had to be relatively quick to knit ( I was on a holiday gift knitting deadline); use yarn I already had; and be small enough to pack in a suitcase for the flight to visit my folks. Plus, the recipients had to like it too. Enter Precipitous by Hunter Hammersen. I had a dark charcoal yarn which would be perfect. Partway through this first pair, I realized my Mom would like a pair too. While these weren’t the hardest things to knit from almost black yarn, I was glad to make the second pair in golden yellow. They were both pretty quick to knit too even with all the twisted stitches.

The kind of yarn you use matters! I used 2 different yarns to make 2 pairs of Precipitous cuffs on the same needles, and got two wildly different finished projects. - FO: Precipitous Cuffs | withwool.com
My thanks to @HunterHammersen for sharing this blocking trick. Instead of graph paper, I made a template to get the 5 points evenly spaced and sized. - FO: Precipitous Cuffs | withwool.com

After I’d bound off, I knew blocking was a necessity. There was no way the points would be distinct or that the twisted stitches would pop otherwise. Plus it would help even out the stitches on the increase rows and ribbing. I wasn’t sure how I was going to block these until I saw this neat trick using bottles and graph paper on Violently Domestic. Finding the bottles was the easy part. The hard part printing the 5 pointed star template so I could block both mitts of a pair to the same size and angles. Thankfully, the ink didn’t bleed onto the yarn during the whole process. 

The kind of yarn you use matters! I used 2 different yarns to make 2 pairs of Precipitous cuffs on the same needles, and got two wildly different finished projects. - FO: Precipitous Cuffs | withwool.com

It is so easy to see the difference yarn choice can make on a project after both pairs were dry. The gold pair is made from Knit Picks Gloss, a merino/silk blend, and the charcoal pair is made form Knitted Wit Gumballs Fingering which is 100% merino. I knit both pairs on the same needles and, aside from a few extra rows on the cuffs of the gold pair, the two pairs are the same. Row gauge and stitch gauge are definitely different. The gold cuffs have a lot more drape because of both the looser gauge and blend of fibers. The charcoal pair has body and memory because they were made from a firmly spun wool yarn at a tighter gauge. When I took the pair off the blocking rig it held it’s shape, and I didn’t knit bullet-proof fabric.

The kind of yarn you use matters! I used 2 different yarns to make 2 pairs of Precipitous cuffs on the same needles, and got two wildly different finished projects. - FO: Precipitous Cuffs | withwool.com

Of course I had to try them to make sure they would fit. They both passed with flying colors, and now I’m tempted to make myself a pair. Not sure if I want drapey cuffs or a no nonsense kind of pair. Either way, the pattern doesn’t use much yardage and I’ve got plenty of sock yarn leftovers. Just need to pick out the right needle size and get to knitting. 

The Specs

Pattern: Precipitous by Hunter Hammersen 

Yarn: Knit Picks Gloss - Honey and Knitted Wit Gumballs Fingering - Carbon

Needles: 2.75 mm and 3.25 mm circulars

Dates: November 15 - December 3, 2015

@Ravelry 

Yarn Storage - Boxes To The Rescue

Cardboard boxes to the rescue! I don’t have shelves yet, but these boxes will do the job until in the meantime. Yarn Storage - Boxes To The Rescue | withwool.com

Know what I had stacks of after I unpacked from moving? Boxes. Know what I had none of after unpacking? Shelves. 

I was so happy to get my yarn, spinning fiber, and tools unpacked that I was completely fine dumping it all out on the floor. The giant piles of yarn and fiber, pretty as they were, got old fast. What’s the point of unpacking if you still have to rummage around for 5 minutes to find something? So everything went back into the boxes with one big change.

I taped up the bottoms, pushed the top flaps in, and stacked the boxes along the wall. The boxes aren’t pretty - and are far from Pinterest perfect - but they’re functional which is what matters. There’s a spot for fiber and handspun. There’s room for notions, and yarn, and WIPs. There’s room for the bigger stuff like my Sidekick and yarn swift too. I even have a dedicated shelf for knitting and spinning books above the stack. I can see everything and get to everything. After years of having to having to put stuff wherever I could find the space, it’s amazing to have it all in one spot. I’ll get some real shelves eventually, but these boxes work perfectly for now. 

FO: Fructose Hat

Fructose is the first hat I’ve knit from handspun and it won’t be the last. #handspunchallenge FO: Fructose Hat | withwool.com

Don’t let the green leaves in the background trick you. I finished knitting and blocking this hat just in time to wear it for the weekend’s snow. 

When I moved to Los Angeles, I only brought one hat knitted hat with me, the Slouchy Babe. That was fine for awhile because it never got cold enough to wear it. Then I moved to San Francisco, the land of fog and rain, and actually needed a hat. Slouchy did it’s job admirably, but I got bored of only wearing one hat. But not bored enough to actually cast on for another hat until I moved again. Road trip knitting is a definite necessity after all. Alex Tinsley’s Fructose had been near the top of the queue for awhile and I already had the yarn picked out, a sparkly handspun single. I cast on the week before the cross-country drive and stashed it in my purse for the trip. 

Fructose is the first hat I’ve knit from handspun and it won’t be the last. #handspunchallenge FO: Fructose Hat | withwool.com

Fructose turned out to be the perfect project. It was simple enough to let me knit while checking out the scenery and easy to come back to after navigating or putting it down for the night. I knit while we drove across stormy Donner Pass. I knit round after round across deserts, salt flats, plains, and mountains.  Sometimes I took it out just put in my lap and stare out the window. I put a few more rounds on it after The Bearded One and I were unpacked. Then I couldn’t knit for 2 frustrating weeks which is why it took a month for me to finish. The hat’s worth the wait though. It’s warm, cosy, and cute too. 

Fructose is the first hat I’ve knit from handspun and it won’t be the last. #handspunchallenge FO: Fructose Hat | withwool.com

I spun the yarn, a blend of Columbia and green Firestar, during the 2015 Tour de Fleece. I only had 2 oz of fiber so I decided to keep it as a single. It’s definitely not my most consistent handspun but the thick and thin created great texture within the ribbing. Going to file that trick away for the next time I knit with wild or wild-ish handspun. I haven’t given up on the #handspunchallenge and this hat is only making me want to knit with more of stashed beauties.

When I cast on I was a little worried that the sparkle from the Firestar would be overwhelming. It’s not though. The Firestar adds mottled color and only up close does the glint of the fiber come into play. Glad I didn’t shy away from it and skip the sparkle. 

Fructose is the first hat I’ve knit from handspun and it won’t be the last. #handspunchallenge FO: Fructose Hat | withwool.com

Pattern: Fructose by Alex Tinsley

Yarn: 138 yds of sport weight handspun

Needles: US 6 (4 mm) circulars

Dates: March 5 - April 8, 2016

@Ravelry

Knit All The Things!

There was a terrible, no good, absolutely rotten time when I could not knit or spin because of stitches and doctor’s orders. Thankfully that time is now over! To make up the two weeks when all I do was longingly pet yarn and plan what to do with it, I’ve been finishing and casting on for all the things.

I’m celebrating being able to knit again by finishing lingering WIP’s and casting on for a bunch of new projects.  Knit All The Things | withwool.com

My almost finished Fructose Hat was the first thing I picked up after my stitches came out. I was working my way through the crown decreases when I had to put it down. Knowing that I was so close to a finished hat that I could’ve been wearing was incredibly annoying. All that was standing between me and a finished hat was a few rows of decreases. It was so tempting to finish the hat during my knitting hiatus - doctor’s orders be damned - but I didn’t. Thought about it though. 

Anyway, the hat and I went out to lunch Friday. I was 4 rows away from cutting the yarn and pulling it through the last stitches when my food arrived. Hunger and tasty Indian food won out so the hat had to wait until I got back home. Worth it. I still need to wash and block the hat but at least the knitting is done. 

I’m celebrating being able to knit again by finishing lingering WIP’s and casting on for a bunch of new projects.  Knit All The Things | withwool.com

With the hat off the needles, I pulled out a cone of cotton and cast on for the Garterlac Dishcloth that I’m modifying to make a kitchen towel. I’ve knit this pattern before and it does great things to variegated yarn. The last cloths were a gift and it’s past time to make some for my own kitchen. 

This is only the second or third time that I’ve knit entrelac and it’s still addicting to make square after square. I don’t even mind picking up stitches to do it. Shocking, I know. Plus, each square has been pretty good bribery. Whenever I cross something of my to-do list, I get to knit a square. Makes for slower knitting, but a completed list at the end of the day.  

This time around I cast on using the increasing base triangle method which starts with just one stitch. It’s not any easier than casting on all the stitches for the bottom edge in one go, but it is a lot more flexible. 

I’m celebrating being able to knit again by finishing lingering WIP’s and casting on for a bunch of new projects.  Knit All The Things | withwool.com

These socks have been hanging out in my purse for way too long. They’re still purse knitting for the time being because there’s still a few inches to put on the second cuff. If I can put in a few rows between garterlac squares, this pair should be on my feet soon enough. 

I’m celebrating being able to knit again by finishing lingering WIP’s and casting on for a bunch of new projects.  Knit All The Things | withwool.com

And the most recent cast on. I’m swatching for a secret project so this is all I can show you for a bit. I can say that it involves some fun cables.

I’m celebrating being able to knit again by finishing lingering WIP’s and casting on for a bunch of new projects.  Knit All The Things | withwool.com

I might be going overboard with the knitting to make up for the two week hiatus, but I regret nothing. I had a winding party Monday night and wound these three skeins of Malabrigo Chunky in Frank Ochre. The plan for them is to knit the Vertigo Cowl; I feel in love with the shop sample years ago but didn’t get the yarn until last week. Once I finish that green swatch, casting on for Vertigo will be my reward. Sounds like good bribery to swatch right?

Interweave Yarn Fest 2016

I had an great time at Interweave Yarn Fest 2016 and my stash is pretty happy too. :) - Interweave Yarn Fest | withwool.com

Normally I hear about an interesting yarn/spinning convention/festival, find out it’s a day’s drive away, decide NOPE, and do my best to forget about it. Not this time. I’ve been looking forward to The Interweave Yarn Fest since I realized I’d be able to go without needing to spend a day in the car or book a hotel room. Unfortunately I wasn’t able to take any classes this year - and a few of them were really tempting - but that didn’t stop me from doing a little stash enhancement. 

I walked into the marketplace with a vague plan. I was looking for yarn and buttons for 2 projects and new types of fiber to spin. There was no shortage of yarn or fiber, but after doing my first walk around it was all fiber that really caught my eye. Then I got caught up in a whirlwind of yarn fumes until I escaped out the front door. I stuck to my shopping list, but looking at all of my fiber purchases now, I’ve realized that I bought something that satisfies every reason why I love to spin. 

I had an great time at Interweave Yarn Fest 2016 and my stash is pretty happy too. :) - Interweave Yarn Fest | withwool.com

I love trying my hand at spinning new fibers. I’ve spun lots of wool but only a few ounces each of cashmere and alpaca. So, one of my goals for this year is to expand my fiber repertoire, and now I’ve built the stash to do it. I’ve got yak/silk, llama/silk, and merino/silk. Apparently, I really wanted to spin silk this year and didn’t know it until now. The blue roving is 100% mohair. I even splurged on an ounce of ultra soft paco-vicuna. Looks like I’ve got a pretty full year ahead of me.

I had an great time at Interweave Yarn Fest 2016 and my stash is pretty happy too. :) - Interweave Yarn Fest | withwool.com

I love spinning color. I was walking by the 100th Sheep booth when I spotted this amazing blue and rust colored roving. There was no way those colors weren’t coming home with me. The 6oz of blended roving looked amazing spun up and I couldn’t resist it either. Note: The ball of roving is a big as my head.

I had an great time at Interweave Yarn Fest 2016 and my stash is pretty happy too. :) - Interweave Yarn Fest | withwool.com

I love learning new yarn constructions and new techniques. The handy Fiber Preparedness Kit packed full of punis, dyed locks, and roving seemed like a good way to branch out from my usual 2-ply. As for the firestar, there’s a drum carder coming my way and I want to make some sparkly batts. 

The market was also full of handspun and handspun-looking yarns. Inspiration and motivation was everywhere you looked. There was handspun with beads and coils. There was handspun that showcased color. There were absolutely gorgeous crepe constructed yarns that I want need to learn to spin. 

I had an great time at Interweave Yarn Fest 2016 and my stash is pretty happy too. :) - Interweave Yarn Fest | withwool.com

I love fun spinning and batts are fun spinning. This absolutely giant 8 oz batt (Ysolda’s Mousie for scale) fit the bill perfectly. I can’t wait to start tearing into that thing. 

I had an great time at Interweave Yarn Fest 2016 and my stash is pretty happy too. :) - Interweave Yarn Fest | withwool.com

I only bought 3 skeins of yarn and none of them were for projects on my list. One of them was a secret gift and the other two, well, I’m a sucker for beautiful grey -  Stone Walk by Western Sky Knits - and a good gradient - white to purple by OgleDesign. Enough said. 

Now that the yarn fumes have faded, I’m happy I went. I came home with yarn, fiber, ideas, a ton of inspiration, and even a pair of earrings. Looking forward to going back to Yarn Fest next year. Until then I’m going to keep an eye for other fiber events to go too. What are your favorite festivals?

My Favorite Chain-Plying Trick

Mugs, cups, and cardboard tubes make it so easy to take a break when you’re in the middle of chain-plying handspun. | My Favorite Chain-Plying Trick - withwool.com

I love chain-plied yarn. I love how plump it is compared to 2-ply yarn. I love how it keeps the clear distinct color of the single and fiber. I love how I can take one single from one bobbin and ply it into something that looks like it came off of three. 

What I don’t love is stopping in the middle of chain-plying, and not because it breaks the rhythm. If you’ve never chain-plied yarn before, the process is a lot like making a crochet chain. Make a big loop from a single piece of yarn, use your fingers to pull another loop through the first, then add twist. Repeat until every single yard is plied. Making a new loop and pulling it though the old one allows you to work with 3 strands at a time instead of 1. The result is a plump, cushy yarn. Nifty, right?

The problem comes when you need to take a break and let go of the open loop. All the twist comes along and closes the loop which needs to be open so you can pull another loop through and keep plying. I always hated untangling that twisted mess, so I waited to chain-ply until I had long stretches of uninterrupted time. Sometimes the single had to sit on the bobbin for awhile until that Netflix marathon came along. Thankfully, I figured out a way around that on my last chain-ply project.

I couldn’t fit all 4 oz of fiber on one regular bobbin and had to finish drafting the single on a second. There was no way I could hold the loop open, get up, reach over to the lazy kate, find the end of the single on the next bobbin, sit back down, and join the two ends together. I don’t have enough hands for that. I needed something to hold the loop open for me and my favorite cup came to the rescue.

Mugs, cups, and cardboard tubes make it so easy to take a break when you’re in the middle of chain-plying handspun. | My Favorite Chain-Plying Trick - withwool.com

I slipped the loop over the bottom of the cup and put it on the table. Voila! The working loop stayed open and the next loop in the chain hung out of the way. Plus, that next loop could still be adjusted for length. Wish I thought of this earlier. Now I can ply for smaller chunks of time, take more breaks, and give my arms a rest.

If you’re getting to up to grab something to drink or calling it a night, a toilet paper tube or any lightweight tube works just as well. I’m keeping a cardboard tube in my spinning kit from now on for this exact purpose.

Happy spinning!

Mugs, cups, and cardboard tubes make it so easy to take a break when you’re in the middle of chain-plying handspun. | My Favorite Chain-Plying Trick - withwool.com

Spinning Noro Rainbow Roll Part 2

The Noro Rainbow Roll is spun, chain-plied, and finished! It became a beautiful handspun yarn, but what's my final verdict? | Spinning Noro Rainbow Roll Part 2

This is part 3 in a series reviewing Noro Rainbow Roll and Imperial Yarns Bulky 2-Strand Pencil Roving. Here’s Part 1 and Part 2

The Noro Rainbow Roll is spun, chain-plied, and finished! It became a beautiful handspun yarn, but what's my final verdict? | Spinning Noro Rainbow Roll Part 2

When last we left our intrepid handspun, it was still on the bobbin and plotting it’s escape… I’m pretty sure the grand plan was to look really pretty so that I’d have to skein it up. Well, it worked because I couldn’t resist anymore. I used a swift to wind the skein and popped it off to get a better look at the yarn. The neps and clumps of wool, which has been the determining factor for how the yarn was spun , were still visible but didn’t stick out like a sore thumb. In fact, the neps along with some uneven tension they created during plying gave the handspun a bit of rustic charm. The chain-plied single was both distinct and rather plump. Plus, It didn’t look all that different from a yarn drafted with a more conventional method.

The Noro Rainbow Roll is spun, chain-plied, and finished! It became a beautiful handspun yarn, but what's my final verdict? | Spinning Noro Rainbow Roll Part 2

I quickly measured the wraps per inch, and dunked it into a cool bath with Eucalan for about 20 minutes. The water had a slight blue tinge, but the yarn didn’t leave any dye on the white towel I used to squish out extra water. Then I snapped the yarn across my arms a few times to even out the twist. Those steps are all part of my usual yarn finishing routine. On a lark, I decided to also give the yarn a few good thwacks against the shower wall with the thought that it would make the neps less visible. Then I hung the yarn to dry overnight. 

The Noro Rainbow Roll is spun, chain-plied, and finished! It became a beautiful handspun yarn, but what's my final verdict? | Spinning Noro Rainbow Roll Part 2

There’s a reason I only sometimes “thwack” handspun, and this yarn is a perfect example why. Thwacking definitely made the neps less visible but it also changed the yarn’s surface. The distinct “plies” relaxed which means that a lot of the finer details were lost. The bloom also gave the yarn a bit of a halo - great for hiding neps but at the cost of making the yarn a little prickly. I’m not particularly sensitive to prickle, so I could still wear this yarn next my neck, but it wouldn’t be my first choice for a cowl. The yarn, and the roving it used to be, was definitely softer before it got a good thwacking. If you like the character neps can add to a yarn, just snap the yarn to even out the twist and hang it up to dry. 

There was one other change to the yarn after finishing, wraps per inch. Before getting a bath, the WPI averaged 7-8 which put into into the aran-bulky range. After washing, the yarn was definitely a bulky weight at 7 WPI. Pre-bath measurements also told me that I had about 158 yards but I’m sure there’s less now that the yarn has plumped up. If I’m doing my math correctly, that would mean I turned 294 yards of pencil roving into a 474 yard single.

The Noro Rainbow Roll is spun, chain-plied, and finished! It became a beautiful handspun yarn, but what's my final verdict? | Spinning Noro Rainbow Roll Part 2

Since we’re talking about a chain-plied yarn, here’s where two of the chains linked together. This bulky change is actually an exception in the skein because I was able to find it. In spite of the thick and thin nature of the single, the joins between links are generally invisible. It probably helps that I made fairly large chains, usually 18” or longer.

The other good thing about making long chains while chain-plying a single with a distinct stripe pattern is that it helps colors shift from one to the next without muddying them. While most roving is one long length that’s been dyed, Rainbow Roll is a combination of pre-dyed wool carded in stripes. Check out these photos of Noro’s yarn being made to see what I mean. Sometimes the color is solid and other times a heather where colors overlap. Chain-plying helped blend those two different kinds of color.

I got so caught up in how to deal with neps, that I forgot to mention vegetable matter earlier. There was some VM, but not much and it was easy enough to pick out. I also noticed a small amount in the bottom of the sink when I took the yarn out of the bath. The roving definitely didn’t feel dirty while I was spinning it. 

The Noro Rainbow Roll is spun, chain-plied, and finished! It became a beautiful handspun yarn, but what's my final verdict? | Spinning Noro Rainbow Roll Part 2

Now that I’ve got a fresh skein of handspun in the stash, what’s my verdict? Sometimes being stubborn is a good thing. Figuring out how turn a nep-filled roving into yarn without hating every second of spinning it became a puzzle I had to solve. I’m absolutely thrilled with the yarn Rainbow Roll became, but I know the process required to get there isn’t everyone’s cup of tea. It was frustrating before I found a solution and afterward the spinning never did go to autopilot. Nor was this the kind of project where I could do anything I wanted. The fiber called the shots 100% and completely changed my original plan. If you want autopilot spinning where you’re in control, pick something else and save the Rainbow Roll for knitting or weaving. Just don’t tug too hard. If you're up for some focused spinning, Rainbow Roll will certainly fit the bill.

Spinning Noro Rainbow Roll Part 1

Rainbow Roll and I had a frustrating start, but we still created some beautiful handspun yarn. | Spinning Noro Rainbow Roll Part 1 - withwool.com

This is Part 2 in a series reviewing Noro Rainbow Roll and Imperial Yarns Bulky 2-Strand Pencil Roving. Here’s Part 1. 

Today I plied, but I’ve been spinning the Noro Rainbow Roll every day since February 23. It’s been an experience. 

Rainbow Roll and I had a frustrating start, but we still created some beautiful handspun yarn. | Spinning Noro Rainbow Roll Part 1 - withwool.com

I gave the fiber one last look before sitting down at the wheel, and noticed neps, small clusters of fibers that have tangled into knots, on the outer rim of the roving. At the time I wasn’t sure if the neps were localized in one spot due to handling or were present in the entire batch. The only way to find out was to get spinning. 

My original plan for this fiber - it was what I had in mind when I bought the Rainbow Roll - was to spin a fingering weight single to preserve the color repeat and then full it to improve durability. I found the end on the outer edge and started drafting from the outside in. Once I was a few feet into the roving, I could tell that I was going to need a new plan. The neps weren’t localized to one spot. They weren’t caused by rough handling or improper storage. These neps were created when the roving was carded. At first I thought it might just be in a particular color, but the neps were consistent and constant throughout the entire 3.5 ounces. Picking them out, a fairly common thing to do with neps, wasn’t an option for several reasons. One, the neps were very close together and often several to an inch. Two, when there weren’t neps there were clumps of wool and picking them out would mean pulling the roving apart. 

Rainbow Roll and I had a frustrating start, but we still created some beautiful handspun yarn. | Spinning Noro Rainbow Roll Part 1 - withwool.com

If you’re weaving or knitting or felting with the roving, neps aren’t a big deal. They can add texture and interest. If you’re trying to spin fiber filled with neps, it’s just a giant pain in the ass. Wether you’re aiming for a smooth worsted style yarn or an airy woolen style, neps muck up drafting. The first 2 colors I spun from the roll are an annoying combination of weak blobs of wool and tightly spun thread. Definitely not the fine single I had in mind. My frustration was growing which meant I had just two options - quit or completely change gears. 

A video posted by April Klich (@aprilklich) on

The blue and purple is what the single looked like when using the first drafting method. The green and white used the second drafting method. | Spinning Noro Rainbow Roll Part 1 - withwool.com

So, I changed gears and decided to modify how I drafted. My initial drafting method was to draft fiber from the roving and then let twist enter said fiber. On a complete lark I decided to reverse this process. I let the twist into 6 or so inches of pencil roving, and then pulled on the roving to even out the single. It actually worked. The single was more consistent, and the neps seemed more like an intentional texture than a hinderance. Don’t misunderstand, the single was still on the wild side. I’d just found a method to work with the roving that didn’t make me want to quit. Good thing there’s lots of different ways to make yarn, huh?

Rainbow Roll and I had a frustrating start, but we still created some beautiful handspun yarn. | Spinning Noro Rainbow Roll Part 1 - withwool.com

I finished drafting the yarn on Friday and let it rest over night before plying. What drew me to Rainbow Roll in the first place was the color and I wanted to maintain that clarity as much as possible. The best way I know to keep distinct color is chain-plying. So I set up the bulky bobbin and flyer and got to work. Once I found my rhythm, plying went very quickly - less than two hours and I was done. Well, done with the more consistent part of the single. The bobbin was literally full at the same time I started into the weak early section. Seemed like the perfect time to call it quits.

I haven’t skeined the yarn yet or given it a bath to set the twist, but I’m very happy with what ended up on the bobbin. It’s colorful, soft, bulky, and has a certain rustic charm. I want to knit it and wear it which is a far cry from the frustration of when I first started spinning it.  

Rainbow Roll and I had a frustrating start, but we still created some beautiful handspun yarn. | Spinning Noro Rainbow Roll Part 1 - withwool.com

Review: Comparing Noro Rainbow Roll and Imperial Yarn Bulky 2-Strand Pencil Roving

Pencil roving can be spun, knit, or woven into beautiful things. This review gives a head to head comparison of 2 different pencil rovings, Noro Rainbow Roll and Imperial Bulky 2-Strand. | Review: Comparing Noro Rainbow Roll and Imperial Yarn Bulky …

Pencil roving makes up just a fraction of my fiber stash, but it’s something that fascinates my spinning brain. Maybe it’s the color. Maybe it’s all the possibilities of what can be done with it as soon as it’s in your hands. Spinning of course, but also knitting and weaving. Maybe it’s that I can go into autopilot when I work with it since it’s generally an easy spin. Pencil roving isn’t the easiest thing to find since regular roving and top are much more prevalent. So, I always keep an eye out which is how I’ve come to have stashed two different but intriguing pencil rovings - Imperial Yarns Bulky 2-Strand and Noro Rainbow Roll. In the interest of spinning, let’s do a little head-to-head comparison. 

I went to Atelier Yarns for the first time a few weeks ago. The shop was well stocked and the Bulky 2-Strand was right up front, though I would have found it if it were in the back too. There was a mix of colors - naturals, solid colors, and a selection of heathers. I fell hard for the indigo heather, a mix of purple, navy blue and teal green. The roving was pleasantly soft, but what made me buy the roving was the yarn that tied up the bundle. The 2-ply was made from the same roving and had a deliciously rustic look. I wanted to spin that same cushy yarn.

Pencil roving can be spun, knit, or woven into beautiful things. This review gives a head to head comparison of 2 different pencil rovings, Noro Rainbow Roll and Imperial Bulky 2-Strand. | Review: Comparing Noro Rainbow Roll and Imperial Yarn Bulky …

The Noro Rainbow Roll came into my stash thanks to the internet. I saw it online while I was browsing Eat.Sleep.Knit for gift yarn. My first thought was, “I can get Noro’s gorgeous, long color repeats without fear of interrupting knots, and spin it into a fingering weight single that won’t come apart if I pull too hard? Gimme.” That’s pretty much how it ended up in a box at my door.

Pencil roving can be spun, knit, or woven into beautiful things. This review gives a head to head comparison of 2 different pencil rovings, Noro Rainbow Roll and Imperial Bulky 2-Strand. | Review: Comparing Noro Rainbow Roll and Imperial Yarn Bulky …

The Rainbow Roll and Imperial Bulky are packaged differently. The aptly named Rainbow Roll came wrapped around a cardboard tube in a wide roll which shows off the different colors and their repeat. Imperial Bulky comes wound as a cake like you’d get off a winder. 

The rovings handle color very differently. Rainbow Roll, this is color 1009, is uniformly dyed into colors that follow a repeating sequence. Some colors, like the bright blue, appear to be a solid, while other colors, like the light blue and green, have a heathered appearance. The Imperial Bulky, Indigo Heather, is evenly heathered throughout its length. Note: Imperial Bulky also comes in solid colors. 

Pencil roving can be spun, knit, or woven into beautiful things. This review gives a head to head comparison of 2 different pencil rovings, Noro Rainbow Roll and Imperial Bulky 2-Strand. | Review: Comparing Noro Rainbow Roll and Imperial Yarn Bulky …

One more note about the color. On the whole, the Rainbow Roll appears to have more vivid, vibrant colors than the Imperial Bulky. 

What about vegetable matter, AKA VM? Both have some VM, but not much and it all appears to be in small pieces. From looking only at the outer layers, there appears to be more VM in the The Imperial Bulky, but I won’t know for sure until I actually get into the cake. 

Now, let’s touch ‘em. Both pencil rovings are made from 100% wool (neither specifies a breed on the label). I find the Imperial Bulky to be the softer the two, but only barely. I would wear both of them around my neck. How soft they are as yarn, will come down to how they’re spun.

The yardage and put-up of these bundles is where the two rovings start getting very different. The Imperial Bulky is 4 oz/113g and 200 yds/183m. However, as the name implies, The Imperial Bulky 2-strand, is 2 strands of pencil roving that are intended to be knit together to form a bulky yarn. The recommended gauge on the label is 12 sts and 16 rows = 4 inches on US 13 (9mm) needles. What one could do, is separate the two strands - easy since the two aren’t twisted together at all - and get double the yardage with a smaller gauge. 

Pencil roving can be spun, knit, or woven into beautiful things. This review gives a head to head comparison of 2 different pencil rovings, Noro Rainbow Roll and Imperial Bulky 2-Strand. | Review: Comparing Noro Rainbow Roll and Imperial Yarn Bulky …

When the individual strands of both rovings are held next to each other, they appear to be the same thickness.

Rainbow Roll is 3.53oz/100 g and has 294yds/270m of roving. The Rainbow Roll label has no suggested gauge or needle. What the label does say, in part, is this, “This product is not a yarn and is not twisted…” The Rainbow Roll Ravelry Page does categorize the roving as bulky. A quick skim through project pages on Ravelry shows that most people used needles ranging from the US 7 to 13. 

It is only one strand, which isn’t big deal if knitting or weaving, but makes it harder to get the colors match when spinning 2-ply yarn. You could definitely break the roving into separate repeats of color. You could spin a single and chain ply it. Or you could just spin it and let the colors fall where they may.

Pencil roving can be spun, knit, or woven into beautiful things. This review gives a head to head comparison of 2 different pencil rovings, Noro Rainbow Roll and Imperial Bulky 2-Strand. | Review: Comparing Noro Rainbow Roll and Imperial Yarn Bulky …

As long as we’re talking numbers, what about the price? I paid $20 for the Rainbow Roll and $18.95 for the Bulky 2-Strand. Seems pretty similar at first glance. However, Rainbow Roll comes to $0.068 a yard and Imperial Bulky is $0.094. Still reasonable; however, if you’re working with one strand of Imperial Bulky instead of 2 at a time, the price goes to $0.047 because there’s now 400 yards instead of 200.        

Part 2 of the comparison focuses on spinning the roving. I might love spinning them. I might hate spinning them. But spin them I will…for science! The Rainbow Roll is going on the bobbins first, and I’ll be sharing the details as I go.

P.S. The next few weeks are going to be all over the place (literally) for me, so the posting schedule is going to be a bit different. Instead of long, detailed posts, I'm going to be posting short snippets a few times a week. Thanks for sticking with me!

Giddy Up Handspun

Finished my first handspun yarn of 2016! Now to figure out what to make with it. | Giddy Up Handspun - withwool.com

My first handspun of 2016 is officially finished! I’m thrilled with how it turned out, but I have to admit something.  Sometimes I buy fiber because I like the look of it and want to try working with something new without much thought to what the finished yarn will look like. That’s definitely what happened when I bought the roving that became this single. Doesn’t always work out, but it did this time. 

Finished my first handspun yarn of 2016! Now to figure out what to make with it. | Giddy Up Handspun - withwool.com

I loved the smooth single I saw on the bobbins and didn’t want to fuzz it up during finishing. So, the yarn got a good 20 minute soak in cool water. I snapped the yarn over my arms to even out the twist, but skipped giving the yarn a good thwack it again the shower wall - didn’t want the halo that can come from thwacking. Then I hung it up to dry. The single did plump up a little after it’s bath, but it still has a smooth surface which helped the seacell keep its luster.  

Finished my first handspun yarn of 2016! Now to figure out what to make with it. | Giddy Up Handspun - withwool.com

Time for my second admission. If I saw this yarn at a shop I’d think it was pretty, but I wouldn’t buy it. Why? Simple. I’d have no idea how to make the most of it. Not going to let that stop me this time though. I’m sketching and swatching up a storm. The good thing about making all my sketches on post-it notes is that I can put them all up on the wall and see what sticks. I might not use the single for the eventual design, but I’m glad to have the challenge.

Finished my first handspun yarn of 2016! Now to figure out what to make with it. | Giddy Up Handspun - withwool.com

Fiber: 4 oz Spun Right Round Blended Roving - Giddy Up

Yardage: 526 yds

Plies & Weight: Sport Weight Single

Start - Finish: January 21 - February 14, 2016

@Ravelry

The First Handspun of 2016

The First Handspun of 2016 - withwool.com

I made a lot of grand plans and overarching intentions for 2016. All of them were inspiring at first, but every one of them became overwhelming at January marched on. I couldn’t decide where to start, which step to take first, or even what project to work on. I needed to clear my head. Spinning has helped me focus in the past so I thought I’d try it again. The wheel came out of the closet and got a good dusting and a bit of oil. Next, I went rummaging through my fiber stash, and pulled out a blended roving from Spun Right Round

The First Handspun of 2016 - withwool.com

I’ve never spun anything quite like those 4 oz, and they turned out to be the perfect project to kickstart the year. Instead of single chunk of dyed fiber, this roving was a combination of orange, teal, and navy merino with shiny, white seacell. The colors weren’t blended into a heather - more like they hung out next to each other. I probably could have separated the colors, but where would the fun have been in that? If anything, the roving was comparable to a batt with big chunks of solid color.

The First Handspun of 2016 - withwool.com

I split the fiber in half at the mid-point, and started spinning without an end goal in mind. I just wanted to spin and let the fiber call the shots. The first few yards that went on the bobbin made it pretty clear that would be no plying. I was drafting back and forth like a typewriter which mixed the colors together two and three at a time. White twisted up with orange. Teal pulled in navy and seacell. Plying the single would only muddy the colors and hide the distinct combinations. The single was interesting enough by itself. Plus, those first few yards were thick and thin. The single did get more consistent as I went along but I let the thick and thin happen without fussing over the differences.

The First Handspun of 2016 - withwool.com

I wish I could say that I used the process of spinning as some sort of daily meditation. I did no such thing. I throughly enjoyed spinning it for 30 minutes before stepping away from the wheel for weeks. It wasn’t until I read the Singles issue of Ply cover to cover that I felt the urge to get spinning again. The enthusiasm in the magazine is rather infectious after all. I sat down, got drafting, and didn’t stop until every last gram was on the bobbin. Well, not the stray seacell that stuck to my pants and my hands, but you get the idea. 

The First Handspun of 2016 - withwool.com

When I started spinning, I did so with the intention of having no intention. There was no plan, no deadline, no blog post. There was nothing that tied the process of making yarn to anything else. I was able to spin for the joy of spinning and play with fiber. Now I’m going to let you in on a little secret: it made me happy - like playing with kittens happy. This project was a great antidote to stressing out about everything, good and bad, that 2016 has in store. 

The First Handspun of 2016 - withwool.com

Next time you get wrapped up and stressed over future plans, try making something for the fun of it. Ditch the deadlines and the self-imposed rules. Stop imagining all those future projects. Jump in and see what happens. You can be retrospective when you’re done, just like I’m doing with this post. Happy making!  

The First Handspun of 2016 - withwool.com

Notes About Spinning Cashmere

My first handspun skeins of cashmere! Cashmere is as soft as everyone says it is, and here's how I turned 2 oz of it into yarn. | Notes About Spinning Cashmere - withwool.com

Brave readers, it’s time for the next installment of adventures in spinning cashmere. In the first entry, I wrote about my attempt at drafting the singles and overcoming the idea that spinning cashmere would be as hard as everyone made it sound. At the time, I was working on the second single with the idea that the true test of whether or not I could spin cashmere would be in the plying. If the singles fell apart every couple of feet, then I’d failed. If the singles stayed together, then I could actually spin cashmere without screwing it up. 

One mama skein and one baby skein of plied cashmere ready to come off the bobbins. Cashmere is as soft as everyone says it is, and here's how I turned 2 oz of it into yarn. | Notes About Spinning Cashmere - withwool.com

Did the singles pass the plying test? If you haven’t already guessed from all the pictures, yes! Seeing all the plied yarn on the bobbins was a relief because I wasn’t sure I was going to pull it off until they were done. There were a few times with the singles pulled apart on me, but I didn’t need all the fingers on one hand to count them. Whew. 

A little uneven and limp, the yarn is ready to be finished with a good soak. Cashmere is as soft as everyone says it is, and here's how I turned 2 oz of it into yarn. | Notes About Spinning Cashmere - withwool.com

The final test came with the finishing. Would the skeins be the lofty, airy yarn I set out to spin? Before the skeins went into the bath, they looked a little limp - plenty of plying twist in them, but limp all the same. Finishing the skeins with a soak and a gentle thwack changed them for the better. The yarn plumped up to a beautiful, airy body and texture. Soft too. Oh, so soft. Of everything I’ve spun, this was the hardest to let go of. If the fiber hadn’t been sent to me to spin and then send back, I probably would have kept the yarn as a pet. Have I mentioned how soft it was? Mmmm…

My first handspun skeins of cashmere! The mama skein is about 240 yrds and mini is about 25 yrds. Cashmere is as soft as everyone says it is, and here's how I turned 2 oz of it into yarn. | Notes About Spinning Cashmere - withwool.com

Enough with the daydreaming, onto the technical details. Now that I know that what I did to spin this cashmere actually works, I can share my notes in good conscience. They still come with the disclaimer that I’m still a newb when it comes to working with this luscious stuff though. 

I didn’t actually read up on how to spin cashmere before I started the singles. My idea to spin cashmere woolen came from a cotton spinning demo with Stephanie Gaustad when she visited the Greater Los Angeles Spinning Guild. (Side note: Fiber guilds are great resources and worth joining.) My biggest takeaway was Gaustad’s comment that people thought spinning cotton, a short staple fiber, was hard was because they tried to spin it the same they they spun grabby, long-stapled fibers. Instead, she recommended woolen spinning because the twist would move into the fiber supply and keep things from falling apart during drafting. 

My first handspun skeins of cashmere! Cashmere is as soft as everyone says it is, and here's how I turned 2 oz of it into yarn. | Notes About Spinning Cashmere - withwool.com

I decided to try this idea with the short, slippery cashmere. So, I used a woolen drafting style and let the twist come into the fiber supply. To keep the twist from locking up the fibers, I set the take up low and used a larger whorl. There’s usually at least good foot and a half between my hands and the wheel’s orifice, so this distance let more twist enter the single before it went on the bobbin. As for plying, I didn’t do anything beyond the ordinary tensioning andbalance checks. 

I did do some research on how to finish cashmere but didn’t turn up much in my cursory internet search. I was working on a deadline, remember. Ended up following my usual steps for finishing a woolen yarn. First, the skeins soaked in cool water with a little Eucalan for about 20 minutes. After the yarn came out of the bath, and I squeezed out as much water as possible first with my hands and then by rolling the yarn up in a towel. I evened out the twist with a few good snaps around my hands before giving the yarn a few gentle thwacks against the shower wall. Gentle is key here since I wanted the plies to open up but not develop a halo. Then I hung them up to dry, and the wait proved to be the hardest part of finishing. The last step, which I heartily recommend, is petting the yarn like it’s an adorable kitten. So soft... 

Made sure to send off the handspun with a tag detailing the weight, WPI, and construction. Cashmere is as soft as everyone says it is, and here's how I turned 2 oz of it into yarn. | Notes About Spinning Cashmere - withwool.com

Fiber: 2 oz cashmere top

Yardage: Mama ~240 yds and Mini ~25 yds

Plies & Weight: 2-ply Sport; Mini skein plied on itself

Start & Finish: November 28 - December 15, 2015

@Ravelry

FO: Non-Felted Slippers and Practical Washcloths

Who knew slippers were so quick and fun to make? I made this pair as a Christmas gift, and now I want to make a pair for me. | FO: Non-Felted Slippers and Practical Washcloths - withwool.com

The Non-Felted Slippers pattern has been in my queue for years, and I finally got the chance to make them. Turns out that slippers are fun to knit. Quick to make too when you use super bulky yarn. I made one other pair but they were essentially socks with soles sewn to the bottom - so these are technically the first pair of slippers I’ve ever made. 

Who knew slippers were so quick and fun to make? I made this pair as a Christmas gift, and now I want to make a pair for me. | FO: Non-Felted Slippers and Practical Washcloths - withwool.com

One of the great things about knitting a pattern that’s been made 2,953+ times is that there are plenty of helpful tips and hints to find. I researched people’s mods to see what was possible and went from there. Definitely didn’t want a seam on the bottom of the foot so I used Judy’s Magic Cast On to start the sole - it’s not just for sock toes - and worked everything except the sole in the round. I made up plenty of time from not having to sew the slipper together even after ripping out the sole twice to get the right size. Full mods and numbers on the slipper’s Ravelry page. 

Who knew slippers were so quick and fun to make? I made this pair as a Christmas gift, and now I want to make a pair for me. | FO: Non-Felted Slippers and Practical Washcloths - withwool.com
Who knew slippers were so quick and fun to make? Sewing on the soles did take a good chunk of time though, but the work was definitely worth it. They gave the slippers structure and a bit of slip resistance. | FO: Non-Felted Slippers and Practi…
Here's what the inside of the slipper looks like after the soles were sewn on. I didn't pull the seams too tight and they blended in well with the sole fabric. | FO: Non-Felted Slippers and Practical Washcloths - withwool.com

The one thing I did underestimate was how long it would take to sew on the soles. I probably could have knit a third slipper in the time it took me to sew on all 4 pieces. At least I didn’t sew the top and bottom together…more than once. Ahem. Anyway, the soles added something special and slip-resistant too. I used the medium size suede Fiber Trends soles which were a good fit for a US 8 slipper. I’ve got a large set stashed away for when I make slippers for myself. 

Who knew slippers were so quick and fun to make? I made this pair as a Christmas gift, and now I want to make a pair for me. | FO: Non-Felted Slippers and Practical Washcloths - withwool.com

Pattern: Non-Felted Slippers by Yuko Nakamura

Yarn: Knit Picks Wool of the Andes Superwash Bulky - 41 yds Fjord Heather and 67 yds Briar Heather

Needles: US 8 (5mm) circs

Dates: November 5 - 27, 2015

@Ravelry

Washcloths are a tried and true gift. Plus, they're a quick knit so you can make a bunch before you get bored. | FO: Non-Felted Slippers and Practical Washcloths - withwool.com

Washcloths are a tried and true gift. Always practical and fun, they’re quick enough that you can makea bunch before you get bored. I usually knit a few of them to giveaway every year. There was a set of 4 on the gift list last year. Each cloth used a different pattern to keep things interesting. I made 2 of my own designs, 1 that’s been in my queue for years, and 1 old favorite. Even though every one is different because of texture or slipped stitches, making them the same color really tied them all together. The washcloths were a big hit so I’m definitely going to knit more sets like this in the future.  

Washcloths are a tried and true gift. Plus, they're a quick knit so you can make a bunch before you get bored. | FO: Non-Felted Slippers and Practical Washcloths - withwool.com

Pattern: Bridges Towel and Laddered Cloth by me; Little Tent Dishcloth by Vaunda Rae Giberson, and All Washed Up by Jill Arnusch

Yarn: Pisgah Yarn Peaches & Creme Ombres - Ivy League (30 - 33 yds per cloth)

Needles: US 6 (4mm) needles

Dates: November 8 - 12, 2015

@Ravelry

Two Bears And A Bunny

Beatrice and Bernard are an inseparable pair that make for quick knit gifts! Cute too. :) | Two Bears And A Bunny - withwool.com

Beatrice and Bernard are an inseparable pair that make for quick knit gifts! Cute too. :) | Two Bears And A Bunny - withwool.com

What do you make for a cute 1-year-old kiddo? A cute bunny and bear, of course. 

Once I decided to make Beatrice and Bernard, they almost seemed to knit themselves. I’ve made the pair before and used a few mods to make them even faster to put together: stuffing them as a go, knitting the arms from the paw up, and grafting the head closed. The only hard part was the making the grafting look nice. Scratch that, I lied. The hard part is sewing on the arms at the same height on both sides. I thought the bunny was almost finished until I got a good look at the arms after sewing them on. One of them was definitely higher than the other which meant I had to unpick the seam and do it again. The second time was the charm fortunately. 

After the pair had arrived in their new home, I got a text that they’d each gotten a kiss when they were unwrapped. Pretty sure that means I won Christmas knitting. :)

Beatrice and Bernard are an inseparable pair that make for quick knit gifts! Cute too. :) | Two Bears And A Bunny - withwool.com

Pattern: Beatrice and Bernard The Inseparable Bunny and Bear by Rebecca Danger

Yarn: 65 yds Knit Picks Wool of the Andes Superwash Bulky

Needles: US 5 (3.75 mm) circulars

Dates: November 24 - 26, 2015

@Ravelry

One adorably Christmas ornament coming up! | Two Bears And A Bunny - withwool.com

I slacked off in 2014, but I have a yearly tradition to make a new ornament for the tree every Christmas. The first ornaments were just an excuse to make cute things to go on the tree, but they’ve grown to tell a story over the years. That’s how I ended up making a stocking covered in palm trees and knitting a color work house among other things. When it came time to make an ornament for 2014, I never really figured out what I wanted to make or how to make it. The idea to knit the extinct California grizzly bear didn’t occur to me until 2015 gift knitting time. Thankfully, making it didn’t take anywhere near as long as it took for me to have the idea. 

Making the bear went quickly even though I essentially knit the pattern twice with the second attempt worked in the round. Then I couldn’t decide on the design for the embroidery. The bear sat to the side while I worked on other Christmas knits and ordered the yarn I wanted to use for the embroidery. Once I had the design sketched out, the final stitching went reasonably quickly even though I redid it a few times to make it neat. So, 2014 finally got its ornament.

As for the 2015 ornament, I have the yarn and an idea. I still have to work out the charts, but it’ll be a nice project for February even if it is a few months late. 

One adorably Christmas ornament coming up! | Two Bears And A Bunny - withwool.com

Pattern: Grizzly Bear Toy by Linda Dawkins

Yarn: 64 yds Knit Picks Gloss Fingering - Doe for the body and Honey for the embroidery

Needles: 2.75 circulars

Dates: November 13 - December 5, 2015

@Ravelry

One knit bear checking out the view. | Two Bears And A Bunny - withwool.com

FO: Crescent Over Lothlorien and The Dewberry Cowl

The Crescent Over Lothlorien Shawl was the first thing I knit from my 2015 holiday gift list. So pleased with how it turned out.  FO: Crescent Over Lothlorien and Dewberry Cowl - withwool.com

I decided to go all out with my gift knitting for Christmas 2015. The list started out small - less than 5 pieces - before growing and growing and growing just a little bit more. When all was said and done, I had knit a shawl, a cowl, a hat, 4 washcloths, a pair of slippers, 2 pairs of wrist cuffs, a bear & bunny duo, and one golden bear. Plus, there was that skein of handspun. This was a pretty ambitious list considering that I skipped holiday gift knitting the previous years. I’m pretty sure the only reason I was able to get everything done was because I’d committed to #yearofmaking, and had built a habit of making something every day. Even a few stitches a day can add up to something really big.

The Crescent Over Lothlorien Shawl was the first thing I knit from my 2015 holiday gift list. So pleased with how it turned out.  FO: Crescent Over Lothlorien and Dewberry Cowl - withwool.com

What do you knit for the lace knitter that loves fantasy and general geekery? Fantasy themed lace, of course! The Crescent Over Lothlorien Shawl fit the bill, and had the added bonus of a reversible stitch pattern. 

I had a few hiccups reading the pattern and had to rip out a few times - once all the way back to the beginning - but the knitting was fairly easy once I figured out the rhythm and quirks of the design. It was also my first time using Dream in Color Smooshy which was lovely. The shawl was also great tv knitting aside from that one time I really messed up the lace pattern. (Note to self: Don’t stay up to 2AM knitting lace. You’re just going to give yourself a headache and a giant time suck the next morning.)

The Crescent Over Lothlorien Shawl was the first thing I knit from my 2015 holiday gift list. So pleased with how it turned out.  FO: Crescent Over Lothlorien and Dewberry Cowl - withwool.com

I’ve said it before and I’m sure I’ll say it again, blocking is magic. Once the shawl was bound off with a ridiculously stretchy decrease bind off, it looked small and crumpled. Even knowing how blocking can transform a piece, I was still nervous that the finished shawl wouldn’t be a worthy gift. I needn't have worried. 

The shawl got a nice long soak before I stretched and pinned it to an inch of its life. Flexible blocking wires made shaping and pulling out the points so much simpler and quicker then working with only pins. Inserting the wires and shaping the shawl still took at least 30 minutes though. When that work was done, instead of a small and crumpled shawl, the crescent was long and delicate. The yarn overs had popped open, the columns were visible, and every leaf was distinct. Whew…

The Crescent Over Lothlorien Shawl was the first thing I knit from my 2015 holiday gift list. So pleased with how it turned out.  FO: Crescent Over Lothlorien and Dewberry Cowl - withwool.com

Pattern: Crescent Over Lothlorien by Cordula Surmann-Schmitt 

Yarn: Dream in Color Smooshy - Icy Reception

Needles: US 4 (3.5mm) circulars

Date: September 12 - October 23, 2015

@Ravelry 

I've wanted to knit the Dewberry Cowl since I first saw it, and it was a perfect pattern for gift knitting. FO: Crescent Over Lothlorien and Dewberry Cowl - withwool.com

The second gift knit was the Dewberry Cowl which I've wanted to make since I first saw it. I like the combination of lace and garter stitch. I like the shape and how it’s worn. I liked how it could be a showcase for lots of different yarn. Plus, I thought the recipient would like it too which is always an important thing to consider when making gifts. Can’t just make stuff you like after all.

It was a pretty quick knit even considering that I had to rip it out - totally my own fault - and make it bigger. The pattern calls for an aran weight yarn, but I mistakenly picked out a DK weight instead. Mrs Crosby Carpet Bag is a beautiful silk wool single and I don’t regret picking it at all. 

I've wanted to knit the Dewberry Cowl since I first saw it, and it was a perfect pattern for gift knitting. FO: Crescent Over Lothlorien and Dewberry Cowl - withwool.com

Mailing these goodies off was hard but, I’ve got the patterns and plenty of worthy yarn. I already have the perfect skein picked out for my Dewberry.

Pattern: Dewberry by Hillary Smith Callis 

Yarn: 1 skein Mrs Crosby Carpet Bag - Hollywood Cerise

Needles: US 6 (4mm) circulars

Date: October 26 - November 4, 2015

@Ravelry

Looking Back At 2015

I’m usually not sentimental about the start of a new year, and the beginning of 2016 is no different. But I do like look back over the past year to see what I've accomplished, what to do in the new year, and what to be grateful for. 

 With Wool

I’ve kept a fairly consistent schedule writing, photographing, and designing for With Wool, but I wasn’t very dedicated. I frequently waited until the last minute or just hoped that an idea for something to write about would just fall into my lap - didn’t happen often. It was until October that I finally got serious and made the work a regular part of my routine. My goal was to spend 2 hours a day working on With Wool - be it designing patterns, writing tutorials, editing photos, putting together the newsletter, brainstorming, or learning about social media. Those 2 hours were occasionally hard to fill though they could expand to take up an entire day, like when I was releasing the Mosaic Sisters.

What about the numbers? In 2015, I self-published 2 patterns: The Cuddly Chevron Blanket in January and The Mosaic Sisters in December. Not a bad pair of end caps for this year. Behind the scenes, I also worked on a few others patterns that I’m looking forward to showing you in 2016. Hats! Socks! Color work! Oh my!

I wrote 51 blog posts, including this one. My favorite is How To Knit And Block A Giant Blanket In 47 Easy Steps. 19 posts were tutorials for knitting or spinning. I'm proudest of Mosaic Knitting 101 and of the long-tail cast on video tutorial. In total, I’m only 1 post short of managing 1 blog post for every week this year which sounds like an awesome goal to aim for next year.

2015 was also the year I got serious about sending out the With Wool Weekly newsletter every week. I’ve really come to enjoy putting it together and seeing it grow as the year progressed. Tomorrow, I’m sending out the 50th newsletter of the year, but it’s also the 54th newsletter since I started sending them out. Looking forward to seeing how to grows and changes. You can sign up here or through the sidebar to the right. 

#YearOfMaking

#yearofmaking was success! I made something on 352 days of 2015. Looking Back At 2015 - withwool.com

#yearofmaking was success! I made something on 352 days of 2015. Looking Back At 2015 - withwool.com

#YearOfMaking was my other major project this year. My only intention was to make something everyday, and post a photo of my progress to Instagram. I haven’t kept up with the photos lately, but I have kept making for the entire year. Some days, the only thing I made was dinner, but dinner still counts. There were times when I was sick, tired, or stuck on planes all day. I am proud to write that I only skipped 13 days. If I finish the year strong and I intend to, I’ll have made something 352 days this year which is nothing to sneeze at. 

After years of being a WIP, I finished my extra large Norma Blanket! Looking Back At 2015 - withwool.com

During those 352 days, I’ve done more and learned more than I would have otherwise. I finished knitting my first sweater and finished my extra large Norma Blanket. I spun yarn for Tour de Fleece and Spinzilla. I spun my first sock yarn and gained the confidence attempt spinning cashmereI spent a month drawing. I built cairns in the Arizona desert. I’ve hauled my camera all over San Francisco to practice photography. 

I finished my first sweater for myself, Amiga, thanks to #yearofmaking. Looking Back At 2015 - withwool.com

Deciding to do a #yearofmaking was a great last minute decision which is why I’m doing it again. While I’m glad I did a lot over the past year, I have one complaint. A lot of the time I felt like I was just going through the motions. There’s nothing wrong with that, but I want to spend this year learning and improving my skills. That’s why, I’m picking one thing focus on this time around.  2016 is about making art - not with yarn or fiber, but with pencils, ink, and markers. Maybe I’ll even learn to paint. There’s still going to plenty of yarn, but the urge to draw and make art everyday is something I can’t deny any longer.  

Looking back, 2015 has been a great year on all fronts. Here’s hoping that 2016 is even better! What are your plans for the new year? 

Easier Plying From A Center Pull Ball

A rolled up piece of paper makes it so much easier to to ply yarn from a center pull ball. No tangles! 

I always forget how long it takes to ply a skein of fingering weight yarn until I’m halfway through. Silly me thought I could ply a skein over the course of 2 days. Took a bit longer than that. When I was almost finished, there was still a good chunk of yardage on the second bobbin. There’s no sense in letting cashmere singles wallow on the bobbin especially when I need to mail the finished skeins by the end of the week. Plying the leftovers from a center pull ball seemed like the best and quickest option.

A rolled up piece of paper makes it so much easier to to ply yarn from a center pull ball. No tangles! 

Thankfully, the single held together during winding. I was about to pull the ball off the winder when I remembered a tip: slide the center pull call unto a toilet paper tube to keep it from collapsing on itself and tangling. I’ve lost plenty of yardage to tangled center pull balls and really didn’t want to lose a single yard of cashmere. The problem was that I was fresh out of toilet paper tubes. Instead, I folded a piece of regular printer paper into a strip and loosely rolled it up. Then I slipped the ball onto the paper directly from the winder.

A rolled up piece of paper makes it so much easier to to ply yarn from a center pull ball. No tangles! 

The rolled up paper worked so much better than I expected. As I pulled out more and more yarn, the roll expanded to fill the center hole and kept the ball from falling apart. There were absolutely zero tangles, and I was able to ply every bit of the single. The only thing I’d do differently next time - and I will be using this trick every time I ply from a center pull ball - is to make sure there’s an even edge on the outside of the roll to keep the single from snagging.