Spinning Cashmere

I'm spinning my first skein of 100% cashmere, and it's not as difficult as all my reading made it out to be. Don't let the fear of messing up hold you back. 

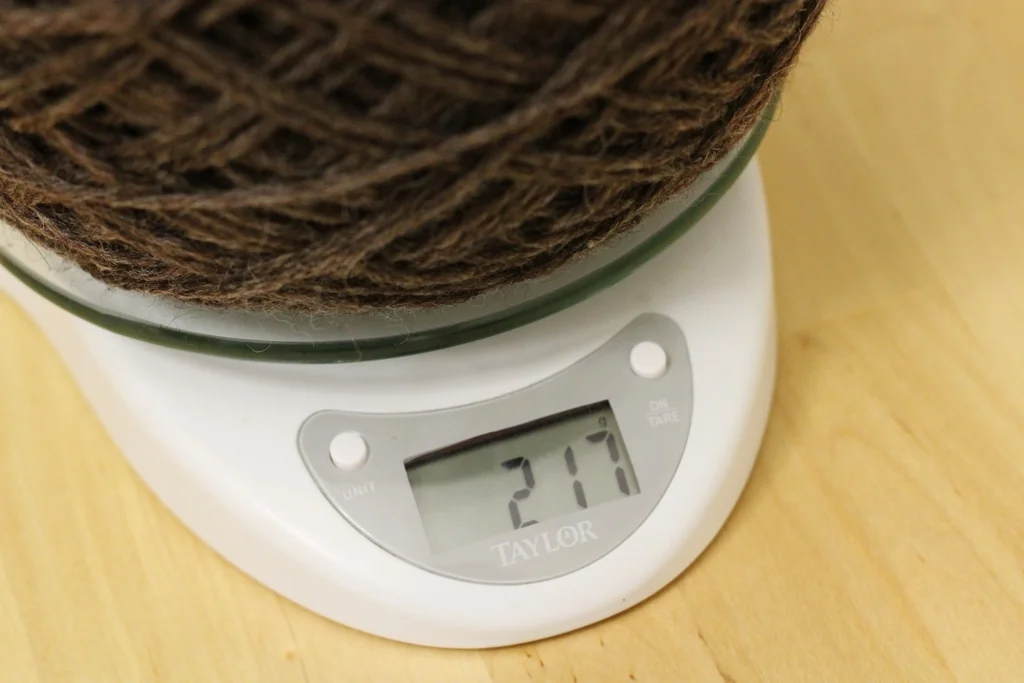
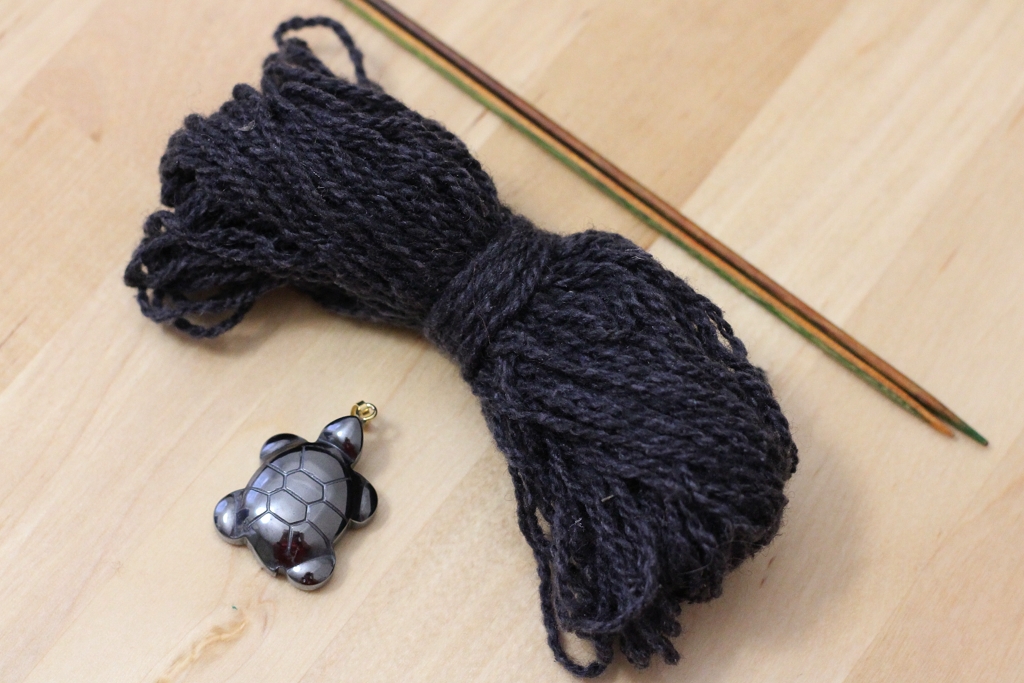
2 ounces of cashmere ended up in my fiber stash innocently enough. A friend of mine asked me if I would spin it for her and, of course, I agreed. She’s an awesome friend who deserves handspun, and I wanted to spin cashmere. It’s a win-win in my book. When the cashmere arrived it was as soft and lovely and amazing as I expected it would be. Then the doubt set in. Sure, I knew how to spin yarn, but most of my experience was with long-stapled, grabby wool. Everything I’ve read about cashmere told me it was slippery and had a relatively short staple length. Plus, I hadn’t figured out how to spin fine singles on my wheel yet which was what the cashmere would require. So the fiber sat for I don’t don’t know how long.

I’m spinning my first skein of 100% cashmere, and it's not as difficult as all my reading made it out to be. Don't let the fear of messing up hold you back. 

It wasn’t until my successful attempt spinning a 3-ply sock yarn during Tour de Fleece 2015 that I started seriously thinking about spinning the cashmere. Spinning that sock yarn meant that I’d finally figured out how to draft a fine yarn. That was half of the hurdle was gone. Now, only the fear of messing up the fiber - because I repeatedly read that it was hard to spin - was holding me back. I didn’t want to waste my friend’s cashmere. If the fiber had been mine, it’d probably still be sitting in fluffy little bundles. It’s not mine though, and I’d been holding on to it for long enough. The only thing left to do was start.

I’m spinning my first skein of 100% cashmere, and it's not as difficult as all my reading made it out to be. Don't let the fear of messing up hold you back. 

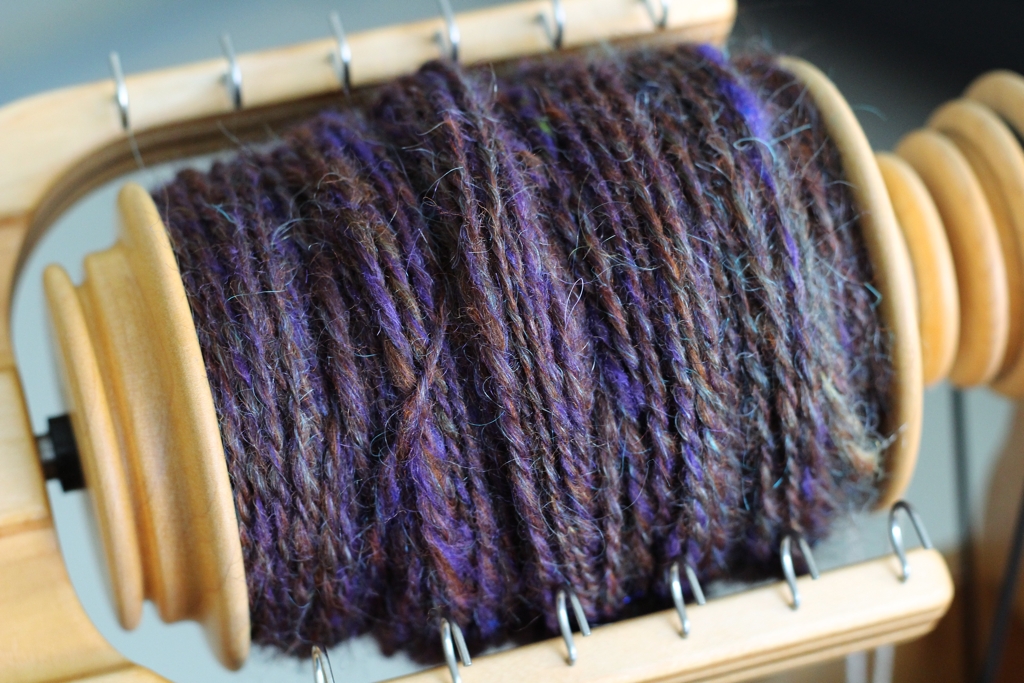
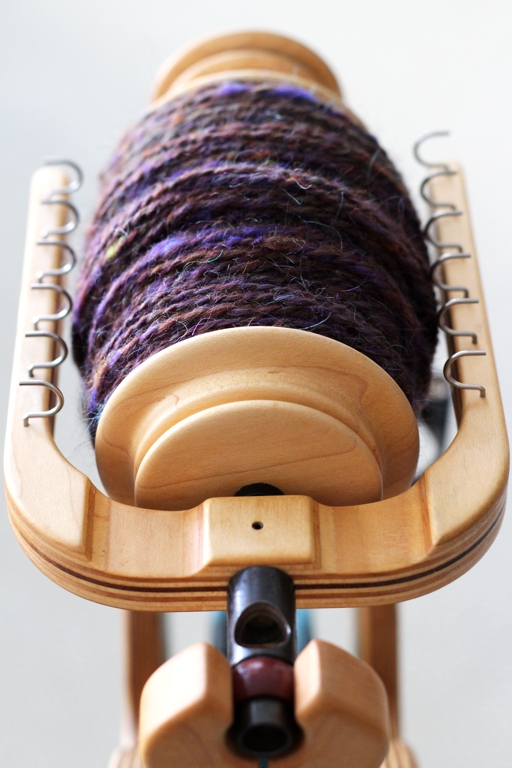
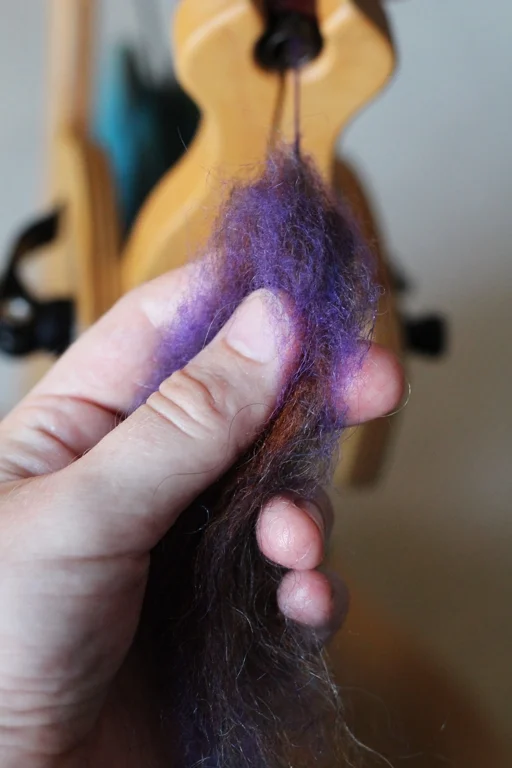
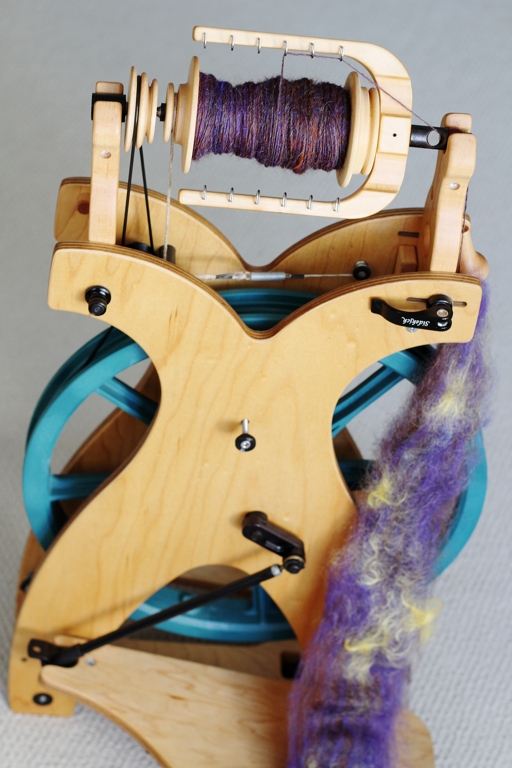
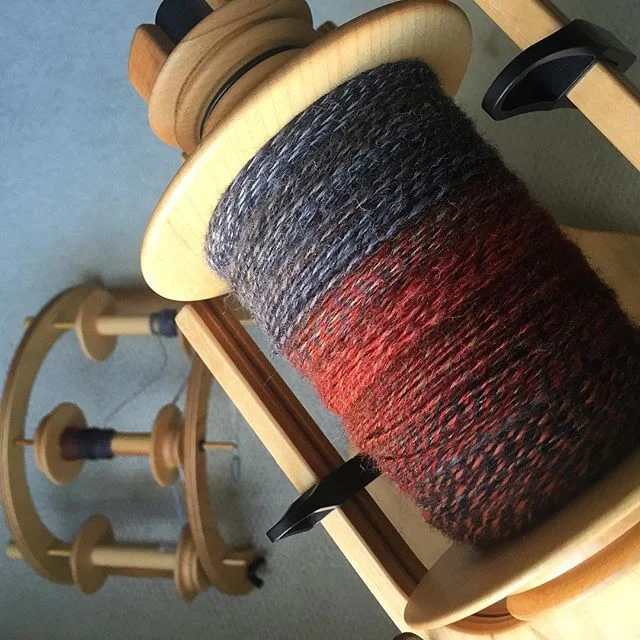
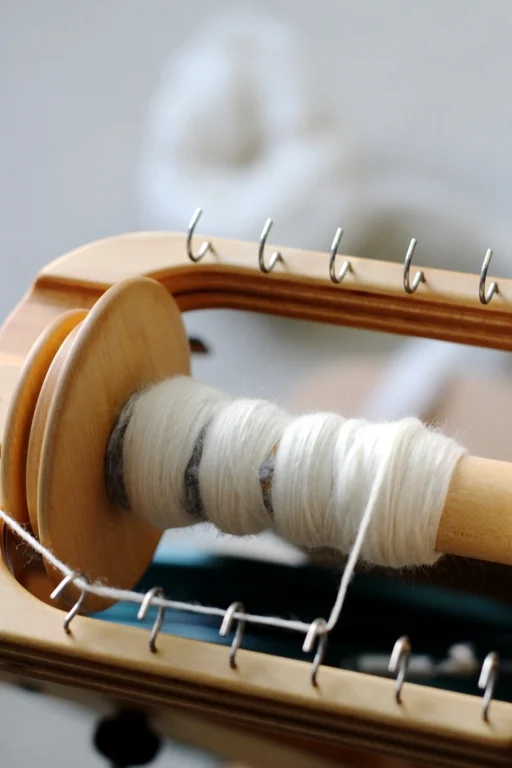
My end goal is to spin a 2-ply fingering weight yarn. Getting the wheel set up in the beginning with just the right amount of tension and twist took some fiddling. The first setting put twist into the fiber but didn’t pull it onto the bobbin. The second adjustment had too much twist and not enough uptake. The third attempt, on a larger whorl setting, was just right with enough twist and enough uptake.

I’m spinning my first skein of 100% cashmere, and it's not as difficult as all my reading made it out to be. Don't let the fear of messing up hold you back. 

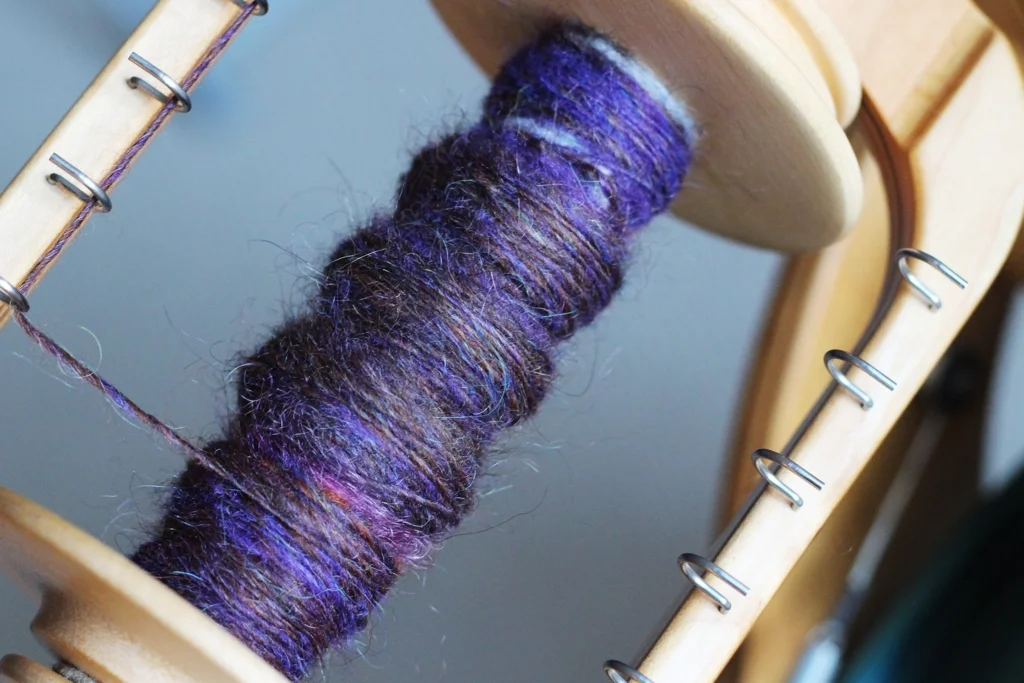
I want the yarn to be lofty and airy so I went with a woolen style draft where the twist comes into the fiber supply — only a little twist though since I’m aiming for a fingering weight yarn. Then I waited for the spinning to be hard. I working my way through the second single at the moment, and I’m still waiting for the spinning to be hard. Has it taken more patience and attention? Definitely, but spinning cashmere isn’t the insurmountable challenge that I’d created in my head. Just goes to show that the only way to know that something is “hard”, is to not let fear hold you back and try it for yourself.

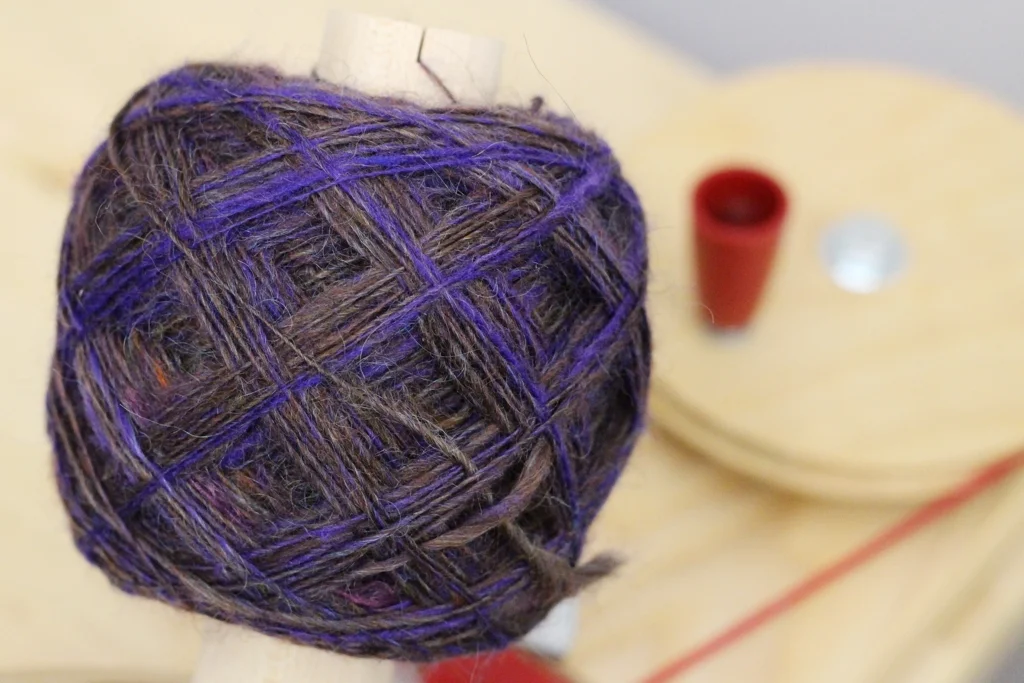
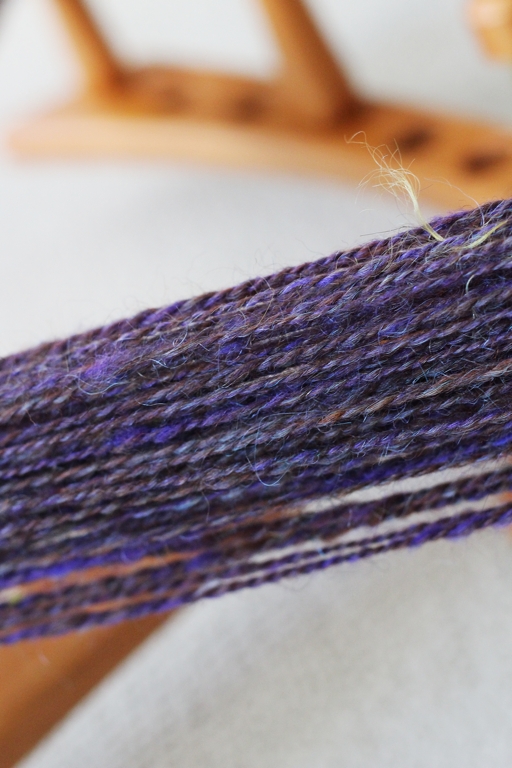
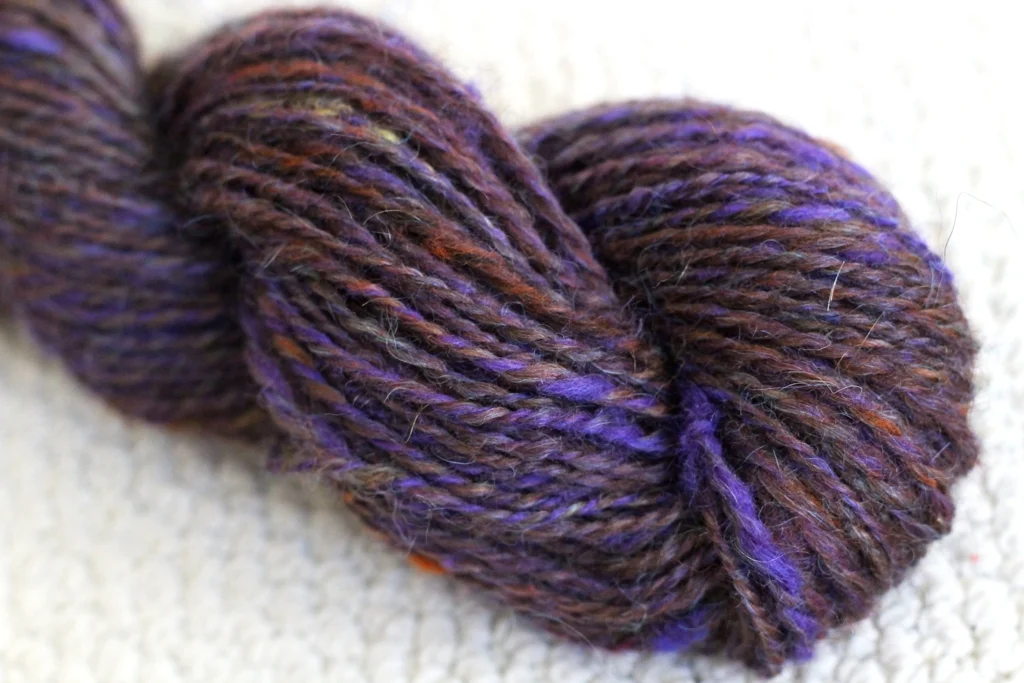
I am by no means an expert at spinning cashmere. Not even a little. I’m just fumbling along and finding what works. Are my singles perfect? No, but they’re fairly consistent and holding together. Fingers crossed that the pair doesn’t fall apart during plying - then I’ll have to take back that whole ‘I can spin cashmere’ thing. Stayed tuned for adventures in plying.

I’m spinning my first skein of 100% cashmere, and it's not as difficult as all my reading made it out to be. Don't let the fear of messing up hold you back. 

Pattern: Mosaic Sisters

Colorful and geometric, the Mosaic Sisters are textured mosaic knit cloths perfect for the kitchen or the bathroom. Each cloth is made with garter stitch and slipped stitches that are simple to knit, but create complex patterns. All of the sist…

I am thrilled to finally share the Mosaic Sisters! Why sisters? Because each mosaic design, though unique, shares several traits. They all have wide stripes, are knit in garter stitch, and have geometric designs. The pattern is a set 3 three different designs that can be turned into kitchen towels, washcloths, and coasters. Or anything else your needles desire. Mosaic knitting makes the cloths the perfect thickness and texture to be useful in both the kitchen and the bathroom. Since the basis of the patterns is garter stitch, the cloths won't twist or curl. Since they're all sister designs, you can make them in as many or as few colors as you want. Make a whole set in 2 colors or mix and match for maximum rainbow. 

If you're nervous about working mosaic knitting for the first time, I wrote a few tutorials to help. Mosaic Knitting 101 will show you the basics, and the next tutorial shows how to carry yarn up the side of the work. To cast on, I recommend the long-tail cast on - it's great with cotton.

Colorful and geometric, the Mosaic Sisters are textured mosaic knit cloths perfect for the kitchen or the bathroom. Each cloth is made with garter stitch and slipped stitches that are simple to knit, but create complex patterns. All of the sist…

I had the idea for the Mosaic Sisters years ago. At the time there was only one cloth, the oldest sister of course, and it had a different name. I knit the first sample, wrote the pattern, and made the chart. For one reason or another I never published it. Years later I saw a call to submit designs for home related patterns. The oldest sister came to mind, but I knew I couldn't just submit one - that's when the middle sister came along. Spoilers - the submission wasn't accepted. Now two designs were hanging out on my hard drive. Once the sting of disappointment wore off, I looked at them again and decided to add a third pattern to the set, the youngest sister. I've been swatching, charting, knitting, and putting the pattern together ever since. It's been a long road, but I'm glad that the sisters are finally getting their debut. 

To celebrate the Mosaic Sisters release, the pattern is free until Sunday, December 6 11:59 PM PST. Afterwards, it'll go to it's regular price of $5. No coupon or Ravelry account required. Happy knitting! 

Mosaic Sisters

Sizes: Kitchen Towel - 8.5" x 14"; Washcloth - 8.5" x 8"; Coaster - 4.25" x 4"

Gauge: 5 sts = 1" in pattern

Needles: US 6 (4mm) straight or circular needles 

Yarn:  Worsted Weight Cotton Yarn in 4 colors

Shown in Knit Picks Dishie - Swan, Azure, Crème Brulee, and Tranquil

For the kitchen towels: 37g / 70 yds each color

For the washcloths: 20g / 39 yds each color

For the coasters: 7g / 14 yds each color

Mosaic-Sister-3.jpg


Stripes and Carrying Yarn Up The Side

The Mosaic Sisters pattern- a set of colorful mosaic knit kitchen towels, washcloths, and coasters - is here! Meet the sisters and get the pattern.

Check out the other tutorials for the Mosaic Sisters: The Long Tail Cast On and Mosaic Knitting 101


Spend your time knitting, not weaving in ends! Here's the final tutorial celebrating the Mosaic Sisters pattern! Today's tutorial is about how to carry yarns up the side of your work when you're knitting stripes. Doesn't matter if the stripes a…

In Mosaic Knitting 101, I showed that mosaic knitting is just stripes and slipped stitches. Knitting stripes is fun, but weaving in ends for every color change is not. The first few times I knit stripes, I cut the yarn at the beginning and end of every color. Ugh. Thankfully, there’s a way to carry yarn up the side of the piece which means you don’t have to spend as much time weaving in ends as you did knitting. The carried yarns will twist together as you work and tuck themselves in nicely behind the edge stitches.

For Narrow Stripes

Spend your time knitting, not weaving in ends! Here's the final tutorial celebrating the Mosaic Sisters pattern! Today's tutorial is about how to carry yarns up the side of your work when you're knitting stripes. Doesn't matter if the stripes a…

If you’re working 2 row stripes there’s only one step to carry your yarns up the side. For the sake of clarity, yellow is Color 1 and white is Color 2. When it’s time to change colors, hold color 1 to the back of the work and start working the next stripe. You can drop Color 1 after you’ve got a few stitches of the new stripe on the needles because the two yarns are now twisted together. 

Is it possible to hold the yarn to the outside of the work instead of along the back? Definitely, but there is one benefit to holding the yarn to the inside. It’s faster because you always know what strand you just used and what strand to grab next. Plus, it easier to keep the yarns from tangling which means you get to spend your time knitting and not untangling yarn. Which ever direction you choose, be consistent and stick with it for the entire project.

For Stripes That Don’t Start At The Edge (And Wide Stripes Too)

Spend your time knitting, not weaving in ends! Here's the final tutorial celebrating the Mosaic Sisters pattern! Today's tutorial is about how to carry yarns up the side of your work when you're knitting stripes. Doesn't matter if the stripes a…

So what about when a stripe starts a few stitches in from the edge of work? The Middle Sister of the Mosaic Sisters pattern has a row that starts this way. You’ve got a couple options and neither of them involve cutting the yarn or weaving in more ends. Both choices equally effective, it’s just a matter of what you think looks better. 

Spend your time knitting, not weaving in ends! Here's the final tutorial celebrating the Mosaic Sisters pattern! Today's tutorial is about how to carry yarns up the side of your work when you're knitting stripes. Doesn't matter if the stripes a…

Option 1 is treating the stripes above and below the short stripe as one wide stripe. 

Begin by holding Color 1 to the back of the work just like with the narrow stripe. Slip the stitches at the beginning of the row and work the short stripe with Color 2. When you’re finished working the short stripe, twist the two colors together and start working with Color 1 again. Don’t forget to keep a little slack between the edge and the first knit stitches so the edge doesn’t pucker.

Spend your time knitting, not weaving in ends! Here's the final tutorial celebrating the Mosaic Sisters pattern! Today's tutorial is about how to carry yarns up the side of your work when you're knitting stripes. Doesn't matter if the stripes a…

Option 2 starts a little differently. When you start the short stripe with Color 2, hold Color 1 (green in this example) to the outside instead of against the back. Finish the short stripe.

Spend your time knitting, not weaving in ends! Here's the final tutorial celebrating the Mosaic Sisters pattern! Today's tutorial is about how to carry yarns up the side of your work when you're knitting stripes. Doesn't matter if the stripes a…

Now hold Color 2 to the the outside. When you start the next stripe by bringing up Color 1, it holds Color 2 in place. Go back to twisting yarns to the inside until the next short stripe. 

Spend your time knitting, not weaving in ends! Here's the final tutorial celebrating the Mosaic Sisters pattern! Today's tutorial is about how to carry yarns up the side of your work when you're knitting stripes. Doesn't matter if the stripes a…

I know I recommended earlier to twist to the inside, but twisting to the outside on stripes that start away the edge works well in this case. When paired with inside twists, the occasional outside twist prevents longer strands of yarn from being carried up the side and potentially snagging. 

Mosaic Knitting 101

The Mosaic Sisters pattern- a set of colorful mosaic knit kitchen towels, washcloths, and coasters - is here! Meet the sisters and get the pattern.

Check out the other tutorials for the Mosaic Sisters: The Long Tail Cast On & Stripes And Carrying Yarn Up The Side.

Mosaic-Knitting-101

Mosaic knitting is a technique that creates beautiful and intricate finished projects with the simple slip stitch. What it makes it different from other types of color work is that you’re only working with one strand of yarn at a time. For such a simple technique, mosaic knitting is quite versatile. It can be worked in garter stitch or stockinette. It can be smooth or textured. It can be worked flat or in the round. The patterns can be bold and geometric or create simple images and all manner of things in between. There’s no limit to the type of project it can create either. Mosaic knitting can create scrubby washcloths, cushy socks, warm shawls, slouchy hats, and colorful blankets.

How Mosaic Knitting Works

Aside from slipped stitches, the real reason why mosaic knitting works is that it's based on 2 row stripes.  So if you can knit stripes, you can mosaic knit.  

To work a stripe of mosaic knitting, you work across the first row and slip certain stitches purl-wise to create the pattern. On the second row, the stitches slipped on the first row are slipped again. Then it's time to make the next stripe. Drop the first color and work the next stripe with a second color and slip more stitches. As the stripes repeat, the slipped stitches build on each other. The below GIF shows the stripes and slipped stitches adding up to make the finished design. 

Standard Mosaic Knit Abbreviations

Mosaic patterns are presented as written, charted, or with a combination of the two. Small patterns might only be written.  The key abbreviations in written mosaic patterns are slX, wyib, and wyif.

sl means to slip a stitch purl-wise and the X afterward tells you how many stitches to slip. wyib and wyif are paired with slX.

wyib means to slip the stitch with the yarn held behind the work on the wrong side. wyif means to slip the stitch with the yarn held in front. If you don’t see wyib or wyif or any variant of them, it’s assumed that the yarn is always held to the back of the work. 

The other important abbreviations are MC, Main Color, and CC, Contract Color. The different colors might also be referred to as C1 and C2 or Color 1 and Color 2. 

Finished-Mosaic-101-Swatch.jpg

Here is a swatch of a simple mosaic pattern where there are slipped stitches on the garter rows (white) and a stockinette background (blue). The written pattern for the swatch reads like this:

Cast on 15 stitches (a multiple of 4+3) with C1.

Row 1: With C1, knit

Row 2: purl

Row 3: With C2, *k3, sl1wyib*, repeat between * * to end of row, k3

Row 4: *k3, sl1wyif* k3

Repeat the 4 rows until piece is desired length. End on Row 2 and bind off. 

How To Read Mosaic Charts

If the above pattern were charted, there are 2 fairly standard ways the chart could be presented and it’s designer’s choice. The difference between the two styles is in how the 2 row stripes are presented: a stripe, 2 worked rows, per chart row OR every row is charted. Personally, I prefer the chart where it’s one stripe to a row because it gives a better visual of the finished pattern. If I make a mistake early in the pattern, I find it easier to notice if I have the chart to compare it too. Also, it's easier to find my place again if I put the project down for a bit.  

The two styles do share some similarities. Both will show show what color to use either in column on the right side or on the chart row. Rows are usually numbered. Both charts will use the same symbols to show when to slip. There are 2 common versions of the slip symbol. Always read the instructions on the pattern though in case the designer has different instructions for a symbol. 

slip stitch definitions.jpg

V means to slip the stitch purl-wise with the yarn held on the on the wrong side to the back of the fabric.  A V with a horizontal line through the middle or underneath means to slip the stitch purl-wise with the yarn held in the front on the right side of the fabric. 

To work from the 1 stripe (2 rows) to a chart row style, you read the rows first from right to left and then backwards from left to right. This means that each row is worked twice; once forwards for the right side and once backwards for the wrong side. If the pattern is worked in the round than you’d work both rows from right to left because you’re always working on the right side of the fabric. 

To work from the 1 chart row equals 1 knit row style, you’ll always read from right to left. The 1 to 1 style chart is more common for mosaic patterns knit in the round. However, as is the case with the Pair-a-normal Socks, the same mosaic effect can sometimes be made with 1 row instead of 2. 

That’s everything you need to get started with mosaic knitting and start the Mosaic Sisters! Have fun and knit on! 

How To Do The Long Tail Cast On And Helpful Tips

The Mosaic Sisters pattern- a set of colorful mosaic knit kitchen towels, washcloths, and coasters - is here! Meet the sisters and get the pattern.

Check out the other tutorials for the Mosaic Sisters: Mosaic Knitting 101 & Stripes And Carrying Yarn Up The Side


The long tail cast on was was one of the first cast ons I learned after branching out from the backwards loop cast on that most new knitters learn right off the bat. After years of knitting, the long tail method has become one of my favorites and my default cast on when a pattern doesn’t ask for a specific method. It’s stretchy, makes a tidy edge, and works up quickly once you get the hang of it. It can be worked in knit, purl, or ribbing (this tutorial focuses on the knit version). 

The long tail cast-on creates the first row of your work - which is why I especially love this cast on when working with non-stretchy yarns like cotton or linen which can be hard to start from a backwards loop cast on. Having a row already made is also great for when you join to knit in the round because it’s much easier to check that the stitches haven’t twisted around the needle. Plus, if you mess up and knit too many rows like I did on a recent project, you can even un-pick the cast on to fix the mistake. The process is a little finicky, but completely doable. 

Even better, for all of this long-tail goodness, all you need are needles and yarn. 

Getting Started

Pull the yarn over the needle with the tail end to the front. There’s no need to tie a knot. The photos above show how to hold and position yarn on the needles with and without my fingers in the way. Hold the yarn in your left hand with the tail end of the yarn over your thumb and the working end over your pointer finger. The needle goes in the middle. The yarn over your thumb becomes the bottom edge and the yarn over your pointer finger becomes the first row.

How much yarn do you need to pull out? Eventually, you’ll be able to eyeball the amount, but a good trick is to cast on 10 stitches, then unravel to find out how much yarn they used. Multiply the amount and had a few inches to weave in later and you’ll have a good estimate. 

Here’s an interesting fact: if you reverse positions and hold the needle in your left hand and the yarn in your right, you’ll make purl stitches instead of knit stitches. 

The 4 Steps To Make A Stitch

How to make a stitch with the long tail cast on. Also, gifs are perfect for when you don't want to watch an entire video.

How to make a stitch with the long tail cast on. Also, gifs are perfect for when you don't want to watch an entire video.

There are 4 distinct steps to make a stitch which seem complicated at first, but your hands will learn. Cast on enough stitches and you won’t even have to think about doing them. I exaggerated the motions to make the steps clearer, but I usually work with much smaller and faster movements.

Step 1: Bring the yarn in front and up underneath the yarn in front of your thumb. This is the loop that will secure the stitch. 

Step 2: Move the needle behind the forward strand on your pointer finger from right to left.

Step 3: Move your thumb backwards which bring the the loop over the needle and the yarn.

Step 4: Take your thumb out of the loop and pull on the front piece of yarn to secure the stitch.

Repeat those 4 steps until you have all the stitches you need on the needles and your first row. If you’re working in stockinette, purl the next row.  

When Casting On Lots of Stitches…

The main complaint about the long-tail cast on is when making a lot of stitches. I’m going to be conservative and say 50 stitches and up. If your yarn estimate is off, you’ll have too little yarn and have to rip out to start again or too much yarn and have a long tail hanging off the end of your work. To avoid both of these hassles, work the cast on with two strands of yarn instead of one.

You don’t have to knot them together either. Just hold the ends in place on the needle with your fingers. Once the first 2 stitches are on the needles, the yarn is secure and isn’t going anywhere. When the cast on is finished cut the front strand of yarn long enough to weave in. Yeah, it’s another end to weave in but it’s still less time and energy than having to repeatedly redo the cast on.

Tangle Free Circular Needle Storage

Learn how to wrap circular knitting needles and cables to keep them neat, tidy, and tangle free. | withwool.com

I’ve been knitting a lot during the past few weeks so I’m not making hats, mitts, toys, and ornaments during the wee morning hours of December 25th. The pile of gifts has gotten taller but my circular needles and extra cables are a tangled mess. I needed to pull a 2.75 circ out of the bag they’re all crammed in and ended up with all of them in my lap. Ugg. Then I had an idea. Why not coil them the same way as flexible blocking wire?

A video posted by April Klich (@aprilklich) on

Before, my knitting needles were a mess, but now they’re neat and tidy. I can actually grab just the one I want - it’s the small things in life. This trick works well on interchangeable cables too. I’m just got to make myself coil all of them up. 

FO: Amiga Cardigan

The Amiga Cardigan and I have a long history together. My notes tell me that I cast on January 21, 2014, but it seems like so much longer because I originally cast on for a bolero with the same yarn. I fell out of love with the first sweater (and all my mods) and ripped out all my work. Life’s too short to knit sweaters you’re never going to wear after all. 

Amiga is a simple stockinette raglan. Knitting the giant Norma Blanket was more complicated than this, but the Amiga is special because it’s the first sweater that I’ve ever finished. I’ve swatched and cast on for others but this is the only one I’ve ever been able to wear. So, I’m happy with it even though it turned out completely different than I thought it would. 

It wasn’t that my swatch lied to me, per say, but that it didn’t have all the information it needed to tell the truth. When I swatched over a year ago, I cast on just enough stitches to measure 4” between a garter stitch border. Then I washed and dried it the same way I would the finished sweater. The stitches evened out but the gauge didn’t change. I even hung and weighted it to see if the fabric would stretch. It didn’t and and I got started. 

After the initial excitement of casting on for THE first sweater again wore off, I worked on it here and there. Somewhere in the middle I bought 2 extra skeins which took some doing since the color had been discontinued. The off and on knitting might have something to do with why the sweater grew or it might not. I’m not really sure. Eventually an overwhelming urge to finish all the things took overand I finally bound off the collar, weave in all the ends, and blocked the sweater 20 months to the day after casting on.

The first sign that the sweater wasn’t the same size was when I pulled it from the soapy water of the sink. It definitely looked longer when I laid it out. I measured to make sure everything was even but I didn’t compare the measurements to the schematic. I know you should, but I didn’t want to know for sure. There was no denying it though when I tried it on. Instead of ending mid back, the sweater hung inches lower. The previously three quarter length sleeves were full length. The carefully placed button holes had moved several inches down to my belly button.

Disappointing? Yes, but I also wanted to make myself a light, flowing sweater with plenty of drape. I ended up doing  just that so I’m not going to complain. Next time, though, I’m knitting a bigger swatch.

The Specs

Pattern: Amiga by Mags Kandis

Yarn: 5 skeins Elsebeth Lavold Silky Wool - Thunderstorm

Needles: US 10 (6 mm) circulars 

Dates: January 21, 2014 - August 21, 2015

@Ravelry

How To Do The Math For Toe Up Sock Gussets

How To Do The Math For Knitting Toe Up Sock Gussets | withwool.com

I am a toe-up sock knitter. There are lots of reasons why I made the switch to toe up socks after knitting a few pairs of cuff down socks but the main reason is pretty straightforward. I, and most of the people I knit socks for, have big feet. Working from the toe-up means I can increase until I reach a stitch count that fits at a gauge that will make a comfortable, durable sock.

There are plenty of options for heels to work on toe up socks: heel flaps, short rows, afterthought heels, and all manner or hybrids. I usually go for a heel flap with a gusset because that style fits me the best. Luckily, the math to figure out where to start a gusset is easy-peasy.  I do this math for every pair of socks I knit, whether I working from a pattern or making it up on the fly, and it takes less than 5 minutes. Those 5 minutes are worth it to get a great fitting pair of socks. 

To get started you need your stitch count, row gauge, and the finished foot length. When you do the math on the back of an envelope, this is what it looks like. Seriously, the hardest thing about the whole process is measuring the row count. 

Stitch Count x .5 = gusset rows

Gusset Rows / Row Gauge = Gusset Length

Foot Length - Heel Turn Length - Length of Gusset = Where to start gusset

How To Do The Math For Knitting Toe Up Sock Gussets | withwool.com

I’m working on pair of 2x2 ribbed socks that I’m going to use as an example. Here are the numbers and the math.

64 x .5 = 32 sts

32 sts / 13 rows = 2.46”

10.25” - .75” - 2.46” = 7.04”

Stitch Count: 64 sts

Row Gauge: 13 rows/inch

Sock Length: 10.25”

Step 1: The usual number to increase for a sock gusset is 50% of the stitch count. For this pair, that means increasing 32 stitches before beginning the heel turn. 

The typical gusset construction of increasing 2 stitches on one row and working a plain row the next makes figuring out the gusset’s row count really easy. The answer is 32 because I’m increasing 32 stitches. Here’s why:

32 stitches / 2 (because increases happen twice on increase rounds) = 16 increase rounds

Add an equal number of plain rows and: 

16 increase rounds + 16 plain rounds = 32 gusset rows

If you’re knitting a sock to fit a high instep, you’ll probably need a taller heel flap. Increase 60% of the stitches instead of 50%. The rest of the math is exactly the same. 

Step 2: Now to find out how long the gusset will be.

Gusset Rounds / Row Gauge = Gusset Length

32 gusset rows / 13 rows an inch = 2.46” 

Step 3: Now that we have the length of the gusset, we can figure out where to start it. I estimate needing .75” for the heel turn. If you’re making socks for smaller feet, .5” is a good estimate. For a more exact number, measure the length of heel turn on a sock you’ve already knit. 

Foot Length - Heel Turn Length - Gusset Length = Where to start the gusset

10.25” - .75” - 2.46” = 7.04”

After rounding down the final number to get something easier to work with, the gusset needs to start 7” from the tip of the toe. That's all it takes to figure out the increases and where to start a sock gusset. Happy sock knitting! 

How To Do The Math For Knitting Toe Up Sock Gussets | withwool.com

How To Knit And Block A Giant Blanket in 47 Easy Steps

1. Spend 2-3 years knitting a giant blanket.

2. Feverously finish the last 50+ rows and bind off in a month.

3. Decide you need blocking wires to stretch the blanket to its max.

4. Research rigid and flexible blocking wires. Order the flexible ones in hopes of making all future blocking easier. 

5. Impatiently wait 3 weeks for blocking wires to arrive in the mail. 

6. On the day you're going to block, remember that you still need to weave in ends. 

7. Weave in ends. 

8. Decide that filling up the tub would probably be overkill to soak the blanket. Plus, you really don't want to scrub the tub.

9. Figure out that the kitchen sink is probably big enough.

10. Do the dishes so you can scrub the sink. 

11. Scrub the sink. 

12. Get wrapped up in a bunch of other tasks. Decide the sink is clean enough so you don't have to scrub it again. 

13. Fill the sink almost to the brim with cool water and a few capfuls of Soak. 

14. Squish the blanket under the water.

15. Let it soak for 30 minutes. Try to figure out how to squeeze all the water out of it so you can haul it to the bedroom floor to pin it out with dripping a river behind you.

16. Watch a few last minute videos about using blocking wires.

17. After the timer rings, go pull the stopper out of the bottom of the sink. Squish as much water out of the blanket as possible.

18. Take the blanket out of the sink and plop it down in the middle of a much smaller towel.

19. Haul the blanket burrito to the bathroom and drop it on the bath matt. 

20. Make lunch. 

21. Spread out a sheet to keep any bleeding dye and loose fiber out of the carpet.

22. Go back to the bathroom and step on a soggy matt to pick up the blanket. 

23. Gently spread out the blanket on the floor.

24. Carefully uncoil the blocking wires so you don't wing yourself in the face with the tips.

25. Pick a corner and gingerly thread the wire through one edge while hunched over the floor. 

26. Screw that. Sit on the floor and drag the blanket into your lap to thread the wire.

27. Halfway through the first edge, realize you should have started a podcast or music or something to keep you company. 

28. Finish wiring the first side, get up, grab your phone, come back, start a podcast. Not a podcast about knitting though because that's what got you into this mess.

29. Uncoil another wire and start the second edge. Repeat for the third and fourth sides which only take 15 minutes each instead of 20. 

30. Get out from underneath the giant blanket to start spreading it out.

31. Prick your fingers taking t-pins out of the bag. 

32. Stick one pin in a corner and begin smoothing things out. 

33. Start stretching and pinning with what might be described as reckless abandon. 

34. Stand up and check out your handiwork. Notice the blanket looks lopsided.

35. Sigh.

36. Go track down a tape measure - but not the the puny one that you keep in your notions bag - the big metal one. 

37. Stick a pin the blanket's cast on (in the center of course). Measure until you find the longest distance from pin to side. 

38. Take out pins and readjust, readjust, readjust all they all have the same measurement. Also, make sure the corners are about 90 degrees. Smooth, pull, and sweet talk the knitting as necessary. 

39. Somewhere in the middle of this, run out of pins. Get up to look for more and find absolutely zero. Bah.

40. Move pins around until all the edges are straight-ish.

41. Measure one more time just to be sure.

42. Stand up and survey your 2 hours of work. Yay! It's not lopsided anymore. 

43. Go do anything else while the blanket air dries with the help of several fans pointed directly at it. 

44. Keep waiting. All night and the next day if you have too. 

45.  After poking at it a million times, find out that it’s finally dry! Time to celebrate by pulling out all the t-pins without poking yourself and pulling the wires out of the edges. 

46. Stand up and swing the blanket around your shoulders like a cape. So warm and comfy!

47. After doing a happy dance with your blanket/cape, go find someone to cuddle with underneath it. Done! 

Feel free to skip a few steps. I personally recommended not stabbing your fingers with t-pins, pinning the blanket lopsided, or running out of pins. 

Joking aside, I’m so glad this blanket is finally done. It was one of the few things I hauled cross country in the trunk to Los Angeles. Didn’t work on it much more before I moved to San Francisco, but Ididn’t want to move again with it still on the needles. Part of the reason Norma took so long was because I wanted to use up 4 skeins of Lion Brand Nature’s Brown Fisherman’s Wool. Knitting all 1860 yards meant I worked the expanded chart available on Ravelry before charting out an additional 24 rows and then working the edging. Having to bind off 820 stitches was definitely worth it. 

An overwhelming urge to finish all the things helped push progress along too. I knit 2 rows or more a day for weeks until it was finally done. It became one of my daily rituals and I almost miss working on it. Almost. I’m much happier that it’s done and looking forward to snuggling up underneath it for years to come. 

Pattern: Norma by Meghan Jones

Yarn: 3.9 skeins (1813.5 yds) Lion Brand Fisherman’s Wool - Nature’s Brown  

Final Size: 60” x 60”

Needles: US 7 (4.5 mm)

Dates: December 25, 2012 - October 22, 2015

@Ravelry

The Almost Finished Norma Blanket

It was the first weekend of October. There was sci-fi on the TV and I’d grabbed a comfy seat on the couch to finish the last few rows of my extra large version of the Norma Blanket. It takes a long time to knit a row that’s 820 stitches around so I settled in for the long haul with snacks and a drink. Thankfully, knitting garter in the round is still faster than working lace. Even though I was keeping track of each row as I knit it, the bound off row snuck up on me. I even double checked that I’d knit the right number of edge rows before starting. 

Instead of a complicated bind off requiring lots of yarns overs or a tapestry needle, the pattern recommends the simple purl two together bind off. Not only is it stretchy, it moves really quickly once you get into a rhythm. I expected to be up half the night just binding off. Nope. Less than an hour after starting, the Norma blanket was off the needles. I took a lot of breaks stretching it out as I bound off each side. 

I had some idea of how big it would be while it was bunched up off needles, but seeing it spread out was something else entirely. The blanket is about 47” across unblocked. It’s bumpy in the middle and lumpy in the way that lace is when it’s fresh off the needles. The edging waves back and forth with thepattern repeats and almost looks too big for the center. Almost. I’m not worried though because, when I stretch the blanket out over my knees, the lace grows and opens up. It’s going to need all the room the edging can give it. 

Blocking has been on hold for the past three weeks while I non too patiently waited for a set of blocking wires to come in the mail. They finally arrived yesterday! Today, I’m taking over the bedroom carpet and stretching the Norma Blanket to its limits. 

How I Won Spinzilla

I started Spinzilla a day late on Tuesday by spinning 1 ounce of a batt. Wednesday, I spun the second ounce and finished the single. I let the twist rest Thursday and Friday. Saturday, I wound the single into a ball to ply it back on itself. On the last day of Spinzilla, I plied and had a lovely new skein of handspun to drool over. 

This year I thought I’d spend a few minutes spinning everyday until the end of the challenge. Enjoying spinning and not rushing the process was the name of game. I also wanted to spin through my stash of batts which, while not large, is enough to play with. Didn’t really happen like that. Certainly enjoyed the spinning and process, but I didn’t spin every day or clear out my batt stash. I spun just the one batt, and an awesome batt it was, into 130 (390 yards with the plying credit) yards of worsted weight 2-ply yarn. 

That one skein was all it took to win Spinzilla. I definitely did not top last years winning total of 20+ miles spun by a rogue spinner, but I did change the rules. Instead of spinning as much yarn as I could in week, I had fun spinning a batt; added a great new skein to my handspun stash; and got excited about spinning again. The weekend before Spinzilla, my bobbins still had leftover singles from Tour de Fleece on them. Other projects - daily drawing, finishing the Norma Blanket, and yoga - took over my time. Spinzilla brought me back to my wheel after a long drought. Now that I think about it, that long drought is probably the reason I wanted to revel in the process instead of pushing to spin, spin, spin. Now that Spinzilla is over I’ve got plans for for new handspun to make, and spinning is going to be a regular part of my routine again. In the end, 390 yards was all I needed to win. 

What was your Spinzilla like? I hope you won too.

In The Middle of Spinzilla

We’re three days into Spinzilla and I still haven’t finished filling my first bobbin. The fiber, a batt from Fairytale Fibers, is lovely, so why am I not filling all my free time with spinning? Simple. I don’t want to rush my spinning. I know Spinzilla is a challenge to spin as much yarn as possible, but there are other priorities higher on the list this year. I want to enjoy the fiber. I want to enjoy the process of spinning. I want to enjoy the ritual of sitting down at my wheel. I can’t do any of that if I’m rushing to make miles of yarn in a single week.

That said, I’m not ditching the challenge part of Spinzilla. Just redefining it. Instead of spinning all the yarn, I’m spinning all the batts and the wilder stuff I’ve got stashed away. There are batts, mini-batts, and mashups of fiber. This is the week I step out of my comfort zone and spin something with texture. Maybe even art yarn which I want to make, but have no idea what to do with afterward. If I happen to spin a mile of yarn doing it, great. If I don’t, that’s great too.

The rest of my goals for the challenge are pretty simple. Spin every day. Don’t hurt myself. Have fun. These are things I can do. 

What are your Spinzilla goals?

Updated Yardage Calculator for Spinzilla 2015

Spinzilla is next week! The deadline to sign up for the annual challenge to spin all the yarn is this Friday, October 2. You can join a team or spin Rogue if you just want to challenge yourself. Spinzilla costs $10 to join and the money goes to support the NeedleArts Mentoring Program which teaches kids spinning, weaving, knitting, crochet, and spinning. Signed up? Great!

I've spun Rogue since Spinzilla began in 2013 and I'm doing it again this year. In 2014 I wanted to spend more time making yarn and less time totaling yardage so I made a spreadsheet to do the math for me. I've made a few improvements to this year's version and it still calculates plying credit. The first is that the calculator will now tell you how many miles you've spun. The other improvement is actually a second calculator that converts meters to yards and gives all the same information as the first calculator.

To use this spreadsheet, please click "File" in the main menu under "Spinzilla 2015 Yardage Calculator". To use in Google Docs, click "Make a copy..." To download for use in Excel or as an Open Document, click "Download As".

Thanks and Happy Spinning!

How To Measure Yardage And Stop Playing Yarn Chicken

How to Measure Yardage and Stop Playing Yarn Chicken | withwool.com

The urge to finish all the things bit me hard in August. I’ve finished a sweater and a cabled scarf, and have moved on to the Norma Blanket that I cast on in 2012. Part of the reason Norma still isn’t finished is because I’m knitting the expanded version. The other reason is that I wanted to use every yard of nature’s brown Fisherman’s Wool I had in my stash. That’s a grand total of 1,860 yards and the expanded version calls for only 1,500 yards. 

Well, I finished the extended charts and still had a skein leftover which meant I had to chart the extra rows. But how many? To answer that question, I’ve been tracking my yardage. I use this trick a lot to figure out both how big I can knit something before binding off and when I need to stop to knit edging. It’s also pretty handy when you’re working on a pattern with growing repeats. Shawls, blankets, socks, sweaters, hats, and anything you can knit or crochet are all fair game.

How to Measure Yardage and Stop Playing Yarn Chicken | withwool.com

To track your yardage, you’re going to need a scale that can measure in grams. I use a basic digital kitchen scale.

How often you weigh your yarn depends on what you’re making:

  • If you’re making something where the stitch count stays the same, like a scarf, you only have to measure once. After you’ve cast on and worked a few rows, weigh the yarn ball, and knit a few more rows. 

  • If you’re making something small, - say a pair of stockinette socks or a hat - weigh, work at least 4 rows, and weigh the yarn again. The numbers will be more accurate over a larger number of rows than just one.

  • If you’re making something with a larger stitch count, like a shawl, you can knit a single row or pair of rows between weigh-ins. 

  • If making something with repeats, measure the yarn before and after working one repeat. Even if the repeats get larger as you go, you’ll have a better idea of the amount of yarn required. 

  • Weigh the yarn when the stitch pattern changes. A section of straight stockinette isn’t going to need the same about of yarn as a section of elongated stitches, cables, or slipped stitches.

  • Tracking yardage for projects where the stitch counts increase or decrease is a little more complicated. The good news is that, in most cases, the amount of yarn it takes to knit a row isn’t going to change that quickly. You don’t have to measure after every single row like I did for 100 or so rows of the Norma blanket. Maybe you measure yardage every 5, 10, or 15 rows. Just check regularly and keep your notes handy.

How to Measure Yardage and Stop Playing Yarn Chicken | withwool.com

Once you have the numbers, it’s time to do the math. There are two options. The first is a little easier and gives an estimate. The second is more precise but requires more math.

Option 1: Divide the grams of remaining yarn by grams per row. The answer is the max number of knit-able rows, including the bind off. Next subtract the bind off and number of edge rows, if any, from the max row number. That answer is how many rows to work before starting an edging or binding off. If you’re working a repeat, divide the number of workable rows by the number of repeat rows. 

As an example, here’s the math I did to find out how many more rows I needed to chart out for Norma. At the end of the chart I had 268 grams of yarn and was using 7-8 grams per row. Thanks to my meticulous measuring, I knew it would take a lot more stitches to need 9 or more grams per row.

268 grams / 7grams per row = 38.2 rows

268 grams / 8 grams per row = 33.5 rows

Since I’m going to be using more and more yarn with every row, I went with the 8 gram result which means 33 rows in the maximum I have yarn for. 

33 rows - 7 edge rows - 1 bind off row = 25 rows

25 rows / 8 rows per repeat = 3.1 repeats. 

So, I can knit 3 full repeats before starting the edging. Plus, I have a little wiggle room with the yardage, and hopefully not have to play yarn chicken during the bind off. 

How to Measure Yardage and Stop Playing Yarn Chicken | withwool.com

Option 2: Instead of working with row counts, this option focuses on finding stitches per gram. 

Why worry with the number stitches per gram of yarn? It’s great for estimating the yarn required for patterns where the stitch count changes from row to row. If you’re designing a pattern, you can use stitches per gram of a swatch to estimate how much yarn the pattern will need before you cast on. The only downside is that you need to have a fairly accurate stitch count. In the example below, stitch count could refer to the number of stitches per row, per repeat, or the number of stitches worked between weigh-ins. 

Stitch Count / Grams Worked= Stitches Per Gram

732 stitches / 7 grams = 104.5 stitches per gram

Armed with the number of stitches you can knit per gram and a spreadsheet of stitch counts, you can figure out exactly how much yarn a row, repeat, or bind off with need. Take the numbers with a grain of salt though because gauge changes and yarn isn’t always evenly spun. You can also follow the steps in the first method with stitches per gram as well. 

I-Cord Necklace How To

Learn how to make an i-cord necklace that’s a quick gift for you or a friend. | withwool.com

While I was shopping for beads for an upcoming project, I found a cute turtle pendant that ended up in my digital cart. It was still cute once I had it in hand, but I didn’t have a way to wear it. I knew if I put it away in drawer that I’d forget about it so it stayed on the table. My kitchen table, AKA my desk, is a jumble of books, yarn, knitting needles, spinning fiber, and tech. It wasn’t long before the pendant and the right yarn ended up next to each other. It be much easier to make a necklace for the pendant instead of forgetting to ever buy one. 

Learn how to make an i-cord necklace that’s a quick gift for you or a friend. | withwool.com

Materials

2-3 yds Sport Weight Yarn

2 2.75 mm double pointed needles OR a short circular needle

A pendant, charm, or bead

Tapestry needle

Knitting The Cord

Learn how to make an i-cord necklace that’s a quick gift for you or a friend. | withwool.com

 Cast on 3 stitches and slide them to the right tip of the needle. 

Learn how to make an i-cord necklace that’s a quick gift for you or a friend. | withwool.com

Pull the working end of the yarn behind the stitches from left to right. Knit the 3 stitches and slide them back to the right hand tip of the needle. This method allows you to work flat but still get a closed, round cord when you’re done. 

Repeat until the i-cord is 19” long or the length you want plus 2” to tie the knots. I decided how long to make my i-cord by comparing it the length of one of my favorite necklaces. 

Learn how to make an i-cord necklace that’s a quick gift for you or a friend. | withwool.com

Bind off the 3 stitches and cut the working yarn. Weave in the ends by pushing the needle and thread through the center of the cord for an inch before pushing the needle out and cutting the thread. If your pendant has a small bail or opening, wait to weave in one of the ends. 

Learn how to make an i-cord necklace that’s a quick gift for you or a friend. | withwool.com

While not strictly necessary, blocking the i-cord will help even out the stitches and create a nicer looking necklace. To block, soak the i-cord in cool water for 15 minutes. Wrap it in a towel and squeeze out the excess water without wringing. Lay it flat to dry. 

Tying the Stopper Knot

It might take a few attempts to get the knots in the right spot or looking just so. Keep the tapestry needle ready because it’s a big help unpicking the knots. I re-tied each several times to get the right tension and placement.

Learn how to make an i-cord necklace that’s a quick gift for you or a friend. | withwool.com

Make a loop with one end of the cord. 

Learn how to make an i-cord necklace that’s a quick gift for you or a friend. | withwool.com

Bring the end of the cord behind both strands of the loop…

Learn how to make an i-cord necklace that’s a quick gift for you or a friend. | withwool.com

then pull it around the first loop and into the space between the loop and the wrapping end of the cord.

Learn how to make an i-cord necklace that’s a quick gift for you or a friend. | withwool.com

Pull the end through the first loop from behind and tighten the knot. 

If the photos aren’t helping, check out this animation of how to tie the Stopper Knot

Learn how to make an i-cord necklace that’s a quick gift for you or a friend. | withwool.com

Before tying the next knot, string the pendant. If the bail is small, pull the unwoven end through the bail first and use it to pull the cord through. Weave in the end. 

Tying the Slip Knot

Learn how to make an i-cord necklace that’s a quick gift for you or a friend. | withwool.com

Make a loop with the opposite end of the cord.

Learn how to make an i-cord necklace that’s a quick gift for you or a friend. | withwool.com

Bring the end over the legs of the first loop and make a second loop. 

Learn how to make an i-cord necklace that’s a quick gift for you or a friend. | withwool.com

Wrap the end around the first loop’s two legs twice and bring the end out through the second loop. Tighten the knot leaving the first loop open at the end. Done correctly, you’ll be able to shrink or grow the loop as needed. I like the pull the slip knot tight after pulling the stopper knot through to keep the necklace in place.  

If the photos aren’t helping, check out this animation of how to tie the Slip Knot

Learn how to make an i-cord necklace that’s a quick gift for you or a friend. | withwool.com

Done! Enjoy your new necklace!

Learn how to make an i-cord necklace that’s a quick gift for you or a friend. | withwool.com

Exploring the Balclutha

Long weekends are the perfect time to go exploring so  The Bearded One and I took the opportunity to explore more of San Francisco. This time we ended up wandering around the San Francisco Maritime National Historical Park. Meandering through a collection of old, restored ships is a pretty good way to spend the afternoon. The Balclutha, built in 1886, was particularly interesting because of its age and beautiful details. The spinner in me kept noticing all the really cool knots and rope work. 

The chart house is happy to see you.

The Eureka ferry boat is a little confused. 

This handle was in the galley of the steam tug Hercules. 

Lessons from 31 Days of #DrawingAugust

#AugustDrawing-Lessons.jpg

There’s been plenty of knitting going around here. I finished a sweater, put a few feet on a scarf, and worked on a few designs. While it feels great to have made progress and crossed a few things off my knitting list, August’s main project was #DrawingAugust. #DrawingAugust is pretty simple - draw every day and show your work. Thanks to the previous habit-building 212 days of #yearofmaking, drawing everyday was pretty easy. When I missed a day, I caught up on the next day which means I have 31 drawings tucked away in my sketch book. 

The hard part of this challenge wasn’t the drawing. It was showing my work. There were a few sketches that I was really proud of, and I couldn’t wait to post them to Instagram. But there were also a few that I would have rather hidden away. I’m a firm believer that once something goes online, it’s always online. The possibility that someone’s first impression of my work might not be the “perfect” one I want is rattling. Even though I’ve posted the less than perfect sketches this month, it didn’t get any easier. Here’s the thing though: I’d didn’t start #DrawingAugust with the intention of creating perfection. There’s no way I could have finished 31 sketches or even started the first if I had. #DrawingAugust was about the process, about learning, and about doing the work. I wasn’t chasing perfection; I was just trying to get better at drawing. 

31 days later I’m happy to say that my drawing skills did improve. I’m certainly more confident with a pen. I’ve also gotten past the idea that all of my sketches had to 100% accurate. That rule had been floating around in my head for years, and it wasn’t until I let it go that I realized how much it held me back. I knew I couldn’t accurately reproduce an object so there was no reason to try. Beginner or not, the idea that you have to chase perfection and achieve it every day can be the biggest stumbling block. You have to give yourself permission to fail so that you can keep trying day after day. 

Also, 20 - 30 minutes every day adds up. The bulk of my sketches took about 20 minutes from start to finish. Some might have only taken 5 and some might have take 45, but 20 minutes was the norm. 20 minutes a day might not seem like much, but that’s over 10 hours of work spread across the month. It’s time well spent.  

Now that it’s September, I’m moving on to a different daily project, but I’m not packing away the sketchbook. I was getting bored doing straight line drawing so I’m going to experiment and try different techniques and styles. Maybe I’ll have a full sketchbook by the end of the year.

In Defense of the Cosy and a Free Pattern

A few months ago I decided that I had to knit a cosy for my water bottle. I was tired condensation soaking the side of my pants as a I walked and wiping up water rings whenever I picked it up. A knit cosy seemed like the perfect solution. Stay with me here. I know the first thing people thing of when they hear “cosy” are creepy toilet paper covers. I know I do. 

Cozies can be functional though. I like cup cozies since anything that lets me drink hot beverages without burning my hands is a winner. Phone cozies are pretty helpful too since they protect screens from scratches. Hot water bottle cozies keep hot water hot longer. I’ve never made a tea cosy but I’ve got a small glass pot that could probably use a little insulation between pours.

So, I measured my water bottle and started knitting it a cosy in hopes that the thing would stop sweating all over me. My first thought was to use cotton because it makes absorbent kitchen towels, but I went with wool instead. Wool has more stretch than cotton which has helped keep the cosy on the bottle. Plus, wool is a much better insulator. It’ll definitely keep you warm, but it’ll also keep cold things cold. I fill up the cozied water bottle with ice and cold water. Even after sitting in 80º room for 70 minutes, there’s still ice floating around hours later. Cozies win!

If I’ve convinced you to cosy up your water bottle, here are a few tips and a recipe.

Measure first. It’s tempting to eye ball and guess how many stitches to cast on, but water bottles are larger around than you’d think. Mine holds 33oz/1000 ml and is 11” in circumference.

Negative ease will keep the cosy in place. The knitting is going to stretch during use and, if it stretches too much, the cosy will just fall off. By making the cosy slightly smaller than the water bottle, the cosy will stretch to fit but not get too big. A negative ease of 10% worked well for me. 

For example: My water bottle is 11” around and my gauge was 6 stitches to the inch which would give me 66 stitches before negative ease. Including 10% ease means I’d need 10% fewer stitches which brings the cast on number to 60. 

Put some ribbing on it. Whether you’re adding lace or sticking with stockinette, a few inches of 2x2 ribbing at the top will make the cosy easy to get on and off.  

Use wool. It’s got great stretch which will keep the cosy on your bottle. It’ll keep cold water cold and hot water hot. Plus, it’ll be a little easier on your hands when you knit.

Waffle Rib Water Bottle Cosy Recipe

Cast on a multiple of 4 stitches. For my 11” circumference bottle, that was 60 stitches at gauge of 6 stitches/inch.

Join to work in the round. Work 2x2 rib for 1.5”

Repeat the waffle rib pattern until the cosy is as tall as your water bottle. 

    Rows 1-2: knit

    Rows 3-4: knit 2, purl 2

Decreases work just like a hat. Repeat 1 decrease row and 1 knit row. Here’s what it looks like over 60 sts (there were 6 set of decreases that happened over 10 sts):

    Row 1: *knit 8 sts, k2tog* repeat between * *

    Row 2: knit all 

    Row 3: *knit 7 sts, k2tog*

    Row 4: knit all

    Row 5: *knit 6 sts, k2tog*

    Row 6: knit all 

    Row 7: *knit 5 sts, k2tog*

    Row 8: knit all

Once I’d decreased half the stitches, I started decreasing every row to keep bottom from bunching.

Cut the yarn and pull through the stitches when there’s 10 or less on the needles.

Weave in the ends and the cosy is good to go. 

Rainbow Waffle Socks

My sock drawer might be close to overflowing, but it’s been awhile since I’ve knit myself a pair of cushy socks to wear to bed. At night, my toes can get painfully cold and thick worsted-weight socks are the only answer. My favorite pair of bed socks - they’re also the first pair of toe up socks I ever made way back in 2007 - finally saw enough wear to develop a few well placed holes. I have every intention of darning them. Eventually. In the mean time, I need another pair of socks in the rotation. So, hello rainbow waffle socks. 

Once there were enough stitches on the needles I went with one of my favorite stitch patterns, the waffle rib, because it’s stretchy, fun to knit, and good looking. It added just enough texture to keep the knitting from getting boring, especially during the larger color blocks. Since there was only 244 yards and I wanted a longer cuff, the afterthought heel was the way to go. I followed the steps in this tutorial to open up and knit the heel.

The one thing I did differently on this pair was changing up the order of ssk’s and k2tog’s on the heel decreases. Even though it definitely looks different, the fit is exactly the same. 

I’m glad I didn’t try to match up the stripes because the 2 balls weren’t even close to the same. Both were the same dye lot, and I had no idea they were so different from just looking at the balls. Somehow the heels matched up with no help from me. I like wearing mismatched socks though so this pair makes me extra happy. What more could a knitter ask for?

The Details: 

Yarn: 2 balls Classic Elite Yarns Liberty Wool - 7838

Needles: 2.75 mm circs

Date: June 18 - Aug 4, 2015

Full notes on the Ravelry page

223 Days of #YearOfMaking

Read more: Lessons from 50 Days of #YearOfMaking

Way back on January 1st when I started #yearofmaking, my goals were simple. I wanted to make something every day, learn new things, and improve my skills. To keep myself accountable, I’d post a photo of the day’s work to Instagram. Day 223 looks a lot different than Day 1. 

Over the past 7+ months, I’ve spun yarn, knit a lot, cooked many dinners, taken photos, written thousands of words, made videos, baked cakes, and doodled. I have photos and logs tracking everything I’ve made. Seeing those chains grow has helped me keep going. Sure, there are days that I didn’t make anything, but those days are rare. 

Making something every day is now a habit and I get a little fidgety if I haven’t done something by the end of the day. That’s not to say that I’m finishing something everyday. There’s no way I could keep up the pace if a project had to be complete by the time I went to bed. If I only knit 2 rows on sock, it counts. Building the habit of making is what was important. 

I’ve gotten a lot of good from #yearofmaking but it was starting to feeling like I was just going through the motions in June and July. Then Tour de Fleece happened. To get ready I set goals and picked a skill to focus on. After 3 dedicated weeks of spinning, my forward draft and handspun were much improved. I was even able to check “make sock yarn” off my spinning bucket list! Seeing that improvement put the excitement back into daily making. 

When Tour de Fleece ended, I went looking for something else to focus on. When I read about #DrawingAugust I knew I’d found my next goal. I’m now drawing every day and keeping the sketches simple so I can finish them in 15 - 30 minutes. Some drawings I’m really proud of and others I’m embarrassed to show, but they all go up. It’ll be nice to see how I’ve improved at the end of the month. Plus, this project has also been a good kick in the butt to finally watch all those online classes I’ve bought and never gotten around to watching. 

Instead of being separate projects, Tour de Fleece and #DrawingAugust brought intention back to #yearofmaking for me. At first, just making something every day was enough because I was building the habit. Once that intention was “complete”, I was still making things but I wasn’t learning or improving my skills. I needed a new intention to keep going or I was going to find reasons about why playing video games was a perfect use of all my free time. This month, improving my drawing is my motivation. These smaller goals are what’s going to keep me making to the end of the year.