Marginalia and Spreadsheets

A close up view of my in progress Free Your Fade shawl with grey and green stripes.Marginalia and Spreadsheets || withwool.com

I remember taking a random knitting survey that asked if I preferred printed patterns or digital patterns. I am 100% in for printing my patterns. I’ll keep the file on my phone as a backup, but the paper version is what I’m going to work from. Why? Because it is so much easier to make notes, track repeats, and see the whole pattern at a glance. Plus, I don’t have to run the distraction laden gauntlet that is my phone every time I have a question about a stitch count.

A segment of the knitting pattern with my notes tracking row counts, yarn used, and when to switch colors.Marginalia and Spreadsheets || withwool.com

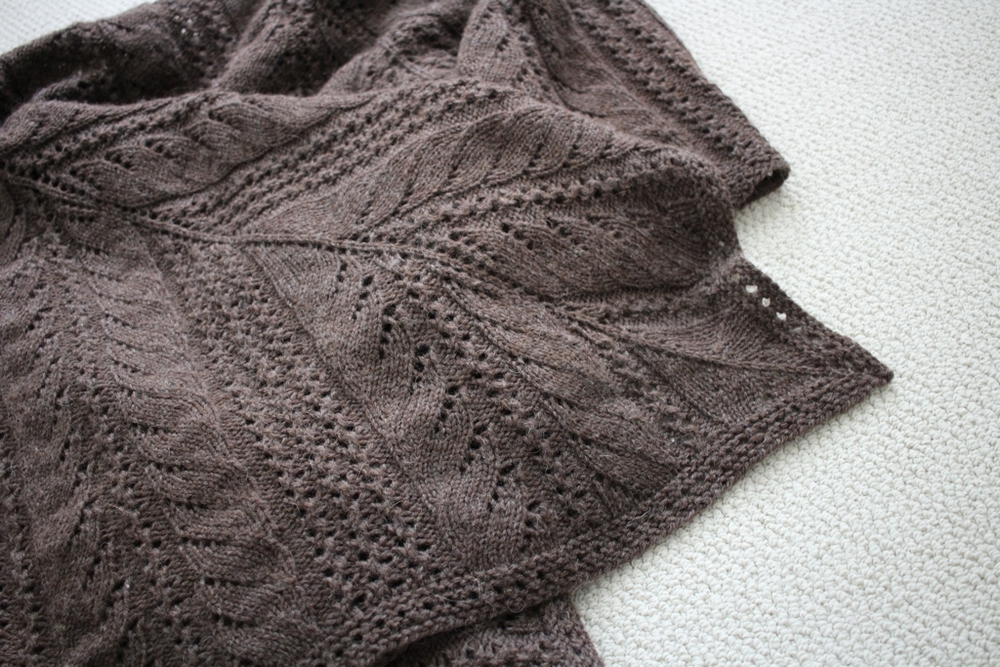
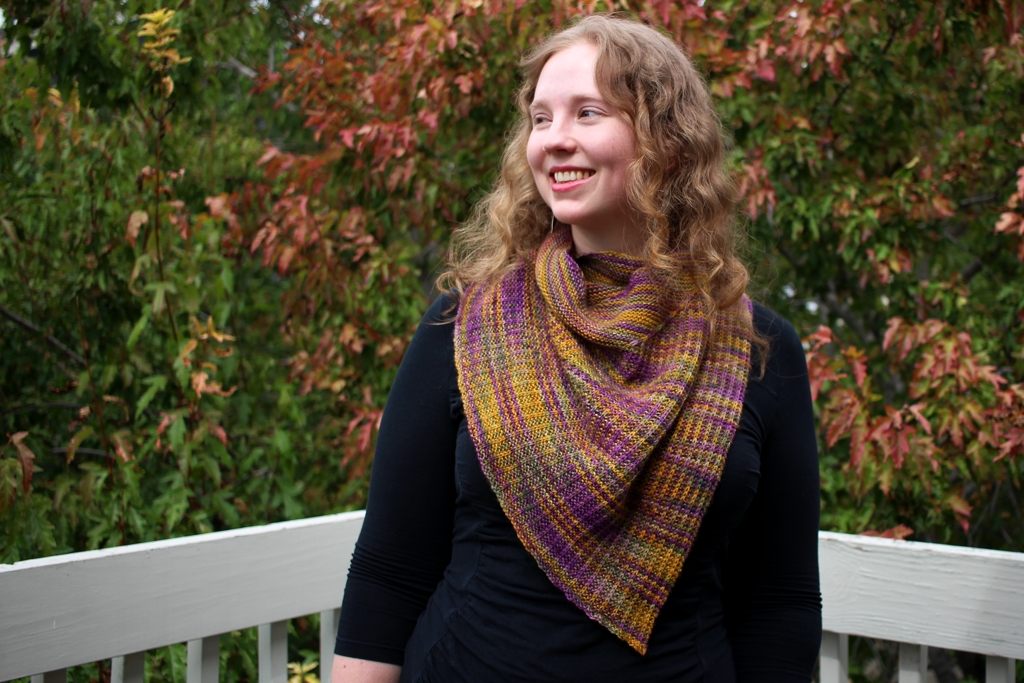
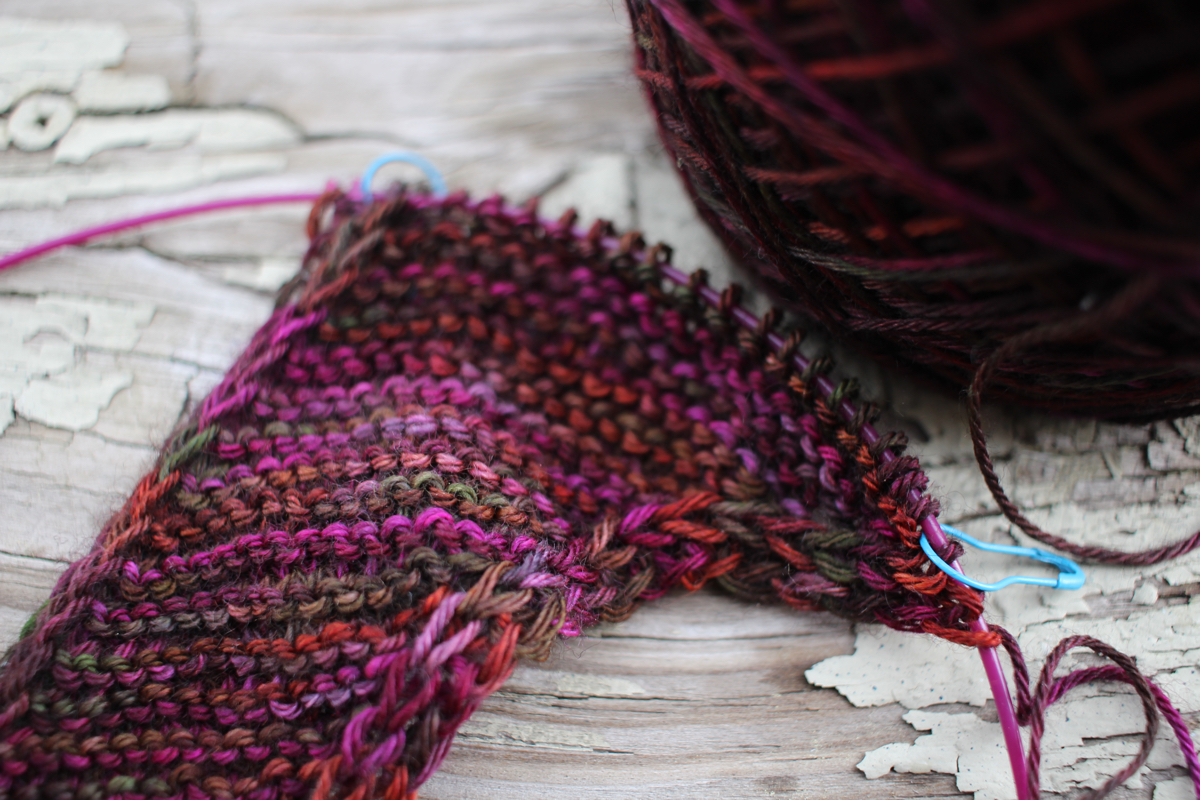
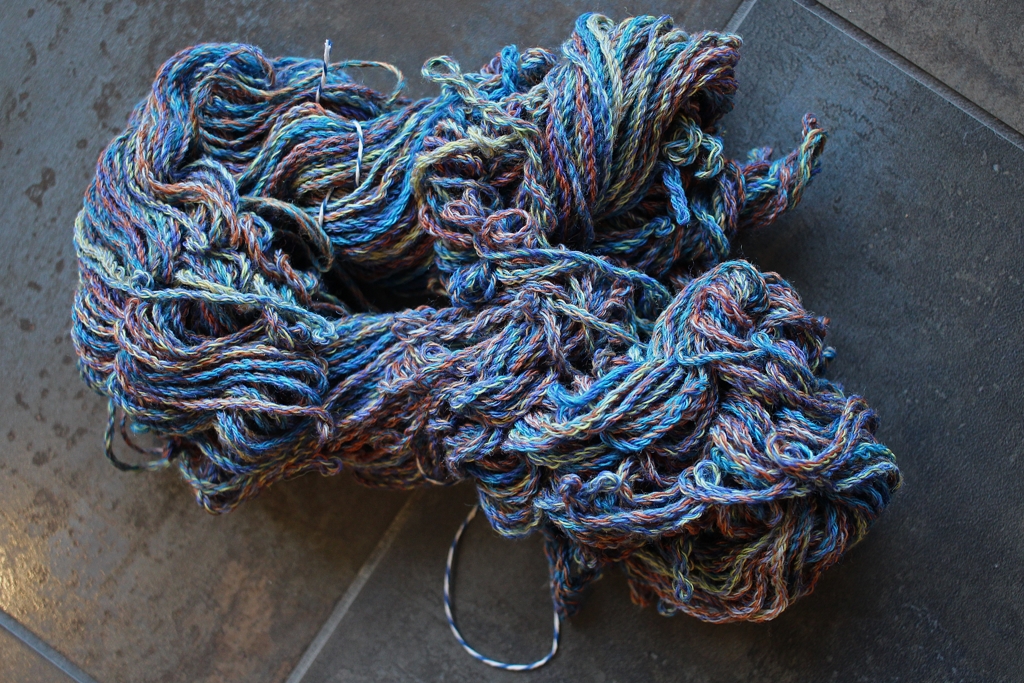
The Free Your Fade pattern, or the Yarn Chicken shawl as I’ve come to call it, is the perfect example. The margins are jam packed with notes. You can see where I’m counting row repeats, tracking how much yarn each section is using, and telling myself where to fade in new colors. All this marginalia is also a pretty handy indicator of how much I’ve knit these past weeks - AKA a lot. This is one case where working from a screen can’t beat paper.

A small segment of my spreadsheet used for tracking rows and yarn used per repeat. #FreeYourFadeShawlMarginalia and Spreadsheets || withwool.com

This is not to say that I’m not going to use a computer/phone when needed to enhance my knitting. My spreadsheets and knits are best friends. Take a gander at the screenshot above. Those strings of numbers are me “knitting” the shawl digitally. With enough IRL knitting and then weighing the yarn after each repeat, I was able to determine how much yarn is used per stitch. Armed with that minuscule number, I can work ahead in the spreadsheet, estimate how much yarn will be used, and figure out where to switch colors. There have been some leftovers, but I’m fairly confident I’m getting as much out of the yardage as I can.

An overall photo showing the #FreeYourFade shawl with 4 colors knit and and 2 yarn balls waiting to be knit.Marginalia and Spreadsheets || withwool.com

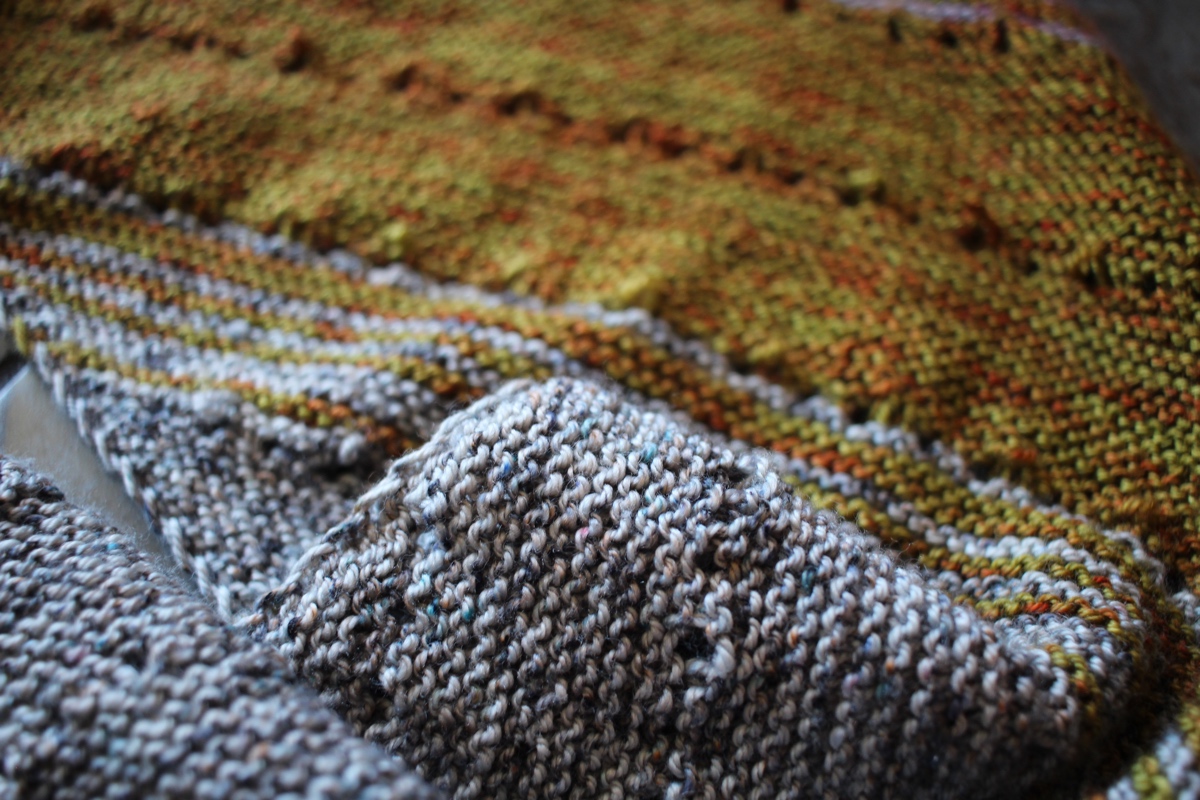
Even though this shawl isn’t the low key process knit I was expecting, it’s still really fun. It’s also a great excuse to watch other people play video games I’m not going to play myself. As much as I’ve been focusing on the stitch counts and row by row of this pattern, taking these photos is the first time I laid the shawl out and got a good look at all of it. I really like my Free Your Fade which is, you know, good since I’ve put so much time and energy into it already.

Yarn Chicken Shawl

As a happy birthday gift to myself I finally wound the yarn to knit a Free Your Fade shawl by Andrea Mowry. Dyed by Sun Valley Fibers, the colors are earthy and lovely. The merino/cashmere/nylon blend has been a joy so far. I really enjoyed casting on and knitting the first few repeats during a day trip to Rocky Mountain National Park. However, this shawl is going to be more stressful to knit than I originally thought. Why? I have already played yarn chicken and lost on the first fade!

Ran out of yarn with just a few stitches left in the row. Sock yarn leftovers to the rescue! Yarn Chicken Shawl || withwool.com

I was tracking how much yarn I used every repeat (small digital kitchen scales (<<— affiliate link!*) are awesome for this) and estimated I’d have just enough yarn to finish Color 1. I was right except for the 26 stitches left at end of the last row. Bah. It was late so I went to bed instead of ripping back.

Ran out of yarn with just a few stitches left in the row. Sock yarn leftovers to the rescue! Yarn Chicken Shawl || withwool.com

Getting some sleep turned out to be the best option because, in the morning, I remembered all the leftover sock yarn I have stashed away. Maybe I could find some that matched? Turns out that I did have something close, and can’t tell the difference between the two in the shawl. The extra ends are the only sign I had to take drastic measures. Whew!

Ran out of yarn with just a few stitches left in the row. Sock yarn leftovers to the rescue! Yarn Chicken Shawl || withwool.com

I’m going to rename the shawl Yarn Chicken because, while I have the required amount of yarn, all six colors are the same yardage. Those rows are only going to get longer and longer too. I did find a few other matching leftovers so I do have some insurance, but knitting this is going to be...interesting. The scale and a spreadsheet will be my constant companions.

*This post contains an affiliate link which means, if you decide to buy through that link, I’ll get a small commission. Thanks!

10th Anniversary Celebration + Sale

This week is the 10th anniversary of With Wool! It’s had a few different names over the years since I cut my teeth blogging on LiveJournal, but With Wool got it’s real start when the Bearded One bought me a domain for my birthday. I had graduated college a few months before, and was using my greater amounts of free time to dive a little deeper into blogging, knitting, pattern design, and fiber arts. My first few years of posts weren’t just about knitting. I tried origami, shared kumihimo tutorials, and wrote about monthly goals for yoga, art, and learning to spin yarn. The bulky blue and yellow yarn below is my very first handspun!

It’s been wonderful looking back at my posts and seeing the projects and yarn I’ve made. I’ve learned so much and made dozens of tutorials. My life has changed so much as well with several cross country moves, marriage, and a now a young kiddo. It’s been a wild and wonderful 10 years.

What’s next?

  • For one, the blog will keep going because I like writing it though I will be mixing things up a little. There will still be step-by-step tutorials and other longer posts, but I’m also aiming to post more short WIP updates and other ramblings. I miss writing that sort of thing. And I’m going to try to post more than twice a month which should be easier with shorter posts.

  • I’ve mostly given up on the idea of video tutorials because I hate filming and editing videos. There might be the rare tutorial video, but they’re not a top priority.

  • I’m going to keep working on knitting patterns even though they’ll take me longer than usual. My main work time is nap time after all.

  • I’m also giving myself the permission and leeway to change things up if they aren’t working anymore. No more feeling obligated to do something just because I’ve been doing it for years.

A compilation of my knitting patterns from top to bottom: The Odd Couple Shawl, The Mosaic Sisters dishtowel set; Sapling baby hat; and Diagonal Socks. Available on Ravelry.com || withwool.com

And it’s also my birthday. So to celebrate my joint blogging anniversary and birthday, I’m having a sale. With Wool patterns will be 34% off for the next 2 weeks! Thanks for celebrating with me!

Use code HOORAY here, now through August 21, 2019, to pick up a pattern or two you’ve had your eye on.

FO: The Long Awaited Mrs Watson

The Mrs Watson shawl was worth the wait, and will be great to wear this Fall. #knitting | withwool.com

Some projects just seem to take ages, and this Mrs Watson shawl was one of them. The pattern sat in my queue since it was first released 2015. It took me 3 years to get the pattern and buy the yarn to make it. At least I cast on less than a week later. The first stripes went pretty fast once I figured out what was going on. The rhythm of the short rows was soothing too. Then Mini Me joined the family, and I barely knit for months. Sure, I looked at my knitting but didn’t have the energy or brain space to actually pick it up.

Eventually the fog lifted and I did want to knit again. Plus, I could knit again. The Mrs Watson shawl was just what I needed too. There were some interesting bits, but the bulk of the shawl is garter stitch - and I could still count to 10 - so I was able to just knit and watch her play. In fact, that’s how I knit the bulk of this shawl. She crawled around and played, and I followed behind her with needles in hand and project bag hanging from my arm.

The Mrs Watson shawl was worth the wait, and will be great to wear this Fall. #knitting | withwool.com

Six months after casting on, I finally bound off. Blocking didn’t take long at all, but I did have to do some next level stacking to keep the Mini out of the wires and pins until the shawl was dry.

The real reason that it seems like this shawl took ages, was that it took me another 8 months to photograph it! What took me so long? I don’t even know anymore. It sat balled up in a box until I was photographing a hat. The light was good and the camera ready so Mrs Watson finally got her time in the spotlight.

The Mrs Watson shawl was worth the wait, and will be great to wear this Fall. #knitting | withwool.com

I used a fingering weight yarn instead of the recommended sport weight so the finished shawl is smaller than I expected. Yet it’s the right size to wrap around my neck and tuck into my coat. It’s cosy and geometric, but not bulky which I really appreciate. I’ll be wearing it a lot this Fall. Still, I’m tempted to make a second Mrs Watson in a sport or worsted weight yarn for a big, super warm shawl. Maybe that one won’t take another three years to start.

The Specs:

Pattern: Mrs Watson by Martina Behm

Yarn: MJ Yarns Tough Ram - Garnet and Pearl

Needles: US 6 (4mm)

Dates: April 20 - October 21, 2018

@Ravelry

The Mrs Watson shawl was worth the wait, and will be great to wear this Fall. #knitting | withwool.com

A Day At The Estes Park Wool Market 2019

Learn how to shop at a fiber festival, and follow along with me for the day at Estes Park Wool Market 2019. | withwool.com#fiberfestival #epwoolmarket #spinning #knitting #estespark

Last weekend I packed up the family and plenty of snacks to drive up to the Estes Park Wool Market. It’s a fun local wool festival that I enjoy visiting every year with a neat marketplace, classes, demos, and animals. Then when we’ve had our fill of the festival, we can head over to Rocky Mountain National Park which is always worth a visit. Since we had to skip the festival in 2018 (new baby + no sleep = so tired), I was really looking forward to going this year. Plus, it would be the Mini’s first fiber festival! How could we not go?

Learn how to shop at a fiber festival, and follow along with me for the day at Estes Park Wool Market 2019. | withwool.com#fiberfestival #epwoolmarket #spinning #knitting #estespark

I wasn’t about to let precious knitting time go to waste and brought my Curve of a Boat shawl with me for the drive. The pattern was great for letting me knit and watch the scenery at the same time.

Learn how to shop at a fiber festival, and follow along with me for the day at Estes Park Wool Market 2019. | withwool.com#fiberfestival #epwoolmarket #spinning #knitting #estespark

We started in the marketplace. Mini didn’t mind being pushed around in the stroller too much, but she definitely wanted to be carried around for a better view of all the yarn and excitement. Thankfully, she let me follow my usual festival shopping routine which looks like this.

  1. Go in with a list. I like to make a list of all the projects I’m shopping for and what materials I need. If the festival is going to be super crowded or huge, I check out the vendor list before hand and write down which ones I want to visit as well.

  2. Next I take a full circuit of the market place to see which ones catch my eye or might have something I want. Unless I see the absolute perfect yarn/fiber, I write down the vendor and their location so I can come back later. Admittedly, this is way easier to do at smaller festivals where backtracking isn’t so much of a hassle.

  3. Once I know which vendors I want to visit, I get down to shopping and trying not to get overwhelmed by all the pretty yarn. Knowing where I want to go helps me get exactly what I want for a project and not settle when the perfect thing might be in the next booth. And when I see a sample project that I like, I take a photo of the info so I can look it up later.

Once I know which vendors I want to visit, I get down to shopping and trying not to get overwhelmed by all the pretty yarn. Knowing where I want to go helps me get exactly what I want for a project and not settle when the perfect thing might be in t…
Learn how to shop at a fiber festival, and follow along with me for the day at Estes Park Wool Market 2019. | withwool.com#fiberfestival #epwoolmarket #spinning #knitting #estespark

My shopping list was pretty short this year. I only had two things on my list: a large, single skein gradient to knit Wingspan by Kyle Vey and fiber from Hummingbird Moon. I couldn’t find the colors I wanted for Wingspan but I did buy two very fun fiber bumps from Hummingbird Moon. The colors she dyes always spin up magically, and I can’t wait to see how these transform.

After finishing up in the marketplace, we took Mini on a walk to see all the animals. There were sheep, goats, llamas, alpacas, and rabbits. I’m pretty sure she liked seeing all these new and interesting animals, but was much more interested in getting lunch.

Learn how to shop at a fiber festival, and follow along with me for the day at Estes Park Wool Market 2019. | withwool.com#fiberfestival #epwoolmarket #spinning #knitting #estespark #navajochurro
Learn how to shop at a fiber festival, and follow along with me for the day at Estes Park Wool Market 2019. | withwool.com#fiberfestival #epwoolmarket #spinning #knitting #estespark #alpaca
Learn how to shop at a fiber festival, and follow along with me for the day at Estes Park Wool Market 2019. | withwool.com#fiberfestival #epwoolmarket #spinning #knitting #estespark #llama
Learn how to shop at a fiber festival, and follow along with me for the day at Estes Park Wool Market 2019. | withwool.com#fiberfestival #epwoolmarket #spinning #knitting #estespark #goats

We left the festival and grabbed burgers before spending the rest of the day wandering around downtown Estes park. I picked up a few souvenirs and just the right amount of chocolate drizzled caramel corn. It was a nice surprise to come across the Estes Park Area Weaver’s Guild during our walk. Their space was filled with huge floor looms and a giant walking wheel. The wheel and been repaired and restored, and my fingers were itching to give it a spin. Maybe it’s finally time to get back to my own spinning wheel.

Learn how to shop at a fiber festival, and follow along with me for the day at Estes Park Wool Market 2019. | withwool.com#fiberfestival #epwoolmarket #spinning #knitting #estespark #spinningwheel

All in all, it as a good trip and a nice family adventure. We all had fun and I’m sure we’ll be back next year for the festival. We didn’t make it to Rocky Mountain National Park this time, but now we have a reason to go back to Estes Park again soon.

The Shawl That Bronchitis Gave Me

The Curve of a Boat shawl has been a great distraction from all the coughing. | withwool.com#knitting #knitshawl #hedgehogfibers

I’ve got a piece of paper on my desk that lists most of my current knitting projects. Well, the projects with a deadline or just what I want to be done with already. Said list is about half completed - never mind that I wrote it the end of January - and it’s time to finish the last few lingering things so I can get back to a clean slate.

And yet, I’ve been feeling the urge to cast on for a new shawl. Or a blanket. Or a pair of vanilla stockinette socks. Something rhythmic to accompany the random minutes of free time that are scattered throughout the day and after dinner. I have pretty new yarn ready to be knit into a gradient shawl and plenty of sock yarn too, but no pattern called my name. So I stuck to the knit list. I’ve got a finished hat and an updated pattern to thank for it too.

The Curve of a Boat shawl has been a great distraction from all the coughing. | withwool.com#knitting #knitshawl #hedgehogfibers

Then two things happened. I came across the Curve of a Boat by Larissa Brown, and it was just what I was looking for. Clean lines, simple lace, and interesting details. I bought the pattern the day it came out which I hardly ever do anymore. That’s how much I wanted to knit this shawl. The second thing that happened was that I got bronchitis. Coughing up my lungs and everything else for a week straight sapped my willpower. So, hello new shawl. Fingerless mitts, I will get back to you soon.

Curve of a Boat and I are still very much in the newness of our relationship. I’m enjoying the short and sweet repeats that are slowly building a lovely foundation for the lace that is to come. The rows, even though they’re short, do require my attention because of all the slipped stitches and paired increases and decreases. The knitting is challenging in the best way because I have to keep up with someone else’s instructions instead of writing my own. It’s a nice change of pace. Along side the medications, this shawl has been so helpful to my recuperation. It’s a good distraction from all the coughing.

The Curve of a Boat shawl has been a great distraction from all the coughing. | withwool.com#knitting #knitshawl #hedgehogfibers

Plus, I get to admire this yarn. The yarn itself is loosely plied so I have to be careful not to split it during the more complicated stitches, but this subtle color is keeping me hooked. The blips of green, brown, and red hiding in the dark magenta are enchanting. It sounds so weird written out, but the combination completely works on the needles. What a sweater this would be! I’m glad to have it as a shawl though because it’s a perfect match to my favorite green jacket.

I’m really looking forward to working on this project during the drive to Estes Park Wool Market over the weekend. Here’s hoping the bronchitis won’t be coming with me.

FO: Prairie Boots

The Prairie Boots are finally ready to keep my toes warm! Who knew sewing on buttons would be the hard part? | withwool.com

What took me so long to finish these oh so cosy slippers? It wasn’t the knitting, that’s for sure. Thanks to bulky yarn and garter stitch I was able to make quick work of turning yarn into slippers. Even sewing on the suede soles went reasonably fast. The hold up turned out to be the weather and buttons. Mostly, buttons. For a few weeks, the weather was warm and bright. I packed up my winter jackets and extra warm knits. Why bother finishing a pair of slippers during my limited knitting time just to immediately stash them in a closet? Then Spring turned temperamental with surprise snow, cold nights, and sudden temperature swings. Finishing up a pair of warm slippers went to the top of my to-do list.

Now, about those buttons. I needed 12 of them, in 2 different designs, and getting out to the store took longer then I liked. Then I couldn’t decide which set I wanted to see when the cuffs were folded vs unfolded. My decision process turned out to be ignoring the whole project for a few weeks in hopes that the answer would suddenly present itself. There was no late night epiphany about which side to put which buttons, but I was finally able to make up my mind.

The Prairie Boots are finally ready to keep my toes warm! Who knew sewing on buttons would be the hard part? | withwool.com

Gathering up the motivation to sew on 12 buttons took some doing as well. My tried-and-true method of setting a 20 minute timer and just getting stuff done didn’t really work for me this time around. I didn’t want to come back to this process day after day. I just wanted it done. So, one night after the chores were done and the Mini was asleep, I got to work. An hour and a half later, I had slippers complete with buttons! You better believe that I wore them for the rest of night.

My hack for faster sewing was attaching on the front and back buttons at the same time. I cut a longer length of thread, tied the thread in place, and sewed on button #1. After making the first button shank, I pulled the thread to the other side of the fabric and sewed on button #2. Only having to thread a needle and prep it for sewing 6 times instead of 12 sped things up a lot.

The Prairie Boots are finally ready to keep my toes warm! Who knew sewing on buttons would be the hard part? | withwool.com

The weather is still flip flopping between clear sunny skies, chilly rain and fog, and the occasional surprise snow. So I’ve been wearing these slippers a lot to keep my toes warm, especially during these last few cold and snowy days. They are definitely warm and cosy. My only real complaint was that I wish they had more structure. Maybe working at a tighter gauge would have helped or adding a stiffer one piece sole. Still, I love these slippers and the option to wear the cuffs up when I need the added warmth. Plus, it’s nice knowing they’ll be ready and waiting for me this Fall.

The Specs:

Pattern: Prairie Boots by Julie Weisenberger

Yarn: Malabrigo Yarn Chunky - Sunset (Upper) and Pearl Ten (Sole)

Needles: US 9 (5.5 mm) and US 10 (6 mm)

Date: February 24 - April 4, 2019

More details on the Ravelry project page

A Finished Sweater for the Mini

A cool and comfy baby sweater with room to grow. #knitting | withwool.com

#The100DayProject has been a great kick in the pants for my knitting. Not only am I knitting at night again, instead of scrolling through my phone, I’m actually finishing stuff. My first finished item is a Marigold Fields sweater for the Mini. I know baby/kid sweaters can be ridiculously fast knits, but the push to do something every day kept me from tucking this away to work on later. I got through the hard work of swatching, and figuring out mods for gauge, and actually starting which was the hardest thing of all. Working on the sweater, even as the yoke rows seemed to get longer and longer and longer, was the easy part.

This is only the second sweater that I’ve ever knit for the kiddo. I’ve got plans for a few others to make over the summer and fall, but this is the second which makes it special. The first sweater I finished before she was born, and it’s a special sweater too. That sweater was about what I wanted to make, and I planned it just so from the yarn to the pattern. It’s a warm, cosy welcome to the family even if she did have to grow into it. Now, well, she’s just about grown out of it. This second sweater isn’t just about what I want to make because now I have an idea of what she likes. And she likes the color yellow. So, I can make a sweater more for her and less about me. I’m looking forward to seeing what she wants in the years to come.

A cool and comfy baby sweater with room to grow. #knitting | withwool.com

I couldn’t resist dressing up her in the sweater the other day after I’d wove in the ends. While she didn’t immediately wriggle out of it, she did put the sweater through its paces. I’m hoping she’ll like it better now that it has buttons. I haven’t actually put it on her since sewing on the buttons, because I made the next size up. So, it’s a bit big which is so much better than a bit small. She’ll have the rest of spring and the whole summer to grow into it. Probably won’t take that long though.

Finishing the sweater turned out to be more interesting and collaborative than usual. I did the usual first step of dropping it in some cool water with a squirt of Eucalan, and gave it 20 minutes to soak. Then I laid it out to dry on a mat on my studio floor. That only lasted until the Mini crawled in and got a good grab of it. To prevent any more drastic adjustments to the shape, I put the whole blocking rig on top of my printer. The problem was that the sweater was much bigger and stretched out than it had been before going in the bath. Plus, it was still rather damp even after sitting out all night and most of the morning. Something had to change. The yarn, Knit Picks Comfy, is a blend of cotton and acrylic. I’ve had good luck putting similar blends in the dryer before so I chucked this one in the dryer too. On low, of course. The dryer did the trick! The yarn plumped up, the stitches got neater, and the sweater went back to its original size. That’s a win on all fronts. Once I had some free time that night, I sewed on the buttons. The cuteness was complete.

A cool and comfy baby sweater with room to grow. #knitting | withwool.com

What am I going to do for #The100DayProject now that this sweater is finished and documented? Next on the list is sewing buttons on a pair of slippers so I can finally wear them…next fall. Then I need to get started on a pair of fingerless mitts, including rewriting the pattern for scratch, to match a lace hat. My plans after that are still nebulous, but I’ve got some time to figure it out.

The Specs:

Pattern: Marigold Fields by Taiga Hilliard

Yarn: 251 yds Knit Picks Comfy - Semolina

Needles: US 8 (5mm) and US 9 (5.5mm)

Dates: April 13 - 30, 2019

Full modifications and notes listed on Ravelry

Yarn, Knitting, and #The100DayProject

#The100DayProject is helping me feel like myself and remember what I like so much about yarn. | withwool.com

#The100DayProject, a project dedicated to 100 days of whatever you choose, kicked off earlier this month, and I decided to join last minute. I’ve tackled this project in previous years with the goals of daily art, and spinning. For this year’s project, I wasn’t sure what I wanted to commit 100 days to. All I knew was that I was so bored of starring at my phone when I plopped on the couch at the end of the day after putting the Mini to bed. I wanted to do something or make something instead of endlessly scrolling through whatever or playing another game for the Nth time. So there was my project. My goal for 100 days was to put down my phone and make something. It’s been an interesting and fun change of pace. I haven’t done a great job of posting my daily progress online (mainly because it’s already after 11PM when I’m done), but I have put down my phone to make tasty desserts, write tutorials, take photos, pick out buttons, and knit lots.

#The100DayProject is helping me feel like myself and remember what I like so much about yarn. | withwool.com

#The100DayProject might be bringing back my knitting mojo. I returned to a pair of floundering socks for the Bearded One. I finished a pair of slippers, and now just need to sew on 12 buttons. The main project that I’ve devoted the past few days to is a new sweater for the Mini. She’s almost outgrown the first sweater I made her, and I want something she can wear through the Summer and into Fall. All of my perusing through Ravelry for baby stuff while I was still pregnant left me with lots of options to choose from. I picked out three sweaters and first up is Marigold Fields by Taiga Hilliard I had the yarn and the pattern already, but the 100 Day Project gave me the kick I needed to actually start. Casting on turned out to be harder than expected because I couldn’t get a fabric I liked at the required gauge. So I came back the next day to figure out how to make the yarn and pattern work together.

#The100DayProject is helping me feel like myself and remember what I like so much about yarn. | withwool.com

And here we are now. The lace yoke is finished. The arm holes are bound off. My mods went off without a hitch. Now I’m zooming through the body with 3” left before the bottom edge. I’m making the 2T size which will probably be a bit big for her right now, but should hopefully fit her for a long time.

I’m glad I committed to #The100DayProject after taking a break from it last year. It’s helping me feel like my old self and remember what I like so much about yarn. Anyone else tackling the Project with me?

How To Sew Soles Onto Knitted Slippers

Learn how to sew soles onto your slippers for extra grip and added durability. #knitting | withwool.com

Cosy slippers are wonderful things. I’ve made several pairs for other people, but this is the first pair that I’ve made for myself. The slippers are thick and cushy, and I can turn up the cuffs when I need the extra warmth. I want them to last a long time which means adding soles because all my socks (and some of my shoes) wear out underneath the balls of my feet. A sewn on sole will last much longer and be easier to repair than plain knitting. So, here’s how I like to attach soles to slippers.

I prefer using backstitch instead of whip stitch or blanket stitch when the sole is smaller than the bottom of the slipper. If I can’t see the sole from the side, I don’t want to see the stitches holding it in place either.

Learn how to sew soles onto your slippers for extra grip and added durability. #knitting | withwool.com

Materials

  • The Slippers

  • Pins

  • A narrow tapestry needle

  • Soles (I’m using Fiber Trends Suede Soles.)

  • Yarn that will fit through sole holes (try saying that three times fast.)

  • Scissors

Learn how to sew soles onto your slippers for extra grip and added durability. #knitting | withwool.com

1. Use the pins to pin the sole in place on the slipper. Since these suede soles come as a separate toe and a heel, I’m working with one piece at a time. I like to use as few pins as possible to not skew how I sew the fabric and the sole together.

Learn how to sew soles onto your slippers for extra grip and added durability. #knitting | withwool.com

2. Thread the tapestry needle and put the end of your yarn between the sole and the fabric. Burying the end between the sole and the slipper keeps the end in place and keeps you from feeling it during wear. I highlighted the end in pink so it would be easier to see.

Learn how to sew soles onto your slippers for extra grip and added durability. #knitting | withwool.com

3. It’s time to start sewing down the sole with backstitch. You can start anywhere you want. I picked a spot in the middle of the pins so I’d have plenty of room to work. Pull the needle through a hole from underneath and then down into the next hole in the line.

Learn how to sew soles onto your slippers for extra grip and added durability. #knitting | withwool.com

When it’s time to remove the pin, the completed sewing will hold the sole in place. You can also move the pin to a different spot if that helps.

Learn how to sew soles onto your slippers for extra grip and added durability. #knitting | withwool.com

4. Slip the needle through a stitch on the slipper - it shouldn’t go all the way through the fabric. Catching just the top of the loop in garter stitch or a leg of a stockinette stitch will be enough to secure the sole.

Learn how to sew soles onto your slippers for extra grip and added durability. #knitting | withwool.com

5. Push the needle back up through the last hole that has yarn. This will create a continuous line of stitches on the visible side of the sole.

Learn how to sew soles onto your slippers for extra grip and added durability. #knitting | withwool.com

6. To continue, push the needle through the next hole in the line and repeat steps 3-5.

Here’s what the sewn sole will look midway through.

Learn how to sew soles onto your slippers for extra grip and added durability. #knitting | withwool.com

When you’ve finished sewing and need to secure the end:

Learn how to sew soles onto your slippers for extra grip and added durability. #knitting | withwool.com

Push the needle through first sewn hole and bring the needle to the outside of the sole.

Learn how to sew soles onto your slippers for extra grip and added durability. #knitting | withwool.com

Then slip the needle between the sole and slipper and push it in as far as you can. It helps to have your hand inside to help guide the needle. Angle the needle through the fabric to the inside of the slipper. The yarn will both be slipped through a few stitches and buried underneath the sole.

Then turn the slipper inside out as best you can and cut the working yarn. Repeat for the other sole pieces. All done!

Learn how to sew soles onto your slippers for extra grip and added durability. #knitting | withwool.com

When you need more yarn:

Secure the working yarn between the sole and slipper by pulling it through a few slipper stitches before cutting. Then cut a new length of yarn. After threading the needle, pull it through a few stitches on the slipper and push it up from the bottom into the last used hole to continue sewing.


If you enjoyed this tutorial,

Buy Me a Coffee at ko-fi.com

Thank you for your support! It means so much! Happy knitting!

Pattern Update: Waffle Time Washcloth

The Waffle Time Washcloth is a free #knitting pattern that makes a wonderfully cushy washcloth. | withwool.com

I got an email this weekend asking about my Waffle Time washcloth pattern. The knitter’s in-progress washcloth didn’t look anything like the washcloth in the photos. She asked if maybe the K3 needed to be outside the asterisks?

The Waffle Time Washcloth is a free #knitting pattern that makes a wonderfully cushy washcloth. | withwool.com

I published Waffle Time in 2016 and haven’t really touched it since. So, I started knitting a swatch to get the pattern fresh in my brain. Surely, the instructions would work. There were 15 finished projects on Ravelry that looked just like the original sample… and there was one that didn’t. Huh. I spent hours trying to get the stitch pattern to work as written. Different stitch counts and different numbers of repeats. No matter what I tried, my swatch didn’t look like the original washcloth either. Ugh. What did work was pulling the K3 out of the asterisks, just as she suggested.

The Waffle Time Washcloth is a free #knitting pattern that makes a wonderfully cushy washcloth. | withwool.com

Thanks to her message, the pattern has been corrected, and I updated the layout since I was fiddling around with the file anyway. You can download the updated pattern below and have yourself a lovely new washcloth in no time. I might dig out a ball of cotton and knit one for myself too since I gave the original cloths away.


If you enjoyed knitting this pattern, please

Buy Me a Coffee at ko-fi.com

Thank you for your support! It means so much! Happy knitting!

How I Organize My Knitting Needles and Notions

3-ring binders and zippered pockets are a great storage system for #knitting needles and notions! No more digging through drawers and bags to find that one thing I need right now. | withwool.com

My previous method for organizing my smaller knitting needles, extra interchangeable cables, and random crochet hooks was stuffing them in a plastic bag. This wouldn’t have been so bad if everything had a label marking it’s size or was even in it’s original packaging. Nope. It’s was a tangled mishmash and I had to pull out a needle gauge every time I needed a knitting needle. So I finally did something about it. I picked up three giant 3” 3-ring binders and zippered binder pockets* (yeesh, those were hard to find).

3-ring binders and zippered pockets are a great storage system for #knitting needles and notions! No more digging through drawers and bags to find that one thing I need right now. | withwool.com

The next question was how do I label everything so I know what it is. I thought about designing cute templates that I could print out, but that seemed like more work than I wanted to do. Eventually, I settled on something much simpler. Tape. Specifically, washi tape in a pattern that I liked and that wouldn’t distract from my labeling.

Even after figuring out how I was going to organize everything and getting all the materials, I was still shoving my needles right back into that plastic bag. Ugh. It wasn’t until I’d spread out the needles, and the cables, and crochet hooks on my desk for the 25th time that setting up the binders seemed like a better option than shoving everything back in the bag.

A few notes before we get to the knitty-gritty:

  • I coiled up all my circular needles and extra cables as shown in this tutorial.

  • I grouped everything by size. Size 4 needles with other size 4 needles, regardless of length or type. 4mm crochet hooks went in with the 4 mm knitting needles because I don’t want to have to dig through a separate pocket to find a match for a project. The only exception was my interchangeable needle tips because they already have their own organized pouch.

  • I did not do this all in one sitting. All my various needles and hooks and notions were scattered across my desk, my couch, and my floor. It was overwhelming so I did things in chunks when I felt like it or got frustrated about everything falling on the floor. Again.

  • As I went through years of accumulated knitting supplies, I got rid of what I didn’t need or wasn’t going to use again. Those circular needles with the metal cables that I got in a box at a garage sale did not make the cut.

  • The zipper pockets have different colored zips. I tried to keep things organized by color - needles in one color, extra cables in another - which worked until the end when I had more needles than I had pockets in that color.

Here’s what I did:

3-ring binders and zippered pockets are a great storage system for #knitting needles and notions! No more digging through drawers and bags to find that one thing I need right now. | withwool.com

First, I started with the extra interchangeable cables. I measured them, sorted them by length, and put each length in it’s own pocket. As I filled up a pocket, I added a strip of washi tape to the front and wrote down what was inside.

3-ring binders and zippered pockets are a great storage system for #knitting needles and notions! No more digging through drawers and bags to find that one thing I need right now. | withwool.com

Next up on the list were the fixed circular needles. I coiled them, sorted them by size, and made each size it’s own pocket. These stacked up pretty fast. Sizes that I had a lot of or where on the much smaller end, got there own pockets. I don’t want to have to sort a 2.0mm needle from a 2.5mm every time I start a pair of socks. Sizes that I don’t have many of were bundled together, US 10 and up for example, because its easier to tell them apart. Straights, DPN’s, and crochet hooks went in next.

3-ring binders and zippered pockets are a great storage system for #knitting needles and notions! No more digging through drawers and bags to find that one thing I need right now. | withwool.com

After the needles were contained, I gathered up random notions from various drawers, bags, and shelves. The pom-pom makers I can never find when I need them, they went in a pocket. If it was a needle or pin of any kind - tapestry, beading, cable, or t-pin - it went in a pocket. Extra scissors, needle gauges, tape measures, row counters, chart trackers, etc - you got it - went in a pocket. It is possible to fit a surprising amount of stuff into one of those.

3-ring binders and zippered pockets are a great storage system for #knitting needles and notions! No more digging through drawers and bags to find that one thing I need right now. | withwool.com

After corralling everything into their designated pockets, I sorted them into binders. Notions and interchangeable needle cables went into one binder. Needles and crochet hooks got their own binder. I added a needle gauge into the front of the needle and crochet hook binder to make it easy to put things away.

3-ring binders and zippered pockets are a great storage system for #knitting needles and notions! No more digging through drawers and bags to find that one thing I need right now. | withwool.com

I’ve been using this system for almost a year, and it is a massive improvement over shoving things into scattered bags and drawers then forgetting where they are. The two binders have their own shelf and they are impossible to miss. Whenever I need something, I know right where to look which makes to so much easier to start a project or finish one. If I ever need to expand, I have an extra binder and extra pockets. I am so happy that I finally organized my needles and notions and don’t have to go digging every time I need something.


If you enjoyed this tutorial,

 
Buy Me a Coffee at ko-fi.com
 

Thank you for your support! It means so much! Happy knitting!

*This post contains an affiliate link which means, if you decide to buy through that link, I’ll get a small commission. My opinions are my own, and formed after much use. Thanks!

A Long Overdue WIP

After years of waiting, I finally cast on a pair of slippers for myself. The first one is so cosy! #knitting | withwool.com

Have you ever not started a knitting project because of the inertia of your couch? I have, last Saturday in fact. That morning I decided it was finally time to cast on for a pair of slippers while it was still cold outside, and I was going to do it that night. My cold feet have pleaded with for a pair of slippers for long enough. Later though, after putting the Mini to bed and cleaning up the kitchen, I plopped down on the couch and did not want to get back up. Printing the pattern, finding the yarn, and digging out the right needles seemed more like work than fun. The couch and a very cozy blanket had me trapped. So I watched a movie instead.

After years of waiting, I finally cast on a pair of slippers for myself. The first one is so cosy! #knitting | withwool.com

Sunday was a different story. I pulled out everything I needed before the end of the day when the couch sings its siren song. Casting on felt so good. I’m making the Prairie Boots by Cocoknits and using Malabrigo Chunky. The first slipper is speeding along too thanks to the bulky yarn. I finished the first sole and a good chunk of the foot that afternoon. Over the past few days I’ve finished the foot and am speeding my way up the leg. A single row squeezed in during the odd moments of the day really adds up.

After years of waiting, I finally cast on a pair of slippers for myself. The first one is so cosy! #knitting | withwool.com

I couldn’t resist trying it on and the slipper is as cosy as it looks. There will be no cold feet here…just as soon as I finish the second one. And pick out the right buttons. And sew on the suede bottoms. Okay, so it might be awhile before my feet get to bask in the warmth that is this pair of slippers, but it’ll be worth it. I’ve waited at least a year to pick out a pattern so a few more weeks is nothing my toes can’t handle.

After years of waiting, I finally cast on a pair of slippers for myself. The first one is so cosy! #knitting | withwool.com

How to Work Judy's Magic Cast-On in Knit and Purl

Learn how to work Judy’s Magic Cast-On to seamlessly start knitting in knit or purl. It’s a great cast-on to use for toe-up socks and other projects that start from the center out. #knitting #knittingcaston #knittingtutorials | withwool.com

Judy’s Magic Cast-On burst into the knitting scene in the Spring 2006 issue of Knitty. The technique has become my default way for starting toe-up socks and other center-out projects because of it’s versatility. This cast-on is fast, seamless, and makes a great provisional cast on (but that’s another tutorial). And, if you change how the yarn is wrapped, the stitches won’t be twisted on the needles.

I recently cast on for a pair of toe-up socks that would need a princess sole - where the smooth side of stockinette is against the foot - and didn’t want a noticeable “seam” across the toes. Would it be possible to use Judy’s Magic Cast-On to get started entirely in purl? After a little fiddling and experimentation, I found that it is possible and just as easy to start Judy’s Magic Cast-On in purl as it is to knit.

Let’s start at the beginning. If you know how to work the knit version of the cast-on that doesn’t twist the stitches, skip ahead to Step 8.

Learn how to work Judy’s Magic Cast-On to seamlessly start knitting in knit or purl. It’s a great cast-on to use for toe-up socks and other projects that start from the center out. #knitting #knittingcaston #knittingtutorials | withwool.com

Materials: You’ll need your yarn and a set of circular needles. It’s also possible to work Judy’s Magic Cast-On with double pointed needles, but it will be more finicky to work the first few rows.

Learn how to work Judy’s Magic Cast-On to seamlessly start knitting in knit or purl. It’s a great cast-on to use for toe-up socks and other projects that start from the center out. #knitting #knittingcaston #knittingtutorials | withwool.com

1. Arrange your needles so that both tips are together and pointing left.

Learn how to work Judy’s Magic Cast-On to seamlessly start knitting in knit or purl. It’s a great cast-on to use for toe-up socks and other projects that start from the center out. #knitting #knittingcaston #knittingtutorials | withwool.com

2. Pull the yarn between the needles - leave yourself enough of a tail to create the required stitches and weave in later. 8 inches, or about 20 cm, is usually enough to start a pair of socks. The working yarn will lay over the top needle and the tail will hang down in the middle.

Learn how to work Judy’s Magic Cast-On to seamlessly start knitting in knit or purl. It’s a great cast-on to use for toe-up socks and other projects that start from the center out. #knitting #knittingcaston #knittingtutorials | withwool.com

3. Twist the tail and working yarn together around the top needle - this counts as the first stitch. The yarn will now form a V between the needles and your hand. The tail, which was at the bottom, will now be held at the top over the pointer finger. The working yarn will now be held at the bottom over the thumb.

How the stitches are wrapped is very important. When wrapped as demonstrated here the stitches will sit untwisted on the needles. If wrapped as shown in the original Knitty tutorial, you’ll have to knit through the back of the stitch to seat them correctly on the needle during the next round.

Learn how to work Judy’s Magic Cast-On to seamlessly start knitting in knit or purl. It’s a great cast-on to use for toe-up socks and other projects that start from the center out. #knitting #knittingcaston #knittingtutorials | withwool.com

4. To make a stitch on the bottom needle, wrap the top yarn up and into the gap between the two needles.

Learn how to work Judy’s Magic Cast-On to seamlessly start knitting in knit or purl. It’s a great cast-on to use for toe-up socks and other projects that start from the center out. #knitting #knittingcaston #knittingtutorials | withwool.com

5. To make a stitch on the top needle, bring the bottom yarn into the gap between the needles and then up and around the top needle. The movement is like working a yarn over.

Learn how to work Judy’s Magic Cast-On to seamlessly start knitting in knit or purl. It’s a great cast-on to use for toe-up socks and other projects that start from the center out. #knitting #knittingcaston #knittingtutorials | withwool.com

6. Repeat steps 4 and 5 until you have the required number of stitches on your needles. Pushing the stitches together as you work will help keep them the same size. When a pattern calls for casting on 20 stitches with a toe-up cast on, that means to make 10 stitches on each needle because this cast-on creates pairs of stitches.

Learn how to work Judy’s Magic Cast-On to seamlessly start knitting in knit or purl. It’s a great cast-on to use for toe-up socks and other projects that start from the center out. #knitting #knittingcaston #knittingtutorials | withwool.com

7. Take the tail yarn and tuck it between the needles next to the first stitches. It should sit on the same side as the purl ridge created by the cast on. You’ll have to hold in place until the first few stitches are worked, but then it will be secure.

8. Turn the work so the tips are now pointing right. The first stitch on the new top needle is the beginning of the round. If you’re starting a pair of socks, the top stitches form the top of the toe and the bottom stitches form the sole.

Here’s where things change depending on whether you want the knit or the purl side as the right side of your project.

Learn how to work Judy’s Magic Cast-On to seamlessly start knitting in knit or purl. It’s a great cast-on to use for toe-up socks and other projects that start from the center out. #knitting #knittingcaston #knittingtutorials | withwool.com

To start with the usual knit side out, make sure the smooth side of the cast on is facing you and knit as usual.

Learn how to work Judy’s Magic Cast-On to seamlessly start knitting in knit or purl. It’s a great cast-on to use for toe-up socks and other projects that start from the center out. #knitting #knittingcaston #knittingtutorials | withwool.com

To start in purl, keep the purl ridge facing you. The tail end of the yarn will be laying across the front of the stitches. Instead of knitting, purl the first round and continue as stated in your pattern.

If you’re working with circular needles, pull the bottom needle out and start working the first stitch of the top needle. If you used double points, bring in a third needle for half of the stitches on the top needle. After you’ve worked a few rows and created more structure, you can add additional needles.

One additional note: When starting a pair of socks, I like to work one plain round and then begin the toe increases. The extra row creates a smoother edge and gives a better base for increases.

Learn how to work Judy’s Magic Cast-On to seamlessly start knitting in knit or purl. It’s a great cast-on to use for toe-up socks and other projects that start from the center out. #knitting #knittingcaston #knittingtutorials | withwool.com

Here’s what a finished sock toe looks like with knitting as the right side.

Learn how to work Judy’s Magic Cast-On to seamlessly start knitting in knit or purl. It’s a great cast-on to use for toe-up socks and other projects that start from the center out. #knitting #knittingcaston #knittingtutorials | withwool.com

Here’s what the purled sock toe looks like after all the increases are done. Not a seam or bunched up stitch in sight. I had already wove in the tail before taking this photo, but it will be hanging from the outside of your work when starting in purl. You’ll have to bring to the other side before weaving it in.


If you enjoyed and learned something from this tutorial,

 
Buy Me a Coffee at ko-fi.com
 

Thank you for your support! It means so much! Happy knitting!

8 Months Later and Blogging Again!

I have this informal rule when I’m looking for new blogs to follow: If the latest post was 6+ months ago, I’m moving on. So when I realized in October 2018 that it’d been 6 months since I published anything new to my own blog, I was rather frustrated. I did not imagine that my maternity leave would stretch 8 months. Before Mini Me came along I thought that 3-4 months would be enough time for me to get my feet back underneath me (ha!), but it took that long just for me to not feel like a walking zombie. Never mind feeling like a functional human being who could string a sentence together.

When I took this break (which in no way was a break) way back in May 2018, I was also burned out by the whole routine of blogging and writing a newsletter on a weekly basis. I didn’t know if I wanted to come back to blogging or continue to publish knitting designs at all. Even though my maternity leave was twice as long as I expected, it did help me realize that I still wanted to write about and share my knitting. I still wanted to design and share my own knitting patterns. I still wanted to send out a newsletter to connect with people and share beautiful, interesting, fun, and helpful things. So I’m going to keep doing all of those things - just in a different way than before.

My mantra since before Mini Me was born has been “Go with the flow,” and I’m going to stick with it. I’m challenging myself for the next few months to put out a new blog post and newsletter every 2 weeks. I’m hoping that by publishing every 2 weeks instead of 1 week that I can still write detailed posts at a similar quality as I have previously. If that doesn’t work, or just stresses me out, I’ll switch things up again.

My other challenge for this year is to tackle the pile of half-finished designs which are stacked pretty deep. I would like to share at least 1 of them with you in the next few months. Guess I’d better figure out the decreases for that lace hat and update that other hat pattern I never published from 2010.

The one thing I have managed to do is update my website. I’ve updated the homepage and tweaked the overall design. Plus, I’ve got a new logo!

To celebrate my return to blogging and feeling like a functional human being/mom, I’m having a sale on my knitting patterns. Now, January 16th through end of January 31st MST, use the coupon “yayblog” on Ravelry to get 20% off all my patterns.

Big News + What's Next

The Pacific Coast sweater is finally done and I couldn’t be happier! | withwool.com

This sweater has shown up a lot during the past few months. I used it to test out a more truthful and accurate method of swatching.  When I was feeling overwhelmed by all of my knitting projects, I focused on this sweater to feel like I was making progress. Plus, there were the random WIP updates. In all that, I never shared who I was making this sweater for. Well, I’m not mailing it cross-country, and I’m not giving it away at a baby shower. This little beauty is staying right here with me for my own little one!

The Pacific Coast sweater is finally done and I couldn’t be happier! | withwool.com

Aside from a few fiddly details of my own making, the pattern - Pacific Coast - was a pretty easy knit. I made a few changes, but mostly followed the instructions since I haven’t knit a lot of sweaters of any size. You can check out all of my notes, mods, and more photos here on the sweater’s project page.

The Pacific Coast sweater is finally done and I couldn’t be happier! | withwool.com

Since it’s almost baby time, there’s going to be a few changes around here too. First, this will mostly likely be the last blog post for awhile. Second, I’m not sure when I’ll be back to regular posting or what that schedule will be. I’m just going to play it by ear. There might be a random post here and there over the summer or maybe not. We’ll see. Third, the With Wool Weekly newsletter will also be taking a break and will return eventually.

Happy knitting and happy spinning. I’ll see you on the other side and on Instagram.

Wooly Links: April 2018

Wooly Links is a round up of the best knitting, spinning, and crochet links I find on the web. The collection goes out bi-weekly in the With Wool Express. You can sign up to get the newsletter full of Wooly Links and other good stuff below.


You can do so much great stuff with crochet - like make the Willendorf Venus with this pattern.

Now I want to make a blanket into a wall hanging too. There’s no knitting police to say you can’t after all.

Bristol Ivy shares her thought process for how she designed the lovely Shape of the Bay shawl.

A handy list of some of US fiber festivals from May through August.

April 21st was the inaugural Local Yarn Store Day which aims show appreciation for small shops and celebrate the fiber art community. You can learn more about the big day here.

And to help celebrate Local Yarn Store Day, Laura Nelkin partnered with Melbourne Woolens and designed the Adventura Shawl which will only be available in stores with Ravelry in-store sales. The shawl is a choose-your-own-adventure pattern that could be lacy, mesh, or colorful.

Beth Smith highlights the costs of producing fleeces in small flocks for handspinning.

I am rather smitten with the cabled Hawley sweater by Julie Hoover. The details are so clean and neat.

Felicia Lo Wong of Sweet Georgia Yarns shares her experience hosting a booth at the huge handcraft convention of h+h Cologne. So many interesting tidbits and things to think about.

Not just for spinners! A thorough example of how the number of plies in a yarn affects the look and texture of knitting.

It isn’t always fun to have to pick up stitches, but doing it well is really satisfying. This tutorial on the in-depth details of picking up stitches in different situations is clear and helpful.

A neat tutorial for how to work helical stripes and skip the jog when switching colors.

I am rather smitten with the bold geometric lines of the Correa shawl by Ambah O’Brien.

Duplicate stitch doesn’t get enough love, and Franklin Habit shows how great it can be.

A great video with answers and tips about stranding knitting from Paper Tiger. Even the opening is fun.

Are step-by-step photo tutorials how you want to learn new techniques? Here’s a detailed tutorial with extra GIFs about how to work the tubular cast on.

I stumbled across this in depth guide to drum carders and there is so much good info for the reading.

How to spin yarn with beads

And now for something completely different... is about the other interesting stuff I find online. Sometimes it's photography, art, science, crafty goodness, or a good story.

A touching thank you to all the supporters of the Woolery Weave-Off which is  donating hand woven kitchen towels to women and children moving out of shelters.

Kristen Meyer arranges a variety of objects - leaves, broken crackers, bark, moss, etc - into exact geometric shapes. So satisfying.

New Nasca lines were recently found in southern Peru.

Carrie Chan creates incredibly precise watercolor patterns and designs. Just looking at them is satisfying.

How to Make Bulkier Yarn with Chain-Plying

Yarn thinner than you like? Learn how to chain-ply commercial yarn into the thicker, bulkier yarn you want!&nbsp; #spinning #knitting | withwool.com

Way back when, at least on the internet time-scale, I wrote a tutorial about how to chain-ply commercial yarn to manipulate color which you can read here. The variegated yarn I used flashed and pooled no matter how I knit with it, and chain-plying it created a beautiful marled yarn. Then I used that yarn for an easy (and free) hat pattern. Now I’m chain-plying another commercial yarn because I wanted to make it bulkier. So consider this part 2.

Yarn thinner than you like? Learn how to chain-ply commercial yarn into the thicker, bulkier yarn you want!&nbsp; #spinning #knitting | withwool.com

I’ve had the Opal Sock Yarn Bunny by Susan B. Anderson pattern in my Ravelry queue for months. It’s so cute, but I have had the hardest time picking out the right yarn. I wanted something durable and hard-wearing because I like to imagine that this would become THE favorite toy; however, I also wanted the colors to be something whimsical and fun. Turns out durable and whimsical is a hard combination to find.  I eventually found a ball of sock yarn hiding in the deep stash. Seriously, I bought this ball of Zitron Trekking XXL 9 years ago on vacation. I almost turned it into a pair of socks, but didn’t want to knit socks on size 0 needles.

I don’t want to knit this totally adorable bunny on size 0 needles either. Plus, I’d like the bunny to be a little bigger than the 6.5” height stated in the pattern. Chain-plying to the rescue. The first and most important step to chain-plying any commercial yarn is to figure out how the yarn is plied. Commercial yarn is generally plied to the left, AKA with S twist, so you’ll need to chain-ply to the right, AKA with Z twist. If you’re plying a single ply yarn, you’ll probably be plying to the left. You can find the full tutorial for how to chain-ply commercial yarn here.

Yarn thinner than you like? Learn how to chain-ply commercial yarn into the thicker, bulkier yarn you want!&nbsp; #spinning #knitting | withwool.com

And a helpful tip: If you’re working on a wheel, and have the option, use a jumbo bobbin. The plied yarn will take up more space than you expect. I plied 459 yards of fingering weight yarn and just barely got it all on to a single regular bobbin.

Yarn thinner than you like? Learn how to chain-ply commercial yarn into the thicker, bulkier yarn you want!&nbsp; #spinning #knitting | withwool.com

I finished the newly-plied yarn just like any other handspun yarn because you still have to set the twist. I skeined it and measured the results before dunking it in a bath. I had about 137 yards of worsted weight yarn. Then I soaked it in cool soapy water for 20 minutes, rolled it in a towel to squeeze out extra water, and snapped it out my arms to even out the twist one last time. Then I let it dry over night.

Yarn thinner than you like? Learn how to chain-ply commercial yarn into the thicker, bulkier yarn you want!&nbsp; #spinning #knitting | withwool.com

The twist really really relaxed and evened out. There are still a few over twisted and kinked spots, but most of the yarn is well behaved and smooth. I measured the skein again to see if setting the twist changed anything. The yarn was still a worsted weight, but I did “lose” 23 yards to the yarn plumping up. So I’m down to 114 yds, and really hoping I have enough yarn because I love it even more now.

Yarn thinner than you like? Learn how to chain-ply commercial yarn into the thicker, bulkier yarn you want!&nbsp; #spinning #knitting | withwool.com

Before you go, here’s a few things to keep in mind before chain plying for bulkier yarn.

  • Even though chain-plying a fingering weight yarn will make a worsted weight yarn, the “new” yarn won’t have the same feel as a commercial or handspun worsted weight skein. Why? It’s much heavier and denser than either.
  • Because of how chain-plying works, expect to reduce your yardage to at most a third of it’s original number. My original 459 yds turned into 114 yds.

  • Sample a small piece of yarn first to see if you like the weight, drape, and density of the chain-plied version. It’d be really frustrating to do all that work and turn out with something you don’t like or wish you could undo. Take it from me, undoing a chain-plied yarn is not quick or easy.

Knitting A Gauge Swatch That Tells The Truth: The Results Are In

The sweater is washed and blocked. Did the different method of swatching tell the truth? Is my sweater the same size it was before washing? Yes and yes!&nbsp; #knitting | withwool.com

I knit myself a sweater a few years ago and did all the things a “good” knitter is supposed to do. I knit a reasonably sized swatch on the same needles I was going to use for the sweater. I washed and blocked the swatch the same way I was going to wash and block the sweater. I liked the results and got gauge, so I cast on for the real thing. Said sweater was cute and fit perfectly until I washed it. Instead of the cute cropped cardigan I wanted, I ended up with an oversized sweater that I still wore and enjoyed. So not a total loss, but not really a success either. Blasted lying swatch.

Then a few months ago, I read an article which helped explain why my swatch didn’t react the same way as my sweater when it hit the water. Seeing as how I was about to knit a baby sweater, I decided to try out this different swatching method that skipped the garter edges and blocking pins for what seemed like very logical reasons. You can read all about the swatching attempts here and an update from when I was halfway though the sweater here.

A few notes before we get down to the knitty gritty: I did not knit this sweater all at once, but in bits and pieces over a few months. I knit it while watching tv and not watching tv. I knit it on the same needles I swatched with. I knit it when I was tired and when I was wide awake. I can’t remember if I knit it on road trips. All of this is too say that my gauge had the opportunity to change a lot during knitting even though the sweater was stockinette.

The sweater is washed and blocked. Did the different method of swatching tell the truth? Is my sweater the same size it was before washing? Yes and yes!&nbsp; #knitting | withwool.com

I measured the stitch/row gauge and overall dimensions before dropping the sweater in the bath. Here are the numbers:

  • Stitch/row gauge (measured across the back): 29 sts and 38 rows = 4”
  • Stitch/row gauge of washed and blocked swatch: 28 sts and 37.5 rows = 4”
  • Sweater measurements across chest: 9.75”
  • Sweater length from neck cast on to body bind off: 11.5”
The sweater is washed and blocked. Did the different method of swatching tell the truth? Is my sweater the same size it was before washing? Yes and yes!&nbsp; #knitting | withwool.com

I washed the sweater the same way as the swatch. I soaked them both in cool, soapy water (I like unscented Eucalan (<<— affiliate link!*)) for 20 minutes. I rolled them in a towel and squeezed out the excess water. Then I laid them flat to dry without pinning them down (this is one of the important parts of this swatching method). The only change I made when blocking the sweater was gently pulling the button bands and collar into place to make them lie flat and even up both sides. See what a difference blocking made to how neat and even the stitches look? After the sweater dried, this is what I found:

  • Stitch/row gauge (also measured across the back): 28 sts & 38 rows = 4”
  • Sweater measurements across chest: 10.25”
  • Sweater length from neck cast on to body bind off: 11.75”

Wow! The only gauge difference between the washed and blocked swatch and the washed and blocked sweater was half a row over 4”. The chest measurement changed too, but the stitch gauge changed to match the swatch so I’m calling it true. Overall, the length of the entire sweater only changed by .25” which could have happened for several reasons - me tugging out the edges, the ribbing growing, etc. I’m not worrying over an extra .25” on a baby sweater.

I also measured the sleeves. Their length and diameter stayed the same; however, I’m not counting this info towards the swatch experiment because they were knit in the round and not flat like the swatch.

I’d say this method of swatching - skipping the garter edging and not pinning the swatch into a rectangle - is the most accurate and truthful method of swatching I’ve ever tried. You can read about the full method and why it it works here. It’s definitely how I’m going to swatch for all my future sweaters and anything else that has to fit. Definitely give it a try.

I’m looking forward to seeing how truthful the swatches are when I knit a sweater for myself. I suppose that will be the true test, and I’m more than willing to give it a shot.

The sweater is washed and blocked. Did the different method of swatching tell the truth? Is my sweater the same size it was before washing? Yes and yes!&nbsp; #knitting | withwool.com

*This post contains an affiliate link which means, if you decide to buy through that link, I’ll get a small commission. My opinions are unbiased, my own, and formed after years of use. I wouldn’t recommend this soap if I didn't think it worked. Thanks!

Wooly Links: March 2018

Wooly Links is a round up of the best knitting, spinning, and crochet links I find on the web. The collection goes out bi-weekly in the With Wool Express. You can sign up to get the newsletter full of Wooly Links and other good stuff every week below.


These giant oversized crochet doilies by Ashley V Blalock seem like they could grow and take over the world.

That Night There Were Roses by Debbie Sullivan solves the hump shape of crescent shawls with short rows. It’s lacy and gorgeous with a wide wingspan.

Neat! How to spin a beehive coil without using a core for your handspun.

A great complication of different knitting increases with clear diagrams and instructions.

This tutorial was sent to me when I asked for help preventing holes at sleeve joins, and it is a detailed look at how to seamlessly knit set-in sleeves. Saving it for later.

The Spring+Summer 2018 issue of Knitty went live and it’s full of good stuff. I’m definitely going to knit a sea turtle or 5 and Charmayne is on the list too.

Janelle Shane is trying to teach a neural network to generate knitting instructions, and a Ravelry group is interpreting and knitting up those garbled lines with interesting results.

I’m incredibly tempted and smitten by the large scale lace of the Equal Night blanket. Might even have the yarn in my stash to make it too!

Blocking your knits can be an art form all by itself.

I used a Clover pom-pom maker to make the pom on my latest hat, and it was so easy to make a great pom without a lot of extra trimming. Here’s a handy tutorial about how to use one.

Why crescent shaped shawls always seem to have the hump in the middle.

Info and advice from Patty’s Purls of Wisdom about biasing gauge swatches, metric vs US needle sizes, and “startitis”.

The SNAP hat pattern might be just the thing for all those leftover bits of sock yarn.

25 names of fabrics, wools, and leathers derived from place names.

Looking for a quick baby knit? Franklin Habit wrote up his variation of the vintage Fine-Hour Baby Jacket and it’s a cutie.

Here’s a great example of just how much color can change when colorful blended fiber turns into yarn.

I’m loving the texture of the Beeswax Scarf by Amy van de Laar.

A quick and helpful tutorial about how to count rows in garter stitch.

And now for something completely different... is about the other interesting stuff I find online. Sometimes it's photography, art, science, crafty goodness, or a good story.

The Parthenon, Pyramid of the Sun, and other ruins have been restored to their ancient architectural glory in a series a series of GIF's by Maja Wronska.

Ethel Stein, a master weaver who combined historical weaving methods with a Bauhaus design aesthetic, has died at the age of 100. (via Mielke’s Fiber Arts Newsletter)

Diana Sudyka creates beautiful illustrations around vintage postage stamps.

Elyse Dodge meshes beautiful geometric mountains with painted landscapes of British Columbia.