The Mighty Raven Queen Mitts

Two grey and red fingerless mitts laying next to each other to show the front and back of the pattern.

“Ya know, the photos really didn’t do these mitts justice.”

That was the paraphrased text I got from my friend after she unwrapped these mitts, and I am inclined to agree. She knew that I making these for her so I kept her updated with progress pics. A finished cuff there, half a raven over here, and so on. I didn’t send her any photos after I blocked the mitts though so I wouldn’t spoil the final reveal. Still, they are so great to see in person and wear too. I had to try them on, of course, and make sure my floats weren’t too tight. Yeah, that’s the reason. :)

Two red fingerless mitts covered in grey raven color work.

I had a long list of Christmas knits that I wanted to make, but kept cutting it down as time ran out. I finally decided what was left would be Happy 2021 gifts instead since I’d have to put everything in the mail during massive shipping delays anyway. These mitts were one of the few projects that made the cut. Pretty sure the impressive and fun color work is the reason. I stayed up way too late many a night just to do one more row. Oh! And one extra bonus is that this pattern finally pushed me to understand how m1 increases work. Lifted increases are still my favorite, but I’ll keep the m1 in mind for color work.

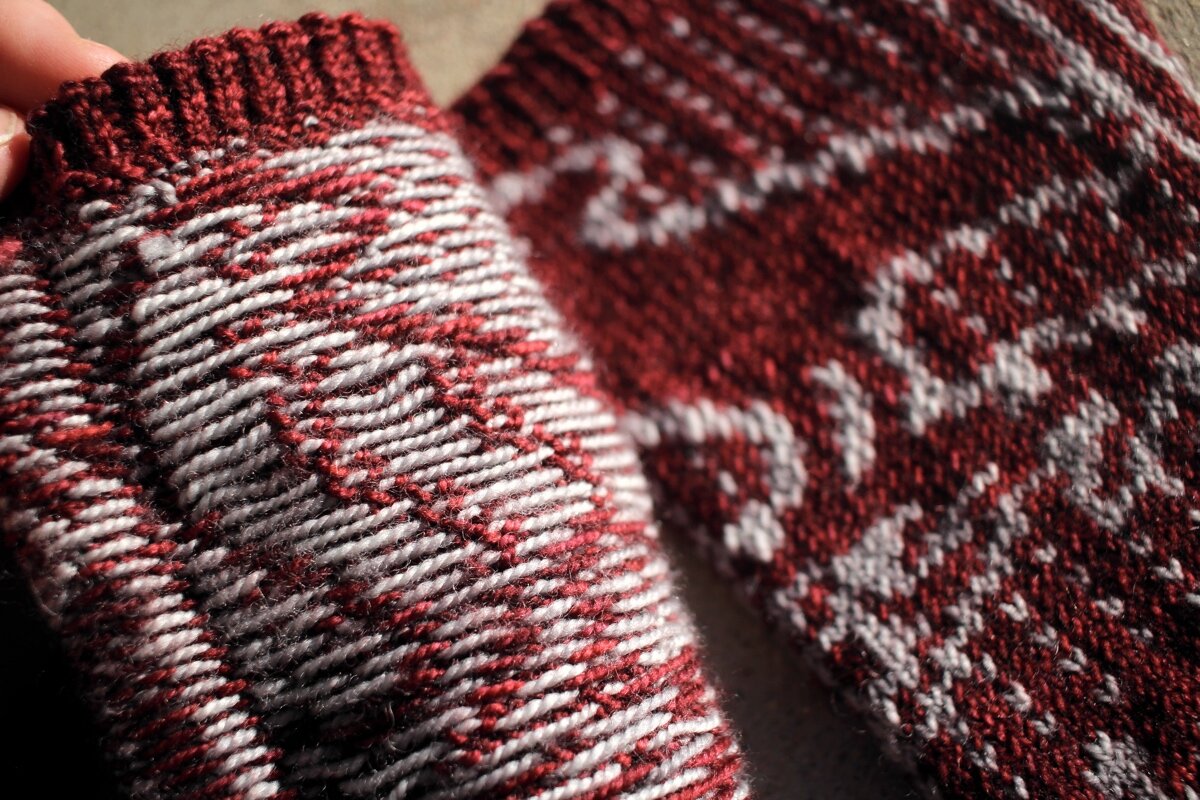
Close-up of the inside of the Raven Queen mitts showing gray floats of yarn secured by red stitches. The other mitt right side out is behind.

And here are the floats since no post about finished color work is complete without a photo of the back side. There are a few sections where the floats are pretty long so I trapped them about every 8-10 stitches which worked really well. They didn’t catch my fingers when I tried on the mitts at all.

Looking at these photos makes me want to cast on for my own pair right now. I even have the yarn - a variegated charcoal and a golden yellow - wound and ready to go. Now if only I could find energy to start and the brain power to follow color work charts.

The Specs:

Pattern: Raven Queen by Jacquline Rivera (Ravelry Link)

Yarn: Knit Picks Hawthorne Fingering Kettle Dye - 75 yds slate and 147 yds Hood River

Needles: 2.25 mm circulars for ribbing and 2.5 mm circulars for color work

Dates: December 7 - 20, 2020

Ravelry Page

The Red Scarf

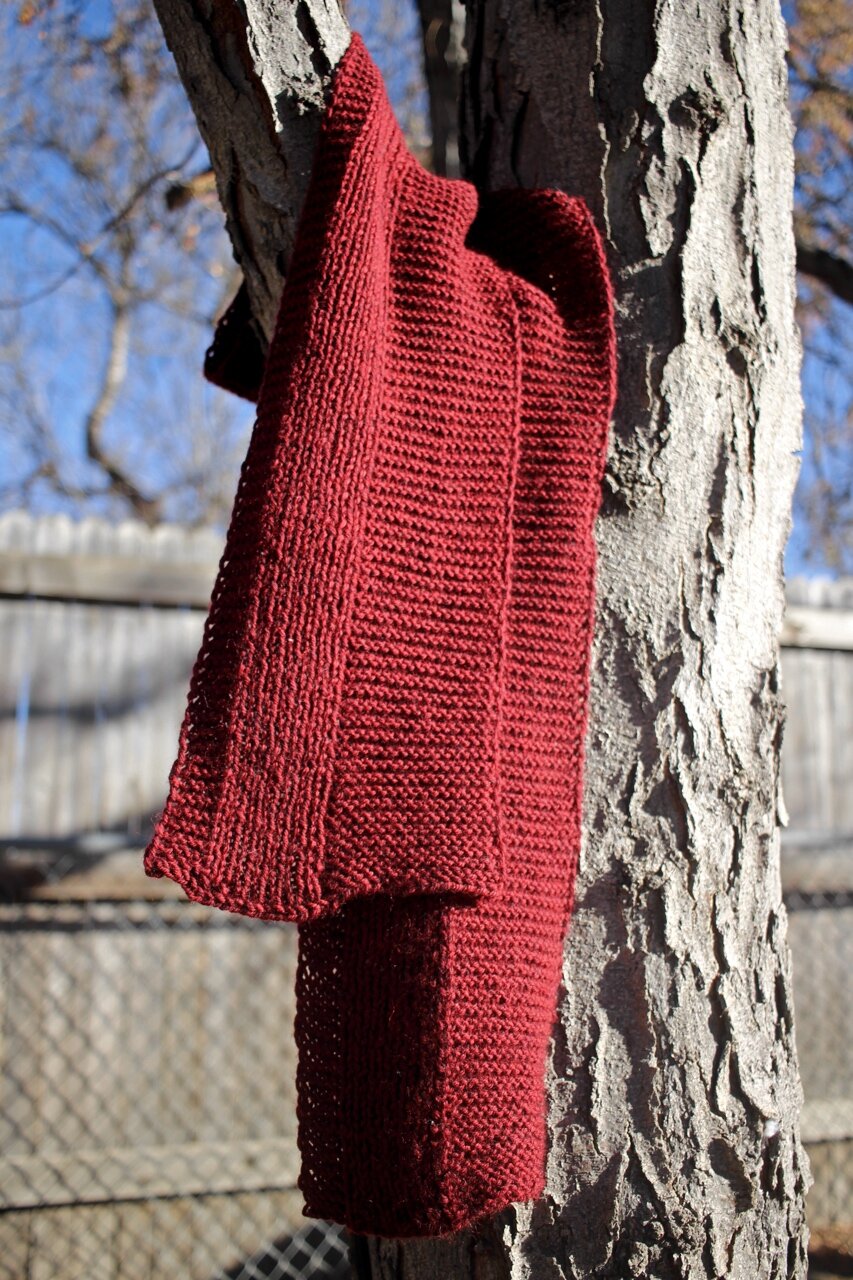
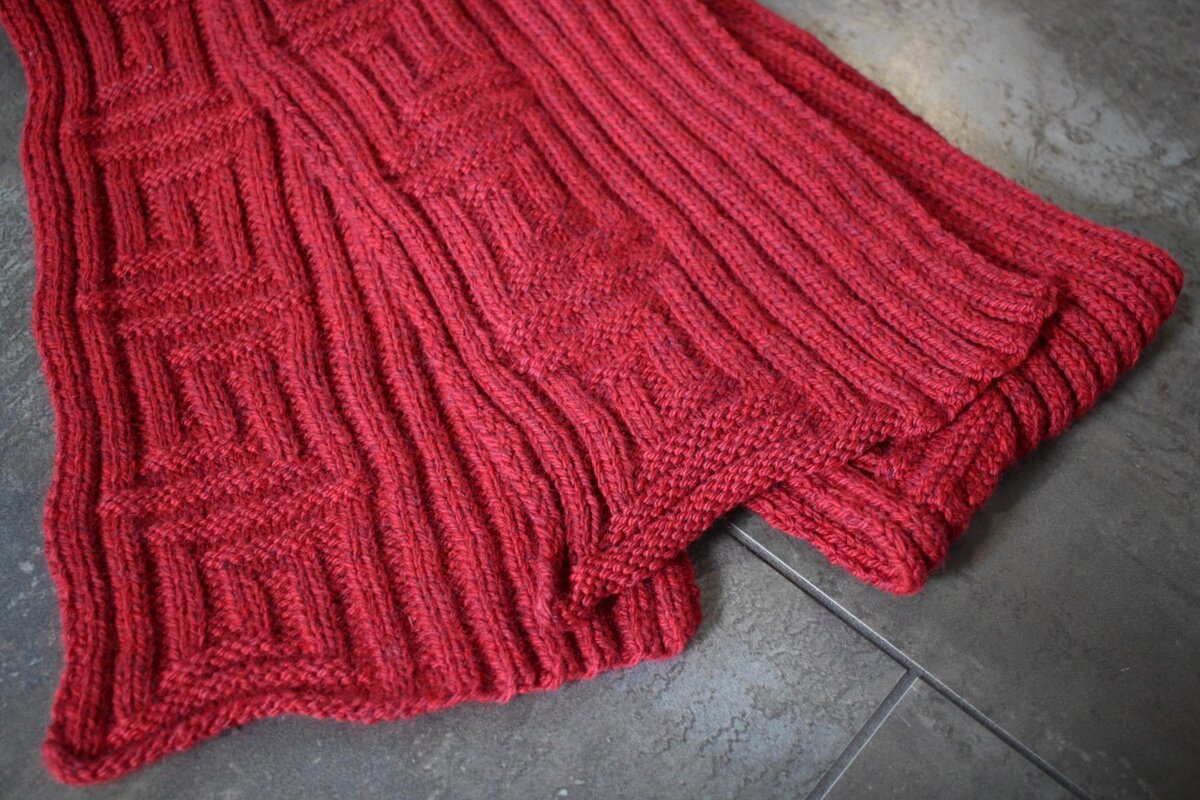
A red scarf with a rib and garter stitch motif knit following the Wheat pattern by Tin Can Knits.

This beautiful red scarf for the Foster Care to Success ended up being one of my last knitting projects of 2020 even though I started it during the summer. At first I couldn’t decide on a pattern so I decided to knit 2x2 rib. Simple, reversible, and easy to knit, right? Yes, but also a bit boring so I didn’t want to pick up after working the first couple of inches. This was rip number one.

My second attempt at knitting this scarf, got me to pick a pattern: The Wheat Scarf by Tin Can Knits. So I cast on once again. The contrast between the garter and the panel of ribbing was definitely more interesting to knit. Unfortunately, now I didn’t like the fabric and decided the needles were too small for this pattern. This was rip number 2.

A closeup of the rib and garter stitch pattern of this red scarf.

For the third try, I went up a needle size and skipped the garter edges at the end of the scarf. This time I liked what was on the needles, but it still took me awhile to make. My other mod to the pattern was making the scarf a few inches shorter than the Red Scarf Project guidelines to account for how much superwash scarves can grow during their first wash and block. This one grew 4 inches! So, the scarf was only a hair too long instead of way too long.

In the end, I managed to get it in the mail with a few days to spare even with the holiday shipping delays. Here’s hoping it brings warmth and comfort to whoever wears it.

A rib and garter stitch red scarf hanging on a tree branch.

The Specs

Pattern: Wheat by TinCanKnits

Yarn: 338 yds Berroco Ultra Wool - Sour Cherry

Needles: US 6 - 4.0mm

Dates: August 5 - November 27, 2020

Ravelry Page: Red Scarf 2020

An Autumn Knits Round-Up

All-Pumpkins-3.jpg

After a summer spent doing pretty much anything other than knitting (besides from finishing a few pairs of socks), the urge to play with all the yarn came back strong this Fall. I made fun stuff to put around the house, whipped up gifts, and finished up the odd lingering project. It was cathartic to get my fingers on the needles again and go stash diving to find the perfect yarn.

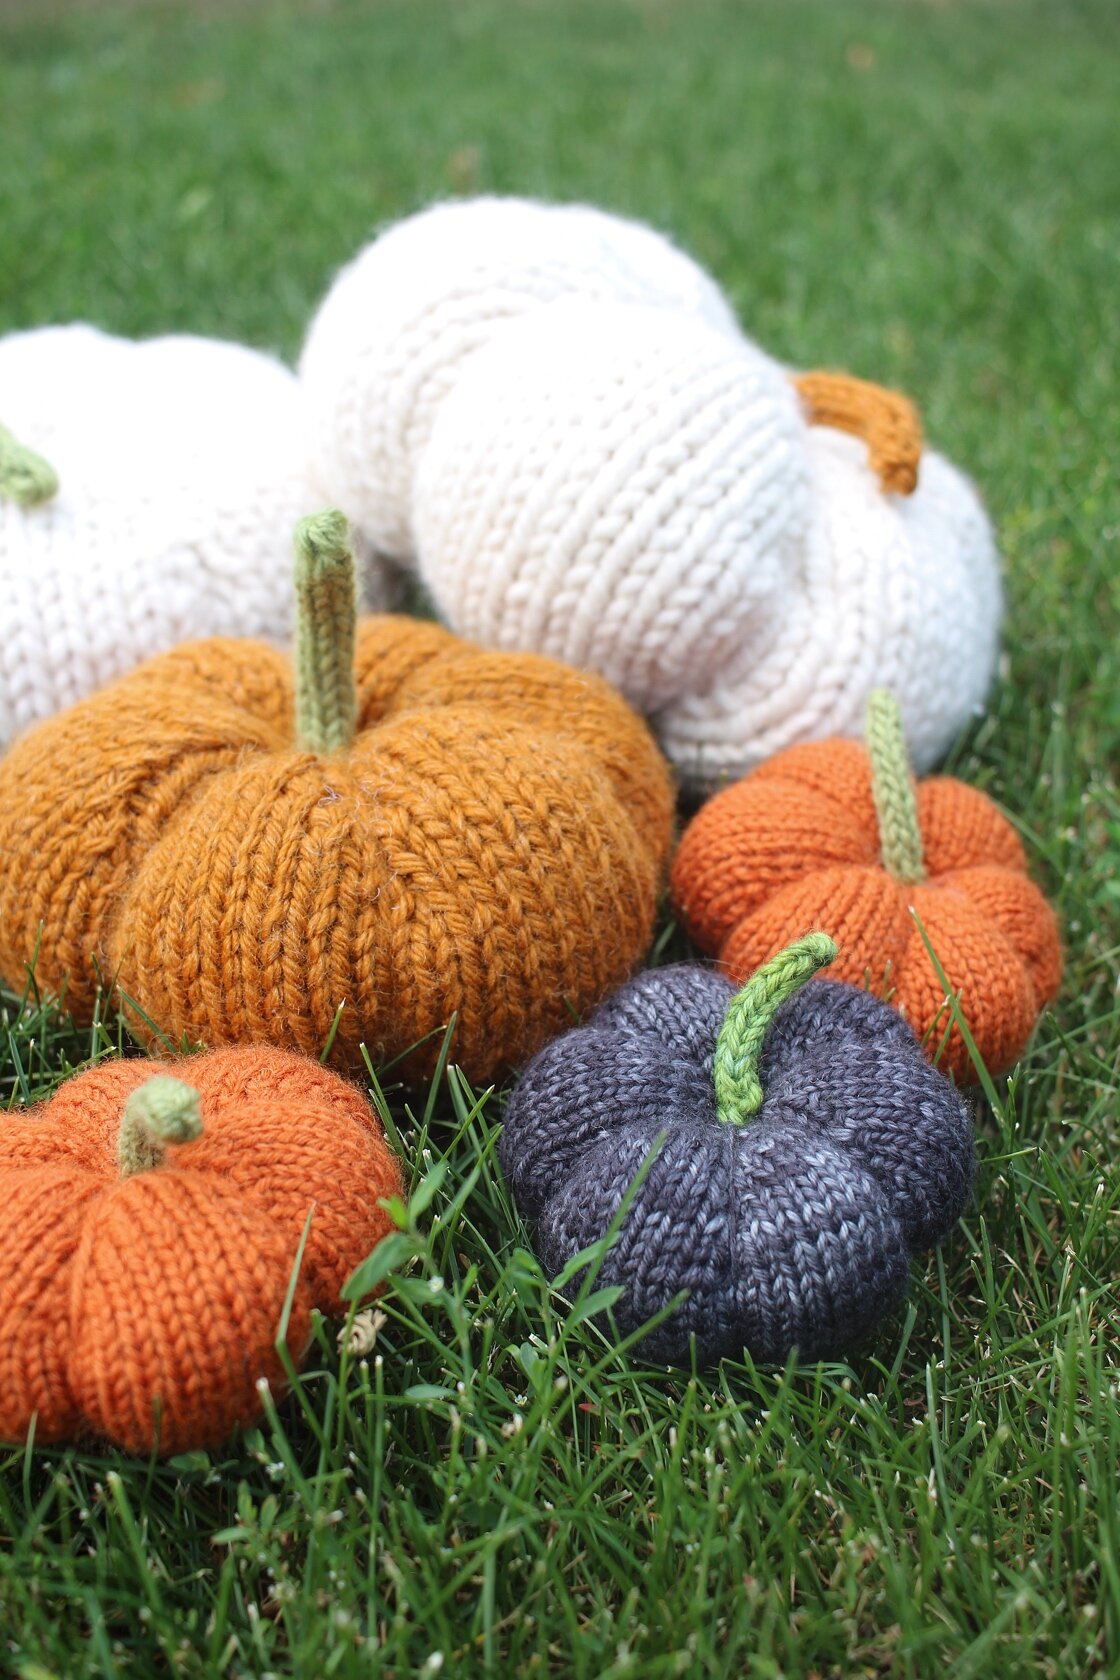
A collection of small, medium, and large knit pumpkins sitting in the grass. The pumpkins are orange, white, black, and purple.

I’m pretty sure it was the Spice and Clove Pumpkin pattern that brought back my knitting drive. This pattern showed up on my radar last year, but I didn’t get the chance to knit it at the time. This year I dove into the stash and pulled out yarn to make all sorts of fun pumpkins. There are tiny pumpkins made from doubled up sock yarn and big, squishy pumpkins made with bulky yarn. It’s a pretty versatile pattern that way.

Some of these have stayed with me and taken up residence on random shelves all over the house. Kiddo likes totting them around so they get up to some off the wall adventures. The rest headed off to new homes as fun gourd surprises.

While I’ve mostly gotten knitting pumpkins out of my system for the time being, I’m thinking about making one more using this pattern. All the shaping is done with increases and decreases instead of wrapping with yarn. I don’t think I’ll be able to whip one up before Thanksgiving, but it’ll still be a fun project in December.

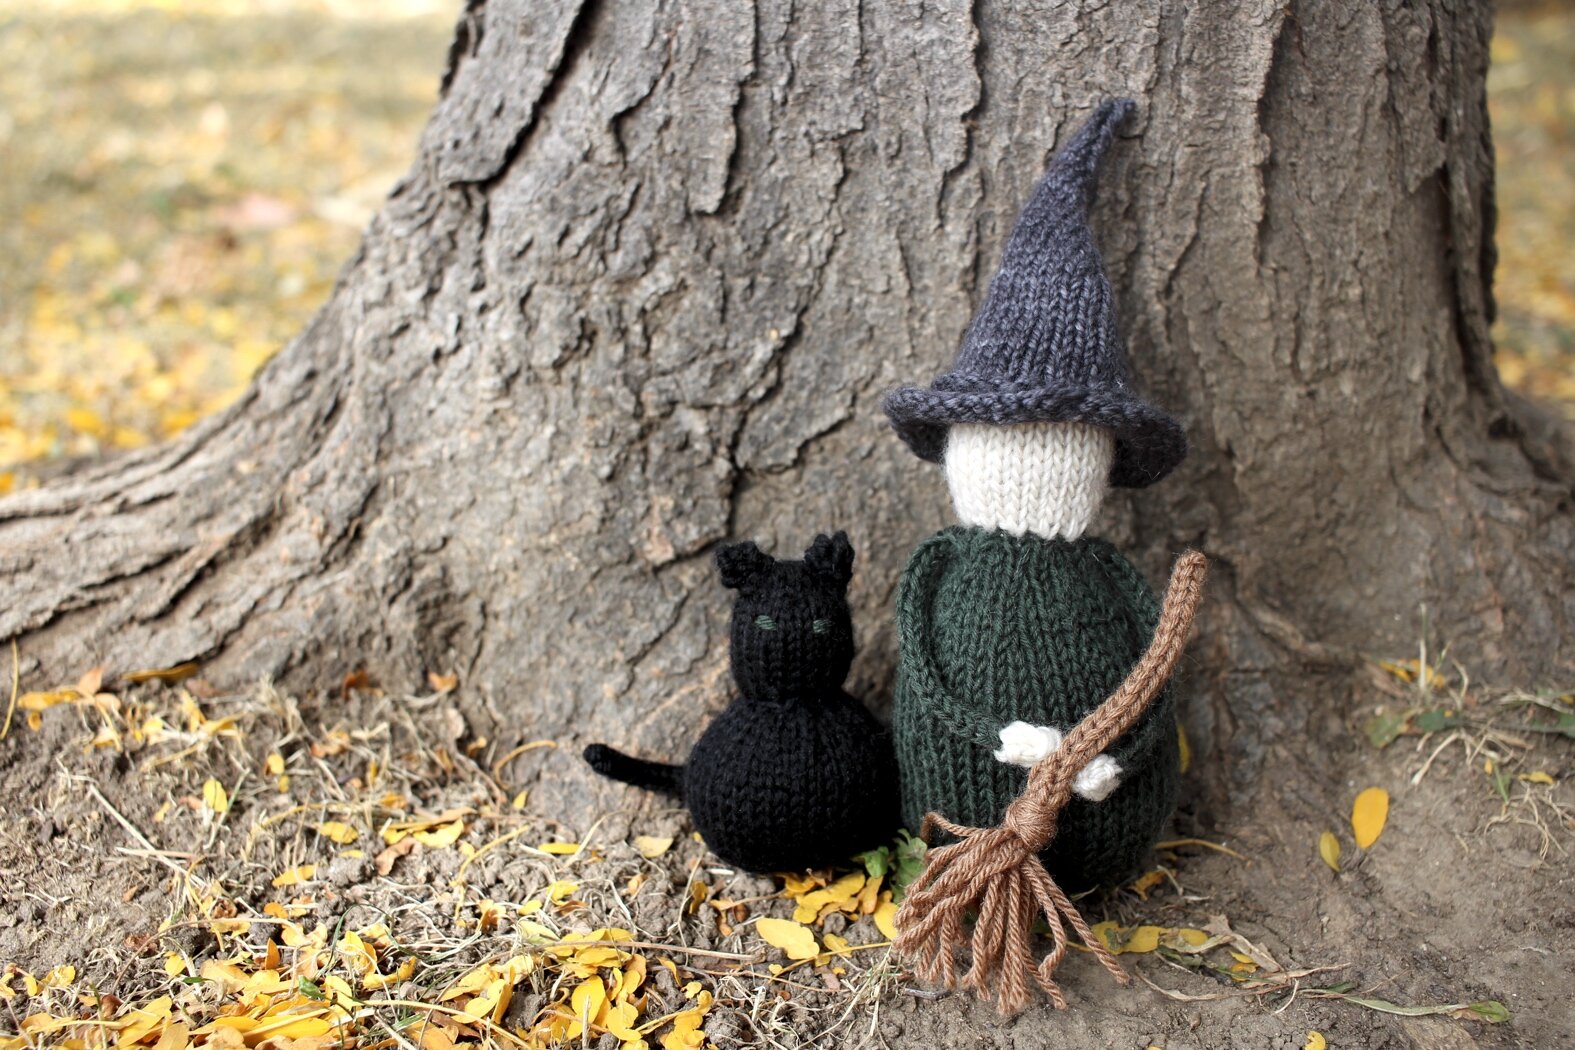
A knitted black cat and witch wearing a green dress and grey hat sitting at the base of a tree.

This adorable little witch duo (well, duos), is another pattern I came across last year, but didn’t get around to knitting until September and October. The green witch and cat were a gift. Then I couldn’t resist knitting a sunflower yellow witch for my own shelves. The pattern, Little Witch Charm Set by Susan B. Anderson, is a little fiddly at times and I made a few mods to avoid picking up as many stitches.

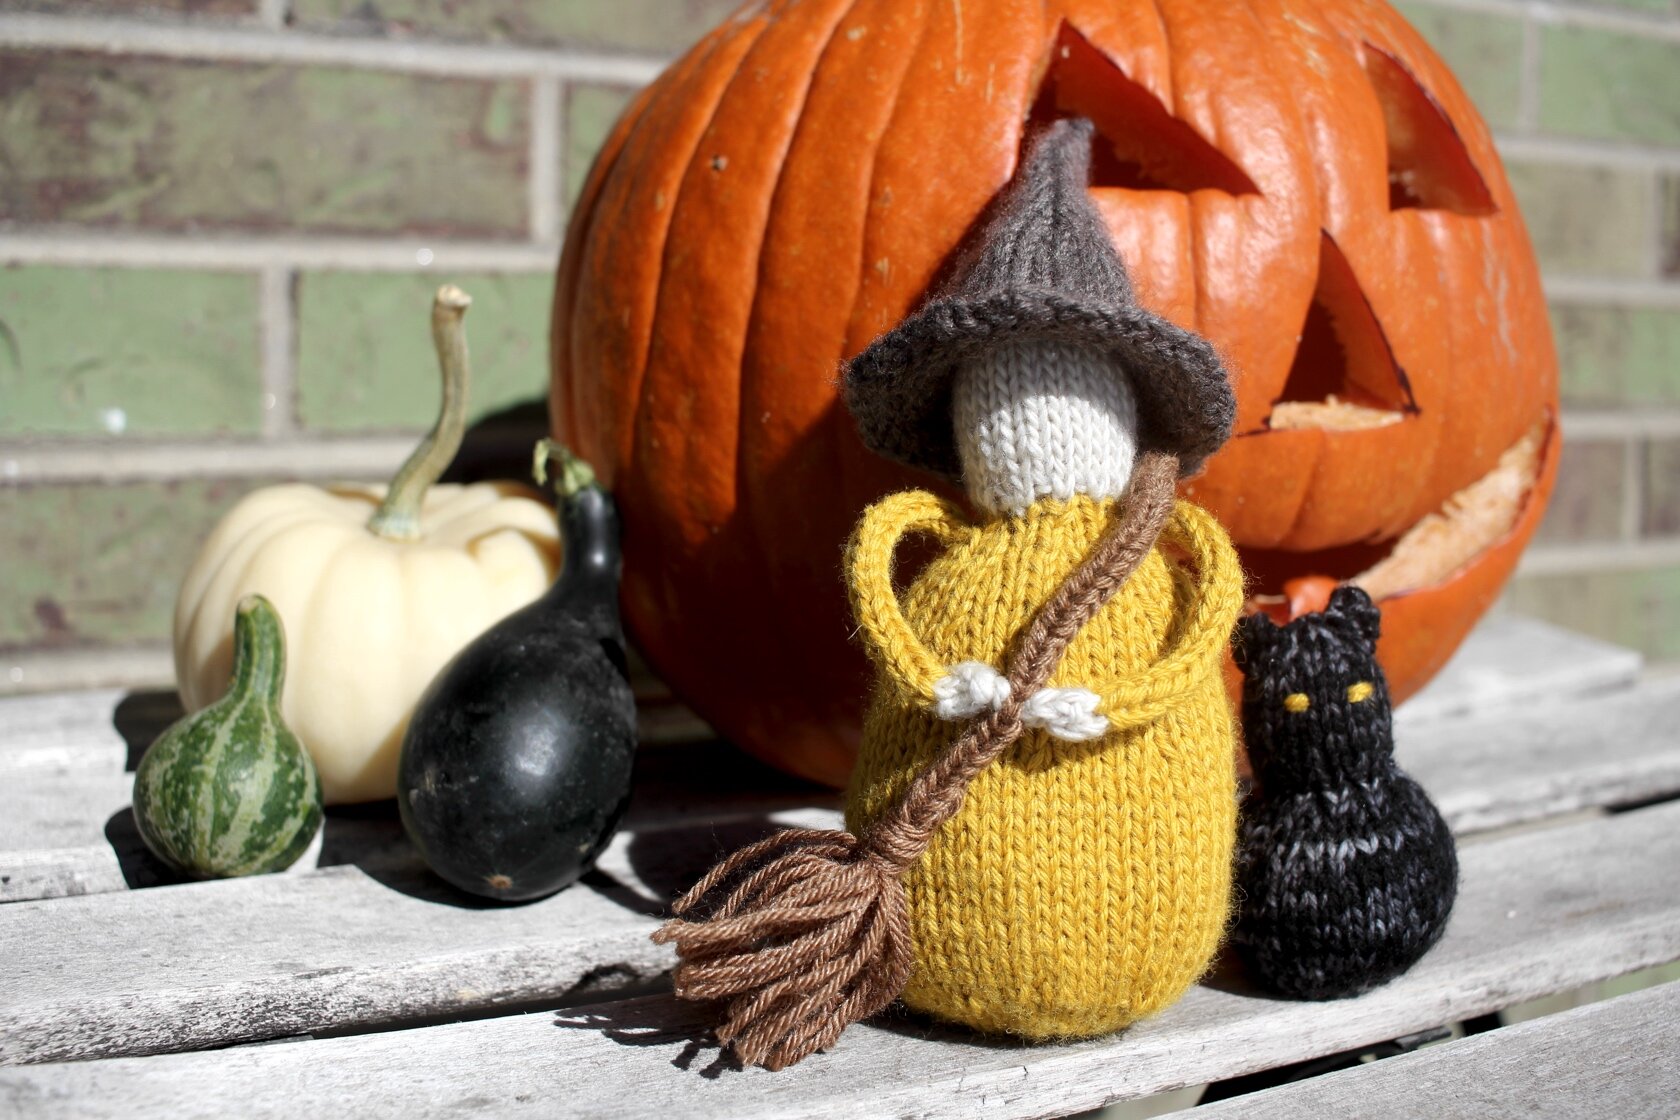
A speckled black cat and a witch with a broom, yellow dress, and brown hat sitting in front of a jack-o-lantern.

I couldn’t get gauge with the yarn I needed to use, so I used said fingering weight yarn doubled up. It was a great way to use up my sock yarn leftovers and gave the witches a nice size boost. Still small and cute, but not mini. Here’s a full list of all my mods on the Ravelry project page.

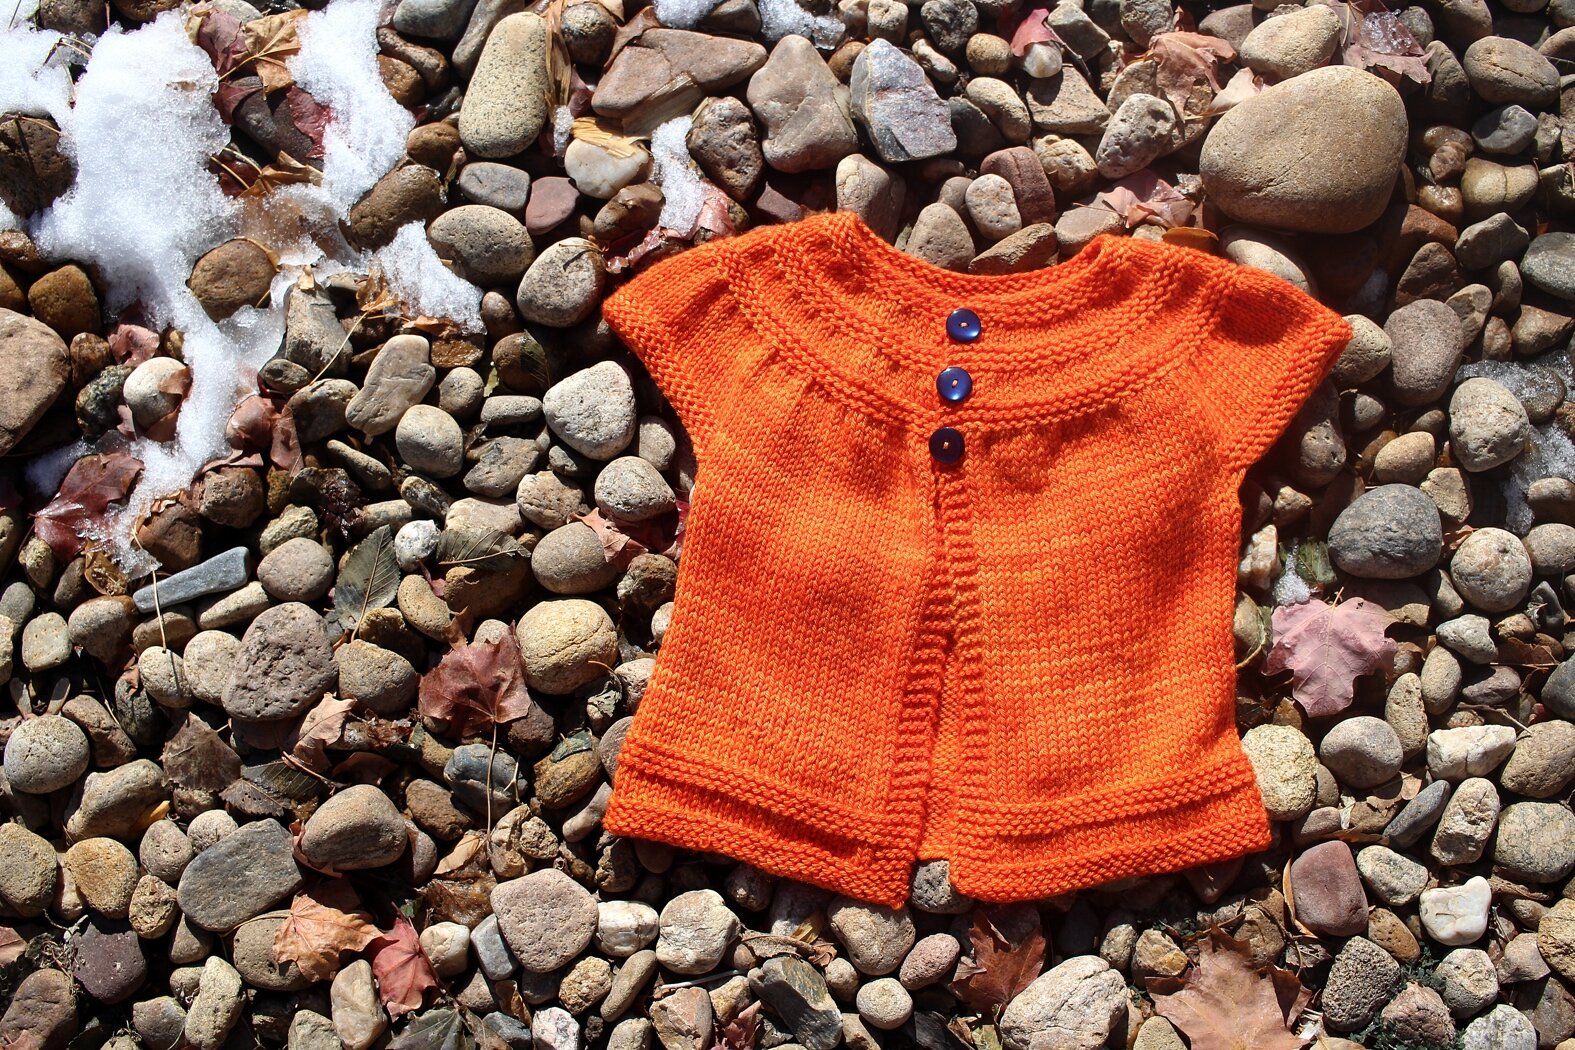
An orange cardigan with 3 blue buttons laying on a field of rocks and snow.

And a sweater for the kiddo! This is the In Threes sweater that I started and finished knitting in 2019. The problem was that is got packed up on a high shelf while I tackled other major projects. The lingering doubt of whether or not it would still fit said kiddo this winter finally made me pull it down. Then it took me a few more weeks to sew on three buttons. The good news is that the sweater fits and looks like it will still fit next winter. Whew! The even better news is that kiddo still likes the sweater and asks to wear it. That’s a win in my book any day.

A close-up of the yoke of the cardigan with short sleeves and three blue buttons.

What’s next on the knit list? The Red Scarf Project scarf is still on the needles, but I couldn’t resist casting on a for a sweater. A sweater for me, no less. Christmas gift knitting is also staring me in the face. There’s a whole pile of yarn waiting for me to wind it up. I’ve got plans for cute unicorns, color work mitts, socks, and ornaments. Here’s hoping I haven’t bitten off more than I can chew.

A Sock Restart

A partially knit yellow cabled sock sitting next to a yarn cake.

This is the beginning of a beautiful sock. It’s a combination of a good yarn, good cables, and good color. But...it’s too small. All those cable twists (sometimes six a round) really sucked up all the give and stretch usually present in knit fabric.

So, this sock is yarn again and has the potential to be a beautiful sock that actually fits.

Was it frustrating to rip out 20+ rows of a plaited cable knit with fingering weight yarn? Most definitely, but totally worth it to have a comfortable sock that gets worn instead of stuffed in the back of a drawer. Now that I’m starting over, I have a better idea of how I can add ribbing and extra stitches for a better fit. And having a little extra time to figure out how to work around a stiff cable that sucks up stitches doesn’t hurt either. Here’s hoping 80 stitches will be enough this time around.

Crinkled yellow yarn sitting on a table after ripping out a too small sock.

Halfway Finished With 100 Days Of Sock Knitting

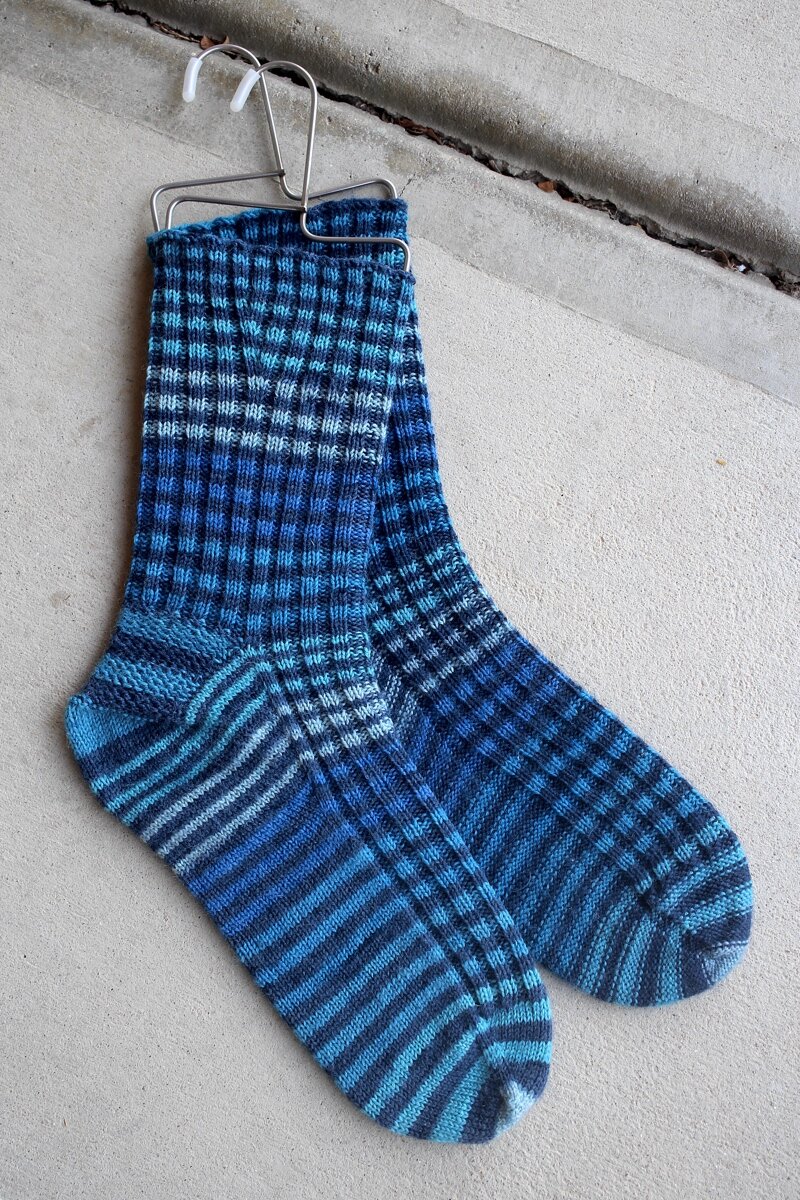
A pair of blue striped toe-up socks on sock blockers with one sock flipped inside out.

Back in 2019, I wanted to spend 2020 knitting socks. Socks for me. Socks for the Bearded One. Socks for the kiddo. Socks for friends. Did I knit socks in Janaury? Nope. Did I knit socks in February? Kind of. I started a pair of kid socks, and then they sat untouched for months after my own kiddo pulled out a needle’s worth of stitches. Ugh. Then the 100 Day Project kicked off and I made yarn for 100 Days which didn’t leave much room for sock knitting, but did get me some lovely new handspun. When that project ended, I wasn’t sure what to do next. I’d given up on a year of socks or even six months of socks. 100 days of sock knitting, though? That I could do. I quietly kicked off the project on July 28th, 2020 and got back to work on the lingering kid socks. Those only took a week to finish at a few rounds every day. What was next on the list? These blue-striped beauties for the Bearded One, which thanks to daily knitting, were knit in just under a month.

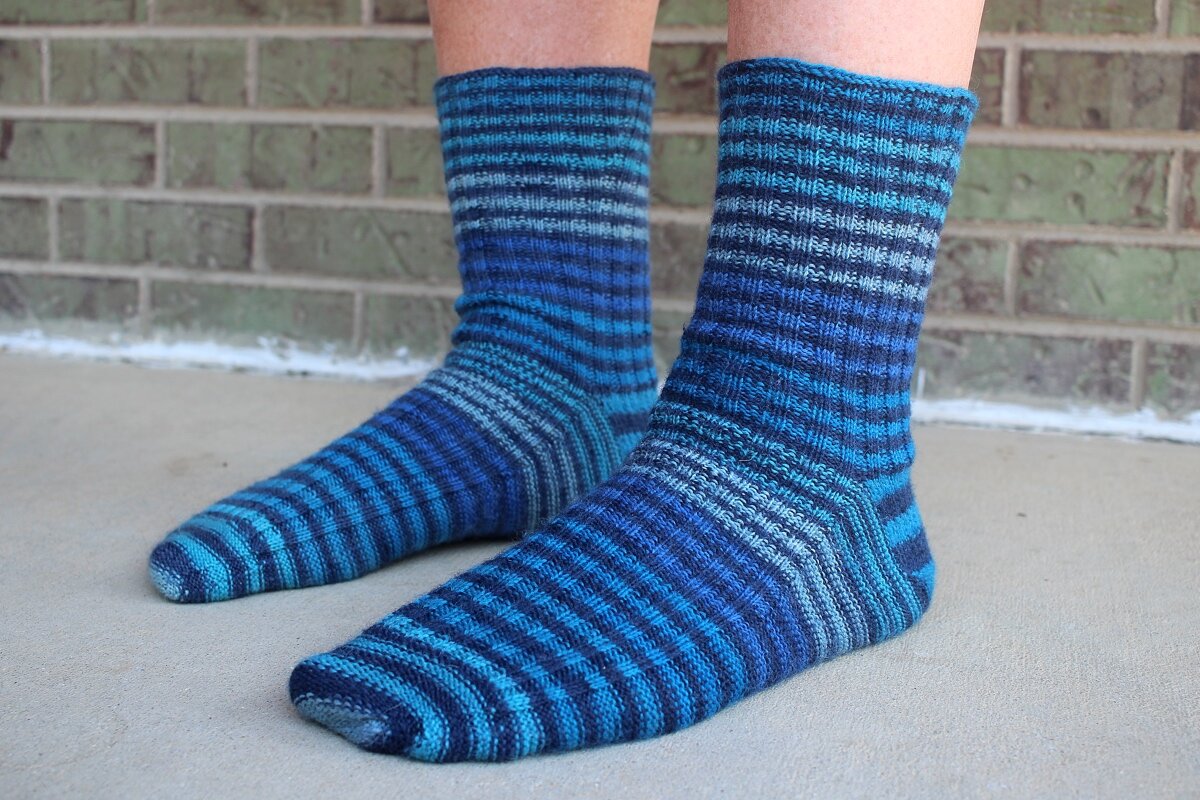
Blue-striped socks on feet and showing off the princess sole.

While they weren’t unceremoniously removed from their needles by a curious kiddo, knitting these socks wasn’t without aggravation. I’m a stickler for making self-striping yarn match up on each sock. The first step is matching up the yarns and making sure both skeins are in the same point in the color sequence. It’s a good thing I bought this yarn at a discount and got two balls because both of them came with knots. The stripe sequence was completely reversed in the middle of one ball! Thankfully, the largest chunks from both balls were enough to knit matched socks. And I’ve got enough leftovers to make a smaller matching pair for the kiddo. So, pulling the yarn balls apart, cutting, detangling, and spreading them all over the room for a few days was totally worth it.

The other big aggravation was finding two dropped gusset stitches that somehow escaped being knitted together with the edge of the heel flap. That part was all me, and easy enough to sew up at the end.

A close-up of the heel flap surrounded by the reverse stockinette of a princess sole.

The pattern is my own much tweaked and refined default toe-up sock pattern. Tweaking continued with this pair because I had to figure out how to knit the socks so I could flip them inside out after binding off to get a princess sole without purling. Totally worked though it did feel odd to knit a heel flap with the right side inside the sock. The pair got the Bearded One’s seal of approval so they must have turned out great. :D

I’m aiming to get the pattern written up properly in a wide range of sizes as I knit them. Figured I’d start with the biggest size and work my way down. It’s going to be awhile before this particular pattern is anywhere close to finished, but I will keep you updated.

With these socks complete, I’ve knit 2 pairs during my 100 Days of Sock Knitting project. Pair three is on the needles and there are cables afoot with 50 days of dedicated sock knitting time left. More on those socks later though.

The Specs:

Pattern: My own default toe-up sock pattern

Yarn: 437 yds (390.3 m) of Wisdom Yarns Stanza - 703 Burns

Needles: US 1.5 - 2.5 mm circular needles

Dates: August 6 - September 4, 2020

Ravelry Page and more notes here

New Pattern: Morticia's Surprise

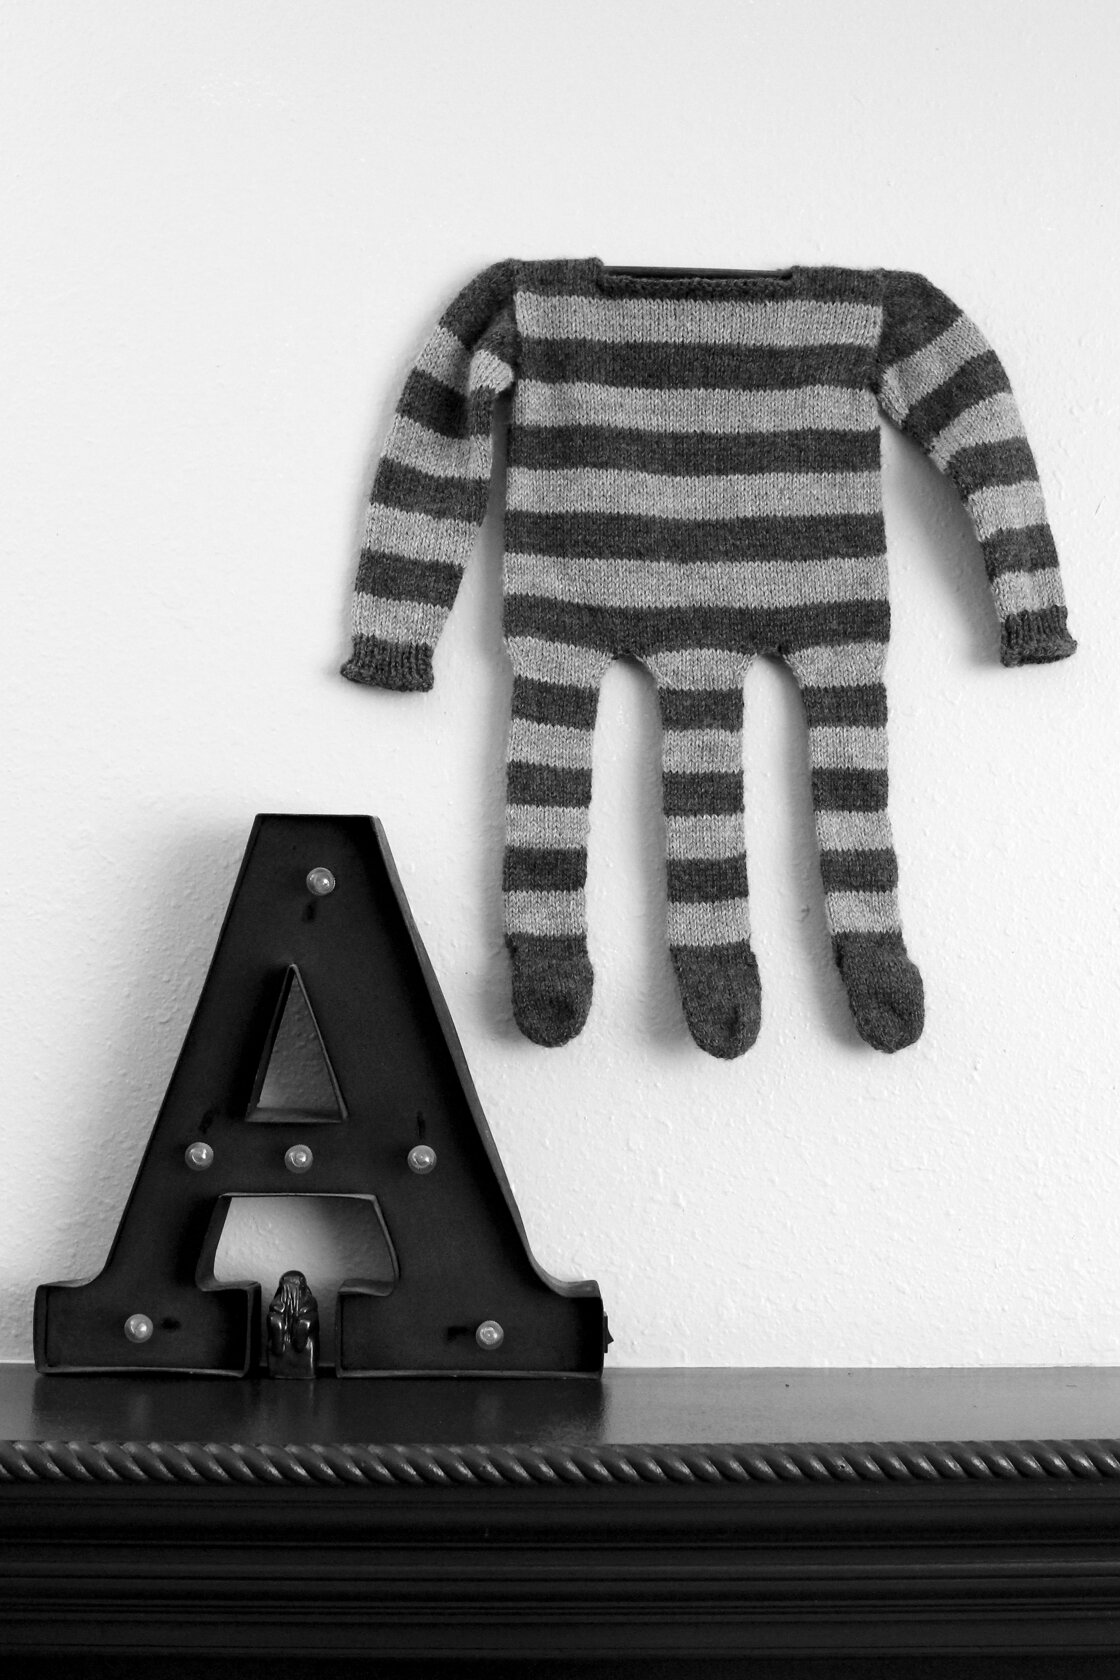
The three-legged romper, titled Morticia’s Surprise, hanging on the wall above a large metal "A” and small Cthulu sculpture.

Last year, a cosplayer friend of mine commissioned me to make the three-legged baby romper from the end of 1991’s Addams Family movie. I loved this movie when it came out and I still regularly watch it. So, of course I was all in when she asked me to make it. Designing a pattern to replicate something from a movie that I’ve enjoyed for so long made the process a fun challenge. This definitely wasn’t how I expected to learn how to knit and construct a set-in sleeve or write instructions for a short-row heel, but I’m so glad I did.

For most of the pattern writing and knitting, the plan was to knit the romper and mail it off. That’d be the end of it. The Bearded One had other ideas, and kept pushing me to release the pattern for this wonderful bit of geekery. He finally convinced me, and after a few more months of work and tech editing, Morticia’s Surprise is now ready for your knitting pleasure.

The three-legged romper from the Addams Family hanging on the wall above a large A and a handful of knick-knacks.

The romper starts with the feet, moves up the legs, then the body, and the shoulders are grafted together. From there you’ll pick up the stitches at the arm holes, work a short row sleeve cap, and knit the sleeves down to the cuffs. There are three different neck options and instructions for adding yarn and needles to match what’s shown in the film.

Close up view of the three feet and striped legs hanging on the wall next to a big metal “A”.

I’m releasing Morticia’s Surprise under the value-for-value model which means you can pay what it’s worth to you.

You can download the pattern and get all the details by clicking the button below. Then show your support for this pattern and future patterns by making a donation or becoming a monthly subscriber on Ko-Fi.

You can also get the pattern through Ravelry. Pay what you want using the coupon codes on the pattern page.

The neck and set-in sleeve of the Morticia’s Surprise romper hanging on the wall.

With Wool is now Value-For-Value

With Wool is now value for value.

There’s been a project on my to-do list for a long, long time for With Wool. That big project was investigating other places to sell my knitting patterns and potentially also setting up my own dedicated shop on this site. The recent Ravelry redesign and the accessibility issues it created finally pushed additional online shops to the top of my list. After researching my options for different shop platforms and seeing the amount of work involved, I’m doing something completely different.

Instead of selling patterns, I’m offering them under the value-for-value model. If you enjoy a pattern and find value in it, you can pay what it’s worth to you. You can find all my knitting patterns right here. Previously paid patterns will still be available on Ravelry with coupon codes so you can pay what you want.

FYI, as part of this switch I’m also planning to update all of my patterns to fix errata, clarify details, answer questions, and improve layout. You can expect to see those updates over the coming months.

I’m also dipping my toes into subscriptions. If you enjoy and want to support my work, future patterns, and the With Wool Express newsletter, you can become a monthly supporter on my Ko-Fi.

Buy Me a Coffee at ko-fi.com

The decision to move to a value-for-value model didn’t happen out of the blue. It’s something I’ve been considering for a long time and the Ravelry redesign was the catalyst. It’s been 10 years since I published my first paid pattern in 2010. It wasn’t until 2019 that I made enough through sales and ko-fi donations to cover all the costs (hosting, email, domain, and payment processing) associated with running With Wool. After taxes, I had enough leftover to buy a single cup of coffee. So, changing things up to try something new isn’t a major risk.

To end this post want to say thank you to everyone who has ever bought a pattern or donated or wrote me note. Your support and kind words have been incredible encouragement to keep going.

Knitting At Home Sale

I hope you’re all safe and settled in for social distancing with lots of yarn and fiber to keep you occupied. At first the thought of sending out a newsletter or writing a blog post about knitting seemed odd to me during this tumultuous time. But knitting has power. It can bring warmth and joy, calm and focus, connection and love. I think we can all do with a little bit more of those things.

One of my main goals for With Wool has been to create a sense of connection with fiber arts as the key. I am so thankful that you’re here. One of my other main goals for this space (there are more, but we’ll talk about them later) is to spread joy...and something to occupy your hands and mind with yarn.


All of my knitting patterns are on sale for 40% off through April 4, no coupon necessary.

I also have free patterns for hats, shawls & scarves, fingerless mitts, washcloths, and socks here. So let’s knit, spin, crochet, tat, felt, and make art like introverts - separately, in our own homes.

The amount of time I have for knitting hasn’t changed, but that hasn’t stopped me from planning what to start next. I’ve got a few projects in mind for myself, but gifts and new designs are consuming most of my attention. Hoping to share them with you soon.

How A Challenging Project Changed My Approach To Knit Design and Publishing

How taking on a fun commission changed my approach to designing and publishing knitting patterns. #knitting #geekknitting #knitdesign #addamsfamily #knittingdesigner ||withwool.comDescription: Close up of an in-progress sleeve knit from the top down…

I never thought I’d cut my teeth on short row sleeve caps by writing a short row sleeve cap. I always figured that I’d knit one eventually following someone else’s sweater pattern. Okay, let’s back up a little.

A few months ago, a cosplayer friend of mine commissioned me to make the three-legged baby romper from the end of 1991’s Addams Family movie. I loved this movie when it came out and I still regularly watch it. So, of course I was all in when she asked me about knitting it. When I went digging around for a pattern, I found people selling reproductions of the piece, but no patterns. That didn’t frighten me off though. If anything, designing a pattern from something I’ve enjoyed for so long made it a fun challenge. One that’s taken me far longer than expected, but I’m happy with the results. There’s just a bit more of a second sleeve to knit before the whole thing gets a soak and the final finishing touches.

How taking on a fun commission changed my approach to designing and publishing knitting patterns. #knitting #geekknitting #knitdesign #addamsfamily #knittingdesigner ||withwool.comDescription: The laid out three-legged Addams Family romper knit in g…

For most of the pattern writing and knitting, the plan was to knit the romper and mail it off. That’d be the end of it. The Bearded One had other ideas, and has been pushing me to release the pattern. I brushed him off in the beginning, but I think I will publish the pattern. Not sure quite when yet, though With Wool Express subscribers will be the first to know.

For as long as I’ve been designing knitting patterns (both free and paid), the question of whether anyone else would knit the pattern was one of the first I’d ask. Designing and writing and laying out a knitting pattern, so that people can understand it is no small amount of work. If I was going to put the effort into publishing a pattern, I didn’t want to put my time towards something that would fall flat or be ignored. I have notebooks filled with ideas that never got beyond a few notes and a half-hearted swatch because I didn’t think anyone else would want to knit them. To be fair, those notebooks are also full of ideas that I fell out of love with along with a few nuggets that keep nagging at me years later.

How taking on a fun commission changed my approach to designing and publishing knitting patterns. #knitting #geekknitting #knitdesign #addamsfamily #knittingdesigner ||withwool.comDescription: The body of the three-legged romper sitting next to cake…

Now that I have a young kiddo and far less free time than I did when I published my first pattern in 2009, my thoughts have changed. I have far less time to be weighed down by my own self doubt, anxiety, and endless questions. I have to commit what time I do have for deep, focused work to the stuff that I want to do. Even if that thing is a knitting pattern that’s not going to take the world by storm. So, I will be publishing the pattern for this three-legged Addams Family romper and whatever pattern idea consumes my brain next. Solving knitting puzzles with yarn is part of what grounds me and makes me happy, so I’ll continue to knit on and share my patterns. Not all of them will be as geeky as this romper, but they’ll be fun and varied.

FO: Kiddo's New Mittens

A pair of snow caked mittens sitting on a pile of snow. #knittingFO: Kiddo’s New Mittens | withwool.com

Kiddo has a cute blue snowsuit with pink trim and it’s just a bit too long for her which makes outfit extra cute. The arms have little flaps that can be folded over her hands to keep her fingers warm. Know what she hates with a burning tantrum inducing passion? Those flaps because they keep her from driving her fingers straight into the snow. Warm fingers are just not a priority for her. Keeping her fingers warm is, however, a priority for me and the yarn stash.

I made her the Beloved Bonnet by Tin Can Knits last winter. The hat was big at the time - still a bit oversized now - but she likes wearing it. That’s more than I can say for most of her hats that I pick up off the floor 10 seconds after putting them on her noggin. When I went looking for a mitten pattern a few weeks ago, there was just enough yarn left over to make a pair of The World’s Simplest Mittens, also by Tin Can Knits. The pair was an exceedingly quick knit even with the few extra rounds I tacked on to make the mittens longer. There’s still yarn leftover too so who knows what the last 33 yards will turn into.

Cute kiddo wearing an octopus hat and mittens while holding mom’s hand. #knittingFO: Kiddo’s New Mittens | withwool.com

Normally, this is where I’d show you a cute photo of the matching hat and mittens. I would love to take that photo too, but the hat is currently having an adventure. We don’t know where it is or when it plans to return. I’m hoping soon because there’s 4” of snow on the ground, and kiddo should have her favorite hat back for her adventures. The giant octopus hat is a close second though.

One clean, dry mitten worn by a kid being pulled along in a sled. #knittingFO: Kiddo’s New Mittens | withwool.com

I can show you the mitts in action though! They got their first wearing out to go play in the snow. She didn’t immediately hate them! They got wet, caked in snow, frequently put back on (really need to get some mitten clips), and pulled around in a sled. It was a good day for all involved.

Then, the next day when the mitts were dry again, Kiddo pulled them off the shelf and put one on all by herself. I helped with the second. Yay, knitting win! The first pair of hand knit socks I made for her were also well received and well-worn. I’m trying not to get my hopes up that she’ll love the next thing I make for her too. Optimistic? Sure. Also prepared for kiddo to never want to wear the next thing I knit for her? Yeah, that too.

The Specs:
Pattern: The World’s Simplest Mittens by Tin Can Knits
Yarn: 64 yds Jojoland Splatter Dash - color 36
Needles: US 5 (3.75 mm) and US 6 (4 mm) circular needles
Dates: January 25 - 29, 2020
@Ravelry

A hand holding up one very snow-caked mitten. #knittingFO: Kiddo’s New Mittens | withwool.com

Snowy February Sale

January’s weather was cold and clear, but February started off with a snow storm! Hand knits are always a great thing to have whether you’re trudging through the snow or cuddling up inside. So, all With Wool knitting patterns are on sale Feb 6 - 19, 2020.

Use code WARM in the Ravelry shop to get 20% off. Hope you’re staying warm and happy knitting!

FO: Kiddo's Socks

A pair of hand knit striped kid’s socks with a gusset and heel Flap. FO:Kiddo’s Socks || withwool.com

The Kiddo does not like wearing socks. If she has any choice in the matter, she’ll pull them off at her earliest convenience and leave them behind/under the nearest piece of furniture. When we’re short socks on laundry day I go check under the crib with a flashlight. Usually turns up at least a pair or two. This wouldn’t be much of a problem if not for cold toddler toes which should really be warm toddler toes. So I finally decided to knit kiddo a pair of wool socks.

Striped hand knit socks overlaying each other.FO: Kiddo’s Socks || withwool.com

I got started and kept right on knitting with the expectation that I’d be pulling these out from under the furniture just like all her other socks. Then she tried them on and surprised the hell out of me by actually liking them! She didn’t pull them off or chuck them under the coffee table. She wore them, walked around in them, and motioned for me to put them on again the next day. When I asked if she wanted mom to make her more socks, she nodded yes and I was positively verklempt. I hadn’t dared hope that she’d like these socks, but she did, and it felt like my heart was going to burst out of chest from happiness. Kiddo can have all the hand knit socks she wants.

She’s also a natural, if wiggly, sock model.

Toddler wearing a pair of striped hand knit socks.FO:Kiddo’s Socks || withwool.com

I made these socks long and oversized, which is probably why she likes them. Her feet have plenty of room to grow, and there’s time enough for me to eventually make another pair. The pattern is one of my own making and it uses lots of ribbing to stretch and fit wiggly growing feet.

Striped hand knit socks worn on briefly still toddler feet.FO: Kiddo’s Socks || withwool.com

While I am very happy with how this pair turned out, the pattern is definitely in need of some tweaks. Good thing I have at least one more pair to knit soon, and plenty of stashed leftover sock yarn to work with. This pair only took about 65 yards (60 m, 14g). Then it’ll be time to figure out how to write it for multiple sizes and lengths in a way that’s clear and easy to follow. It’s going to be awhile before the finished pattern sees the light of day, but that’s okay because it gives me more time to work on getting things right.

New Pattern: The Old Friend Hat

Old-Friend-Hat-Side-View.jpg

It all started with a hat I knit for the Bearded One nine years ago. He saw a hat he liked on an old British tv show from the 70’s*, and said he would totally wear a hat like that. I, a knitter with a little too much time on her hands, said I could make that happen. After taking a few screen caps, I got to work. The hat wasn’t an exact recreation since I had to guess at some of the details, but it was close and a big success. He wore that hat everywhere and usually kept it in his back pocket just in case he’d need it.

Old-Friend-Hat-Crown-Portrait.jpg

Well, after nine years of constant wear, the hat was an old friend but also showing it’s age. So it was time to knit him another one. While I worked on the new hat, I couldn’t help but imagine a longer slouchier version for me. And how could I not whip up a matching hat for the kiddo too. So I took the opportunity to clean up and expand the pattern to fit small baby heads all the way up to big adult noggins. There’s both a snug fitted version and a long slouchy version. And how could I not name the pattern “Old Friend”. The hat has been with us for 9 years already, and I’ve got the yarn to knit several more. Sounds like this hat is going to be sticking around for a long time.

Old-Friend-Group-Horizontal.jpg

While I’ve only been wearing my Old Friend hat for a few months, I am absolutely in love. The cables look great with pretty much everything. I wear it slouchy most of the time, but am really glad of the extra ribbing when I want an extra layer over my ears. Even the kiddo, who won’t wear most hats for more than five seconds at a time, wears her Old Friend hat when it’s cold. Though our hats are all different colors and lengths, they still match without having to be exactly the same.

Oh, and after nine years, I am so happy to finally share the pattern with you! Whether you choose to knit it short and fitted or long and slouchy, this cabled hat is sure to become an old friend that’s always by your side.

To celebrate the release of Old Friend, the pattern will be on sale October 13 - 20th, 2019 MST . Use code FRIENDLY when you check out to get 20% off the pattern!

Sizes:

Baby/Toddler: (16 - 18”) [41 - 46 cm]

Child: (18 - 20”) [46 - 51 cm]

Adult S/M: (20 - 22”) [51 - 56 cm]

Adult L: (22 - 24”) [56 - 61 cm]

Gauge: 4 sts and 6 rows = 1” in pattern

Yarn:

For Fitted Hat: 60 (85, 120, 140) yds / 55 [78, 104, 119] m worsted weight yarn

  • Shown in Knit Picks Swish Worsted - Allspice, and Stonehedge Fiber Mill Shepherd’s Wool Worsted - Garnet

For Slouchy Hat: 70 (100, 140, 172) yds / 64 [91, 128, 157] m worsted weight yarn

  • Shown in Knit Picks Swish Worsted - Dove Heather

Needles and Notions:

  • US 7 (4.5mm) 32” circular needles OR 16” circular needles/DPN’s

  • Tapestry Needle

  • Regular and Locking Stitch Markers (Optional)

*Said show is “Last of the Summer Wine”, and I’m totally guessing that the episodes I was watching were from the 70’s.

How To Knit Cables Without A Cable Needle

How To Knit Cables Without A Cable Needle || withwool.com

I love the complexity and depth and texture that cables create. I love small simple cables and big complicated cables. For complicated cables and reversible cables, cable needles are my best friend, but for small cables - 6 stitches or smaller - I skip the cable needle. It makes the knitting faster and and there’s one less thing to fiddle with.

I knit the Old Friend hat without a cable needle which helped make the project a quick, easy knit.

Front Cross Cable

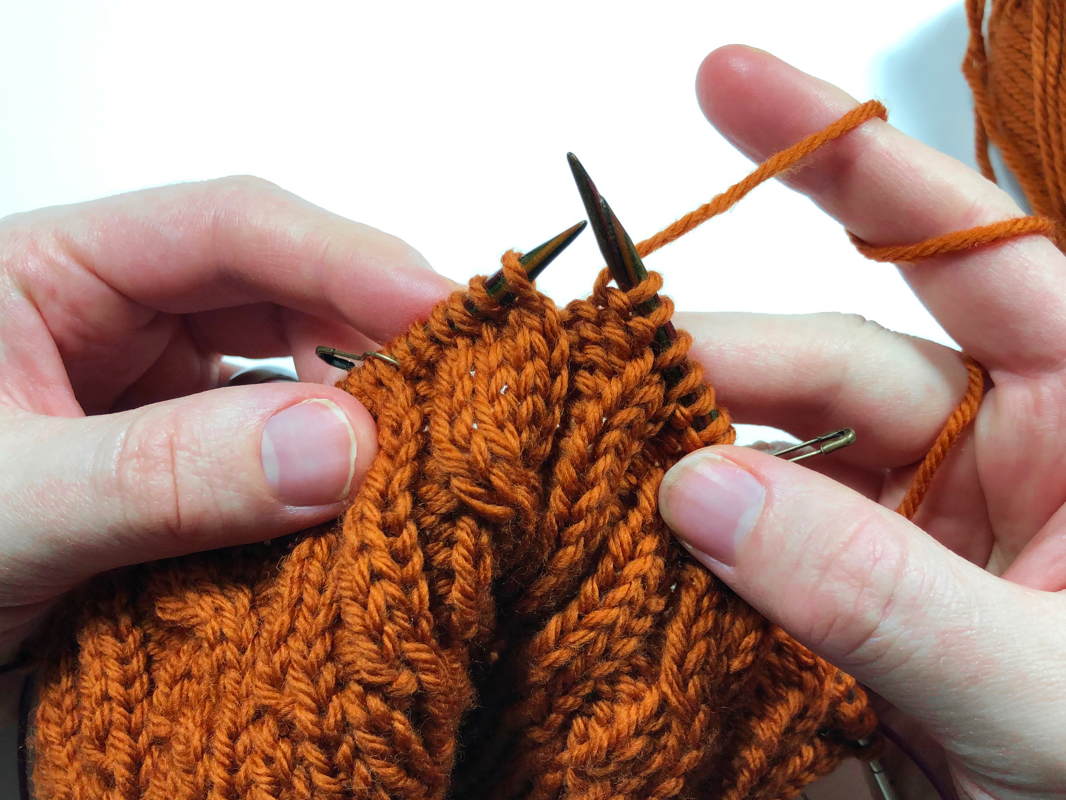
Knitting across a row and ready to cross a 4 stitch cable.How To Knit Cables Without A Cable Needle || withwool.com

In the photo above, I’m ready to work a front crossing cable, also called a left cross cable, across the next 4 stitches on the left needle. This means that the 2 right-most stitches will be crossing in front of the 2 left stitches.

The right 2 stitches hanging of the needles to prepare to cross a front cross cable without a cable needle.How To Knit Cables Without A Cable Needle || withwool.com

The first step is to slip the 2 right (front) stitches closest to the needle tip off the needle.

Slipping the left cable stitches onto the right needle to cross the cable. The other half of the cable stitches are hanging in the front of the work.How To Knit Cables Without A Cable Needle || withwool.com

Next slip the 2 left stitches purl-wise from the left needle to the right needle. The hanging stitches will stay in the front and you can hold them in place with your thumb.

Slipping the hanging cable stitches onto the left needle purl-wise.How To Knit Cables Without A Cable Needle || withwool.com

Slip the hanging stitches on to the left needle purl-wise.

Slipping cable stitches from right needle back to left needle. The cable is crossed and is now ready to be knit across.How To Knit Cables Without A Cable Needle || withwool.com

Slip the 2 cable stitches on the right needle back to the left needle. Now the hard part is done, and the cable is crossed.

Knitting across the cable stitches in pattern.How To Knit Cables Without A Cable Needle || withwool.com

Knit (or purl as the pattern requires) across the cable stitches. You’re ready to keep working across the row.

A complete front cross cable.How To Knit Cables Without A Cable Needle || withwool.com

Here’s what the knitting looks like after working the cable cross.

Back Cross Cable

The left stitches of a back cross cable handing off the needles and being held behind the left needle.How To Knit Cables Without A Cable Needle || withwool.com

Now I’m ready to work a back crossing cable, also known as a right cross cable - which means that the 2 right-most stitches will be crossing behind the 2 left stitches. The first step is to slip the 2 right stitches off and hold them behind the needle.

Slipping the left half of the cable stitches to the right needle. The hanging cable stitches are hidden behind the work in the photo.How To Knit Cables Without A Cable Needle || withwool.com

Next slip the 2 left stitches purl-wise from the left needle to the right needle. The hanging stitches will stay in the back which is why you can’t see them in this photo.

Slipping the hanging cable stitches purl-wise onto the left needle.How To Knit Cables Without A Cable Needle || withwool.com

Slip the hanging stitches on to the left needle purl-wise.

A complete back cross cable, also known as a right cross cable.How To Knit Cables Without A Cable Needle || withwool.com

Slip the cable stitches on the right needle back to the left needle and work across. Now you’re ready to keep knitting to your next cable.

Even Faster Cable Knitting

Now that you’ve seen the basics, are you ready to work cables even faster? Here’s a demo with a front crossing cable, but the basic process will be the same for a back crossing cable as well.

Inserting the right needle into the left half of the cable stitches on the back of the work to work a front cross cable.How To Knit Cables Without A Cable Needle || withwool.com

Slip the right needle purl-wise into the left half of the cable stitches from behind.

Cable stitches hanging off the needles at the front of the work after pulling out left needle. Other half of the cable stitches remain on the right needle.How To Knit Cables Without A Cable Needle || withwool.com

Pull the left needle out of the cable stitches. The two left stitches will be on the right needle with the other two stitches hanging out in front.

Left needle slipped into previously hanging cable stitches. Next step is to slip other cable stitches to left needle and work across.How To Knit Cables Without A Cable Needle || withwool.com

Slip the left needle back into the hanging stitches purl-wise and on the front side of the work. Then slip the 2 cable stitches on the right needle back to the left needle. Work across and you’re ready to cross more cables.


If you enjoyed this tutorial, buy me a coffee! Thank you for your support!

Buy Me a Coffee at ko-fi.com

Around Here - November 2019

Two feet standing on a handwoven rag rug with labels attached.Around Here || withwool.com

There’s been lots of small great things happening around here. Let’s catch up!

Last weekend, I packed up the family and headed up to the Boulder Handweavers Guild and Sale. It’s always interesting walking around and seeing what all the different fiber artists in the area are getting up too. There were knitted items of all kinds from tiny baby booties to giant shawls. There were beautiful woven clothes, hand dyed silk scarves, felted bowls, as well as yarn and fiber. I also saw some really cool crocheted t-shirt yarn baskets which made me want to give crochet another try.

Beams of sunlight falling on a handwoven rag rug.Around Here || withwool.com

We spotted a beautiful handwoven rag rug that had to come home with us too. The rug is cushy to stand on, a good size, and has great colors. Said rug is also the first thing we bought for our new place! I’m looking forward to having more room to spread out, and plenty of space for the kiddo to play.

A half-finished sweater for a toddler sitting next to a ball of yarn.Around Here || withwool.com

Much progress has been made on kiddo’s Fall sweater. It’s taken a back seat the last few days to other overdue projects, but the sweater has still come a long way in the past week. The yoke is finished, the sleeves are bound off, and now I’m working through the body. It’s been great autopilot knitting to pick up at random moments throughout the day. Still looking for buttons though.

The first and second attempt at making the Cattywampus Hat look like the flag of Trinidad and Tobago. #knitting The second attempt is going much better, and in the right direction.Around Here || withwool.com

Remember the hat I was trying to make in the likeness of the Trinidad and Tobago flag? I finally figured out how to make the stripes slope in the correct direction! Charting out the rewrites really helped. Now I’m past the spot where I stopped on the first attempt and quickly moving towards the grafting. Who knew I’d be so excited about kitchener stitch.

Two skeins of Berroco Vintage DK in Cracked Pepper and Smoke. #knittingAround Here || withwool.com

I decided to take on a project for a friend that sounded so fun I couldn’t resist. That grey and dark grey yarn above? That’s the yarn I’m using, and I don’t think I’ve even been so excited to knit with so much grey. More details on that later.

Sweater Weather

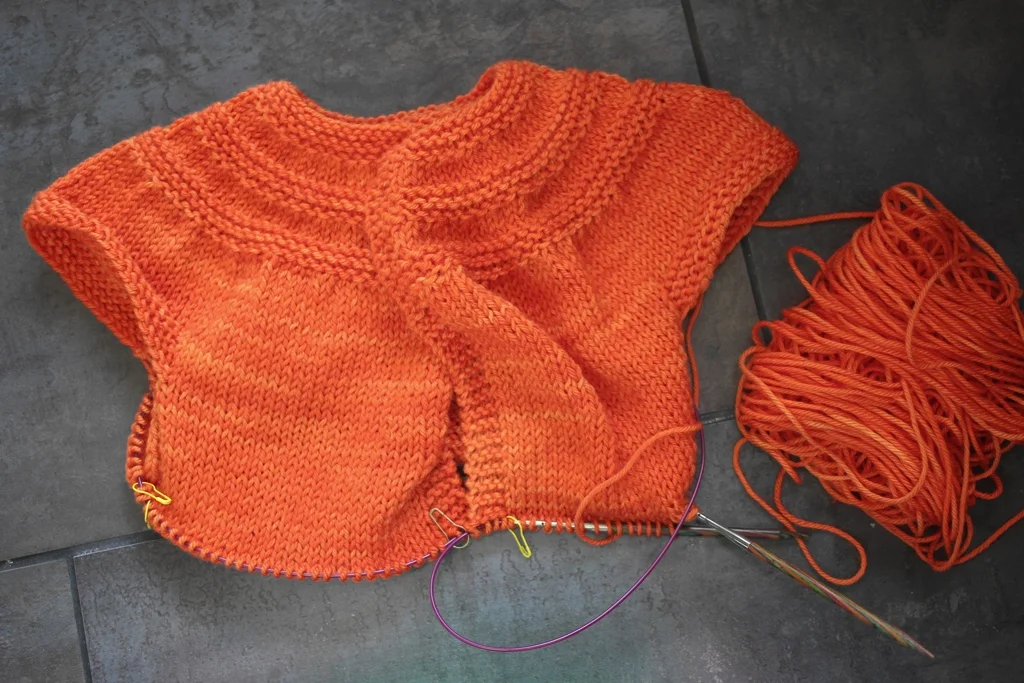
An orange ball of yarn and an in progress sweater yoke sit on a table covered in snow. #knittingSweater Weather || withwool.com

The world outside my windows is covered in falling snow for the third day in a row. All that white stuff is really stacking up so what better thing to do than hunker down inside and cast on for a sweater?

This bright orange number is for the Kiddo and she picked out the color herself when we went to Yarn Fest 2019. The festival was a few months ago, but I can tell she still likes the color because she would not stop staring at it while I knit through breakfast. Maybe the color means she’ll like wearing it more than any of the hats I’ve made her? A mom can dream.

An orange ball of yarn and an in progress sweater yoke sit on a table covered in snow. #knittingSweater Weather || withwool.com

The pattern is In Threes: A Baby Cardigan which has only been in my queue since 2011. I’ve been waiting for the right time to knit it which is apparently right now. The sweater’s simplicity and size make for quick knitting and very noticeable progress. It is also really nice to have something easy to knit during the day when I’m keeping an eye on an inquisitive toddler.

The other reason I started this sweater was because I finally wrote up my Christmas knitting plans. There, I wrote the dreaded words: Christmas knitting. Oh, there they are again. Though, in my case, this end of year dash should probably just be called “Stuff I Want Done Before 2020”. Hmm, not as catchy. There is some holiday knitting on said list, but it’s mostly a bunch of unfinished projects like 70% knit socks or long lingering hats. This sweater made the list because I wanted to knit Kiddo a Fall sweater. Looks like it might be a Winter sweater now though. Guess I better keep knitting.

An in progress orange sweater yoke being held up in front of a snow covered cityscape. #knittingSweater Weather || withwool.com

Shawl Parade

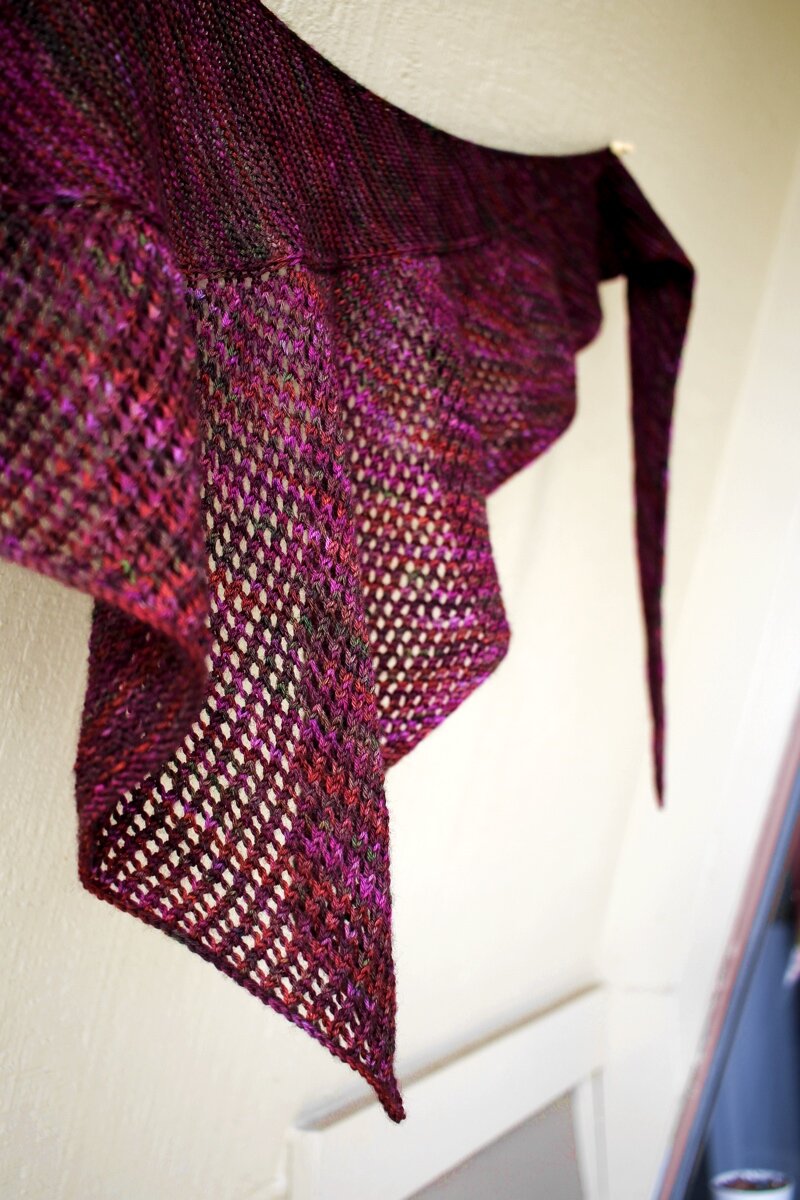
A close up of the mesh section of a Curve of a Boat shawl knit with a variegated magenta yarn. #knitting #finished shawlShawl Parade | withwool.com

We got an early snow storm last week that dumped about 4” (that’s about 10 cm) and brought cold temps along with it. And I was ready thanks to my very prolific bout of knitting over the summer. All I had to do was wrap myself up in one of the two shawls I finished in August.

A finished Curve of a Boat shawl hanging from a wall. #knitting #knitshawlShawl Parade | withwool.com

The first shawl of the needles was Curve of a Boat by Larissa Brown. It had been a travel project in July, but I didn’t work on it much at all when I was traveling. Turned out to be just what I wanted when I got back home - interesting autopilot knitting that I could relax with at the end of the night.

A close up of the mesh and variegated colors of the Curve of the Boat shawl. #knitting #hedgehogfibersShawl Parade | withwool.com

As beautiful as the shawl was on the needles, washing and blocking really helped it bloom. The yarn plumped and lost the limp feel it had while I was working on it. The garter stitch and mesh sections opened up to make a wonderfully sized shawl with great drape. I love the extra points and different shape that arise from how this shawl is constructed. The only real mod I made was to skip the tassels since I wanted something more streamlined.

The color is definitely more magenta than I usually pick for myself, but it still has earthy tones that will match pretty much all of my jackets. I’ll be wearing Curve so much this Fall.

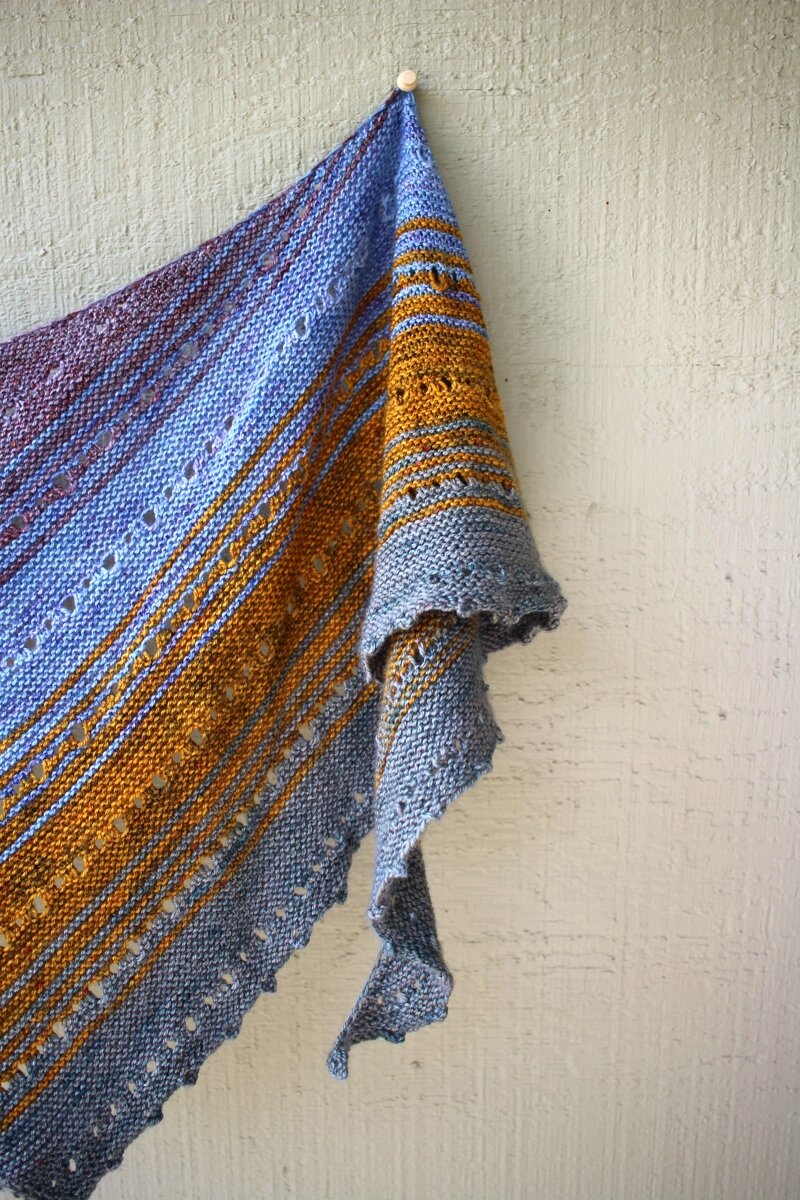
A finished Free Your Fade shawl hanging from a wall. #knitting #AndreaMowryShawl Parade | withwool.com

It took me a few years to join the fade trend, but I finally knit a Free Your Fade shawl. I don’t want to stuff this shawl in a closet when I’m not wearing it. I want to hang it on the wall as art. It’s got beautiful drape and luster, and curls just so. Plus, the colors speak to my usual muted earth tones palette. I haven’t had much luck hanging it up because wall space is at a premium, but it was the perfect thing to wear when I had to run errands through the snow. I can now see why people really love cashmere.

A close up of the bind off edge of the Free Your Fade shawl hanging and curling from a wall. #knitting #AndreaMowry #FreeYourFadeShawl Parade | withwool.com

The yarn kit I used added a little extra challenge to the project. While I loved the colors and the fiber blend, every color had the same yardage. So I had to spend a lot more time tracking yardage and “knitting” the shawl in a spreadsheet so I could get the most out of every color. It wasn’t exactly the autopilot knit I imagined but the end result is so worth it.

I had to make a few mods as I went. The biggest is that I started the color/fade sections at different spots in the repeat so I could make the most of the yarn. I also changed the picot bind off to have fewer points. Whenever I knit another one of these shawls, I’ll stick to just a regular yarn over because of the larger stitches sticking out all over the place.

A slightly out of focus look at the color progression of the Free Your Fade shawl. #knitting #FreeYourFade #AndreaMowryShawl Parade | withwool.com

Washing and blocking did wonders for this shawl. The stitches relaxed and I was able to stretch and shape the Fade just so. It went from dense and compact to big and drapey without losing warmth. Perfect for bundling up in the snow.

In typical Fall fashion, the weather is back to it’s sunny, warm, and windy self. The gusts, cold spells, and surprise snow storms are never far off though, and I am so ready.

Pattern: Curve of a Boat by Larissa Brown

Yarn: 429 yds Hedgehog Fibers Socks - Vengeance

Needles: US 4 (3.5 mm)

Dates: June 1 - August 2, 2019

@Ravelry

Pattern: Free Your Fade by Andrea Mowry

Yarn: Sun Valley Fibers MCN Gradient Set

Needles: US 4 (3.5 mm)

Dates: August 5 - 22, 2019

@Ravelry

Sideways Swatching

I don’t always swatch for hats which means I sometimes end up ripping out the first few inches because the hat is comically too big. It’s not a big deal because I know it’s an easy fix to rip out and start over with a few less stitches. The hat I’m knitting this time though is a little different. Instead of working in the round from the bottom up, Cattywampus is worked sideways, on the bias, with short rows. Ripping out because it’s too big or too tall is not an easy task. You better believe I swatched.

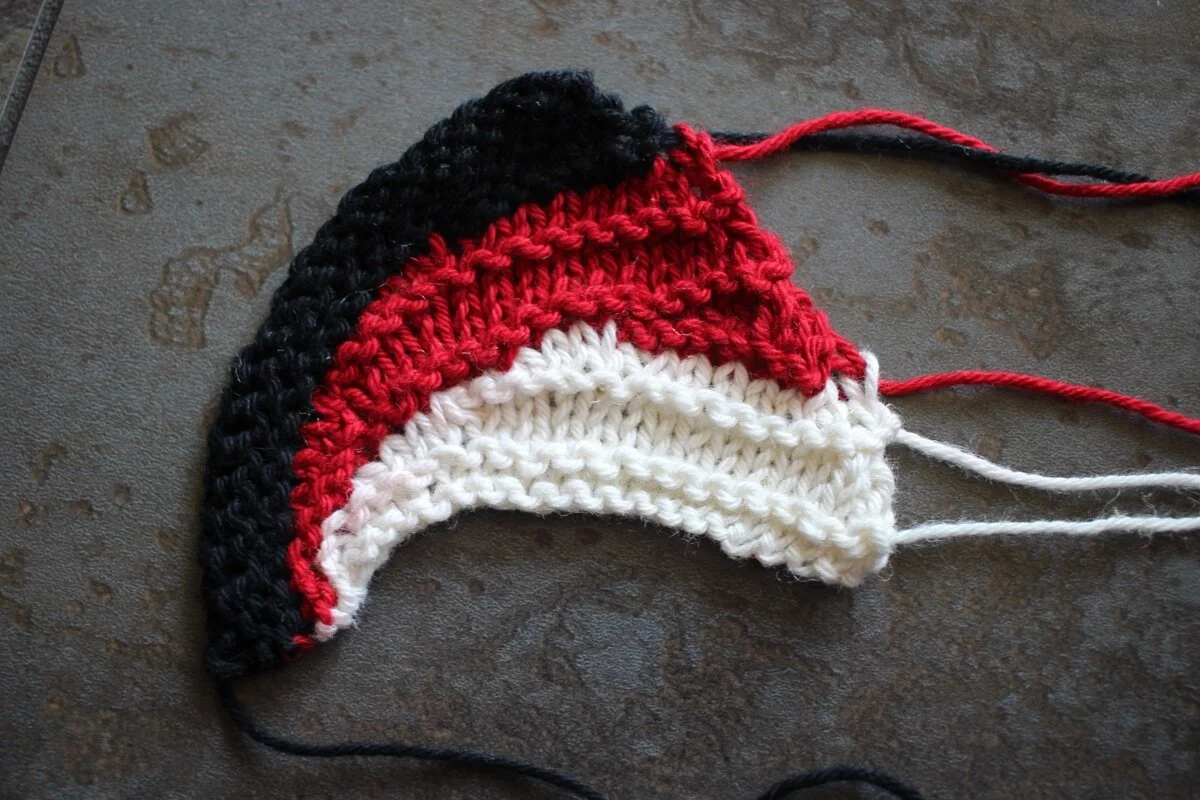
A close up view of a red, white, and black knitted swatch soaking in the sink.Sideways Swatching || withwool.com#knitswatch #darkmatterknits

The reason for working side-to-side is that I’m making a hat that resembles the flag of Trinidad and Tobago for a friend. I’m not keen on working intarsia, especially intarsia with cotton/linen blends, and working sideways was the easiest way to pull off the diagonal stripes. I worked two sections of the short row crown shaping with all three colors. My gauge was right on the money, and I’m really hoping the swatch wasn’t lying to me.

Red, white, and black swatch dry with ends hanging out.Sideways Swatching || withwool.com#knitswatch #darkmatterknits

The other reason I swatched was to see if the colors would bleed. I only have enough yarn to make one hat and it would be really aggravating if the red and black dye bled on the white stripes. After 20+ minutes in a warm soak with Eucalan, the water was still clear without the faintest tint of red. The problem came when I squeezed water out of the swatch. You can just see the the barest pits of pink where the red and white yarn got squished together. Hmmm…

My hope is that if I squeeze out the water in a different way that the colors won’t bleed. Maybe that’s just wishful thinking. Do you have any tips or recommendations for soap that would stop the excess dye in its tracks?

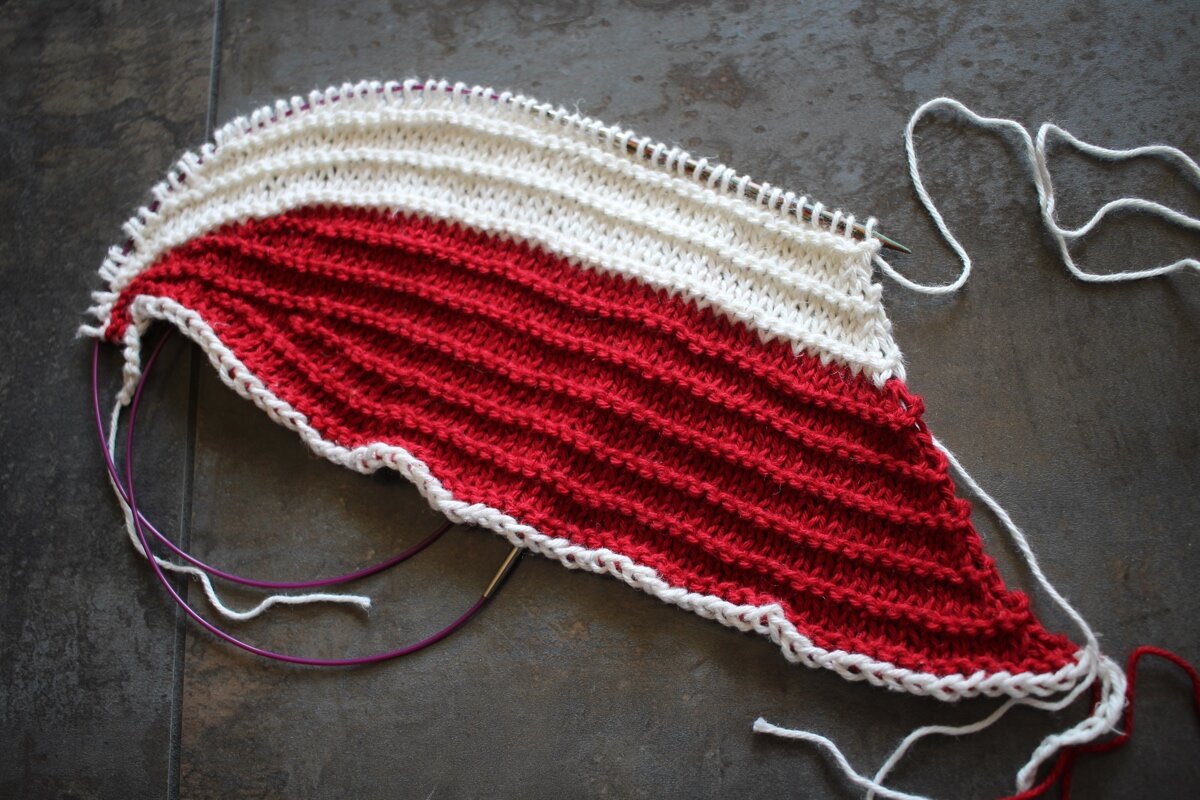
A partially knit hat in red and white with short row crown shaping and a provisional cast on.Sideways Swatching || withwool.com#knitswatch #darkmatterknits

I did start the hat, and worked several repeats. I was almost done with the black stripe that I added after taking this photo. Yarns had been cut and most of the ends woven in. Then I noticed a rather aggravating issue. The short rows slope in the opposite direction of the flag’s diagonal stripes. The only fix is ripping out, reworking the pattern to slope in the opposite direction, and casting on again. Ugh. Looks like I get to restart this hat despite my best efforts.

Another One for the Red Scarf Project

A ribbed red scarf for the Foster Care to Success Red Scarf Project. || withwool.com

The Foster Care to Success Red Scarf Project sends red scarves and care packages to college-bound foster youth for Valentine’s Day. They started accepting scarves for Valentine’s Day 2020 September 1st, and this scarf is ready to go. I need to add a label and pick up a gift card to send off with it, but it’s ready.

I’ve knit a few scarves for the project over the years and I’m usually rushing to mail one off right before the submission deadline. Not this time. I’d like to say it’s because I cast on a few months ago, but really it was because I started this scarf way back in 2017. I knit half of the scarf before I needed a break. Then everything else got in the way. It wasn’t until the end of this July that I picked it up again because I needed to knit something so badly. I was digging through my pile of WIPs, found the half-finished scarf, and decided that, obviously, this was the next project to finish. I’m not sure where this sudden and overpowering urge to knit came from but I’m still rolling with it months later. I’ve knit more in these past few months than I have in at least the past year.

A ribbed red scarf for the Foster Care to Success Red Scarf Project. || withwool.com

The pattern is a mash up of Mabel’s Scarf by Larissa Brown and a band of 2x2 rib. Mabel’s Scarf had been in my queue for awhile, and was the only one that called to me when I was digging through different patterns. The scarf was narrow though and needed the extra stitches to meet the required width. The stitch pattern was based on 2x2 rib so adding more of seemed like the optimum choice relatively easy knitting that still looked good. Once I figured out where I was in the pattern repeat and reclaimed the correct needle tips, the stitches seemed to fly off the needles.

The finished scarf is lovely. It’s beautiful, easy to wrap and tie, and definitely cosy. The chosen yarn, Stonehedge Fiber Mill Shepherd’s Wool Worsted (yeesh, say that 3 times fast), is a wonderful red specked with small bits of blue thanks to how it’s spun. The color has depth and interest and variety even though it just looks red from far off. I’d definitely use this yarn again for another scarf.

Now that I’ve waxed poetic about this scarf, it’s time to put it in the mail to make someone warm and happy.

If you would like to donate money or send a red scarf, you can find more info here. And if you’re looking for a pattern, check out the Melded Scarf which I designed specifically for the Red Scarf Project.

A ribbed red scarf for the Foster Care to Success Red Scarf Project. || withwool.com


Pattern Specs

Pattern: Mabel’s Scarf by Larissa Brown

Yarn: 413 yds Stonehedge Fiber Mill Shepherd’s Wool Worsted - Garnet

Needles: US 6 (4mm)

Dates: August 28, 2017 - August 15, 2019

@Ravelry

Yarn Along The Rockies 2019

I had a fun time visiting yarn shops during Yarn Along The Rockies! Went to three shops and added sock yarn, spinning fiber to the stash.Yarn Along The Rockies 2019 || withwool.com

Yarn Along The Rockies was the third week of August, and I happily joined in. I only visited the closest 3 of the 13 shops, but I still enjoyed myself. One of those shops, FingerPlay, was brand new to me and I’ve been meaning to get down there for months. It’s a cute shop with a great vibe, and frequent knit afternoons/open studios. I’m looking forward to stopping in again soon since it’s been so long since I’ve had a regular knitting group to visit. I also made it to Shuttles, Spindles, and Skeins which remains one of my favorite yarn and spinning shops. Maverick Fiber Arts was my other stop and had a nice selection of different yarns and notions.

Two skeins of sock yarn I bought during Yarn Along The Rockies 2019. Cascade Heritage Wave on the left and Regia Pairfect on the right. #knitting #sockyarnYarn Along The Rockies 2019 || withwool.com

The stash did get a little larger, but not by much. I have no shortage of sock yarn or spinning fiber, but everything I bought came home with intention. Both sock yarns, Cascade Heritage Wave and Regia Pairfect, made me excited to knit socks for myself again. That’s an exciting feeling after finding it lacking for so long. The fiber, 8 oz of Frabjous Fibers and 4 oz of Hummingbird Moon, will eventually be handspun gifts or play a part in a Nightshift shawl. My plans are still a little murky on that front. I also came home with a pair of sock blockers for the Bearded One’s socks. The blockers are a little shorter than I would like but will still do the job.

While I only visited a fraction of shops on the tour, I enjoyed myself. I got to visit different places, see new yarns, and go on a little adventure. Also picked up a nice project bag which is cool too. I’m glad I didn’t skip the yarn crawl this year, and I’m looking forward to next year.