Handspun Present Cowl

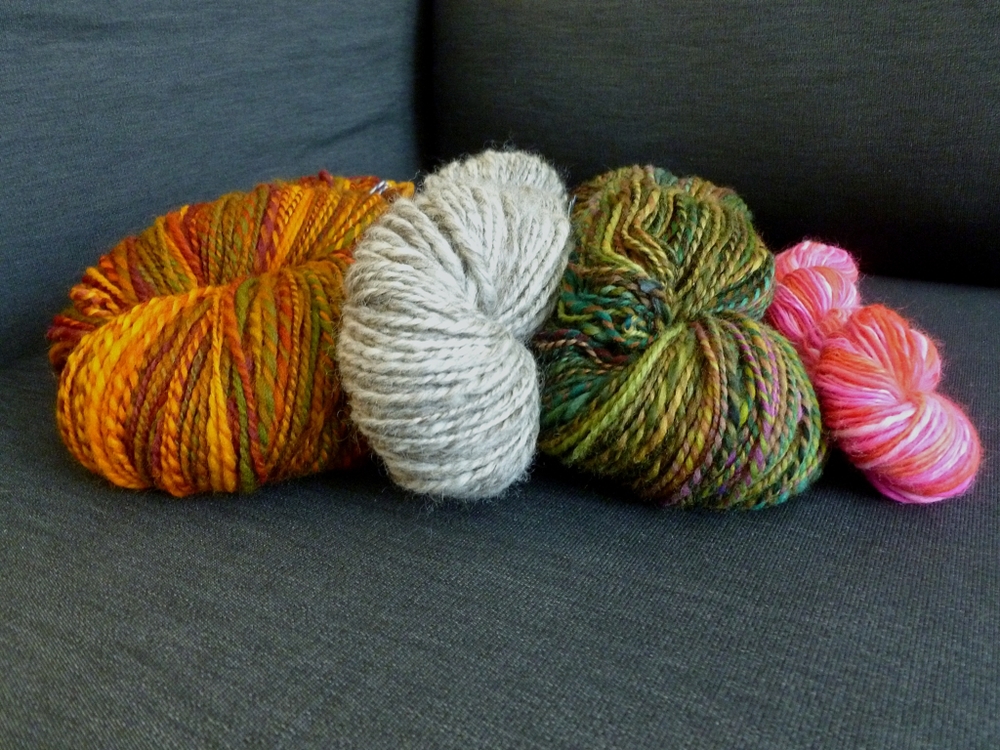
Once upon a time, I got a text message from a friend of mine. We live on opposite sides of the country so texting is the main way we keep in touch. Most of the time we talk knitting and yarn. She also reads this blog. After reading so many posts about my spinning and my ready-to-knit skeins of handspun, she asked if I had ever knit with any of it. A perfectly valid question. I referred her to Exhibit A, a pair of mitts knit from my first 3-ply yarn, and a shawl I was ripping out. Out of the dozens of skeins I’ve spun over the years, I’ve only knit with 2 of them. After I hit send, she threw down the gauntlet. Knit with my handspun or face the consequences. I’m not really sure what those consequences were, but I’m sure they were dire.

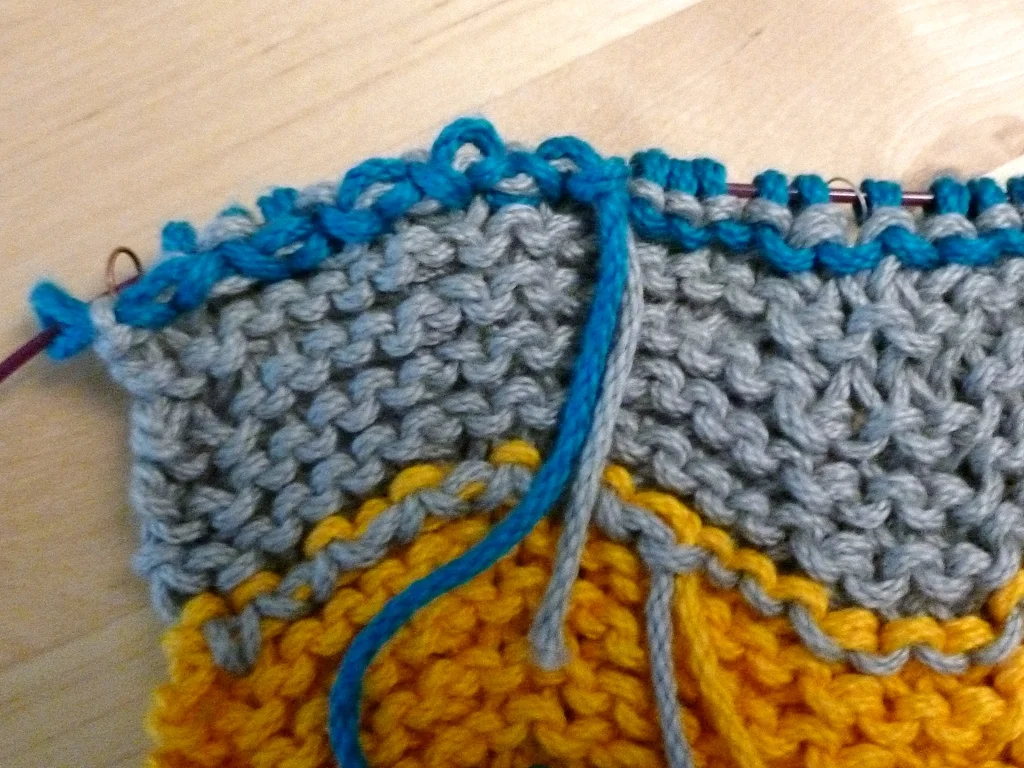
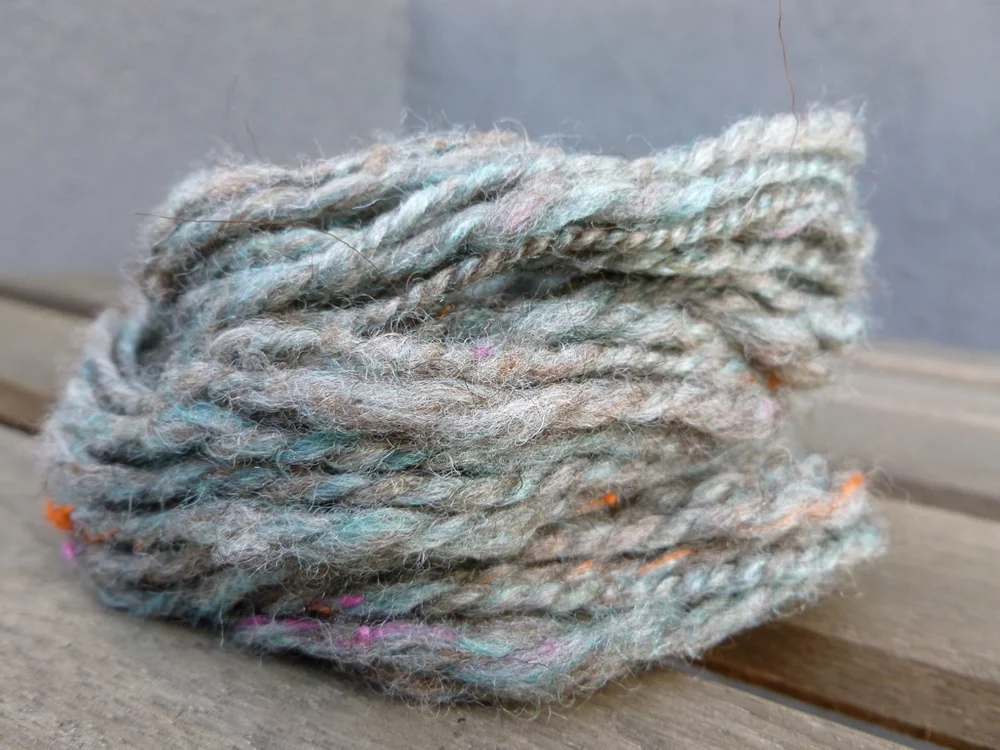
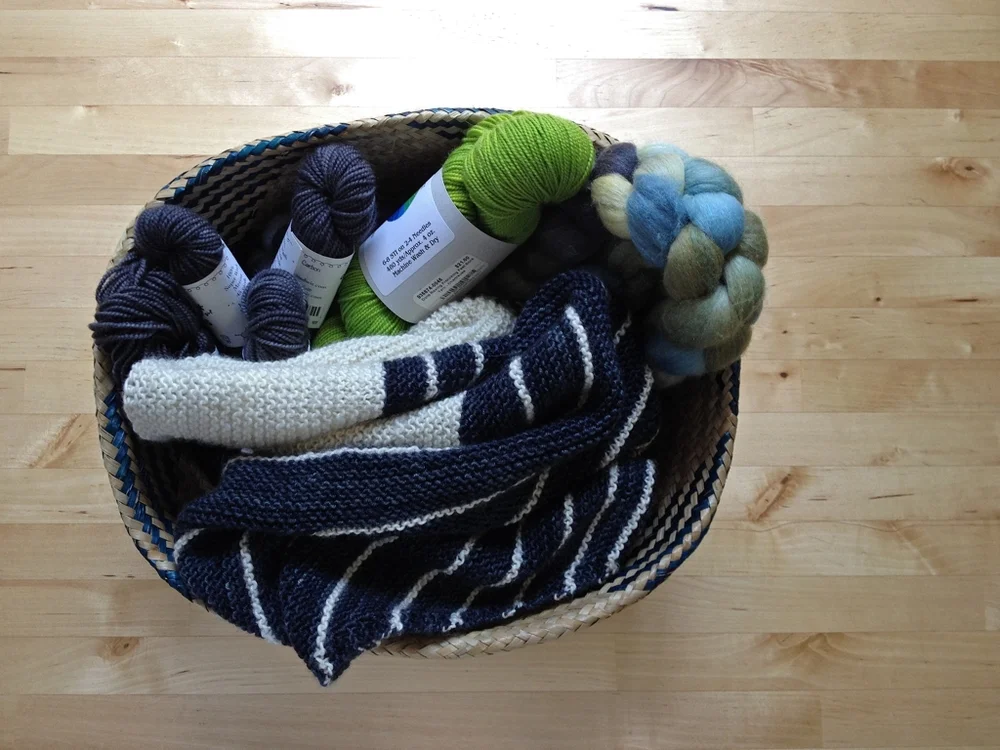
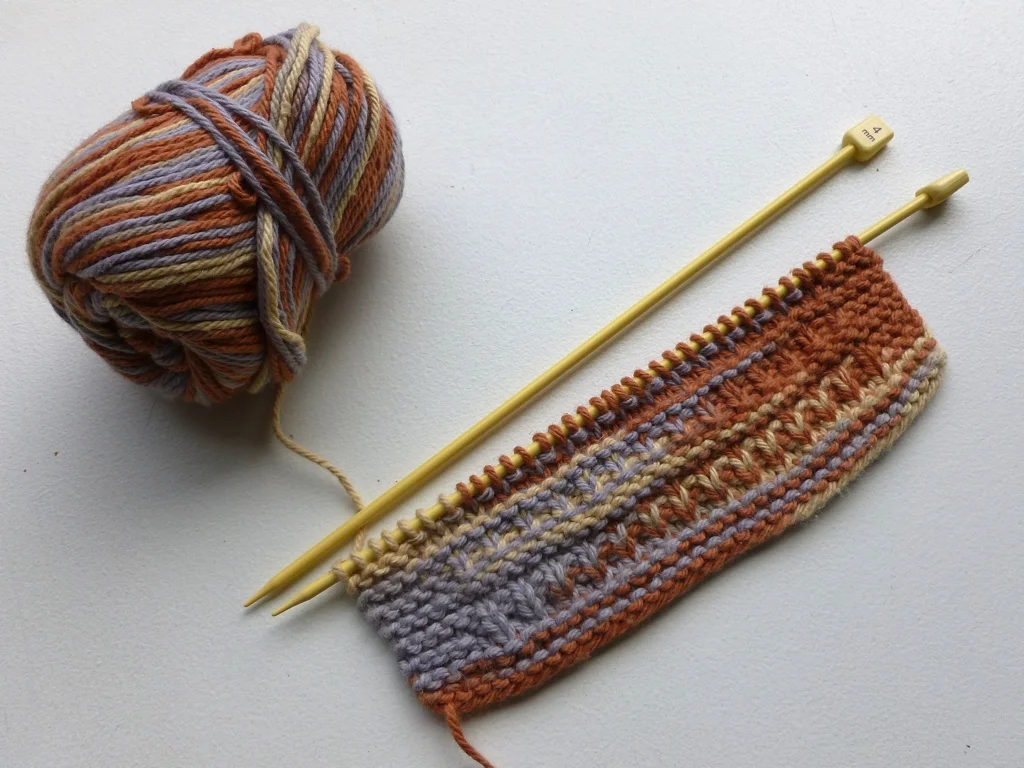
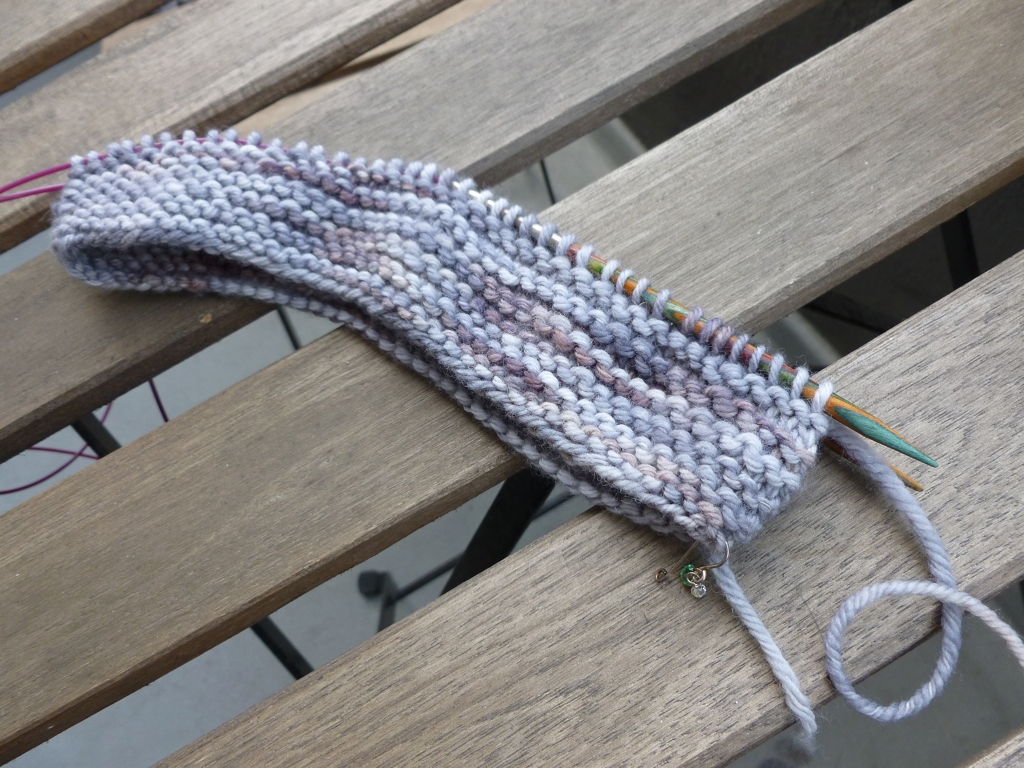
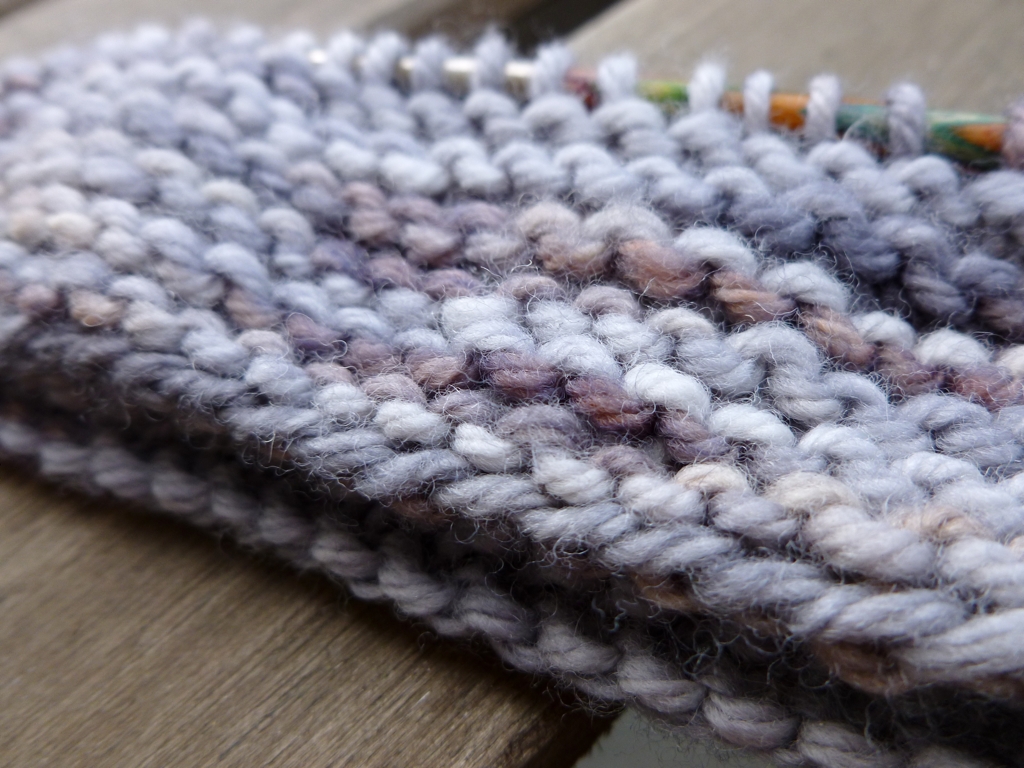
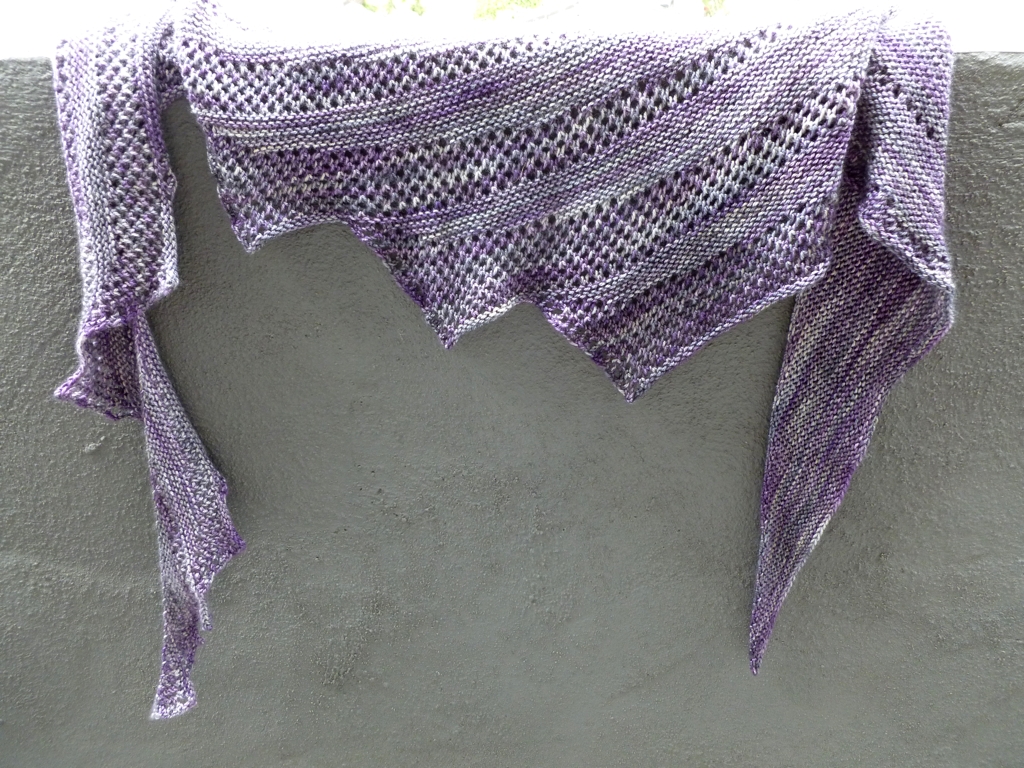
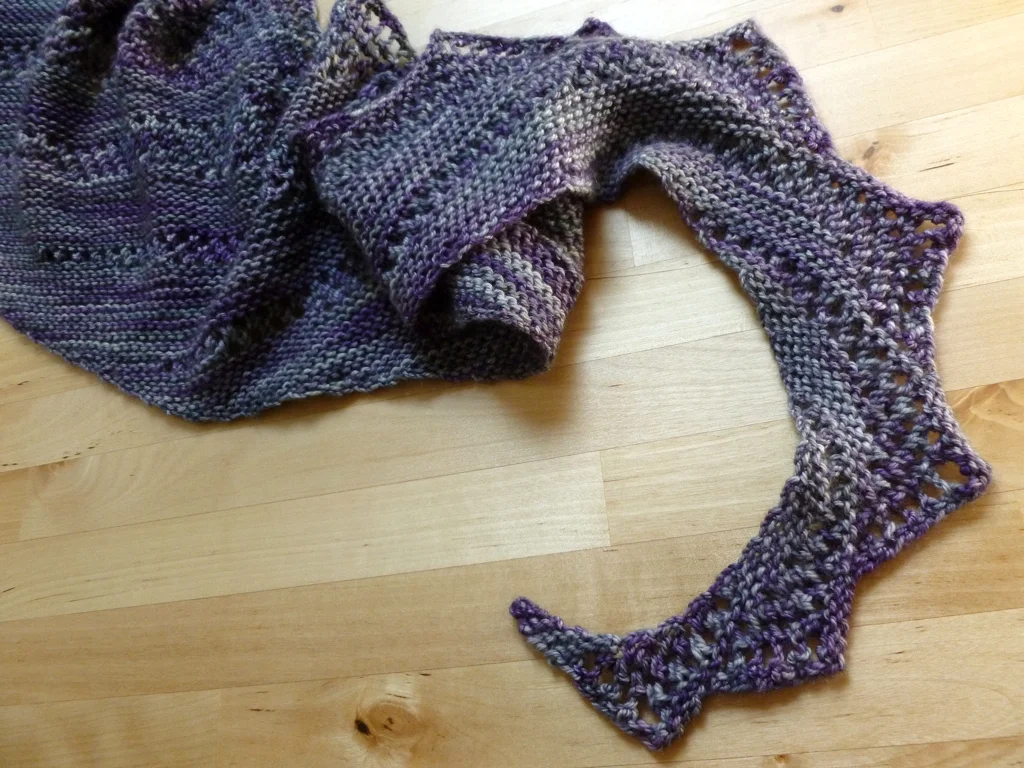
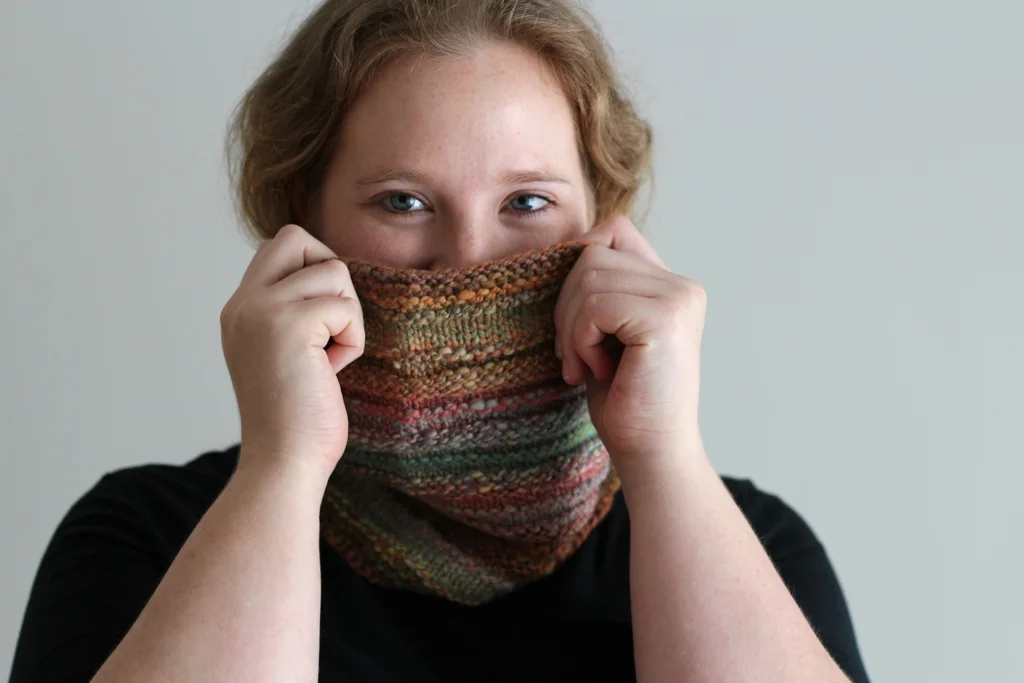
I choose a freshly spun skein and went looking for a pattern. I had enough yardage for a cowl and eventually picked the Present Cowl by Mademoiselle C. The cowl was a quick knit where the handspun was the star of the show. I knit it up last year but took my sweet time to block it. Still wore it though with the ends tucked out of the sight. When I flew back to Birmingham for a visit, the cowl came with me so I could prove that I actually had knit my own handspun. Consequences averted. Whew.  

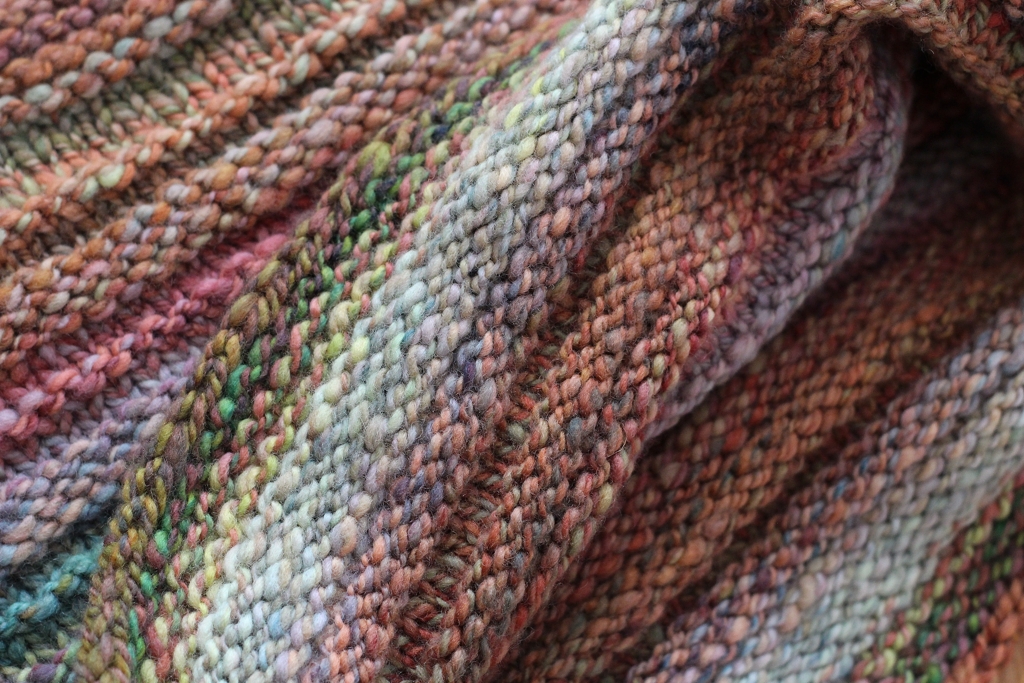
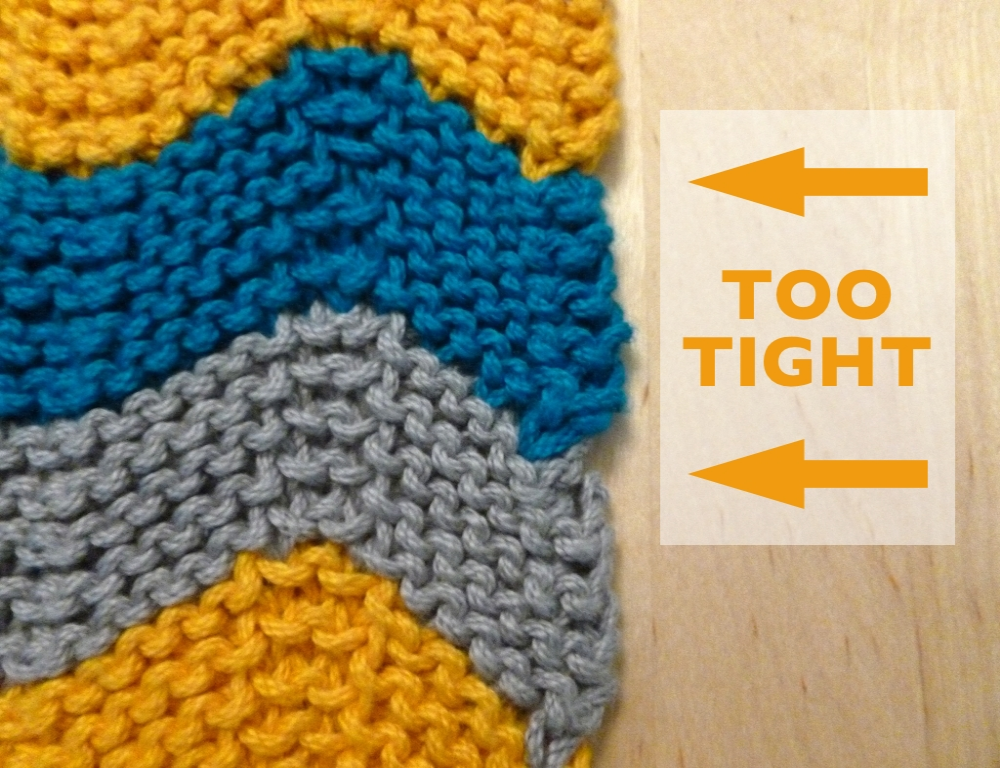
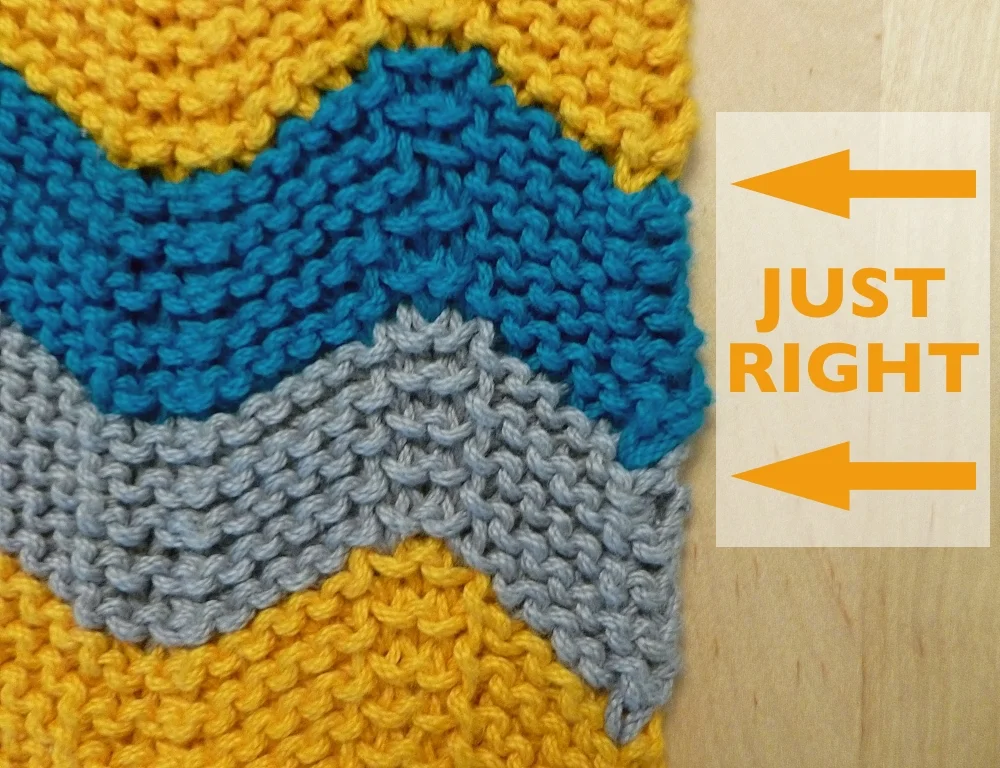
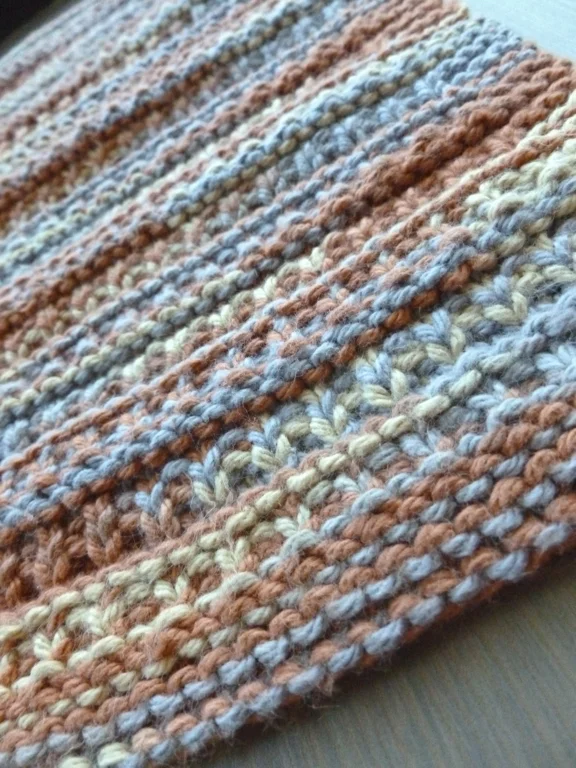
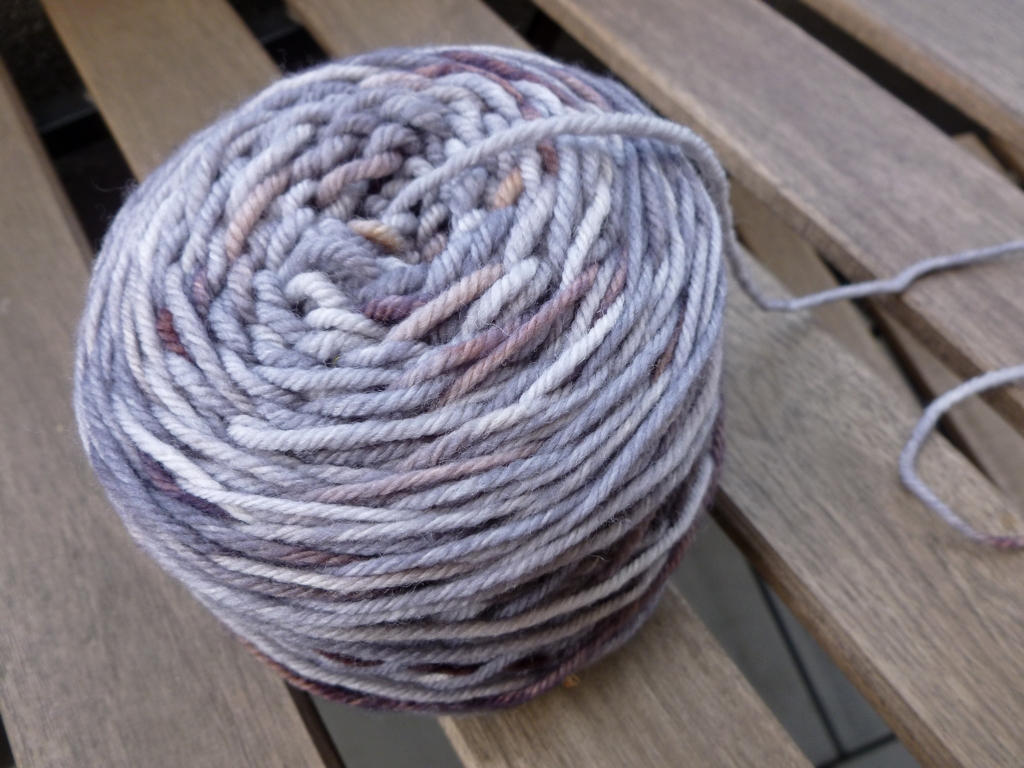
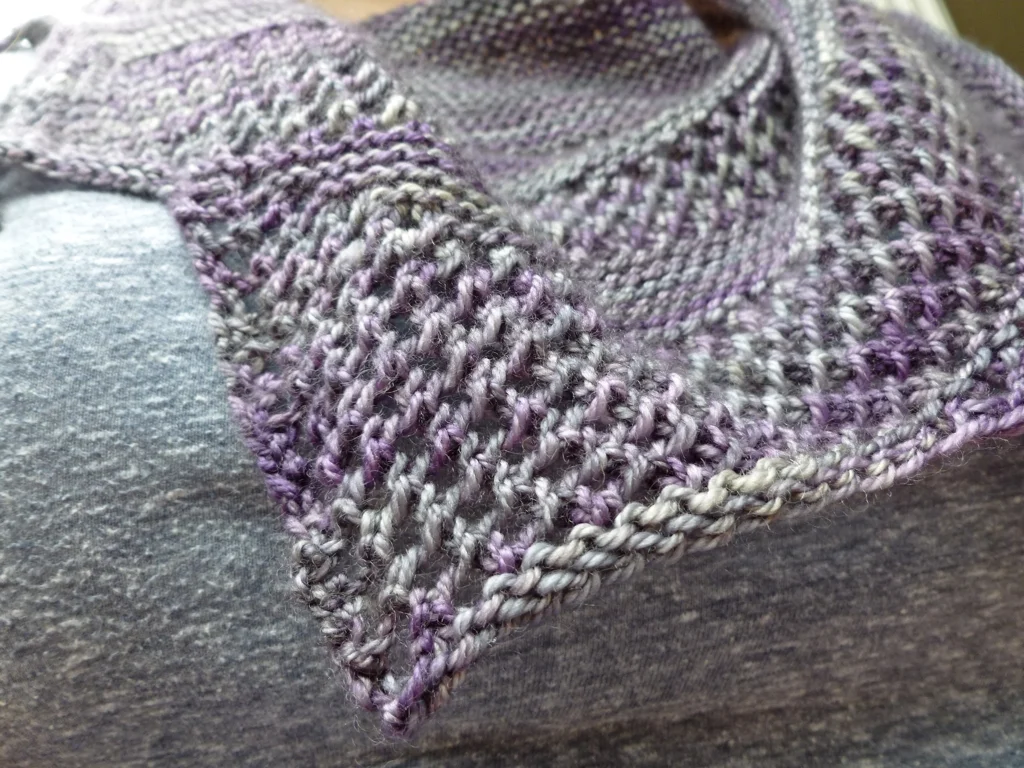
When I dunked the cowl into the water, I was curious if blocking would change the gauge and drape of the piece. Before knitting, the handspun got it’s own bath to set the twist when it came off the bobbin. Would that soak be enough to prevent changes in the knitted fabric? Nope. After blocking, the stitches noticeably relaxed. The fabric had more drape and the cowl grew taller and wider. It’s still the right size to wear without collapsing so I’m happy. The moral of the story is swatching is important whether you’re working with commercial or handspun yarn.

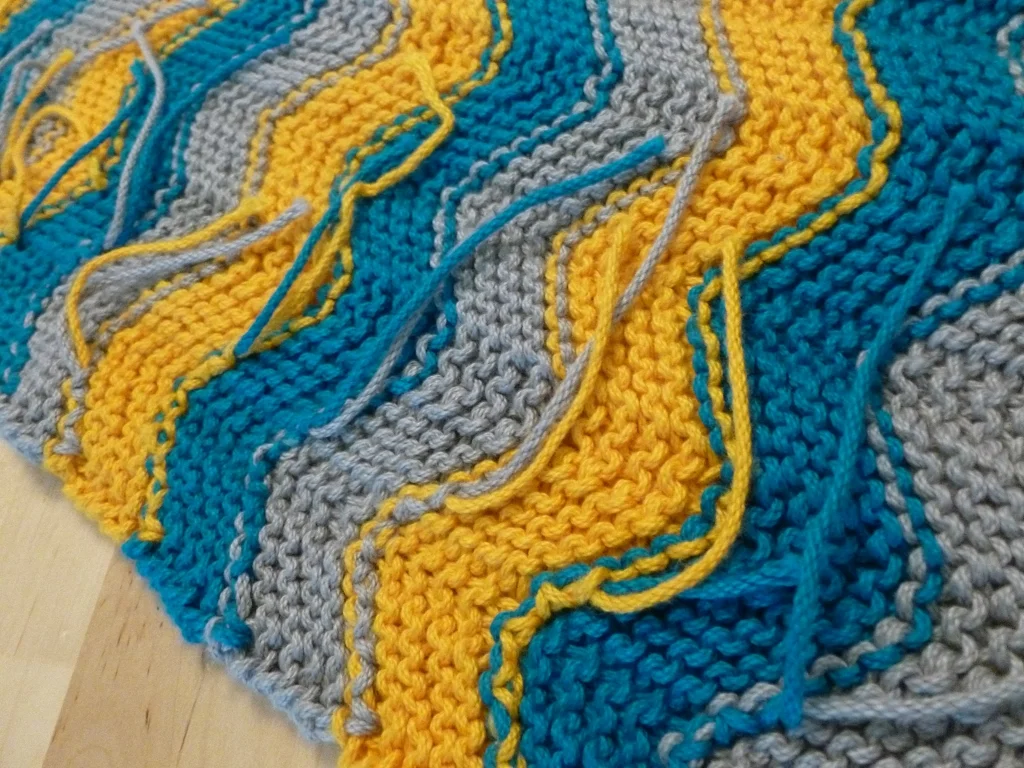
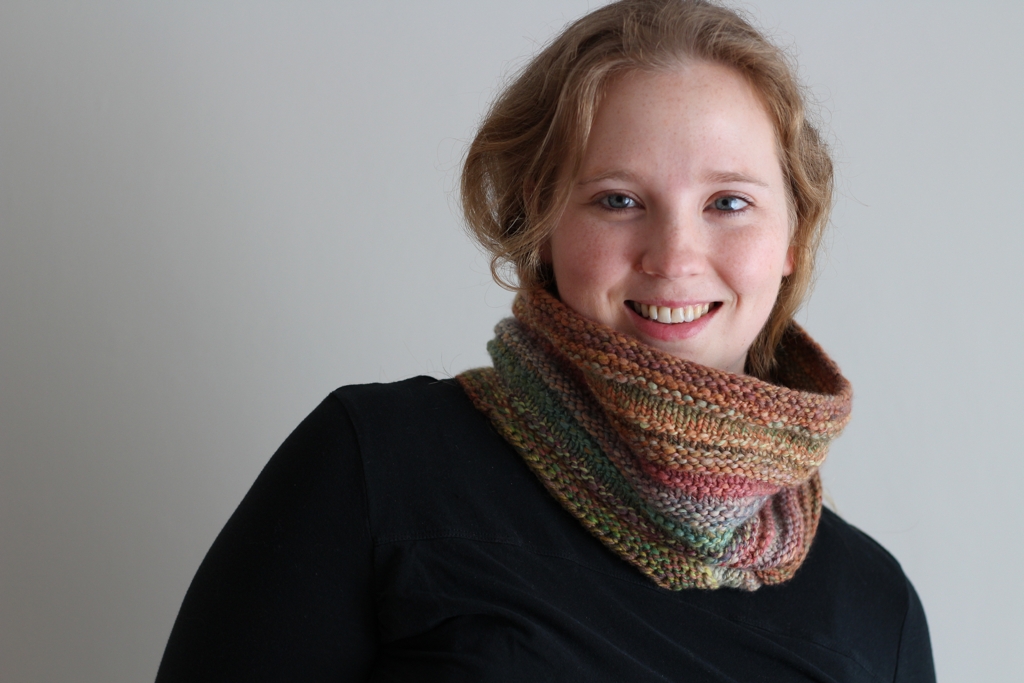
The finished cowl is warm, comfy, and looks great with my favorite coat. It’s also good protection from all the wind whipping through my neighborhood. Now I just have to wait for the temperature to get cold enough to wear it.

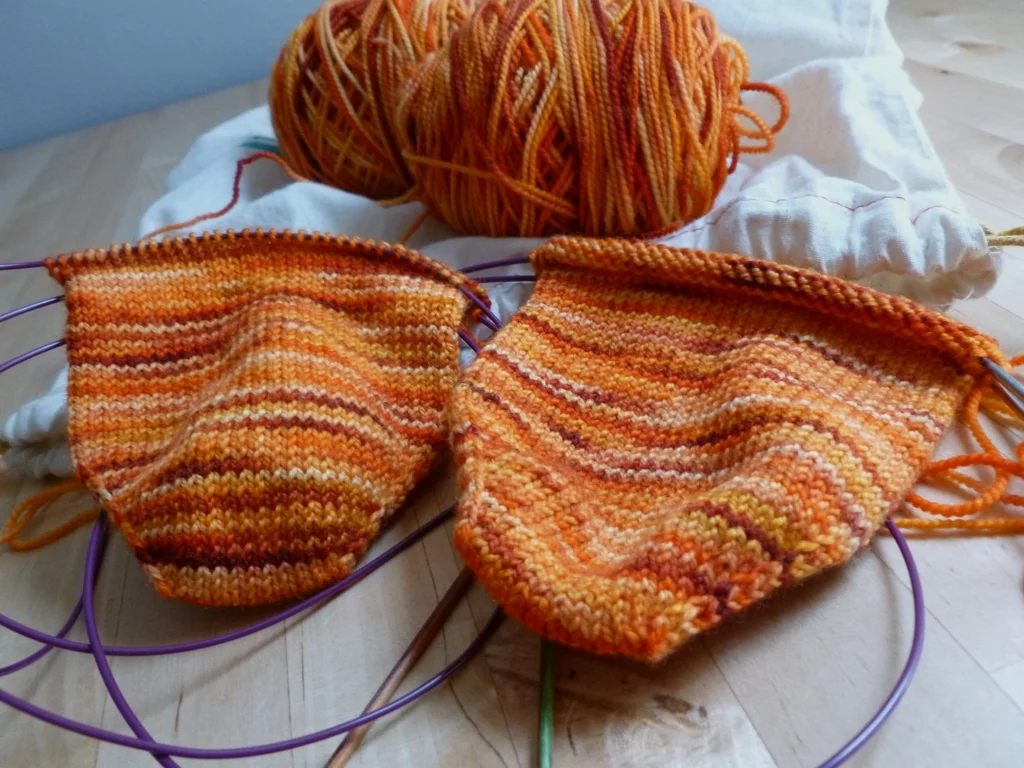
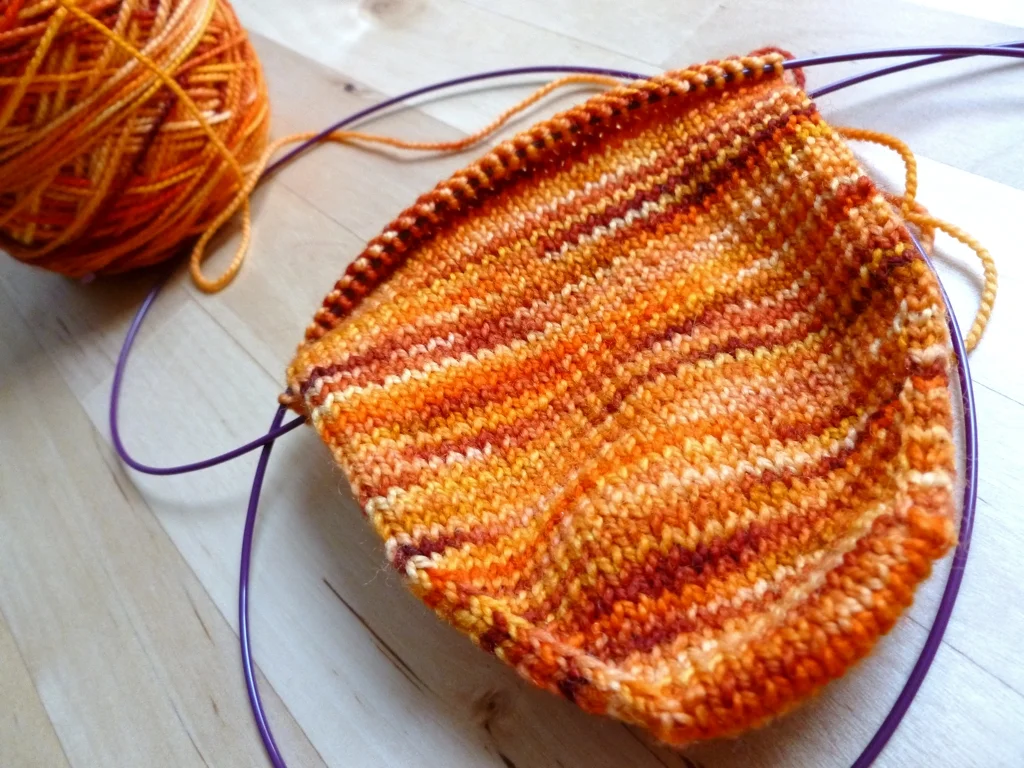
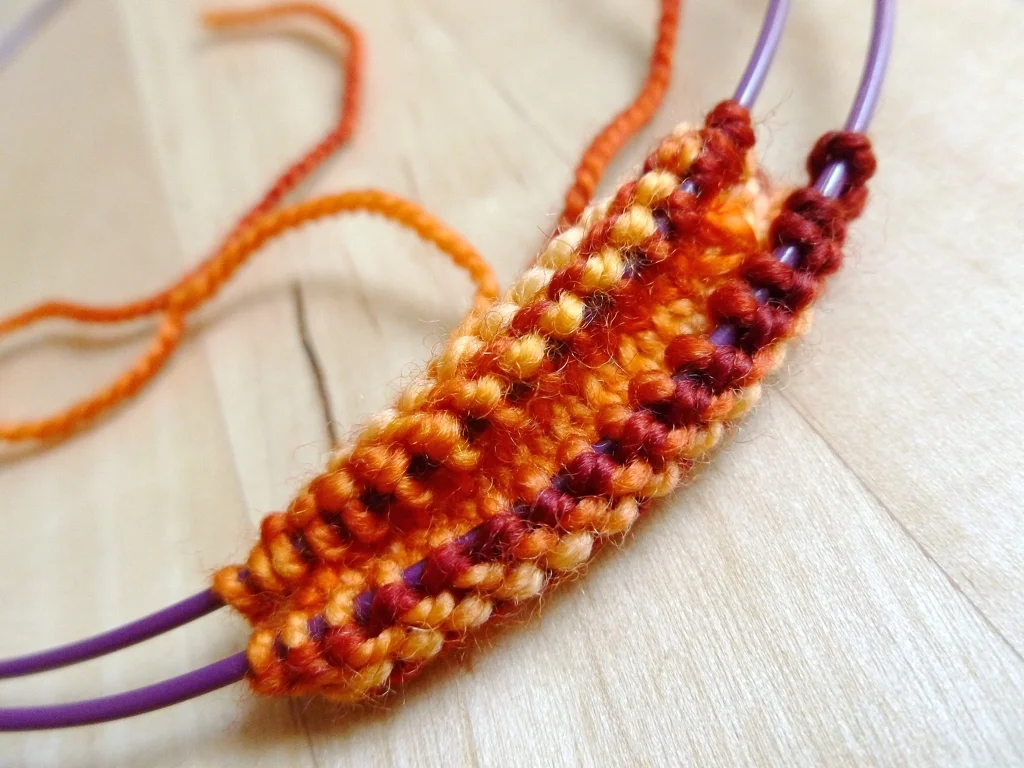
Since knitting up this skein, I’ve knit one other project with handspun which I’ll be sharing soon. I also have my eye on another handspun skein that I wound but never knit. So, I’m passing the challenge on to you. Have tons of handspun that you’ve never knit with? Grab a skein and knit it up! The consequences of #handspunchallenge will be fun, wooly, and anything but dire. 

Pattern: Present Cowl by Mademoiselle C

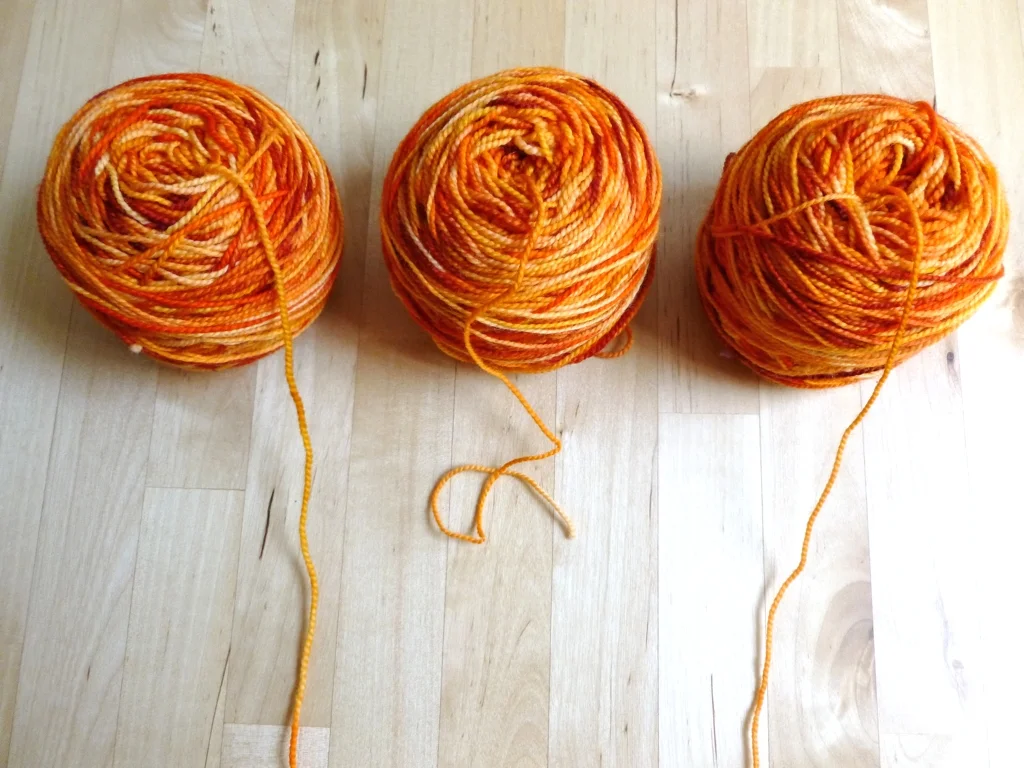
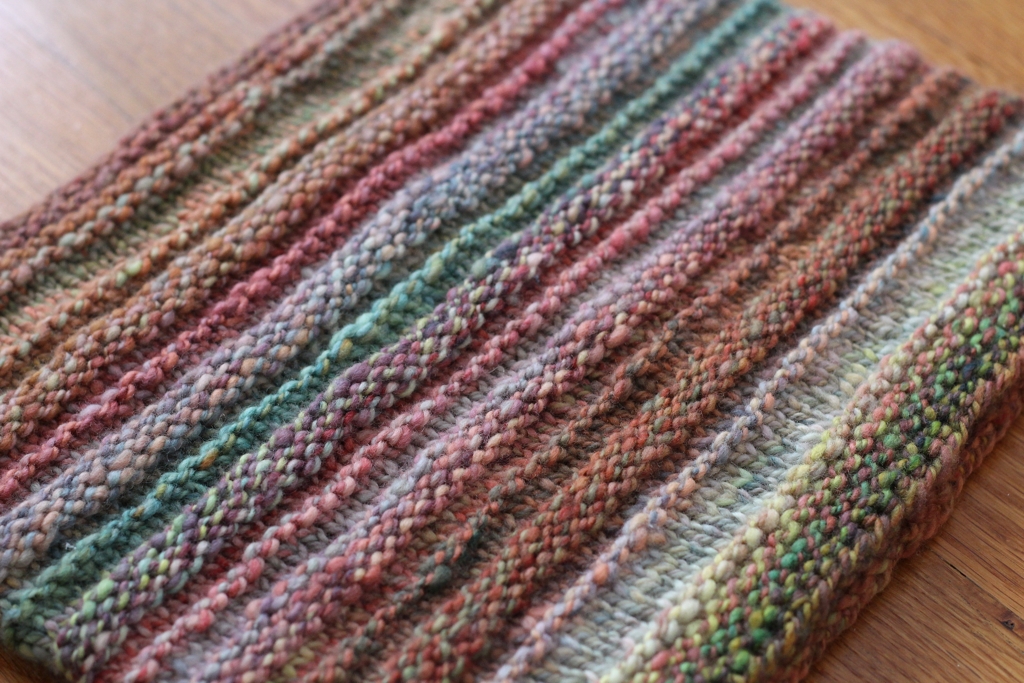
Yarn: 2 ply handspun Malabrigo Nube - Arco Iris

Needles: US 8 (5 mm) circulars

Dates: August - September 2014

@Ravelry

How To Make A Blocking Board

What happens when you have to block your knitting (shawl, lace, mitts, color work, what have you) and are completely lacking in pin-ready space? You make your own blocking board. After finally binding off a small shawl I was ready to block it, but I’d just moved to a place without carpet. I couldn’t take over the bed or furniture either with wet garter stitch and pointy pins. Foam mats weren’t in the cards either. The good news was that moving left me with plenty of boxes that I could use instead. If you’re in a similar spot, here’s what you’ll need:

 One large cardboard box (mine was 41.5” x 27” flattened)

A towel large enough to cover the box

Packing or Mailing Tape

Scissors or Knife


Step 1: If you can still put stuff inside the box, it’s time to change that. Cut the tape holding it together and flatten out the box. 

Step 2: Tape the box’s edges together like so. The two layers of cardboard will be thick enough to support pins and stretched out knitting. 

Step 3: Wrap up the box/now board in the towel. If the towel’s bigger than the box, fold over the edges and tape them in place. 

There you have it! One DIY blocking board ready for pins and knitting. Mine seemed no worse for wear after a couple of days with a shawl and a cowl pinned to it. Can see myself getting a fair bit of use out this blocking board before I need to upgrade. 

What's In Your Notions Bag?

After years of knitting I’ve got my required notions down to a science so I’ll have what I need whether I’m at knit night, on a plane, or just hanging out on my couch. 

I love getting little peeks at other people’s desks and studios. A knitter’s notion bag is the same thing in a much smaller package. So, what’s in your notions bag? What are the absolutely necessary tools you use to make knitting and crochet easier? Post a photo to Instagram with the hashtag #mynotionsbag or tell me in the comments. I can’t wait to see!

Without further ado, here’s what I keep in mine.

  • About the bag itself. I used to carry around everything in a metal tin but it rusted and was hard to open. I went to Etsy when I couldn’t stand it anymore and found this great pencil case from Silke Jacobs. It’s just the right size to hold my notions while not taking up too much space in my project bags. Plus, I’ve got the room to hold interchangeable needle tips and an extra cable too when I need them.
  • A simple retractable tape measure.
  • Kitty snips! I got a pair to replace collapsable and embroidery scissors when I fly and decided to use them all the time. 
  • Tapestry needles in different sizes. I won the set of two smaller Chibi needles last year and was surprised at how nice they are. Added a larger needle as well so I can weave in ends from lace weight up to bulky.
  • Stitch markers. Lots of stitch markers. I’ve got locking stitch markers, fancy stitch markers, and plain rubber rings in the bag at all times but the selection varies with the project.
  • Needle keys and cable caps. These things are here to keep my interchangeable needles tight and happy. The key makes sure that the needle and cable aren’t going to twist apart. The caps keep my knitting on the cable when I need the needle tips for another project. 
  • Lotion and a nail file. The nail file is a recent addition to the group. After growing out my nails, I got tired of snagging them on my yarn every other stitch. It’s nice not to have to go digging to find the one file that may or may not be in my purse.  

The 5 Reasons I Went To Stitches West

I got up bright and early Friday morning to go to Stitches West. I was wearing one of my favorite knitting cat shirts and a small matching scarf of my own making. In my backpack, I had knitting for the round trip train ride, extra shopping bags, a snack, and all my usual purse accoutrements. So, was it worth the almost 4 hours I spent on Caltrain and the Santa Clara VTA getting there and back? Yes. Absolutely, positively yes. Will I be going again next year? Definitely.

Stitches West is a like a yarn shop combined with a spinning shop, both of which are on steroids. This was the second time that I’d been to a Stitches event, the other being Stitches South, and both times were enjoyable. What’s more, these two events make me want to go to other festivals because they give me an idea of just how much amazing fiber goodness is out there. Here are the 5 reasons I went and why I try to go to other fiber festivals. 

All the yarn and fiber you could want. Even knowing what to expect, I was still completely overwhelmed when I walked through the doors. There was yarn to my left and yarn to my right. It came in every color of the rainbow and any weight you could want. I didn’t know where to start so I just walked the aisles trying to keep my mouth from falling open. I went with the intent of restocking my stash of spinning fiber and was completely spoiled for choice. A sweater’s worth of wool from Miss Babs, a brand new tote bag, and buttons came home with me too.

It’s easy to find new yarns and dyers. Once I had my wits back, I was able to start picking out individual booths that interested me. Many of these dyers I might never have found if I only had the internet to rely on, such as Wonderland Dyeworks. The second I walked by her booth I knew I couldn’t leave without some of that delicious fiber.

You can touch everything. Seriously, you are encouraged to feel yarn and fiber to gauge it’s softness and quality. There’s different breeds of wool, alpaca, llama, silk, and various plant fibers to get your hands on. 

There’s the chance to meet your favorite designers. The night before, I printed out Dotted Rays by Stephen West and cast on so I’d have some knitting for the train. The shawl pattern is a pretty straightforward knit with an ingenious treatment for the short rows. When I walked past the Mixtape booth, I had the opportunity to tell him how much I loved the pattern which was great to do face to face. 

Inspiration is everywhere you look. If you’re in a making funk, inspiration is all around you. Maybe it comes from a particular skein of yarn in a booth. Maybe you see an amazing shawl on someone’s shoulders. Maybe a bump of fiber gives you the jumpstart to spin for a sweater. Inspiration to knit, crochet, and spin is hard to miss.

How To Weave In Ends Without A Tapestry Needle

Learn how to weave in ends without a tapestry needle as you knit! | withwool.com

There are two great reasons to learn how to weave in ends without a tapestry needle. One, you don’t have to stop knitting to look for that one tapestry needle which has probably wandered off already. Where do they go? Ahem. Two, you can weave in ends as you go instead of putting it off until after the bind off or, if you really loathe working them in, never doing it all. 

Learning to weave in ends without a tapestry needle can be finicky the first few times you do it, especially if you’ve never done color work, but it’s worth the effort. Not only does it save time during finishing but it’s also versatile. You can use it with stockinette, garter, and in pattern. It still works if you’re increasing and decreasing. The ends will follow the curves and angles of short rows and chevrons without creating extra bulk. While it is noticeable on the wrong side, weaving in ends sans needle is neat and tidy. Plus, it even works with slippery yarns.

Sounds pretty cool so far, right? I thought so too which was why I used this method to weave in the ends when I switched colors on the Cuddly Chevron Baby Blanket. The deadline for that blanket left me in a dust with half finished knitting and weaving in the ends without a needle as I went cut out one last step at the end. 

Step By Step

Learn how to weave in ends without a tapestry needle as you knit! | withwool.com

efore we get started, there’s one you need to know that’ll make learning this technique much easier. It might seem like you’re just knitting as usual with the new yarn but it’s actually wrapping around the tails as you move them back and forth.

Learn how to weave in ends without a tapestry needle as you knit! | withwool.com

When it’s time to switch colors (or time to add another ball of yarn), work one stitch in the new color. The tail should be about 6” so you have enough yarn to hold on to.

Learn how to weave in ends without a tapestry needle as you knit! | withwool.com

In the opposite hand of your new yarn (if you have the dexterity to do all this with one hand, mad props), hold the tails of both colors together.

Learn how to weave in ends without a tapestry needle as you knit! | withwool.com

Wrap the tails around the right needle from top to bottom.

Learn how to weave in ends without a tapestry needle as you knit! | withwool.com

Work the stitch normally with the new yarn. Just the new yarn will be caught in the stitch and the tails will fall to the back. This is exactly what you want.

Learn how to weave in ends without a tapestry needle as you knit! | withwool.com

Work the next stitch with the tails held behind the needle.

Learn how to weave in ends without a tapestry needle as you knit! | withwool.com

Repeat steps 4 and 5 until you’re satisfied with how much you’ve woven in. I usually aim for 1 - 2”. Drop the tails, cut the old color, and keep on knitting with nary a tapestry needle in sight.

See how all the steps come together below.

Learn how to weave in ends without a tapestry needle as you knit! | withwool.com

Here’s what the woven in ends look like on the wrong side of the knitting. The tails follow the curve of the chevron with no problem and are quite secure. A quick note: I waited to cut the tails until after the blanket came out of the washer and dryer.

Tips  & Tricks

Learn how to weave in ends without a tapestry needle as you knit! | withwool.com

t the switch between the grey and the blue, the blue yarn isn’t evenly woven in. Since the tails are just wrapped in the working yarn, there’s no need to redo it. Just tug on the tail until it’s neatly in place.

Learn how to weave in ends without a tapestry needle as you knit! | withwool.com

What if the tails were woven in too tightly? As shown above on the left, the stripes will pull in and pucker at the change but it’s easy to fix. Gently pull the edge out until to loosen up the tails and straighten the edge like in the right photo. If the tails get pulled out to far, just tug them back into place.


How To Work Lifted Increases In Garter Stitch

This the second tutorial for the Cuddly Chevron Baby Blanket. The first tutorial is 5 Ways To Use Stitch Markers

Lifted increases have been my favorite way to add stitches to my knitting since I first heard about them in New Pathways For Sock Knitters. (Thank you, Cat Bordhi!) When working in stockinette, lifted increases, specifically LLinc and LRinc, are easy to work, not fiddly, and don’t create big holes or blemishes in your knitting. Over the years I’ve experimented with them in other stitche patterns and lifted increases work just as well in garter stitch as they do in stockinette. So, when I was swatching for the Cuddly Chevron Baby Blanket, LLinc and LRinc were the first increases I tried and they worked wonderfully. LLinc is an abbreviation for Leaning Left Increase while LRinc stands for Leaning Right Increase. Use them together and you get matched, symmetrical increases which makes my designer’s brain happy. 

I’m trying something new for this tutorial. The increases will be shown with BOTH step-by-step instructions AND a gif demonstrating the technique. Happy stitching! 

How To Work LLinc In Garter Stitch

Knit to the spot where your pattern says to increase.

Insert the left needle up into closest bump directly under the right needle.

Insert the right needle just like a regular knit stitch.

Wrap the yarn around the needle and work it the same as a regular knit stitch.

Ta-da! One new stitch on the needles.

How To Work LRinc in Garter Stitch

Knit to the spot you need to increase.

Insert the right needle up into the first garter bump directly under the left needle.

Slip the stitch onto the left needle and move the right needle behind the left. Wrap the yarn around the needle and work the stitch the same way as knitting through the back of stitch. 

Check back February 3rd for the next Cuddly Chevron Baby Blanket Tutorial, Weaving In Ends As You Knit. No tapestry needle required!

5 Ways To Use Stitch Markers

Stitch markers come in lots of shapes, sizes, and materials. They can be flexible rubber rings, simple metal triangles, intricate jeweled baubles, or cute beads on wire. You can even make them on the spot from small pieces of leftover yarn, paper clips, rubber bands, or hair ties. Stitch markers can be one continuous piece or able to be opened up and “locked” on a specific stitch. These little tools can do a lot to help with your knitting even if they are easy to lose between couch cushions.

Use them to mark the Right Side of your work. When you first cast-on for a garter stitch project, it can be hard to tell the Right Side from the Wrong Side when you pick it up after a break. Take a stitch marker, different from the rest if you’re using a lot of them, and put it a stitch or two in from the starting edge of the Right Side. Pick up your needles and don’t see the marker near the tip? Then you’re on the Wrong Side of your work. 

Stitch markers can be used to mark more than just stitch repeats. On the Cuddly Chevron Blanket, I placed a marker every time I had to increase or decrease. It kept me from having to count (or miscount) every stitch and left my mind free to listen to podcasts or watch a movie while I knit. 

Clover-Locking-Stitch-Markers.jpg

Lockable stitch markers are great for tracking your progress. When you’re working on a big project and it starts to feel like a slog, start your knitting for the day by putting a locking stitch marker on a just knit stitch. When you’re done, you’ll easily see how much you’ve accomplished. This trick is great for seeing progress on sleeves, sweaters, and socks, but can be a bit discouraging if you’re knitting a blanket from the center out.  

stitch-marker-tips.jpg

Stitch markers are also great for counting rows. Here’s also where locking stitch markers come in handy again. When you’re starting a new section of knitting and need to knit a certain number of rows/rounds, say for the ribbing on a pair of toe-up socks, put a locking stitch marker on the first row and count from there. You could also put a marker every 5 or 10 rows so you can see how many rows you’ve knit at a glance. 

Stitch markers are really helpful when you’re casting on a large number of stitches. I can count 20 stitches without losing my place much easier than I can count 400. So, after you cast on 20 sts, place a marker and repeat until you have the required number for your pattern. No miscounting here.

P.S. Here’s one last tip for all the hand spinners out there. Locking stitch markers make it much easier to measure the yardage of skeined handspun. 


Cuddly Chevron Baby Blanket Tutorials

1. Tips for Using Stitch Markers

2. Working lifted increases in garter stitch (January 27th)

3. Weaving in ends as you go without a tapestry needle (February 3rd)

Pattern: Cuddly Chevron Baby Blanket

Cuddly-Chevron3.jpg

Early last year I found out that a good friend of mine was having her first child. Since she’s on my knit-worthy list, my mind started churning with all sorts of ideas. I considered sweaters, hats, toys, and baby tube socks. All of those things are still an option now but what what I really wanted to make was a blanket. Sure, it’s more knitting, yarn, and time than the other ideas but a blanket has staying power. It can’t be outgrown like a sweater or a hat or adorable baby tube socks. A blanket is more useful than a toy and, maybe, not as easy to misplace. Plus, if you pardon the cliche, a great way to wrap someone up in love.

Cuddly-Chevron4.jpg

Those thoughts were the start of the Cuddly Chevron Baby Blanket. I swatched my way through several different and complicated ideas, none of which panned out, before coming back around to the simple chevron. Soft, cushy, colorful garter stitch chevrons, in fact. After tracking down a machine washable cotton/acrylic yarn that actually had all the colors I needed, a task that proved much harder than I thought, I cast on. Then I ripped out because I wanted the blanket to be bigger. After that, the knitting was smooth sailing. I didn’t finish the blanket in time to send it off before the kid was born but it did arrive before winter turned really cold. 

My original plan was to publish the pattern before Christmas. Obviously that didn’t happen but I’m so happy that Cuddly Chevron is the first pattern of 2015. The first of many! Another first and something I’m really excited about is that I’m going to be releasing a tutorial series detailing the techniques in this blanket! I’ve never released tutorials revolving around a specific pattern before and can’t figure out why I haven’t. The tutorials will focus on several key techniques that will help with both with the blanket and future projects. The series starts next week and will cover weaving in ends as you go (without a tapestry needle), working lifted increases in garter stitch, and uses for stitch markers. If you’re wondering how to work another technique, let me know. 

Happy Knitting! 

Cuddly Chevron Baby Blanket

Download Now

Simple, classic, and warm, the Cuddly Chevron Baby Blanket is easy to make and a great gift for any baby or yourself. Worked in garter stitch, the blanket knits up quickly to create a cushy fabric. 

Stick with three colors of worsted weight yarn, just use two, or go wild and use up all those leftover yarns in your stash.

Want to make it bigger or smaller? The pattern includes notes to help you out. 

Size: 30” x 30”

Needle: US 7 (4.5 mm) 36” circular needle

Yarn: Cascade Yarns Avalon - 2 skeins (350 yds) of each color

C1: 10 - Artisan's Gold

C2: 02 - Silver

C3: 17 - Enamel Blue

Notions: Tapestry Needle, Stitch Markers (Optional)

Check it out on Ravelry!

Download Now

Tips For Flying With Your Knitting

Can your flying with your knitting and needles? Yes. Even in carry on? Yes.

In December the Bearded One and I flew to Alabama to visit family. Since I was spending 3 weeks away, you can bet I brought knitting. The problem was that I hadn’t really swatched for either of the projects I was bringing. So, I wound the yarn and threw everything I thought I’d possibly need in a bag. My supplies included 2 skeins of yarn, 3 pairs of interchangeable needles tips, cables for said tips, a needle gauge, snips, tapestry needles, a measuring tape, stitch markers, and waste yarn. The pattens came along as PDF’s on my phone. My bag wasn’t flagged or searched and went through the X-ray machine without a single beep. So, here are a few tips to make flying with your knitting easy and trouble free. 

Disclaimer: I’ve flown with my knitting and all required notions for years without trouble. I’ve gone through security at BHM, ATL, LAX, SFO, and PHX without any hassle besides from pulling off my shoes, belt and jacket; however, I can only write about my own experiences flying within the United States. I’ve never had to go through Customs or enter another country or enter the US. Follow these tips at your own discretion. 

Print out the TSA’s own page that says knitting needles are allowed in carry-on bags. In all the years and places that I’ve gone through airport security, I’ve never been questioned about my needles or knitting notions or all the yarn I’m hauling in my luggage. That said, I still print out this page from the TSA website that explicitly allows knitting needles because whether or not that make it through security is still up the individual agent.

If you’re really afraid of losing something, your favorite needles or scissors for example, don’t take it. I’ve read advice about flying with knitting that advises bringing a self-address envelope to put any offending items into. You know what I’ve never seen next to security at any airport I’ve been too - a mailbox. If you do really need to bring an something, put it in a checked bag. Don’t risk it otherwise. 

Edit your notions bag. Like to keep some lotion with your notion to smooth dry hands? It has to go in the same bag with all the rest of your liquids. Solid lotion bars seem to be okay to stay with your notions though. Keep your scissors small and under 4”, anything longer than that isn’t allowed in carry-on. Circular thread cutters or anything with a concealed, unremovable blade are right out too. I carry a small pair of HiyaHiya Kitty Snips (there’s also Puppy Snips) and they’re perfect for traveling and everyday use. 

Bring a book or something else to do as Plan B. Just because you can get your knitting on a plane doesn’t mean you’ll have the elbow room to do it. I blame the Yarn Harlot and photos of her knitting on planes for thinking I could get hours of mostly uninterrupted knitting time. If you’re like me and travel with a broad shouldered guy (or just end up sitting next to one), you’ll probably feel a little squished. When I sit down I spread my elbows out a bit to see if I have the space before I go through the effort of pulling out my knitting. I’m not flying First Class, so most of the time, I just don’t have the room to comfortably knit, and it has to wait until after I’ve reached my destination. 

What are your experiences with flying with your knitting? Share your tips and stories in the comments.

My Favorite Posts of 2014

And it’s almost 2015. How did that happen? While it seems like it should only be July or August, I’m looking forward to the new year. I’ve got lots of plans and I can’t wait to get started, but first I’m going to remember all the good stuff that happened in 2014. It’s so easy to always focus on the next step that you can forget to celebrate what you’ve already accomplished. So, in no particular order, here are my favorite posts/wins from 2014.

One of my top wins is relaunching this site. I love the With Wool name, the new layout, and direction. My only regret is that I didn’t do it sooner. 

Rolags: A Love Story & Handcarded vs Drumcarded Rolags

In bits and pieces this year, I learned that I love making and spinning rolags. Rolling them is easy and they spin up in no time at all. Even better, the resulting handspun is fluffy, light, and warm - the perfect thing to add to my ever growing stash of handspun. Can’t wait to do more with them in 2015.

Looking back through the archives, I was able to relive a few of the past year’s adventures. There’s my first trip to San Francisco, exploring LA’s Natural History Museum, and working my way through the Scorpion Submarine. I hope I can go on as many adventures and more in the new year. 

Mystery-Batt-Skein.jpg

Another win is my surprise favorite of Tour de Fleece. On the bobbin and even plied, I just wasn’t sure about this skein. I didn’t hate it but I didn’t like it either. It was weird and totally different from what I usually spin, but a good soak did wonders. Glad I put in the work and followed through to the end. 

One of my favorite tutorials from this year is about how to start and keep a handspun journal. It’s a great treasure trove of information about your spinning and helps keep track of future goals. 

The Shur’tugal Socks took far too long to get off the needles. The wait was worth it because they’ve become one of my favorite pairs of hand knit socks. I’ll grab them on the rare occasion I can actually wear wool socks out of the apartment. They also made the list because I’ll really happy with the photos. Taking attractive photos of your own feet is no easy task.  

This year’s Spinzilla was a powerful win. I learned more about productive spinning, but the real lesson was that I was only spinning against myself. I don’t have to compete and constantly compare myself to others. Plus, I got 4 awesome skeins of handspun out of it.

I can’t pick a favorite post but it’s fun to look through the Wander the Web series. The photos are mini journal of my days and there’s lots of interesting links tucked away on numerous topics. If you’re wondering what happened to the new updates, the series has moved to my weekly newsletter, with a wooly bent, which you can sign up for here.

Onward to 2015!

The Cat And The Hat

Say hello! This vermillion kitty cat doesn’t have a name yet but he (she?) is heading to a new home for the holidays.

Will there be catnip, snuggles, and tea parties? This cat does love a good tea party.

Traveling with the vermillion cat is a matching hat. Since I knit the hat in the 18 month - 4 years size, I was able to make both from one skein of Tosh Vintage. Even had a few yards to spare. I knit the cat mostly as written with the few mods I used detailed here. The collar is garter stitch and 5 stitches wide with a yarn over buttonhole. The hardest part of the whole pattern wasn’t the knitting but embroidering the face. Ripped out the nose and the whiskers several times to create just the right expression. 

 If you’re looking for safety eyes to use on your toys and softies, I recommend 6060 on Etsy. The selection for safety eyes - cat, round, or handpainted - and safety noses is amazing. There are plenty of different sizes and colors to choose from at reasonable prices. I picked up a 12mm variety pack of 5 different colors so I could pick out the eyes that would pop best on the vermillion yarn. Plus, my order shipped quickly so I’ll definitely be ordering from that shop again. 

Cat Pattern: Greta the Captivating Cat by Rebecca Danger

Hat Pattern: Slouchy Babe Hat by me - Download it here

Yarn: Madelinetosh Tosh Vintage - Vermillion

All Washed Up Is All Finished

When I went to add this kitchen towel to my Ravelry page, I found out that I’d knit the pattern in 2012 as a gift. Glad I kept the pattern in my queue instead of deleting it after shipping it off to its new home. The pattern repeat is easy to knit, memorize, and read which was just what I needed for last weekend’s trip to Ikea. We went looking for a couch, an ottoman, and a couple of things to spruce up the new apartment. Yes, we did have to unpack the couch to get it in the back seat. It only hung out one of the back windows. 

Once the couch was set up, sans slipcover but protected by a blanket, I sat down with my knitting to assert my dominance. Seems to have worked. The couch didn’t eat either of my needles nor did it forcibly eject my yarn to the floor. Didn’t finish the towel that night but I made my point.

Now that the towel is bound off, I love it. The variegated yarn and the pattern worked wonderfully together. There was pooling but it repeated well and pooling yarn doesn’t always have to be a bad thing. The towel is just the right thickness for wiping up spills, drying hands, and acting as a trivet in a pinch. Good size too. This cloth is definitely going in the rotation and the workhorse pattern is definitely staying in my queue for a long time. 

And one more thing. Now that it’s finished, we’re officially moved in.

Pattern: All Washed Up by Jill Arnusch

Yarn: 1 ball Pisgah Peaches & Creme Ombres - Desert Sunset

Needles: US 6 (4 mm) needles

Dates: September 18 - 22, 2014

@Ravelry

The Tradition Continues

It’s been a long week since my last post. I spent my last few days in LA packing, cleaning, and putting stuff on a truck. Then The Bearded One and I spent too many hours in a car and slept way too little. Once we were in San Francisco, everything happened in reverse. Take stuff off the truck. Clean. Unpack. Now that the internet is swiftly flowing, the apartment is officially home base and I can once again talk to all of you lovely people out there. 

Now that the bulk of the work is done, I have some room in my head for knitting. I hadn’t picked up the needles in a week and none of my current WIP’s were calling. Needed something I could cast on and bind off a couple of days later. Gladly, I’ve already unpacked the yarn stash so I had a few balls of cotton to choose from and my favorite washcloth needles. Then the Ravelry queue came to the rescue with a washcloth/kitchen towel pattern. 

Seems like I’ve made washcloths and kitchen towels since I first learned to knit. They’re small, quick, and relatively cheap. Without meaning too, I knit a new one every time I moved whether it was a new dorm room, apartment, or house for the past 9 years. Making that towel, or 3, makes that new place more welcoming. Sounds like a tradition to me. Yesterday, I cast on for the All Washed Up cloth and the apartment already feels more like home. 

Journey of the Aviator Hat

Now that this aviator hat has gone on its own cross-country journey, I can finally write about it. Knit for a brand-new baby boy, it was an easy knit that came out adorable. The hardest part was picking just the right buttons. My only mod was to tack down the corner edges of the front flap so it didn’t stick out due to sturdy button stitching. Thanks to the multiple sizes, all the way up to an adult small, I’m sure I’ll be making many more for both boys and girls.

It wasn’t until the hat was in front of the camera that I noticed something. The hat was staring back at me. Now I can’t un-see that face with it’s stubby legs and bulky body. What does it want? Cuddles, I hope, and maybe cookies. When I picked out this pattern, I never noticed the face. It was just a cute hat. To be fair, it’s still a cute hat and not all of the finished projects on Ravelry look like silly creatures. I’m glad this one does though.

The Specs:

Pattern: The Journey of the Aviator by Gabrielle Danskknit

Yarn: Rowan Pure Wool Worsted - Electric (143)

Needles: US 7 & 6

Dates: July 17 - August, 2014

@Ravelry

World Wide Knit in Public Day 2014

The week of World Wide Knit In Public Day started on Saturday and I’ve hardly knit a stitch anywhere. That row and half knit on a sock while I was waiting for water to boil Sunday night barely counts. No worries though. The festivities are going on until June 22 and I’m making the effort to get out with my sock knitting everyday this week. Pretty sure I’m going to end up on the beach most days which is perfectly fine with me. Plus, I’ll be that much closer to a new pair of socks. 

Over at the World Wide Knit in Public Day site, you can search for meet-ups in your area if you don’t want to stitch alone. If the meet-ups have passed or there are none nearby, get out and knit anyway. Take your knitting to lunch, out for coffee, or to the park. Spread the love. I’ll be on the beach. 

Garterlac Dishcloths

Fairly sure that I’ve fallen down the Entrelac rabbit hole. The day started innocently enough when I went looking for pattern that would look great with variegated yarn. My first choice, Grandma’s Favorite, pooled catastrophically. My second choice, the Garterlac Dishcloth, seemed like it was made for variegated yarn. The pattern had been in the queue for years. Why not not try it? Little did I know that I was standing on the edge.

Casting on was simple. As were the crumpled looking edge triangles. Then I knit a square and then another and another. In no time at all, I was working the bind off triangles and weaving in ends. Picking up stitches be damned, knitting entrelac was fun! I was officially falling down the rabbit hole and it was awesome.

I was so tempted to keep these for myself but into a box and off they went to their new home. Going to be knitting a lot more cloths so I’m sharing the entrelac love. After all, it’s a perfect use for my giant stash of kitchen cotton. 

If you’ve never tried Entrelac knitting before, this pattern is a good place to get your toes wet. It’s well written and easy to understand. The cloth is small and quick so you’re not investing a lot of time trying a new technique; however, it’s still large enough to know if you enjoy working Entrelac. Doesn’t take much yarn either - less than 60 yards, about 30 grams, of worsted weight cotton. Plus, the cloth looks very impressive and much harder to make than it actually is. If you can knit, pick up stitches, and work kfb and k2tog, you have everything you need to get started.

The Specs:

Pattern: The Garterlac Dishcloth from Criminy Jickets

Yarn: Knit Picks Dishie Multi - Nettle

Needles: US 6 (4mm)

Dates: May 6 - 9, 2014

@Ravelry 

Aspiring Teenage Mutant

Teenage-Mutant-Brim.jpg

Was in the mood for a little yarn shopping last week and ended up at the beautiful Twist Yarns in Manhattan Beach. After perusing and petting everything that caught my eye, I walked out with 2 skeins of Twist Fluff, hand dyed by the shop’s owner, Cathy Karen. There was some vague idea in my head about knitting them into a slouchy hat and a matching pair of mitts. Whether it would be a pattern of my own or someone else’s, I hadn’t gotten that far.

Teenage-Mutant-Garter-Stitch.jpg

While catching up on  Dull Roar, I saw the I Was A Teenage Mutant Hat from Apocalypse Knits. The pattern was and still is one of my favorites from when I first looked through the book but I’d forgotten about it. Though I somehow managed to buy the perfect yarn for it. Cast on last night and it’s rather relaxing to just knit something that someone else has already put the work into designing.  Sometimes the thought gets into my head that I have to design and write up everything that I knit. As enjoyable as it is, the process gets tiring after awhile. Plus, let’s not forget that other designers are constantly coming up with amazing patterns that I want to make and wear. I’m not doing myself any favors my fencing myself in to my own patterns and thoughts. It’s important to get an idea of how other people think about yarn and fiber too. The only thing to do is give myself permission to work from other patterns and give myself the opportunity to be inspired and learn new tricks.

Speaking of inspired, the ‘Teenage Mutant Hat’ pretty simple, which makes it a relaxing knit, but has a great twist at the end. There’s no crown shaping because the hat to closed off with some strategic kitchener stitch. I can’t wait.

So far the yarn, Twist Fluff, is lovely and held up to frogging like a champ. The first attempt was too big. Whomp whomp. Anyway, the yarn soft and cushy but still seems durable and sturdy. The color, no idea what it’s called, reminds me of a rocky beach and is knitting up wonderfully in garter stitch. Should be equally lovely in stockinette. 

Simple Socks

After the complexity of the Shur’tugal Socks, a simple pair of socks seemed like just the thing for purse knitting. The pattern shouldn’t take a year to knit not should it get left behind for something less complicated. Before it got too big, the Amiga Sweater and all of its stockinette was fine purse knitting but it’s time to get back to socks. 

I spent way too much time trying to find the perfect simple but not boring pattern before picking the Business Casual Socks. The pattern seemed easy enough to mod for toe-up knitting and into knee highs. Unfortunately, the tiny cables kept getting lost in the different colors. Next I tried variations of ribbing but nothing lived up to my expectations. Eventually, I stopped fighting the simplicity and went with the plain jane stockinette that looked so awesome in the toe. The colors are wild and interesting enough to keep me from getting too bored. Plus, stockinette socks are great tv knitting since you don’t have to look at them when you’re not turning a heel or increasing a gusset. 

It’s not just the colors that are making these socks such a pleasure to knit. The yarn, Koigu KPPM, has great bounce and softness. I don’t have to use my smallest size 0 needles to get a nice, squishy fabric either. If this pair goes well, my stash is going to have a lot more Koigu in it. 

Frisson Shawl

When I first saw the Frisson pattern, I was instantly smitten. I liked the shape and the size and the points. I liked the combination of garter stitch and eyelet wedges. It looked like an easy knit that wouldn’t be too boring, what the Knitmore Girls would call ‘autopilot knitting’. To the top of the queue it went and, when I decided to knit a shawl for a friend’s birthday gift, Frisson beat out all the other options.

The knitting was definitely easy since the pattern was well written and easy to follow. Addicting too because the points just seemed to show up on my needles when I wasn’t looking. I’d knit one point and just have to knit another. Eventually, the rows got long enough that I couldn’t knit a whole point in one sitting but it was still really fun. If I hadn’t dropped a knee on my circular needle and snapped it at the join, I would have finished the shawl a lot sooner. Lesson learned though. Don’t leave knitting needles on the bed. 

Even after knitting one as a gift, I still want to make a second one for myself which is the sign of a great pattern. Have the yarn picked out and everything.

Another reason this shawl was such a great yarn to knit was the yarn. Twist Heavenly, a blend of superwash merino, cashmere, and nylon, is a local yarn hand dyed in Manhattan Beach at The Twist Yarn Shop. The yarn is wonderfully soft and has great drape. The colors are beautiful and knit up well too. Even with the long rows of garter stitch, there was no flashing and the colors barely pooled. One skein of Heavenly wasn’t enough to knit the full shawl but, with 12 points, this Frisson is still a perfect size to wear as a scarf.

The Specs: 

Pattern: Frisson Shawl by Brittany Wilson

Yarn: Twist Yarns Heavenly - Geode 

Needle: US 5 (3.75 mm) Circular

Date: February 23 - March 31, 2014

@Ravelry

Shur'Tugal Socks

I sometimes forget how hard it is to take attractive photographs of one’s own feet only to be reminded whenever I try to document a new pair of socks. I’ve tried several times to get good photos of this pair but they never came out. Either my feet looked like amorphous blobs or my legs took up have the shot or the lighting was terrible or… You get the point. Yesterday, the marine layer filled the sky and the diffused light was perfect for taking photos. So, I took one last attempt and, 5 months after binding off, the Shur’tugal Socks finally get their spot in the limelight.

I love the pattern and I love the yarn, Sweet Georgia Tough Love Sock, but these socks were not a fast knit. At the cast on I wanted a slightly more interesting sock than plain ribbing but Shur’tugal turned out to be more complicated than I wanted for purse knitting. So they languished and spent more time in the bag than they did being knit. They languished even longer when I had to rip out an entire gusset because it started too late. The motivation to finish didn’t hit until a big trip was right around the corner and I really didn’t bringing these unfinished socks cross-country again. I finished them one repeat at a time and finally cast off a few days before getting on a plane.

Of course, there were mods. The biggest was working the socks toe-up though I didn’t bother to flip the charts. No point with this particular stitch pattern. It looks good going up or down. The secret bonus of working these socks from the toe was that it let me test out the stitch pattern. It was stretchy enough for my foot but didn’t have enough give to go completely around and up my leg. I worked a few repeats right after the heel before switching to 2x2 ribbing up the back. No way I’d be able to get those socks on without that ribbing. Plus, it was much easier than figuring how to add an extra repeat in pattern. 

The Specs

Pattern: Shur’tugal Socks by Alice Yu

Yarn: Sweet Georgia Tough Love Sock - Lettuce Wrap

Needles: 2.25 mm Circulars

Dates: Jan 31, 2013 - December 9, 2013

@Ravelry

I haven’t had much of a chance to wear them because, most of the time, LA isn’t cold enough for wool socks. Looking forward to living in a different city where knitted goodness can become a regular part of my wardrobe again.