The Almost Finished Norma Blanket

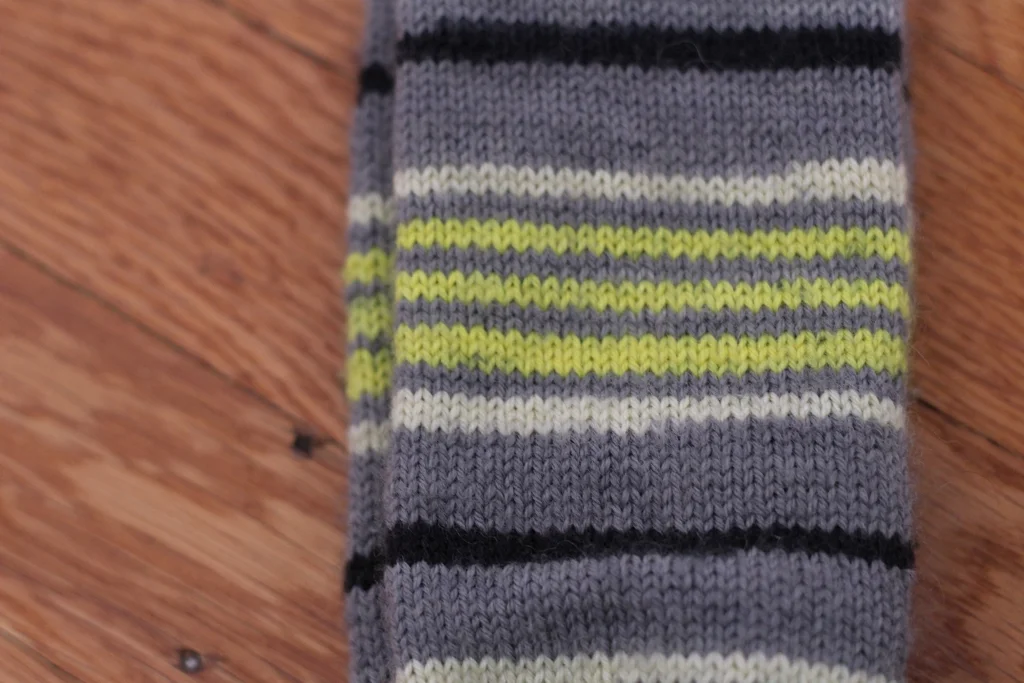
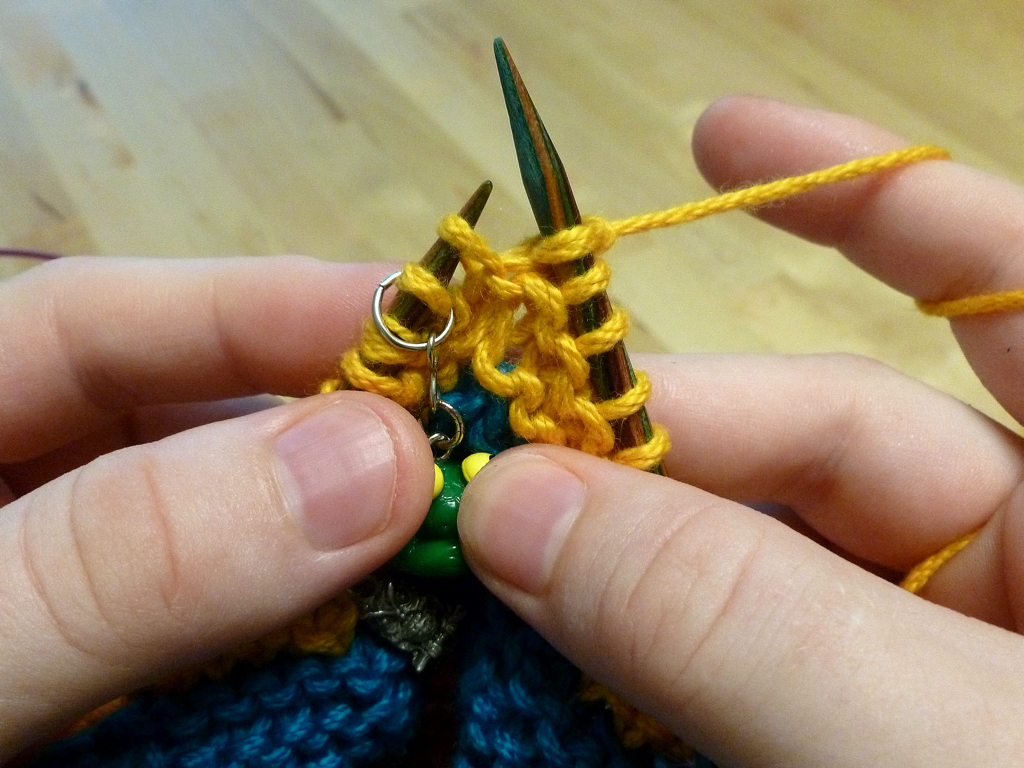
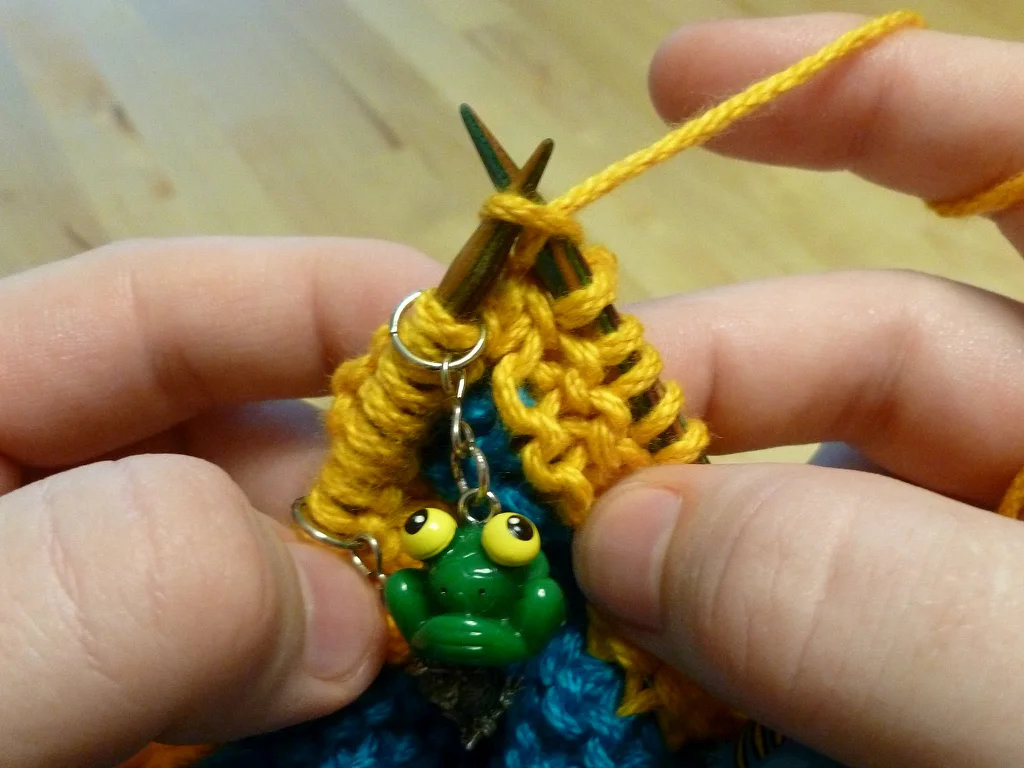
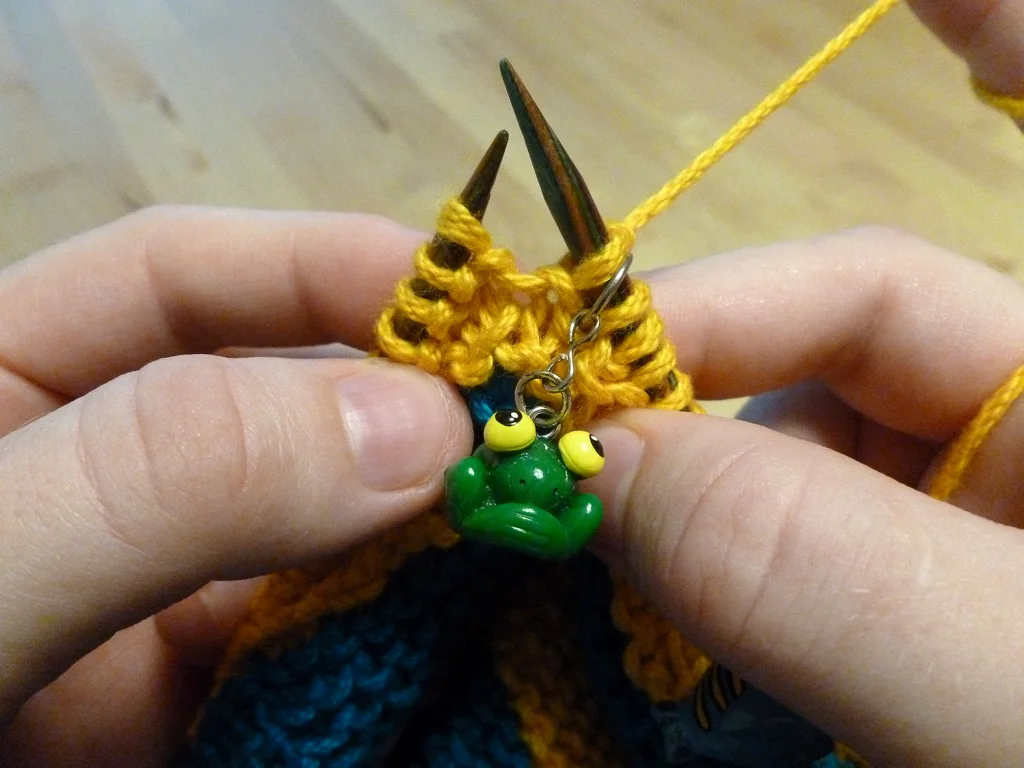
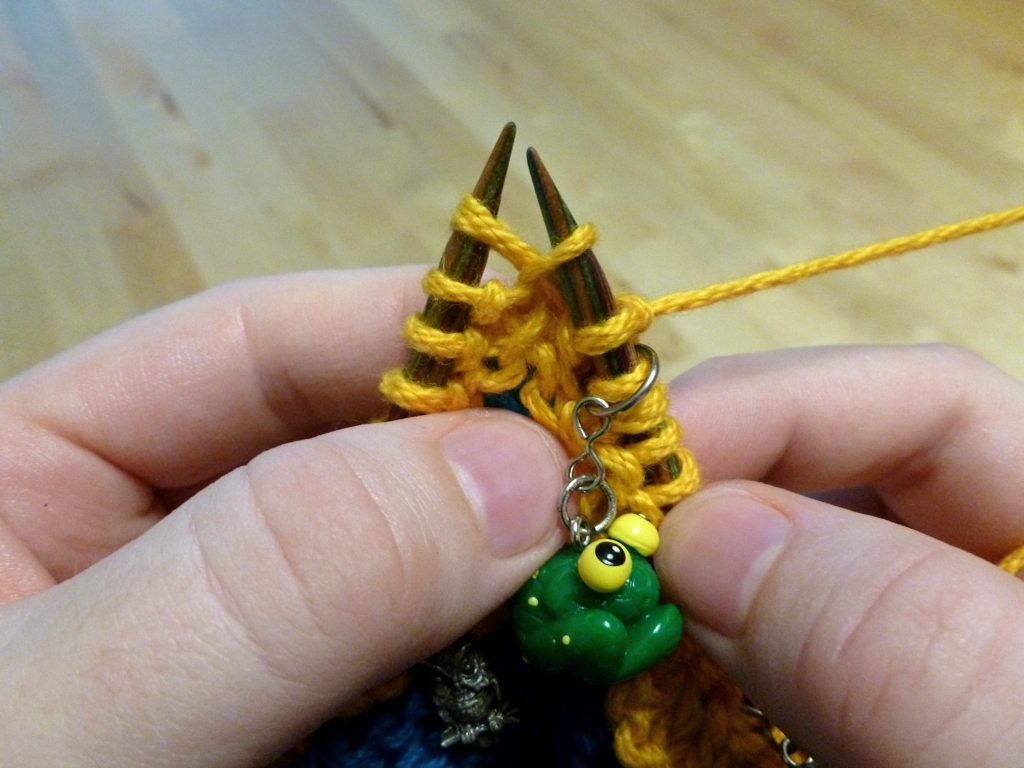
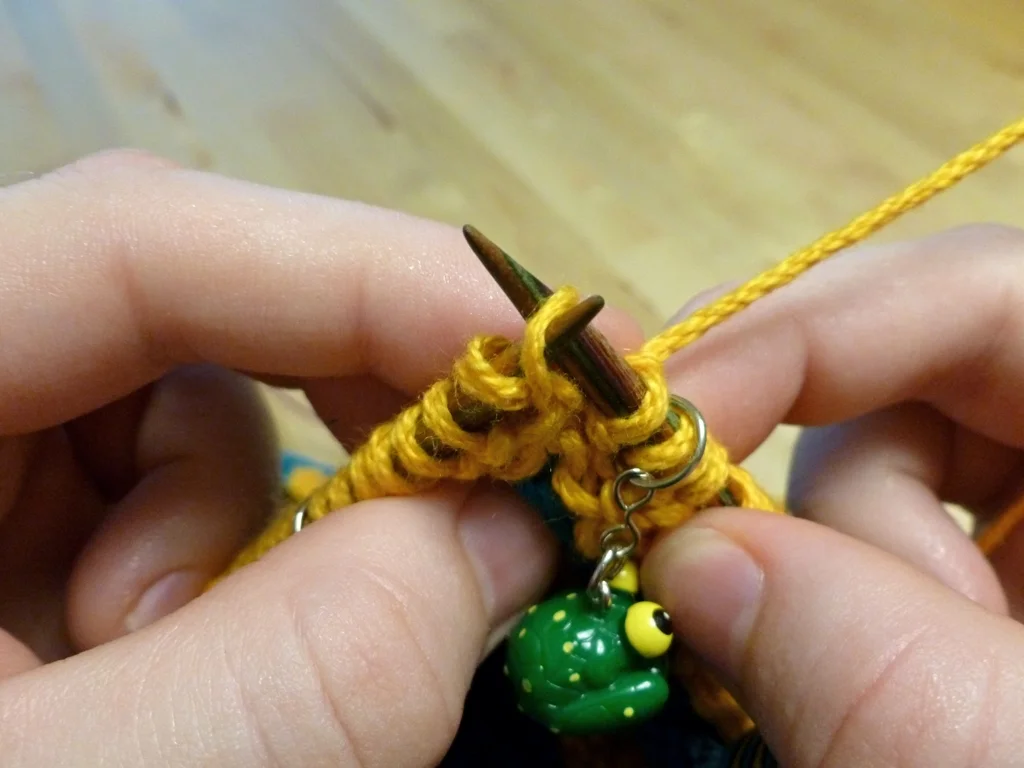
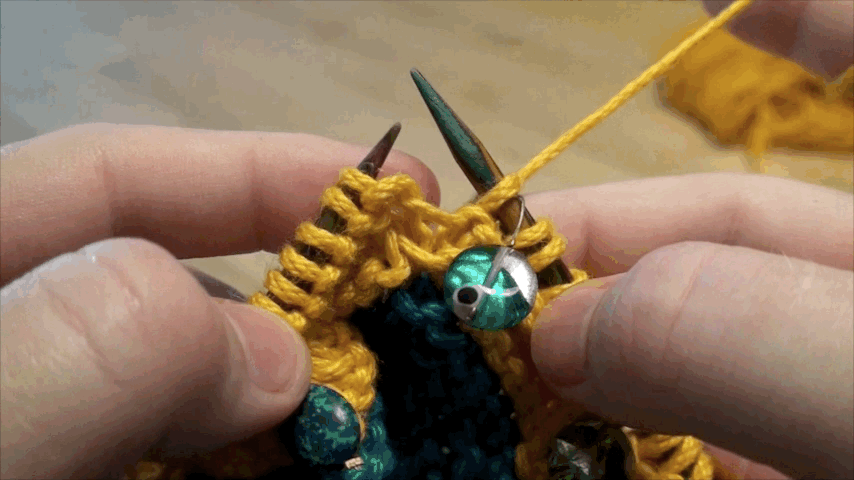
It was the first weekend of October. There was sci-fi on the TV and I’d grabbed a comfy seat on the couch to finish the last few rows of my extra large version of the Norma Blanket. It takes a long time to knit a row that’s 820 stitches around so I settled in for the long haul with snacks and a drink. Thankfully, knitting garter in the round is still faster than working lace. Even though I was keeping track of each row as I knit it, the bound off row snuck up on me. I even double checked that I’d knit the right number of edge rows before starting. 

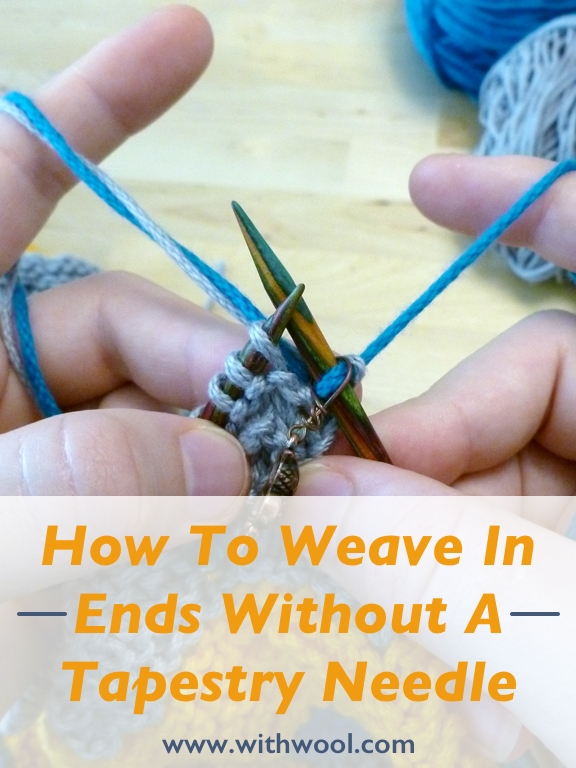
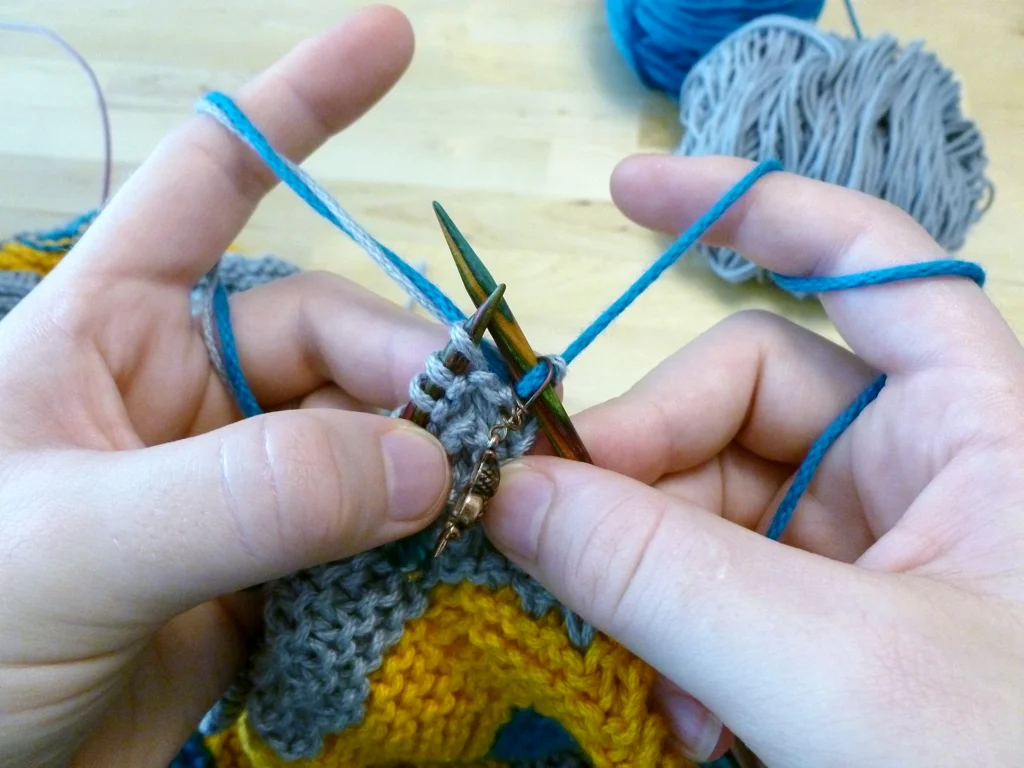
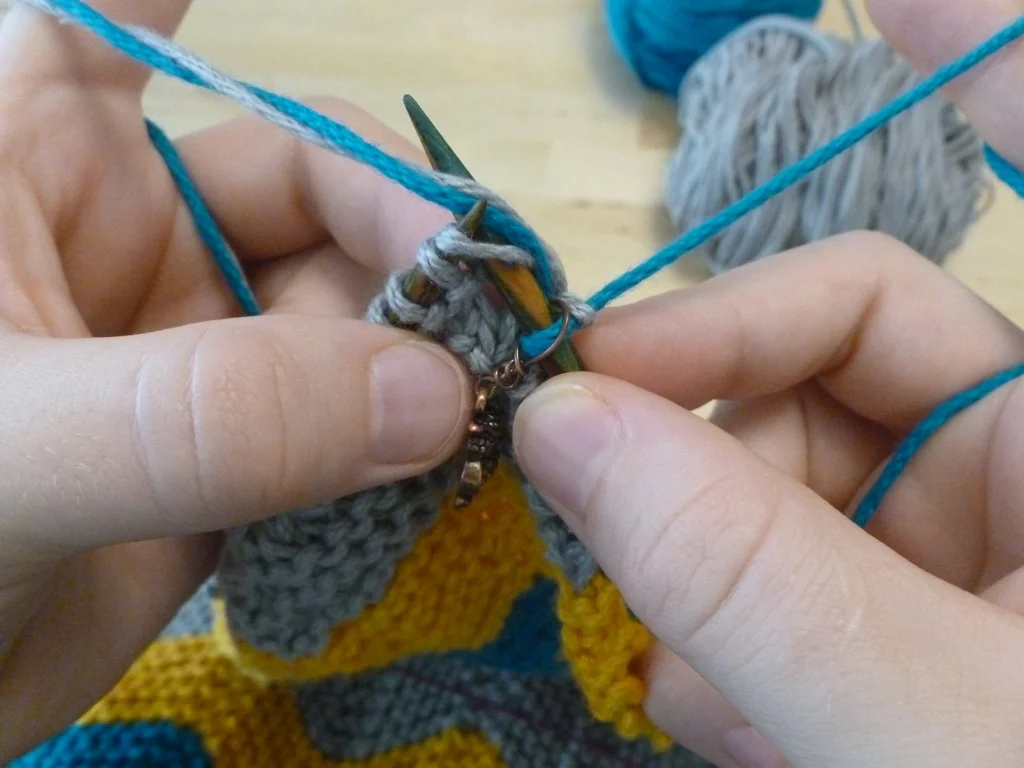
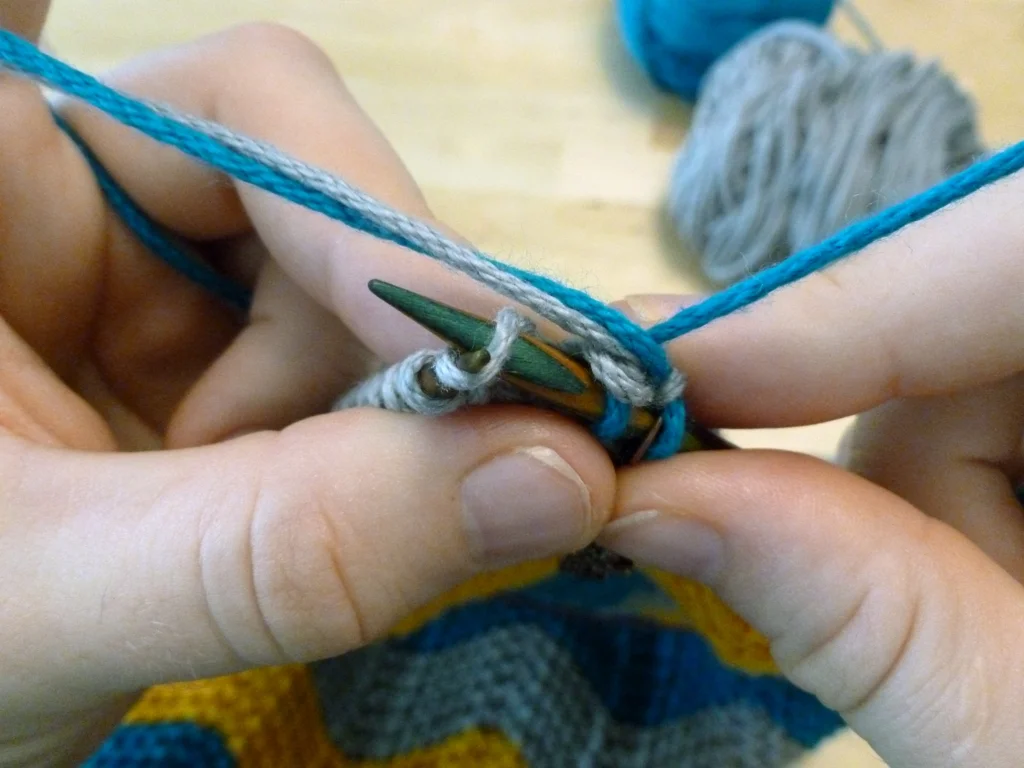
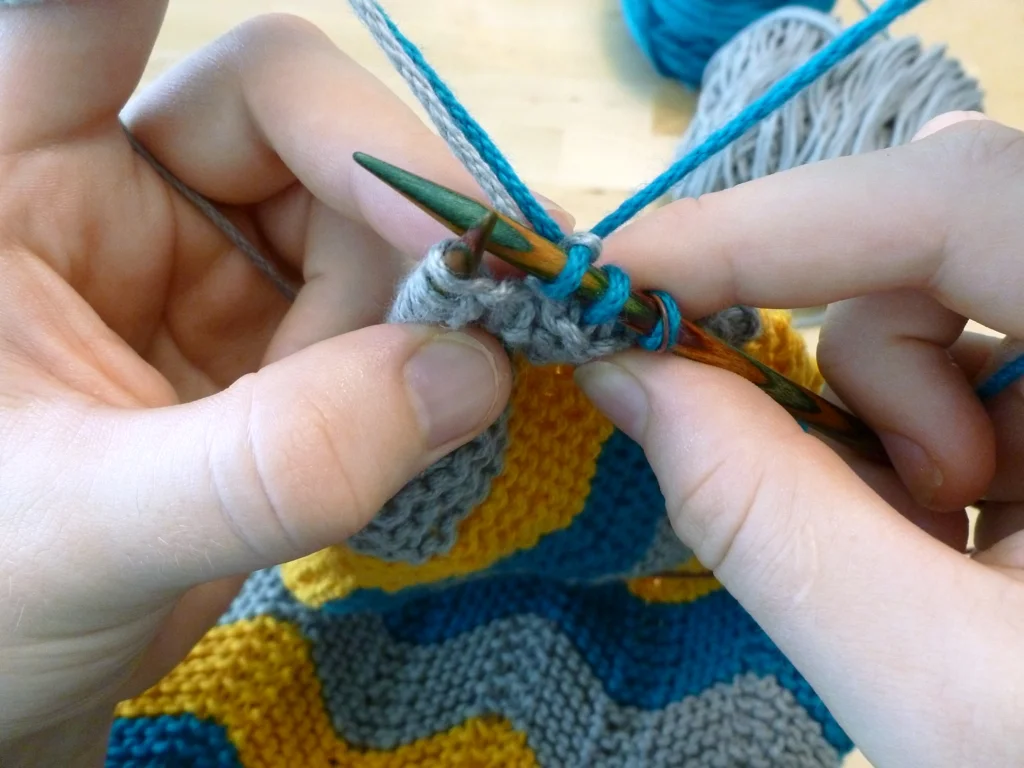
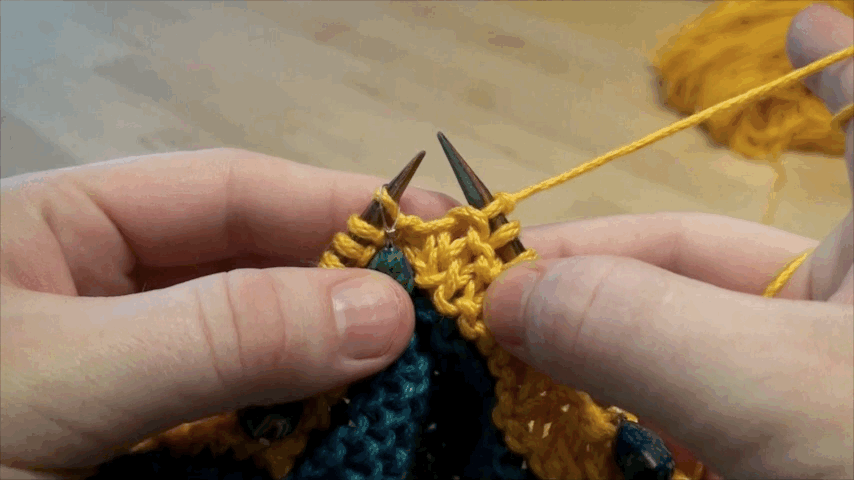
Instead of a complicated bind off requiring lots of yarns overs or a tapestry needle, the pattern recommends the simple purl two together bind off. Not only is it stretchy, it moves really quickly once you get into a rhythm. I expected to be up half the night just binding off. Nope. Less than an hour after starting, the Norma blanket was off the needles. I took a lot of breaks stretching it out as I bound off each side. 

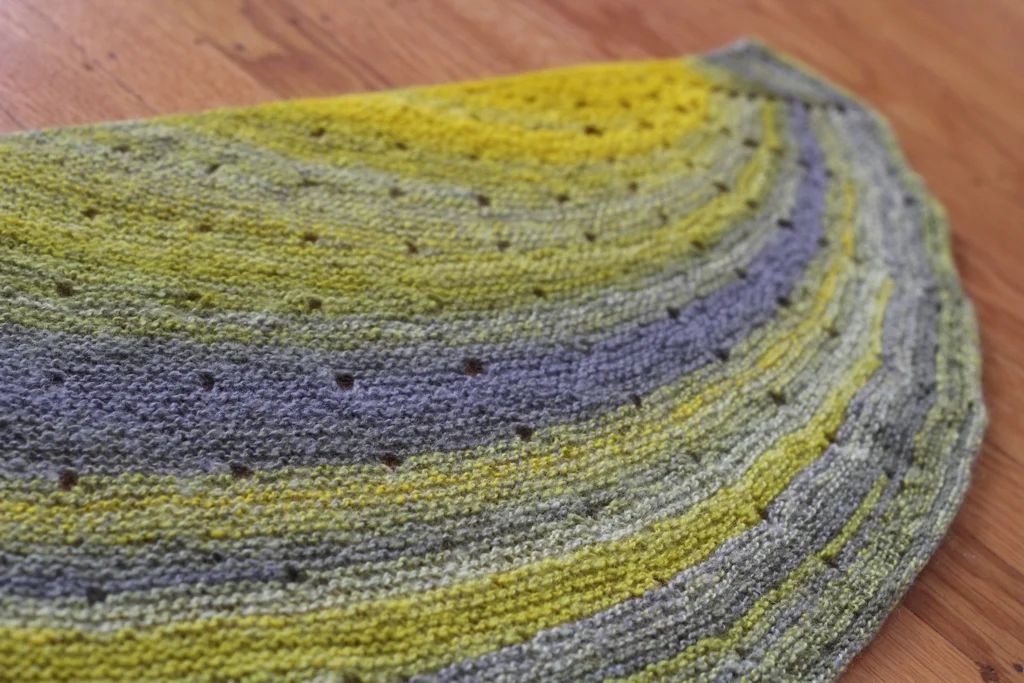
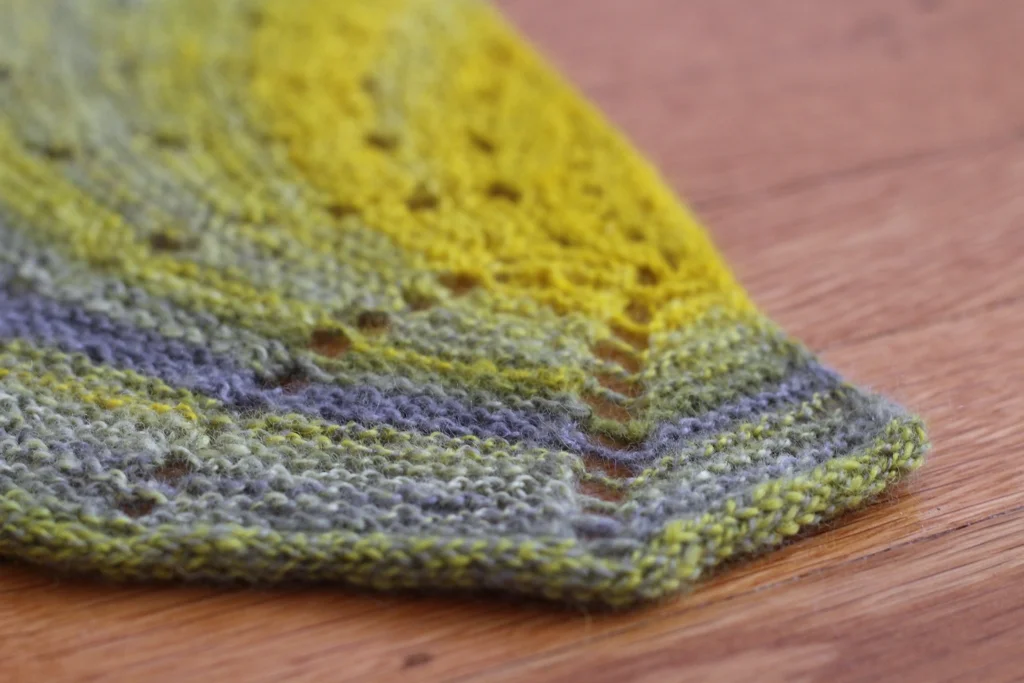
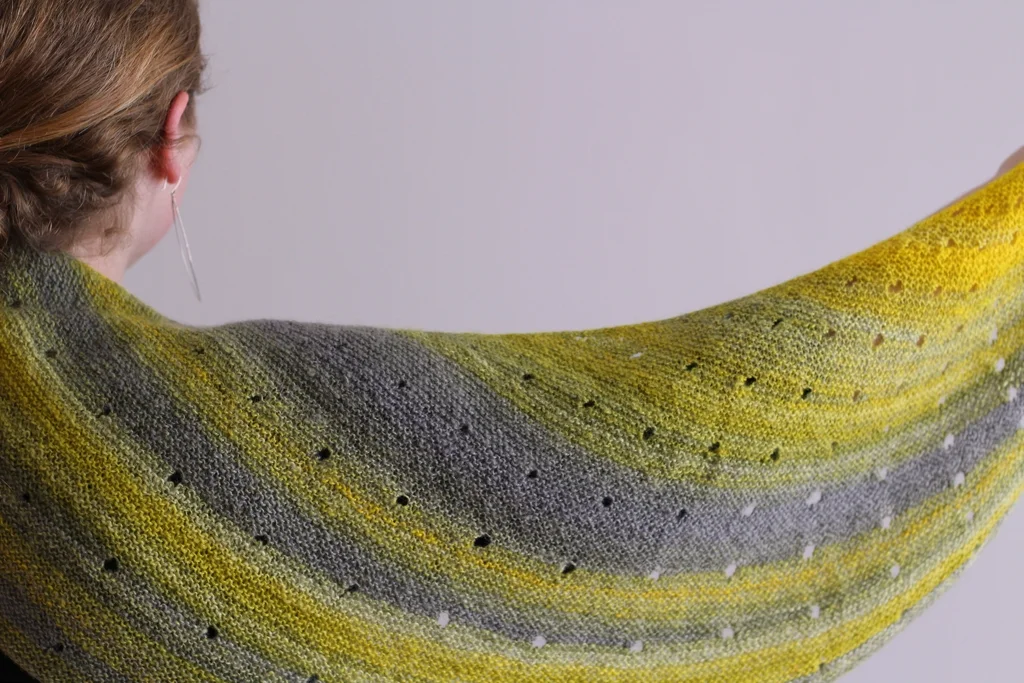
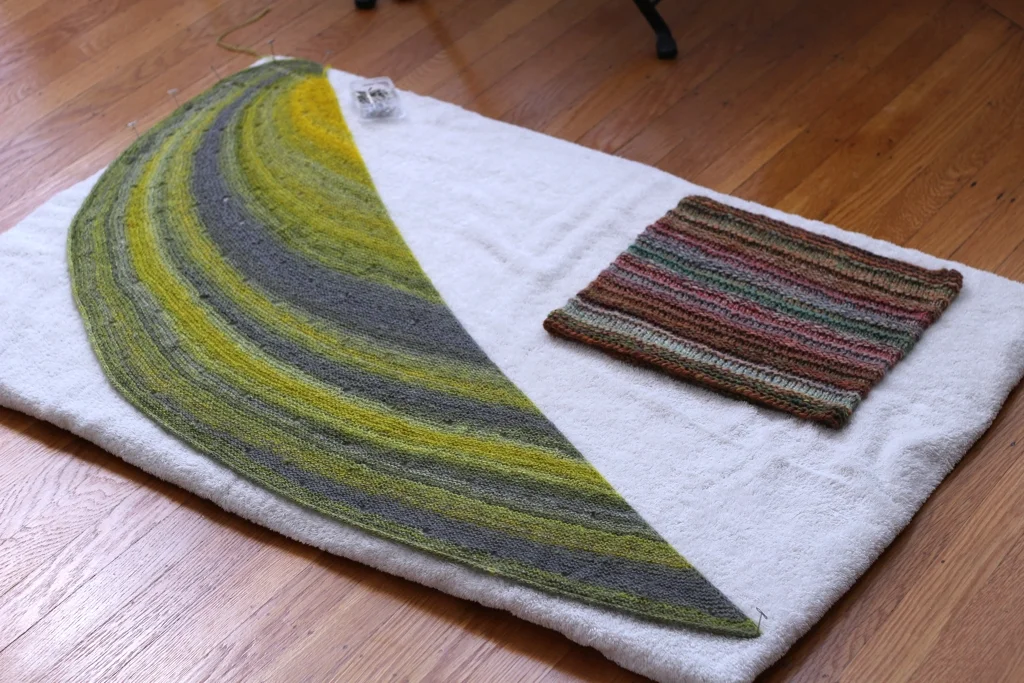
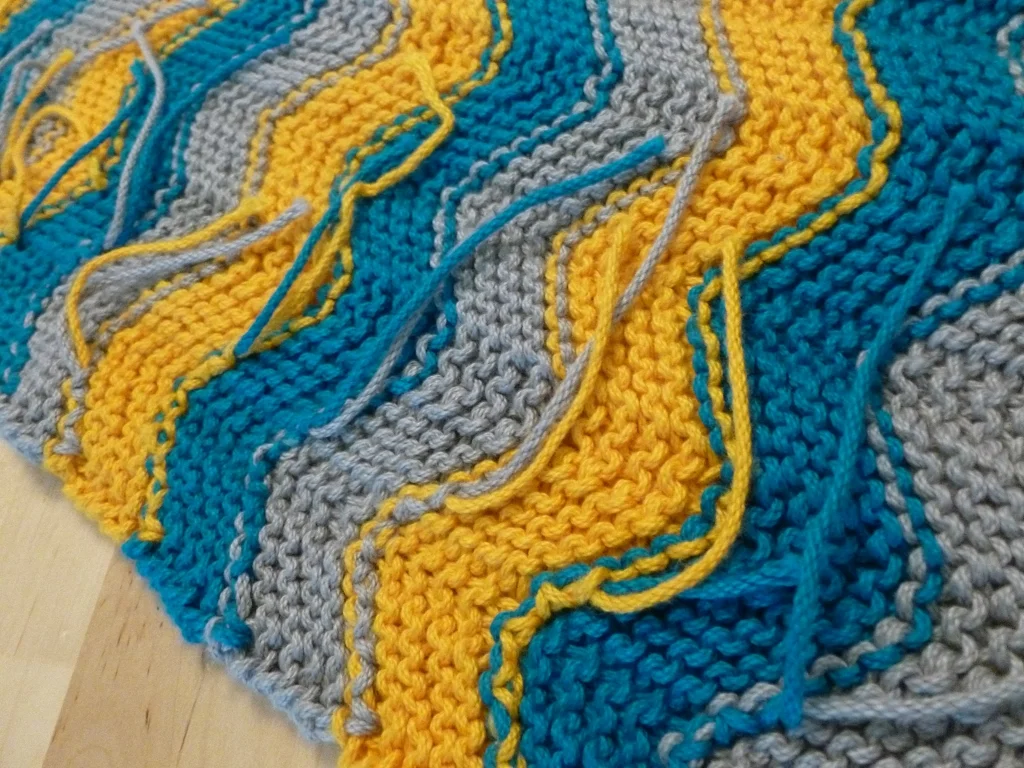
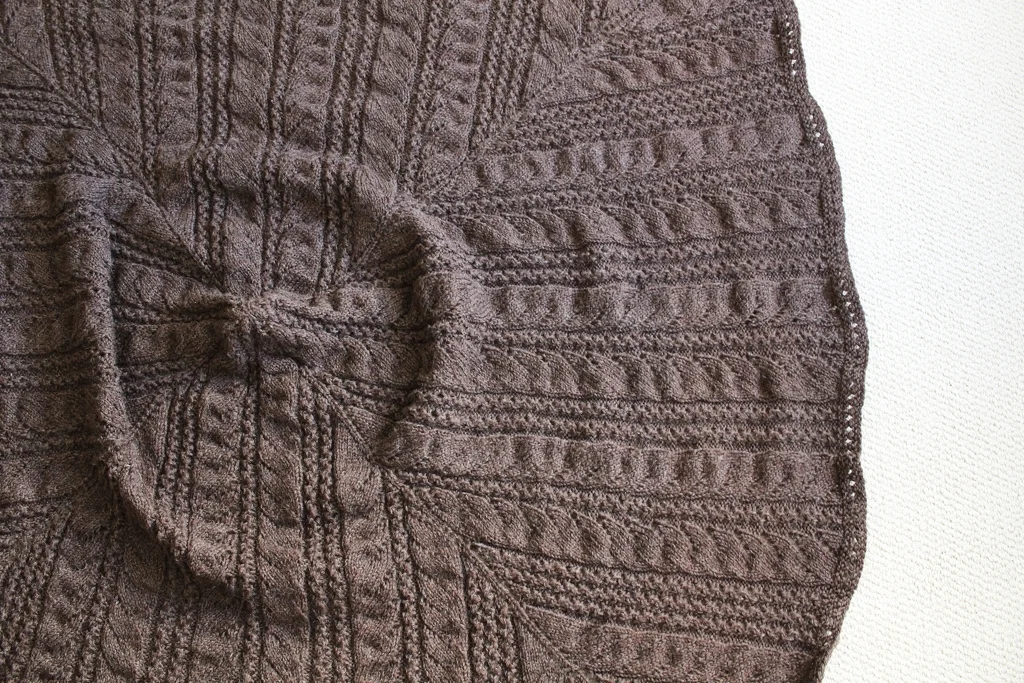
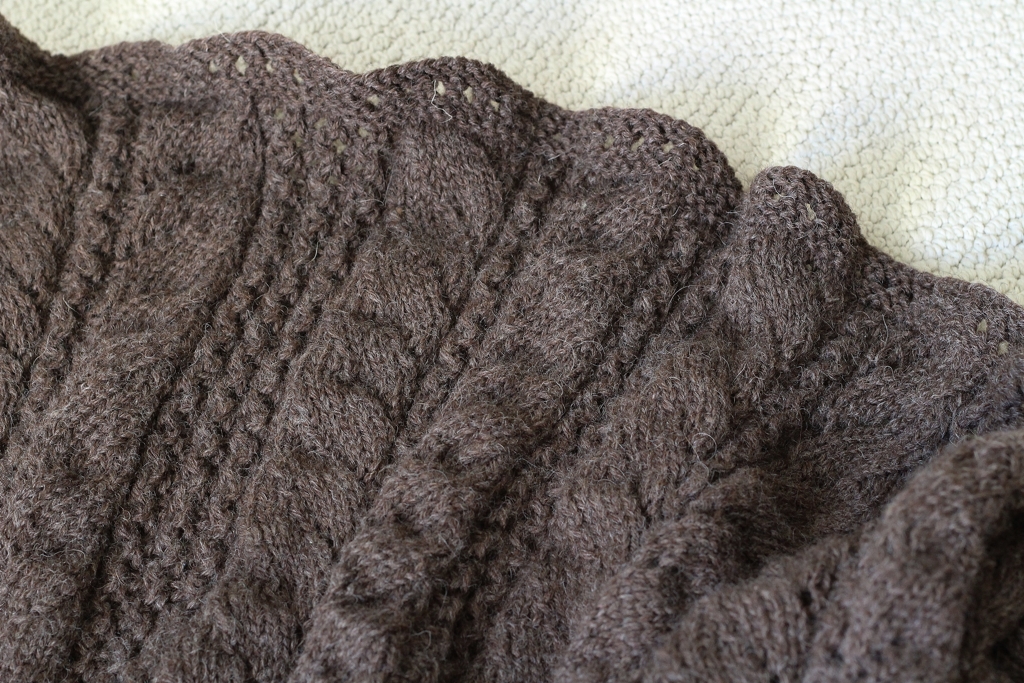
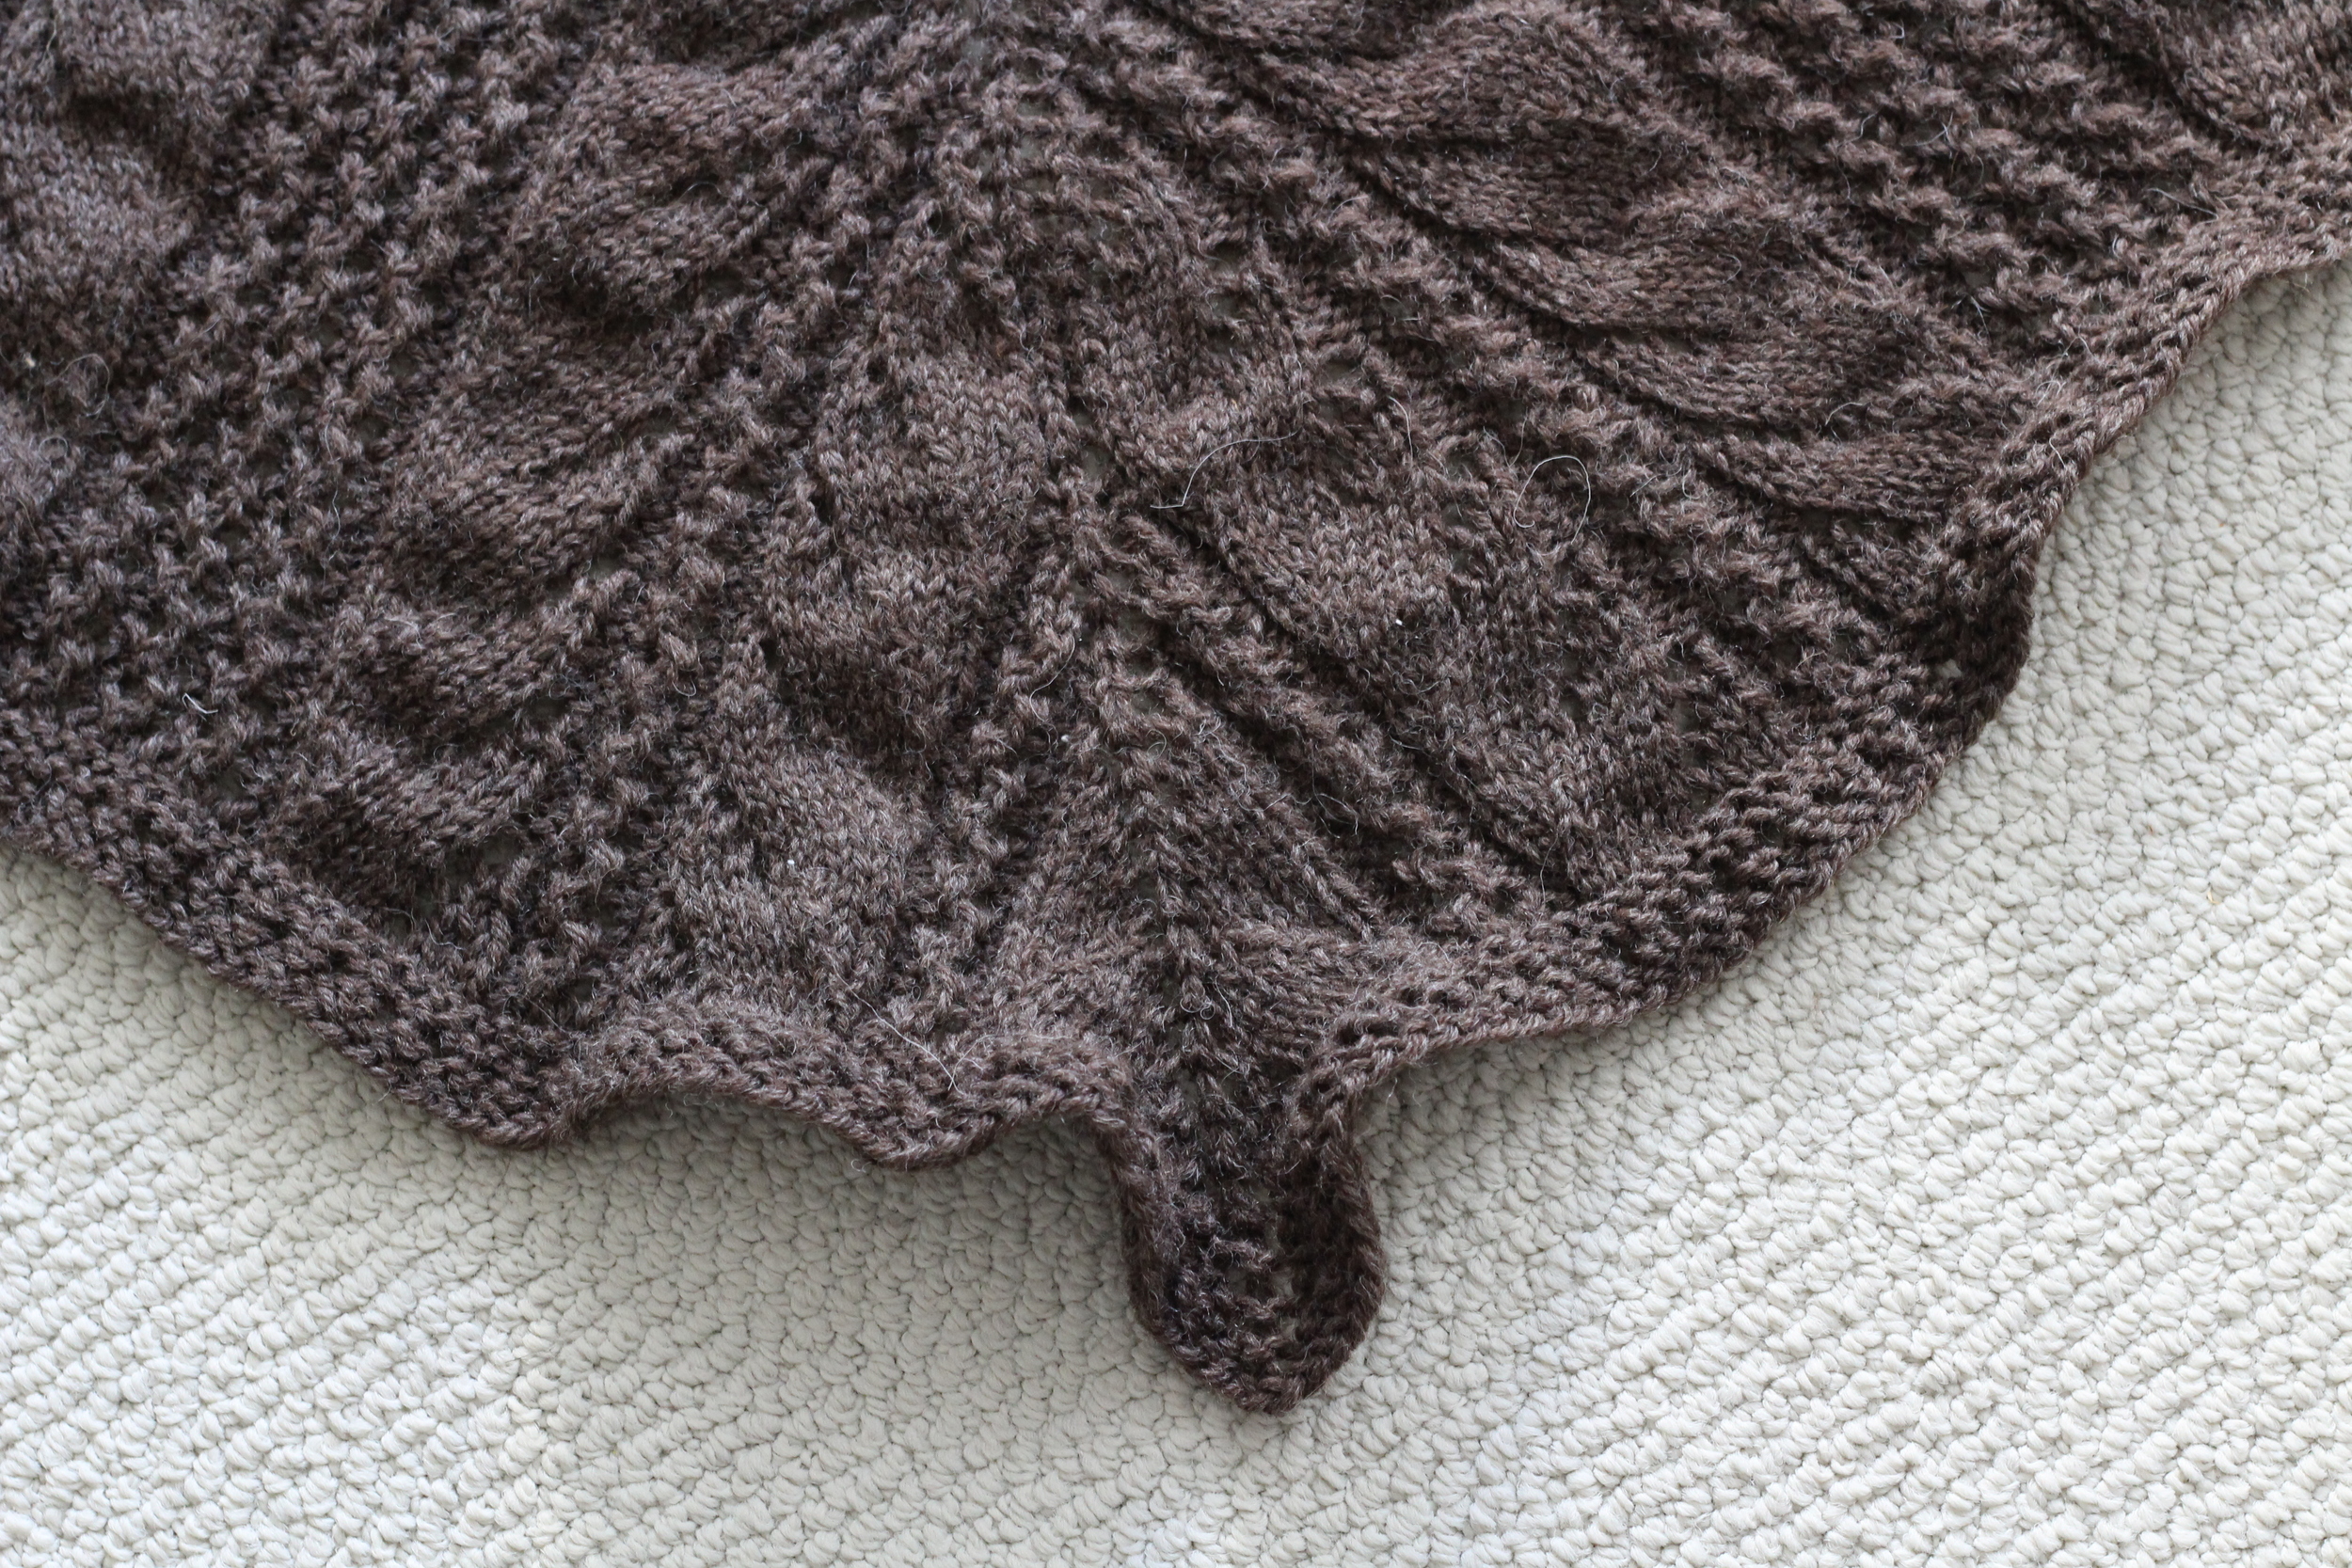
I had some idea of how big it would be while it was bunched up off needles, but seeing it spread out was something else entirely. The blanket is about 47” across unblocked. It’s bumpy in the middle and lumpy in the way that lace is when it’s fresh off the needles. The edging waves back and forth with thepattern repeats and almost looks too big for the center. Almost. I’m not worried though because, when I stretch the blanket out over my knees, the lace grows and opens up. It’s going to need all the room the edging can give it. 

Blocking has been on hold for the past three weeks while I non too patiently waited for a set of blocking wires to come in the mail. They finally arrived yesterday! Today, I’m taking over the bedroom carpet and stretching the Norma Blanket to its limits. 

How To Measure Yardage And Stop Playing Yarn Chicken

How to Measure Yardage and Stop Playing Yarn Chicken | withwool.com

The urge to finish all the things bit me hard in August. I’ve finished a sweater and a cabled scarf, and have moved on to the Norma Blanket that I cast on in 2012. Part of the reason Norma still isn’t finished is because I’m knitting the expanded version. The other reason is that I wanted to use every yard of nature’s brown Fisherman’s Wool I had in my stash. That’s a grand total of 1,860 yards and the expanded version calls for only 1,500 yards. 

Well, I finished the extended charts and still had a skein leftover which meant I had to chart the extra rows. But how many? To answer that question, I’ve been tracking my yardage. I use this trick a lot to figure out both how big I can knit something before binding off and when I need to stop to knit edging. It’s also pretty handy when you’re working on a pattern with growing repeats. Shawls, blankets, socks, sweaters, hats, and anything you can knit or crochet are all fair game.

How to Measure Yardage and Stop Playing Yarn Chicken | withwool.com

To track your yardage, you’re going to need a scale that can measure in grams. I use a basic digital kitchen scale.

How often you weigh your yarn depends on what you’re making:

  • If you’re making something where the stitch count stays the same, like a scarf, you only have to measure once. After you’ve cast on and worked a few rows, weigh the yarn ball, and knit a few more rows. 

  • If you’re making something small, - say a pair of stockinette socks or a hat - weigh, work at least 4 rows, and weigh the yarn again. The numbers will be more accurate over a larger number of rows than just one.

  • If you’re making something with a larger stitch count, like a shawl, you can knit a single row or pair of rows between weigh-ins. 

  • If making something with repeats, measure the yarn before and after working one repeat. Even if the repeats get larger as you go, you’ll have a better idea of the amount of yarn required. 

  • Weigh the yarn when the stitch pattern changes. A section of straight stockinette isn’t going to need the same about of yarn as a section of elongated stitches, cables, or slipped stitches.

  • Tracking yardage for projects where the stitch counts increase or decrease is a little more complicated. The good news is that, in most cases, the amount of yarn it takes to knit a row isn’t going to change that quickly. You don’t have to measure after every single row like I did for 100 or so rows of the Norma blanket. Maybe you measure yardage every 5, 10, or 15 rows. Just check regularly and keep your notes handy.

How to Measure Yardage and Stop Playing Yarn Chicken | withwool.com

Once you have the numbers, it’s time to do the math. There are two options. The first is a little easier and gives an estimate. The second is more precise but requires more math.

Option 1: Divide the grams of remaining yarn by grams per row. The answer is the max number of knit-able rows, including the bind off. Next subtract the bind off and number of edge rows, if any, from the max row number. That answer is how many rows to work before starting an edging or binding off. If you’re working a repeat, divide the number of workable rows by the number of repeat rows. 

As an example, here’s the math I did to find out how many more rows I needed to chart out for Norma. At the end of the chart I had 268 grams of yarn and was using 7-8 grams per row. Thanks to my meticulous measuring, I knew it would take a lot more stitches to need 9 or more grams per row.

268 grams / 7grams per row = 38.2 rows

268 grams / 8 grams per row = 33.5 rows

Since I’m going to be using more and more yarn with every row, I went with the 8 gram result which means 33 rows in the maximum I have yarn for. 

33 rows - 7 edge rows - 1 bind off row = 25 rows

25 rows / 8 rows per repeat = 3.1 repeats. 

So, I can knit 3 full repeats before starting the edging. Plus, I have a little wiggle room with the yardage, and hopefully not have to play yarn chicken during the bind off. 

How to Measure Yardage and Stop Playing Yarn Chicken | withwool.com

Option 2: Instead of working with row counts, this option focuses on finding stitches per gram. 

Why worry with the number stitches per gram of yarn? It’s great for estimating the yarn required for patterns where the stitch count changes from row to row. If you’re designing a pattern, you can use stitches per gram of a swatch to estimate how much yarn the pattern will need before you cast on. The only downside is that you need to have a fairly accurate stitch count. In the example below, stitch count could refer to the number of stitches per row, per repeat, or the number of stitches worked between weigh-ins. 

Stitch Count / Grams Worked= Stitches Per Gram

732 stitches / 7 grams = 104.5 stitches per gram

Armed with the number of stitches you can knit per gram and a spreadsheet of stitch counts, you can figure out exactly how much yarn a row, repeat, or bind off with need. Take the numbers with a grain of salt though because gauge changes and yarn isn’t always evenly spun. You can also follow the steps in the first method with stitches per gram as well. 

I-Cord Necklace How To

Learn how to make an i-cord necklace that’s a quick gift for you or a friend. | withwool.com

While I was shopping for beads for an upcoming project, I found a cute turtle pendant that ended up in my digital cart. It was still cute once I had it in hand, but I didn’t have a way to wear it. I knew if I put it away in drawer that I’d forget about it so it stayed on the table. My kitchen table, AKA my desk, is a jumble of books, yarn, knitting needles, spinning fiber, and tech. It wasn’t long before the pendant and the right yarn ended up next to each other. It be much easier to make a necklace for the pendant instead of forgetting to ever buy one. 

Learn how to make an i-cord necklace that’s a quick gift for you or a friend. | withwool.com

Materials

2-3 yds Sport Weight Yarn

2 2.75 mm double pointed needles OR a short circular needle

A pendant, charm, or bead

Tapestry needle

Knitting The Cord

Learn how to make an i-cord necklace that’s a quick gift for you or a friend. | withwool.com

 Cast on 3 stitches and slide them to the right tip of the needle. 

Learn how to make an i-cord necklace that’s a quick gift for you or a friend. | withwool.com

Pull the working end of the yarn behind the stitches from left to right. Knit the 3 stitches and slide them back to the right hand tip of the needle. This method allows you to work flat but still get a closed, round cord when you’re done. 

Repeat until the i-cord is 19” long or the length you want plus 2” to tie the knots. I decided how long to make my i-cord by comparing it the length of one of my favorite necklaces. 

Learn how to make an i-cord necklace that’s a quick gift for you or a friend. | withwool.com

Bind off the 3 stitches and cut the working yarn. Weave in the ends by pushing the needle and thread through the center of the cord for an inch before pushing the needle out and cutting the thread. If your pendant has a small bail or opening, wait to weave in one of the ends. 

Learn how to make an i-cord necklace that’s a quick gift for you or a friend. | withwool.com

While not strictly necessary, blocking the i-cord will help even out the stitches and create a nicer looking necklace. To block, soak the i-cord in cool water for 15 minutes. Wrap it in a towel and squeeze out the excess water without wringing. Lay it flat to dry. 

Tying the Stopper Knot

It might take a few attempts to get the knots in the right spot or looking just so. Keep the tapestry needle ready because it’s a big help unpicking the knots. I re-tied each several times to get the right tension and placement.

Learn how to make an i-cord necklace that’s a quick gift for you or a friend. | withwool.com

Make a loop with one end of the cord. 

Learn how to make an i-cord necklace that’s a quick gift for you or a friend. | withwool.com

Bring the end of the cord behind both strands of the loop…

Learn how to make an i-cord necklace that’s a quick gift for you or a friend. | withwool.com

then pull it around the first loop and into the space between the loop and the wrapping end of the cord.

Learn how to make an i-cord necklace that’s a quick gift for you or a friend. | withwool.com

Pull the end through the first loop from behind and tighten the knot. 

If the photos aren’t helping, check out this animation of how to tie the Stopper Knot

Learn how to make an i-cord necklace that’s a quick gift for you or a friend. | withwool.com

Before tying the next knot, string the pendant. If the bail is small, pull the unwoven end through the bail first and use it to pull the cord through. Weave in the end. 

Tying the Slip Knot

Learn how to make an i-cord necklace that’s a quick gift for you or a friend. | withwool.com

Make a loop with the opposite end of the cord.

Learn how to make an i-cord necklace that’s a quick gift for you or a friend. | withwool.com

Bring the end over the legs of the first loop and make a second loop. 

Learn how to make an i-cord necklace that’s a quick gift for you or a friend. | withwool.com

Wrap the end around the first loop’s two legs twice and bring the end out through the second loop. Tighten the knot leaving the first loop open at the end. Done correctly, you’ll be able to shrink or grow the loop as needed. I like the pull the slip knot tight after pulling the stopper knot through to keep the necklace in place.  

If the photos aren’t helping, check out this animation of how to tie the Slip Knot

Learn how to make an i-cord necklace that’s a quick gift for you or a friend. | withwool.com

Done! Enjoy your new necklace!

Learn how to make an i-cord necklace that’s a quick gift for you or a friend. | withwool.com

In Defense of the Cosy and a Free Pattern

A few months ago I decided that I had to knit a cosy for my water bottle. I was tired condensation soaking the side of my pants as a I walked and wiping up water rings whenever I picked it up. A knit cosy seemed like the perfect solution. Stay with me here. I know the first thing people thing of when they hear “cosy” are creepy toilet paper covers. I know I do. 

Cozies can be functional though. I like cup cozies since anything that lets me drink hot beverages without burning my hands is a winner. Phone cozies are pretty helpful too since they protect screens from scratches. Hot water bottle cozies keep hot water hot longer. I’ve never made a tea cosy but I’ve got a small glass pot that could probably use a little insulation between pours.

So, I measured my water bottle and started knitting it a cosy in hopes that the thing would stop sweating all over me. My first thought was to use cotton because it makes absorbent kitchen towels, but I went with wool instead. Wool has more stretch than cotton which has helped keep the cosy on the bottle. Plus, wool is a much better insulator. It’ll definitely keep you warm, but it’ll also keep cold things cold. I fill up the cozied water bottle with ice and cold water. Even after sitting in 80º room for 70 minutes, there’s still ice floating around hours later. Cozies win!

If I’ve convinced you to cosy up your water bottle, here are a few tips and a recipe.

Measure first. It’s tempting to eye ball and guess how many stitches to cast on, but water bottles are larger around than you’d think. Mine holds 33oz/1000 ml and is 11” in circumference.

Negative ease will keep the cosy in place. The knitting is going to stretch during use and, if it stretches too much, the cosy will just fall off. By making the cosy slightly smaller than the water bottle, the cosy will stretch to fit but not get too big. A negative ease of 10% worked well for me. 

For example: My water bottle is 11” around and my gauge was 6 stitches to the inch which would give me 66 stitches before negative ease. Including 10% ease means I’d need 10% fewer stitches which brings the cast on number to 60. 

Put some ribbing on it. Whether you’re adding lace or sticking with stockinette, a few inches of 2x2 ribbing at the top will make the cosy easy to get on and off.  

Use wool. It’s got great stretch which will keep the cosy on your bottle. It’ll keep cold water cold and hot water hot. Plus, it’ll be a little easier on your hands when you knit.

Waffle Rib Water Bottle Cosy Recipe

Cast on a multiple of 4 stitches. For my 11” circumference bottle, that was 60 stitches at gauge of 6 stitches/inch.

Join to work in the round. Work 2x2 rib for 1.5”

Repeat the waffle rib pattern until the cosy is as tall as your water bottle. 

    Rows 1-2: knit

    Rows 3-4: knit 2, purl 2

Decreases work just like a hat. Repeat 1 decrease row and 1 knit row. Here’s what it looks like over 60 sts (there were 6 set of decreases that happened over 10 sts):

    Row 1: *knit 8 sts, k2tog* repeat between * *

    Row 2: knit all 

    Row 3: *knit 7 sts, k2tog*

    Row 4: knit all

    Row 5: *knit 6 sts, k2tog*

    Row 6: knit all 

    Row 7: *knit 5 sts, k2tog*

    Row 8: knit all

Once I’d decreased half the stitches, I started decreasing every row to keep bottom from bunching.

Cut the yarn and pull through the stitches when there’s 10 or less on the needles.

Weave in the ends and the cosy is good to go. 

Rainbow Waffle Socks

My sock drawer might be close to overflowing, but it’s been awhile since I’ve knit myself a pair of cushy socks to wear to bed. At night, my toes can get painfully cold and thick worsted-weight socks are the only answer. My favorite pair of bed socks - they’re also the first pair of toe up socks I ever made way back in 2007 - finally saw enough wear to develop a few well placed holes. I have every intention of darning them. Eventually. In the mean time, I need another pair of socks in the rotation. So, hello rainbow waffle socks. 

Once there were enough stitches on the needles I went with one of my favorite stitch patterns, the waffle rib, because it’s stretchy, fun to knit, and good looking. It added just enough texture to keep the knitting from getting boring, especially during the larger color blocks. Since there was only 244 yards and I wanted a longer cuff, the afterthought heel was the way to go. I followed the steps in this tutorial to open up and knit the heel.

The one thing I did differently on this pair was changing up the order of ssk’s and k2tog’s on the heel decreases. Even though it definitely looks different, the fit is exactly the same. 

I’m glad I didn’t try to match up the stripes because the 2 balls weren’t even close to the same. Both were the same dye lot, and I had no idea they were so different from just looking at the balls. Somehow the heels matched up with no help from me. I like wearing mismatched socks though so this pair makes me extra happy. What more could a knitter ask for?

The Details: 

Yarn: 2 balls Classic Elite Yarns Liberty Wool - 7838

Needles: 2.75 mm circs

Date: June 18 - Aug 4, 2015

Full notes on the Ravelry page

Say Hello To Señor Squid

Señor Squid was hanging out on the ocean floor and he was feeling kind of bored. 

Swimming through the inky depths wasn’t much fun and he wanted to see the sun.

He said good bye to his tentacled friends and quickly began to ascend. 

He waved hello to sea snails and avoided passing whales. 

Being eaten for dinner wasn’t part of the plan.

He swam and swam until he found a patch of clams.

They pointed him to a seaweed grove hidden in an underwater cove. 

He kept swimming after a nap even though he didn’t have a map.

He passed sharks, submarines, and fish as it was starting to look like he’d get his wish.

The water was brighter now and he was far from where he began. 

He’d reached the surface and was only just a little bit nervous.

With one eye above the waves he decided to keep being brave 

because the beach was within his reach.

Soon he touched the sand and gave the land another scan.

There was an octopus with an umbrella and he looked like an interesting fella. 

They said hello and got to know each other in the sun’s glow.

At this time, I walked by solo and they asked for a photo.

After the shot, Señor Squid let me in on his plan. 

I was only too glad to show him around as I picked him up from the ground. 

Between seeing the sights and the city lights, 

Señor Squid became a good friend and I’ll be sorry to see him descend.

When I cast on for Señor Squid, I’d just finished another project and was in the mood to make something fun and frivolous. The yarn had been wound and waiting for months along with the pattern, Inkling the Squid by Cate Carter-Evans. Then, once I started I just couldn’t stop. From the tip of the mantle to the last tentacle tip, I knit and assembled the whole thing in 8 days.

Knitting the squid was definitely fun, but also really finicky once I got to the tentacles. There were 2 strands of yarn at all times, an ever increasing number of almost-tentacles, and DPN’s sticking out all angles. Would I knit it again, knowing what I do now? Of course. The challenge of corralling DPN’s, seaming things just so, and learning basic intarsia was part of the fun. 

Oh all the things I’ve made during #yearofmaking, I’m most proud of Señor Squid. Knitting him required me to take my knitting skills and knowledge to another level of patience and detail. Looking forward to taking that step again with Horatio the Nautilus and Opus the Octopus

The Pattern: Inkling the Squid by Cate Carter-Evans

Yarn: Done Roving Yarns Frolicking Feet - Chartreuse (Body) and Knitted Wit Gumballs Fingering - Carbon (Underbelly and Tentacles)

Needles: 2.5 mm 

Dates: April 25 - May 3, 2015

@Ravelry

Knitting Fail

I had to count on my fingers to figure this out, but I have been knitting for about 10 years. Over those 10 years I have learned a lot about the art of knitting and worked with a lot of yarn. I’ve knit small things, big things, geeky things, comfy things, and completely frivolous things. I’ve also knit things that I am incredibly proud of. Even with all that experience under my belt I still make silly mistakes. Example A, these socks.

They look the same, right? The stripes match, except for the heels. They’re the same length from cast on to bind off. But they’re different.

The first sock I knit on a 2.5 mm needle. I knit the second sock on a 2.25 mm needle, thinking that it was the 2.5 mm needle. I didn’t realize the difference until after the bind off when I had to cajole it on to my foot. The first sock is a half inch larger and much more cooperative. 

This week’s knitting public service announcement: If you ever have to snag your sock needles for another project between the first and second sock, do yourself a favor. Use your trusty needle gauge to make sure you’re using the same size needle for both socks.

After leaving the pair to its own devices for a night, I came up with two options for how to fix it. Option 1, unpick the bind off and rip right back to the toe. Nope. Option 2, wash the socks and stretch the second sock into shape over a sock blocker. That’ll happen as soon as I get my hands on my blockers, but it’s not as necessary as I’d first thought. In the few minutes I wore the socks to photograph them, the tighter sock (on the left) relaxed enough to be comfy. Snug, but comfy. All those stitches were not in vain and I still get a pair of socks!

So this knitting fail wasn’t a complete lose. Plus, I’ll get the added bonus of seeing how long each sock holds up. Will the looser knit but better fitting sock outlast the stretched sock with the tighter gauge? Only time and steps will tell. 

Pattern: Full pattern notes on the Ravelry page.

Yarn: 2 balls Patons Kroy Stripes - Spring Leaf Colors

Needles: 2.5 and 2.25 mm circulars

Date: January 29 - May 27, 2015

The Second Frisson Shawl

I don’t often knit patterns more than once, but Frisson has made it on to that short list. The first one I knit was a gift, but the second was all for me. I would even have used the exact same yarn if I could have gotten my hands on a skein. Instead, I lucked across a skein of Cephalopod Yarn’s Traveler during my first and only visit to the now closed yarn shop. 

The months I’d waited to cast on for the second shawl made sure that pattern was familiar but not boring. No second sock shawl syndrome here. Starting out at the tiniest point and seeing it grow all over again was still really fun. My only annoyance was that I didn’t buy 2 skeins. I was only able to get 10 points so the shawl is more of a shawlette. That said, I can still wrap myself up in it just fine, but I’ll pick something bigger for the windy days.  

As small of this shawl is, it’s been with me for a lot of big, awesome things. I started knitting it on a trip visiting family across the country. Blocking and pinning it out was the first thing I did for #yearofmaking. I wore it to Stitches West this year when I met Stephen West. In the future, my Frisson is small enough to fit into my bag and bring along on adventures. Can’t wait. 

The Pattern: Frisson by Brittany Wilson

Yarn: Cephalopod Yarns Traveler - Red Palace

Needles: US 6 (4 mm) circulars

Dates: December 13 - 26, 2014

@Ravelry

Review: Knit Picks Hawthorne

The Yarn: Hawthorne Fingering Multi 

Company: Knit Picks

Price: $10.99 US


TL;DR: One pair of washed socks later, I’m impressed and will definitely buy Hawthorne again. 

Yarn Weight: Fingering

Knitting Gauge: 7 - 8 sts = 1" on #1 - 3 needles (2.25mm-3.25mm)

Crochet Gauge: 21 – 32 sc = 4'' on B - E hooks (2.25mm-3.5mm)

Yardage/Weight: 357 yds/ 100 g

Suggested Care: Machine Wash Gentle/Tumble Dry Low

A good friend of mine has knit me several comfy pairs of socks and I wanted to knit a pair for her. Even if they have small feet, sock knitters appreciate all the work that goes into a good pair of hand knit socks. I didn’t have anything in my stash that I thought she’d love so I went shopping for a nice skein of sock yarn. I was looking for yarns for other projects on the Knit Picks site and decided look over their sock yarn. One Hawthorne’s colorways, Vancouver, seemed like the perfect choice and, after checking how it knit up on Ravelry, it went in the cart. 

My first impression after carefully cutting open the box was good. The colors were as saturated and true as they appeared on my screen. As for the yarn, it was soft but still seemed strong enough to be made into a pair of socks. The good impression continued when I wound the hank into a ball/cake. I didn’t have to untangle any of the strands and didn’t find any knots or weak spots. The only thing left to do was knit. I cast on for a modified version of the Smokestack socks which you can check out here.

At 357 yards per hank the yardage is on the low side when compared to other put-ups; however, the 2-ply yarn is on the thicker side of fingering weight which is a major bonus for me. Hawthorne is spun to high twist suitable for a sock yarn and held up well to repeated ripping. I couldn’t see or feel any difference between the yarn that I worked with several times and the yarn I’d only knit once. The other bonus of the twist was that it created strong stitch definition. Cables popped and garter ridges stood out. Even with this twist, the yarn isn’t wiry and it didn’t hurt my hands while I was knitting it.

Hawthorne is hand painted and the Vancouver colorway is a combination dark earth tones - green, purple, brown, burgundy - and a bright sky blue. Looking at it directly, the majority of the colors are muted but saturate the yarn. There are no white spots nor muddying between colors. The full color repeat is several feet long while the length of individual colors varies. Thanks to the blended nylon and the smooth tight twist, Hawthorne has a slight luster which really shows up on camera.

Knit Pick’s care instructions say that the yarn can be machine washed on gentle and tumbled dried low. I didn’t machine wash the pair since I didn’t need to do laundry and wanted to save my $3.25 in quarters for another day. The socks got a 30 minute soak in cool water with a bit of unscented Eucalan. I dried them by squishing them, rolling them up in a towel, and stomping on them to get out the last of the excess water. Then I hung them up to dry.  The socks stayed the same size and the colors didn’t bleed at all. 

Since my friend has small feet, I had ~150 yards leftover. I loved working with this yarn so much that I’m going to pair it with a skein of the kettle dyed Hawthorne to make socks for me. The Broken Seed Socks seem like the right pattern. 

Smokestack Socks

I’m pretty sure that hidden away in all the math that is knitting there’s a simple equation which reads: give hand knit socks = get hand knit socks. I’ve gotten a few pairs of comfy, well-fitting socks as gifts from one particular knitting friend, and it was past time I equalized the equation. 

Step 1: Buy sock yarn in her favorite colors. I took a chance on Knit Picks Hawthorne and picked up a skein of the Fingering Multi in the Vancouver colorway.

Step 2: Snoop through her Ravelry queue to find out what she likes in a sock. Cables popped up quite a bit which lead me to pick the Smokestack Socks by Tanis Lavallee. The pattern has been in my queue to knit for myself for awhile but I also picked it because of the cables and how easy it looked to modify the stitch count. Just as important was how the pattern looked with variegated yarn which, thanks to Ravelry, was quick to see.

Step 3: Wind the yarn.

Step 4: Actually knit the socks. This is easier written than it was done because of how many times I ripped out. Not the patterns fault at all; it was all me. The Smokestack Socks are written to be knit from the cuff down, but I worked them toe-up as I knit all of my socks. The first ripping came when I found out how small knitting friend’s feet are. The rest of the sock was smooth sailing asides from the moments I tinked back to add the purl ridges or cross a missed cable. 

The second sock was not as forgiving. I cast on, knit the toe, worked the foot, increased for the gusset, turned the heel, and was working the heel flap when I noticed that it was too long. By almost an inch and there’s no fudging that. I measured and my gauge had increased by 1 row/inch; nothing else changed except the speed I was knitting. That’s what I get for rushing. At least I had the company and sympathy of a few knitting buddies when I ripped all the way back to the toe. Thankfully, my gauge cooperated for the second attempt. 

Step 5: Wash the socks. No problems here.

Step 6: Mail the socks. The package arrived over the weekend and I got a photo of the socks on her feet. Social media is pretty awesome like that. All the ripping and re-knitting was worth it because they’re a perfect fit. #knittingwin The equation is equal, and now I get to knit a pair for myself in green. 

The Specs

Pattern: Smokestack Socks by Tanis Lavallee

Yarn: 204 yds Knit Picks Hawthrone - Vancouver (204 yds)

Needles: 2.25 mm circulars

Dates: April 3 - 21, 2015

Full modificaitons listed @Ravelry

Free Download: Handknit Handspun Wallpapers

I started the #handspunchallenge because I’ve spun lots of yarn and only knit a few skeins of it. Grab your handspun and knit, crochet, or weave it up! Handspun is too precious not to use. Read about how the #handspunchallenge got started here.

For #handspunchallenge this week, I’m picked out my favorite photos of handspun in action to make into desktop and mobile backgrounds. The first is of my Dotted Rays Shawl and the second is of my Present Cowl. Since we’re talking about handspun, the first wallpaper set I made featuring Texel singles is a perfect match to this set too. 

I’ve also got plans to cast on for a handspun hat but I haven’t picked out the lucky skein yet. Or a pattern. Yeah….

Download Desktop Wallpaper
Download Mobile Wallpaper
download desktop wallpaper
download mobile wallpaper

Handspun Dotted Rays

I started the #handspunchallenge because I’ve spun lots of yarn and only knit a few skeins of it. Grab your handspun and knit, crochet, or weave it up! Handspun is too precious not to use. Read about how #handspunchallenge got started here

Dotted Rays wasn’t the first shawl I knit out of this handspun skein. The first was a pattern of my own design that I’d sketched and knit a mini sample of. I happily cast on, knit several inches of it’s crescent shaped body before deciding the edge increases just weren’t quite right. Rip it. Rip it. On my second attempt, I got a little farther before I needed the needles for another project. When I came back to the shawl again, the love was gone. If I wasn’t enjoying my own design, I couldn’t expect anyone else to either. The to be frogged shawl went into a bag that went under the bed to await it’s fate. 

Scrolling through new patterns on Ravelry, like one does, I found Stephen West’s Dotted Rays. The more I looked at the combination of the crescent shape, short rows, and eyelets I knew that it was the perfect pattern for the fractal handspun hiding under the bed. Because I wanted Dotted Rays to be a treat, I didn’t actually frog the ill-fated shawl and cast on until months later when I needed knitting for the train ride down to Stitches West. 

By the time I got to Stitches, I’d worked enough the pattern to rock my knitting world. The short row treatment was ingenious and completely different from what I expected. Just that one instruction was worth the cost of the pattern. And when I saw Stephen West at Stitches West, I made sure to tell him exactly that.

I could not put this shawl down. Turns out that you can finish something rather quickly when you work on it everyday (Thanks #yearofmaking!). The fact that I only had ~500 yards instead of the recommended 720 for the small size might also have had something to do with it. After my last full wedge, I worked as many rows I could get way with before started the i-cord bind off. Even after blocking, the shawl is on the small side but still big enough to be cozy. I’m glad it matches my favorite jacket because I’m going wear it all the time. 

Pattern: Dotted Rays by Stephen West

Yarn: 2-ply fingering weight fractal handspun; fiber dyed by Yarn Geek Fibers 

Needles: US 4 (3.5 mm) circulars

Dates: February 19 - March 15, 2015

@Ravelry

Handspun Present Cowl

Once upon a time, I got a text message from a friend of mine. We live on opposite sides of the country so texting is the main way we keep in touch. Most of the time we talk knitting and yarn. She also reads this blog. After reading so many posts about my spinning and my ready-to-knit skeins of handspun, she asked if I had ever knit with any of it. A perfectly valid question. I referred her to Exhibit A, a pair of mitts knit from my first 3-ply yarn, and a shawl I was ripping out. Out of the dozens of skeins I’ve spun over the years, I’ve only knit with 2 of them. After I hit send, she threw down the gauntlet. Knit with my handspun or face the consequences. I’m not really sure what those consequences were, but I’m sure they were dire.

I choose a freshly spun skein and went looking for a pattern. I had enough yardage for a cowl and eventually picked the Present Cowl by Mademoiselle C. The cowl was a quick knit where the handspun was the star of the show. I knit it up last year but took my sweet time to block it. Still wore it though with the ends tucked out of the sight. When I flew back to Birmingham for a visit, the cowl came with me so I could prove that I actually had knit my own handspun. Consequences averted. Whew.  

When I dunked the cowl into the water, I was curious if blocking would change the gauge and drape of the piece. Before knitting, the handspun got it’s own bath to set the twist when it came off the bobbin. Would that soak be enough to prevent changes in the knitted fabric? Nope. After blocking, the stitches noticeably relaxed. The fabric had more drape and the cowl grew taller and wider. It’s still the right size to wear without collapsing so I’m happy. The moral of the story is swatching is important whether you’re working with commercial or handspun yarn.

The finished cowl is warm, comfy, and looks great with my favorite coat. It’s also good protection from all the wind whipping through my neighborhood. Now I just have to wait for the temperature to get cold enough to wear it.

Since knitting up this skein, I’ve knit one other project with handspun which I’ll be sharing soon. I also have my eye on another handspun skein that I wound but never knit. So, I’m passing the challenge on to you. Have tons of handspun that you’ve never knit with? Grab a skein and knit it up! The consequences of #handspunchallenge will be fun, wooly, and anything but dire. 

Pattern: Present Cowl by Mademoiselle C

Yarn: 2 ply handspun Malabrigo Nube - Arco Iris

Needles: US 8 (5 mm) circulars

Dates: August - September 2014

@Ravelry

How To Make A Blocking Board

What happens when you have to block your knitting (shawl, lace, mitts, color work, what have you) and are completely lacking in pin-ready space? You make your own blocking board. After finally binding off a small shawl I was ready to block it, but I’d just moved to a place without carpet. I couldn’t take over the bed or furniture either with wet garter stitch and pointy pins. Foam mats weren’t in the cards either. The good news was that moving left me with plenty of boxes that I could use instead. If you’re in a similar spot, here’s what you’ll need:

 One large cardboard box (mine was 41.5” x 27” flattened)

A towel large enough to cover the box

Packing or Mailing Tape

Scissors or Knife


Step 1: If you can still put stuff inside the box, it’s time to change that. Cut the tape holding it together and flatten out the box. 

Step 2: Tape the box’s edges together like so. The two layers of cardboard will be thick enough to support pins and stretched out knitting. 

Step 3: Wrap up the box/now board in the towel. If the towel’s bigger than the box, fold over the edges and tape them in place. 

There you have it! One DIY blocking board ready for pins and knitting. Mine seemed no worse for wear after a couple of days with a shawl and a cowl pinned to it. Can see myself getting a fair bit of use out this blocking board before I need to upgrade. 

What's In Your Notions Bag?

After years of knitting I’ve got my required notions down to a science so I’ll have what I need whether I’m at knit night, on a plane, or just hanging out on my couch. 

I love getting little peeks at other people’s desks and studios. A knitter’s notion bag is the same thing in a much smaller package. So, what’s in your notions bag? What are the absolutely necessary tools you use to make knitting and crochet easier? Post a photo to Instagram with the hashtag #mynotionsbag or tell me in the comments. I can’t wait to see!

Without further ado, here’s what I keep in mine.

  • About the bag itself. I used to carry around everything in a metal tin but it rusted and was hard to open. I went to Etsy when I couldn’t stand it anymore and found this great pencil case from Silke Jacobs. It’s just the right size to hold my notions while not taking up too much space in my project bags. Plus, I’ve got the room to hold interchangeable needle tips and an extra cable too when I need them.
  • A simple retractable tape measure.
  • Kitty snips! I got a pair to replace collapsable and embroidery scissors when I fly and decided to use them all the time. 
  • Tapestry needles in different sizes. I won the set of two smaller Chibi needles last year and was surprised at how nice they are. Added a larger needle as well so I can weave in ends from lace weight up to bulky.
  • Stitch markers. Lots of stitch markers. I’ve got locking stitch markers, fancy stitch markers, and plain rubber rings in the bag at all times but the selection varies with the project.
  • Needle keys and cable caps. These things are here to keep my interchangeable needles tight and happy. The key makes sure that the needle and cable aren’t going to twist apart. The caps keep my knitting on the cable when I need the needle tips for another project. 
  • Lotion and a nail file. The nail file is a recent addition to the group. After growing out my nails, I got tired of snagging them on my yarn every other stitch. It’s nice not to have to go digging to find the one file that may or may not be in my purse.  

The 5 Reasons I Went To Stitches West

I got up bright and early Friday morning to go to Stitches West. I was wearing one of my favorite knitting cat shirts and a small matching scarf of my own making. In my backpack, I had knitting for the round trip train ride, extra shopping bags, a snack, and all my usual purse accoutrements. So, was it worth the almost 4 hours I spent on Caltrain and the Santa Clara VTA getting there and back? Yes. Absolutely, positively yes. Will I be going again next year? Definitely.

Stitches West is a like a yarn shop combined with a spinning shop, both of which are on steroids. This was the second time that I’d been to a Stitches event, the other being Stitches South, and both times were enjoyable. What’s more, these two events make me want to go to other festivals because they give me an idea of just how much amazing fiber goodness is out there. Here are the 5 reasons I went and why I try to go to other fiber festivals. 

All the yarn and fiber you could want. Even knowing what to expect, I was still completely overwhelmed when I walked through the doors. There was yarn to my left and yarn to my right. It came in every color of the rainbow and any weight you could want. I didn’t know where to start so I just walked the aisles trying to keep my mouth from falling open. I went with the intent of restocking my stash of spinning fiber and was completely spoiled for choice. A sweater’s worth of wool from Miss Babs, a brand new tote bag, and buttons came home with me too.

It’s easy to find new yarns and dyers. Once I had my wits back, I was able to start picking out individual booths that interested me. Many of these dyers I might never have found if I only had the internet to rely on, such as Wonderland Dyeworks. The second I walked by her booth I knew I couldn’t leave without some of that delicious fiber.

You can touch everything. Seriously, you are encouraged to feel yarn and fiber to gauge it’s softness and quality. There’s different breeds of wool, alpaca, llama, silk, and various plant fibers to get your hands on. 

There’s the chance to meet your favorite designers. The night before, I printed out Dotted Rays by Stephen West and cast on so I’d have some knitting for the train. The shawl pattern is a pretty straightforward knit with an ingenious treatment for the short rows. When I walked past the Mixtape booth, I had the opportunity to tell him how much I loved the pattern which was great to do face to face. 

Inspiration is everywhere you look. If you’re in a making funk, inspiration is all around you. Maybe it comes from a particular skein of yarn in a booth. Maybe you see an amazing shawl on someone’s shoulders. Maybe a bump of fiber gives you the jumpstart to spin for a sweater. Inspiration to knit, crochet, and spin is hard to miss.

How To Weave In Ends Without A Tapestry Needle

Learn how to weave in ends without a tapestry needle as you knit! | withwool.com

There are two great reasons to learn how to weave in ends without a tapestry needle. One, you don’t have to stop knitting to look for that one tapestry needle which has probably wandered off already. Where do they go? Ahem. Two, you can weave in ends as you go instead of putting it off until after the bind off or, if you really loathe working them in, never doing it all. 

Learning to weave in ends without a tapestry needle can be finicky the first few times you do it, especially if you’ve never done color work, but it’s worth the effort. Not only does it save time during finishing but it’s also versatile. You can use it with stockinette, garter, and in pattern. It still works if you’re increasing and decreasing. The ends will follow the curves and angles of short rows and chevrons without creating extra bulk. While it is noticeable on the wrong side, weaving in ends sans needle is neat and tidy. Plus, it even works with slippery yarns.

Sounds pretty cool so far, right? I thought so too which was why I used this method to weave in the ends when I switched colors on the Cuddly Chevron Baby Blanket. The deadline for that blanket left me in a dust with half finished knitting and weaving in the ends without a needle as I went cut out one last step at the end. 

Step By Step

Learn how to weave in ends without a tapestry needle as you knit! | withwool.com

efore we get started, there’s one you need to know that’ll make learning this technique much easier. It might seem like you’re just knitting as usual with the new yarn but it’s actually wrapping around the tails as you move them back and forth.

Learn how to weave in ends without a tapestry needle as you knit! | withwool.com

When it’s time to switch colors (or time to add another ball of yarn), work one stitch in the new color. The tail should be about 6” so you have enough yarn to hold on to.

Learn how to weave in ends without a tapestry needle as you knit! | withwool.com

In the opposite hand of your new yarn (if you have the dexterity to do all this with one hand, mad props), hold the tails of both colors together.

Learn how to weave in ends without a tapestry needle as you knit! | withwool.com

Wrap the tails around the right needle from top to bottom.

Learn how to weave in ends without a tapestry needle as you knit! | withwool.com

Work the stitch normally with the new yarn. Just the new yarn will be caught in the stitch and the tails will fall to the back. This is exactly what you want.

Learn how to weave in ends without a tapestry needle as you knit! | withwool.com

Work the next stitch with the tails held behind the needle.

Learn how to weave in ends without a tapestry needle as you knit! | withwool.com

Repeat steps 4 and 5 until you’re satisfied with how much you’ve woven in. I usually aim for 1 - 2”. Drop the tails, cut the old color, and keep on knitting with nary a tapestry needle in sight.

See how all the steps come together below.

Learn how to weave in ends without a tapestry needle as you knit! | withwool.com

Here’s what the woven in ends look like on the wrong side of the knitting. The tails follow the curve of the chevron with no problem and are quite secure. A quick note: I waited to cut the tails until after the blanket came out of the washer and dryer.

Tips  & Tricks

Learn how to weave in ends without a tapestry needle as you knit! | withwool.com

t the switch between the grey and the blue, the blue yarn isn’t evenly woven in. Since the tails are just wrapped in the working yarn, there’s no need to redo it. Just tug on the tail until it’s neatly in place.

Learn how to weave in ends without a tapestry needle as you knit! | withwool.com

What if the tails were woven in too tightly? As shown above on the left, the stripes will pull in and pucker at the change but it’s easy to fix. Gently pull the edge out until to loosen up the tails and straighten the edge like in the right photo. If the tails get pulled out to far, just tug them back into place.


How To Work Lifted Increases In Garter Stitch

This the second tutorial for the Cuddly Chevron Baby Blanket. The first tutorial is 5 Ways To Use Stitch Markers

Lifted increases have been my favorite way to add stitches to my knitting since I first heard about them in New Pathways For Sock Knitters. (Thank you, Cat Bordhi!) When working in stockinette, lifted increases, specifically LLinc and LRinc, are easy to work, not fiddly, and don’t create big holes or blemishes in your knitting. Over the years I’ve experimented with them in other stitche patterns and lifted increases work just as well in garter stitch as they do in stockinette. So, when I was swatching for the Cuddly Chevron Baby Blanket, LLinc and LRinc were the first increases I tried and they worked wonderfully. LLinc is an abbreviation for Leaning Left Increase while LRinc stands for Leaning Right Increase. Use them together and you get matched, symmetrical increases which makes my designer’s brain happy. 

I’m trying something new for this tutorial. The increases will be shown with BOTH step-by-step instructions AND a gif demonstrating the technique. Happy stitching! 

How To Work LLinc In Garter Stitch

Knit to the spot where your pattern says to increase.

Insert the left needle up into closest bump directly under the right needle.

Insert the right needle just like a regular knit stitch.

Wrap the yarn around the needle and work it the same as a regular knit stitch.

Ta-da! One new stitch on the needles.

How To Work LRinc in Garter Stitch

Knit to the spot you need to increase.

Insert the right needle up into the first garter bump directly under the left needle.

Slip the stitch onto the left needle and move the right needle behind the left. Wrap the yarn around the needle and work the stitch the same way as knitting through the back of stitch. 

Check back February 3rd for the next Cuddly Chevron Baby Blanket Tutorial, Weaving In Ends As You Knit. No tapestry needle required!

5 Ways To Use Stitch Markers

Stitch markers come in lots of shapes, sizes, and materials. They can be flexible rubber rings, simple metal triangles, intricate jeweled baubles, or cute beads on wire. You can even make them on the spot from small pieces of leftover yarn, paper clips, rubber bands, or hair ties. Stitch markers can be one continuous piece or able to be opened up and “locked” on a specific stitch. These little tools can do a lot to help with your knitting even if they are easy to lose between couch cushions.

Use them to mark the Right Side of your work. When you first cast-on for a garter stitch project, it can be hard to tell the Right Side from the Wrong Side when you pick it up after a break. Take a stitch marker, different from the rest if you’re using a lot of them, and put it a stitch or two in from the starting edge of the Right Side. Pick up your needles and don’t see the marker near the tip? Then you’re on the Wrong Side of your work. 

Stitch markers can be used to mark more than just stitch repeats. On the Cuddly Chevron Blanket, I placed a marker every time I had to increase or decrease. It kept me from having to count (or miscount) every stitch and left my mind free to listen to podcasts or watch a movie while I knit. 

Clover-Locking-Stitch-Markers.jpg

Lockable stitch markers are great for tracking your progress. When you’re working on a big project and it starts to feel like a slog, start your knitting for the day by putting a locking stitch marker on a just knit stitch. When you’re done, you’ll easily see how much you’ve accomplished. This trick is great for seeing progress on sleeves, sweaters, and socks, but can be a bit discouraging if you’re knitting a blanket from the center out.  

stitch-marker-tips.jpg

Stitch markers are also great for counting rows. Here’s also where locking stitch markers come in handy again. When you’re starting a new section of knitting and need to knit a certain number of rows/rounds, say for the ribbing on a pair of toe-up socks, put a locking stitch marker on the first row and count from there. You could also put a marker every 5 or 10 rows so you can see how many rows you’ve knit at a glance. 

Stitch markers are really helpful when you’re casting on a large number of stitches. I can count 20 stitches without losing my place much easier than I can count 400. So, after you cast on 20 sts, place a marker and repeat until you have the required number for your pattern. No miscounting here.

P.S. Here’s one last tip for all the hand spinners out there. Locking stitch markers make it much easier to measure the yardage of skeined handspun. 


Cuddly Chevron Baby Blanket Tutorials

1. Tips for Using Stitch Markers

2. Working lifted increases in garter stitch (January 27th)

3. Weaving in ends as you go without a tapestry needle (February 3rd)

Pattern: Cuddly Chevron Baby Blanket

Cuddly-Chevron3.jpg

Early last year I found out that a good friend of mine was having her first child. Since she’s on my knit-worthy list, my mind started churning with all sorts of ideas. I considered sweaters, hats, toys, and baby tube socks. All of those things are still an option now but what what I really wanted to make was a blanket. Sure, it’s more knitting, yarn, and time than the other ideas but a blanket has staying power. It can’t be outgrown like a sweater or a hat or adorable baby tube socks. A blanket is more useful than a toy and, maybe, not as easy to misplace. Plus, if you pardon the cliche, a great way to wrap someone up in love.

Cuddly-Chevron4.jpg

Those thoughts were the start of the Cuddly Chevron Baby Blanket. I swatched my way through several different and complicated ideas, none of which panned out, before coming back around to the simple chevron. Soft, cushy, colorful garter stitch chevrons, in fact. After tracking down a machine washable cotton/acrylic yarn that actually had all the colors I needed, a task that proved much harder than I thought, I cast on. Then I ripped out because I wanted the blanket to be bigger. After that, the knitting was smooth sailing. I didn’t finish the blanket in time to send it off before the kid was born but it did arrive before winter turned really cold. 

My original plan was to publish the pattern before Christmas. Obviously that didn’t happen but I’m so happy that Cuddly Chevron is the first pattern of 2015. The first of many! Another first and something I’m really excited about is that I’m going to be releasing a tutorial series detailing the techniques in this blanket! I’ve never released tutorials revolving around a specific pattern before and can’t figure out why I haven’t. The tutorials will focus on several key techniques that will help with both with the blanket and future projects. The series starts next week and will cover weaving in ends as you go (without a tapestry needle), working lifted increases in garter stitch, and uses for stitch markers. If you’re wondering how to work another technique, let me know. 

Happy Knitting! 

Cuddly Chevron Baby Blanket

Download Now

Simple, classic, and warm, the Cuddly Chevron Baby Blanket is easy to make and a great gift for any baby or yourself. Worked in garter stitch, the blanket knits up quickly to create a cushy fabric. 

Stick with three colors of worsted weight yarn, just use two, or go wild and use up all those leftover yarns in your stash.

Want to make it bigger or smaller? The pattern includes notes to help you out. 

Size: 30” x 30”

Needle: US 7 (4.5 mm) 36” circular needle

Yarn: Cascade Yarns Avalon - 2 skeins (350 yds) of each color

C1: 10 - Artisan's Gold

C2: 02 - Silver

C3: 17 - Enamel Blue

Notions: Tapestry Needle, Stitch Markers (Optional)

Check it out on Ravelry!

Download Now