The Famous February Baby Sweater

Pithy instructions, a little garter stitch, and a bunch of lace make up the famous February Baby Sweater. It’s a good test of knitting skill too. | withwool.com

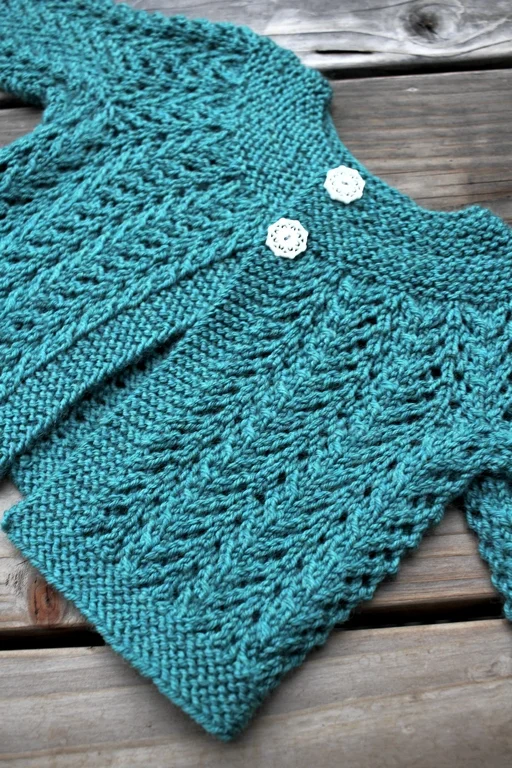
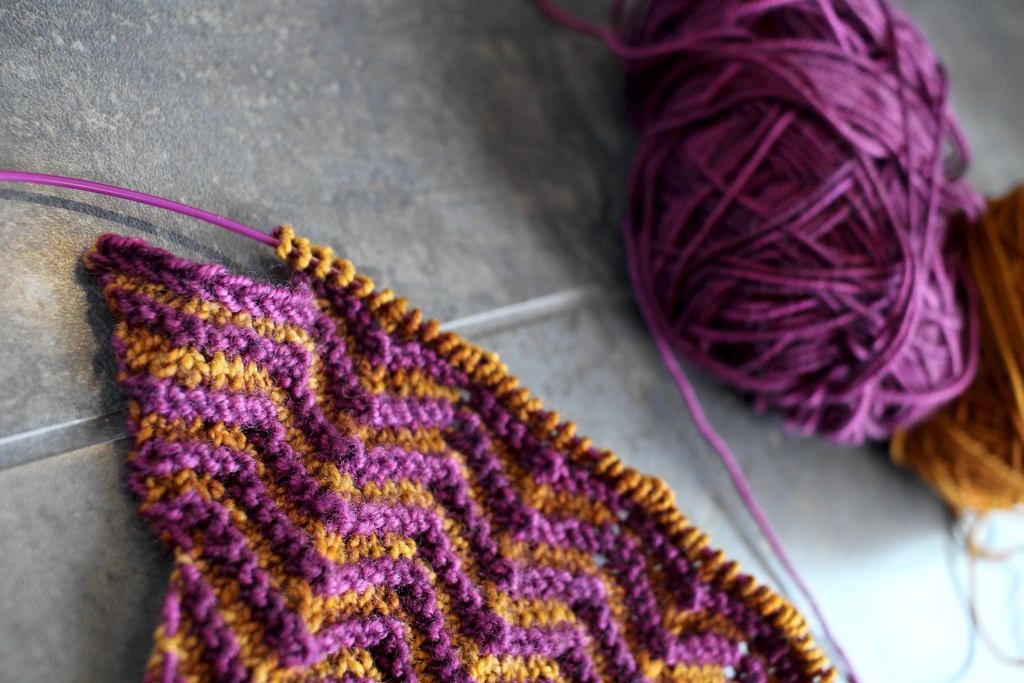
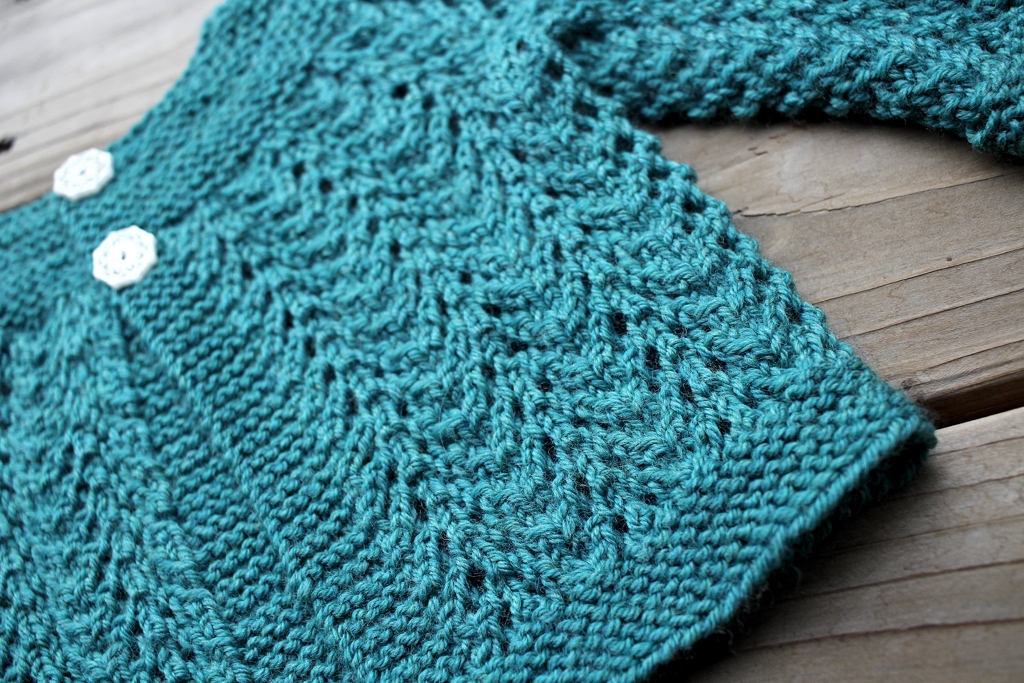
I spent the first few months of 2017 working on secret knitting. It was a baby gift for a good friend of mine, and now that the sweater is at it’s new home, I can share it with you too. When I first heard that my friend was having a baby, I thought about making a blanket. She had plenty of those coming in though so I decided to make a cute sweater instead. After scrolling through page after page of baby sweaters on Ravelry I picked Elizabeth Zimmerman’s February Baby Sweater. The pattern has been in my queue for awhile but that’s not why I picked it. It looked cute and I wanted to make something with lace for a dedicated lace knitter.  

I went into this project knowing EZ’s patterns have a reputation of being, as she calls them, “pithy”. Concise, terse, succinct, condensed… Having made a Pi Shawl a few years ago, I thought I knew what I was getting into. I was mistaken. 

Pithy instructions, a little garter stitch, and a bunch of lace make up the famous February Baby Sweater. It’s a good test of knitting skill too. | withwool.com

After years of knitting from (and writing) more detailed row-by-row instructions, the 3 paragraph pattern took some getting used to. It wasn’t that the pattern was hard to understand - the gist of it was definitely there - I just had a lot of questions about specific details. So I had to answer them for myself. Thankfully, lots of other people have knit this sweater and I found helpful mods and size charts to make a 9-month sized sweater. Swatching was definitely a requirement. 

Pithy instructions, a little garter stitch, and a bunch of lace make up the famous February Baby Sweater. It’s a good test of knitting skill too. | withwool.com

Since I was writing more detailed instructions to work from, I made a few of my own modifications to knit the sweater to my own preferences. You can find the full details on the project page.

  • Cast on more stitches and worked fewer rows before starting the first yoke increase row to get a wider neck opening.
  • Switched out the "M1" for "kfb" because it looked neater. 
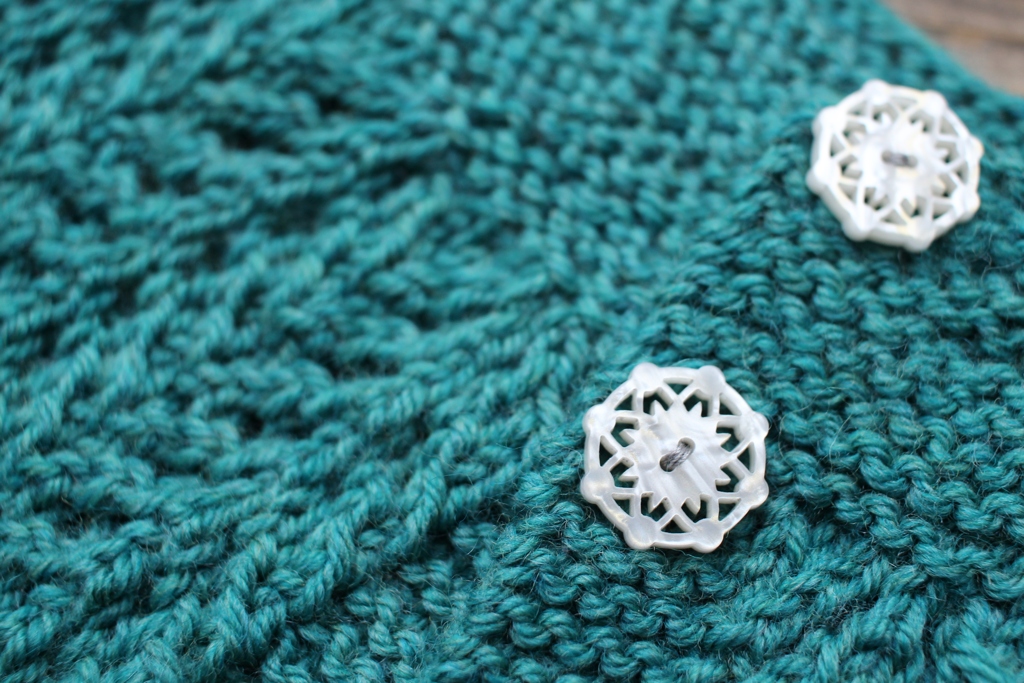
  • Worked the button band over more stitches and made larger button holes.
  • I knit the body of the sweater flat, but worked the sleeves in the round. After reaching the spot to set up for the sleeves, I knit those stitches with waste yarn and decreased to get the stitch count of the sleeves. Then I came back, picked out the waste yarn, and put the live stitches on the needles to knit the sleeves just like an afterthought heel. Finicky? A little, but I got a neat, seamless join that didn’t break the lace pattern. Totally worth it in my book. 
Pithy instructions, a little garter stitch, and a bunch of lace make up the famous February Baby Sweater. It’s a good test of knitting skill too. | withwool.com

The February Baby Sweater is definitely worth the effort, and I encourage you to make one yourself. I say this counting the time that I frogged the sweater back to the cast on because I had to re-do the yoke increases. Figuring out how to get exactly what you want out of this pattern is a good test of skill that will up your knitting game. Plus, the lace and garter stitch are an absolutely beautiful combination. I am proud to give this sweater to a good friend who is also an amazing knitter. 

P.S. Since this post has gotten on the long side, I’ll show you what I did with the leftovers next. 

Pattern: Baby Sweater on Two Needles (February) by Elizabeth Zimmerman

Yarn: 317 yds Cascade 220 Superwash - Lake Chelan Heather

Needles: US 6 (4 mm)

Dates: January 18 - April 28, 2017

@Ravelry

Ditching Silly Excuses

Don’t let silly excuses hold you back from knitting and projects you love.  | withwool.com

Sometimes my knitting projects sit around for the silliest reasons. Like this one. It’s the Feeling Groovy shawl by Nim Teasdale. I started it last year as a bit of selfish knitting after finishing all my holiday gift knitting. I was making good progress on it too until I added another step. I wanted to know how many repeats I could work before starting the decreases.  

Step one involved measuring how much yarn I had . Step two was working up a repeat, or two, or three. Step three, measure how much yarn I used. Step four, do the math.  

Don’t let silly excuses hold you back from knitting and projects you love.  | withwool.com

Enter the silliest reason to hold myself up. I did weighed the yarn and then got stuck on the knitting a repeat or two. I made lots of excuses why the time was never right to knit the repeats, and made the whole process much harder than it had to be. Ugh. Then a bunch of other important must-do’s came up and the shawl languished in a project bag for a few months. Eventually I needed new purse knitting and this shawl was the easiest thing to grab. The shawl was getting bigger but I still needed to know when to start the increases. 

Side note: The pattern has some helpful notes on when to start the decreases, but I’m knitting the shawl at a tighter gauge. So I have to do my own yardage calculations for this. 

I went back to step one, kept detailed notes, and got to work on the calculations. Spreadsheets make this kind of number crunching pretty easy, but it’s still time consuming. A couple of uninterrupted hours later and I knew the absolute latest point to start the decreases and use the most yarn. The good news? There was only 1.5 repeats between me and the first bind off. 

Don’t let silly excuses hold you back from knitting and projects you love.  | withwool.com

I haven’t been able to put the shawl down since. It’s been my constant companion during long drives, low key parties, and tv time.  And I bound off the first point yesterday! There’s still a lot of stitches between now and binding off the last stitch, but it won’t take long at the rate I’m knitting. If I hadn’t let some silly excuse hold me, I’d probably be wearing this shawl right now. Well, it’s summer, so probably not right now, but maybe during that last surprise snow storm. 

And Now There's Swatching

Even when knitting swatch doesn’t work out the first time, there’s still plenty to learn from it. | withwool.com

I usually keep a knitting project in my bag for when I’m out and about, but not in the past few weeks. None of my other projects are suited for purse knitting. They’re too big, too complicated, or too bulky. So I’ve got to start something new so my bag doesn’t feel worryingly empty. 

I want to make a pair of mitts from my Sockhead leftovers but I can’t decide how just what I want the pair to look like. Plus it’s hard to design a pattern and write down the instructions standing in line at the grocery store. Socks, my usual travel project, aren’t all that exciting right now. What I really want to knit is another hat from fingering weight yarn. I even picked out a pattern, Regina by Alex Tinsley

Even when knitting swatch doesn’t work out the first time, there’s still plenty to learn from it. | withwool.com

Casting on willy-nilly for a fingering weight hat seemed like a bad idea so knit a small swatch last night. It went well until I started the pattern. I managed to muck up the lace on row 3. Not a good sign. And I definitely need a cable needle to work the cable twist. Plus, I’m not a fan of how firm the fabric is working up which means I need to go up a needle size or two. 

The swatch wasn’t a total waste though. The ribbing looks good and stretchy on the current needles which is a good start. I like how the yarn, Knit Picks Hawthorne Kettle Dye in Picnic, is working up too. It’s a good fit for the pattern and adds interest without overwhelming the lace and cables. 

After a bit more swatching with a larger needle or two, I’ll be able to cast on for real. The ribbing will be good purse knitting after all. Still not sure what I’m going to carry around in the mean time. 

The Sockhead Hat

How the Sockhead Hat pattern showed me the greatness of hats knit from fingering weight yarn. | withwool.com

I was kicking myself for taking so long to make this hat because it seemed like I’d finish it just to pack it up for next Winter. But then it started snowing the afternoon I bound off. So, I guess my timing was perfect. 

The Sockhead is the first hat I’ve made out of fingering weight yarn. Every other hat I’ve made has been knit from sport, worsted weight or bulkier. Those yarns certainly work up faster, but I also thought they’d be warmer because it’s a thicker layer. This hat, worked at reasonable gauge of 8 stitches an inch, certainly proved that theory wrong. The Bearded One and I went on a spontaneous 8+ mile walk through the falling snow. I wore snow boots, a down jacket, this handspun cowl, and of course the Sockhead hat. Not once did my head get cold even with the wind and heavy snow flakes. 

How the Sockhead Hat pattern showed me the greatness of hats knit from fingering weight yarn. | withwool.com

And the other thing that makes this hat awesome is that it has the perfect amount of slouch. I can fold up the ribbing for a medium slouch (and extra warm ears) or not fold it all for maximum slouch. 

There’s also something to be said to have a hat that looks good with pretty much every coat I own. And having enough yardage leftover to make a matching pair of mitts is icing on the proverbial cake. 

How the Sockhead Hat pattern showed me the greatness of hats knit from fingering weight yarn. | withwool.com

I know it’s a lot of “boring” stockinette, but if you’ve got a skein of fancy sock yarn that doesn’t want to be socks or a shawl, consider making a Sockhead Hat. The finished hat is definitely worth the effort. 

The Specs:
Pattern: Sockhead Hat by Kelly McClure
Yarn: 319 yds Rio de la Plata Yarns Sock Multicolor (sadly discontinued)
Needles: 2.5 mm circular needles
Dates: February 19 - April 27, 2017
@Ravelry

Bringing Back The Creative Mojo

#The100DayProject got me spinning yarn again, and brought back my creative mojo! | withwool.com

There’s been a lot of making going on around here, and I have #The100DayProject to thank. I was in a bit of a making rut the past few months. Didn’t really want to knit, spin, or draw beyond the simplest doodle. Reading, video games, and staring on my phone claimed my free time. I don’t regret how many books I read or hours spent playing games, but I knew I’d need a push to get making again. #The100DayProject turned out to be just the thing. 

#The100DayProject got me spinning yarn again, and brought back my creative mojo! | withwool.com

I had started spinning the big purple gradient in March in bits and pieces. It certainly wasn’t the every day project that it is now. I’m glad that changed because there’s no way I’d have 4 finished skeins and have started the 5th otherwise. Being halfway through with what feels like a rather large project - at only 6 ounces of fiber total, it’s not - is rather nice. I had a sneaking suspicion that would be the case. 

#The100DayProject got me spinning yarn again, and brought back my creative mojo! | withwool.com

What I didn’t expect was that a routine of daily spinning would bring back my drive to knit on slumbering projects, draw more complicated sketches, and even fiddle around with video editing. At the beginning of March just the thought of that stuff made me tired. Now now. My Sockhead Hat is a few rows taller and my past due gift knitting is almost done. My sketchbook is getting full and I put together a short video of a bobbin filling up with chain-plied yarn. 

I wish I could put my finger on exactly why a daily project recharged my creativity. I’d certainly use the trick to hack my behavior on a regular basis. Maybe it’s seeing daily progress. Maybe it’s because I’m solving puzzles and focusing on the details. Whatever the cause, this high tide of creativity isn’t going to last forever, so I’m going to enjoy it while it’s here. Then I’ll enjoy the low tide too and take a break. When I’m ready to start making again, I’ll pick another daily project and see where it takes me.

Interweave Yarn Fest 2017 Haul

I had a blast at Interweave Yarn Fest 2017, and came home with some great goodies for the stash. | withwool.com

I made it 72 days without buying yarn or fiber for myself before breaking my Cold Sheep streak at Interweave Yarn Fest. Besides from 2 skeins I bought to knit a baby gift, all of my knitting and spinning has come from the great stash repository that is Yarn Fort.

I had a blast at Interweave Yarn Fest 2017, and came home with some great goodies for the stash. | withwool.com

So what did I get at Yarn Fest? Just the stuff that absolutely called out to me and that I had a plan for. I’m always enthralled by the colors in the Western Sky Knits booth and couldn’t walk away without at least one skein. Her grays are incredible, and how could I turn down lustrous green on a BFL/silk blend. They’re destined to be shawls or cowls. The skein on the right is Brown Sheep Lana Worsted and I couldn’t resist the colors. My first idea was that it would become a hat or mitts, but now I’m thinking about slippers. Either way, that yarn will turn into something cosy. The mini-skein kit I bought as a gift only now I want to keep it for myself. I’m still waffling about what to do about it. Knitting it up and giving that away counts too, right?

I had a blast at Interweave Yarn Fest 2017, and came home with some great goodies for the stash. | withwool.com

One of my main fiber buying goals was to find fiber to spin for a friend of mine. I couldn’t find the right colors though. Still found stuff for myself though, so I didn’t go home empty handed. In a big departure from my usual color picks, I bought a lot of black mixed up with bright colors. 8 oz is a Rambouillet/Columbia cross from Brown Sheep. 4 oz is a beautiful carded prep of Shetland, Alpaca, and silk noil, perfectly named Stained Glass, by The Natural Twist. My last pick is 8 oz of BFL and Tussah Silk. It was the first roving that caught my eye when I wandered the booths and I kept coming back to it. I had no plan for it, still don’t, but I’m not going to let it languish.

I had a blast at Interweave Yarn Fest 2017, and came home with some great goodies for the stash. | withwool.com

I got some not yarn too: two beautiful project bags from Sincere Sheep, a yew wood shawl pin, and buffalo/merino socks.   

All in all, I’m thrilled with what I got. And as someone doing the Cold Sheep thing, I regret nothing about my purchases. Going to Yarn Fest and other local fiber festivals has been part of my Cold Sheep plan from the beginning. I went knowing what I already had and what I wanted which really curbed the urge to buy all the things. Telling myself I didn’t have to spend every cent I brought helped too. The stash got some fresh new additions that I’m excited about and don’t feel overwhelmed by. That’s a win and the ultimate end goal of Cold Sheep for me.    

Sockhead in Progress

Yarn from the deep stash finally told me what it wants to be - a Sockhead Hat! | withwool.com

My sock knitting mojo has disappeared. Once I bound off the last pair, cosy and nice as they are, I wasn’t excited to start another pair. So I didn’t, but I still wanted some auto-pilot purse knitting. 

The good thing about having a sizable stash is that I can still find yarn I want to use even if a particular kind of project doesn’t appeal. This time a skein from the deep stash circa 2012 was calling my name. I had wandered into my favorite yarn shop way back when because it seemed like something fun to do and found this beauty on the clearance shelf. I loved it and bought it even though I had no clue what to do with it which is how a lot of yarn came into my stash. I figured the yarn would tell me what it wanted to be eventually. Didn’t expect it to take 5 years though. 

Yarn from the deep stash finally told me what it wants to be - a Sockhead Hat! | withwool.com

The yarn wanted to be a simple, slouchy hat which is great because my hat knitting mojo is on the rise. The marled colors would hide anything detailed or lacy so I kept things simple and went the with Sockhead Hat. The 13,573+ projects on Ravelry can’t be wrong, right? Sockhead has been in my queue for awhile, but I could never pick a yarn to use until now. Plus, I’m in the mood for auto-pilot knitting at the moment and this is the perfect project. 

A post shared by April Klich (@aprilklich) on

I knit a mini swatch to find the right needle size and get gauge before casting on. If only the swatch hadn’t lied to me. I’d almost finished the 4” of ribbing when I tried it on. My slouchy hat was tight and not slouchy at all. I put it in time out for a couple days and then ripped it out. Cast on again with 160 stitches the second time around, and it seems to be the magic number. The ribbing is cosy without feeling tight and the stockinette seems perfectly slouchy. Hope I have enough yarn to knit the hat as long as the pattern calls for. And that the longer circular needle I ordered arrives soon. Don’t want to tug the slightly too short cable just so every round for magic loop.  

Yarn from the deep stash finally told me what it wants to be - a Sockhead Hat! | withwool.com

FO: Meadow Multi Socks

Toe-up socks with afterthought cuffs make perfect travel knitting. | withwool.com

It’s March and it feels a little strange to be thinking about holiday parties right now, but that’s when I cast on for these socks. I needed something to keep my hands busy at a potluck last December and a pair of toe-up socks were just the thing. Then the pair was my constant companion, even if I didn’t always take them out of my purse. They flew cross-country and back, went to movies, binge watched tv, and went skiing with me too. I’ve got a lot of memories knit into these socks even if they are just a simple 2x2 rib.    

Toe-up socks with afterthought cuffs make perfect travel knitting. | withwool.com

The pattern is my own default toe-up vanilla sock with an afterthought leg. Ever since trying Cat Bordhi’s Houdini Socks pattern, I really prefer it over working an afterthought heel. When you bind off the cuff, you’ve got a finished sock - aside from weaving in ends - that’s ready to wear. That beats having to come back and add a heel any day of the week. 

Toe-up socks with afterthought cuffs make perfect travel knitting. | withwool.com

The weather’s been on the weird side for the past few weeks. It snowed for a couple of days, and by the end of the week temps were in the 70’s. I didn’t need a jacket, let alone a pair of wool socks. And now it’s chilly again. Weird. At least the socks are ready to warm my toes when it does get cold. 

Toe-up socks with afterthought cuffs make perfect travel knitting. | withwool.com

The Specs

Pattern: My Default Toe-Up Sock with an Afterthought Cuff

Yarn: Knit Picks Stroll Multi - Meadow Multi

Needles: 2.25 mm circulars

Dates: December 13, 2016 - February 18, 2017 

@Ravelry

FO: My First Handspun Socks

My first pair of handspun socks is off the needles and on to happy feet! | withwool.com

When I was first learning spin, one of my far way goals was to spin durable yarn for socks. It took me a few years to reach the point with my skills and confidence to try and actually succeed. Then it took me another year (or was it two?) to spin more sock yarn and finally use it for socks. This pair was for the Bearded One, which is why I finally took the plunge and cast on. When I knit to keep my own toes warm, other sock yarns and fun patterns somehow keep distracting me.

My first pair of handspun socks is off the needles and on to happy feet! | withwool.com

The yarn was always going to be the star of the show. When I sat down to design the pattern, I knew that the striping and mottled colors would only obscure a more detailed stitch. So I went with my standard vanilla sock with 2x2 rib which would also make for a well-fitting sock. I also added a princess sole, where the stockinette side of the fabric is against the foot, to smooth out any bumps that might have come with using a sometimes thick-and-thin yarn. The downside to the princess sole was that it slowed me down since I had to purl a big chunk of every row. That changed when I knit the second sock inside out, and worked the reverse of pretty much every stitch. Take my word for it, it’s much easier working lifted increases on the knit side of a fabric. 

My first pair of handspun socks is off the needles and on to happy feet! | withwool.com

I had a few worries when I cast on for this pair. One, would the half pound of yarn I spun be enough? It’s not like a I could go to the store and buy more. Two, would knitting smooth out the unevenly plied and unruly sections of yarn? Now I know the answers to both those questions are an obvious yes, but figuring that out definitely kept me on my toes. I have a few yards leftover for darning. Plus, I can’t point out the sections where the yarn was more snarled than smooth. 

The best part is that all that work - picking a yarn construction, spinning the yarn, setting the twist, designing the pattern, and then knitting two huge socks - has been rewarded. This pair is the Bearded One’s new favorite out of the many pairs of socks I’ve made for him. Knowing that does a spinner/knitter’s heart good, and makes sure the hand knit socks keep coming. 

My first pair of handspun socks is off the needles and on to happy feet! | withwool.com

Pattern: My own basic vanilla sock with 2x2 ribbing and a princess sole

Yarn: Tour de Fleece 2016 Sock Yarn 

Needles: 2.75 circulars

Dates: September 22 - December 11, 2016

@Ravelry 

How To Block A Ribbed Scarf

How to Block a Ribbed Scarf. And what does it mean to block knitting anyway? | withwool.com

I was thrilled to bind off the Melded Scarf, you can get the pattern here, but I knew I wasn’t done. The first few inches I reknit after frogging looked wonky. There were rows that stood out more than the rest. I could tell where I stopped knitting one night and picked it up again the next day. I knew I had to block the scarf to wash it and get it looking and feeling it’s best.

What is blocking?

Blocking is a finishing technique that makes a piece of knitting go from good to great. Blocking evens out stitches and gives the knitting - scarf, shawl, or sweater - it’s final shape. I think many knitters picture complicated lace shawls that have been stretched and pinned to the limit when someone mentions blocking.  But blocking doesn’t equal stretching. It’s wetting, laying out the knitting in the shape you want it to be, and letting the piece dry. 

Every natural fiber yarn benefits from blocking. Blocking can drastically change natural fiber yarns. Yarn can “bloom” and get softer. Stitches can grow and stretch. Gauge can definitely change and affect the size of a finished piece.  So always knit a big swatch and block it the way you’d block the finished project.  Blocking will even out stitches worked in synthetic blends like acrylic, but it won’t do much more then that.

There are several different ways to block knitting and different fibers do better with different methods. The Melded Scarf I’m working with is 100% non-superwash wool which reacts well to wet blocking, the method I’m using here. Check the care instructions for your yarn to choose the best method for your project.

Materials:

  • the scarf
  • a no-rinse wash (I use Eucalan. ) 
  • a large flat surface that you can put pins in (foam mats, carpet, or a DIY board
  • a towel
  • a tape measure
  • a ruler
  • a few rustproof pins

Step-by-Step

1. Fill a sink or small tub with cool water and add a capful or two of no-rinse wash. Submerge the scarf and let it soak for about 20 minutes. 

2. Take the scarf out of the water in one big lump. Squeeze out as much water as possible, but don’t wring it, before laying it out on a towel. Roll the scarf up in the towel, and squeeze out even more water. Standing on the scarf burrito works well for me. 

How to Block a Ribbed Scarf. And what does it mean to block knitting anyway? | withwool.com

3. Unroll the towel where you’re going to block. Then lay the scarf out flat, making sure that it’s in a straight line. Also make sure that there aren’t any parts of the ribbing that look more stretched out. 

If, like the Melded Scarf, your scarf has 2 distinct halves, use the tape measure to make sure both halves are the same length. If one half is longer than the other, carefully pull on small sections of the shorter side. Work from the middle to the end. The scarf is vary malleable at this point so you won’t have to do much to gain an extra inch or two. 

How to Block a Ribbed Scarf. And what does it mean to block knitting anyway? | withwool.com

4. Time to break out the ruler. Hold it across the scarf to make sure the width is the same from end to end. For this scarf, that’s about 6”. Where the scarf is narrower, pull out both edges to the width you want. Working an inch or two in from the edge will keep the ribbing from looking more stretched out than the rest of the scarf. 

How-to-block-a-ribbed-scarf-step-5.jpg

5. To get crisp corners at the ends, pull each corner to the shape you want and pin it. 

6. Let it dry, take out the pins, and you’ve got a cosy new scarf.

How to Block a Ribbed Scarf. And what does it mean to block knitting anyway? | withwool.com

Video Tutorial: Carrying Yarn Up The Side Of Your Knitting

 Learn how to work stripes and carry yarn up the side of your knitting with this video tutorial. | withwool.com

With the release of the Melded Scarf pattern, which you can find here, I decided to create a video tutorial of how to carry yarn up the side of your knitting when working short and tall stripes. Why learn how? There won’t be near as many ends to weave in at the end. Plus the yarns neatly twist together and are ready to use when you need them.

If you’d like to learn how to carry yarn up the side from step-by-step photos instead, here’s a link to that tutorial.

Learn how to work stripes and carry yarn up the side of your knitting with this video tutorial. | withwool.com

The Melded Scarf is worked in 1x1 rib with a selvedge stitch on each edge which hides the carried yarn really well. You can see blips of the carried yarn on the taller stripes, but they don’t stand out. Definitely less noticeable and less work than weaving in a bunch of ends. 

How To Work "sl1 wyif"

What the knitting abbreviation “sl1 wyif” means and how to work it. | withwool.com

The Melded Scarf, get the pattern here, is a straight forward pattern to knit with 1x1 ribbing and stripes. So why is there a “sl1 wyif” worked at the end of each row and what does that mean? “sl1 wyif” is an abbreviation which means slip 1 stitch purl-wise with yarn in front. Because the "sl1 wyif" is worked at the end of the row, that slipped stitch creates a selvedge edge which gives the scarf a neat, finished edge. It also has the neat side effect of pushing and hiding the carried yarns from the stripes (video tutorial coming Thursday) away from the edge of the scarf. 

The "sl1 wyif" along with it's opposite "sl1 wyib" - slip 1 stitch purl-wise with yarn in back - is also a big part of Mosaic Knitting, which you can learn more about here.

What the knitting abbreviation “sl1 wyif” means and how to work it. | withwool.com

So how do you work a "sl1 wyif"?

A post shared by April Klich (@aprilklich) on

1. Bring yarn to the front of the stitch

2. Slip stitch purl-wise to the right needle

Since this stitch is sitting on the end of a row, you’ll turn the scarf and start knitting the next row. No other special techniques required.  

Free Pattern: The Melded Scarf

Introducing the Melded Scarf - a free scarf pattern designed for the Foster Care 2 Success’ Red Scarf Project. | withwool.com

The Melded Scarf is what happens when two colors meet in the middle and come together to make a cosy and bold striped scarf. Worked in 1x1 rib the scarf is reversible, and looks great on anyone. The Melded Scarf is also a great showcase for variegated and gradient yarns.

Check it out on Ravelry and add it to your queue!

Introducing the Melded Scarf - a free scarf pattern designed for the Foster Care 2 Success’ Red Scarf Project. | withwool.com

I originally designed this pattern for Foster Care to Success’s Red Scarf Project which collects red scarves to send college-bound foster youth for Valentine’s Day. I first read about the project several years ago when I was a college student myself.  I probably should have been studying, but I was hunched over my laptop reading knitting blogs instead. A huge part of the reason I got into college and made it through 5 grueling years was because I had the support of my parents. Without them and their support everything from buying books, to final exams, to pulling all-nighters (saw so many sunrises from my studio desk) would have been so much more difficult. And it was so nice getting notes and surprise care packages from home. It was amazing and wonderful knowing that people were cheering me on. I wanted to share that feeling and support with others, and I still do. 

If you enjoy the pattern, please consider making a scarf for the Red Scarf Project or making a donation to the Foster Care to Success program. They provide scholarships, coaching, care packages, and an emergency fund to help foster kids get through college. And, according to Charity Navigator, the majority of the money F2C receives actually goes to it’s programs and services.

Download the Pattern
Introducing the Melded Scarf - a free scarf pattern designed for the Foster Care 2 Success’ Red Scarf Project. | withwool.com

The Doctor Who Scarf Saga: Part 2

Doctor Who Scarf Update Part 2! The scarf is finally halfway done, though my gauge is very different after 7 years. | withwool.com

Sound the trumpets! My Doctor Who Scarf is finally past the halfway point, and it’s 91.5” long. Also known as 7.6’ or 2.5 yards or 2.3 meters. Now I can make a reasonable guess that the final length (before blocking) will be about 15’. And that doesn’t include tassels either. I can only imagine how the weight of all that yarn and garter stitch’s natural tendency to stretch will change that number. Good thing I want a giant, cosy scarf. 

When I started knitting this scarf of so many years ago the uneven edges really bothered me. I was still a relatively new knitter at the time, and creating a straight edge was a point of pride. I chalked it up to using different balls of yarn since some colors pulled in and others expanded at the edges. Blocking will fix this, I thought. Now, the uneven edge doesn’t really bother me because the edges on the original scarves weren’t even either. Plus, uneven edges won’t be that noticeable when I’m wearing it. 

 Doctor Who Scarf Update Part 2! The scarf is finally halfway done, though my gauge is very different after 7 years. | withwool.com

I could have titled this post “My Gauge Is Not What It Was”. A wobbly edge is one thing, but as I knit more and more of the scarf it is impossible not to notice that my gauge has changed. The part of the scarf that was tucked away in a bag for years is about 10” across. The new stripes are about 11.5” across! Same number of stitches. Same yarn. Same needles. Different gauge 7 years later, give or take a few months.

Now I could rip back to the old section of knitting, switch to a smaller needle, and get knitting again. I could, but I’m not. I like this looser gauge and, more importantly, I’m fairly sure I’ll still have enough yarn to finish. That’s the important part after all. I might block just that one section of the scarf to get it to match the rest though I haven’t made up my mind yet. I’ve got a bit of time to figure that out.

Doctor Who Scarf Saga: Part 1

Long Term Project: The Doctor Who Scarf

Time to finish my Doctor Who scarf! | withwool.com

One of my goals for 2017 is to focus on big projects that I’ve been putting off or have put on the back burner. One of those projects is learning how to make batts on my drum carder. Another is finally darning that mountain of well-worn socks. And then there are other projects that have spent the past few years packed up in boxes. My season 16 Doctor Who scarf is one of these. 

I don't even have to look at my Ravelry notes to know that this is my oldest work in progress. The Bearded One bought me the yarn as a Christmas present years before we got married. I cast on in February 2009 (!!) and worked on it in spurts over the next year or two. It was good company to all my required reading college reading. The Scarf was several feet long by the time I put it down to work on other more interesting projects. It is nothing but garter stitch for literally miles of yarn after all. 2.62 miles of yarn if you want to be precise about it.

Time to finish my Doctor Who scarf! | withwool.com

I wasn’t trying to break any speed knitting records when I started. I figured it would be something I’d pick up and work on whenever the mood struck. Though I didn’t think it would take 8 years. But, yarn as my witness, it will not take 9. And as it turns out, my brain and fingers are craving simple auto-pilot knitting. All I have to do is count the rows for each stripe. 

Since I pulled The Scarf out of WIP limbo a couple weeks ago, I've made good progress. Past me was super helpful and included The Scarf, the pattern - complete with detailed row count progress - an accurate row counter, and one ball of each color in the bag. Evenings with tv, movies, and audiobooks have seen the scarf grow from one third complete to not quite halfway done. And it’s already 80” long. 80” long. It already makes a pretty good blanket piled up in my lap. And I can wear it while I knit on it which is pretty cosy. I can only imagine what wearing it in its full tasseled glory will be like. Well, I’d better get back to the knitting if I going to be able to wrap up in it by next winter. 

FO: Shawls for Two

I made an Elder Tree Shawl and a Myndie Shawl as gifts for two excellent friends. | withwool.com

An Elder Tree Shawl and a Myndie Shawl. These were the 2 big projects I made for the holiday gift knitting rush. I was definitely rushing and around to finish things at the last minute, but these two were first on the list so I wouldn’t stress over them. Staying up late, counting, beads, and an impending sense of doom are not a good mix for me. So, once I’d finalized the knitting gift list and pulled the needed yarn from stash, I started on the Elder Tree Shawl. It was the most complicated project on the list and I didn’t want to rush it. 

I made an Elder Tree Shawl and a Myndie Shawl as gifts for two excellent friends. | withwool.com

Elder Tree turned out to be a fairly easy knit once I got the pattern straight in my head. Except for this one repeat. It was almost finished and I was all too happy to mark my progress. Then I got to the far edge of the pattern and noticed my stitch count wasn’t quite right. My first inclination was to fudge it and keep going, but no such luck. The leaves were mashed together and I had no choice but to rip back. Still, I didn’t want to lose a night’s progress and tried ripping just that one portion. Probably would have worked too if there’d been enough yarn to work all the stitches. I ripped and reknit that one section 2 or 3 times and it never looked right. So, out came the needles, all of those rows turned into yarn again, and I spent the rest of the night making sure the yarn overs didn’t run away. Worth it. 

I made an Elder Tree Shawl and a Myndie Shawl as gifts for two excellent friends. | withwool.com

The yarn, Jojoland Melody Superwash, and the lace worked so well together. I happened to have purple beads from a previous project and they were the perfect added touch to the last repeat. This was the first time I’ve knit a beaded shawl and I love the look. Definitely need to add a few to the queue for myself. 

I made an Elder Tree Shawl and a Myndie Shawl as gifts for two excellent friends. | withwool.com

And now the Myndie Shawl. This pattern is also on the list of things I want to knit for myself this year. Once I figured out how to work the pattern in a heaver yarn, it was smooth sailing. I ended up using way less yardage than the pattern called for, but you wouldn’t be able to tell. Thanks to a firm blocking, this shawl grew from a sad looking lump to beautiful 80” long wrap. 

Knitting a shawl or anything else as a gift can be a stressful and time consuming endeavor, but I’m happy to do it for good friends and family. It’s not something I do lightly either, because every stitch is a declaration of how much I care for and appreciate the recipient. I’m not a human knitting machine after all. 

I made an Elder Tree Shawl and a Myndie Shawl as gifts for two excellent friends. | withwool.com

Pattern: The Elder Tree Shawl by Sylvia McFadden

Yarn: 431 yds Jojoland Melody Superwash - ms08

Needles: US 4 (3.5mm) circulars

Dates: September 21 - October 9, 2016

@Ravelry

Pattern: Myndie by Ambah O’Brien

Yarn: 358 yds Araucania Nature Wool - 07

Needles: US 8 (5 mm) circulars

Dates: October 10 - 16, 2016

@Ravelry  

Aubie The Captivating Tiger

Say hello to Aubie the Captivating Tiger! | withwool.com

Say hello to Aubie the Captivating Tiger! He was one of the last projects I made for the 2016 gift knitting rush, and definitely the cutest of the bunch.  At first Aubie was going to be a cat knit in a bright, unnatural color like this one, but then a few thoughts came at me all at once. One, said cat is going to be knit for the daughter of one of my best friends from college. Two, said college mascot is a tiger (War Eagle!) and there’s no lack of school spirit in their house. Three, I had yarn in perfect Auburn colors. There was no way I couldn’t knit Aubie.

Say hello to Aubie the Captivating Tiger! | withwool.com

I made the arms and tail first so I could sew them on as soon as the body was finished. I also spent a good chunk of time embroidering the face and getting the expression just so. He was technically done, but looked naked. So he got a bandana. I used my Show Off Boomerang shawl pattern as a base. When it was wide enough to cover the front half of the body, I cast on more stitches to wrap around the rest of the neck. Then I knit a few more rows, bound off, and added a button. Aubie was ready to hit the road.             

Say hello to Aubie the Captivating Tiger! | withwool.com

Since I’ve made several of Rebecca Danger’s toys, I have a few mods that I make every time. You can see the full list on the Ravelry project page. For Aubie, I also tried something new. I’ve always had a hard time sewing arms on toys with a nice looking seam. Were the arms on there? Sure, but it wasn’t always pretty. This time I used duplicate stitch, making sure to go through both layers of arm every time I made a new stitch. The seam is both sturdy and near invisible. This kind of seaming does make the arms stick up a little, but that only adds to the charm. 

The pattern base I used, Greta the Captivating Cat by Rebecca Danger, has never let me down. It’s cute in any yarn, a quick & easy project, and is a great canvas for special added touches. Plus, kids and adults love it. I was so tempted to keep this one for myself because it was too cute. I’ve got plenty of yarn to make a twin though and I’m sure I will.

Say hello to Aubie the Captivating Tiger! | withwool.com

Pattern: Greta The Captivating Cat by Rebecca Danger

Yarn: 93 yds Knit Picks Telemark, Tangelo and Skyline, and 17 yds Wool of the Andes Sport, White

Needles: US 3 (3.25 mm) circulars

Date: December 3 - 11, 2016

@Ravelry

2016 Gift Tag Round-Up

It's almost time to put all those knitted, crocheted, and handmade goodies under the tree. So, I'm rounding up a few of my favorite printable gift tags to make wrapping faster and easier. Anything to get a few more minutes of knitting time is a good thing!   

And here's the last gift tag round up with even more goodies!

Lovely, and simple gift tags for puresweetjoy.com

I love the simplicity of this lovely gift tags from puresweetjoy.com.

Enjoy these cute fox and reindeer gift tags with Scandinavian flair from foxandhazel.com

Looking for something cute and colorful? foxandhazel.com has beautiful gift tag printables with a Scandinavian twist. 

Gift tags with just the right amount of snark from smallfriendly.com

Need a little snark to go with your handmade gift? smallfriendly.com has you covered. 

Printable gift tags with vintage flair from Sew DIY.

Want a vintage touch to your tags? Here are some simple, cuties from Sew DIY

Sweet and straight to the point gift tags from masondixonknitting.com

Simple and straight to the point gift tags are great too. Get this free tag from masondixonknitting.com.

Free Pattern: Waffle Time Washcloth

The Waffle Time Washcloth is just the right size with a stitch pattern that looks great on both sides. | withwool.com

After knitting more washcloths and kitchen towels than I care to count, I have some very definite opinions about washcloths. The stitch pattern doesn’t have to be reversible, but it should look good on both sides. Garter stitch borders are a plus. Cloths with a bit of texture are perfect for scrubbing. And any washcloth much larger than a 7” square is unwieldy and too big. 

The Waffle Time Washcloth is just the right size with a stitch pattern that looks great on both sides. | withwool.com

I wanted to make a few washcloths as gifts and couldn’t find a pattern that I matched all my criteria. So I picked a scrubby stitch pattern and went from there. The cloths were quick to knit, and they’ll be sweet gifts with some lotion and a nice bar of soap.

If you share any of my opinions on washcloths, you can get the pattern below. Happy knitting! 

Download Now
The Waffle Time Washcloth is just the right size with a stitch pattern that looks great on both sides. | withwool.com

Still Gift Knitting

Just need to finish this tiger and I’ll be so close to finishing 2016’s gift knitting. | withwool.com

I’m knitting a tiger. Well, a cat with orange and blue stripes. The pattern, Greta the Captivating Cat by Rebecca Danger, is one I’ve knit before with great results. It’s cute, cuddly, and sweet too. Once you cast on, it’s also a fast and simple knit though it doesn’t seem that way if you knit the body and then the arms, tail, and ears. To speed things along and get a finished tiger sooner, or at least make it seem that way, I knit the arms and the tail first. Then I don’t have to wait to sew them on. Anything to make holiday gift knitting in December a smoother process is fine by me. 

As for the rest of this year’s gift knitting, I’m calling it. All the big stuff I wanted to do, is done aside from a good soak and blocking. It’s all the little things that I kept adding to the list that I’m skipping. The endless variations of ornaments and “wouldn’t this be neat” things were stressing me out. So they’re gone. I’m going to knit a few ornaments, finish that pair of handspun socks, and call it good. Besides, I’d much rather stay up late playing Final Fantasy XV than worry over my knitting. My wrists and shoulders are already thanking me.