Estes Park Wool Market

I went to the Estes Park Wool Market and had a great time with yarn, sheep, and border collies. | withwool.com

Early this year I started putting together a list of 100 things I wanted to do. There are small things like riding my bike around town and big things like taking a trip to Yellowstone. I am no where close to even having 100 things I want to do written down, let alone completed, but a big chunk of that list is fiber arts related. No surprise, right? Well, I wrote “Go to a fiber festival” and I was finally able to do just that on Saturday at the Estes Park Wool Market.

I went to the Estes Park Wool Market and had a great time with yarn, sheep, and border collies. | withwool.com

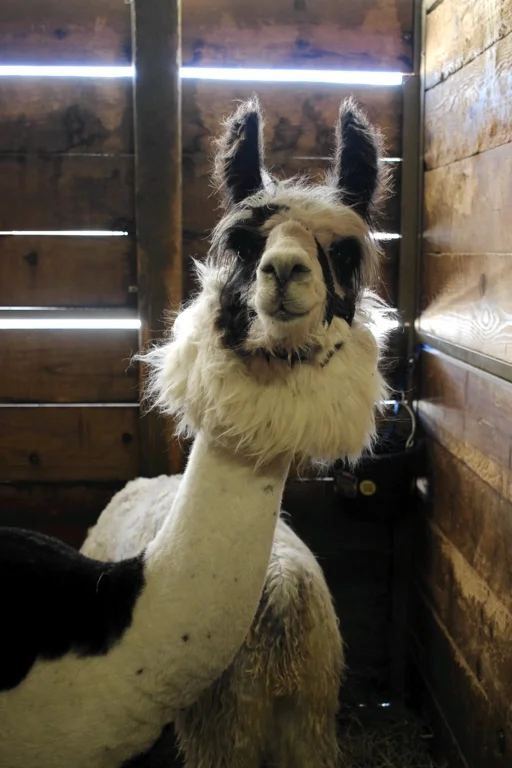
There were sheep, goats, llama, and alpacas. Some of them really hammed it up for the camera.  

I went to the Estes Park Wool Market and had a great time with yarn, sheep, and border collies. | withwool.com

I tempted the Bearded One to come with me with the promise of herding dogs. We were able to see amazing Border Collies at work, and then we got to pet them! They were such a sweet bunch too. This handsome guy’s name is Bruiser.

I went to the Estes Park Wool Market and had a great time with yarn, sheep, and border collies. | withwool.com

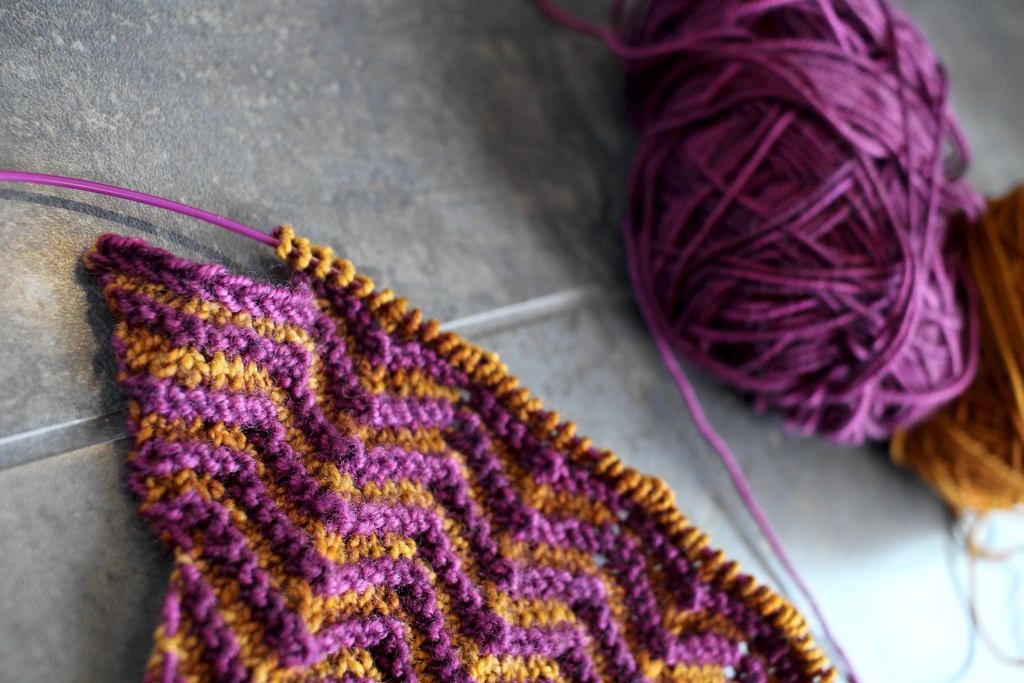
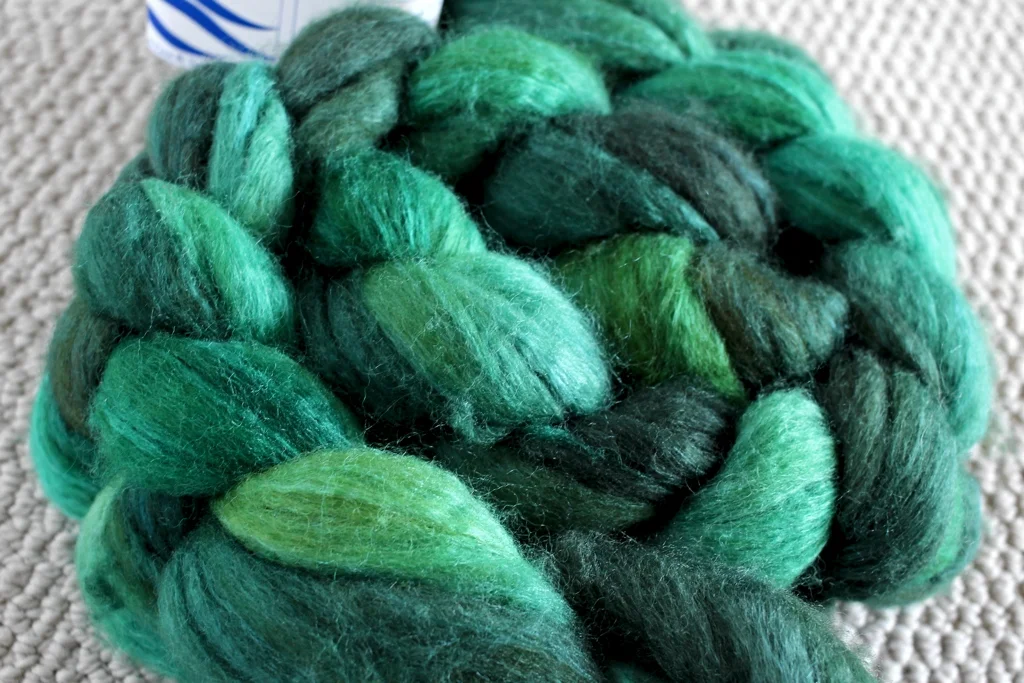
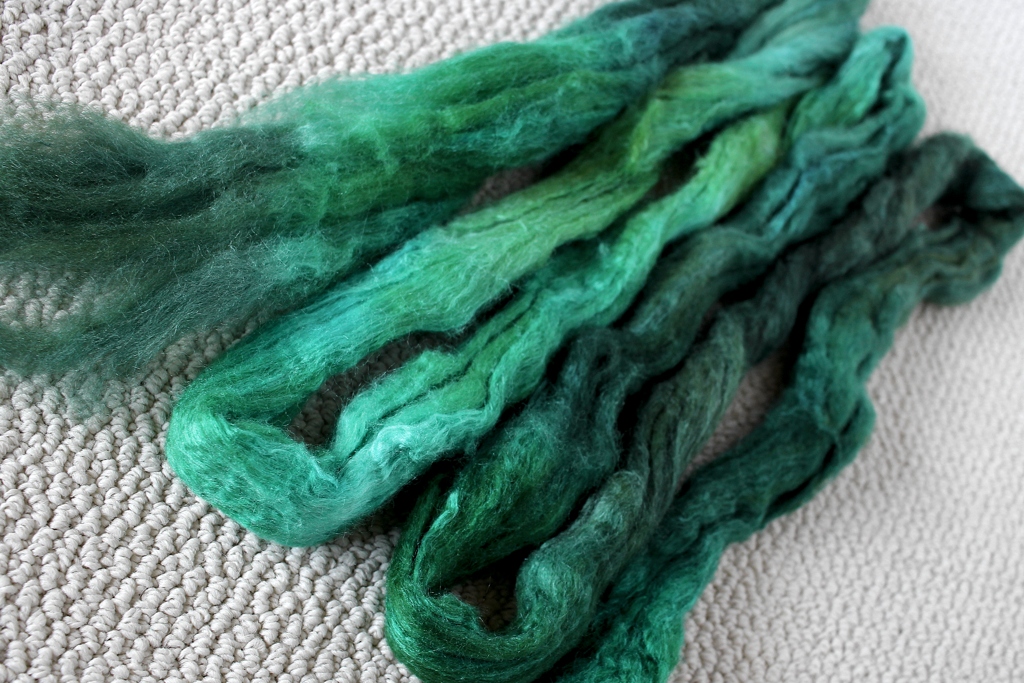
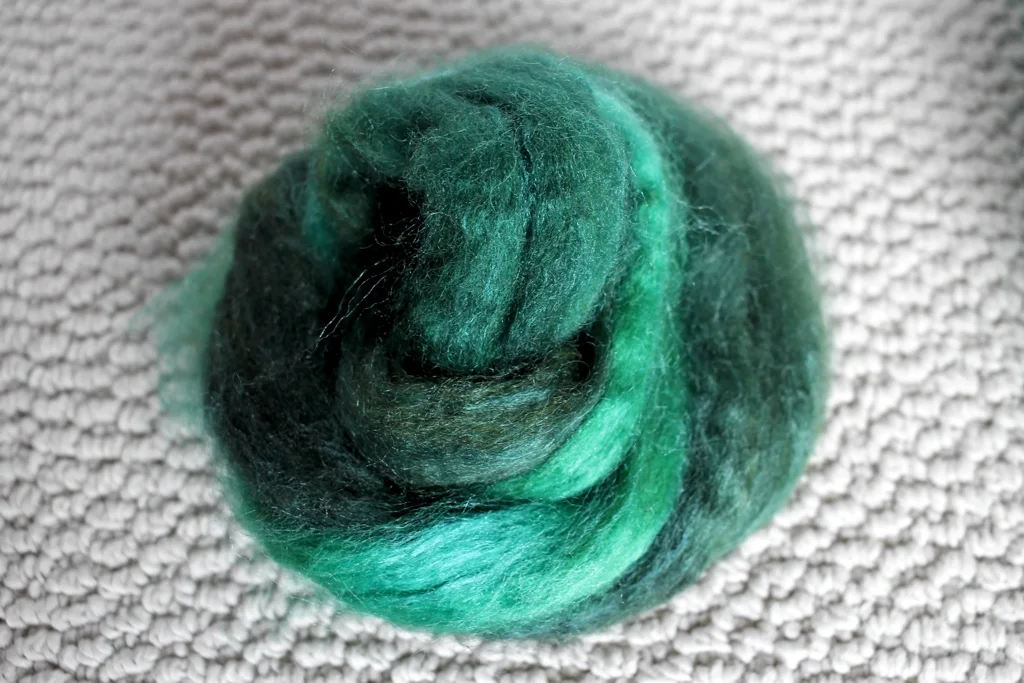
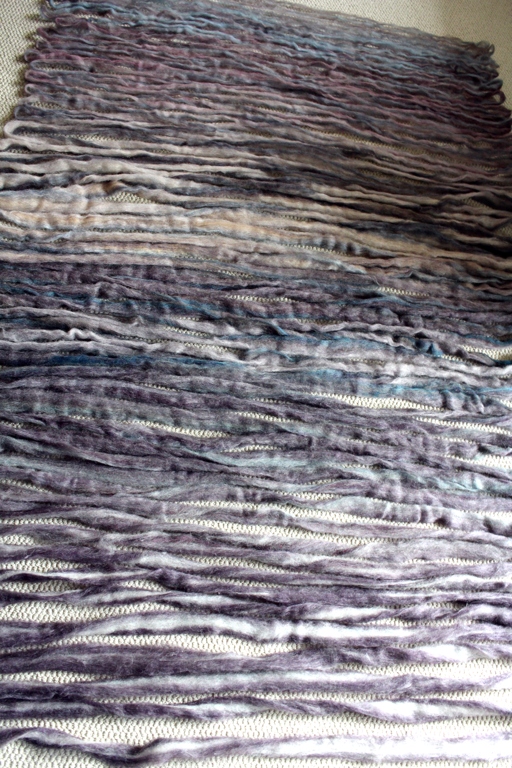
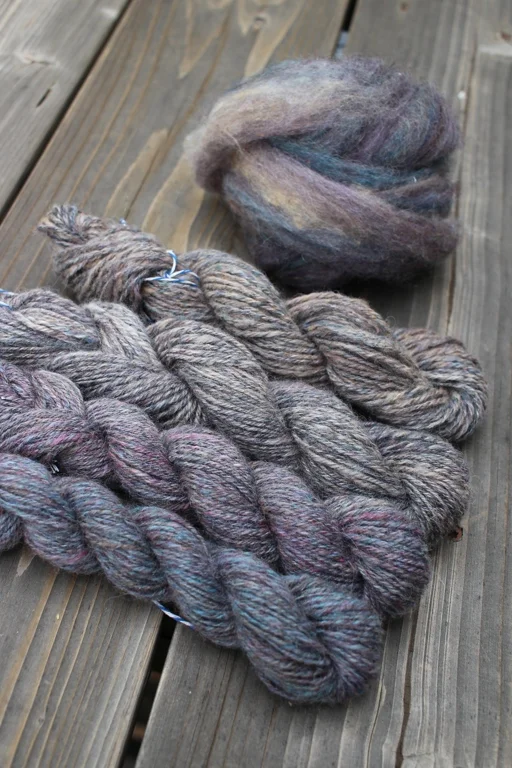
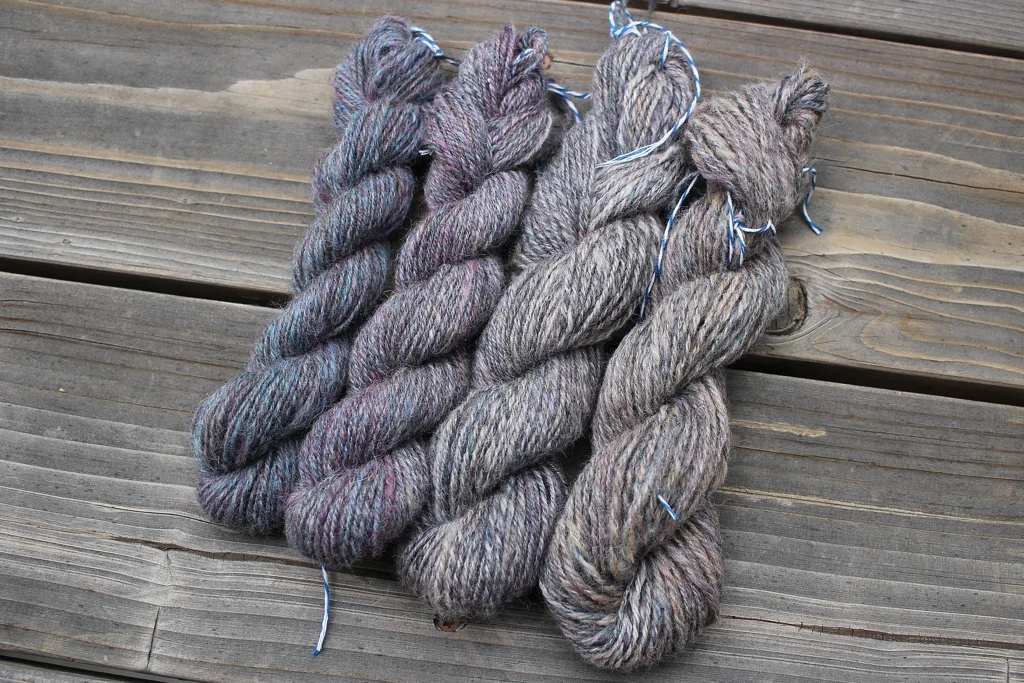
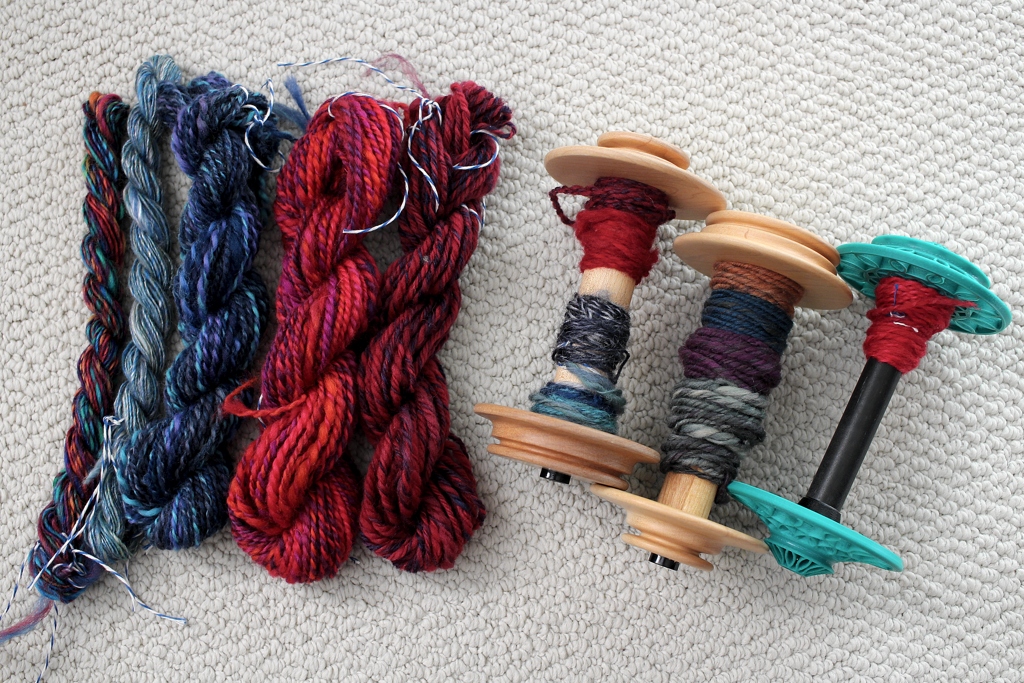
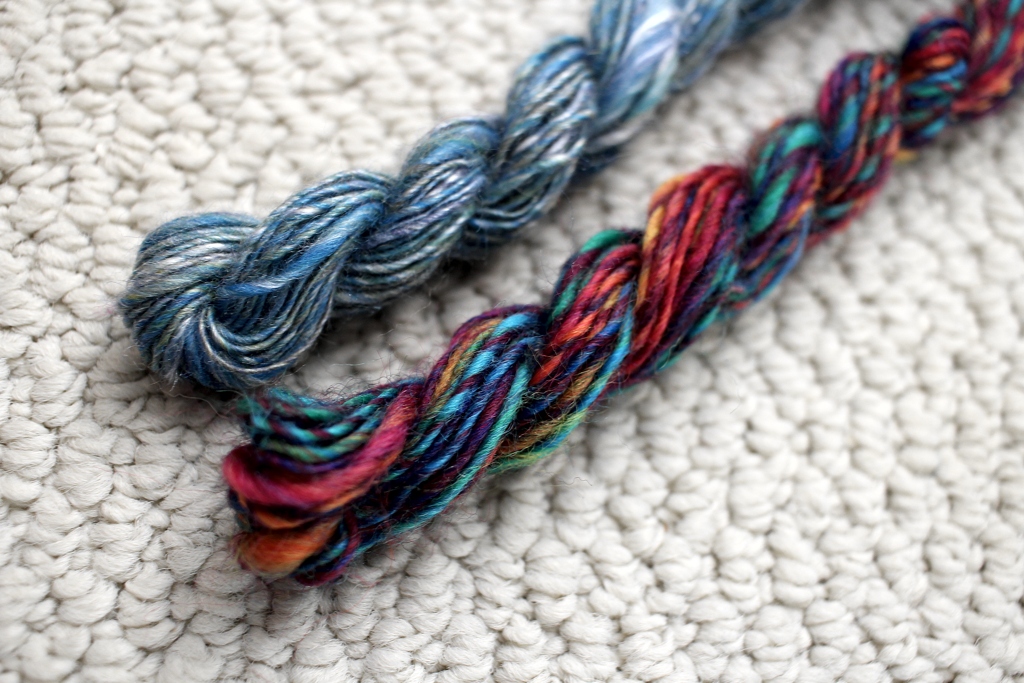
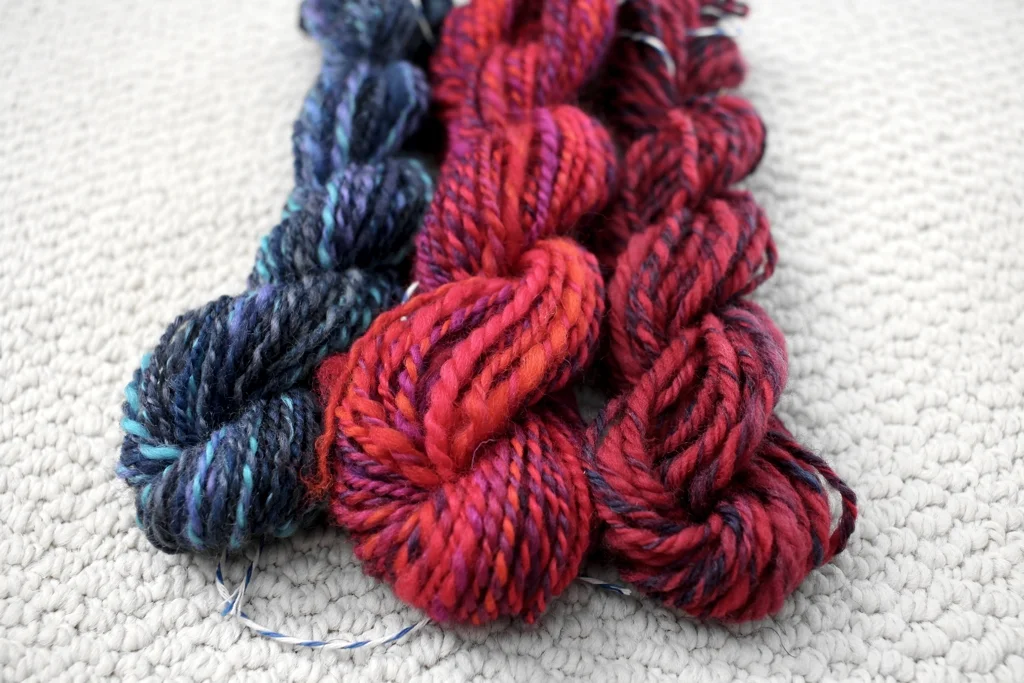
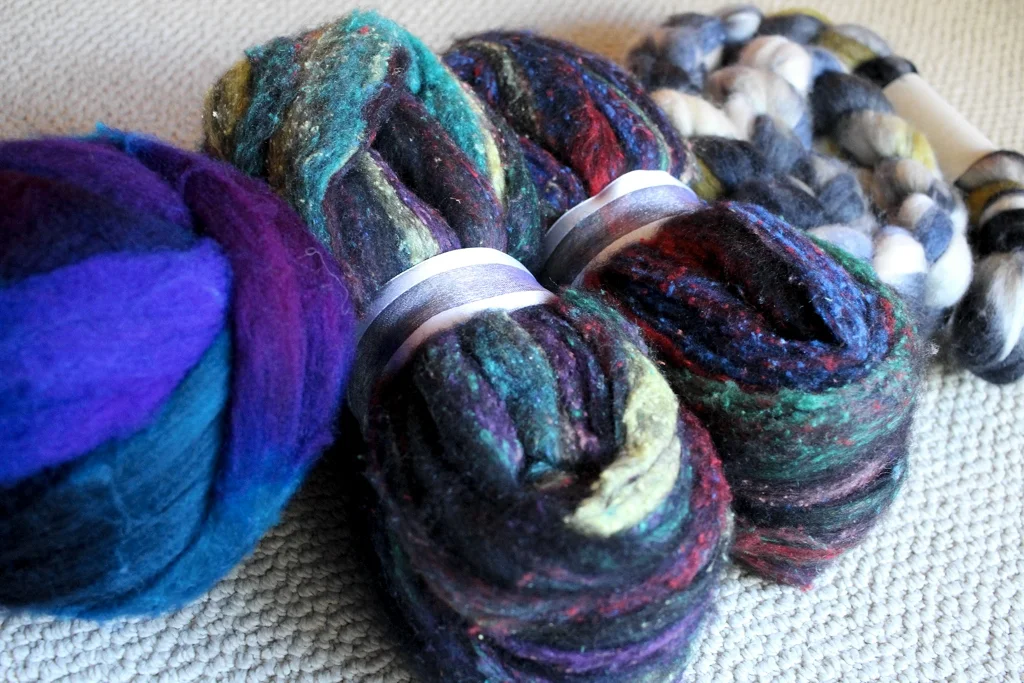
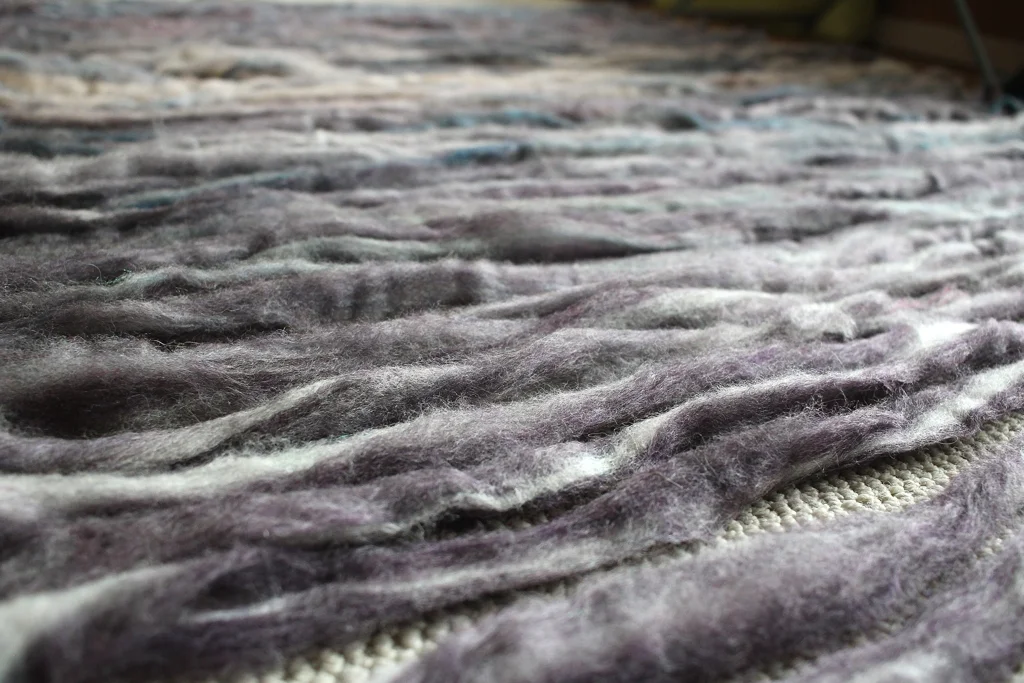
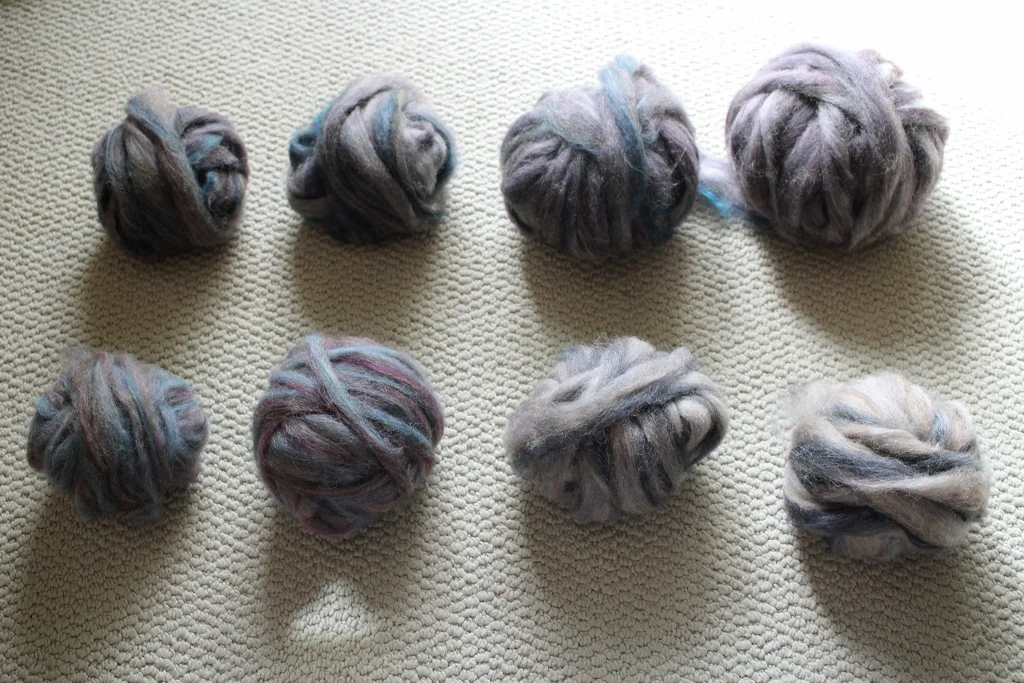
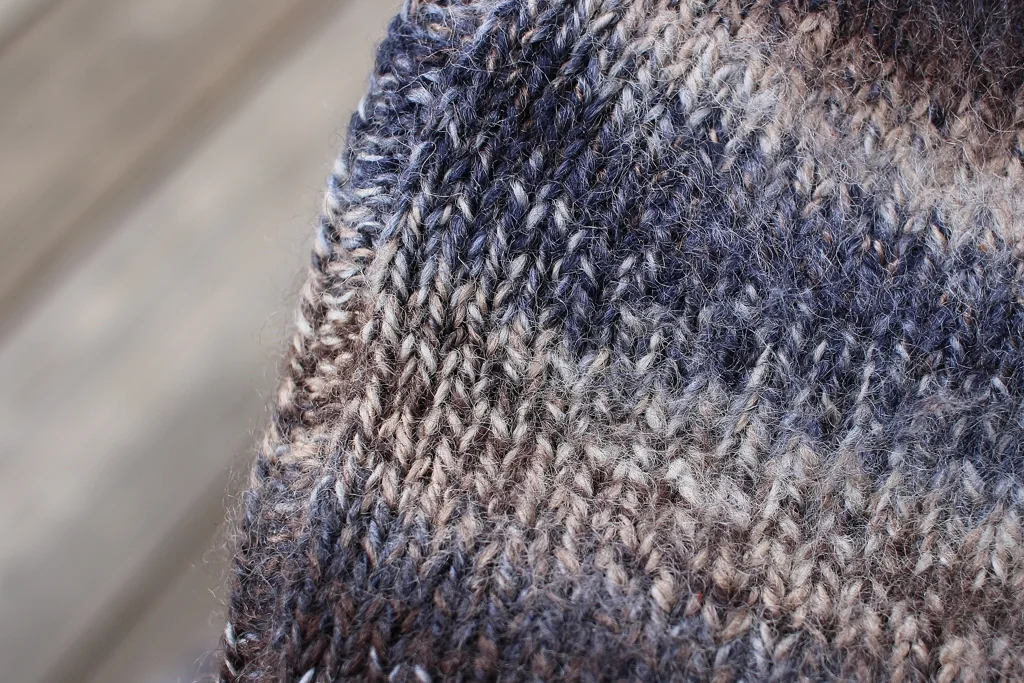
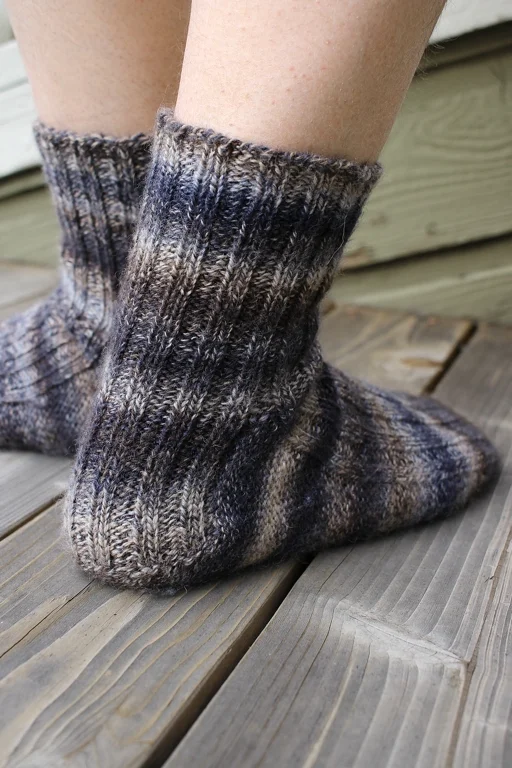
There were so many venders with beautiful yarn and fiber, and I couldn’t resist enhancing the stash. I fell hard for 200 yards of bulky 100% alpaca spun together with metallic thread. So soft and cuddly. Then I broke from my usual color scheme and bought a wild variegated skein of pinks mixed with dark, muted colors by Traci Bunkers. And I got an awesome wool/bison felt hat from The Buffalo Wool Co. It kept the sun out of my face for the rest of the day. Looks good too. 

I went to the Estes Park Wool Market and had a great time with yarn, sheep, and border collies. | withwool.com

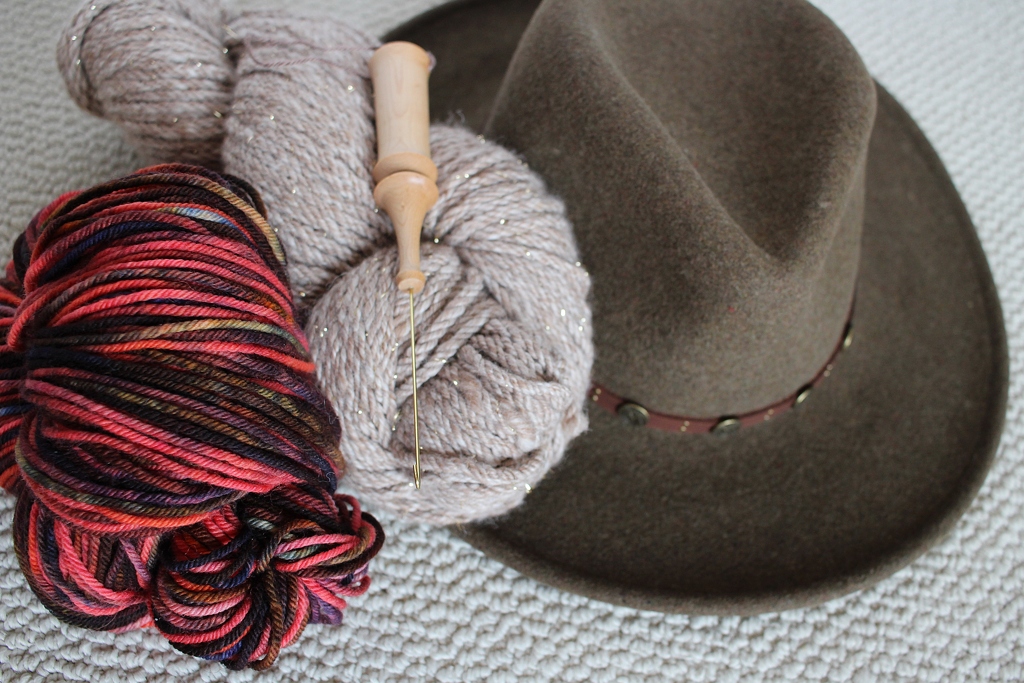
The last thing I bought was an orifice hook for my wheel. I’ve only been trying to find one that would comfortably fit my hand for literally years. I found this one at Clemes & Clemes. It’s made of hand turned maple with a long hook and a spot to attach a charm or lanyard. Tried it out when I got home and it’s perfect. 

Wool Market was a great first fiber festival and I’m looking forward to going again next year. Hopefully, I’ll remember to sign up for a class or two before the deadline. I’m also thinking about submitting a skein or two to the handspun competition.     

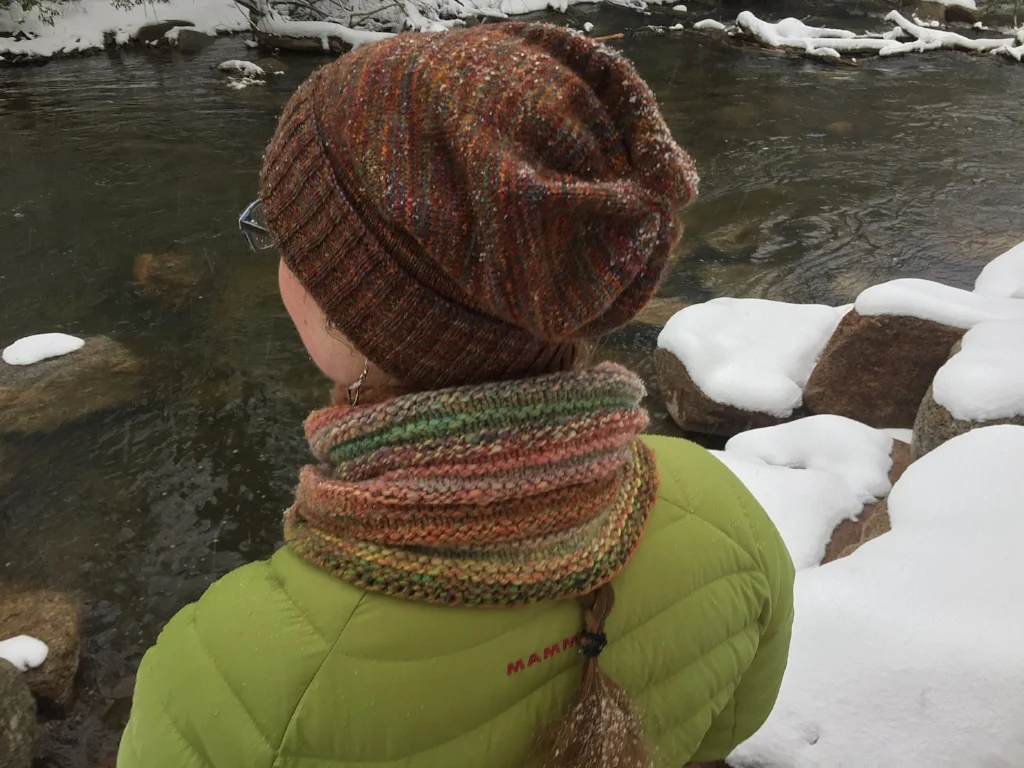
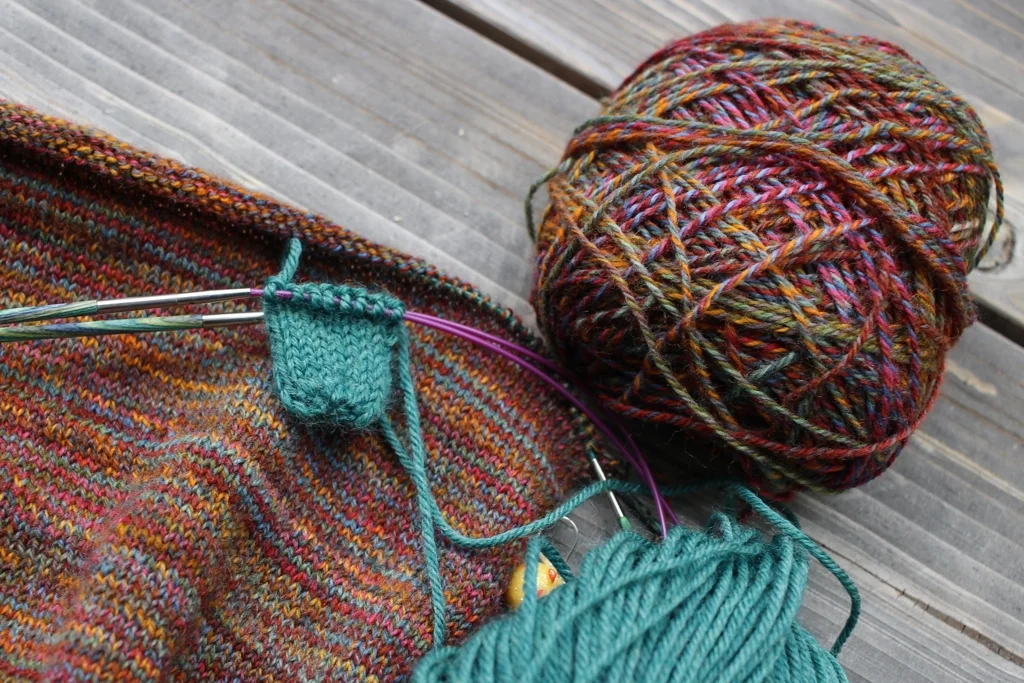
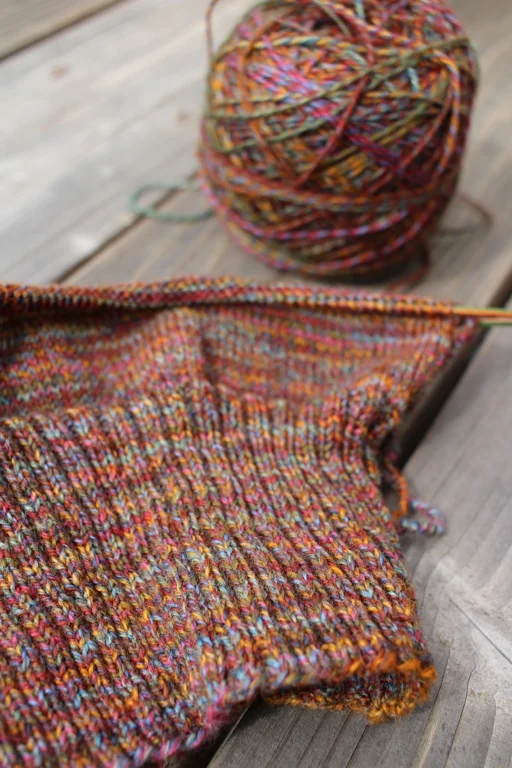
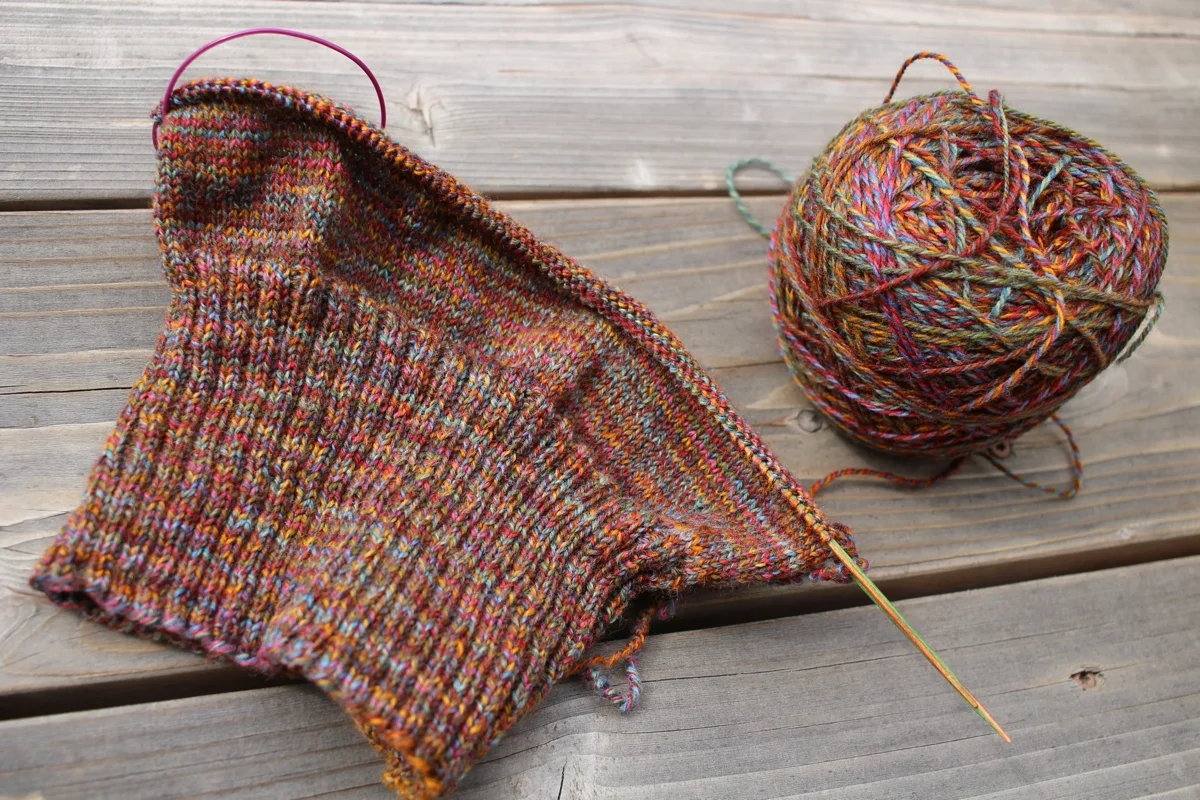
Saturday also happened to be World Wide Knit In Public Day. I made sure to get my knit on during a side trip to Rocky Mountain National Park. 

I went to the Estes Park Wool Market and had a great time with yarn, sheep, and border collies. | withwool.com

The Inseparable Duo

Rebecca Danger’s patterns never let me down with I need a cute gift. Say hello to Beatrice and Bernard! | withwool.com

I knew I was going to have leftover yarn. Not a tiny little ball I could put in my hand and post to Instagram tagged #socute. Nope. After binding off the February Baby Sweater, I had about 125 yards to work with and I want to make something cute to match. I thought about booties and hats but shelved the idea. I wanted something that could be used and enjoyed for more than a few minutes before being tucked away in a drawer to keep safe for later. A cute, soft toy seemed like just the thing.

Rebecca Danger’s patterns never let me down with I need a cute gift. Say hello to Beatrice and Bernard! | withwool.com

Every toy I’ve made from a Rebecca Danger pattern has been a big hit. Like this cat that’s now a favorite. And this tiger. I picked The Inseparable Beatrice and Bernard this time because they’re adorable and not too big. The fact that the duo is a relatively quick and easy project might have had something to do with it too. Didn’t hurt that I already had the right safety eyes too. 

I knit the arms and tail first just to get the fiddly bits out of the way. Knitting the bodies went fast once I actually sat down to do it. I followed all my usual mods, which I’ve listed on the Ravelry project page, and ended up with 2 adorable buddies. And who could resist that cute bunny tail!

A post shared by April Klich (@aprilklich) on

Pattern: The Inseparable Beatrice and Bernard by Rebecca Danger

Yarn: 57 yds Cascade 220 Superwash - Lake Chelan Heather

Needles: US 4 (3.5 mm)

Dates: March 28 - April 28, 2017

All mods listed on Ravelry

The Famous February Baby Sweater

Pithy instructions, a little garter stitch, and a bunch of lace make up the famous February Baby Sweater. It’s a good test of knitting skill too. | withwool.com

I spent the first few months of 2017 working on secret knitting. It was a baby gift for a good friend of mine, and now that the sweater is at it’s new home, I can share it with you too. When I first heard that my friend was having a baby, I thought about making a blanket. She had plenty of those coming in though so I decided to make a cute sweater instead. After scrolling through page after page of baby sweaters on Ravelry I picked Elizabeth Zimmerman’s February Baby Sweater. The pattern has been in my queue for awhile but that’s not why I picked it. It looked cute and I wanted to make something with lace for a dedicated lace knitter.  

I went into this project knowing EZ’s patterns have a reputation of being, as she calls them, “pithy”. Concise, terse, succinct, condensed… Having made a Pi Shawl a few years ago, I thought I knew what I was getting into. I was mistaken. 

Pithy instructions, a little garter stitch, and a bunch of lace make up the famous February Baby Sweater. It’s a good test of knitting skill too. | withwool.com

After years of knitting from (and writing) more detailed row-by-row instructions, the 3 paragraph pattern took some getting used to. It wasn’t that the pattern was hard to understand - the gist of it was definitely there - I just had a lot of questions about specific details. So I had to answer them for myself. Thankfully, lots of other people have knit this sweater and I found helpful mods and size charts to make a 9-month sized sweater. Swatching was definitely a requirement. 

Pithy instructions, a little garter stitch, and a bunch of lace make up the famous February Baby Sweater. It’s a good test of knitting skill too. | withwool.com

Since I was writing more detailed instructions to work from, I made a few of my own modifications to knit the sweater to my own preferences. You can find the full details on the project page.

  • Cast on more stitches and worked fewer rows before starting the first yoke increase row to get a wider neck opening.
  • Switched out the "M1" for "kfb" because it looked neater. 
  • Worked the button band over more stitches and made larger button holes.
  • I knit the body of the sweater flat, but worked the sleeves in the round. After reaching the spot to set up for the sleeves, I knit those stitches with waste yarn and decreased to get the stitch count of the sleeves. Then I came back, picked out the waste yarn, and put the live stitches on the needles to knit the sleeves just like an afterthought heel. Finicky? A little, but I got a neat, seamless join that didn’t break the lace pattern. Totally worth it in my book. 
Pithy instructions, a little garter stitch, and a bunch of lace make up the famous February Baby Sweater. It’s a good test of knitting skill too. | withwool.com

The February Baby Sweater is definitely worth the effort, and I encourage you to make one yourself. I say this counting the time that I frogged the sweater back to the cast on because I had to re-do the yoke increases. Figuring out how to get exactly what you want out of this pattern is a good test of skill that will up your knitting game. Plus, the lace and garter stitch are an absolutely beautiful combination. I am proud to give this sweater to a good friend who is also an amazing knitter. 

P.S. Since this post has gotten on the long side, I’ll show you what I did with the leftovers next. 

Pattern: Baby Sweater on Two Needles (February) by Elizabeth Zimmerman

Yarn: 317 yds Cascade 220 Superwash - Lake Chelan Heather

Needles: US 6 (4 mm)

Dates: January 18 - April 28, 2017

@Ravelry

Ditching Silly Excuses

Don’t let silly excuses hold you back from knitting and projects you love.  | withwool.com

Sometimes my knitting projects sit around for the silliest reasons. Like this one. It’s the Feeling Groovy shawl by Nim Teasdale. I started it last year as a bit of selfish knitting after finishing all my holiday gift knitting. I was making good progress on it too until I added another step. I wanted to know how many repeats I could work before starting the decreases.  

Step one involved measuring how much yarn I had . Step two was working up a repeat, or two, or three. Step three, measure how much yarn I used. Step four, do the math.  

Don’t let silly excuses hold you back from knitting and projects you love.  | withwool.com

Enter the silliest reason to hold myself up. I did weighed the yarn and then got stuck on the knitting a repeat or two. I made lots of excuses why the time was never right to knit the repeats, and made the whole process much harder than it had to be. Ugh. Then a bunch of other important must-do’s came up and the shawl languished in a project bag for a few months. Eventually I needed new purse knitting and this shawl was the easiest thing to grab. The shawl was getting bigger but I still needed to know when to start the increases. 

Side note: The pattern has some helpful notes on when to start the decreases, but I’m knitting the shawl at a tighter gauge. So I have to do my own yardage calculations for this. 

I went back to step one, kept detailed notes, and got to work on the calculations. Spreadsheets make this kind of number crunching pretty easy, but it’s still time consuming. A couple of uninterrupted hours later and I knew the absolute latest point to start the decreases and use the most yarn. The good news? There was only 1.5 repeats between me and the first bind off. 

Don’t let silly excuses hold you back from knitting and projects you love.  | withwool.com

I haven’t been able to put the shawl down since. It’s been my constant companion during long drives, low key parties, and tv time.  And I bound off the first point yesterday! There’s still a lot of stitches between now and binding off the last stitch, but it won’t take long at the rate I’m knitting. If I hadn’t let some silly excuse hold me, I’d probably be wearing this shawl right now. Well, it’s summer, so probably not right now, but maybe during that last surprise snow storm. 

Sampling To Spin With Purpose

I’m starting a new handspun project, and relying on spinning mini-skeins, aka sampling, to set me up for success. | withwool.com

A good friend of mine has said for years that she’d like to knit with my handspun. I kept the request in the back of my mind, but didn’t really take it seriously until I was able to consistently spin the kind of yarn she liked to use. That would be fingering weight yarn. We settled on 2 choice skeins of 100% cashmere as equitable bribery, I mean compensation, and I got to work.

I’m starting a new handspun project, and relying on spinning mini-skeins, aka sampling, to set me up for success. | withwool.com

The first step was finding the right fiber. My friend likes to knit complicated lace shawls and wants to make one with this handspun. So right off the batt, I had a clear set of requirements to meet:

  • The yarn should be a 2-ply fingering weight.
  • The final yardage should be between 500 - 600 yards.
  • The colors need to be similar in tone and hue so they won’t distract from the lace. 
  • She likes to work with wool and wool/silk blends.
  • Preferred colors are dark blue or emerald green. 

I’m happy to have these very specific requirements, because they take a lot of the guesswork out of the process. Instead of constraining me, knowing the end goal for the yarn makes it easier to spin. I get a clear vision of what I’m working toward from the beginning which is rather freeing. As much as I enjoy spinning for the fun of it, finding something to do with that “just for fun” yarn can be frustrating. 

I’m starting a new handspun project, and relying on spinning mini-skeins, aka sampling, to set me up for success. | withwool.com

It took me a few months of looking around online, in stores, and at festivals before finding fiber I thought would work. After getting an okay on the color, I ordered 8 oz of Dreaming in Green, a BFL/Silk blend from Three Waters Farm. I’m not going to need all 8 oz for the handspun, more like 5 or 6 oz. Those extra ounces are for sampling. Before I dive straight in to spinning 600 yards of fingering weight handspun, I need to make sure I am. It’d be an expensive failure if I made 400 yards of worsted weight by accident. Sure, the yarn would be pretty, but not what we want. 

I’m starting a new handspun project, and relying on spinning mini-skeins, aka sampling, to set me up for success. | withwool.com

Sampling will help me figure out the right ratios and tension for my wheel. I’ll be able to fine tune my worsted drafting for a wool/silk blend. Equally as important, I can try out different methods of handling color to find what works for lace. Then I can wash and set the twist on the sample skeins to see how that changes the yarn. I’ve spun many a yarn that looks like a sport weight when it comes off the bobbin and blooms to an aran weight after setting the twist. That cannot happen this time.

So I pulled off 2 oz to experiment with. There’s no deadline and I’ve got time to answer any questions that comes to mind. I might even knit a few swatches. Time to get sampling. 

I’m starting a new handspun project, and relying on spinning mini-skeins, aka sampling, to set me up for success. | withwool.com

A Handspun Purple Gradient

8 handspun skeins, 6 ounces of roving, and 1 beautiful color gradient. I spent almost 2 months spinning this yarn, and it was worth the effort. | withwool.com

And done! The extra long purple gradient I’ve been working on since mid March is finally yarn and ready to knit. I tackled the last bit of spinning and plying last week, and got the handspun off the bobbins on Sunday. Then the later skeins got a bath to set the twist before I hung them up to dry. In fact the bigger skeins were still a wee bit damp when I took these photos.

8 handspun skeins, 6 ounces of roving, and 1 beautiful color gradient. I spent almost 2 months spinning this yarn, and it was worth the effort. | withwool.com

This felt like such a big project when I was in the middle of it. I usually spin 4 ounces at a time and keep it as one big skein. Working with 6 ounces and splitting it into 8 mini-skeins definitely changed things up. There was more upfront prep. More bobbins. More plying. More letting the twist rest overnight. More baths to set the twist (otherwise I would have mixed up the gradient order).  All that extra work tricked me into thinking it was a much larger project than it was.  An additional 2 ounces of fiber isn’t all that much, nor is 6 ounces anywhere close to a sweater quantity of handspun. When I look at the skeins all lined up, they still seem like a big project because I know just how much work, time, and brain space when into making them. Because of that, I’m proud of all 8 of these skeins. They’re the same weight and have the same finished texture. I feel like I can move onto bigger and more involved spinning projects now. Might not be all that long before I start spinning yarn for a sweater. Or a giant blanket.

8 handspun skeins, 6 ounces of roving, and 1 beautiful color gradient. I spent almost 2 months spinning this yarn, and it was worth the effort. | withwool.com

I really enjoyed spinning this fiber, and I wish I could remember the vendor I bought it from. All I know is that it’s wool and that it was one of the last things that caught my eye at Interweave Yarn Fest 2016. I wish I’d put all the details up on the Ravelry stash page when the info was fresh in my mind. Maybe I’ll find the receipt, but I doubt it. 

8 handspun skeins, 6 ounces of roving, and 1 beautiful color gradient. I spent almost 2 months spinning this yarn, and it was worth the effort. | withwool.com

Now for the technical details. Since it had been so long since I saw what was in the middle of the roving ball, I laid it all out flat. Wasn’t sure what I wanted to do before, but seeing the complete color gradient made my decision easy. I split the gradient into its 8 major color sections and wound them into nests, making sure to keep the colors moving in the same direction. I wanted to preserve the colors and variation within each section as much as possible so I decided to chain ply. 

I started with the smallest nest of fiber which just so happened to be at one end of the gradient. Then I treated this first skein as a sample to figure out how I wanted to spin the 7 other bigger skeins. You can read more about that process here.

Once I figured out which drafting method worked for the fiber and the finished yarn, the only thing left to do was to get spinning. This fortunately coincided with the start of #the100DayProject where I dedicated myself to making yarn everyday for 100 days. That little bit of daily spinning, even if it was only 10 minutes, really added up. And the 100 Day Project kept me spinning even on busy days when I would have skipped it otherwise. 

A post shared by April Klich (@aprilklich) on

Almost 2 months later, I’ve got about 560 yards of sport weight yarn. I’m sure that number shrunk when I set the twist, but there’s still plenty of yardage to make a cosy shawl. I have an idea in my head for what that will look shawl will like, and I’m almost ready to get that down on paper. I think it’s time to get swatching.  

And Now There's Swatching

Even when knitting swatch doesn’t work out the first time, there’s still plenty to learn from it. | withwool.com

I usually keep a knitting project in my bag for when I’m out and about, but not in the past few weeks. None of my other projects are suited for purse knitting. They’re too big, too complicated, or too bulky. So I’ve got to start something new so my bag doesn’t feel worryingly empty. 

I want to make a pair of mitts from my Sockhead leftovers but I can’t decide how just what I want the pair to look like. Plus it’s hard to design a pattern and write down the instructions standing in line at the grocery store. Socks, my usual travel project, aren’t all that exciting right now. What I really want to knit is another hat from fingering weight yarn. I even picked out a pattern, Regina by Alex Tinsley

Even when knitting swatch doesn’t work out the first time, there’s still plenty to learn from it. | withwool.com

Casting on willy-nilly for a fingering weight hat seemed like a bad idea so knit a small swatch last night. It went well until I started the pattern. I managed to muck up the lace on row 3. Not a good sign. And I definitely need a cable needle to work the cable twist. Plus, I’m not a fan of how firm the fabric is working up which means I need to go up a needle size or two. 

The swatch wasn’t a total waste though. The ribbing looks good and stretchy on the current needles which is a good start. I like how the yarn, Knit Picks Hawthorne Kettle Dye in Picnic, is working up too. It’s a good fit for the pattern and adds interest without overwhelming the lace and cables. 

After a bit more swatching with a larger needle or two, I’ll be able to cast on for real. The ribbing will be good purse knitting after all. Still not sure what I’m going to carry around in the mean time. 

The Sockhead Hat

How the Sockhead Hat pattern showed me the greatness of hats knit from fingering weight yarn. | withwool.com

I was kicking myself for taking so long to make this hat because it seemed like I’d finish it just to pack it up for next Winter. But then it started snowing the afternoon I bound off. So, I guess my timing was perfect. 

The Sockhead is the first hat I’ve made out of fingering weight yarn. Every other hat I’ve made has been knit from sport, worsted weight or bulkier. Those yarns certainly work up faster, but I also thought they’d be warmer because it’s a thicker layer. This hat, worked at reasonable gauge of 8 stitches an inch, certainly proved that theory wrong. The Bearded One and I went on a spontaneous 8+ mile walk through the falling snow. I wore snow boots, a down jacket, this handspun cowl, and of course the Sockhead hat. Not once did my head get cold even with the wind and heavy snow flakes. 

How the Sockhead Hat pattern showed me the greatness of hats knit from fingering weight yarn. | withwool.com

And the other thing that makes this hat awesome is that it has the perfect amount of slouch. I can fold up the ribbing for a medium slouch (and extra warm ears) or not fold it all for maximum slouch. 

There’s also something to be said to have a hat that looks good with pretty much every coat I own. And having enough yardage leftover to make a matching pair of mitts is icing on the proverbial cake. 

How the Sockhead Hat pattern showed me the greatness of hats knit from fingering weight yarn. | withwool.com

I know it’s a lot of “boring” stockinette, but if you’ve got a skein of fancy sock yarn that doesn’t want to be socks or a shawl, consider making a Sockhead Hat. The finished hat is definitely worth the effort. 

The Specs:
Pattern: Sockhead Hat by Kelly McClure
Yarn: 319 yds Rio de la Plata Yarns Sock Multicolor (sadly discontinued)
Needles: 2.5 mm circular needles
Dates: February 19 - April 27, 2017
@Ravelry

Bringing Back The Creative Mojo

#The100DayProject got me spinning yarn again, and brought back my creative mojo! | withwool.com

There’s been a lot of making going on around here, and I have #The100DayProject to thank. I was in a bit of a making rut the past few months. Didn’t really want to knit, spin, or draw beyond the simplest doodle. Reading, video games, and staring on my phone claimed my free time. I don’t regret how many books I read or hours spent playing games, but I knew I’d need a push to get making again. #The100DayProject turned out to be just the thing. 

#The100DayProject got me spinning yarn again, and brought back my creative mojo! | withwool.com

I had started spinning the big purple gradient in March in bits and pieces. It certainly wasn’t the every day project that it is now. I’m glad that changed because there’s no way I’d have 4 finished skeins and have started the 5th otherwise. Being halfway through with what feels like a rather large project - at only 6 ounces of fiber total, it’s not - is rather nice. I had a sneaking suspicion that would be the case. 

#The100DayProject got me spinning yarn again, and brought back my creative mojo! | withwool.com

What I didn’t expect was that a routine of daily spinning would bring back my drive to knit on slumbering projects, draw more complicated sketches, and even fiddle around with video editing. At the beginning of March just the thought of that stuff made me tired. Now now. My Sockhead Hat is a few rows taller and my past due gift knitting is almost done. My sketchbook is getting full and I put together a short video of a bobbin filling up with chain-plied yarn. 

I wish I could put my finger on exactly why a daily project recharged my creativity. I’d certainly use the trick to hack my behavior on a regular basis. Maybe it’s seeing daily progress. Maybe it’s because I’m solving puzzles and focusing on the details. Whatever the cause, this high tide of creativity isn’t going to last forever, so I’m going to enjoy it while it’s here. Then I’ll enjoy the low tide too and take a break. When I’m ready to start making again, I’ll pick another daily project and see where it takes me.

A New Eye For Spinning Color

I took a class with Maggie Casey and have new tools on how to manipulate and work colors for handspun yarn. | withwool.com

I’m happy to say that the #100handspunday project is still a daily thing. Aside from 1 day during the first week, I haven’t pushed a day off to do on the next. It’s hard for me to get going again once that little chain of “x’s” breaks for any reason. So I don’t stop, even on the long days. That’swhen I get handspun off the bobbins and measure yardage. Then there are the days when I can spin for an hour and go back for more after stretching my wrists.   

A little bit of flexibility has been key for me keeping this project going. The second part of Maggie Casey’s You Can’t Tell A Braid By It’s Color has also helped me spin every day. First, it’s a spinning class and you actually have to spin yarn. That took care of 2 days right there. Second, I had to spin samples for homework which took up a good chunk of last week. Third, the class pushed me right out my usual spinning comfort zone. 

I took a class with Maggie Casey and have new tools on how to manipulate and work colors for handspun yarn. | withwool.com

We worked with several colors and fiber that I liked and wanted to try, such as the blue silk/wool single, but also colors that wouldn’t be my first choice. The rainbow single is a mix of bright saturatedcolors that I drafted together with more muted tones. I didn’t expect to like the combo (wish I’d taken a before photo of the fiber) and was pleasantly surprised at how the colors melded.

I took a class with Maggie Casey and have new tools on how to manipulate and work colors for handspun yarn. | withwool.com

When I was spinning samples for plying, I paired like colors together. There was a semi-solid dark blue paired with bright blue and purple. Another pair was a solid red single and a striped blue and red single. The blues turned into the really interesting 2-ply on the left. 

The red pair turned into first attempts at different yarn constructions. There was a 4-ply cable, which I’ve only got a yard of, and the chain-ply, above right, spun with 2 plies instead of 1. I could have used an extra hand or two because you’re only looping 1 ply at a time and bringing the other along for the ride. Getting the tension right is trying. 

The skein in the middle is a bright red and purple fractal yarn. I’ve spun plenty of fractal yarns, but chugged along on this one because the colors aren’t my usual pick. Curious to see how it knits up. 

I took a class with Maggie Casey and have new tools on how to manipulate and work colors for handspun yarn. | withwool.com

I had a few samples leftover so I spent yesterday plying them in different ways. Now I need to get them off the bobbins and set the twist. Also plied a few other leftovers that had been hanging around. Looking forward to all the mini-skeins that will come out of this. 

The class got me thinking about color and spinning in a new way. My previous modus operandi would be to to spin yarns to preserve the color with clear distinct stripes, chain-plying, or singles. If I was feeling more adventurous (and the dye pattern of the fiber was clear), I’d aim for a fractal. Or I wouldn’t bother at all and just spin a 2-ply or 3-ply. 

A post shared by April Klich (@aprilklich) on

I’m sure I’ll still do all of those things, but now I’ll sample to see how colors will blend and heather in the drafting. I’ll try to figure out how to pair wildly different colors and braids together to create a specific effect. I’ll give more consideration to how construction and yarn weight affect color. I’m also going to sample more and do it for fun. I really liked those bite-sized chunks of spinning because of how wild the results might be. It’s also given me an appreciation dyed with bright saturated colors because I know they can be tamed and changed. 

If you get the chance and you want to explore spinning color, You Can’t Tell A Braid By It’s Color is a class worth taking. You can read my thoughts about the first part of the class here. It’s changed my outlook on dyed fiber and gave me the tools to manipulate color through every step of spinning. Plus, it’s given me plenty of ideas for what to spin for the rest of my #100HandspunDays. 

#100HandspunDays and Homework

Taking a spinning class about color was a great way to start my #The100DayProject, #100HandspunDays. | withwool.com

#the100dayproject and my 100 days of handspun started last Tuesday. I already missed a day, but I did make it up when I had both the time and energy to spin yarn. And, in a happy coincidence, the project kicked off the same week that I was going to a spinning class. Maggie Casey was teaching You Can’t Tell A Braid By Its Color, a 2-part class about different ways to spin and manipulate color. 

Part 1 focused on drafting. We got a few different kinds of dyed fiber to work with: top made of longitudinal stripes, semi-solid colors, heavily blended heathers, splotchy dye jobs, and top with long sections of color. I made fine fingering samples and bulky samples. I spun worsted, long-draw, and even over the fold. I spun the fiber as is, pre-drafted, and teased out sideways. I divided fiber into narrow strips to change the ratio of colors. All of this to see how these methods affected the color in the singles. Then I plied the singles back on themselves in either a 2-ply or chain-ply. 

Going into this class, I thought I knew a decent amount about how to spin with color. I’m not a beginner, but there’s clearly still a lot to learn. The thought isn’t disappointing or depressing. It’s exciting because there are still things to try and and techniques to play with. Learning anything is a journey, not a destination. 

Taking a spinning class about color was a great way to start my #The100DayProject, #100HandspunDays. | withwool.com

2 of my favorite samples came from fiber that’s way outside my usual picks. I sampled with Northern Lights top in the very bright Circus colorway. The top yarn is spun without changing anything about the color at all. But for the bottom yarn, I held two sections of the top together so that drafting created an eye-catching heather. I’d knit with this yarn. 

Taking a spinning class about color was a great way to start my #The100DayProject, #100HandspunDays. | withwool.com

My other favorite sample came from roving dyed by Hummingbird Moon. It’s splotchy with black, white, purples, bright green, and neon pink. Drafting mellows and heathers the colors so that they work together. The bright green and pinks create interesting pops of color that draw the eye instead of push it away. I’m rather smitten, and happy to have some of this fiber stashed away for later. 

Taking a spinning class about color was a great way to start my #The100DayProject, #100HandspunDays. | withwool.com

I came home with a lot of samples and a bit of homework too. The next class is all about how plying affects color and I need to bring well-rested singles. Won’t be waiting to the last minute to get this done. I’m actually happy to have this assignment because it gives me a non-negotiable deadline inside my 100 Day Project. No figuring out what to do that day from a dozen possibilities. No convincing myself that I could just do it later.  Plus, the different colors and methods are a nice break from my long-term projects. Time to get back to spinning. 

100 Days of Handspun

I’m tackling #The100DayProject this year and spinning yarn every day! #100HandspunDays | withwool.com

One of goals for 2017 is to get back to my wheel and spin more yarn. Writing it down is one thing, actually doing it is another. So to keep myself accountable and accomplish this goal, I’m joining #the100DayProject. Simply put, the 100 Day project is a world wide art project where you do one small thing for 100 days. This cute video explains it well

I’m going to keep my rules simple and convenient so I can keep the project going for the long haul. Plus, I want to improve my improve my spinning skills and knowledge.

  1. Sit down at the wheel and spin!
  2. Fiber prep counts. So taking a few days (or weeks) to learn how to make batts or practice hand carding is encouraged.
  3. Work out of the fiber stash and see just how far it’ll go.
  4. On busy draining days, reading about fiber, breed characteristics, and yarn construction is a-ok. What good is having a spinning reference shelf if I never use it?
  5. Share the day’s spinning on Instagram and in blog posts. I’m using #100HandspunDays to keep things organized.  

A post shared by April Klich (@aprilklich) on

Today, April 4th, is Day 1 and first bit of handspun is on the bobbin. I’m continuing with the purple gradient - nothing said I had to start a brand new project after all. I’m on the 3rd of 8 nests and curious to see it all spun up. 

Are you doing #the100DayProject? What’s your one small thing?

Interweave Yarn Fest 2017 Haul

I had a blast at Interweave Yarn Fest 2017, and came home with some great goodies for the stash. | withwool.com

I made it 72 days without buying yarn or fiber for myself before breaking my Cold Sheep streak at Interweave Yarn Fest. Besides from 2 skeins I bought to knit a baby gift, all of my knitting and spinning has come from the great stash repository that is Yarn Fort.

I had a blast at Interweave Yarn Fest 2017, and came home with some great goodies for the stash. | withwool.com

So what did I get at Yarn Fest? Just the stuff that absolutely called out to me and that I had a plan for. I’m always enthralled by the colors in the Western Sky Knits booth and couldn’t walk away without at least one skein. Her grays are incredible, and how could I turn down lustrous green on a BFL/silk blend. They’re destined to be shawls or cowls. The skein on the right is Brown Sheep Lana Worsted and I couldn’t resist the colors. My first idea was that it would become a hat or mitts, but now I’m thinking about slippers. Either way, that yarn will turn into something cosy. The mini-skein kit I bought as a gift only now I want to keep it for myself. I’m still waffling about what to do about it. Knitting it up and giving that away counts too, right?

I had a blast at Interweave Yarn Fest 2017, and came home with some great goodies for the stash. | withwool.com

One of my main fiber buying goals was to find fiber to spin for a friend of mine. I couldn’t find the right colors though. Still found stuff for myself though, so I didn’t go home empty handed. In a big departure from my usual color picks, I bought a lot of black mixed up with bright colors. 8 oz is a Rambouillet/Columbia cross from Brown Sheep. 4 oz is a beautiful carded prep of Shetland, Alpaca, and silk noil, perfectly named Stained Glass, by The Natural Twist. My last pick is 8 oz of BFL and Tussah Silk. It was the first roving that caught my eye when I wandered the booths and I kept coming back to it. I had no plan for it, still don’t, but I’m not going to let it languish.

I had a blast at Interweave Yarn Fest 2017, and came home with some great goodies for the stash. | withwool.com

I got some not yarn too: two beautiful project bags from Sincere Sheep, a yew wood shawl pin, and buffalo/merino socks.   

All in all, I’m thrilled with what I got. And as someone doing the Cold Sheep thing, I regret nothing about my purchases. Going to Yarn Fest and other local fiber festivals has been part of my Cold Sheep plan from the beginning. I went knowing what I already had and what I wanted which really curbed the urge to buy all the things. Telling myself I didn’t have to spend every cent I brought helped too. The stash got some fresh new additions that I’m excited about and don’t feel overwhelmed by. That’s a win and the ultimate end goal of Cold Sheep for me.    

Spinning a Gradient Part 2: Sampling

How spinning a sample before starting a big project made me a happy spinner and got me the handspun I wanted. | withwool.com

This post could also be titled “Sampling Is Your Friend And Will Help You Get The Handspun You Want”.  Doesn’t really roll of the tongue though.

After comparing the amount of roving I’ve spun and the amount that’s still waiting on my desk, it’s a pretty safe bet that I’m not going to be done spinning the gradient by Thursday. Any new fiber goodies I bring home from Interweave Yarn Fest will just have to wait until this is done. I’m a one project at a time kind of spinner. And this is good practice for the fine spinning I’ll be working on next. 

Since it had been awhile since l last sat down at my wheel, I decided to start with the smallest nest at the end of the gradient to get my sea legs back so to speak. Halfway through that nest I decided it’d be a good sample to figure out how to spin the rest of the 6 ounces. 

How spinning a sample before starting a big project made me a happy spinner and got me the handspun I wanted. | withwool.com

To be completely honest I wasn’t thrilled with what was on the bobbin when I finished. It was finely spun but hairy because I’d fallen into my default long-draw drafting style. When I brushed up on how to spin fine yarn, one tip was that you should be able to see through the fibers you’re actively drafting. I took that one a little too far because there were times I could have counted the individual fibers going into the single. This wouldn’t have been a problem if I could have put in enough twist during drafting, but I don’t have the right tools to put that much twist into so fine a single.

The single rested over night so I could chain-ply it the next day. I had a few reasons for chain-plying. One, I like how it looks after finishing. Two, I wanted to preserve the colors as much as possible. Three, and this reason is purely practical, it would be easier to keep the gradient in order as I worked. 

It’s normally pretty easy for me to find a rhythm making the “chains” and plying, but not when the single keeps breaking. I had to join it together or at least fake it more than 4 times. Got it done though. Let it rest another night before skeining it up. The skein was definitely lace weight and about 49 yards.

How spinning a sample before starting a big project made me a happy spinner and got me the handspun I wanted. | withwool.com

I set the twist by soaking the skein in cool water with Eucalan, snapping it over my hands, and hanging it up to dry. The transformation was amazing. The yarn plumped up into an airy woolen spin. It definitely wasn’t lace weight anymore and ranged from fingering weight to sport weight. The twist even seems reasonably balanced. Happy ending, right? Kind of. The yarn is beautiful but a complete hassle to spin and not the smooth handspun I want. 

How spinning a sample before starting a big project made me a happy spinner and got me the handspun I wanted. | withwool.com

So I changed two things for the second nest which have had a big impact. One, I’m making an effort to spin with the inch worm forward draft and not fall into long-draw. It’s slow going but the latest single is much smoother and even shiny. Two, I’m spinning this single a little thicker. I can still see through the drafting triangle but I can’t count the individual fibers. Much happier with single #2 and I’m definitely planning to spin the other 6 nests this way. Lucious handspun gradient, here I come. 

How spinning a sample before starting a big project made me a happy spinner and got me the handspun I wanted. | withwool.com

Time To Spin A Gradient

It’s been way too long since I sat down at my wheel, but a lovely, low-key gradient is bringing me back. | withwool.com

Interweave Yarn Fest is at the end of the month and I’m ready. I’ve decided which day to go, bought my ticket, and am making up a shopping list. That list is pretty short so far: an orifice hook for my wheel, roving from Brown Sheep Yarn Company, and fiber for a commissioned spinning project. Of course this list could definitely grow. :)

It’s been way too long since I sat down at my wheel, but a lovely, low-key gradient is bringing me back. | withwool.com

I enjoyed walking around the show last year and made some considerable stash enhancements. Unfortunately I haven’t knit or spun anything that I bought, which I’m aiming to change before going back to Yarn Fest this year. My knitting list is pretty full at the moment, but I’ve got room in my brain to spin. And plenty of empty bobbins to fill. After digging through the stash I was drawn to a ball of roving bigger than my head. 

It’s been way too long since I sat down at my wheel, but a lovely, low-key gradient is bringing me back. | withwool.com

The next step was unrolling the ball and reminding myself what was inside. I kept unrolling and unrolling and rolling until the roving was laid out in 45” x 66” rectangle! What I found was a lovely, muted gradient. Before I unrolled the roving, my plan was to randomly pull sections and make 3 skeins of 2-ply. The gradient made me reconsider. I split the roving into the major color changes and wound them into nests. I’m going to spin each nest and chain-ply them in the order I found them. Don’t know if I’ll finish before I make it to Yarn Fest, but I’m going to try. As for what the yarn will become, well, a semi-circular shawl sounds pretty good right now. 

It’s been way too long since I sat down at my wheel, but a lovely, low-key gradient is bringing me back. | withwool.com

Sockhead in Progress

Yarn from the deep stash finally told me what it wants to be - a Sockhead Hat! | withwool.com

My sock knitting mojo has disappeared. Once I bound off the last pair, cosy and nice as they are, I wasn’t excited to start another pair. So I didn’t, but I still wanted some auto-pilot purse knitting. 

The good thing about having a sizable stash is that I can still find yarn I want to use even if a particular kind of project doesn’t appeal. This time a skein from the deep stash circa 2012 was calling my name. I had wandered into my favorite yarn shop way back when because it seemed like something fun to do and found this beauty on the clearance shelf. I loved it and bought it even though I had no clue what to do with it which is how a lot of yarn came into my stash. I figured the yarn would tell me what it wanted to be eventually. Didn’t expect it to take 5 years though. 

Yarn from the deep stash finally told me what it wants to be - a Sockhead Hat! | withwool.com

The yarn wanted to be a simple, slouchy hat which is great because my hat knitting mojo is on the rise. The marled colors would hide anything detailed or lacy so I kept things simple and went the with Sockhead Hat. The 13,573+ projects on Ravelry can’t be wrong, right? Sockhead has been in my queue for awhile, but I could never pick a yarn to use until now. Plus, I’m in the mood for auto-pilot knitting at the moment and this is the perfect project. 

A post shared by April Klich (@aprilklich) on

I knit a mini swatch to find the right needle size and get gauge before casting on. If only the swatch hadn’t lied to me. I’d almost finished the 4” of ribbing when I tried it on. My slouchy hat was tight and not slouchy at all. I put it in time out for a couple days and then ripped it out. Cast on again with 160 stitches the second time around, and it seems to be the magic number. The ribbing is cosy without feeling tight and the stockinette seems perfectly slouchy. Hope I have enough yarn to knit the hat as long as the pattern calls for. And that the longer circular needle I ordered arrives soon. Don’t want to tug the slightly too short cable just so every round for magic loop.  

Yarn from the deep stash finally told me what it wants to be - a Sockhead Hat! | withwool.com

FO: Meadow Multi Socks

Toe-up socks with afterthought cuffs make perfect travel knitting. | withwool.com

It’s March and it feels a little strange to be thinking about holiday parties right now, but that’s when I cast on for these socks. I needed something to keep my hands busy at a potluck last December and a pair of toe-up socks were just the thing. Then the pair was my constant companion, even if I didn’t always take them out of my purse. They flew cross-country and back, went to movies, binge watched tv, and went skiing with me too. I’ve got a lot of memories knit into these socks even if they are just a simple 2x2 rib.    

Toe-up socks with afterthought cuffs make perfect travel knitting. | withwool.com

The pattern is my own default toe-up vanilla sock with an afterthought leg. Ever since trying Cat Bordhi’s Houdini Socks pattern, I really prefer it over working an afterthought heel. When you bind off the cuff, you’ve got a finished sock - aside from weaving in ends - that’s ready to wear. That beats having to come back and add a heel any day of the week. 

Toe-up socks with afterthought cuffs make perfect travel knitting. | withwool.com

The weather’s been on the weird side for the past few weeks. It snowed for a couple of days, and by the end of the week temps were in the 70’s. I didn’t need a jacket, let alone a pair of wool socks. And now it’s chilly again. Weird. At least the socks are ready to warm my toes when it does get cold. 

Toe-up socks with afterthought cuffs make perfect travel knitting. | withwool.com

The Specs

Pattern: My Default Toe-Up Sock with an Afterthought Cuff

Yarn: Knit Picks Stroll Multi - Meadow Multi

Needles: 2.25 mm circulars

Dates: December 13, 2016 - February 18, 2017 

@Ravelry

Handspun Experiments: Opposing 3-ply Sock Yarn

Is handspun 3-ply opposing sock yarn more durable than a traditional 3-ply construction? | withwool.com

The end goal for this yarn was always going to be a pair of socks. So I followed the internet’s advice which recommended spinning a high-twist opposing 3-ply construction. What makes this construction special is that one ply is spun in the opposite direction which is supposed to add elasticity and increased durability. I started with 8 oz of Louet Northern Lights Top, color Blue Spruce, which is space-dyed and a blend of similar wool types. It’s not as soft as Merino, but seemed much more durable. 

A post shared by April Klich (@aprilklich) on

I split the top lengthwise into 3 more or less equal sections for each of the 2 skeins. I spun each ply with a fairly firm twist to stand up to the extra wear and tear of socks. 2 of the plies had Z-twist, and 1 had S-twist. Plying a balanced yarn was a trial since the S-twist skein took in even more twist and would kink up when given half a chance. Next time, I’ll experiment with putting less twist on the opposing ply and make up for it during plying. You can read more about how I spun the yarn here.

Is handspun 3-ply opposing sock yarn more durable than a traditional 3-ply construction? | withwool.com

I didn’t photograph the pair (find all the knitty details here) when I finished them, and the socks got about a month of regular daily wear before camera time. While spinning the yarn, I was worried about holes. Now I’m pretty sure the socks will felt before a hole even thinks about opening up. The stitches on the bottom of the sole have already started felting together and loosing some of their stretch. The stitches on the side and top are still distinct and flexible though. Any eventual repairs I have to make will probably be more difficult because of the felting, but at least I’ll notice the holes before they get too big. 

Is handspun 3-ply opposing sock yarn more durable than a traditional 3-ply construction? | withwool.com

The jury is still out on whether or not the opposing ply yarn construction is more durable than a traditional 3-ply. I will keep you updated though as things develop. And when I spin a traditional 3-ply as sock yarn.

There’s one other skein of opposing 3-ply sock yarn stashed away for me. This skein is my first attempt at an opposing ply sock yarn. It’s a true fingering weight spun from Falkland top. Once I’m ready to whip up another pair of vanilla socks, I’ll give this yarn a try. I can’t be the only one without handspun socks in this house after all.

FO: My First Handspun Socks

My first pair of handspun socks is off the needles and on to happy feet! | withwool.com

When I was first learning spin, one of my far way goals was to spin durable yarn for socks. It took me a few years to reach the point with my skills and confidence to try and actually succeed. Then it took me another year (or was it two?) to spin more sock yarn and finally use it for socks. This pair was for the Bearded One, which is why I finally took the plunge and cast on. When I knit to keep my own toes warm, other sock yarns and fun patterns somehow keep distracting me.

My first pair of handspun socks is off the needles and on to happy feet! | withwool.com

The yarn was always going to be the star of the show. When I sat down to design the pattern, I knew that the striping and mottled colors would only obscure a more detailed stitch. So I went with my standard vanilla sock with 2x2 rib which would also make for a well-fitting sock. I also added a princess sole, where the stockinette side of the fabric is against the foot, to smooth out any bumps that might have come with using a sometimes thick-and-thin yarn. The downside to the princess sole was that it slowed me down since I had to purl a big chunk of every row. That changed when I knit the second sock inside out, and worked the reverse of pretty much every stitch. Take my word for it, it’s much easier working lifted increases on the knit side of a fabric. 

My first pair of handspun socks is off the needles and on to happy feet! | withwool.com

I had a few worries when I cast on for this pair. One, would the half pound of yarn I spun be enough? It’s not like a I could go to the store and buy more. Two, would knitting smooth out the unevenly plied and unruly sections of yarn? Now I know the answers to both those questions are an obvious yes, but figuring that out definitely kept me on my toes. I have a few yards leftover for darning. Plus, I can’t point out the sections where the yarn was more snarled than smooth. 

The best part is that all that work - picking a yarn construction, spinning the yarn, setting the twist, designing the pattern, and then knitting two huge socks - has been rewarded. This pair is the Bearded One’s new favorite out of the many pairs of socks I’ve made for him. Knowing that does a spinner/knitter’s heart good, and makes sure the hand knit socks keep coming. 

My first pair of handspun socks is off the needles and on to happy feet! | withwool.com

Pattern: My own basic vanilla sock with 2x2 ribbing and a princess sole

Yarn: Tour de Fleece 2016 Sock Yarn 

Needles: 2.75 circulars

Dates: September 22 - December 11, 2016

@Ravelry 

How To Block A Ribbed Scarf

How to Block a Ribbed Scarf. And what does it mean to block knitting anyway? | withwool.com

I was thrilled to bind off the Melded Scarf, you can get the pattern here, but I knew I wasn’t done. The first few inches I reknit after frogging looked wonky. There were rows that stood out more than the rest. I could tell where I stopped knitting one night and picked it up again the next day. I knew I had to block the scarf to wash it and get it looking and feeling it’s best.

What is blocking?

Blocking is a finishing technique that makes a piece of knitting go from good to great. Blocking evens out stitches and gives the knitting - scarf, shawl, or sweater - it’s final shape. I think many knitters picture complicated lace shawls that have been stretched and pinned to the limit when someone mentions blocking.  But blocking doesn’t equal stretching. It’s wetting, laying out the knitting in the shape you want it to be, and letting the piece dry. 

Every natural fiber yarn benefits from blocking. Blocking can drastically change natural fiber yarns. Yarn can “bloom” and get softer. Stitches can grow and stretch. Gauge can definitely change and affect the size of a finished piece.  So always knit a big swatch and block it the way you’d block the finished project.  Blocking will even out stitches worked in synthetic blends like acrylic, but it won’t do much more then that.

There are several different ways to block knitting and different fibers do better with different methods. The Melded Scarf I’m working with is 100% non-superwash wool which reacts well to wet blocking, the method I’m using here. Check the care instructions for your yarn to choose the best method for your project.

Materials:

  • the scarf
  • a no-rinse wash (I use Eucalan. ) 
  • a large flat surface that you can put pins in (foam mats, carpet, or a DIY board
  • a towel
  • a tape measure
  • a ruler
  • a few rustproof pins

Step-by-Step

1. Fill a sink or small tub with cool water and add a capful or two of no-rinse wash. Submerge the scarf and let it soak for about 20 minutes. 

2. Take the scarf out of the water in one big lump. Squeeze out as much water as possible, but don’t wring it, before laying it out on a towel. Roll the scarf up in the towel, and squeeze out even more water. Standing on the scarf burrito works well for me. 

How to Block a Ribbed Scarf. And what does it mean to block knitting anyway? | withwool.com

3. Unroll the towel where you’re going to block. Then lay the scarf out flat, making sure that it’s in a straight line. Also make sure that there aren’t any parts of the ribbing that look more stretched out. 

If, like the Melded Scarf, your scarf has 2 distinct halves, use the tape measure to make sure both halves are the same length. If one half is longer than the other, carefully pull on small sections of the shorter side. Work from the middle to the end. The scarf is vary malleable at this point so you won’t have to do much to gain an extra inch or two. 

How to Block a Ribbed Scarf. And what does it mean to block knitting anyway? | withwool.com

4. Time to break out the ruler. Hold it across the scarf to make sure the width is the same from end to end. For this scarf, that’s about 6”. Where the scarf is narrower, pull out both edges to the width you want. Working an inch or two in from the edge will keep the ribbing from looking more stretched out than the rest of the scarf. 

How-to-block-a-ribbed-scarf-step-5.jpg

5. To get crisp corners at the ends, pull each corner to the shape you want and pin it. 

6. Let it dry, take out the pins, and you’ve got a cosy new scarf.

How to Block a Ribbed Scarf. And what does it mean to block knitting anyway? | withwool.com